Vue 3 应用挂载解析
在Vue 3中,app.mount("#app")这行代码的作用是将Vue应用实例挂载到DOM中的一个指定容器上,从而启动Vue应用。
实现原理


让我通过一个可视化示例来展示Vue应用挂载的过程:
html
<!DOCTYPE html>
<html lang="zh-CN">
<head>
<meta charset="UTF-8">
<meta name="viewport" content="width=device-width, initial-scale=1.0">
<title>Vue 3 应用挂载解析</title>
<script src="https://unpkg.com/vue@3/dist/vue.global.js"></script>
<style>
* {
margin: 0;
padding: 0;
box-sizing: border-box;
font-family: 'Segoe UI', Tahoma, Geneva, Verdana, sans-serif;
}
body {
background: linear-gradient(135deg, #667eea 0%, #764ba2 100%);
color: #333;
min-height: 100vh;
padding: 20px;
}
.container {
max-width: 1200px;
margin: 0 auto;
padding: 20px;
}
header {
text-align: center;
margin-bottom: 40px;
color: white;
}
h1 {
font-size: 2.5rem;
margin-bottom: 10px;
text-shadow: 2px 2px 4px rgba(0, 0, 0, 0.3);
}
.subtitle {
font-size: 1.2rem;
opacity: 0.9;
}
.content {
display: flex;
flex-wrap: wrap;
gap: 30px;
justify-content: center;
}
.card {
background: white;
border-radius: 15px;
padding: 25px;
box-shadow: 0 10px 30px rgba(0, 0, 0, 0.15);
flex: 1;
min-width: 300px;
max-width: 500px;
}
.card h2 {
color: #764ba2;
margin-bottom: 15px;
padding-bottom: 10px;
border-bottom: 2px solid #eee;
}
.code-block {
background: #f8f9fa;
border-left: 4px solid #667eea;
padding: 15px;
margin: 15px 0;
border-radius: 0 5px 5px 0;
overflow-x: auto;
font-family: 'Courier New', monospace;
}
.dom-visualization {
margin-top: 20px;
border: 2px dashed #667eea;
padding: 15px;
border-radius: 10px;
background: #f9f9f9;
}
.dom-element {
padding: 15px;
margin: 10px 0;
background: #e9ecef;
border-radius: 5px;
transition: all 0.3s ease;
}
.dom-element.active {
background: #d4edda;
border-left: 4px solid #28a745;
}
.button {
background: #667eea;
color: white;
border: none;
padding: 12px 20px;
border-radius: 5px;
cursor: pointer;
font-size: 1rem;
margin-top: 15px;
transition: background 0.3s;
}
.button:hover {
background: #5a67d8;
}
.explanation {
margin: 15px 0;
line-height: 1.6;
}
.highlight {
background: #fff3cd;
padding: 2px 5px;
border-radius: 3px;
}
.diagram {
text-align: center;
margin: 20px 0;
}
.arrow {
font-size: 24px;
margin: 10px 0;
color: white;
}
@media (max-width: 768px) {
.content {
flex-direction: column;
}
}
</style>
</head>
<body>
<div class="container">
<header>
<h1>Vue 3 应用挂载解析</h1>
<p class="subtitle">理解 app.mount("#app") 的作用与原理</p>
</header>
<div class="content">
<div class="card">
<h2>什么是 app.mount()?</h2>
<div class="explanation">
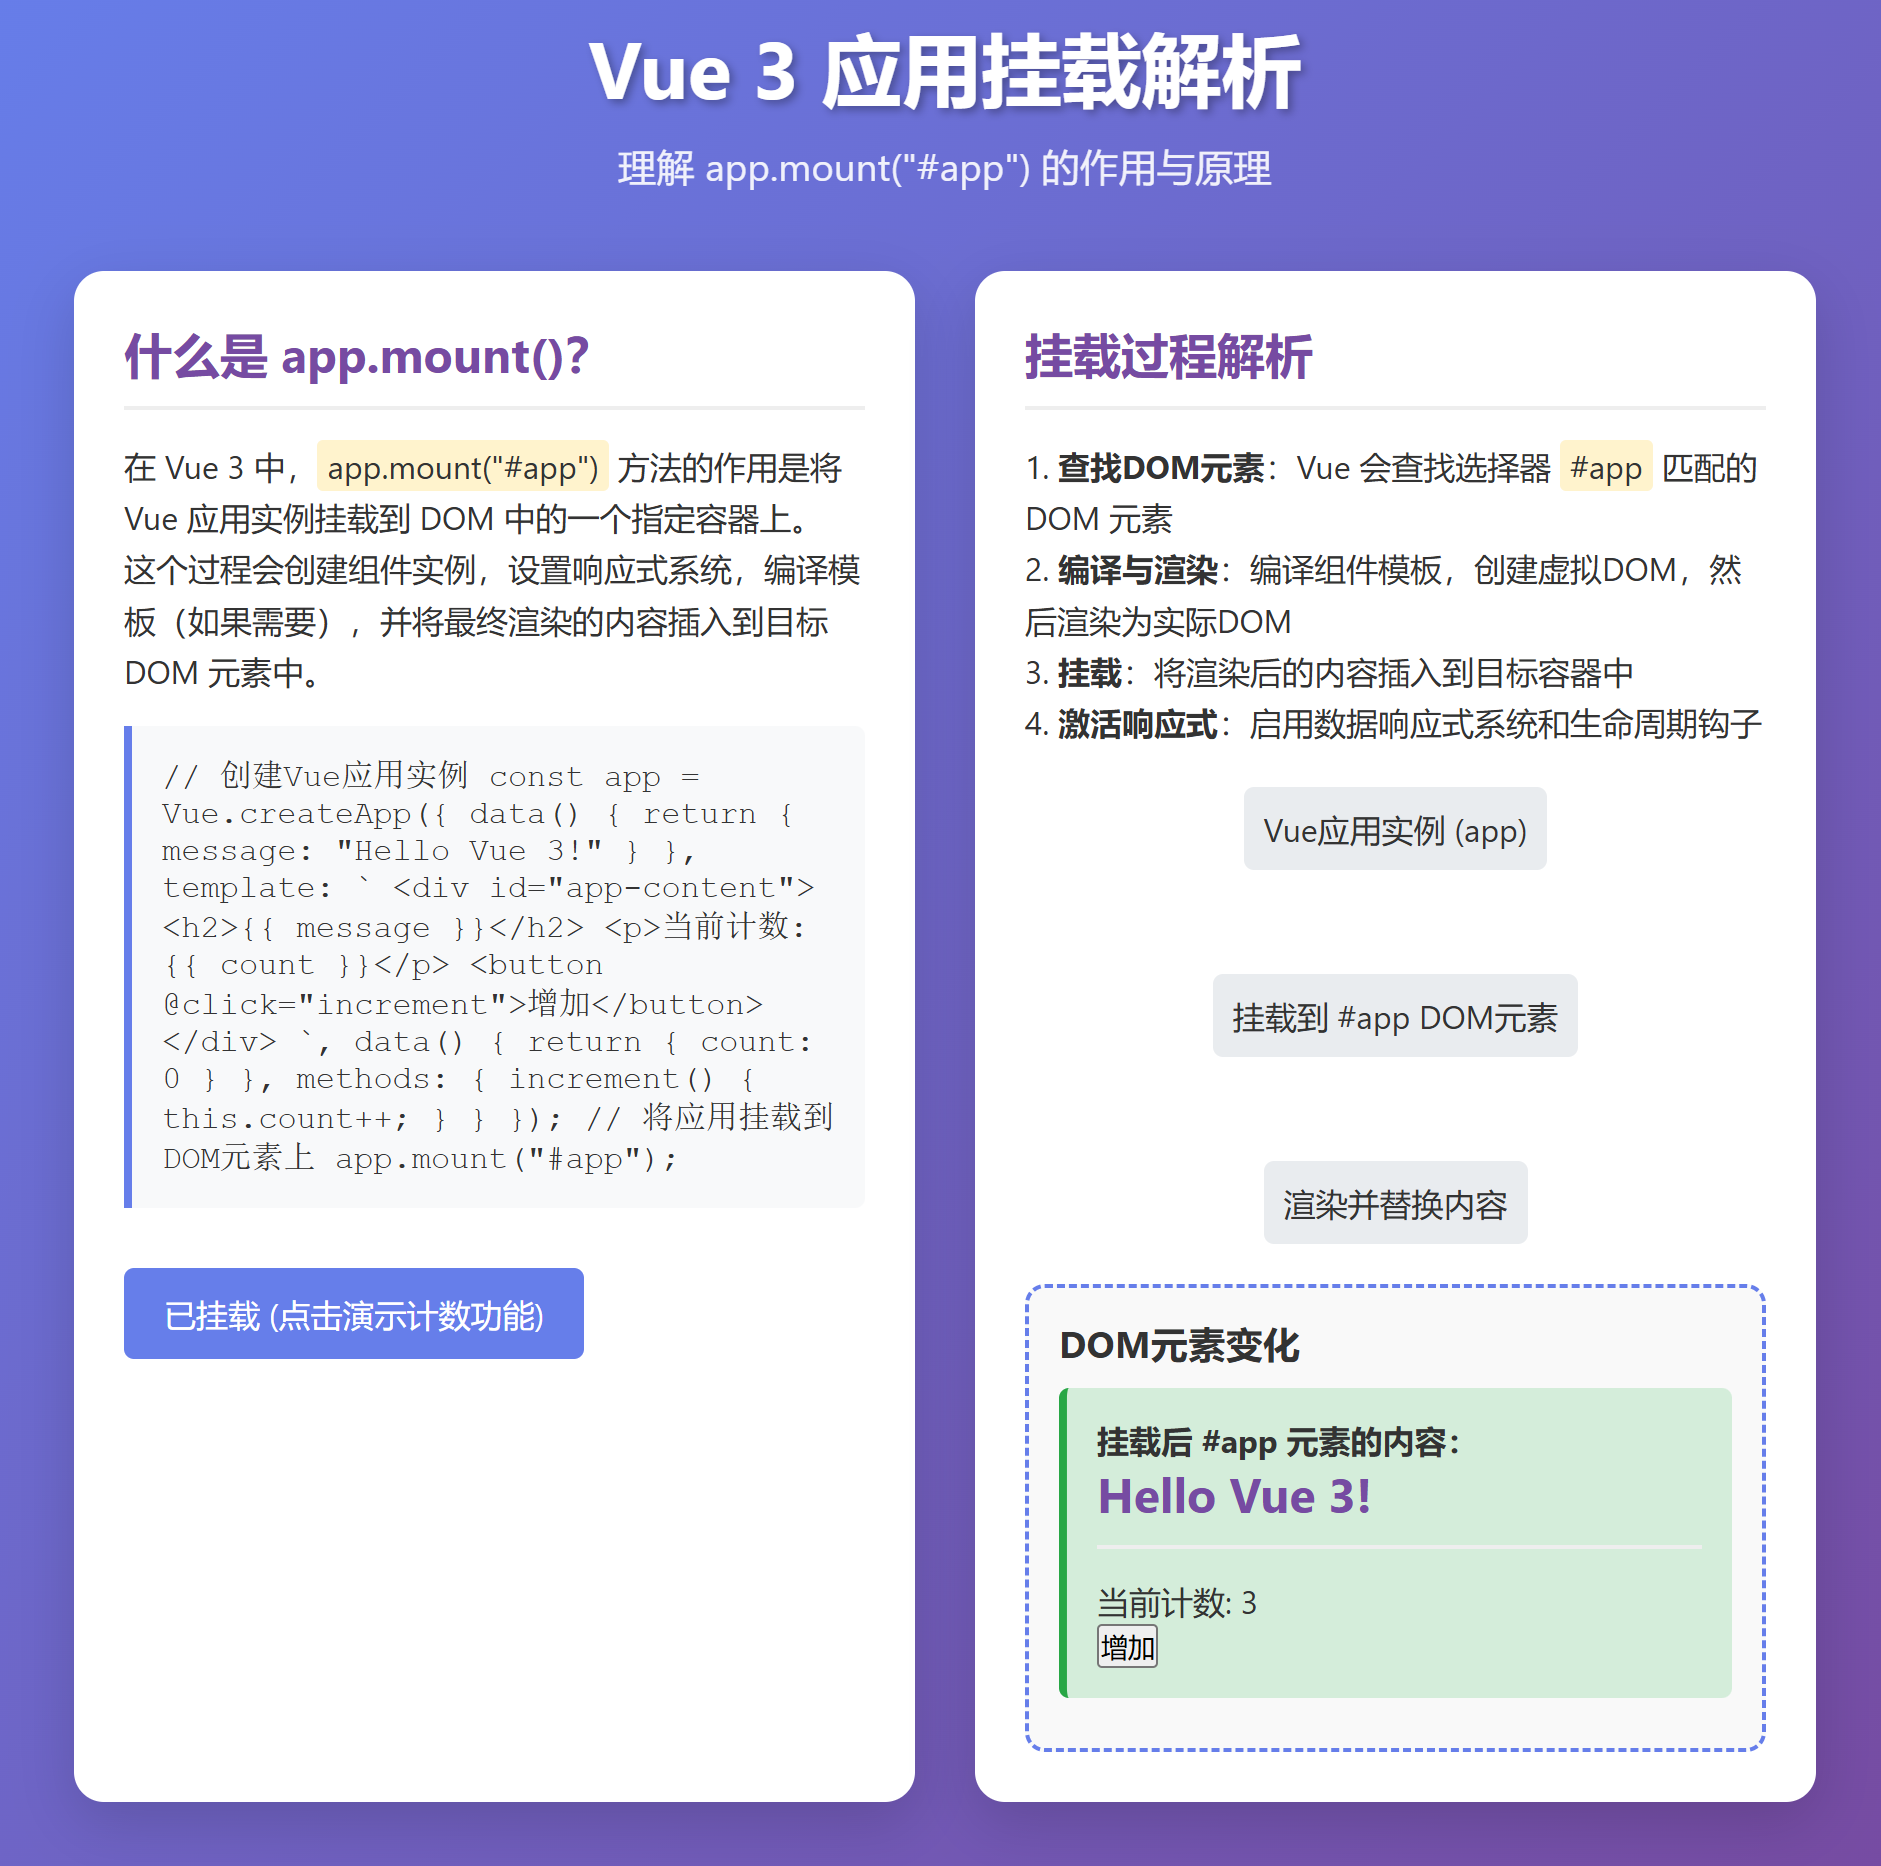
<p>在 Vue 3 中,<span class="highlight">app.mount("#app")</span> 方法的作用是将 Vue 应用实例挂载到 DOM 中的一个指定容器上。</p>
<p>这个过程会创建组件实例,设置响应式系统,编译模板(如果需要),并将最终渲染的内容插入到目标 DOM 元素中。</p>
</div>
<div class="code-block">
// 创建Vue应用实例
const app = Vue.createApp({
data() {
return {
message: "Hello Vue 3!"
}
},
template: `
<div id="app-content">
<h2>{{ message }}</h2>
<p>当前计数: {{ count }}</p>
<button @click="increment">增加</button>
</div>
`,
data() {
return {
count: 0
}
},
methods: {
increment() {
this.count++;
}
}
});
// 将应用挂载到DOM元素上
app.mount("#app");
</div>
<button class="button" id="demo-btn">运行演示</button>
</div>
<div class="card">
<h2>挂载过程解析</h2>
<div class="explanation">
<p>1. <strong>查找DOM元素</strong>:Vue 会查找选择器 <span class="highlight">#app</span> 匹配的 DOM 元素</p>
<p>2. <strong>编译与渲染</strong>:编译组件模板,创建虚拟DOM,然后渲染为实际DOM</p>
<p>3. <strong>挂载</strong>:将渲染后的内容插入到目标容器中</p>
<p>4. <strong>激活响应式</strong>:启用数据响应式系统和生命周期钩子</p>
</div>
<div class="diagram">
<div style="background: #e9ecef; padding: 10px; border-radius: 5px; display: inline-block;">
Vue应用实例 (app)
</div>
<div class="arrow">↓</div>
<div style="background: #e9ecef; padding: 10px; border-radius: 5px; display: inline-block;">
挂载到 #app DOM元素
</div>
<div class="arrow">↓</div>
<div style="background: #e9ecef; padding: 10px; border-radius: 5px; display: inline-block;">
渲染并替换内容
</div>
</div>
<div class="dom-visualization">
<h3>DOM元素变化</h3>
<div class="dom-element" id="dom-before">
<p><strong>挂载前 #app 元素的内容:</strong></p>
<p>这是初始内容,将被Vue渲染的内容替换</p>
</div>
<div class="dom-element" id="dom-after" style="display: none;">
<p><strong>挂载后 #app 元素的内容:</strong></p>
<div id="app-content">
<h2>Hello Vue 3!</h2>
<p>当前计数: <span id="count-value">0</span></p>
<button id="increment-btn">增加</button>
</div>
</div>
</div>
</div>
</div>
</div>
<script>
document.getElementById('demo-btn').addEventListener('click', function() {
// 模拟挂载过程
document.getElementById('dom-before').style.display = 'none';
document.getElementById('dom-after').style.display = 'block';
// 添加激活样式
const domAfter = document.getElementById('dom-after');
domAfter.classList.add('active');
// 模拟Vue的响应式功能
let count = 0;
const countValue = document.getElementById('count-value');
const incrementBtn = document.getElementById('increment-btn');
incrementBtn.addEventListener('click', function() {
count++;
countValue.textContent = count;
});
// 更改按钮文本
this.textContent = '已挂载 (点击演示计数功能)';
this.classList.add('active');
});
</script>
</body>
</html>关键点解析
-
创建应用实例 :首先使用
Vue.createApp()创建Vue应用实例 -
挂载目标 :
app.mount("#app")中的"#app"是CSS选择器,用于指定DOM中的挂载点 -
挂载过程:
-
Vue查找ID为"app"的DOM元素
-
编译组件模板(如果有)
-
创建虚拟DOM并渲染为实际DOM
-
将渲染内容插入到目标容器中
-
激活响应式系统和生命周期钩子
-
-
挂载结果:目标DOM元素的原有内容会被Vue应用的渲染内容替换
这个示例通过可视化方式展示了Vue应用挂载前后的DOM变化,以及挂载后Vue应用的响应式特性。