文字转语音(TTS)在智能助手、有声读物等场景高频使用,今天用 Spring Boot 快速落地,全程聚焦代码与操作,新手也能跟着做。
一、准备工作:3 步搭好项目基础
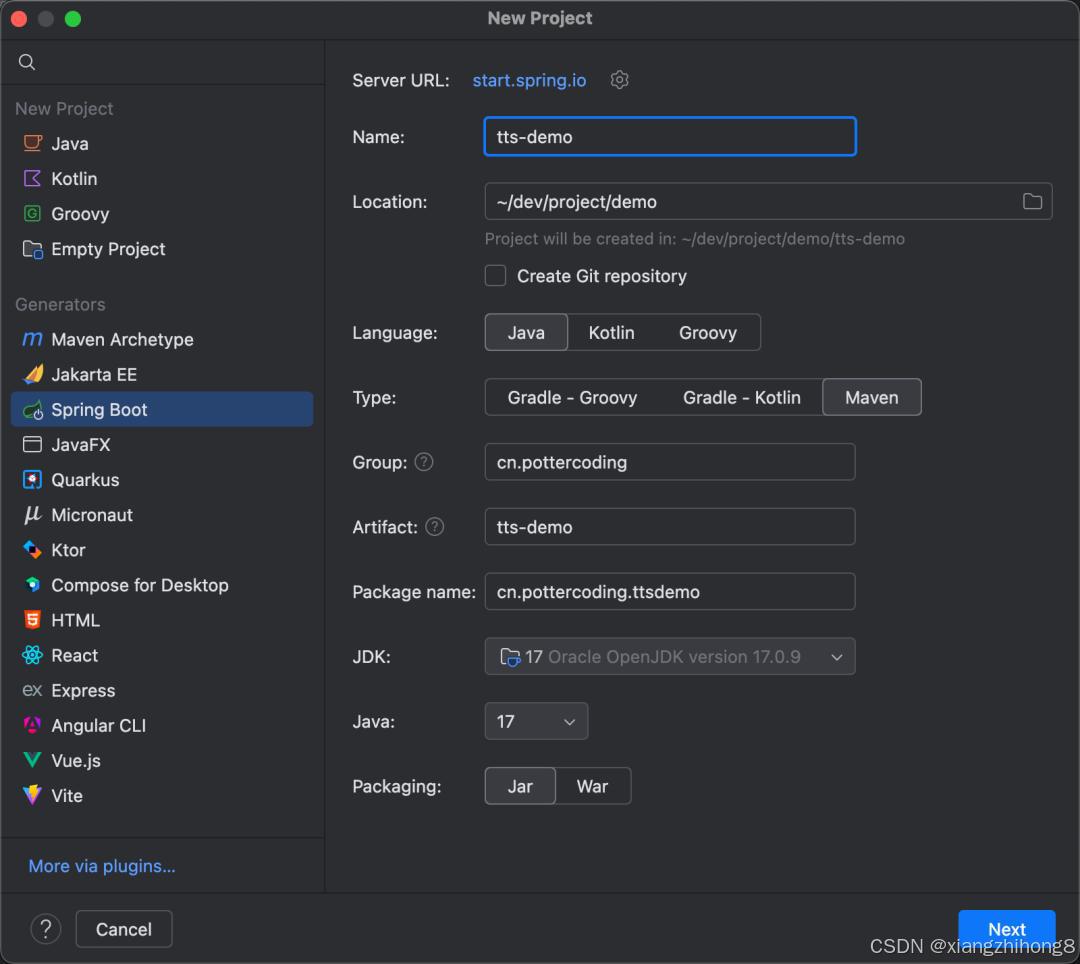
1. 创建 Spring Boot 项目
打开 Spring Initializr,按以下配置选择:
-
 依赖:仅勾选 Spring Web (满足接口开发需求)
 -
打包方式:Jar
JDK 版本:11 或 17(兼容性更佳)
- 点击 Generate 下载项目,解压后导入 IDEA。
2. 引入 TTS 依赖
在 pom.xml中添加 Google Text-to-Speech 依赖(轻量、无需密钥):
dependency>
groupId>com.googlecode.javacvgroupId>
artifactId>javacv-platformartifactId>
version>1.5.8version>
dependency>
dependency>
groupId>com.google.cloudgroupId>
artifactId>google-cloud-texttospeechartifactId>
version>2.31.0version>
dependency>
刷新 Maven 下载依赖。
二、核心实战:写代码实现功能
二、核心实战:写代码实现功能
1. 配置 TTS 客户端
创建 TtsConfig.java,初始化 Google TTS 客户端(本地测试无需额外密钥,默认读取环境变量,若报错可参考 官方文档 配置密钥):
import com.google.cloud.texttospeech.v1.TextToSpeechClient;
import org.springframework.context.annotation.Bean;
import org.springframework.context.annotation.Configuration;
@Configuration
public classTtsConfig{
@Bean
public TextToSpeechClienttextToSpeechClient throws Exception {
// 初始化客户端
return TextToSpeechClient.create;
}
}
2. 写接口:接收文字 + 生成语音
创建 TtsController.java,提供 POST 接口,接收文字参数,生成 MP3 音频文件并返回文件路径:
import com.google.cloud.texttospeech.v1.*;
import com.google.protobuf.ByteString;
import org.springframework.beans.factory.annotation.Autowired;
import org.springframework.web.bind.annotation.PostMapping;
import org.springframework.web.bind.annotation.RequestParam;
import org.springframework.web.bind.annotation.RestController;
import java.io.FileOutputStream;
import java.io.OutputStream;
@RestController
public classTtsController{
@Autowired
private TextToSpeechClient ttsClient;// 接口:接收文字,生成语音文件
@PostMapping("/text-to-speech")
public StringtextToSpeech(@RequestParam String text) {
try {
// 1. 构建语音请求参数
SynthesisInput input = SynthesisInput.newBuilder.setText(text).build;// 2. 设置语音参数(中文、女声)
VoiceSelectionParams voice = VoiceSelectionParams.newBuilder.setLanguageCode("zh-CN") // 语言:中文
.setSsmlGender(SsmlVoiceGender.FEMALE) // 性别:女
.build;// 3. 设置音频格式(MP3)
AudioConfig audioConfig = AudioConfig.newBuilder.setAudioEncoding(AudioEncoding.MP3).build;// 4. 调用 TTS 接口生成音频
SynthesizeSpeechResponse response = ttsClient.synthesizeSpeech(input, voice, audioConfig);ByteString audioContent = response.getAudioContent;// 5. 保存音频到本地(路径可自定义)
String filePath ="D:/tts-output/"+ System.currentTimeMillis +".mp3";
try (OutputStream out = new FileOutputStream(filePath)) {
out.write(audioContent.toByteArray);}return"语音生成成功!路径:"+ filePath;
} catch (Exception e) {
return"生成失败:"+ e.getMessage;
}}}
三、测试运行:2 步验证功能
1. 启动项目
直接运行 Spring Boot 启动类(带 @SpringBootApplication注解的类),控制台显示
Started Application in XX seconds表示启动成功。
2. 调用接口测试
用 Postman 或 Apifox 发送请求:
- 方法:POST
URL:
http://localhost:8080/text-to-speech参数:
text=Spring Boot 文字转语音实战真简单!
- 发送后,若返回「语音生成成功」,打开对应路径即可播放 MP3 音频。
四、关键注意点
若报「密钥不存在」错误:按 Google 官方指引 下载密钥文件,在 IDEA 中设置环境变量
GOOGLE_APPLICATION_CREDENTIALS=密钥文件路径
- 。
-
音频路径可修改:将代码中
D:/tts-output/改为自己的路径(如./tts/表示项目根目录)。 -
可调整语音参数:修改
VoiceSelectionParams中的languageCode(如en-US为英文)、SsmlVoiceGender(MALE为男声)。