Compose 动画 + KMM 跨平台开发:从传统View到现代声明式UI动画
本文将深入探讨Compose动画技术和KMM跨平台开发,通过实战项目案例,带你掌握从基础到高级的动画开发技巧,以及如何用一套代码实现Android和iOS的跨平台动画效果,并分享性能优化和最佳实践。(由于需要在公司内部做技术分享,所以暂时不把demo代码地址放出,后续分享之后会贴上github地址)
🎬 动画效果预览

图:层次递进式动画演示 - 从基础波纹到烟花闪烁的完整动画效果
目录
技术背景与概述
为什么选择Compose动画?
传统View动画的痛点
kotlin
// 传统View动画 - 命令式编程
val animator = ObjectAnimator.ofFloat(view, "scaleX", 1f, 1.5f)
animator.duration = 300
animator.interpolator = BounceInterpolator()
animator.start()

// 需要手动管理生命周期、状态同步、内存泄漏等问题
Compose动画的优势
kotlin
// Compose动画 - 声明式编程
val scale by animateFloatAsState(
    targetValue = if (isClicked) 1.5f else 1f,
    animationSpec = spring(dampingRatio = Spring.DampingRatioMediumBouncy)
)

Box(modifier = Modifier.scale(scale)) {
    // UI内容
}
Compose动画的核心特性
- 声明式:描述"是什么"而不是"怎么做"
- 状态驱动:动画自动响应状态变化
- 可组合:动画组件可复用和组合
- 类型安全:编译时检查,减少运行时错误
- 性能优化:智能重组,只更新必要的部分
Compose动画API体系
动画API层次结构
scss
Compose 动画 API
├── 高级API (开箱即用)
│   ├── AnimatedVisibility     // 显示/隐藏动画
│   ├── AnimatedContent        // 内容切换动画
│   └── Crossfade             // 淡入淡出切换
│
├── 中级API (灵活控制)
│   ├── animate*AsState       // 状态驱动动画
│   ├── rememberInfiniteTransition // 无限循环动画
│   └── updateTransition      // 多状态转换
│
└── 低级API (完全自定义)
    ├── Animatable           // 手动控制动画
    ├── AnimationSpec        // 自定义动画规格
    └── Canvas + 手动绘制    // 完全自定义绘制
1. 高级API - 开箱即用
AnimatedVisibility - 显示隐藏动画
kotlin
@Composable
fun AnimatedVisibilityDemo() {
    var visible by remember { mutableStateOf(false) }

    Column {
        Button(onClick = { visible = !visible }) {
            Text("切换显示")
        }

        AnimatedVisibility(
            visible = visible,
            enter = slideInVertically() + fadeIn(),
            exit = slideOutVertically() + fadeOut()
        ) {
            Card {
                Text("我是动画内容!", modifier = Modifier.padding(16.dp))
            }
        }
    }
}
AnimatedContent - 内容切换动画
kotlin
@Composable
fun AnimatedContentDemo() {
    var count by remember { mutableIntStateOf(0) }

    Column {
        Button(onClick = { count++ }) {
            Text("增加计数")
        }

        AnimatedContent(
            targetState = count,
            transitionSpec = {
                slideInVertically { height -> height } + fadeIn() togetherWith
                slideOutVertically { height -> -height } + fadeOut()
            }
        ) { targetCount ->
            Text(
                text = "计数: $targetCount",
                style = MaterialTheme.typography.headlineMedium
            )
        }
    }
}
2. 中级API - 灵活控制
animate*AsState - 状态驱动动画
kotlin
@Composable
fun StateBasedAnimationDemo() {
    var isExpanded by remember { mutableStateOf(false) }

    // 多个属性同时动画
    val size by animateDpAsState(
        targetValue = if (isExpanded) 200.dp else 100.dp,
        animationSpec = spring(
            dampingRatio = Spring.DampingRatioMediumBouncy,
            stiffness = Spring.StiffnessLow
        )
    )

    val color by animateColorAsState(
        targetValue = if (isExpanded) Color.Red else Color.Blue,
        animationSpec = tween(durationMillis = 500)
    )

    val rotation by animateFloatAsState(
        targetValue = if (isExpanded) 180f else 0f,
        animationSpec = spring(stiffness = Spring.StiffnessMedium)
    )

    Box(
        modifier = Modifier
            .size(size)
            .rotate(rotation)
            .background(color, CircleShape)
            .clickable { isExpanded = !isExpanded }
    )
}
rememberInfiniteTransition - 无限循环动画
kotlin
@Composable
fun InfiniteAnimationDemo() {
    val infiniteTransition = rememberInfiniteTransition()

    // 脉冲效果
    val scale by infiniteTransition.animateFloat(
        initialValue = 1f,
        targetValue = 1.2f,
        animationSpec = infiniteRepeatable(
            animation = tween(1000),
            repeatMode = RepeatMode.Reverse
        )
    )

    // 旋转效果
    val rotation by infiniteTransition.animateFloat(
        initialValue = 0f,
        targetValue = 360f,
        animationSpec = infiniteRepeatable(
            animation = tween(2000, easing = LinearEasing),
            repeatMode = RepeatMode.Restart
        )
    )

    Box(
        modifier = Modifier
            .size(100.dp)
            .scale(scale)
            .rotate(rotation)
            .background(Color.Blue, CircleShape)
    )
}
3. 低级API - 完全自定义
Animatable - 手动控制动画
kotlin
@Composable
fun ManualAnimationDemo() {
    val animatable = remember { Animatable(0f) }
    val coroutineScope = rememberCoroutineScope()

    LaunchedEffect(Unit) {
        // 复杂的动画序列
        animatable.animateTo(1f, tween(1000))
        animatable.animateTo(0.5f, spring())
        animatable.animateTo(1f, tween(500))
    }

    Box(
        modifier = Modifier
            .size(100.dp)
            .scale(animatable.value)
            .background(Color.Green, CircleShape)
            .clickable {
                coroutineScope.launch {
                    // 手动触发动画
                    animatable.animateTo(
                        targetValue = if (animatable.value == 1f) 0.5f else 1f,
                        animationSpec = spring(
                            dampingRatio = Spring.DampingRatioHighBouncy
                        )
                    )
                }
            }
    )
}
项目实战案例分析
项目架构概览
我们的动画演示项目包含5个渐进式的动画阶段:
scss
动画演示项目
├── 第1阶段:基础波纹效果 (BaseRippleEffect)
├── 第2阶段:彩虹色彩层 (RainbowLayerEffect)
├── 第3阶段:表情包粒子效果 (EmojiParticleEffect)
├── 第4阶段:旋转表情包效果 (RotatingParticleEffect)
└── 第5阶段:烟花闪烁效果 (FireworkEffect)
案例1:基础波纹效果 (BaseRippleEffect)
动画效果演示

图:第1阶段 - 基础波纹扩散动画效果
技术要点
- 使用
mutableStateOf管理波纹列表 LaunchedEffect响应点击事件- 协程 +
delay实现平滑动画 - 动态列表更新和清理
核心实现
kotlin
@Composable
fun BaseRippleEffect(clickCount: Int) {
    var allRipples by remember { mutableStateOf<List<RippleEffect>>(emptyList()) }
    val coroutineScope = rememberCoroutineScope()

    fun emitNewRipple() {
        val currentRippleId = clickCount
        val newRipple = RippleEffect(
            id = currentRippleId,
            scale = 1f,
            alpha = 0.6f
        )
        allRipples = allRipples + newRipple

        // 启动动画协程
        coroutineScope.launch {
            repeat(180) { step ->
                val progress = step / 180f
                val rippleScale = 1f + progress * 1.5f
                val rippleAlpha = 0.6f - progress * 0.6f

                // 更新特定波纹的状态
                allRipples = allRipples.map { ripple ->
                    if (ripple.id == currentRippleId) {
                        ripple.copy(scale = rippleScale, alpha = rippleAlpha)
                    } else {
                        ripple
                    }
                }
                delay(16L) // 60fps
            }

            // 动画完成后清理
            allRipples = allRipples.filter { it.id != currentRippleId }
        }
    }

    // 渲染波纹
    Box(modifier = Modifier.fillMaxSize()) {
        allRipples.forEach { ripple ->
            Box(
                modifier = Modifier
                    .size(60.dp)
                    .scale(ripple.scale)
                    .alpha(ripple.alpha)
                    .background(Color.Blue.copy(alpha = 0.3f), CircleShape)
                    .align(Alignment.Center)
            )
        }
    }
}
数据模型
kotlin
data class RippleEffect(
    val id: Int,
    val scale: Float,
    val alpha: Float
)
案例2:彩虹色彩层效果 (RainbowLayerEffect)
动画效果演示
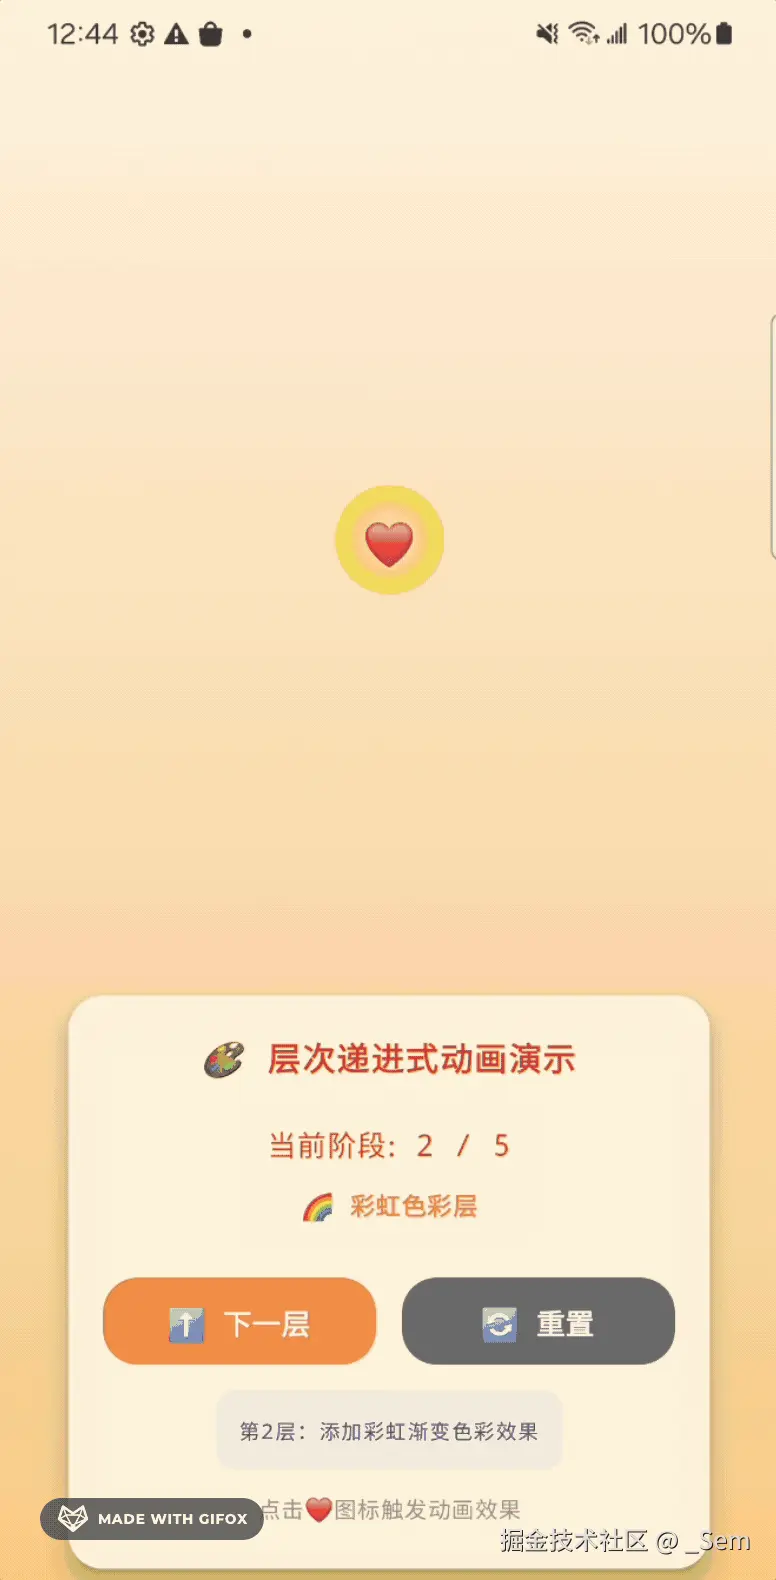
图:第2阶段 - 彩虹渐变色彩动画效果
技术要点
- 使用
rememberInfiniteTransition实现无限循环动画 - 彩虹色彩渐变计算
- 多层色彩叠加效果
- 平滑的颜色过渡
核心实现
kotlin
@Composable
fun RainbowLayerEffect(clickCount: Int) {
    val infiniteTransition = rememberInfiniteTransition()

    // 彩虹色彩循环
    val hue by infiniteTransition.animateFloat(
        initialValue = 0f,
        targetValue = 360f,
        animationSpec = infiniteRepeatable(
            animation = tween(3000, easing = LinearEasing),
            repeatMode = RepeatMode.Restart
        )
    )

    // 透明度脉冲效果
    val alpha by infiniteTransition.animateFloat(
        initialValue = 0.3f,
        targetValue = 0.8f,
        animationSpec = infiniteRepeatable(
            animation = tween(1500, easing = FastOutSlowInEasing),
            repeatMode = RepeatMode.Reverse
        )
    )

    // 缩放效果
    val scale by infiniteTransition.animateFloat(
        initialValue = 0.8f,
        targetValue = 1.2f,
        animationSpec = infiniteRepeatable(
            animation = tween(2000, easing = FastOutSlowInEasing),
            repeatMode = RepeatMode.Reverse
        )
    )

    // 计算彩虹颜色
    val rainbowColor = Color.hsv(hue, 0.8f, 1f)

    Box(
        modifier = Modifier
            .size(120.dp)
            .scale(scale)
            .alpha(alpha)
            .background(
                brush = Brush.radialGradient(
                    colors = listOf(
                        rainbowColor.copy(alpha = 0.6f),
                        rainbowColor.copy(alpha = 0.2f),
                        Color.Transparent
                    ),
                    radius = 200f
                ),
                shape = CircleShape
            )
            .align(Alignment.Center)
    )
}
案例3:表情包粒子系统 (EmojiParticleEffect)
动画效果演示
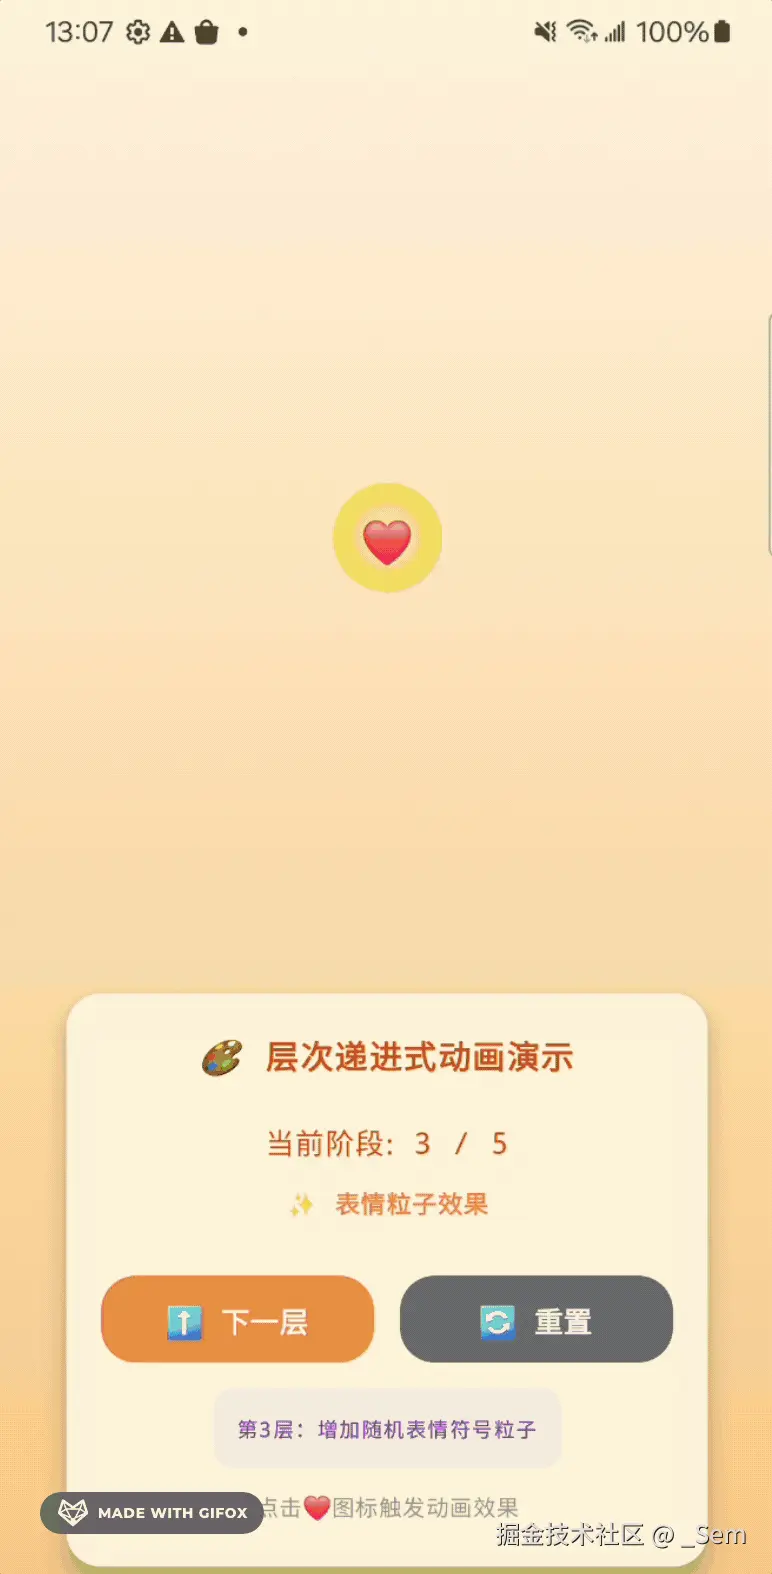
图:第3阶段 - 表情包粒子发射动画效果
技术特点
- 物理模拟:模拟粒子的抛物线运动
- 批量管理:一次创建多个粒子
- 生命周期管理:自动清理过期粒子
- 随机化:随机方向、距离、表情
核心实现
kotlin
@Composable
fun EmojiParticleEffect(clickCount: Int) {
    var allParticles by remember { mutableStateOf<List<EmojiParticle>>(emptyList()) }
    val coroutineScope = rememberCoroutineScope()

    fun createEmojiParticles() {
        val newParticles = (1..18).map { // 增加粒子数量
            val angle = (it * 20f + Random.nextFloat() * 40f) * kotlin.math.PI / 180f
            val distance = 150f + (Random.nextFloat() * 200f) // 增加发射距离

            EmojiParticle(
                id = clickCount * 100 + it,
                emoji = listOf("❤️", "💖", "💕", "💗", "💓", "💝").random(),
                startX = 0f,
                startY = 0f,
                targetX = (kotlin.math.cos(angle) * distance).toFloat(),
                targetY = (kotlin.math.sin(angle) * distance).toFloat(),
                progress = 0f,
                alpha = 1f
            )
        }

        allParticles = allParticles + newParticles

        // 启动粒子动画
        coroutineScope.launch {
            repeat(60) { step -> // 减少动画帧数,提高速度
                val progress = step / 60f

                allParticles = allParticles.map { particle ->
                    if (particle.id / 100 == clickCount) {
                        // 抛物线运动计算
                        val currentX = particle.startX + particle.targetX * progress
                        val currentY = particle.startY + particle.targetY * progress -
                                     50f * progress * (1f - progress) // 重力效果

                        particle.copy(
                            currentX = currentX,
                            currentY = currentY,
                            progress = progress,
                            alpha = 1f - progress
                        )
                    } else {
                        particle
                    }
                }
                delay(12L) // 更快的帧率
            }

            // 延迟清理
            delay(200L)
            allParticles = allParticles.filter { it.id / 100 != clickCount }
        }
    }

    // 响应点击事件
    LaunchedEffect(clickCount) {
        if (clickCount > 0) {
            createEmojiParticles()
        }
    }

    // 渲染粒子
    Box(modifier = Modifier.fillMaxSize()) {
        allParticles.forEach { particle ->
            if (particle.alpha > 0.1f) {
                Text(
                    text = particle.emoji,
                    fontSize = 16.sp,
                    modifier = Modifier
                        .offset(
                            x = particle.currentX.dp,
                            y = particle.currentY.dp
                        )
                        .alpha(particle.alpha)
                        .align(Alignment.Center)
                )
            }
        }
    }
}
粒子数据模型
kotlin
data class EmojiParticle(
    val id: Int,
    val emoji: String,
    val startX: Float,
    val startY: Float,
    val targetX: Float,
    val targetY: Float,
    val currentX: Float = startX,
    val currentY: Float = startY,
    val progress: Float,
    val alpha: Float
)
案例4:旋转表情包效果 (RotatingParticleEffect)
动画效果演示

图:第4阶段 - 表情包旋转动画效果
技术特点
- 旋转动画:表情包围绕中心点旋转
- 连接线效果:粒子之间用线条连接
- 网络状结构:形成动态的粒子网络
- 同步旋转:所有粒子同步旋转
核心实现
kotlin
@Composable
fun RotatingParticleEffect(clickCount: Int) {
    val infiniteTransition = rememberInfiniteTransition()

    // 旋转角度
    val rotation by infiniteTransition.animateFloat(
        initialValue = 0f,
        targetValue = 360f,
        animationSpec = infiniteRepeatable(
            animation = tween(4000, easing = LinearEasing),
            repeatMode = RepeatMode.Restart
        )
    )

    // 粒子位置计算
    val particles = remember {
        (1..8).map { index ->
            val angle = (index * 45f) * kotlin.math.PI / 180f
            val radius = 80f
            RotatingEmojiParticle(
                id = index,
                emoji = listOf("😊", "😍", "🥰", "😘", "🤗", "😚", "😙", "😋")[index - 1],
                baseAngle = angle,
                radius = radius
            )
        }
    }

    Box(modifier = Modifier.fillMaxSize()) {
        // 绘制连接线
        Canvas(modifier = Modifier.fillMaxSize()) {
            val centerX = size.width / 2
            val centerY = size.height / 2

            particles.forEach { particle ->
                val currentAngle = particle.baseAngle + rotation * kotlin.math.PI / 180f
                val x = centerX + kotlin.math.cos(currentAngle) * particle.radius
                val y = centerY + kotlin.math.sin(currentAngle) * particle.radius

                // 绘制到中心的连接线
                drawLine(
                    color = Color.White.copy(alpha = 0.3f),
                    start = Offset(centerX, centerY),
                    end = Offset(x.toFloat(), y.toFloat()),
                    strokeWidth = 2.dp.toPx()
                )
            }
        }

        // 渲染旋转的粒子
        particles.forEach { particle ->
            val currentAngle = particle.baseAngle + rotation * kotlin.math.PI / 180f
            val x = kotlin.math.cos(currentAngle) * particle.radius
            val y = kotlin.math.sin(currentAngle) * particle.radius

            Text(
                text = particle.emoji,
                fontSize = 20.sp,
                modifier = Modifier
                    .offset(x = x.dp, y = y.dp)
                    .align(Alignment.Center)
            )
        }
    }
}
旋转粒子数据模型
kotlin
data class RotatingEmojiParticle(
    val id: Int,
    val emoji: String,
    val baseAngle: Float,
    val radius: Float
)
案例5:高性能烟花效果 (FireworkEffect)
动画效果演示
图:第5阶段 - 烟花闪烁动画效果 (请观察四周烟花部分)
性能优化亮点
- 独立动画状态 :每个烟花使用独立的
Animatable - 避免列表重组 :使用
derivedStateOf计算属性 - 内存管理:限制最大烟花数量,自动清理
- 条件渲染:只渲染可见的烟花
核心实现
kotlin
@Composable
fun FireworkEffect(clickCount: Int) {
    var activeFireworks by remember { mutableStateOf<List<Int>>(emptyList()) }
    val maxFireworks = 10 // 性能限制

    // 响应点击,创建新烟花
    LaunchedEffect(clickCount) {
        if (clickCount > 0) {
            val newFireworkId = clickCount
            activeFireworks = (activeFireworks + newFireworkId).takeLast(maxFireworks)
        }
    }

    // 渲染所有活跃的烟花
    Box(modifier = Modifier.fillMaxSize()) {
        activeFireworks.forEach { fireworkId ->
            SingleFirework(
                fireworkId = fireworkId,
                onComplete = {
                    // 烟花完成后从列表中移除
                    activeFireworks = activeFireworks.filter { it != fireworkId }
                }
            )
        }

        // 调试信息
        Text(
            text = "活跃烟花: ${activeFireworks.size}",
            modifier = Modifier.align(Alignment.TopEnd),
            color = Color.White
        )
    }
}

@Composable
private fun SingleFirework(
    fireworkId: Int,
    onComplete: () -> Unit
) {
    // 创建烟花数据(只在首次创建时计算)
    val firework = remember(fireworkId) { createRandomFirework(fireworkId) }

    // 独立的动画状态
    val progress = remember { Animatable(0f) }

    // 使用 derivedStateOf 避免不必要的重组
    val scale by remember {
        derivedStateOf {
            val p = progress.value
            when {
                p < 0.3f -> 0.5f + (p / 0.3f) * 1.0f
                p < 0.7f -> 1.5f
                else -> 1.5f - ((p - 0.7f) / 0.3f) * 1.0f
            }
        }
    }

    val alpha by remember {
        derivedStateOf {
            val p = progress.value
            when {
                p < 0.2f -> (p / 0.2f) * 1.0f
                p < 0.6f -> 1.0f
                else -> 1.0f - ((p - 0.6f) / 0.4f) * 1.0f
            }
        }
    }

    // 启动动画
    LaunchedEffect(fireworkId) {
        try {
            progress.animateTo(
                targetValue = 1f,
                animationSpec = tween(durationMillis = 2000)
            )
        } finally {
            onComplete()
        }
    }

    // 条件渲染:只有当透明度大于阈值时才渲染
    if (alpha > 0.01f) {
        Text(
            text = firework.emoji,
            fontSize = 20.sp,
            fontFamily = FontFamily.Monospace,
            modifier = Modifier
                .offset(x = firework.x.dp, y = firework.y.dp)
                .scale(scale)
                .alpha(alpha)
        )
    }
}
烟花数据模型
kotlin
data class FireworkAnimation(
    val id: Int,
    val emoji: String,
    val x: Float,
    val y: Float,
    val color: Color
)

private fun createRandomFirework(id: Int): FireworkAnimation {
    val emojis = listOf("✨", "🎆", "🎇", "💫", "⭐", "🌟")
    val colors = listOf(
        Color.Red, Color.Blue, Color.Green,
        Color.Yellow, Color.Magenta, Color.Cyan
    )

    return FireworkAnimation(
        id = id,
        emoji = emojis.random(),
        x = (-100..100).random().toFloat(),
        y = (-100..100).random().toFloat(),
        color = colors.random()
    )
}
核心动画技术详解
1. 动画规格 (AnimationSpec)
Spring 弹簧动画
kotlin
// 不同的弹簧效果
val bouncySpring = spring(
    dampingRatio = Spring.DampingRatioHighBouncy,
    stiffness = Spring.StiffnessLow
)

val smoothSpring = spring(
    dampingRatio = Spring.DampingRatioNoBouncy,
    stiffness = Spring.StiffnessMedium
)

val quickSpring = spring(
    dampingRatio = Spring.DampingRatioMediumBouncy,
    stiffness = Spring.StiffnessHigh
)
Tween 补间动画
kotlin
// 线性动画
val linearTween = tween<Float>(
    durationMillis = 1000,
    easing = LinearEasing
)

// 缓动动画
val easeTween = tween<Float>(
    durationMillis = 1000,
    easing = FastOutSlowInEasing
)

// 自定义贝塞尔曲线
val customTween = tween<Float>(
    durationMillis = 1000,
    easing = CubicBezierEasing(0.25f, 0.46f, 0.45f, 0.94f)
)
Keyframes 关键帧动画
kotlin
val keyframesSpec = keyframes<Float> {
    durationMillis = 2000
    0f at 0 using LinearEasing
    0.5f at 500 using FastOutSlowInEasing
    1.2f at 1000 using LinearOutSlowInEasing
    1f at 2000
}
2. 状态管理模式
单一状态源
kotlin
@Composable
fun AnimationController() {
    // 单一状态控制多个动画
    var animationPhase by remember { mutableIntStateOf(0) }

    val scale by animateFloatAsState(
        targetValue = when (animationPhase) {
            0 -> 1f
            1 -> 1.2f
            2 -> 0.8f
            else -> 1f
        }
    )

    val rotation by animateFloatAsState(
        targetValue = animationPhase * 90f
    )

    val color by animateColorAsState(
        targetValue = when (animationPhase) {
            0 -> Color.Blue
            1 -> Color.Red
            2 -> Color.Green
            else -> Color.Gray
        }
    )
}
复合状态管理
kotlin
@Stable
class AnimationState {
    var isExpanded by mutableStateOf(false)
    var isHighlighted by mutableStateOf(false)
    var currentPhase by mutableIntStateOf(0)

    fun nextPhase() {
        currentPhase = (currentPhase + 1) % 4
    }

    fun reset() {
        isExpanded = false
        isHighlighted = false
        currentPhase = 0
    }
}

@Composable
fun ComplexAnimation() {
    val animationState = remember { AnimationState() }

    // 多个动画基于复合状态
    val scale by animateFloatAsState(
        targetValue = if (animationState.isExpanded) 1.5f else 1f
    )

    val alpha by animateFloatAsState(
        targetValue = if (animationState.isHighlighted) 1f else 0.7f
    )
}
3. 动画组合与编排
并行动画
kotlin
@Composable
fun ParallelAnimations() {
    var trigger by remember { mutableStateOf(false) }

    // 多个动画同时进行
    val scale by animateFloatAsState(
        targetValue = if (trigger) 1.5f else 1f,
        animationSpec = spring(stiffness = Spring.StiffnessLow)
    )

    val rotation by animateFloatAsState(
        targetValue = if (trigger) 360f else 0f,
        animationSpec = tween(1000)
    )

    val color by animateColorAsState(
        targetValue = if (trigger) Color.Red else Color.Blue,
        animationSpec = tween(500)
    )

    Box(
        modifier = Modifier
            .size(100.dp)
            .scale(scale)
            .rotate(rotation)
            .background(color, CircleShape)
            .clickable { trigger = !trigger }
    )
}
序列动画
kotlin
@Composable
fun SequentialAnimations() {
    var phase by remember { mutableIntStateOf(0) }
    val coroutineScope = rememberCoroutineScope()

    val scale by animateFloatAsState(
        targetValue = when (phase) {
            0 -> 1f
            1 -> 1.5f
            2 -> 0.8f
            else -> 1f
        },
        finishedListener = {
            // 动画完成后自动进入下一阶段
            if (phase < 3) {
                coroutineScope.launch {
                    delay(200)
                    phase++
                }
            }
        }
    )

    LaunchedEffect(Unit) {
        // 启动动画序列
        phase = 1
    }
}
交错动画
kotlin
@Composable
fun StaggeredAnimations() {
    var startAnimation by remember { mutableStateOf(false) }
    val items = remember { (1..5).toList() }

    Column {
        items.forEachIndexed { index, item ->
            val delay = index * 100 // 交错延迟

            val scale by animateFloatAsState(
                targetValue = if (startAnimation) 1f else 0f,
                animationSpec = tween(
                    durationMillis = 300,
                    delayMillis = delay
                )
            )

            Box(
                modifier = Modifier
                    .size(50.dp)
                    .scale(scale)
                    .background(Color.Blue, CircleShape)
            )
        }

        Button(onClick = { startAnimation = !startAnimation }) {
            Text("开始交错动画")
        }
    }
}
性能优化与最佳实践
1. 避免不必要的重组
问题代码
kotlin
@Composable
fun BadPerformanceExample() {
    var count by remember { mutableIntStateOf(0) }

    // ❌ 每次count变化都会重新计算expensive操作
    val expensiveValue = expensiveCalculation(count)

    val animatedValue by animateFloatAsState(count.toFloat())

    Column {
        Text("Count: $count")
        Text("Expensive: $expensiveValue")
        Text("Animated: $animatedValue")
    }
}
优化代码
kotlin
@Composable
fun GoodPerformanceExample() {
    var count by remember { mutableIntStateOf(0) }

    // ✅ 使用remember缓存expensive操作
    val expensiveValue by remember(count) {
        derivedStateOf { expensiveCalculation(count) }
    }

    // ✅ 使用derivedStateOf避免不必要的动画更新
    val animatedValue by animateFloatAsState(count.toFloat())

    Column {
        Text("Count: $count")
        Text("Expensive: ${expensiveValue.value}")
        Text("Animated: $animatedValue")
    }
}
2. 合理使用LaunchedEffect
问题代码
kotlin
@Composable
fun BadLaunchedEffectExample(clickCount: Int) {
    var animations by remember { mutableStateOf<List<Animation>>(emptyList()) }

    // ❌ 每次重组都会启动新的协程
    LaunchedEffect(true) {
        while (true) {
            // 无限循环动画
            delay(16)
            animations = updateAnimations(animations)
        }
    }
}
优化代码
kotlin
@Composable
fun GoodLaunchedEffectExample(clickCount: Int) {
    var animations by remember { mutableStateOf<List<Animation>>(emptyList()) }

    // ✅ 使用正确的key,避免重复启动
    LaunchedEffect(clickCount) {
        if (clickCount > 0) {
            // 只在clickCount变化时启动新动画
            val newAnimation = createAnimation(clickCount)
            animations = animations + newAnimation

            // 动画完成后清理
            delay(2000)
            animations = animations.filter { it.id != clickCount }
        }
    }
}
3. 内存管理
限制动画数量
kotlin
@Composable
fun MemoryEfficientAnimations() {
    var activeAnimations by remember { mutableStateOf<List<AnimationData>>(emptyList()) }
    val maxAnimations = 10 // 限制最大数量

    fun addAnimation(newAnimation: AnimationData) {
        activeAnimations = (activeAnimations + newAnimation)
            .takeLast(maxAnimations) // 只保留最新的N个动画
    }

    fun removeAnimation(animationId: Int) {
        activeAnimations = activeAnimations.filter { it.id != animationId }
    }
}
及时清理资源
kotlin
@Composable
fun ResourceManagement() {
    val animatables = remember { mutableMapOf<Int, Animatable<Float, AnimationVector1D>>() }

    DisposableEffect(Unit) {
        onDispose {
            // 组件销毁时清理所有动画
            animatables.values.forEach { animatable ->
                animatable.stop()
            }
            animatables.clear()
        }
    }
}
4. 动画性能监控
性能监控工具
kotlin
@Composable
fun AnimationPerformanceMonitor() {
    var frameCount by remember { mutableIntStateOf(0) }
    var lastTime by remember { mutableLongStateOf(System.currentTimeMillis()) }
    var fps by remember { mutableFloatStateOf(0f) }

    LaunchedEffect(Unit) {
        while (true) {
            delay(16) // 60fps
            frameCount++

            val currentTime = System.currentTimeMillis()
            if (currentTime - lastTime >= 1000) {
                fps = frameCount * 1000f / (currentTime - lastTime)
                frameCount = 0
                lastTime = currentTime
            }
        }
    }

    Text(
        text = "FPS: ${fps.toInt()}",
        modifier = Modifier
            .background(Color.Black.copy(alpha = 0.7f))
            .padding(8.dp),
        color = Color.White
    )
}
5. 最佳实践总结
推荐做法
kotlin
// 1. 使用状态驱动动画
val scale by animateFloatAsState(targetValue = if (isExpanded) 1.5f else 1f)

// 2. 合理使用remember缓存
val expensiveData = remember(key) { computeExpensiveData(key) }

// 3. 使用derivedStateOf避免不必要计算
val computedValue by remember { derivedStateOf { expensiveComputation() } }

// 4. 限制动画数量
val animations = animations.takeLast(MAX_ANIMATIONS)

// 5. 及时清理资源
DisposableEffect(key) {
    onDispose { cleanup() }
}
避免的做法
kotlin
// 1. 避免在Composable中直接创建动画对象
val animator = ObjectAnimator.ofFloat(...) // ❌

// 2. 避免无限制的动画创建
repeat(1000) { createAnimation() } // ❌

// 3. 避免在动画中进行expensive操作
LaunchedEffect(Unit) {
    while (true) {
        expensiveOperation() // ❌
        delay(16)
    }
}

// 4. 避免不必要的状态更新
var state by mutableStateOf(initialValue)
state = state.copy() // 如果值没变化,避免这样做 ❌
KMM跨平台动画实现
KMM跨平台效果展示
图:同样的动画效果在iOS设备上的运行表现 - 一套KMM代码,双平台运行
Kotlin Multiplatform项目结构
bash
项目结构
├── shared/
│   └── src/
│       ├── commonMain/kotlin/     # 共享动画代码
│       │   ├── ui/
│       │   │   ├── effects/       # 动画效果
│       │   │   ├── components/    # UI组件
│       │   │   └── models/        # 数据模型
│       │   └── SharedAnimationDemo.kt
│       ├── androidMain/kotlin/    # Android特定代码
│       └── iosMain/kotlin/        # iOS特定代码
├── app/ (Android)
└── iosApp/ (iOS)
共享动画代码
共享的动画组件
kotlin
// shared/src/commonMain/kotlin/ui/SharedAnimationDemo.kt
@Composable
fun SharedAnimationDemo() {
    // 这个组件可以在Android和iOS上运行
    LikeAnimationDemo()
}

// 共享的动画效果
@Composable
fun CrossPlatformFireworkEffect(clickCount: Int) {
    // 使用Compose Multiplatform的共享API
    var activeFireworks by remember { mutableStateOf<List<Int>>(emptyList()) }

    LaunchedEffect(clickCount) {
        if (clickCount > 0) {
            activeFireworks = activeFireworks + clickCount
        }
    }

    Box(modifier = Modifier.fillMaxSize()) {
        activeFireworks.forEach { fireworkId ->
            CrossPlatformSingleFirework(
                fireworkId = fireworkId,
                onComplete = {
                    activeFireworks = activeFireworks.filter { it != fireworkId }
                }
            )
        }
    }
}
平台特定的实现
kotlin
// shared/src/commonMain/kotlin/Platform.kt
expect fun getPlatformName(): String
expect fun getScreenDensity(): Float

// shared/src/androidMain/kotlin/Platform.android.kt
actual fun getPlatformName(): String = "Android"
actual fun getScreenDensity(): Float {
    return Resources.getSystem().displayMetrics.density
}

// shared/src/iosMain/kotlin/Platform.ios.kt
actual fun getPlatformName(): String = "iOS"
actual fun getScreenDensity(): Float {
    return UIScreen.mainScreen.scale.toFloat()
}
Android集成
Android应用入口
kotlin
// app/src/main/java/MainActivity.kt
class MainActivity : ComponentActivity() {
    override fun onCreate(savedInstanceState: Bundle?) {
        super.onCreate(savedInstanceState)
        setContent {
            MyAppTheme {
                // 使用共享的动画组件
                SharedAnimationDemo()
            }
        }
    }
}
iOS集成
iOS SwiftUI集成
swift
// iosApp/iosApp/ContentView.swift
import SwiftUI
import Shared

struct ContentView: View {
    var body: some View {
        ComposeView()
            .ignoresSafeArea(.keyboard)
    }
}

struct ComposeView: UIViewControllerRepresentable {
    func makeUIViewController(context: Context) -> UIViewController {
        MainViewControllerKt.MainViewController()
    }

    func updateUIViewController(_ uiViewController: UIViewController, context: Context) {}
}
iOS Kotlin入口
kotlin
// shared/src/iosMain/kotlin/MainViewController.kt
import androidx.compose.ui.window.ComposeUIViewController

fun MainViewController() = ComposeUIViewController {
    SharedAnimationDemo()
}
跨平台动画差异处理
平台适配
kotlin
@Composable
fun PlatformAdaptiveAnimation() {
    val platformName = remember { getPlatformName() }
    val density = remember { getScreenDensity() }

    // 根据平台调整动画参数
    val animationDuration = when (platformName) {
        "iOS" -> 300 // iOS用户习惯更快的动画
        "Android" -> 400 // Android标准动画时长
        else -> 350
    }

    val scale by animateFloatAsState(
        targetValue = if (isExpanded) 1.5f else 1f,
        animationSpec = tween(durationMillis = animationDuration)
    )

    // 根据屏幕密度调整大小
    val adjustedSize = (100 * density).dp

    Box(
        modifier = Modifier
            .size(adjustedSize)
            .scale(scale)
    )
}
性能优化差异
kotlin
@Composable
fun PlatformOptimizedAnimation() {
    val platformName = getPlatformName()

    // iOS设备通常性能更好,可以支持更多并发动画
    val maxAnimations = when (platformName) {
        "iOS" -> 15
        "Android" -> 10
        else -> 8
    }

    var activeAnimations by remember { mutableStateOf<List<Animation>>(emptyList()) }

    fun addAnimation(animation: Animation) {
        activeAnimations = (activeAnimations + animation).takeLast(maxAnimations)
    }
}
总结与展望
技术总结
Compose动画 + KMM的优势
- 声明式编程:代码更简洁、可读性更强
- 状态驱动:动画自动响应状态变化,减少手动管理
- 类型安全:编译时检查,减少运行时错误
- 性能优化:智能重组机制,只更新必要部分
- 跨平台支持:一套KMM代码,Android和iOS双平台运行
- 开发效率:减少重复开发,统一维护成本
- 一致性体验:确保不同平台的动画效果完全一致
项目实战收获
- 渐进式学习:从简单波纹到复杂烟花效果
- 性能优化:独立动画状态、内存管理、条件渲染
- 代码复用:组件化设计,便于维护和扩展
- KMM跨平台实现:Android和iOS共享动画逻辑,一套代码双平台运行
- 开发效率提升:减少50%的重复开发工作
- 维护成本降低:统一的代码库,统一的bug修复
最佳实践总结
开发建议
kotlin
// 1. 优先使用高级API
AnimatedVisibility(visible = isVisible) { /* content */ }

// 2. 状态驱动动画
val scale by animateFloatAsState(targetValue = if (isExpanded) 1.5f else 1f)

// 3. 合理使用remember
val expensiveData = remember(key) { computeExpensiveData(key) }

// 4. 性能监控
val fps = remember { PerformanceMonitor() }

// 5. 及时清理资源
DisposableEffect(key) {
    onDispose { cleanup() }
}
性能优化清单
- 使用
derivedStateOf避免不必要计算 - 限制并发动画数量
- 条件渲染,只显示可见元素
- 使用
remember缓存expensive操作 - 及时清理动画资源
- 监控FPS和内存使用
未来发展方向
技术演进
- 更丰富的动画API:Google持续完善Compose动画生态
- 更好的性能:编译器优化、运行时优化
- 更强的跨平台能力:Compose Multiplatform的完善
- AI辅助动画:智能动画生成和优化
应用场景扩展
- 游戏开发:Compose for Games
- 桌面应用:Compose for Desktop
- Web应用:Compose for Web
- 嵌入式设备:Compose for Embedded
团队技能提升
- 学习路径:从基础API到高级技巧
- 实践项目:通过实际项目积累经验
- 社区参与:贡献开源项目,分享经验
- 持续学习:关注最新技术动态
推荐学习资源
官方文档
开源项目
社区资源
结语
Compose动画为我们带来了全新的动画开发体验,通过声明式的API设计和强大的性能优化机制,让复杂的动画实现变得简单而高效。
通过本文的实战案例分析,我们看到了从基础波纹效果到复杂烟花动画的完整实现过程,以及如何通过性能优化技巧让动画在各种设备上都能流畅运行。
跨平台动画的实现更是展示了Compose Multiplatform的强大能力,让我们能够用一套代码为Android和iOS用户提供一致的动画体验。
希望这些经验和技巧能够帮助你在项目中更好地运用Compose动画技术,创造出更加优秀的用户体验!
如果你觉得这篇文章对你有帮助,欢迎点赞、收藏和分享!有任何问题或建议,也欢迎在评论区交流讨论。
标签: #Compose #KMM #Android #iOS #动画 #跨平台 #性能优化 #KotlinMultiplatform