一、JSAR 核心概念与 Rokid 适配基础
1.1 什么是 JSAR
JSAR(JavaScript Augmented Reality)是 Rokid 主导的空间小程序开发技术体系,本质为可嵌入物理空间的 Web 运行时,支持开发者使用 JavaScript、XSML(空间标记语言)等 Web 技术栈,构建能与真实环境融合的沉浸式 AR 应用。其核心价值在于降低 AR 开发门槛,让前端开发者无需掌握底层图形学技术,即可快速实现空间化交互体验。
1.2 JSAR 与 Rokid 设备的深度适配
Rokid 作为 JSAR 技术的核心落地载体,从硬件到软件提供全链路支持:
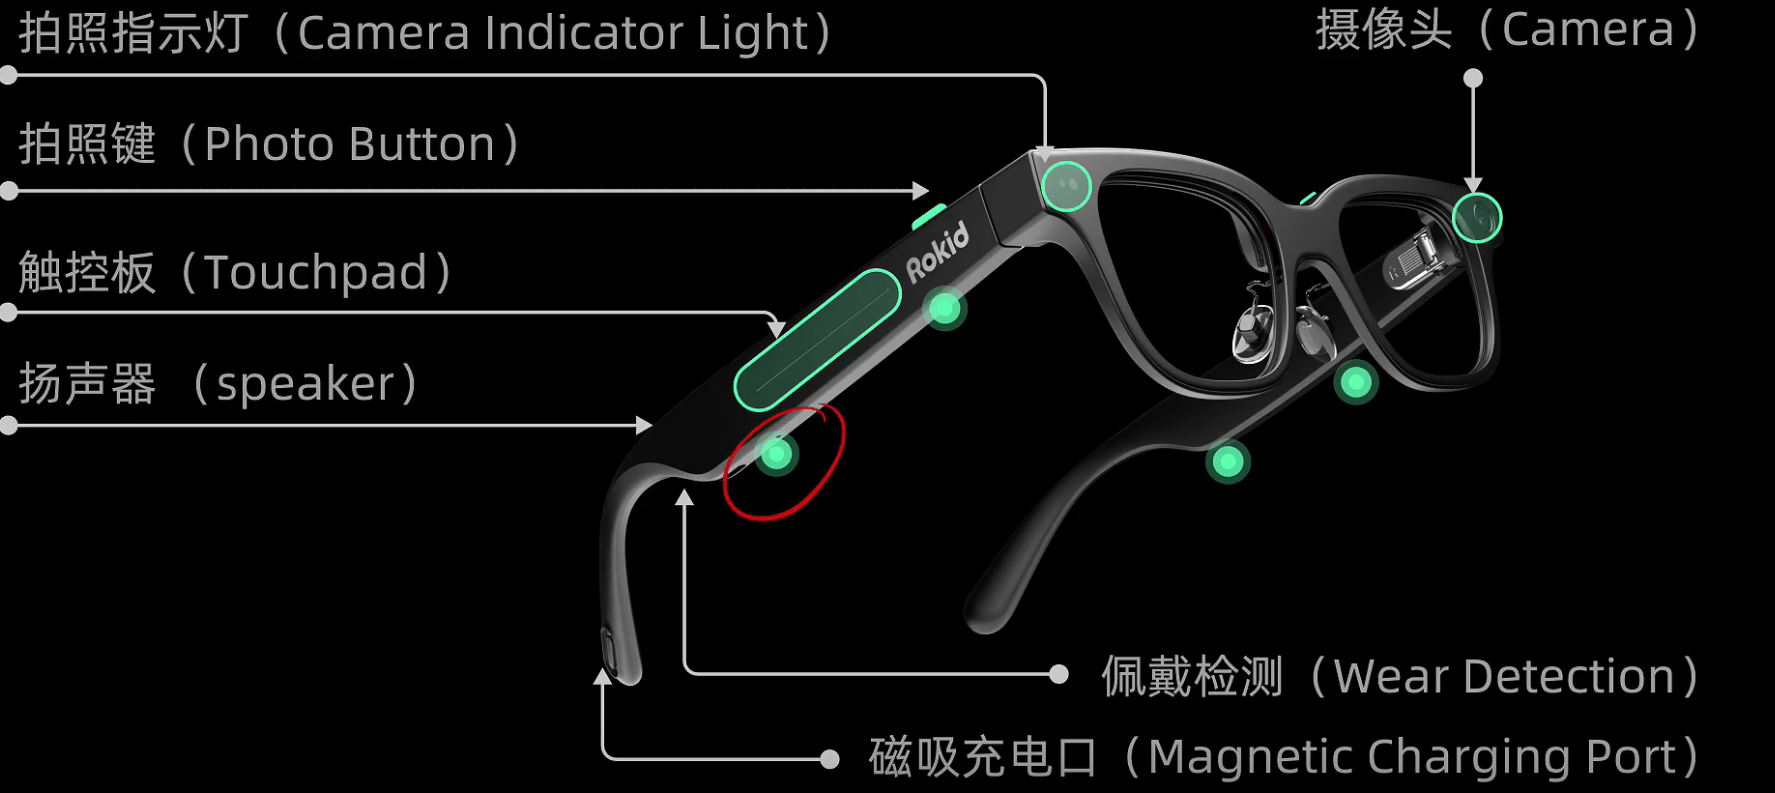
- 硬件适配:兼容 Rokid Glasses 系列、Rokid Max 等主流 AR 头显,利用设备的高精度空间定位、手势识别与近眼显示能力,实现虚拟内容与真实空间的精准对齐。
- 跨设备拓展:依托 WebXR 标准,JSAR 应用可无缝运行于 Rokid、Pico、Apple Vision Pro 等多品牌 AR 设备,且支持 iPhone 等移动终端通过 WebXR Viewer 访问。
- 工具链集成:提供专属 JSAR DevTools 与真机调试方案,优化 Rokid 设备上的渲染性能与交互响应速度。
1.3 核心技术组件
| 组件 | 功能说明 |
|---|---|
| XSML | 空间标记语言,扩展 HTML 语法以描述 3D 空间结构,支持定义平面、模型等空间元素 |
| JSAR-DOM | 空间文档对象模型,基于 Babylon.js 实现,提供空间元素的交互与渲染能力 |
| JSAR DevTools | VS Code 插件,集成场景预览、代码补全、真机调试等核心开发功能 |
| WebXR 适配层 | 支持沉浸式 AR 模式切换,兼容 Rokid 设备的空间定位与姿态追踪 |
二、开发环境搭建(Rokid 官方标准流程)
2.1 环境依赖清单
| 依赖工具 | 版本要求 | 作用说明 |
|---|---|---|
| Visual Studio Code | ≥ 1.80.0 | 代码编辑与插件运行载体 |
| Node.js | ≥ 18.0.0 或最新 LTS 版本 | 依赖管理与项目构建 |
| JSAR DevTools | 最新稳定版 | 场景预览与调试核心工具 |
2.2 分步安装指南
步骤 1:安装基础工具
- Visual Studio Code :前往 VS Code 官网 下载对应系统版本,建议安装中文语言包提升开发效率。
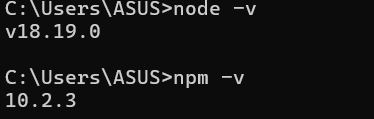
- Node.js :访问 Node.js 官网 下载 LTS 版本,安装后通过终端验证:
node -v # 需显示 v18.0.0 及以上
npm** -v # 配套 npm 版本通常 ≥ 8.0.0**
步骤 2:安装 JSAR DevTools
提供两种官方安装方式,推荐优先使用商店安装:
- 方式一:VS Code 商店安装
打开 VS Code 拓展面板,搜索 JSAR DevTools(插件 ID:RokidMCreativeLab.vscode-jsar-devtools),点击安装即可,安装链接:市场地址。
- 方式二:VSIX 包离线安装
- 下载最新安装包:vscode-jsar-devtools-latest.vsix
- 打开 VS Code,按下
Ctrl + Shift + P,输入Extensions: Install from VSIX...,选择下载的安装包完成安装。
2.3 环境验证
安装完成后,打开 VS Code 右下角状态栏,若显示 JSAR DevTools: Ready,则说明工具激活成功。
三、JSAR 项目开发核心流程
3.1 项目初始化(两种官方方案)
方案 1:Npm 命令快速创建
- 打开终端,执行初始化命令:
plain
npm init @yodaos-jsar/widget- 按照交互提示输入项目名称、描述等信息,工具会自动拉取官方模板 M-CreativeLab/template-for-jsar-widget。
- 进入项目目录,安装依赖:
bash
cd 项目名称
npm install  # 安装类型定义文件,提供代码补全
方案 2:GitHub Template 创建
- 访问官方模板仓库:template-for-jsar-widget,点击 Use this template。
- 填写仓库名称,创建新的 GitHub 项目(推荐添加 jsar-widget 主题标签,便于社区发现)。
- 克隆项目到本地并安装依赖,示例项目可参考:
- 太阳系模拟器:jsar-gallery-solar-system
- 3D 模型展示:jsar-gallery-flatten-lion
3.2 项目核心结构解析
bash
project-name/
├── main.xsml        # 入口文件,定义空间结构与逻辑
├── package.json     # 项目配置,需指定 main 为 main.xsml
├── icon.png         # 应用图标
├── model/           # 3D 模型资源(如 glb 格式)
│   └── foobar.glb
└── lib/             # 业务逻辑脚本
    └── index.ts
package.json 关键配置:
json
{
  "name": "rokid-jsar-demo",
  "displayName": "JSAR Demo",
  "main": "main.xsml",  // 必须指向 XSML 入口
  "icon3d": { "base": "./model/foobar.glb" },  // 3D 图标配置
  "devDependencies": { "@yodaos-jsar/types": "^1.4.0" }  // 类型支持
}
3.3 核心开发语法(XSML + JSAR-DOM)
- XSML 空间元素定义
XSML 扩展 HTML 语法,新增 <space> 标签描述 3D 空间,支持嵌套平面、模型等元素:
xml
<xsml version="1.0">
  <head>
    <title>空间按钮示例</title>
    <script>
      // 获取空间元素并绑定事件
      const guiPlane = spatialDocument.getElementById('gui');
      const openButton = guiPlane.shadowRoot.getElementById('open-btn');
      openButton.addEventListener('mouseup', () => {
      console.log('按钮被点击');
      });
    </script>
  </head>
  <!-- 空间容器,所有 3D 元素需置于此标签内 -->
  <space>
    <!-- 创建交互平面 -->
    <plane id="gui" width="2" height="1" position="0 1.5 -3">
      <style>
        .btn {
        background: rgba(20,33,33,1);
        color: white;
        font-size: 50px;
        width: 200px;
        height: 100px;
        border-radius: 25px;
        }
      </style>
      <div id="root">
        <button id="open-btn" class="btn">点击我</button>
      </div>
    </plane>
  </space>
</xsml>- JSAR-DOM 核心 API
| API 方法 | 功能说明 |
|---|---|
| spatialDocument.getElementById(id) | 获取空间元素,类似 HTML DOM 的 getElementById |
| element.addEventListener(event, fn) | 绑定空间交互事件(mouseup、touchstart 等) |
| spatialDocument.dispatchEvent(e) | 触发自定义事件,实现跨组件通讯 |
3.4 场景预览与调试
1. 本地场景预览
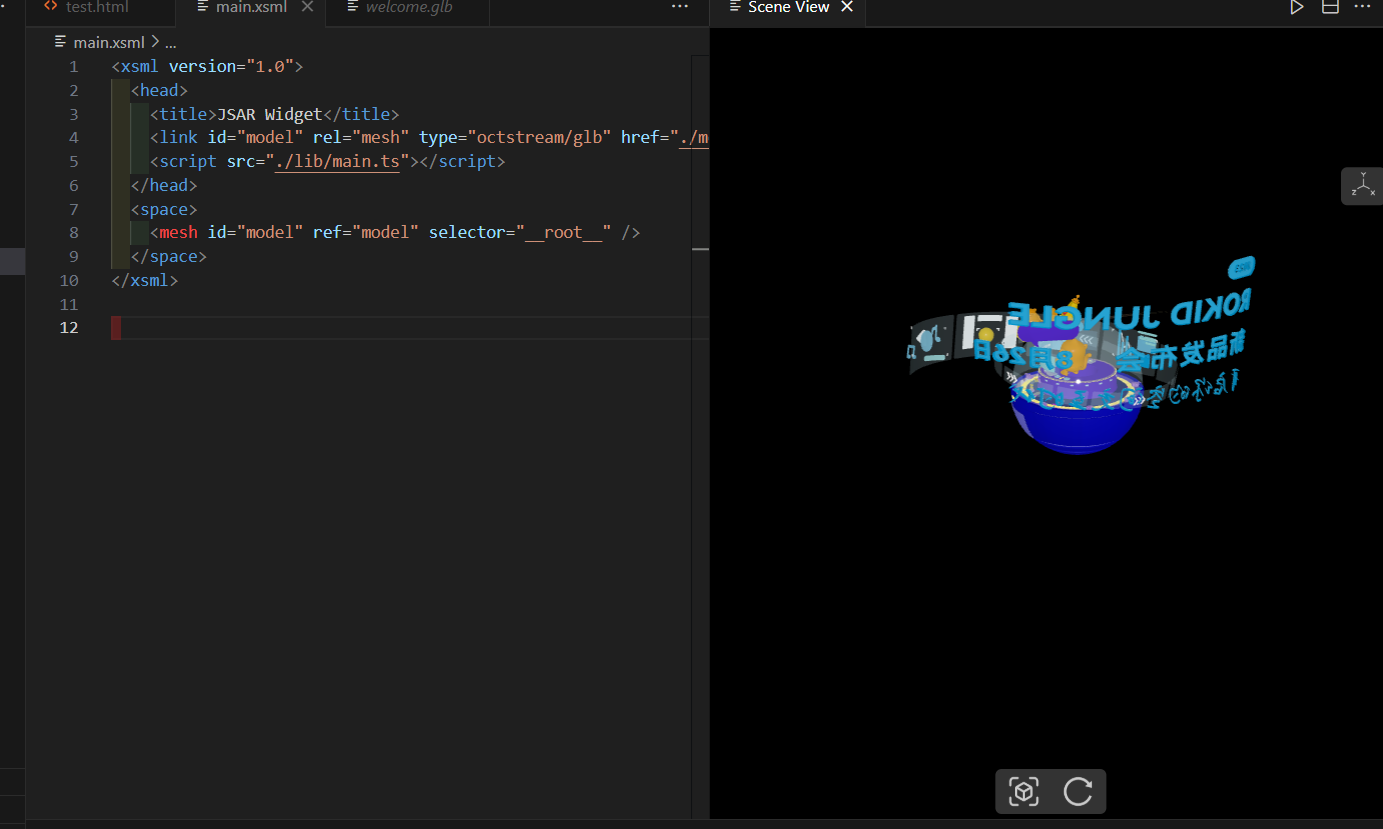
- 在 VS Code 中打开项目的 main.xsml 文件。
- 点击编辑器右上角的「场景视图」按钮(立体图形图标)。
- 场景视图支持两种核心操作
重置位置:将场景恢复到原点坐标
刷新:代码修改后自动 / 手动重新加载场景
2. WebXR 浏览器调试
1.安装 Chrome 插件:Immersive Web Emulator。
2.上传项目到本地服务,通过以下 URL 访问:
plain
https://m-creativelab.github.io/jsar-dom/?url=http://你的IP:端口/main.xsml3.点击「Enter AR」按钮,即可在浏览器中模拟 Rokid 设备的 AR 沉浸式体验。
3. Rokid 真机调试
- 确保开发机与 Rokid 设备处于同一局域网。
- 在 JSAR DevTools 中选择「真机调试」,自动识别设备并部署应用。
- 支持通过 Chrome DevTools 协议(CDP)进行断点调试与日志打印。
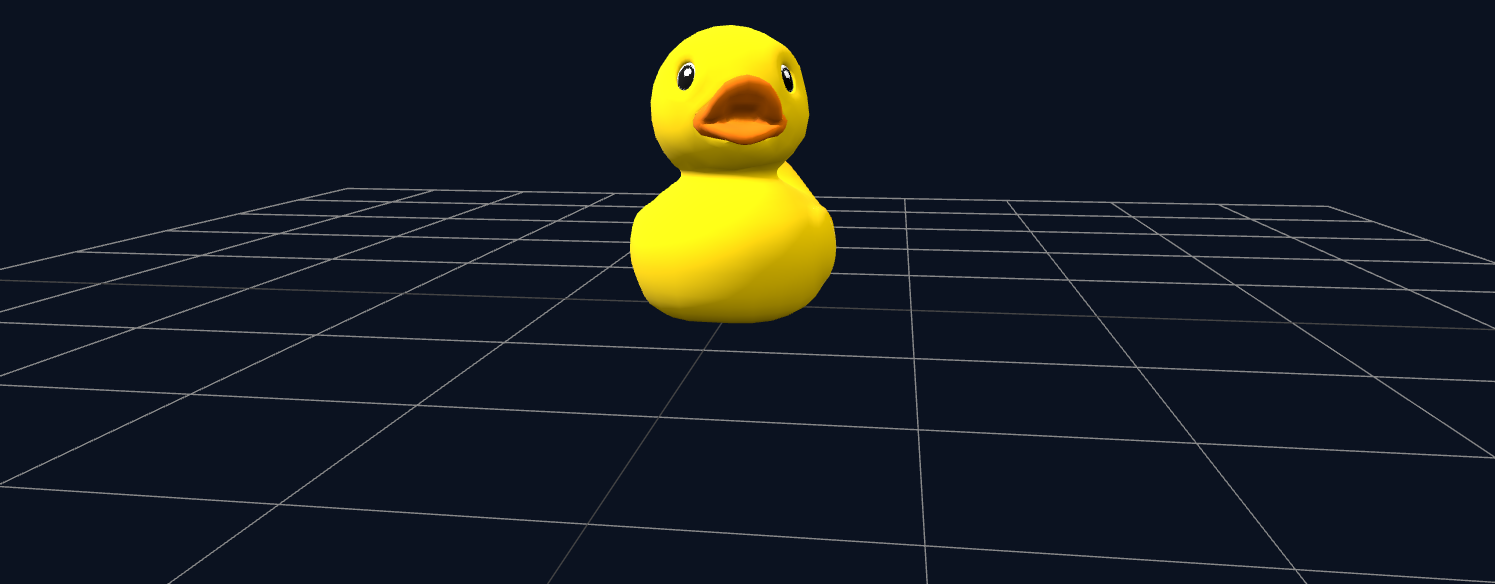
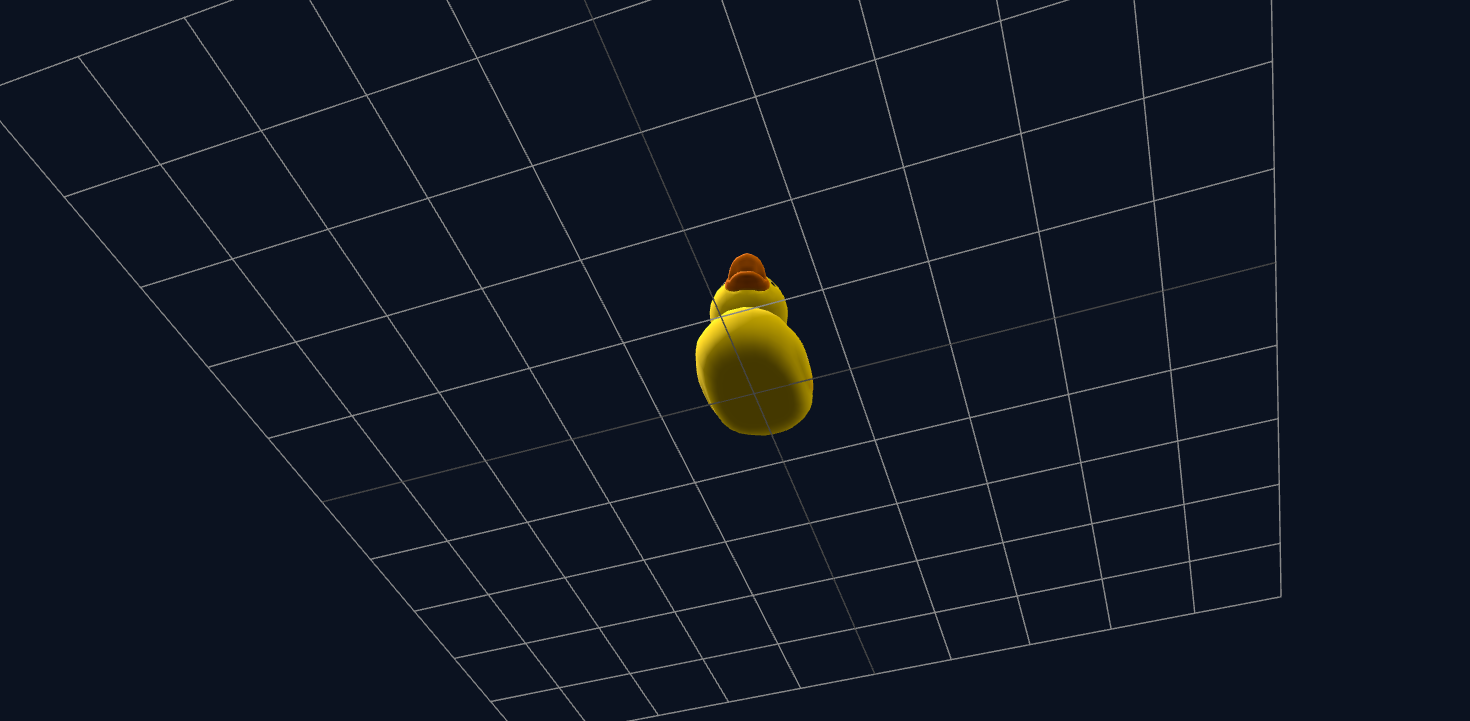
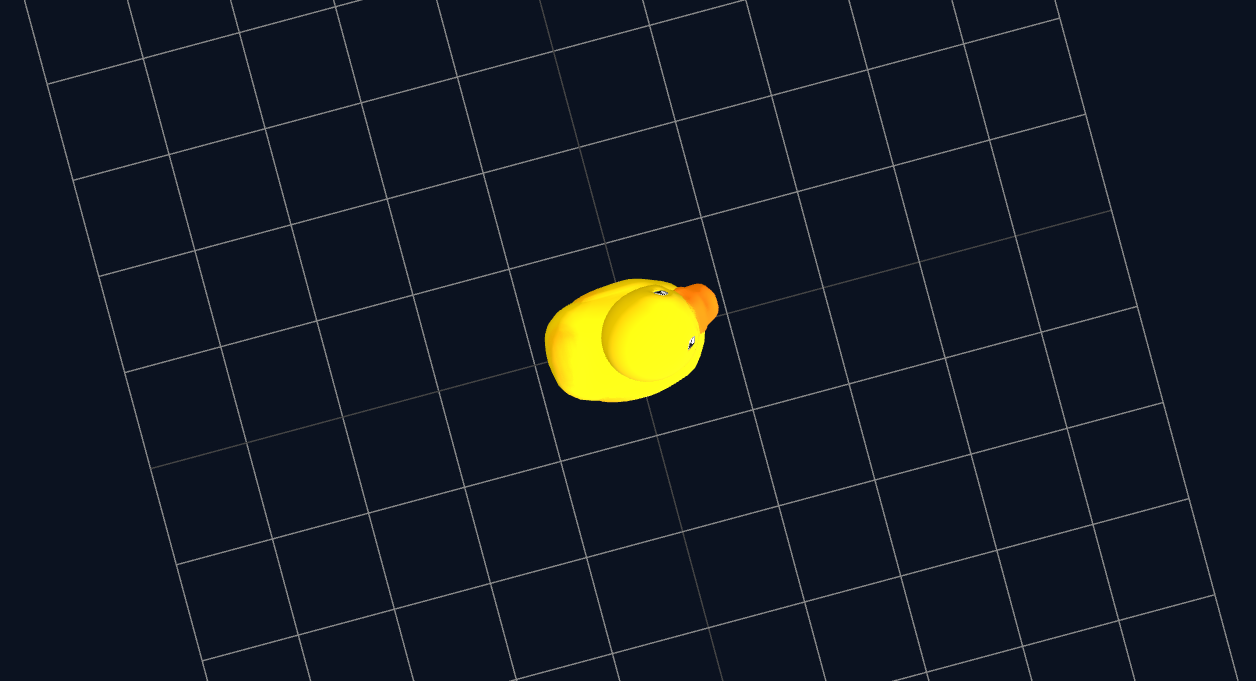
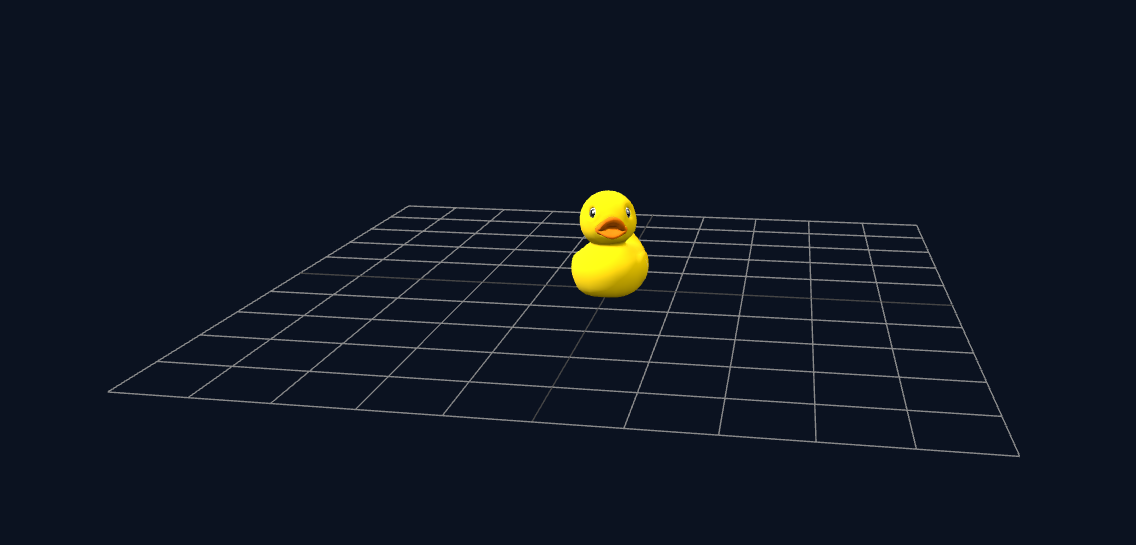
四 、实战演练-3D模型展示-小黄鸭模型的旋转和视图放大缩小
4.1 项目结构
搭建如下项目结构:
plain
3d-model-showcase/
├── lib/                # TypeScript源码,核心渲染与逻辑
│   └── index.ts        # three.js主入口,场景/模型/控件初始化
├── model/              # 存放glb模型文件
│   └── sample.glb      # 示例鸭子模型
├── node_modules/       # npm依赖
├── types/              # TypeScript类型声明
│   └── three-examples.d.ts # three.js扩展类型声明
├── main.html           # 前端页面,入口UI与脚本加载
├── package.json        # 项目依赖与脚本
├── tsconfig.json       # TypeScript编译配置
1. package.json
json
{
"$schema": "https://json.schemastore.org/package",
"name": "3d-model-showcase",
"version": "1.0.0",
"description": "3D 模型展示最小示例(three.js + TypeScript)",
"main": "lib/index.ts",
"type": "module",
"scripts": {
"build": "tsc",
"start": "npx http-server -c-1 ./ -p 8080"
},
"author": "",
"license": "MIT",
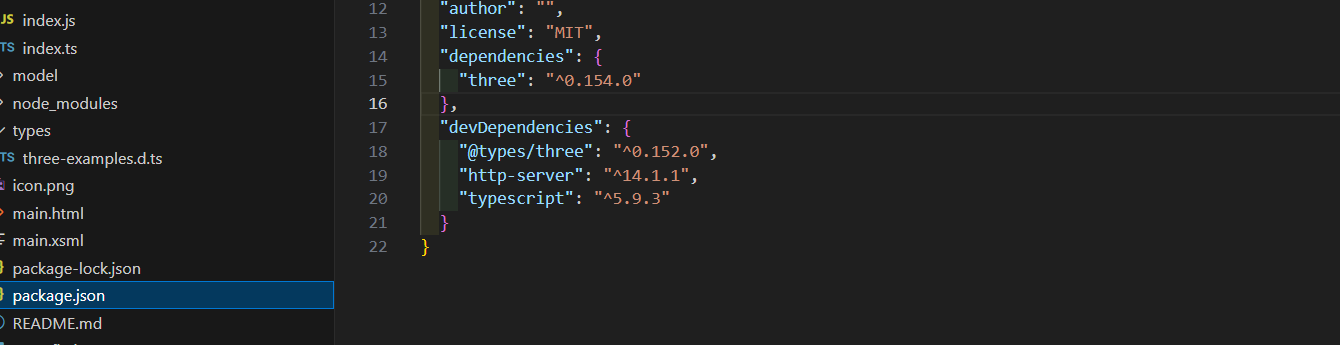
"dependencies": {
"three": "^0.154.0"
},
"devDependencies": {
"@types/three": "^0.152.0",
"http-server": "^14.1.1",
"typescript": "^5.9.3"
}
}记录依赖(如three、typescript、http-server)。
提供npm start脚本,启动本地静态服务器。
2. tsconfig.json
json
{
  "$schema": "https://json.schemastore.org/tsconfig",
  "compilerOptions": {
    "target": "ES2020",
    "module": "ES2020",
    "moduleResolution": "node",
    "strict": false,
    "esModuleInterop": true,
    "forceConsistentCasingInFileNames": true,
    "skipLibCheck": true,
    "outDir": "./lib",
    "declaration": true,
    "allowJs": true,
    "checkJs": false,
    "lib": ["ES2020", "DOM", "DOM.Iterable"]
  },
  "include": ["src/**/*", "lib/**/*"],
  "exclude": ["node_modules"]
}
3. main.html
html
<!-- main.xsml - 最小页面示例,包含一个全屏 canvas 用于 three.js 渲染 -->
<!DOCTYPE html>
<html lang="zh-CN">
  <head>
    <meta charset="utf-8" />
    <meta name="viewport" content="width=device-width, initial-scale=1" />
    <title>3D 模型展示</title>
    <!-- Import map: 映射裸模块名到本地模块,便于直接在浏览器中使用 node_modules 的 ES module -->
    <script type="importmap">
      {
        "imports": {
          "three": "/node_modules/three/build/three.module.js",
          "three/": "/node_modules/three/"
        }
      }
    </script>
    <style>
      html,body { height:100%; margin:0; }
      #app { width:100%; height:100%; display:flex; flex-direction:column; }
      #viewer { flex:1; position:relative; }
      canvas { width:100%; height:100%; display:block; }
      #controls { padding:8px; background:#111; color:#fff; font-family: Arial, sans-serif }
      button { margin-right:8px }
    </style>
  </head>
  <body>
    <div id="app">
      <div id="controls">
        <button id="loadBtn">加载示例模型</button>
        <input id="modelUrl" placeholder="输入 glb URL 或留空使用 ./model/sample.glb" style="width:50%" />
        <span id="status" style="margin-left:12px;color:#9cc;">就绪</span>
      </div>
      <div id="progressBar" style="height:6px; background:#333; width:100%">
        <div id="progressFill" style="height:100%; width:0%; background:#3af;"></div>
      </div>
      <div id="errorMsg" style="color:#f66; padding:6px 8px; display:none; background:#2b0000"></div>
      <div id="viewer">
        <canvas id="glCanvas"></canvas>
      </div>
    </div>

    <script type="module">
      import { init, loadModelFromUrl } from './lib/index.js';

      // 初始化渲染器并挂载到 canvas
      init({ canvas: '#glCanvas', background: '#0b1220' });

      const statusEl = document.getElementById('status');
      const progressFill = document.getElementById('progressFill');
      const errorEl = document.getElementById('errorMsg');

      document.getElementById('loadBtn').addEventListener('click', async () => {
        const input = document.getElementById('modelUrl');
        const url = input.value && input.value.trim() !== '' ? input.value.trim() : './model/sample.glb';
        // reset UI
        if (errorEl) { errorEl.style.display = 'none'; errorEl.textContent = ''; }
        if (statusEl) statusEl.textContent = '开始加载...';
        if (progressFill instanceof HTMLElement) progressFill.style.width = '0%';

        try {
          await loadModelFromUrl(url, (percent) => {
            if (statusEl) statusEl.textContent = `加载中 ${percent}%`;
            if (progressFill instanceof HTMLElement) progressFill.style.width = percent + '%';
          }, (err) => {
            if (errorEl) { errorEl.style.display = 'block'; errorEl.textContent = '加载出错: ' + (err && err.message ? err.message : String(err)); }
            if (statusEl) statusEl.textContent = '加载错误';
          });
          if (statusEl) statusEl.textContent = '加载完成';
          if (progressFill instanceof HTMLElement) progressFill.style.width = '100%';
        } catch (e) {
          console.error(e);
          if (errorEl) { errorEl.style.display = 'block'; errorEl.textContent = '加载失败: ' + (e && e.message ? e.message : String(e)); }
          if (statusEl) statusEl.textContent = '加载失败';
        }
      });
    </script>
  </body>
</html>
页面入口,包含UI(加载按钮、输入框、进度条)。
加载lib/index.js,初始化three.js渲染。
使用import map映射three.js及其扩展模块,支持浏览器原生ESM加载。
绑定按钮事件,调用loadModelFromUrl加载模型。

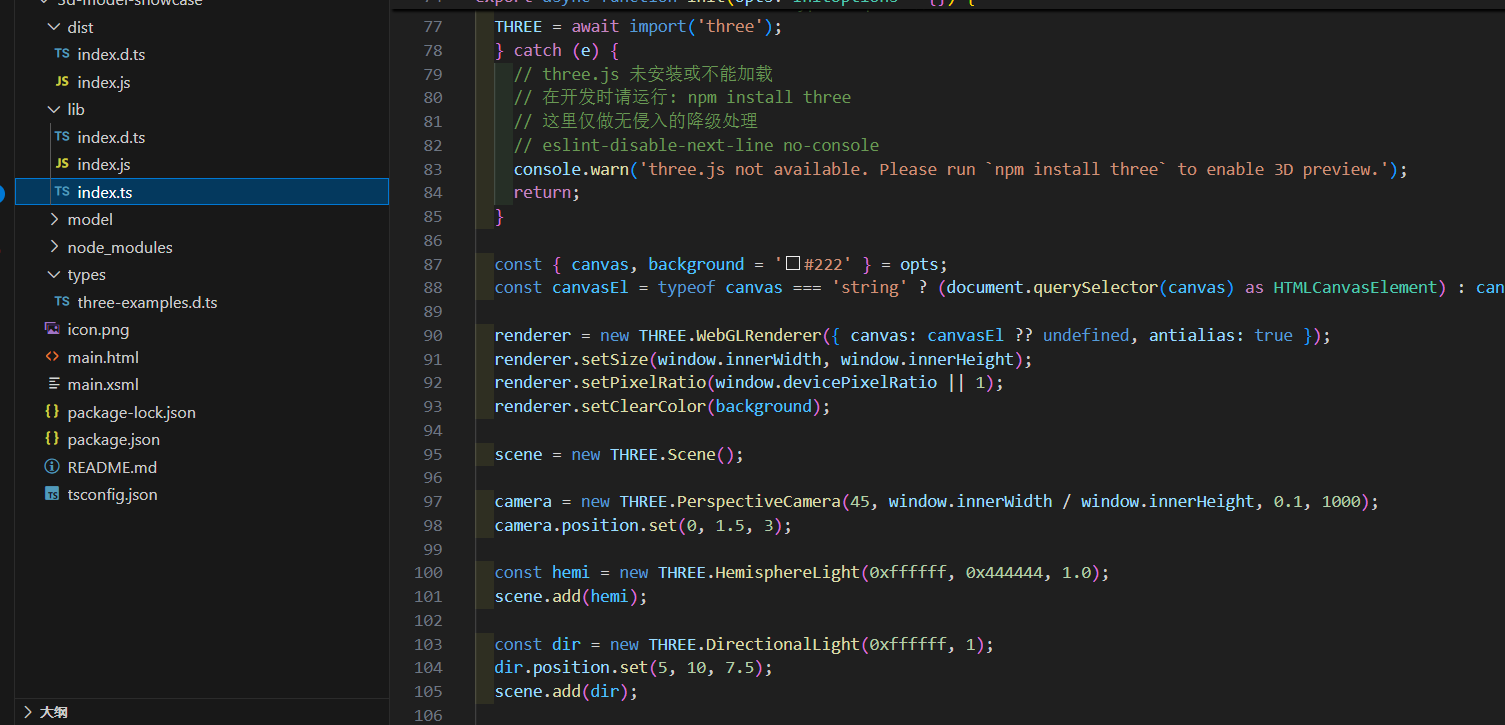
4. index.ts
tsx
// lib/index.ts
// 简单的 three.js 初始化与 glTF (GLB) 加载器。
// 目标:作为项目的最小可用实现 --- 若要实际运行,请先 `npm install` three

export type InitOptions = {
  canvas?: HTMLCanvasElement | string;
  modelUrl?: string;
  background?: string;
};

let THREE: any = null;
let renderer: any = null;
let scene: any = null;
let camera: any = null;
let controls: any = null;
let model: any = null;  // 保存当前加载的模型引用

export async function init(opts: InitOptions = {}) {
  try {
    // 通过包名动态导入 three,兼容 TypeScript 和打包器
    THREE = await import('three');
  } catch (e) {
    // three.js 未安装或不能加载
    // 在开发时请运行: npm install three
    // 这里仅做无侵入的降级处理
    // eslint-disable-next-line no-console
    console.warn('three.js not available. Please run `npm install three` to enable 3D preview.');
    return;
  }

  const { canvas, background = '#222' } = opts;
  const canvasEl = typeof canvas === 'string' ? (document.querySelector(canvas) as HTMLCanvasElement) : canvas;

  renderer = new THREE.WebGLRenderer({ canvas: canvasEl ?? undefined, antialias: true });
  renderer.setSize(window.innerWidth, window.innerHeight);
  renderer.setPixelRatio(window.devicePixelRatio || 1);
  renderer.setClearColor(background);

  scene = new THREE.Scene();

  camera = new THREE.PerspectiveCamera(45, window.innerWidth / window.innerHeight, 0.1, 1000);
  camera.position.set(0, 1.5, 3);

  const hemi = new THREE.HemisphereLight(0xffffff, 0x444444, 1.0);
  scene.add(hemi);

  const dir = new THREE.DirectionalLight(0xffffff, 1);
  dir.position.set(5, 10, 7.5);
  scene.add(dir);

  // 小网格辅助
  const grid = new THREE.GridHelper(10, 10);
  scene.add(grid);

  window.addEventListener('resize', onResize);
  // 动态加载 OrbitControls(浏览器环境直接从 node_modules)
  try {
    const controlsModule = await import('three/examples/jsm/controls/OrbitControls.js');
    const { OrbitControls } = controlsModule;
    controls = new OrbitControls(camera, renderer.domElement);
    controls.enableDamping = true;
    controls.dampingFactor = 0.05;
    controls.screenSpacePanning = false;
    controls.minDistance = 0.1;
    controls.maxDistance = 500;
  } catch (e) {
    // ignore if controls cannot be loaded
  }
  animate();

  if (opts.modelUrl) {
    // 忽略加载错误,让调用者处理异常
    try {
      await loadModelFromUrl(opts.modelUrl);
    } catch (err) {
      // eslint-disable-next-line no-console
      console.error('模型加载失败', err);
    }
  }
}

export async function loadModelFromUrl(url: string, onProgress?: (percent: number) => void, onError?: (err: any) => void) {
  if (!THREE) throw new Error('three.js 未初始化');

  // GLTFLoader 在 examples 模块中,直接从 node_modules 引入浏览器模块
  // 动态导入 GLTFLoader,兼容 Vite/Webpack/Node 环境
  const loaderModule = await import('three/examples/jsm/loaders/GLTFLoader.js');
  const { GLTFLoader } = loaderModule;
  const loader = new GLTFLoader();

  return new Promise((resolve, reject) => {
    loader.load(
      url,
      (gltf: any) => {
        // 把模型加入场景并居中
        scene.add(gltf.scene);
        model = gltf.scene;  // 保存模型引用

        const box = new THREE.Box3().setFromObject(gltf.scene);
        const center = box.getCenter(new THREE.Vector3());
        const size = box.getSize(new THREE.Vector3());
        const radius = size.length() * 0.5;

        // 将模型居中到原点,便于统一处理
        gltf.scene.position.sub(center);

        // 重新计算包围盒并把模型底部抬到 y=0(贴地)
        const bbox = new THREE.Box3().setFromObject(gltf.scene);
        const minY = bbox.min.y;
        if (minY < 0) {
          const baseY = -minY;
          gltf.scene.position.y = baseY; // 将最低点移动到 y=0
          gltf.scene.userData.baseY = baseY; // 保存基础高度供动画使用
        }

        // 计算一个合适的相机距离以完整看到模型
        if (camera) {
          const fov = camera.fov * (Math.PI / 180); // 垂直视场(弧度)
          // 根据包围球半径和视场角估算距离
          const distance = Math.abs(radius / Math.sin(fov / 2)) || radius * 2;
          // 把相机放到模型前上方,稍微偏上以便看到顶部细节
          camera.position.set(0, radius * 0.6, distance * 1.2);
          camera.lookAt(new THREE.Vector3(0, 0, 0));
          camera.updateProjectionMatrix();
        }

        resolve(gltf);
      },
      (progressEvent: ProgressEvent) => {
        if (onProgress && progressEvent && progressEvent.lengthComputable) {
          const percent = Math.round((progressEvent.loaded / progressEvent.total) * 100);
          onProgress(percent);
        }
      },
      (err: any) => {
        if (onError) onError(err);
        reject(err);
      }
    );
  });
}

function animate() {
  requestAnimationFrame(animate);
  if (controls) controls.update();

  // 添加简单的上下浮动动画
  if (model) {
    const bobbingHeight = 0.1;
    const baseY = model.userData.baseY || 0;
    model.position.y = baseY + Math.sin(Date.now() * 0.005) * bobbingHeight;
  }

  if (renderer && scene && camera) renderer.render(scene, camera);
}

function onResize() {
  if (!camera || !renderer) return;
  camera.aspect = window.innerWidth / window.innerHeight;
  camera.updateProjectionMatrix();
  renderer.setSize(window.innerWidth, window.innerHeight);
}

export function dispose() {
  window.removeEventListener('resize', onResize);
  if (renderer) {
    try {
      renderer.dispose();
      // 强制丢弃 GL context(如果可用)
      // @ts-ignore
      renderer.forceContextLoss && renderer.forceContextLoss();
    } catch (e) {
      // ignore
    }
  }
  renderer = scene = camera = null;
}
// end of file
three.js主逻辑,导出init和loadModelFromUrl两个核心方法。
init:初始化渲染器、场景、相机、光源、网格辅助线、OrbitControls(鼠标旋转缩放)。
loadModelFromUrl:加载glb模型,自动居中、贴地,调整相机视角。
animate:渲染循环,实时刷新场景。
仅保留基础交互,支持鼠标操作。
5. 准备其他文件
<font style="background-color:rgb(187,191,196);">icon.png</font>:准备一张方形图片(例如 128x128 像素),放在项目根目录,作为小程序图标。<font style="background-color:rgb(187,191,196);">model/sample.glb</font>:找一个 glb 格式的 3D 模型文件,放在<font style="background-color:rgb(187,191,196);">model</font>目录下(可从网上下载免费的 3D 模型,或使用自己的模型)。- three-examples.d.ts:声明three.js扩展模块类型,解决TypeScript编译时的类型报错。

4.2 运行方式
- 安装依赖
npm install
- 编译TypeScript
npx tsc --project tsconfig.json
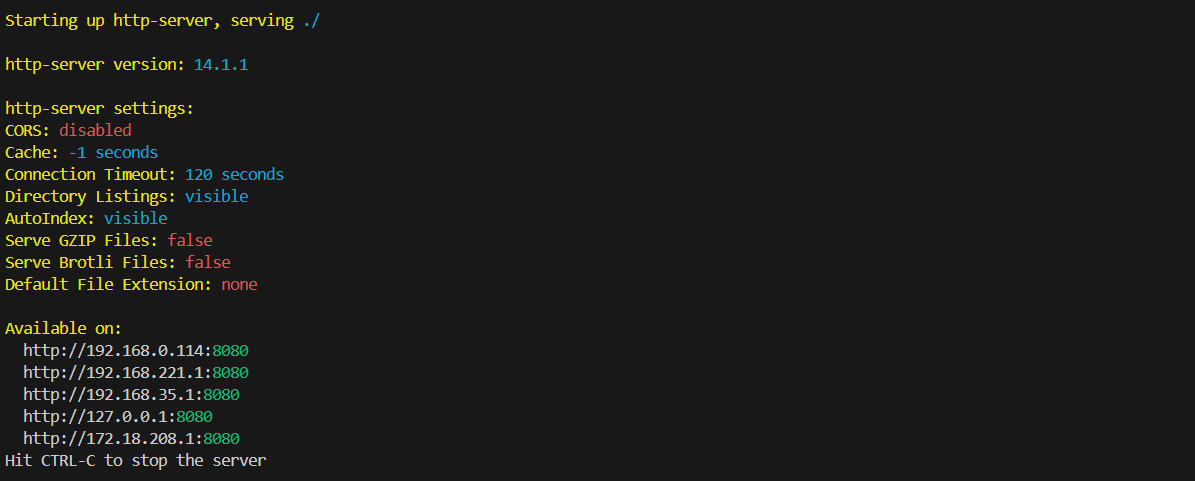
- 启动本地服务器
npm start
默认会用 http-server 启动 8080 端口。
访问页面 在浏览器打开
http://127.0.0.1:8080/main.html
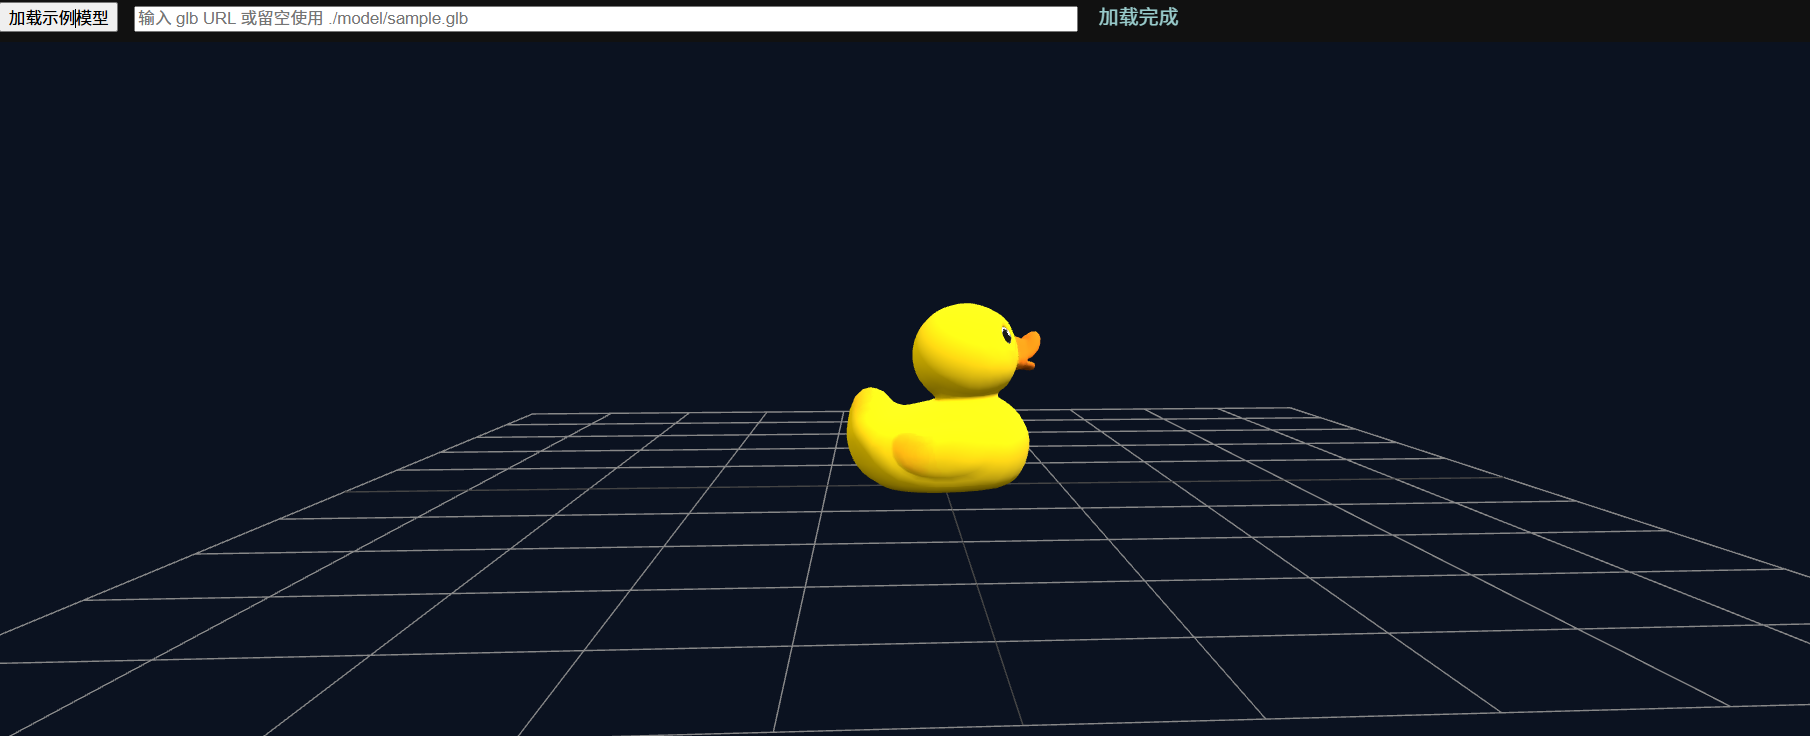
- 加载模型
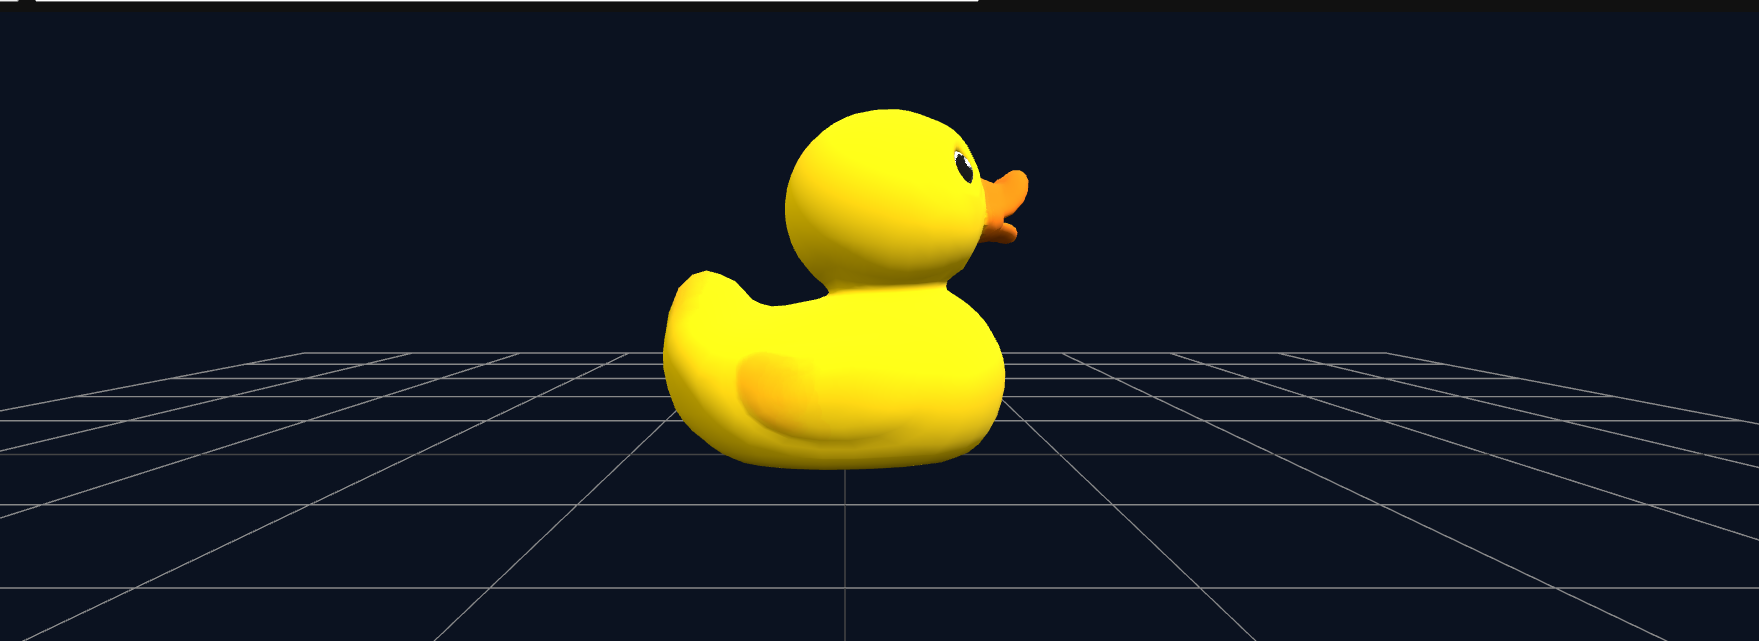
点击"加载示例模型"按钮,或输入自定义glb模型URL加载。
支持鼠标旋转、缩放、平移视角。
4.3 核心依赖
three.js:WebGL 3D渲染引擎
http-server:本地静态服务器
TypeScript:类型安全开发
4.4 效果展示
五、资源与支持
官方资源
- 开发者平台:Rokid 开发者中心
- 模板仓库:template-for-jsar-widget
- 技术文档:JSAR 官方手册