文章目录
一.准备
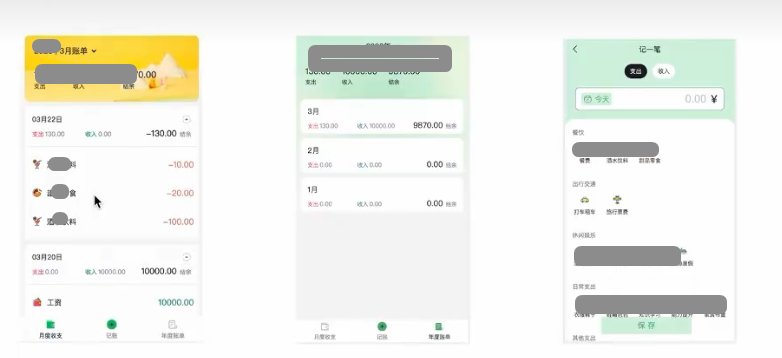
1.功能演示
2.创建项目
javascript
npx create-react-app my-react-bill-test3.安装依赖
安装以下依赖:npm i +xxx
javascript
1).Redex状态管理工具:@reduxjs/toolkit和react-redux
2).路由:react-router-dom
3).时间处理js库:dayjs
4).类名处理库:classnames
5).移动端组件库:antd-mobile----重点
6).axios
4.配置路径别名
输入@即可指代src路径
要求:
- 1).
webpack中的路径解析配置:把@解析为src - 2).在
vsCode中,输入@时自动联想出src下的子级目录
对于要求一
下载craco插件
javascript
-为什么要下载craco插件?
-CRACO的项目本身把webpack配置包装到了黑盒中无法直接修改,需要借助插件之力
配置步骤:
javascript
a.安装craco:npm i -D @craco/craco
b.项目根目录下创建配置文件craco.config.js
c.在配置文件中添加路径解析配置如下:
const path=require('path')
module.exports={
    //webpack配置
    webpack:{
        //配置别名
        alias:{
            //约定:使用@表示src文件所在路径
            '@':path.resolve(__dirname,'src')
        }
    }
}
d.包文件中配置启动和打包命令如下:
"script":{
    "start":"craco start",
    "build":"craco build"
}
对于要求二
新增jsconfig.json文件并在其中配置如下:
javascript
{
    "compilerOptions":{
        "baseUrl":"./",
        "paths":{
            "@/*":[
                "src/*"
            ]
        }
    }
}
5.使用json-server实现数据Mock
步骤:
javascript
    a.安装:npm i -D json-server
    b.准备一个db.json文件
    c.添加启动命令如下:
        "server":"json-server ./server/db.json --port 8888"
    d.访问接口进行测试
优化:合并命令
javascript
安装concurrently:
    npm install concurrently --save-dev
配置package.json:
	"start": "concurrently \"npm run server\" \"craco start\"",

*合并结果:npm run start命令同时启动json-server服务器
二.整体路由设计
新增如下文件:
javascript
src
├─router
│  └─index.js
├─pages
│  ├─Layout
│  │  └─index.js
│  ├─Month
│  │  └─index.js
│  ├─Year
│  │  └─index.js
│  ├─New
        └─index.js
1.配置路由文件router/index.js
javascript
// 导入子路由
import Layout from "@/pages/Layout"
import New from "@/pages/New"
import Month from "@/pages/Month"
import Year from "@/pages/Year";
// 导入createBrowserRouter,作用是创建路由
import { createBrowserRouter } from "react-router-dom";
import { Navigate } from "react-router-dom";
// 创建路由实例对象
const router = createBrowserRouter([
  // 根路径重定向配置
  {
    path: "/",
    element: <Navigate to="/layout/month" replace />, // 重定向到目标路径
  },
  {
    path: '/layout',
    element: <Layout />,
    children: [
      {
        index: true, // 默认子路由
        element: <Month /> // 访问/article时默认显示
      },
      {
        path: 'year',
        element: <Year />
      },
      {
        path: 'month',
        element: <Month />
      },
      {
        path: 'new',
        element: <New />
      }
    ]
  },
])
// 导入路由实例对象
export default router;
2.在入口文件中导入路由实例对象
javascript
//src/index.js
import {  RouterProvider } from 'react-router-dom';
import router from './router'
import {Provider} from 'react-redux'
import store from './store'

root.render(
  <Provider store={store}>
    <RouterProvider router={router} />
  </Provider>
);
......
三.功能验证
1.使用antd-mobile定义主题色
- 新增
src/theme.css
javascript
:root {
  /* 基础主题变量 */
  --adm-color-primary: #a062d4;
  --adm-color-success: #00b578;

  /* 按钮样式变量 */
  --adm-button-background-color: #a062d4;
  --adm-button-border-radius: 20px;

  /* 字体变量 */
  --adm-font-size-main: 16px;
}

/* 局部主题示例 */
.purple-theme {
  --adm-color-primary: #722ed1;
  --adm-button-background-color: #722ed1;
}- 导入
javascript
    //src/index.js
import "@theme.css"- 使用
javascript
//src/pages/Layout/index.js
<Button type="primary">测试全局</Button>
<div className="purple-theme">
    <Button type="primary">测试局部</Button>
</div>
结果:按钮有样式
2.使用Redux管理账户列表
思路:
-
在RTK中配置state,reducer和异步action
-
在组件中dispatch异步action
步骤:
- step1:新建账单列表相关store
javascript
//src/store/modules/billStore.js
import { createSlice } from '@reduxjs/toolkit'
import axios from 'axios'
const billStore = createSlice({
  name: 'bill',
  initialState: {
    // 账单列表
    billList: [],
  },
  reducers: {
    // 设置账单列表
    setBillList(state, action) {
      state.billList = action.payload
    }
  }
})
const { setBillList } = billStore.actions

// 异步获取账单列表
const getBillList = () => {
  return async (dispatch) => {
    const res = await axios.get('http://localhost:8888/list')
    dispatch(setBillList(res.data))
  }
}
export { getBillList }

const reducer = billStore.reducer
export default reducer- step2:组合子模块,导出store实例
javascript
// src/store/index.js
import billReducer from './modules/billStore.js'
import { configureStore } from '@reduxjs/toolkit'
const store = configureStore({
  reducer: {
    bill: billReducer// 这里的key要和子模块的name一致,即:name: 'bill'
  }
})
export default store- step3:在入口文件中注入
javascript
//src/index.js
import {Provider} from 'react-redux'
import store from './store'
......
root.render(
  <Provider store={store}>
    <RouterProvider router={router} />
  </Provider>
);- step4:组件中使用
useEffect触发异步action
javascript
//Layout/index.js
  const dispatch = useDispatch()
  useEffect(() => {
    dispatch(getBillList())
  }, [dispatch])
结果:浏览器>网络,新增一个get请求
3.使用antd-mobile的tabbar组件配置底部标签栏
官网文档:https://mobile.ant.design/zh/components/tab-bar
安装:sass:npm i -D sass
代码:
javascript
//新建Lqyout/index.scss
.layout{
  .container{
    position:fixed;
    top:0;
    bottom:50px;
  }
  .footer{
    position:fixed;
    bottom:0;
    width:100%;
  }
}
javascript
//Layout/index.js
import { Outlet, useNavigate } from "react-router-dom";
import { TabBar } from "antd-mobile";
import { useEffect } from "react";
import { useDispatch } from 'react-redux'
import { getBillList } from "@/store/modules/billStore";
import { BillOutline, AddCircleOutline, CalculatorOutline } from 'antd-mobile-icons'
import '@/pages/Layout/index.css'
const tabs = [
  {
    key: 'month',
    title: '月度账单',
    icon: <BillOutline />,
  },
  {
    key: 'new',
    title: '记账',
    icon: <AddCircleOutline />,
  },
  {
    key: 'year',
    title: '年度账单',
    icon: <CalculatorOutline />,
  }
]
const Layout = () => {
  const dispatch = useDispatch()
  useEffect(() => {
    dispatch(getBillList())
  }, [dispatch])

  const navigate = useNavigate()
  //点击绑定在tabbar的onChange'事件
  const swithRoute = (path) => {
    navigate(path)
  }

  return (
    <div className="layout">
      <div className="content">
        <Outlet />
      </div>
      <div className="footer">
        <TabBar onChange={swithRoute}>
          {tabs.map(item => (
            <TabBar.Item key={item.key} icon={item.icon} title={item.title} />
          ))}
        </TabBar>
      </div>
    </div>
  );
}

export default Layout;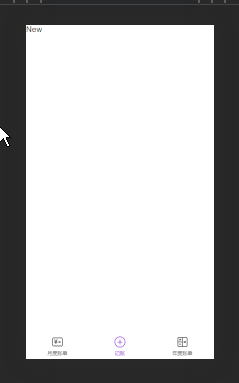
四.统计区域
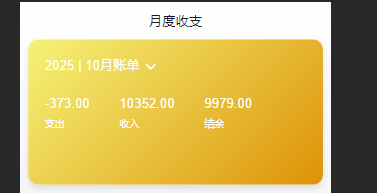
统计区域位于Month月度账单页,主要功能有:点击切换月份,适配箭头显示,统计支出/收入/结余数据
1.静态结构:month页和db.json数据库
javascript
//Month/index.js
import { NavBar, DatePicker } from "antd-mobile";
import "./index.scss"

const Month = () => {
  return (
    <div className="monthlyBill">
      <NavBar className="nav" backIcon={false}>月度收支</NavBar>
      <div className="content">
        <div className="header">
          {/* 时间切换区域 */}
          <div className="date">
            <span className="text">2025 | 10月账单</span>
            <span className="arrow expand"></span>
          </div>
          {/* 统计区域 */}
          <div className="twoLineOverview">
            <div className="item">
              <span className="money">{100}</span>
              <span className="type">支出</span>
            </div>
            <div className="item">
              <span className="money">{200}</span>
              <span className="type">收入</span>
            </div>
            <div className="item">
              <span className="money">{200}</span>
              <span className="type">结余</span>
            </div>
          </div>
          {/* 月份选择器 */}
          <DatePicker
            className="kaDate"
            title="记账日期"
            precision="month"
            visible={false}
            max={new Date()}
            />
        </div>
      </div>
    </div>
  )
}

export default Month;
javascript
//Month/index.scss
.monthlyBill {
  --ka-text-color: #191d26;
  height: 100%;
  background: linear-gradient(180deg, #ffffff, #f5f5f5 100%);
  background-size: 100% 240px;
  background-repeat: no-repeat;
  background-color: rgba(245, 245, 245, 0.9);
  color: var(--ka-text-color);

  .nav {
    --adm-font-size-10: 16px;
    color: #121826;
    background-color: transparent;
    .adm-nav-bar-back-arrow {
      font-size: 20px;
    }
  }

  .content {
    height: 573px;
    padding: 0 10px;
    overflow-y: scroll;
    -ms-overflow-style: none; /* IE 10+ */
    scrollbar-width: none; /* Firefox */
    &::-webkit-scrollbar {
      display: none; /* Chrome Safari */
    }
    > .header {
      height: 135px;
      padding: 20px 20px 0px 18.5px;
      margin-bottom: 10px;
      // background-image:url(https://zaren.gitee.io/ko/month-bg.png);
      // background-size: 100% 100%;
      background: linear-gradient(135deg, #f5f378, #dd9207);
      border-radius: 12px;
      padding: 20px;
      color: white;
      box-shadow: 0 4px 8px rgba(0, 0, 0, 0.1);
      .date {
        display: flex;
        align-items: center;
        margin-bottom: 25px;
        font-size: 16px;

        .arrow {
          display: inline-block;
          width: 7px;
          height: 7px;
          margin-left: 9px;
          border-top: 2px solid #ffffff;
          border-left: 2px solid #ffffff;
          transform: rotate(225deg); /* 默认向上方向 */
          transform-origin: center;
          transition: all 0.3s; /* 添加平滑过渡效果 */

          /* 添加expend类时的样式 */
          &.expand {
            transform: translate(0, 2px) rotate(45deg); /* 向下方向 */
          }
        }
      }
      .twoLineOverview {
        display: flex;
        justify-content: space-between;
        width: 250px;

        .item {
          display: flex;
          flex-direction: column;

          .money {
            height: 24px;
            line-height: 24px;
            font-size: 16px;
            margin-bottom: 5px;
          }
          .type {
            height: 14px;
            line-height: 14px;
            font-size: 12px;
          }
        }
      }
    }
  }
}
javascript
//db.json
{
  "list": [
    {
      "id": 1,
      "type": "pay",
      "money": -128,
      "date": "2025-10-08 14:22:45",
      "useFor": "transport"
    },
    {
      "id": 2,
      "type": "pay",
      "money": -56,
      "date": "2025-10-15 08:45:22",
      "useFor": "food"
    },
    {
      "id": 3,
      "type": "pay",
      "money": -189,
      "date": "2025-10-03 19:30:15",
      "useFor": "shopping"
    },
    {
      "id": 4,
      "type": "income",
      "money": 352,
      "date": "2025-10-13 09:40:51",
      "useFor": "salary"
    },
    {
      "id": 5,
      "type": "income",
      "money": 10000,
      "date": "2025-10-10 23:11:44",
      "useFor": "salary"
    },
    {
      "id": 31,
      "type": "pay",
      "money": -142,
      "date": "2025-03-12 16:45:33",
      "useFor": "health"
    },
    {
      "id": 32,
      "type": "pay",
      "money": -87,
      "date": "2025-03-25 09:15:42",
      "useFor": "food"
    },
    {
      "id": 33,
      "type": "pay",
      "money": -199,
      "date": "2025-03-07 20:30:11",
      "useFor": "shopping"
    },
    {
      "id": 34,
      "type": "pay",
      "money": -53,
      "date": "2025-03-18 14:20:05",
      "useFor": "transport"
    },
    {
      "id": 35,
      "type": "pay",
      "money": -118,
      "date": "2025-03-03 11:45:29",
      "useFor": "entertainment"
    },
    {
      "id": 36,
      "type": "income",
      "money": 117,
      "date": "2025-03-21 13:41:40",
      "useFor": "salary"
    },
    {
      "id": 41,
      "type": "pay",
      "money": -42,
      "date": "2025-05-27 10:15:33",
      "useFor": "drinks"
    },
    {
      "id": 42,
      "type": "pay",
      "money": -175,
      "date": "2025-05-14 16:40:18",
      "useFor": "entertainment"
    },
    {
      "id": 43,
      "type": "pay",
      "money": -93,
      "date": "2025-05-05 09:05:27",
      "useFor": "education"
    },
    {
      "id": 44,
      "type": "income",
      "money": 886,
      "date": "2025-05-21 20:32:09",
      "useFor": "salary"
    },
    {
      "id": 45,
      "type": "income",
      "money": 314,
      "date": "2025-05-31 10:05:31",
      "useFor": "salary"
    },
    {
      "id": 46,
      "type": "income",
      "money": 38,
      "date": "2025-05-01 00:21:17",
      "useFor": "salary"
    }
  ]
}
2.使用antd-mobile的DatePicker组件,实现月份选择器
要求:
- 点击打开月份选择器
<DatePicker /> - 点击月份选择器中的取消按钮,确认按钮以及蒙层均可关闭弹框
- 弹框打开或关闭时,箭头方向会改变
思路:准备一个状态变量isVisible用于切换开启或关闭状态
代码:
javascript
const [isVisible,setIsVisible]=useState()
const onConfirm=(val)=>{
    console.log(val)
    setIsVisible(true)
}

<span className={classnames("arrow",isVisible&&"expand")}></span>

{/* 时间切换区域 */}
<div className="date" onClick={() => setIsVisible(true)}>

{/* 月份选择器 */}
<DatePicker
  className="kaDate"
  title="记账日期"
  precision="month"
  visible={isVisible}
  onClose={() => {
    setIsVisible(false)
  }}
  onConfirm={onConfirm}
  max={new Date()}
  defaultValue={new Date()}
/>
3.在onConfirm中把选择的日期渲染到页面
思路: 创建新的状态变量currentDate用于存月份选择器中用户选择的时间
代码:
javascript
  const [currentDate, setCurrentDate] = useState(new Date())
  const onComfirm = (value) => {
    const date = new Date(value);
    setIsVisible(false)
    setCurrentDate(date)
  }
  const year = currentDate.getFullYear();
  const month = currentDate.getMonth() + 1; // 月份从0开始,需要+1
......
<span className="text">{year} | {month}月账单</span>优化:用dayjs优化时间格式
javascript
  import dayjs from "dayjs";
  const [currentDate, setCurrentDate] = useState(()=>{
    return dayjs().format("YYYY | MM")
  })
  const onComfirm = (value) => {
    setIsVisible(false)
    const date = dayjs(value).format("YYYY | MM");
    setCurrentDate(date)
    //console.log(date);
  }

<span className="text">{currentDate+''}月账单</span>
4.账单数据billList按照月份分组
一条账单数据如下:
javascript
{
    type:'pay',
    money:-99,
    date:'2025-10-14 10:36:52',
    useFor:'drinks',
    id:1
}
思路:
从Redux拿到数据,用useMemo对数据做二次处理,用loadsh做按月处理的逻辑
知识点:
useMemo----记忆化值钩子,用于优化性能,记忆复杂计算的结果(类似于Vue中的computed )
loadsh----是一个一致性、模块化、高性能的 JavaScript 实用工具库
javascript
import _ from 'loadsh'
_.groupBy(collection, [iteratee=_.identity])
其中,
    collection是一个用来迭代的集合
    [iteratee=_identity]是一个用来转换key的迭代函数
返回值:返回一个组成聚合的对象

示例:
_.groupBy([6.1, 4.2, 6.3], Math.floor);// { '4': [4.2], '6': [6.1, 6.3] }
_.groupBy(['one', 'two', 'three'], 'length');//{ '3': ['one', 'two'], '5': ['three'] }
代码:
javascript
import { useState, useMemo } from "react";
import dayjs from "dayjs";
import {useSelector} from "react-redux";
import _ from "lodash"
   // 引入后台消费数据
  const billList=useSelector((state)=>state.bill.billList)
  // 消费数据分组处理
  const monthGroup=useMemo(()=>{
    // return出去计算之后的值
    return _.groupBy(billList, (item) => dayjs(item.date).format("YYYY | MM"))
  },[billList])
  console.log(monthGroup);
5.计算选择月份之后的统计数据(收入/支出/结余)
要求:
点击DatePicker确认按钮,把当前月的消费数据计算出来并渲染到页面
思路:
- 点击确认,获取当前月(2025 | 5)
- 在按月分组数据中找到对应数据
- 基于数组做计算,在
useMemo中使用reduce方法
代码:
javascript
 // 1.状态变量:当前选择月份对应的消费数据列表
  const [currentMonthList, setCurrentMonthList] = useState([])
  //2.事件中修改状态变量为用户选择月份
    const onComfirm = (value) => {
    setIsVisible(false)
    const date = dayjs(value).format("YYYY | MM");
    // 拿到当前年月对应的消费数据
    setCurrentMonthList(monthGroup[date])
    setCurrentDate(date)
    // console.log("用户选择的月份(日期格式优化后):",date);//2025 | 5
    // console.log("用户选择的月份(消费数据):",monthGroup[date]);//2025 | 5对应的消费数据
  }
  // 3.支出/收入/结余的计算逻辑
  const monthResult = useMemo(() => {
    //支出
    const pay = currentMonthList.filter(item => item.type === 'pay').reduce((pre, cur) => {
      return pre + Number(cur.money)
    }, 0);
    //收入
    const income = currentMonthList.filter(item => item.type === 'income').reduce((pre, cur) => {
      return pre + Number(cur.money)
    }, 0);
    //结余
    const balance = income + pay;

    return { pay, income, balance }
  }, [currentMonthList])
//4.渲染到页面
<span className="money">{monthResult.income.toFixed(2)}</span>
6.页面渲染时就有初始化数据(渲染当前月份的数据)
思路:
javascript
    -使用useEffect获取当前月份
    -以当前月份作为key,从monthGroup获取账单数据,并把账单数据存到状态变量currentMonthList中
    -monthResult自动重新计算(什么也不用做)
代码:
javascript
  // 页面渲染时就有初始化数据
  useEffect(()=>{
    // 当前时间
    const nowDate=dayjs().format("YYYY | MM");
    // 获取当前年月对应的消费数据
    if(monthGroup[nowDate]){
      // 并存到状态变量currentMonthList中
      setCurrentMonthList(monthGroup[nowDate])
    }
  },[monthGroup])
五.列表区域
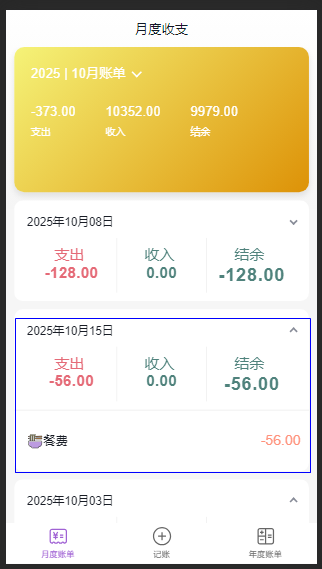
1.静态结构
新增Month/DayBill/index.js代码如下:
javascript
import { useMemo } from "react"
import classnames from "classnames"
import "./index.scss"
const DailyBill = ({ date, billList }) => {
  const dayResult = useMemo(() => {
    // 支出
    const pay = billList.filter(item => item.type === 'pay').reduce((pre, cur) => {
      return pre + cur.money
    }, 0)
    // 收入
    const income = billList.filter(item => item.type === 'income').reduce((pre, cur) => {
      return pre + cur.money
    }, 0)
    // 总计
    const total = pay + income
    return { pay, income, total }
  }, [billList])
  return (
    <div className={classnames('dailyBill')}>
      <div className="header">
        <div className="dateIcon">
          <span className="date">{date}</span>
          <span className={classnames('arrow', 'expand')}></span>
        </div>
        <div className="oneLineOverview">
          <div className="pay">
            <span className="type">支出</span>
             <span className="money">{dayResult.pay.toFixed(2)}</span>
          </div>
          <div className="income">
            <span className="type">收入</span>
            <span className="money">{dayResult.income.toFixed(2)}</span>
          </div>
          <div className="balance">
            <span className="type">结余</span>
            <span className="money">{dayResult.total.toFixed(2)}</span>
          </div>
        </div>
      </div>
    </div>
  )
}
export default DailyBill新增Month/DayBill/index.scss代码如下:
javascript
.dailyBill {
  margin-bottom: 10px;
  border-radius: 10px;
  background: #ffffff;

  .header {
    --ka--text-color: #888c98;
    padding: 15px 15px 10px 15px;

    .dateIcon {
      display: flex;
      justify-content: space-between;
      align-items: center;
      height: 21px;
      margin-bottom: 9px;

      .arrow {
        display: inline-block;
        width: 5px;
        height: 5px;
        margin-top: -3px;
        border-top: 2px solid #888c98;
        border-left: 2px solid #888c98;
        transform: rotate(225deg);
        transform-origin: center;
        transition: all 0.3s;
      }
      .arrow.expand {
        transform: translate() rotate(45deg);
      }
      .date {
        font-size: 14px;
      }
    }
  }
  .oneLineOverview {
    display: flex;
    justify-content: space-between;

    .pay {
      flex: 1;
      .type {
        font-size: 18px;
        margin-right: 2.5px;
        color: #e56a77;
      }
      .money {
        color: var(--ka--text-color);
        font-size: 13px;
      }
    }
    .income {
      flex: 1;
      .type {
        font-size: 18px;
        margin-right: 2.5px;
        color: #4f827c;
      }
      .money {
        color: var(--ka--text-color);
        font-size: 13px;
      }
    }
    .balance {
      flex: 1;
      margin-bottom: 5px;
      text-align: right;

      .money {
        line-height: 17px;
        margin-right: 6px;
        font-size: 17px;
      }
      .type {
        font-size: 10px;
        color: var(--ka--text-color);
      }
    }
  }

  .billList {
    padding: 15px 10px 15px 15px;
    border-top: 1px solid #ececec;
    .bill {
      display: flex;
      justify-content: space-between;
      align-items: center;
      height: 43px;
      margin-bottom: 15px;

      &:last-child {
        margin-bottom: 0;
      }
      .icon {
        margin-right: 10px;
        font-size: 25px;
      }

      .detail {
        flex: 1;
        padding: 4px 0;

        .billType {
          height: 17px;
          line-height: 17px;
          font-size: 15px;
        }
      }

      .money {
        font-size: 17px;
        &.pay {
          color: #ff917b;
        }
        &.income {
          color: #4f827c;
        }
      }
    }
  }
}
.dailyBill.expand {
  .header {
    border-bottom: 1px solid #ececec;
  }
  .billList {
    display: block;
  }
}在父组件中引入DailyBill组件:
javascript
//Month/index.js
import DailyBill from "./DailyBill";

<div className="header">
  {/* 时间切换区域 */}
  {/* 统计区域 */}
  {/* 月份选择器 */}
</div>
  {/* 列表区域 */}
  {/* 传值:date是年月格式的字符串,billList是消费数据列表数组 */}
  <DailyBill date={currentDate} billList={currentMonthList} />
2.把当前月份的数据按日分组
模仿按月分组即可
javascript
//Month/index.js

  // 按日分组
  const dayGroup = useMemo(() => {
    const groupData=_.groupBy(currentMonthList, item => dayjs(item.date).format("YYYY-MM-DD"));
    const keys = Object.keys(groupData);//获取所有日期,放进一个数组中
    return {
      groupData,
      keys
    }
  }, [currentMonthList])
  //console.log("按日分组:",dayGroup);
3.遍历+父传子+渲染页面
javascript
//父组件:Month/index.js
{/* 列表区域 */}
{/* 传值:date是年月格式的字符串,billList是消费数据列表数组 */}
{/* 遍历 */}
{dayGroup.keys.map((key) => {
  return <DailyBill key={key} date={key} billList={dayGroup.groupData[key]} />
})}

//子组件:Month/DailyBill/index.js
//1.获取父组件传值
const DailyBill = ({ date, billList }) => {
  //2.过滤数据
  const dayResult = useMemo(() => {
    const pay = billList.filter(item => item.type === 'pay').reduce((pre, cur) => pre + cur.money, 0)
    const income = billList.filter(item => item.type === 'income').reduce((pre, cur) => pre + cur.money, 0)
    const total = pay + income
    return { pay, income, total }
  }, [billList])
}

//3.渲染
<span className="money">{dayResult.pay.toFixed(2)}</span>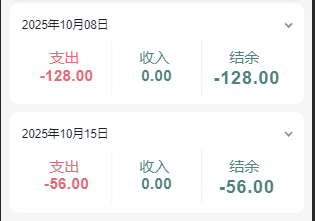
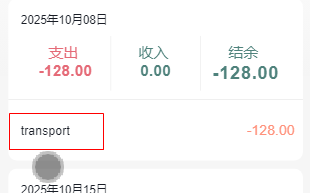
4.单日账单列表显示(展开时)
子组件DailyBill新增单日账单列表代码部分:
javascript
{/* 单日列表 */}
<div className="billList">
  {billList.map(item => {
    return (
      <div className="bill" key={item.id}>
        <div className="detail">
          <div className="billType">
            {item.useFor}
          </div>
          <div className={classnames("money", item.type)}>
            {item.money.toFixed(2)}
          </div>
        </div>
      </div>
    )
  })}
</div>新增适配type的JS文件src/contants/billData.js如下:
javascript
export const billData = {
  pay: [
    {
      type: 'foods',
      name: '餐饮',
      list: [
        { type: 'food', name: '餐费' },
        { type: 'drinks', name: '酒水饮料' },
        { type: 'desserts', name: '甜品零食' },
      ]
    },
    {
      type: 'transport',
      name: '交通',
      list: [
        { type: 'transport', name: '交通费' },
        { type: 'bus', name: '公交地铁' },
        { type: 'taxi', name: '出租车' },
        { type: 'train', name: '火车高铁' },
        { type: 'plane', name: '飞机' }
      ]
    },
    {
      type: 'shopping',
      name: '购物',
      list: [
        { type: 'shopping', name: '购物'},
        { type: 'clothes', name: '衣服裤子' },
        { type: 'shoes', name: '鞋帽包包' },
        { type: 'electronics', name: '数码电器' },
        { type: 'cosmetics', name: '美妆护肤' }
      ]
    },
    {
      type: 'entertainment',
      name: '娱乐',
      list: [
        { type: 'entertainment', name: '电影' },
        { type: 'movie', name: '电影' },
        { type: 'game', name: '游戏' },
        { type: 'sports', name: '运动健身' },
        { type: 'travel', name: '旅游度假' }
      ]
    },
    {
      type: 'health',
      name: '医疗健康',
      list: [
        { type: 'health', name: '医疗药品' },
        { type: 'medical', name: '医疗药品' },
        { type: 'insurance', name: '保险' },
        { type: 'checkup', name: '体检' }
      ]
    },
    {
      type: 'education',
      name: '教育',
      list: [
        { type: 'education', name: '学费' },
        { type: 'tuition', name: '学费' },
        { type: 'book', name: '图书教材' },
        { type: 'training', name: '培训课程' }
      ]
    }
  ],
  income: [
    {
      type: 'salary',
      name: '工资收入',
      list: [
        { type: 'salary', name: '工资' },
        { type: 'bonus', name: '奖金' },
        { type: 'overtime', name: '加班费' }
      ]
    }
  ]
};

export const billTypeToName=Object.keys(billData).reduce((prev, key) => {
  billData[key].forEach(bill=>{
    bill.list.forEach(item=>{
      prev[item.type] = item.name
    })
  })
  return prev
}, {})在子组件中导入并把适配的英文type渲染为中文:
javascript
import {billTypeToName} from "@/contants/billData"
......
<div className="detail">
  <div className="billType">{billTypeToName[item.useFor]}</div>
</div>
5.点击切换列表显示
要求: 点击展开/折叠箭头,切换账单列表的显示
思路:新增状态变量visible用于控制显隐,并在点击事件中取反,把状态变量适配给箭头方向(类名)和显隐控制
javascript
//DailyBill.js
{/* 1.绑定 */}
const [visible,setVisible] = useState(false)

{/* 2.点击实现visible取反,并通过visible控制类名实现箭头方向的变化 */}
<span className={classnames('arrow',visible&&'expand')} onClick={()=>setVisible(!visible)}></span>
/**箭头样式如下:**/
.arrow {
  display: inline-block;
  width: 5px;
  height: 5px;
  margin-top: -3px;
  border-top: 2px solid #888c98;
  border-left: 2px solid #888c98;
  transform: rotate(225deg);
  transform-origin: center;
  transition: all 0.3s;
  /* 添加expend类时的样式 */
  &.expand {
    transform: translate(0, 2px) rotate(45deg); /* 向下方向 */
  }

{/* 单日列表 */}
{/* 3.通过visible控制单日列表的展开和折叠 */}
<div className="billList" style={{display:visible?"block":"none"}}>
    ......
</div>
6.新增图标组件,并匹配不同用途的账单记录
通过父传子匹配不同的图标
- 子组件:新建
src/components/Icon/index.js
javascript
const Icon = (type) => {//把"food","education","drinks"...传过来
  return (
     {/* 此处是写死的,后续通过父传子匹配不同的.svg文件 */}
    <img
      src={`https://yjy-teach-oss.oss-cn-beijing.aliyuncs.com/reactbase/ka/${type}.svg`}
      alt="icon"
      style={{
        width: '20px',
        height: '20px'
      }}
    />
  )
}
export default Icon;- 父组件:
DailyBill
javascript
import Icon from "@/components/Icon"
<Icon type={item.useFor} />
案例代码:git clone https://gitee.com/veizgenq/my-react-bill-test.git