前言
上一篇分享了QT自带媒体模块实现摄像头的操作,第三方库opencv的图像处理方面,功能更丰富,本篇分享与上一篇相似的功能,不分享其他的图像处理功能。
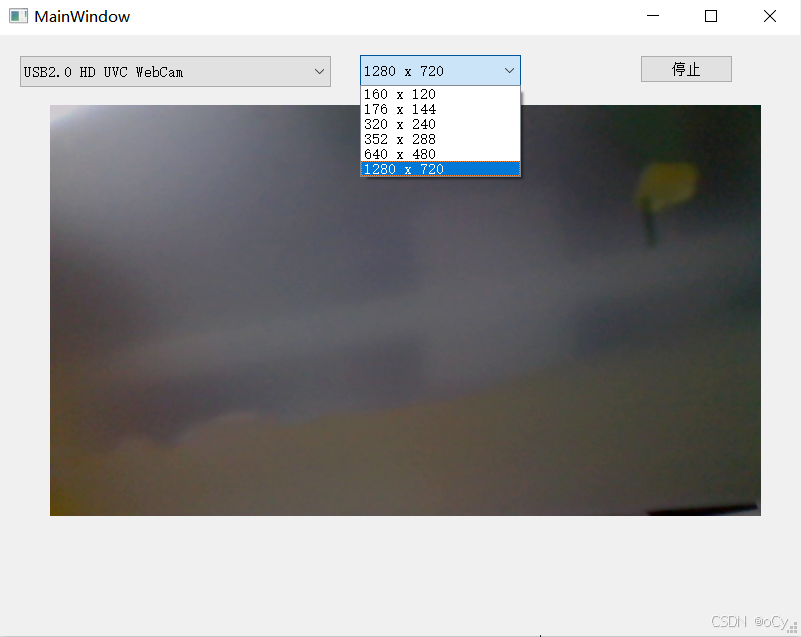
效果图
功能讲解
摄像头下拉框
void MainWindow::refreshCameraList()
{
    ui->cameraComboBox->clear();
    cameraList.clear();

    // 获取可用摄像头列表
    QList<QCameraInfo> cameras = QCameraInfo::availableCameras();
    for(int i = 0; i < cameras.size(); ++i) {
        cameraList.append(qMakePair(i, cameras[i].description()));
        ui->cameraComboBox->addItem(cameras[i].description());
    }
}
在初始化函数中进行调用refreshCameraList()。
分辨率下拉框
使用QT的媒体模块,内容与上一篇一样,代码如下:
QList<QSize> MainWindow::getSupportedResolutions(const QCameraInfo &cameraInfo) {
    QList<QSize> resolutions;

    // 创建临时摄像头对象获取分辨率
    QCamera tempCamera(cameraInfo);

    // 使用QEventLoop等待摄像头加载完成
    QEventLoop loop;
    QTimer timer;
    timer.setSingleShot(true);
    QObject::connect(&tempCamera, &QCamera::stateChanged, [&](QCamera::State state) {
        if (state == QCamera::LoadedState) {
            loop.quit();
        }
    });
    QObject::connect(&timer, &QTimer::timeout, [&]() {
        if (loop.isRunning()) {
            qWarning() << "Camera loading timed out";
            loop.quit();
        }
    });
    tempCamera.load();
    timer.start(2000); // 2秒超时
    loop.exec();

    if (tempCamera.state() == QCamera::LoadedState) {
        QList<QCameraViewfinderSettings> supportedSettings = tempCamera.supportedViewfinderSettings();
        if (supportedSettings.isEmpty()) {
            qWarning() << "No supported viewfinder settings for camera:" << cameraInfo.description();

            // 备用方法:尝试通过图像捕获获取分辨率
            QCameraImageCapture imageCapture(&tempCamera);
            QList<QSize> imageResolutions = imageCapture.supportedResolutions();

            if (!imageResolutions.isEmpty()) {
                resolutions = imageResolutions;
            } else {
                // 提供一些常见分辨率作为备选
                resolutions << QSize(640, 480)
                            << QSize(800, 600)
                            << QSize(1024, 768)
                            << QSize(1280, 720)
                            << QSize(1920, 1080);
            }
        } else {
            // 提取分辨率并手动去重(不使用QSet)
            for (const QCameraViewfinderSettings &setting : supportedSettings) {
                if (setting.resolution().isValid() &&
                    setting.resolution().width() > 0 &&
                    setting.resolution().height() > 0) {
                    // 检查是否已存在相同分辨率
                    bool alreadyExists = false;
                    for (const QSize &existing : resolutions) {
                        if (existing == setting.resolution()) {
                            alreadyExists = true;
                            break;
                        }
                    }

                    if (!alreadyExists) {
                        resolutions.append(setting.resolution());
                    }
                }
            }
        }

        // 按面积排序(从小到大)
        std::sort(resolutions.begin(), resolutions.end(), [](const QSize &a, const QSize &b) {
            return a.width() * a.height() < b.width() * b.height();
        });
    } else {
        qWarning() << "Failed to load camera for resolution detection:" << cameraInfo.description();
        // 提供一些默认分辨率
        resolutions << QSize(640, 480)
                    << QSize(800, 600)
                    << QSize(1024, 768)
                    << QSize(1280, 720)
                    << QSize(1920, 1080);
    }
    tempCamera.unload();
    return resolutions;
}

void MainWindow::updateResolutionComboBox(const QCameraInfo &cameraInfo) {
    qDebug() << "Updating resolution combo box for camera:" << cameraInfo.description();

    // 在状态栏显示加载信息
    statusBar()->showMessage("正在获取摄像头支持的分辨率...");

    // 使用单次定时器异步获取分辨率,避免界面卡顿
    QTimer::singleShot(100, [this, cameraInfo]() {
        QList<QSize> resolutions = getSupportedResolutions(cameraInfo);

        ui->comboBox_resolution->clear();

        if (resolutions.isEmpty()) {
            ui->comboBox_resolution->addItem("默认分辨率");
            statusBar()->showMessage("无法获取分辨率列表,将使用默认分辨率", 3000);
        } else {
            for (const QSize &resolution : resolutions) {
                QString resText = QString("%1 x %2").arg(resolution.width()).arg(resolution.height());
                ui->comboBox_resolution->addItem(resText, resolution);
            }
            statusBar()->showMessage(QString("找到 %1 个支持的分辨率").arg(resolutions.size()), 3000);
        }
    });
}

void MainWindow::on_camera_selection_changed(int index) {
    if (index < 0 || index >= cameras.size()) return;

    ui->comboBox_resolution->clear();

    // 获取选中的摄像头
    QCameraInfo cameraInfo = cameras.at(index);
    updateResolutionComboBox(cameraInfo);
}
在初始化函数中引用
// 如果有摄像头,默认选择第一个并获取其分辨率
    if (ui->cameraComboBox->count() > 0) {
        // 手动调用分辨率获取函数,而不是通过信号触发
        QTimer::singleShot(100, [this]() {
            int index = ui->cameraComboBox->currentIndex();
            if (index >= 0 && index < cameras.size()) {
                QCameraInfo cameraInfo = cameras.at(index);
                updateResolutionComboBox(cameraInfo);
            }
        });
    }
打开/关闭摄像头
两个功能合并到一个按钮中,适合界面紧凑的布局。
void MainWindow::on_startBtn_clicked()
{
    if(!capture) {
        int selectedCam = ui->cameraComboBox->currentIndex();
        if(selectedCam < 0 || selectedCam >= cameraList.size()) return;
        std::cout << __LINE__ << "==" << cameraList[selectedCam].first << std::endl;
        capture = new cv::VideoCapture(cameraList[selectedCam].first);

        QSize selectedRes = ui->comboBox_resolution->currentData().toSize();
        // 设置分辨率并检查是否设置成功
        if(!capture->set(cv::CAP_PROP_FRAME_WIDTH, selectedRes.width()) ||
           !capture->set(cv::CAP_PROP_FRAME_HEIGHT, selectedRes.height())) {
            QString showstr=QString("该摄像头不支持分辨率:%1x%2").arg(selectedRes.width()).arg(selectedRes.height());
            QMessageBox::warning(this, "警告",showstr );
            delete capture;
            capture = nullptr;
            return;
        }

        if(!capture->isOpened()) {
            delete capture;
            capture = nullptr;
            return;
        }
        timer->start(33); // 30fps
        ui->startBtn->setText("停止");
    } else {
        timer->stop();
        capture->release();
        delete capture;
        capture = nullptr;
        ui->startBtn->setText("开始");
        ui->videoLabel->clear();
    }
}