第一步:准备系统环境和基础依赖
1.1 更新yum镜像源
# yum 配置镜像源
vim /etc/yum.repos.d/CentOS-Base.repo


# 文件内容替换下面内容
[base]
name=CentOS-$releasever - Base - mirrors.aliyun.com
baseurl=http://mirrors.aliyun.com/centos/$releasever/os/$basearch/
gpgcheck=1
gpgkey=http://mirrors.aliyun.com/centos/RPM-GPG-KEY-CentOS-7

[updates]
name=CentOS-$releasever - Updates - mirrors.aliyun.com
baseurl=http://mirrors.aliyun.com/centos/$releasever/updates/$basearch/
gpgcheck=1
gpgkey=http://mirrors.aliyun.com/centos/RPM-GPG-KEY-CentOS-7

[extras]
name=CentOS-$releasever - Extras - mirrors.aliyun.com
baseurl=http://mirrors.aliyun.com/centos/$releasever/extras/$basearch/
gpgcheck=1
gpgkey=http://mirrors.aliyun.com/centos/RPM-GPG-KEY-CentOS-7

[centosplus]
name=CentOS-$releasever - Plus - mirrors.aliyun.com
baseurl=http://mirrors.aliyun.com/centos/$releasever/centosplus/$basearch/
gpgcheck=1
enabled=0
gpgkey=http://mirrors.aliyun.com/centos/RPM-GPG-KEY-CentOS-7
清理缓存
sudo yum clean all

sudo yum makecache
1.2 更新系统
# 更新系统包
sudo yum update -y

# 安装基础开发工具
sudo yum groupinstall "Development Tools" -y

# 安装必要的系统依赖
sudo yum install -y wget curl git vim epel-release
sudo yum install -y openssl-devel bzip2-devel libffi-devel sqlite-devel
sudo yum install -y zlib-devel readline-devel tk-devel gdbm-devel db4-devel libpcap-devel xz-devel
1.2 安装系统级图像处理库
# 安装图像处理相关库
sudo yum install -y libjpeg-devel libpng-devel libtiff-devel freetype-devel
sudo yum install -y opencv opencv-devel opencv-python
第二步:安装 Python 3.10 环境
2.1 升级openssl
yum install -y gcc gcc-c++ autoconf automake zlib zlib-devel pcre-devel

cd /opt
wget https://www.openssl.org/source/openssl-1.1.1q.tar.gz --no-check-certificate
tar -zxvf openssl-1.1.1q.tar.gz
cd openssl-1.1.1q

./config --prefix=/usr/local/openssl
make
make install

ln -sf /usr/local/openssl/bin/openssl /usr/bin/opensslecho "/usr/local/openssl/lib" >> /etc/ld.so.conf
ldconfig -v
检查openssl version:

至此,OpenSSL升级完毕。
2.2 安装python3.10
安装依赖,使用root权限:
yum install -y ncurses-devel gdbm-devel xz-devel sqlite-devel tk-devel uuid-devel readline-devel bzip2-devel libffi-devel

cd /opt
wget https://www.python.org/ftp/python/3.10.6/Python-3.10.6.tgz
tar -zxvf Python-3.10.6.tgz
修改Python编译源文件的Module/Setup链接,修改如下:
cd Python-3.10.6
vim Modules/Setup
将下面注释打开
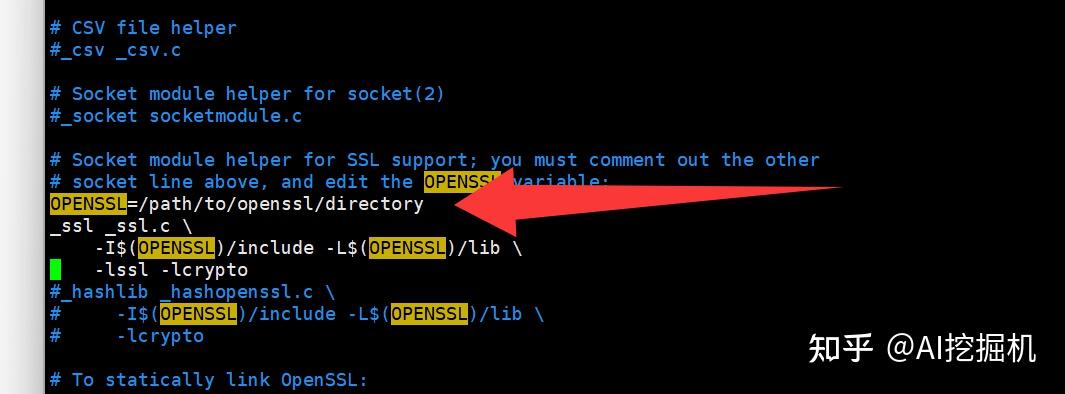
并且 改掉OPENSSL的路径
OPENSSL=/usr/local/openssl
_ssl _ssl.c \
    -I$(OPENSSL)/include -L$(OPENSSL)/lib \
    -lssl -lcrypto
编译安装:
./configure --prefix=/usr/local/python3
make
make install
创建软链接,centos默认安装有python2.7版本,两个版本共存:
ln -s /usr/local/python3/bin/python3.10 /usr/bin/python3
ln -s /usr/local/python3/bin/pip3.10 /usr/bin/pip3
第三步:克隆源码
3.1 创建项目目录
# 创建项目目录
sudo mkdir -p /opt/hivision
sudo chown $USER:$USER /opt/hivision
cd /opt/hivision
3.2 克隆源码
# 克隆 HivisionIDPhotos 源码
git clone https://github.com/Zeyi-Lin/HivisionIDPhotos.git
cd HivisionIDPhotos

# 查看项目结构
ls -la安装依赖pip3 install -r requirements.txt -i https://pypi.tuna.tsinghua.edu.cn/simplepip3 install -r requirements-app.txt -i https://pypi.tuna.tsinghua.edu.cn/simple
第四步:下载和配置模型文件
下载所有模型
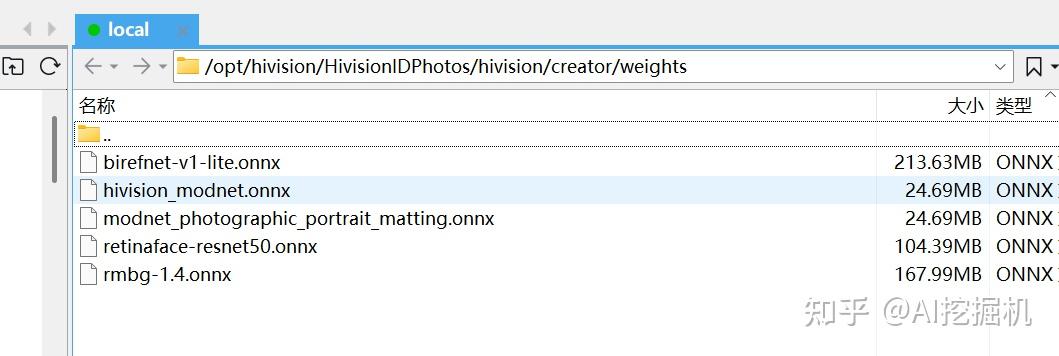
python3 scripts/download_model.py --models all这里可能下载太慢。这里我已经给大家下载好,直接放到 /opt/hivision/HivisionIDPhotos/hivision/creator/weights 下面就可以了。
通过网盘分享的文件:hivision模型
链接: https://pan.baidu.com/s/1XK6OgG2gdQDR1XmsK_BIzw?pwd=kbwq 提取码: kbwq
第五步:启动API服务
python3 deploy_api.py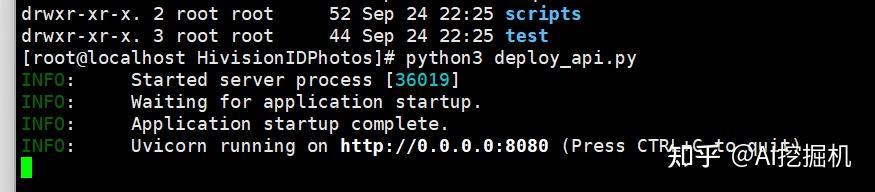
到此服务启动成功。