目录
[1.在 Windows 系统下配置 Nginx 的步骤](#1.在 Windows 系统下配置 Nginx 的步骤)
[1.1 下载 Nginx](#1.1 下载 Nginx)
[1.2 解压 Nginx](#1.2 解压 Nginx)
[1.3 创建文件夹](#1.3 创建文件夹)
[1.4 存放文件](#1.4 存放文件)
[1.5 修改配置文件](#1.5 修改配置文件)
[1.6 检查配置文件语法](#1.6 检查配置文件语法)
[1.7 启动 Nginx](#1.7 启动 Nginx)
[1.8 验证 Nginx 是否启动成功](#1.8 验证 Nginx 是否启动成功)
[2.1 eclipse端------监听访问请求](#2.1 eclipse端——监听访问请求)
[2.2 在DevEco Stdio中创建cj项目](#2.2 在DevEco Stdio中创建cj项目)
[2.2.1 文件分布情况](#2.2.1 文件分布情况)
[2.2.2 创建components文件夹](#2.2.2 创建components文件夹)
[2.2.3 创建UserView.cj](#2.2.3 创建UserView.cj)
[2.2.4 在resource-->rawfile下创建demo1.html](#2.2.4 在resource-->rawfile下创建demo1.html)
[2.2.5 修改main_ability.cj文件](#2.2.5 修改main_ability.cj文件)
[3.1 eclipse端------生成验证码](#3.1 eclipse端——生成验证码)
[3.1.1 数据库准备](#3.1.1 数据库准备)
[3.1.2 加载依赖](#3.1.2 加载依赖)
[3.1.3 具体实现](#3.1.3 具体实现)
[3.2 DevEco Stdio端------实现登录跳转页面](#3.2 DevEco Stdio端——实现登录跳转页面)
[3.3.1 创建UserLogin.cj](#3.3.1 创建UserLogin.cj)
[3.3.2 在resource-->rawfile下创建login.html](#3.3.2 在resource-->rawfile下创建login.html)
[3.3.3 修改main_ability.cj文件](#3.3.3 修改main_ability.cj文件)
1.在 Windows 系统下配置 Nginx 的步骤
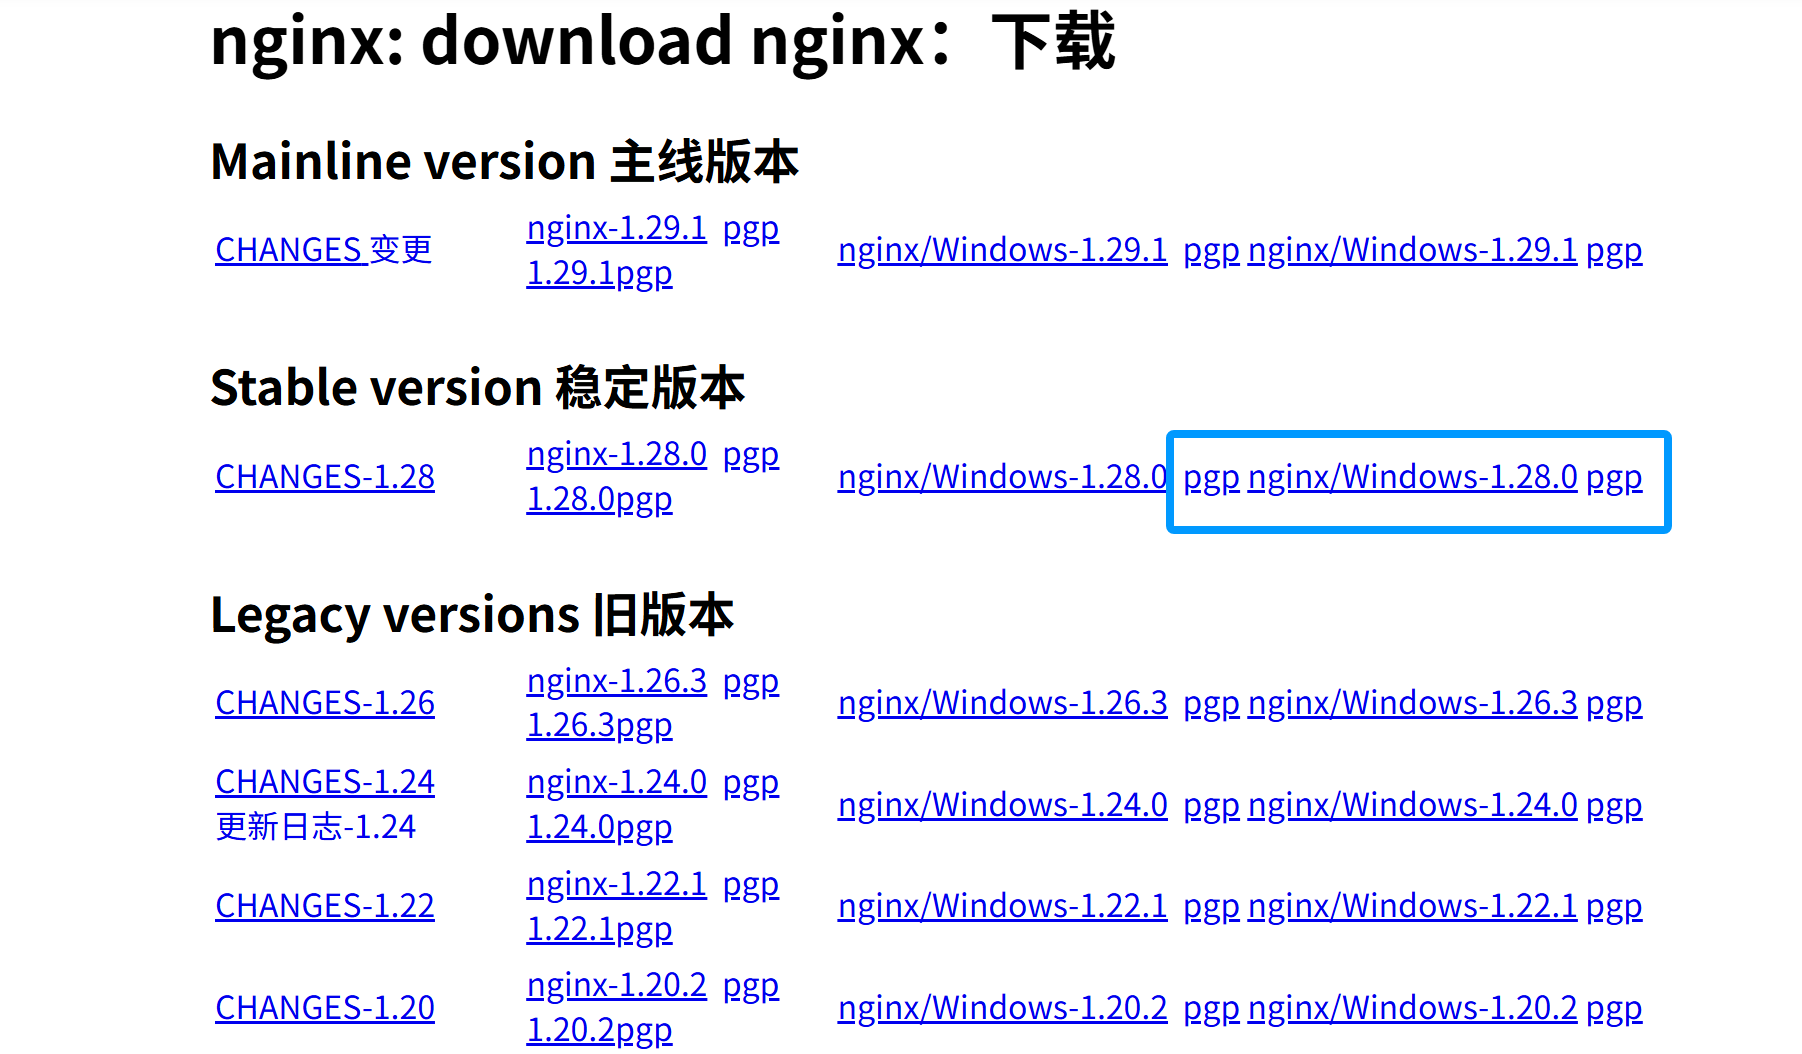
1.1 下载 Nginx
从 Nginx 官网(https://nginx.org/en/download.html)下载 Windows 版的 Nginx 压缩包,推荐下载稳定版。
1.2 解压 Nginx
将下载好的压缩包解压到你希望安装 Nginx 的目录,如D:\nginx-1.28.0。
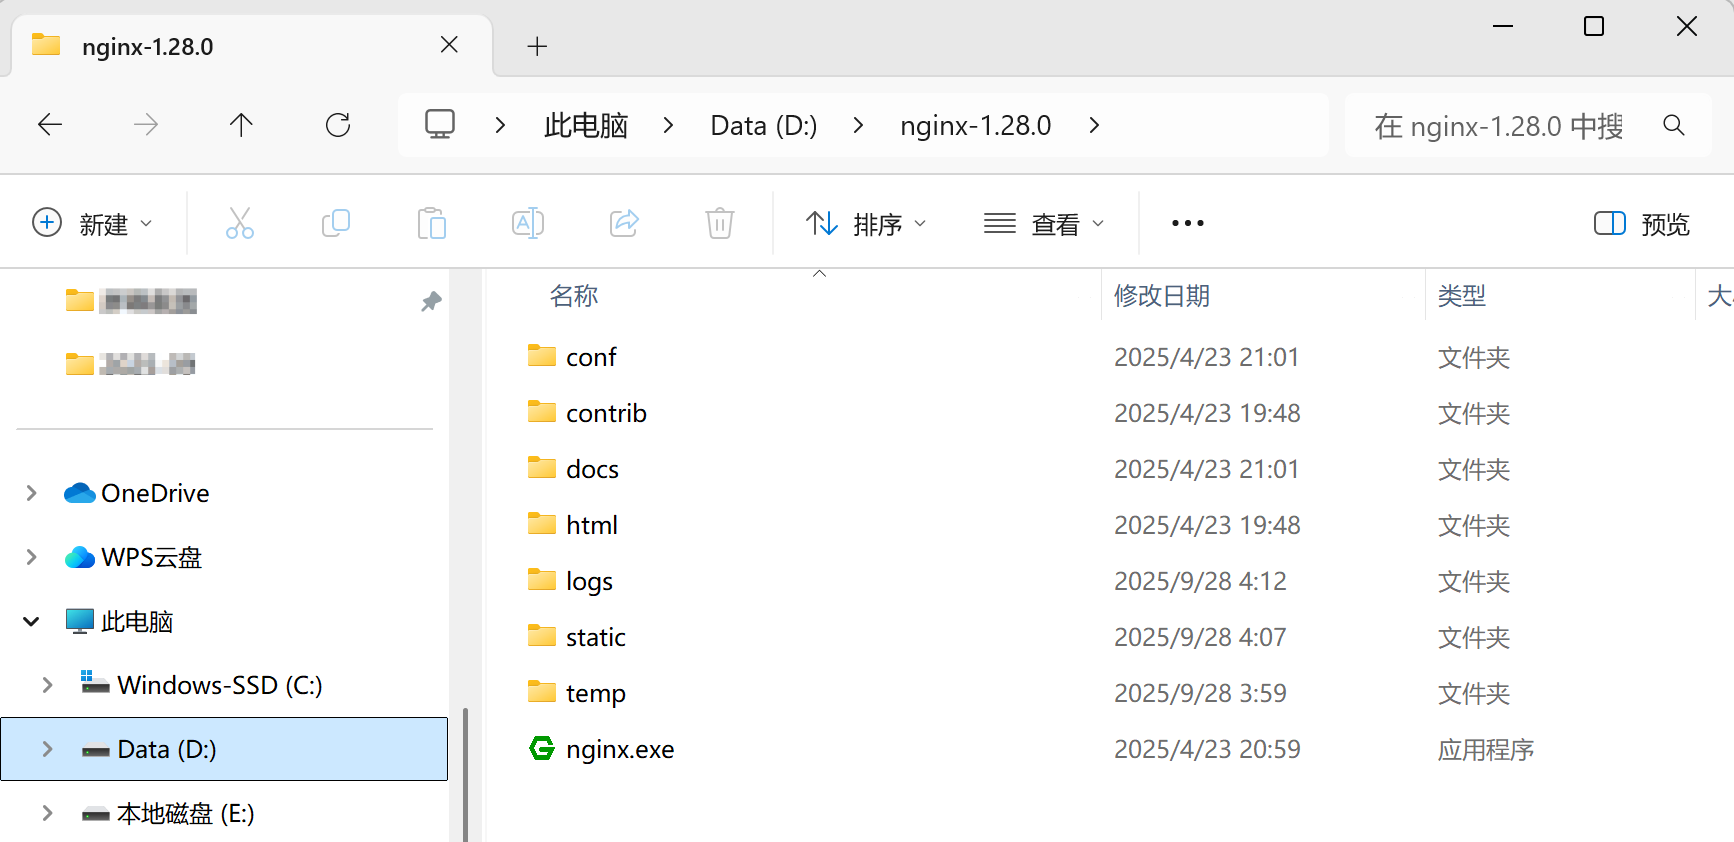
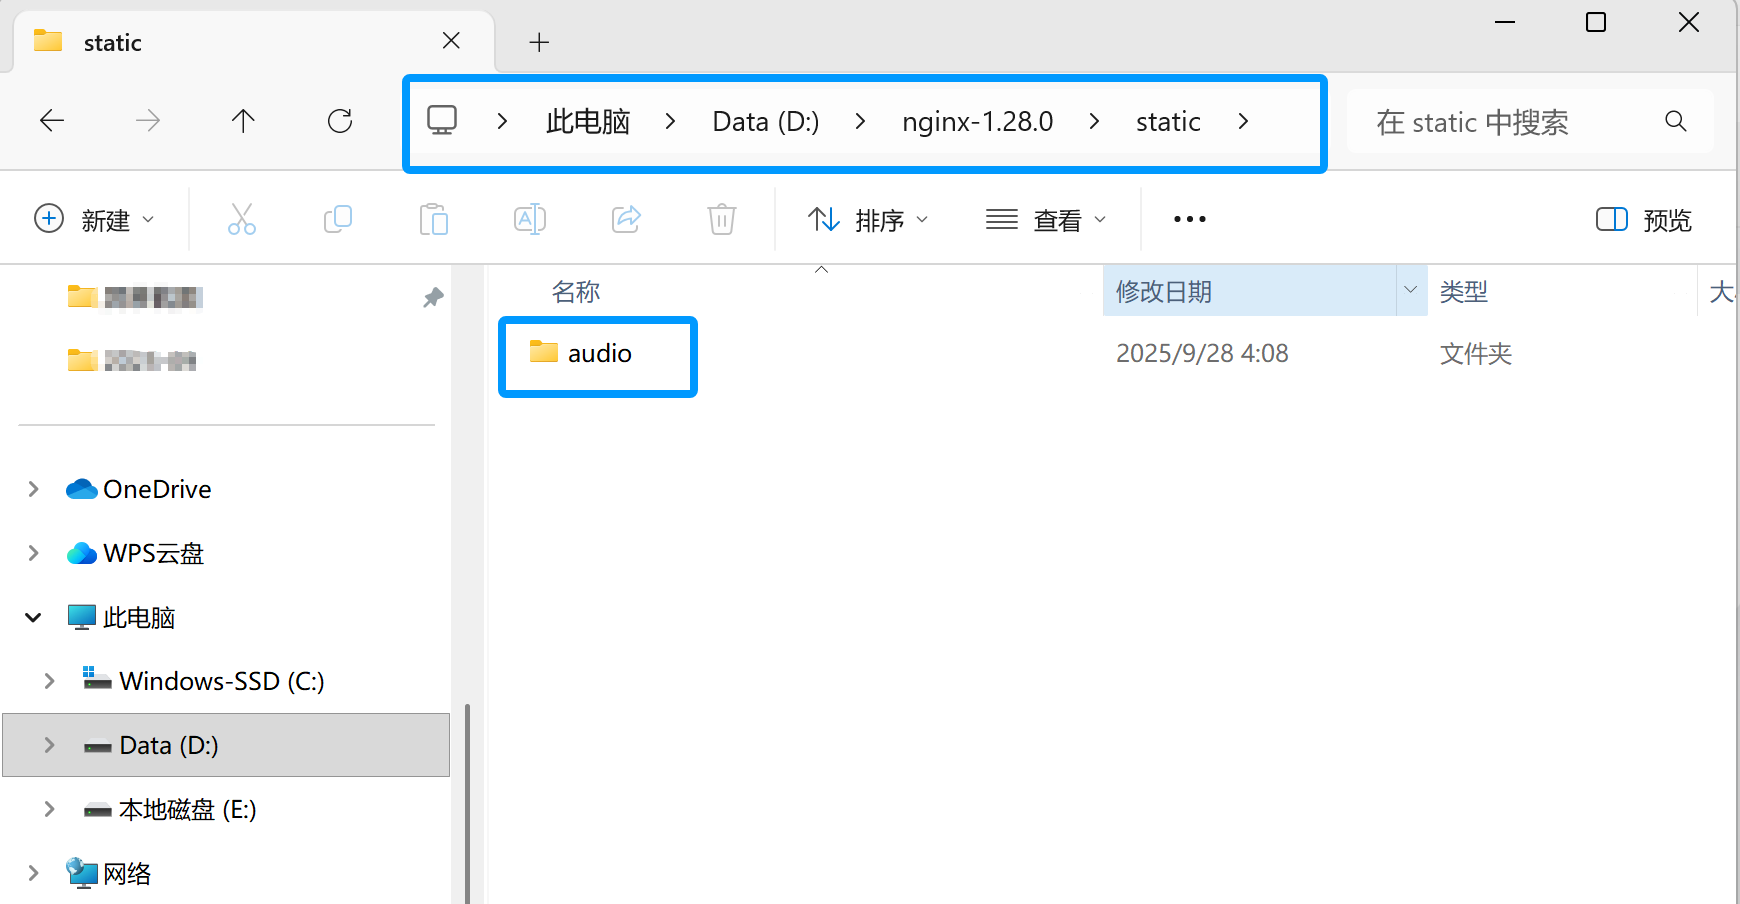
1.3 创建文件夹
在 D:\nginx-1.28.0 目录下创建文件夹 static --> audio
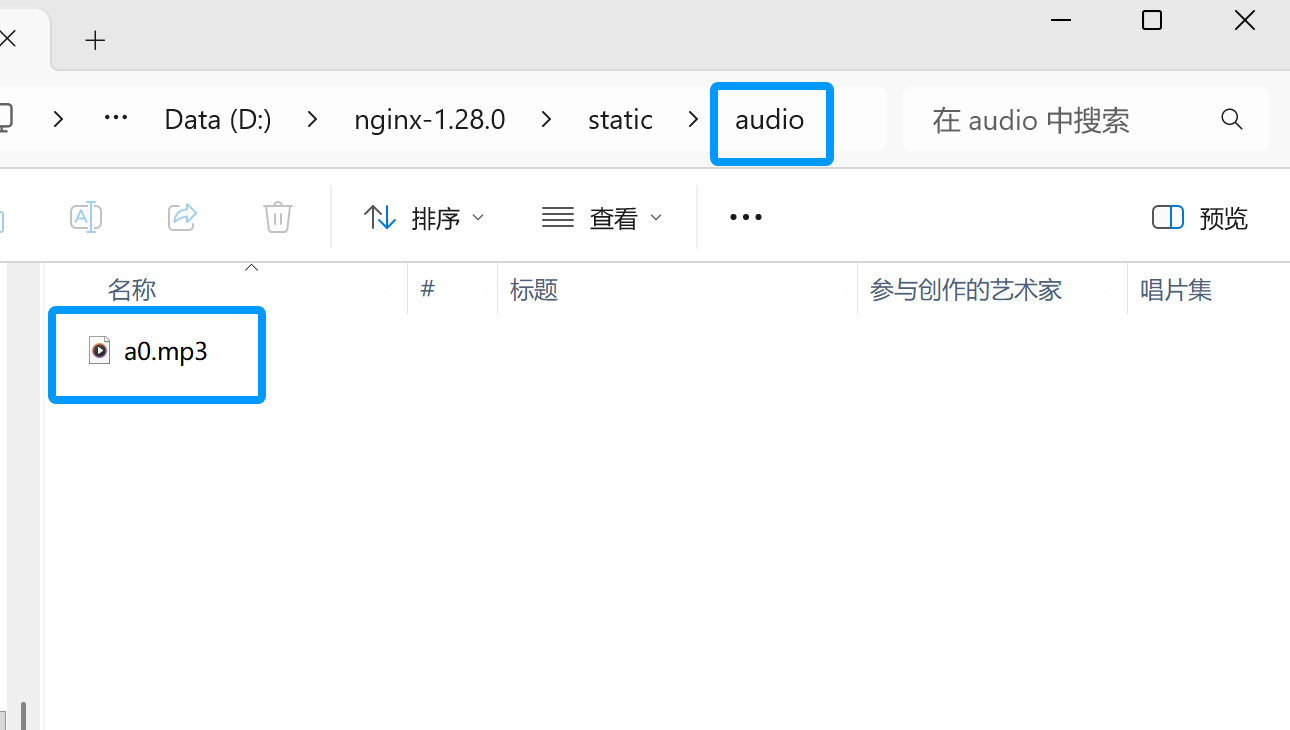
1.4 存放文件
在audio下存放 a0.mp3 和 a0.mp4 文件
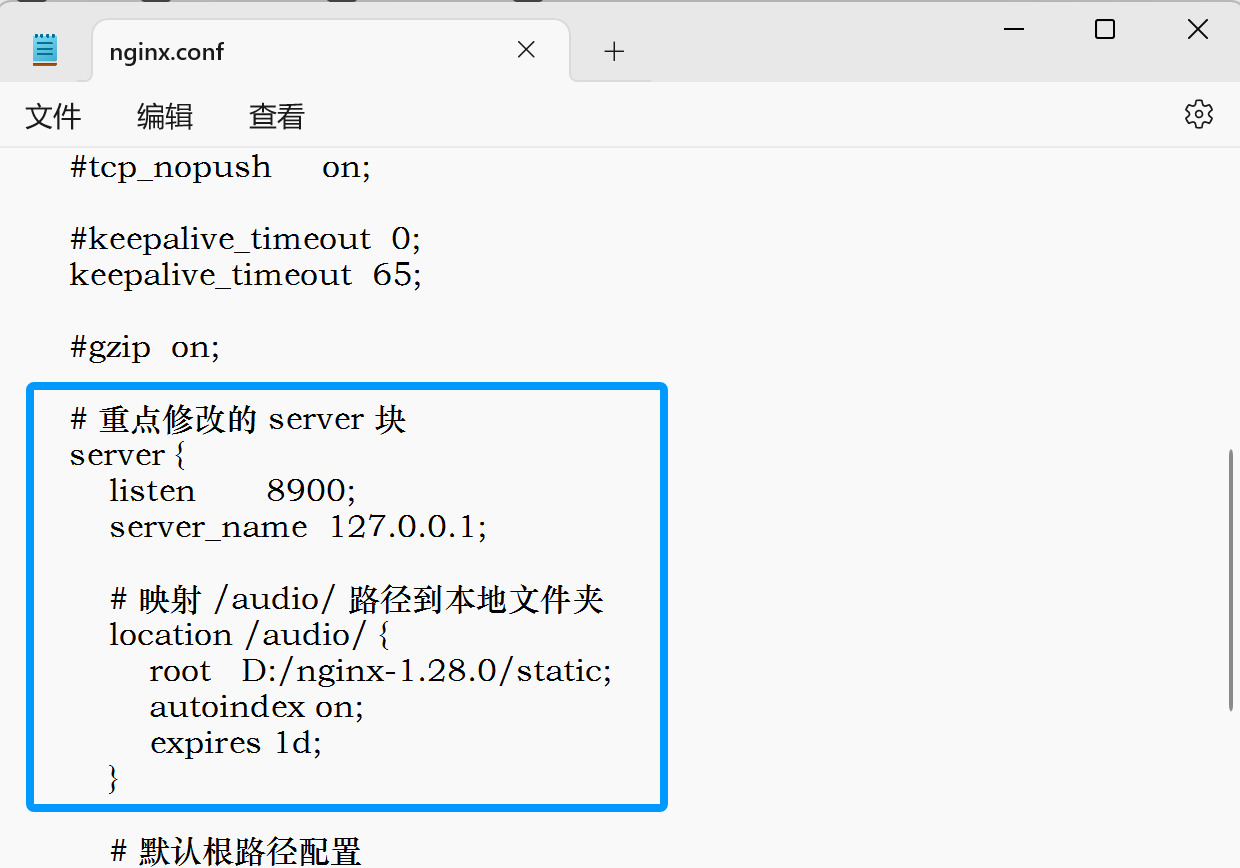
1.5 修改配置文件
Nginx 的配置文件通常位于安装目录下的 conf文件夹中,文件名为 nginx.conf。可以使用任何文本编辑器打开该文件进行配置。
java
user  nobody;
worker_processes  1;

#error_log  logs/error.log;
#error_log  logs/error.log  notice;
#error_log  logs/error.log  info;

#pid        logs/nginx.pid;


events {
    worker_connections  1024;
}


http {
    include       mime.types;
    default_type  application/octet-stream;

    #log_format  main  '$remote_addr - $remote_user [$time_local] "$request" '
    #                  '$status $body_bytes_sent "$http_referer" '
    #                  '"$http_user_agent" "$http_x_forwarded_for"';

    #access_log  logs/access.log  main;

    sendfile        on;
    #tcp_nopush     on;

    #keepalive_timeout  0;
    keepalive_timeout  65;

    #gzip  on;

    # 重点修改的 server 块
    server {
        listen       8900;
        server_name  127.0.0.1;

        # 映射 /audio/ 路径到本地文件夹
        location /audio/ {
            root   D:/nginx-1.28.0/static;
            autoindex on;
            expires 1d;
        }

        # 默认根路径配置
        location / {
            root   html;
            index  index.html index.htm;
        }

        # 错误页面配置(保留默认)
        error_page   500 502 503 504  /50x.html;
        location = /50x.html {
            root   html;
        }

        # 以下 PHP 相关配置保留默认注释即可,无需修改
        #location ~ \.php$ {
        #    proxy_pass   http://127.0.0.1;
        #}
        #location ~ \.php$ {
        #    root           html;
        #    fastcgi_pass   127.0.0.1:9000;
        #    fastcgi_index  index.php;
        #    fastcgi_param  SCRIPT_FILENAME  /scripts$fastcgi_script_name;
        #    include        fastcgi_params;
        #}
        #location ~ /\.ht {
        #    deny  all;
        #}
    }

    # 以下默认注释的 server 块(HTTPS 等)保留不变,无需修改
    #server {
    #    listen       8000;
    #    listen       somename:8080;
    #    server_name  somename  alias  another.alias;
    #    location / {
    #        root   html;
    #        index  index.html index.htm;
    #    }
    #}
    #server {
    #    listen       443 ssl;
    #    server_name  localhost;
    #    ssl_certificate      cert.pem;
    #    ssl_certificate_key  cert.key;
    #    ssl_session_cache    shared:SSL:1m;
    #    ssl_session_timeout  5m;
    #    ssl_ciphers  HIGH:!aNULL:!MD5;
    #    ssl_prefer_server_ciphers  on;
    #    location / {
    #        root   html;
    #        index  index.html index.htm;
    #    }
    #}
}
1.6 检查配置文件语法
修改完配置文件后,在命令提示符中输入nginx -t命令来检查配置文件的语法是否正确。如果语法正确,会显示 "nginx: the configuration file D:\nginx-1.28.0/conf/nginx.conf syntax is ok" 等类似信息。
1.7 启动 Nginx
打开命令提示符,切换到 Nginx 的安装目录,例如cd D:\nginx-1.28.0,然后输入start nginx启动 Nginx。

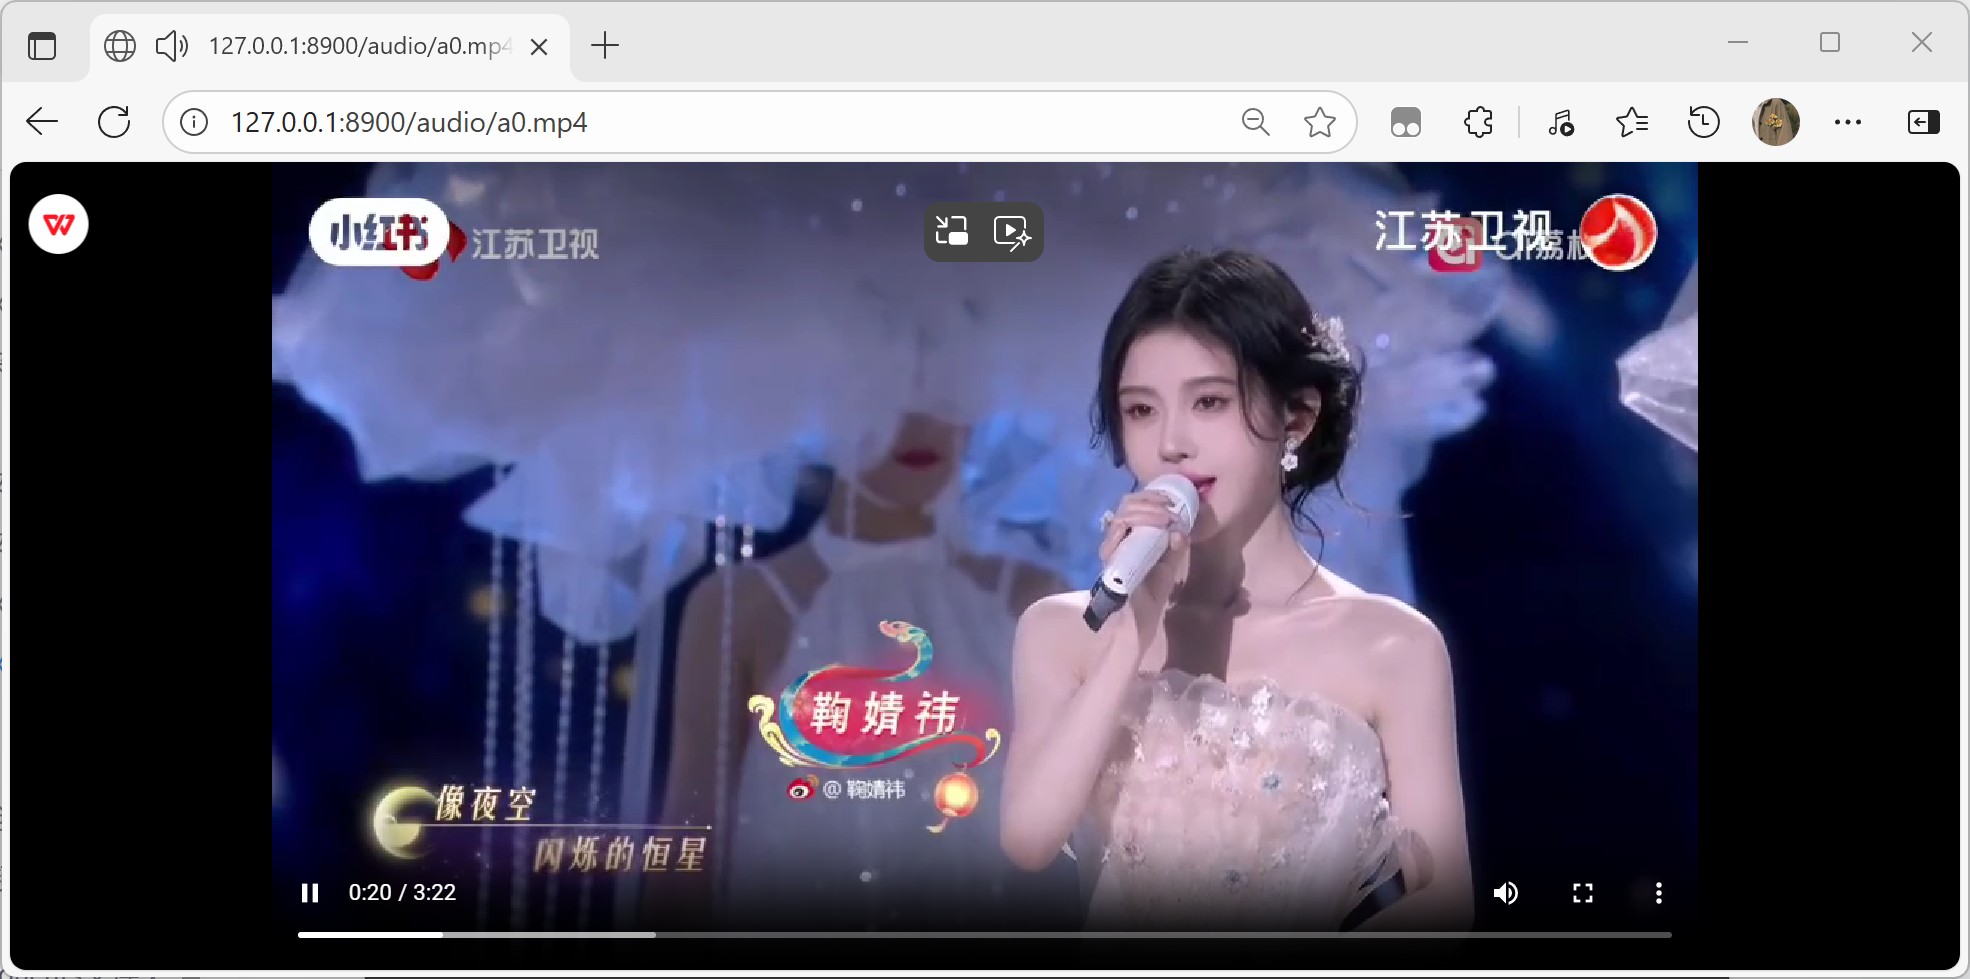
1.8 验证 Nginx 是否启动成功
打开浏览器,在地址栏中输入http://127.0.0.1:8900/audio/a0.mp3,如果浏览器自动下载 a0.mp3 文件,或弹出播放窗口,说明 Nginx 已经启动成功。

2.实现视频、音频播放以及交互
2.1 eclipse端------监听访问请求
使用 Hutool 工具包创建的一个极其轻量级的 HTTP 服务器。它的核心功能是:在本地的 8891 端口启动一个服务,并监听访问 /query 路径的请求,然后返回一句中文欢迎语。
java
package com.hy.chapter1;
import java.nio.charset.Charset;
import cn.hutool.http.ContentType;
import cn.hutool.http.HttpUtil;
public class Server {
public String loadHelloWorld() {
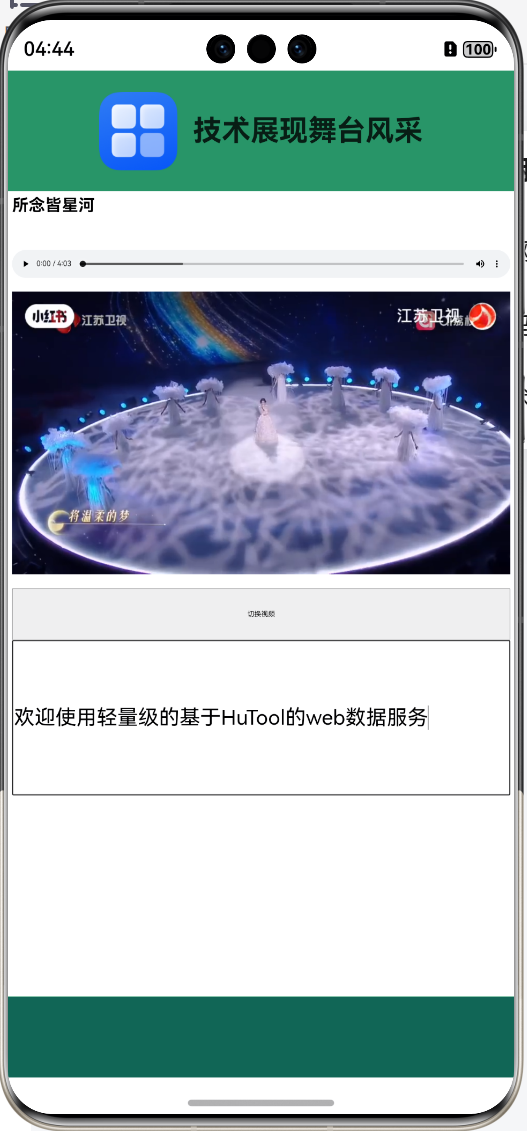
return "欢迎使用轻量级的基于HuTool的web数据服务";
}
public static void main(String[] args) {
HttpUtil.createServer(8891).addAction("/query", (request, response) -> {
System.out.println("鸿蒙的查询服务接受到了");
// 设置字符集不乱码
response.setCharset(Charset.forName("UTF-8"));
// 设置可以跨域,让不同IP和端口的请求可以访问
response.setHeader("Access-Control-Allow-Origin", "*");
Server server = new Server();
String result = server.loadHelloWorld();
response.setCharset(Charset.forName("UTF-8"));
response.write(result, ContentType.TEXT_PLAIN.toString());
}).start();
}
}输出结果:
Hutool Simple Http Server listen on 【0:0:0:0:0:0:0:0:8891】
2.2 在DevEco Stdio中创建cj项目
2.2.1 文件分布情况
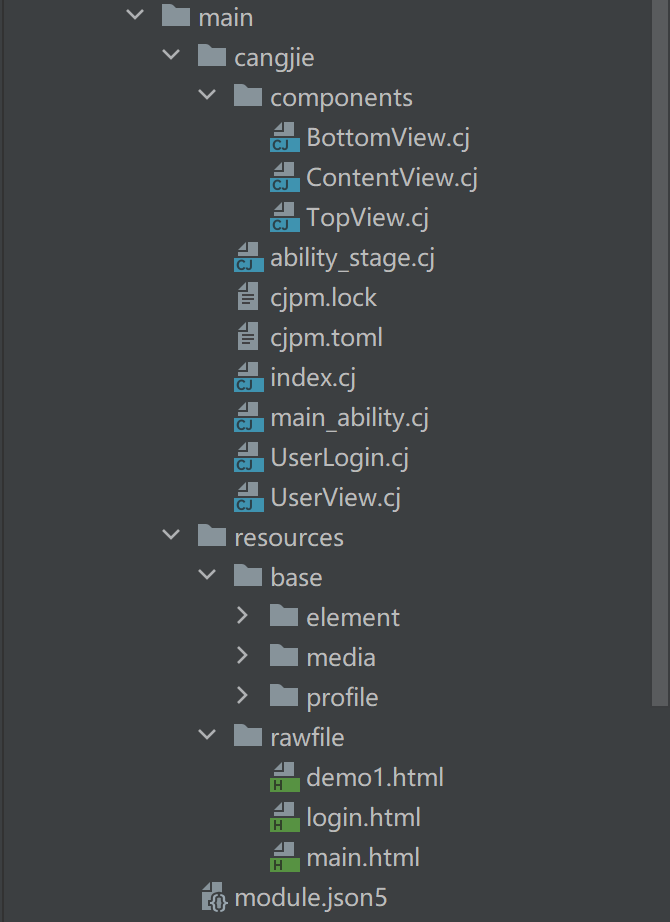
2.2.2 创建components文件夹
① TopView.cj
java
package ohos_app_cangjie_entry.components

import ohos.base.*
import ohos.component.*
import ohos.state_manage.*
import ohos.state_macro_manage.*
import ohos.resource_manager.*

@Component
public class TopView{
    var imgPath:CJResource
    func  build(){

        Row(12){

            Image(this.imgPath).width(60).height(60).objectFit(ImageFit.Contain)

            Text("技术展现舞台风采").fontSize(22).fontWeight(FontWeight.Bold)

        }.width(100.percent).height(12.percent).justifyContent(FlexAlign.Center)

    }
}
② ContentView.cj
java
package ohos_app_cangjie_entry.components

import ohos.base.*
import ohos.component.*
import ohos.state_manage.*
import ohos.state_macro_manage.*
import ohos.resource_manager.*
import  ohos.webview.*

@Component
public class ContentView{

    let webController = WebviewController()

    //这个地方没有s,其实是resource协议
    let  webPath:String = "resource://rawfile/demo1.html"

    func  build(){

        Column(){

           //目前能力还不是很齐全
           // Web(src: "https://one.jit.edu.cn/", controller: this.webController)

           Web(src: this.webPath, controller: this.webController)

        }.width(100.percent).height(80.percent)

    }
}
③ BottomView.cj
java
package ohos_app_cangjie_entry.components

import ohos.base.*
import ohos.component.*
import ohos.state_manage.*
import ohos.state_macro_manage.*
import ohos.resource_manager.*

@Component
public class BottomView{

    func  build(){

        Row(){

        }.width(100.percent).height(8.percent).backgroundColor(0x116655)

    }
}
2.2.3 创建UserView.cj
java
package ohos_app_cangjie_entry
import ohos.base.*
import ohos.component.*
import ohos.state_manage.*
import ohos.state_macro_manage.*
import ohos_app_cangjie_entry.components.TopView
import ohos_app_cangjie_entry.components.ContentView
import ohos_app_cangjie_entry.components.BottomView
@Entry
@Component
class UserView{
//定义变量 资源文件的变量类型:CJResource
//重新引入第三方的图片,仓颉鸿蒙会报错,重新编译一下工程
let imgPath1 :CJResource = @r(app.media.startIcon)
//回调函数,构建鸿蒙的UI
func build(){
Column(){
TopView(imgPath:imgPath1)
ContentView()
BottomView()
}.width(100.percent).height(100.percent).backgroundColor(0x289567)
}
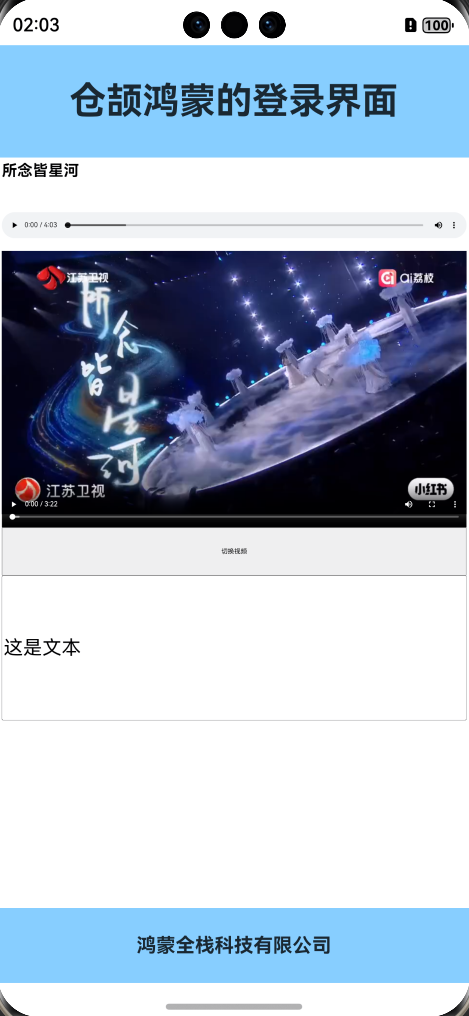
}2.2.4 在resource-->rawfile下创建demo1.html
html
<html>
<header>
<title></title>
<style type="text/css">
#textview{
font-size:40px;
}
</style>
</header>
<body>
<h1>所念皆星河</h1>
<audio src="http://192.168.1.22:8900/audio/a0.mp3" controls="controls" autoplay="autoplay"
style="width:100%;height:100px;"></audio>
<video id="vd" src="http://192.168.1.22:8900/audio/a0.mp4" controls="controls" autoplay="false"
style="width:100%;height:600px;"></video>
<button style="width:100%;height:100px;" id="changebtn">切换视频</button>
<input type="text" style="width:100%;height:300px;" id="textview" value="这是文本"></input>
</body>
<script type="text/javascript">
let btnObj = document.getElementById("changebtn");
let vdObj = document.getElementById("vd");
btnObj.onclick=function(){
console.log("按钮点击切换");
vdObj.src="http://192.168.1.22:8900/audio/a0.mp4";
}
let textObj = document.getElementById("textview");
textObj.onclick=function(){
//1.创建原生ajax对象
let ajaxObj = new XMLHttpRequest();
//2.设置请求方法和链接
ajaxObj.open("get", "http://192.168.1.22:8891/query");
//3.发送请求
ajaxObj.send();
//4.回调,得到服务器传送的数据
ajaxObj.onreadystatechange = () => {
if (ajaxObj.readyState == 4 && ajaxObj.status == 200) {
let result = ajaxObj.responseText;
console.log('1.服务器端传回的数据为:' + result);
//let re1 = eval(result)
// console.log('2.服务器端传回的数据为:' + re1);
textObj.value = result;
}
}
}
</script>
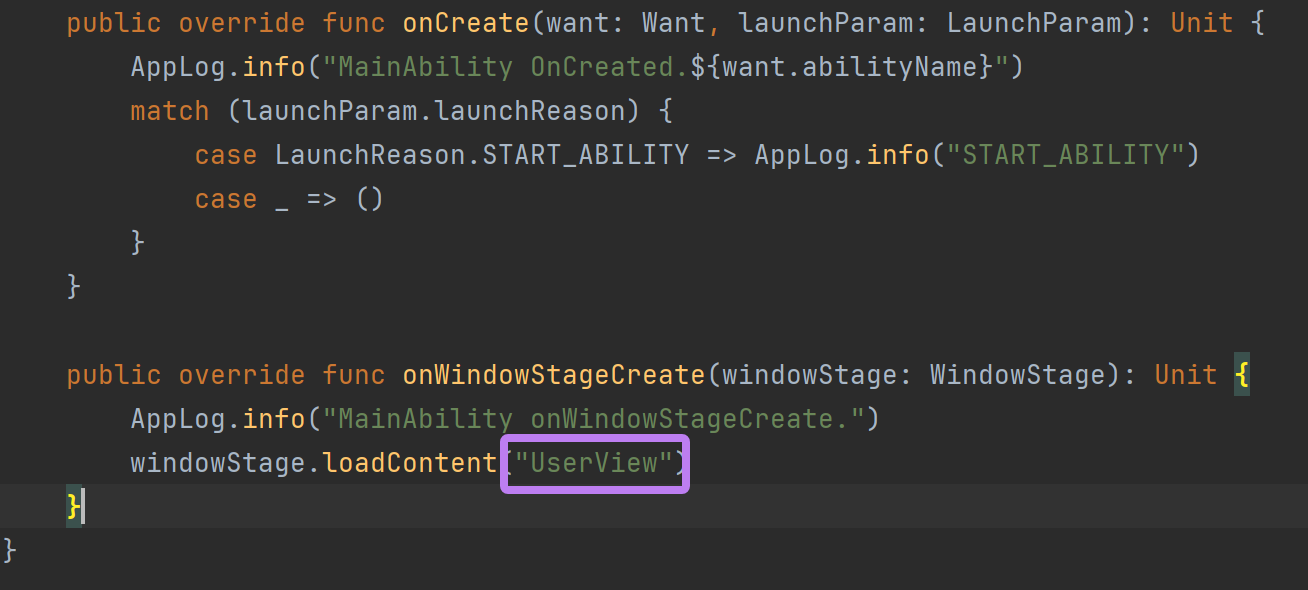
</html>2.2.5 修改main_ability.cj文件
实现效果:
输出结果:
Hutool Simple Http Server listen on 【0:0:0:0:0:0:0:0:8891】
鸿蒙的查询服务接受到了
3.实现登录页面
3.1 eclipse端------生成验证码
3.1.1 数据库准备
sql
CREATE TABLE t_user(
	uid INT PRIMARY KEY auto_increment,
	uname VARCHAR(20) NOT NULL,
	upwd CHAR(11) NOT NULL
)

DROP TABLE t_user

INSERT INTO t_user(uname,upwd) VALUES('admin1','111111');
INSERT INTO t_user(uname,upwd) VALUES('admin2','222222');
INSERT INTO t_user(uname,upwd) VALUES('admin3','333333');

SELECT * FROM t_user
实现效果:

3.1.2 加载依赖
在pom.xml文件中添加并加载依赖
XML
<dependency>
<groupId>mysql</groupId>
<artifactId>mysql-connector-java</artifactId>
<version>8.0.24</version>
</dependency>
<dependency>
<groupId>cn.hutool</groupId>
<artifactId>hutool-all</artifactId>
<version>5.8.38</version>
</dependency>
<dependency>
<groupId>com.alibaba</groupId>
<artifactId>fastjson</artifactId>
<version>1.2.83</version>
</dependency>
<dependency>
<groupId>dom4j</groupId>
<artifactId>dom4j</artifactId>
<version>1.6.1</version>
</dependency>
<dependency>
<groupId>jaxen</groupId>
<artifactId>jaxen</artifactId>
<version>1.1.1</version>
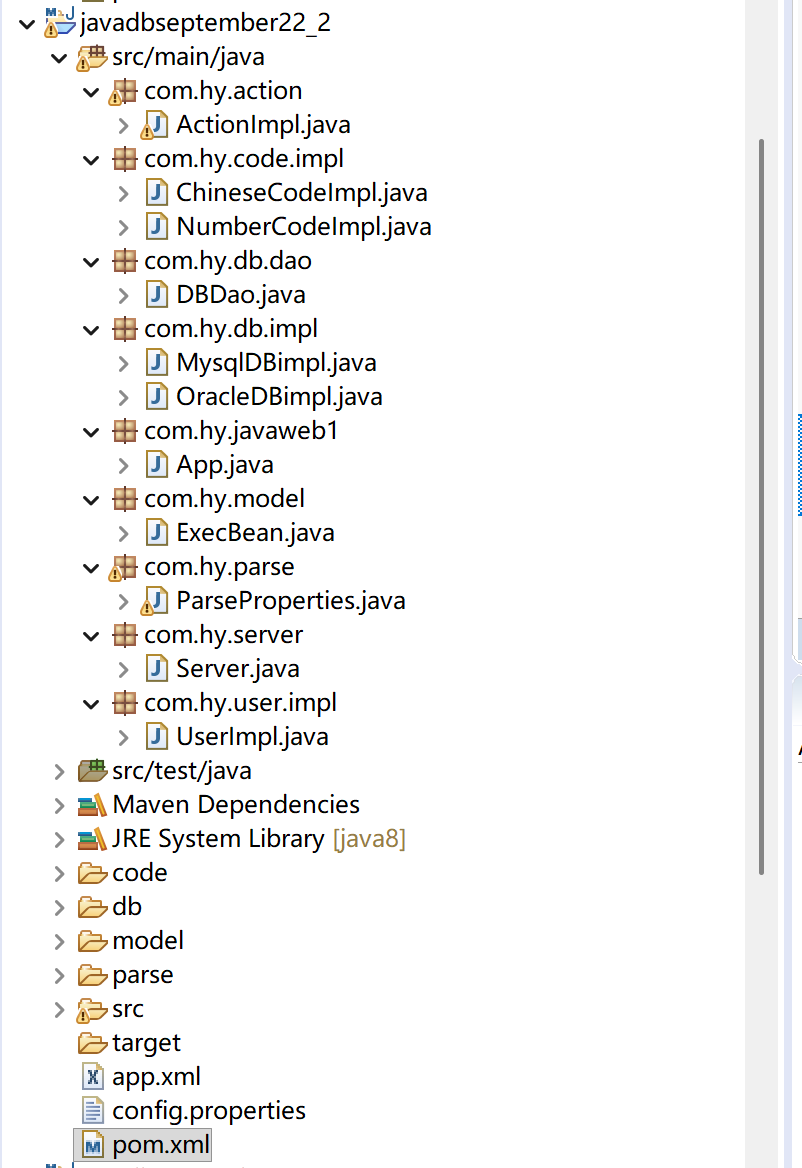
</dependency>3.1.3 具体实现
(1) 类在包中的分布情况
(2) 配置文件
- app.xml(若要使用汉字验证码,将NumberCodeImpl替换为ChineseCodeImpl)
XML
<?xml version="1.0" encoding="UTF-8"?>
<apps>
  <action name="/makecode"  class="com.hy.code.impl.NumberCodeImpl"  method="makeCode"></action>
  <action name="/loginparam"  class="com.hy.user.impl.UserImpl"  method="checkLogin"></action>
</apps>- config.properties
XML
port=8500
path=app.xml
(3) 创建包并实现类
① com.hy.action
java
package com.hy.action;

import java.io.IOException;
import java.lang.reflect.InvocationTargetException;
import java.lang.reflect.Method;
import java.nio.charset.Charset;

import com.alibaba.fastjson.JSONArray;
import com.hy.model.ExecBean;
import com.hy.parse.ParseProperties;

import cn.hutool.http.ContentType;
import cn.hutool.http.server.HttpServerRequest;
import cn.hutool.http.server.HttpServerResponse;
import cn.hutool.http.server.action.Action;
import cn.hutool.json.JSONObject;

public class ActionImpl implements Action {

	public void doAction(HttpServerRequest request, HttpServerResponse response) throws IOException {

		System.out.println("执行。。。。。。。");

		String path = request.getPath();
		System.out.println("请求的路径为:" + path);

		ExecBean bean = ParseProperties.getTabs().get(path);

		try {
			System.out.println(bean.getClassPath());

			Class targetC = Class.forName(bean.getClassPath());
			Object targetObj = targetC.newInstance();

			if (path.contains("login")) {
				String name = request.getParam("name");
				String pwd = request.getParam("pwd");
				System.out.println(name + "," + pwd);
				Method setNameMethod = targetC.getDeclaredMethod("setName", String.class);
				Method setPwdMethod = targetC.getDeclaredMethod("setPwd", String.class);

				setNameMethod.invoke(targetObj, name);
				setPwdMethod.invoke(targetObj, pwd);
			}

			Method m = targetC.getDeclaredMethod(bean.getMethod(), null);
			String str = (String) m.invoke(targetObj, null);
			System.out.println("结果为:" + str);

			response.setCharset(Charset.forName("UTF-8"));
			response.setHeader("Access-Control-Allow-Origin", "*");

			JSONObject objData = new JSONObject();

			System.out.println(path.substring(1));
			objData.put(path.substring(1), str);
			response.write(objData.toString(), ContentType.JSON.toString());

		} catch (ClassNotFoundException e) {
			e.printStackTrace();
		} catch (NoSuchMethodException e) {
			e.printStackTrace();
		} catch (SecurityException e) {
			e.printStackTrace();
		} catch (IllegalAccessException e) {
			e.printStackTrace();
		} catch (IllegalArgumentException e) {
			e.printStackTrace();
		} catch (InvocationTargetException e) {
			e.printStackTrace();
		} catch (InstantiationException e) {
			e.printStackTrace();
		}

	}

}
② com.hy.code.impl
- ChineseCodeImpl.java:中文验证码
java
package com.hy.code.impl;

import java.util.Random;

public class ChineseCodeImpl {

	private static final String[] COMMON_CHARACTERS = { "伟", "芳", "强", "丽", "敏", "静", "杰", "慧", "磊", "娜", "超", "玲", "勇",
			"丹", "军", "艳", "涛", "霞", "明", "梅", "峰", "兰", "刚", "萍", "辉", "秀", "波", "桂", "鹏", "菊", "林", "翠", "俊", "青",
			"龙", "荣", "华", "英", "忠", "玉", "凯", "平", "健", "红", "婷", "祥", "瑞", "云", "雪", "飞", "亮", "芬", "宇", "文", "浩",
			"甜", "佳", "博", "思", "萌", "颖", "振", "海", "冰", "晨", "露", "泽", "宁", "雨", "嘉", "瑶", "润", "琴", "帆", "琪", "昕",
			"梦", "阳", "依", "风", "清", "影", "悦", "新", "源", "媛", "薇", "可", "靖", "萱", "卿", "韵", "逸", "柏", "艺", "馨", "羽",
			"菱", "君", "碧", "锦", "菱", "熙", "菱", "念", "悠", "宛", "若", "诗", "珊", "菱", "芷", "菱", "芙", "榆", "菱", "檀", "菱",
			"樱", "菱", "玫", "菱", "荷", "菱", "莲", "柳", "梨", "槐", "桃", "菱", "竹", "菱", "松", "菱", "柏", "菱", "榕", "菱", "枫",
			"柯", "桦", "桐", "梓", "榕", "杞", "檀", "棉", "棕", "楼", "椿" };

	StringBuilder sb = new StringBuilder();

	public String makeCode() {
		System.out.println("中文验证码执行");

		for (int i = 0; i < 4; i++) {
			Random r = new Random();
			int len = r.nextInt(COMMON_CHARACTERS.length);

			if (!sb.toString().contains(COMMON_CHARACTERS[len])) {
				sb.append(COMMON_CHARACTERS[len]);
			} else {

				i--;
				continue;

			}
		}
		return sb.toString();
	}

}- NumberCodeImpl.java
java
package com.hy.code.impl;

import java.util.Random;

public class NumberCodeImpl {

	private static final String[] COMMON_NUMBERS = { "0", "1", "2", "3", "4", "5", "6", "7", "8", "9" };

	StringBuilder sb = new StringBuilder();

	public String makeCode() {
		System.out.println("数字验证码执行");
		for (int i = 0; i < 4; i++) {
			Random r = new Random();
			int len = r.nextInt(COMMON_NUMBERS.length);

			if (!sb.toString().contains(COMMON_NUMBERS[len])) {
				sb.append(COMMON_NUMBERS[len]);
			} else {
				i--;
				continue;
			}
		}
		return sb.toString();
	}

}
③ com.hy.db.dao
java
package com.hy.db.dao;

import java.sql.Connection;
import java.sql.DriverManager;
import java.sql.PreparedStatement;
import java.sql.ResultSet;
import java.sql.SQLException;

public class DBDao {

	Connection conn;

	public DBDao() {

		try {
			Class.forName("com.mysql.cj.jdbc.Driver");
			conn = DriverManager.getConnection("jdbc:mysql://127.0.0.1:3306/mysql2025", "root", "Hy61573166!!!");
		} catch (ClassNotFoundException e) {
			e.printStackTrace();
		} catch (SQLException e) {
			e.printStackTrace();
		}

	}

	public void closeDB() {

		if (null != conn) {
			try {
				conn.close();
			} catch (SQLException e) {
				e.printStackTrace();
			}
		}

	}

	public int checkLogin(String name, String pwd) {
		String sql = "select  count(uname)  from  t_user  where  uname =?  and  upwd=?";

		int count = 0;

		try {
			PreparedStatement pstmt = this.conn.prepareStatement(sql);
			pstmt.setString(1, name);
			pstmt.setString(2, pwd);

			ResultSet rs = pstmt.executeQuery();

			while (rs.next()) {
				count = rs.getInt(1);
			}

		} catch (SQLException e) {
			e.printStackTrace();
		} finally {
			this.closeDB();
		}
		return count;

	}

}
④ com.hy.db.impl
java
package com.hy.db.impl;

public class MysqlDBimpl {

	public String query() {
		System.out.println("查询Mysql数据库");
		return "Mysql数据";
	}

}
java
package com.hy.db.impl;

public class OracleDBimpl {

	public String query() {
		System.out.println("查询oracle数据库");
		return "oracle数据";
	}

}
⑤ com.hy.javaweb1
java
package com.hy.javaweb1;

import com.hy.server.Server;

/**
 *
 *  交给用户去选择:满足用户需求
 * 1. 生成验证码,大的项目,满足不同用户的需求
 * 2. 数据库不同,mysql,oracle,gaussdb
 * 3. 分布式策略不同
 */
public class App {
	public static void main(String[] args) {
		Server server = new Server();
		server.execAction();
	}
}
⑥ com.hy.model
java
package com.hy.model;

public class ExecBean {

	private String classPath;

	private String method;

	public String getClassPath() {
		return classPath;
	}

	public void setClassPath(String classPath) {
		this.classPath = classPath;
	}

	public String getMethod() {
		return method;
	}

	public void setMethod(String method) {
		this.method = method;
	}

}
⑦ com.hy.parse
java
package com.hy.parse;

import java.io.File;
import java.io.FileInputStream;
import java.io.FileNotFoundException;
import java.io.IOException;
import java.util.Hashtable;
import java.util.List;
import java.util.Properties;

import org.dom4j.Document;
import org.dom4j.DocumentException;
import org.dom4j.Element;
import org.dom4j.io.SAXReader;

import com.hy.model.ExecBean;

public class ParseProperties {

	private static ParseProperties p = null;

	private Properties properties = null;

	private static Hashtable<String, ExecBean> tabs = new Hashtable<String, ExecBean>();

	private ParseProperties() {

		properties = new Properties();
		try {
			FileInputStream fin = new FileInputStream("./config.properties");

			properties.load(fin);

			SAXReader saxReader = new SAXReader();
			Document doc = saxReader.read(new File(properties.getProperty("path")));

			List<Element> lists = doc.selectNodes("./apps/action");

			for (Element element : lists) {
				String classPath = element.attributeValue("class");
				String method = element.attributeValue("method");

				ExecBean execBean = new ExecBean();

				execBean.setClassPath(classPath);
				execBean.setMethod(method);
				tabs.put(element.attributeValue("name"), execBean);
			}

		} catch (FileNotFoundException e) {
			e.printStackTrace();
		} catch (IOException e) {
			e.printStackTrace();
		} catch (DocumentException e) {
			e.printStackTrace();
		}

	}

	public static synchronized ParseProperties getInstance() {
		if (null == p) {
			p = new ParseProperties();
		}
		return p;
	}

	public Properties getProperties() {
		return properties;
	}

	public void setProperties(Properties properties) {
		this.properties = properties;
	}

	public static Hashtable<String, ExecBean> getTabs() {
		return tabs;
	}

	public static void setTabs(Hashtable<String, ExecBean> tabs) {
		ParseProperties.tabs = tabs;
	}

}
⑧ com.hy.server
java
package com.hy.server;

import com.hy.action.ActionImpl;
import com.hy.parse.ParseProperties;

import cn.hutool.http.HttpUtil;
import cn.hutool.http.server.SimpleServer;
import cn.hutool.http.server.action.Action;

public class Server {

	private Action actionImpl = new ActionImpl();

	private SimpleServer simpleServer;

	public Server() {

		String portStr = ParseProperties.getInstance().getProperties().getProperty("port");
		int port = Integer.parseInt(portStr);

		simpleServer = HttpUtil.createServer(port);
		simpleServer.start();

		System.out.println("自定义框架hutoolweb启动");
	}

	public void execAction() {

		simpleServer.addAction("/", actionImpl);
	}

}
⑨ com.hy.user.impl
java
package com.hy.user.impl;

import com.hy.db.dao.DBDao;

public class UserImpl {

	String name;

	String pwd;

	public String checkLogin() {

		System.out.println(this.getName() + "," + this.getPwd());

		DBDao dao = new DBDao();

		if (dao.checkLogin(this.getName(), this.getPwd()) > 0) {
			return "success";
		}
		return "fail";
	}

	public String getName() {
		return name;
	}

	public void setName(String name) {
		this.name = name;
	}

	public String getPwd() {
		return pwd;
	}

	public void setPwd(String pwd) {
		this.pwd = pwd;
	}

}
输出结果:
Hutool Simple Http Server listen on 【0:0:0:0:0:0:0:0:8500】
自定义框架hutoolweb启动
3.2 DevEco Stdio端------实现登录跳转页面
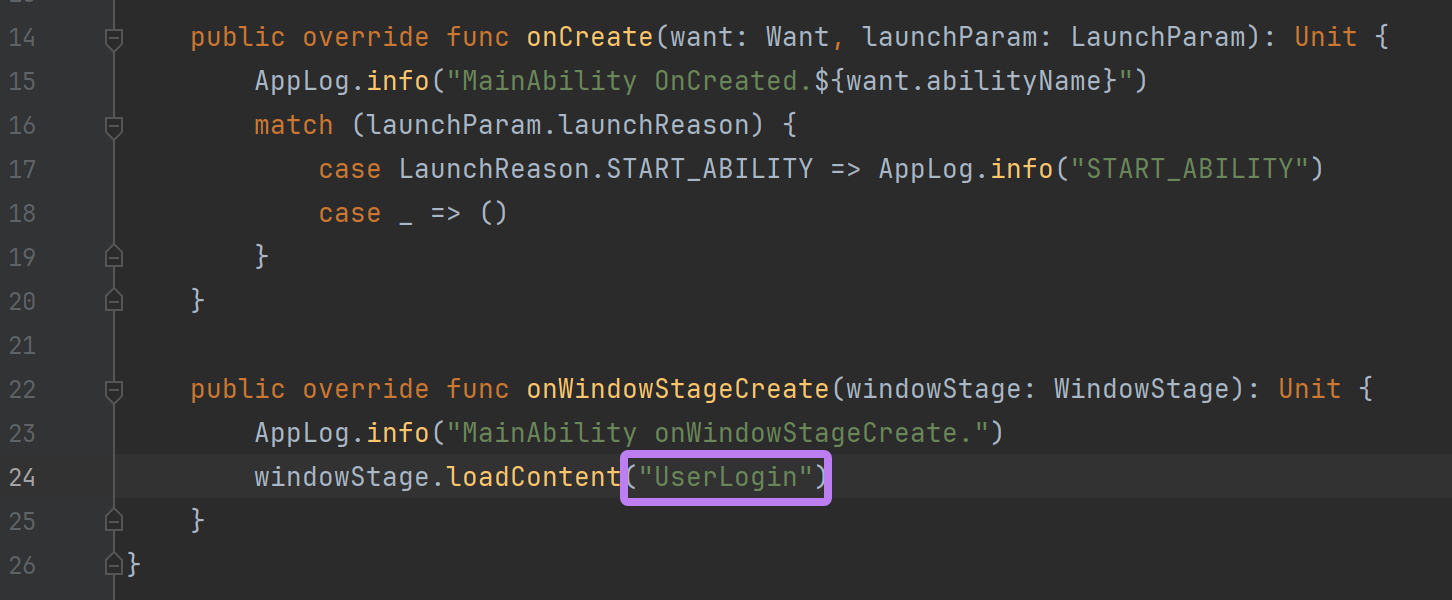
3.3.1 创建UserLogin.cj
java
package ohos_app_cangjie_entry
import ohos.base.*
import ohos.component.*
import ohos.state_manage.*
import ohos.state_macro_manage.*
import ohos.webview.*
@Entry
@Component
class UserLogin {
let webController = WebviewController()
//这个地方没有s,其实是resource协议
let webPath: String = "resource://rawfile/login.html"
func build() {
Column() {
Row() {
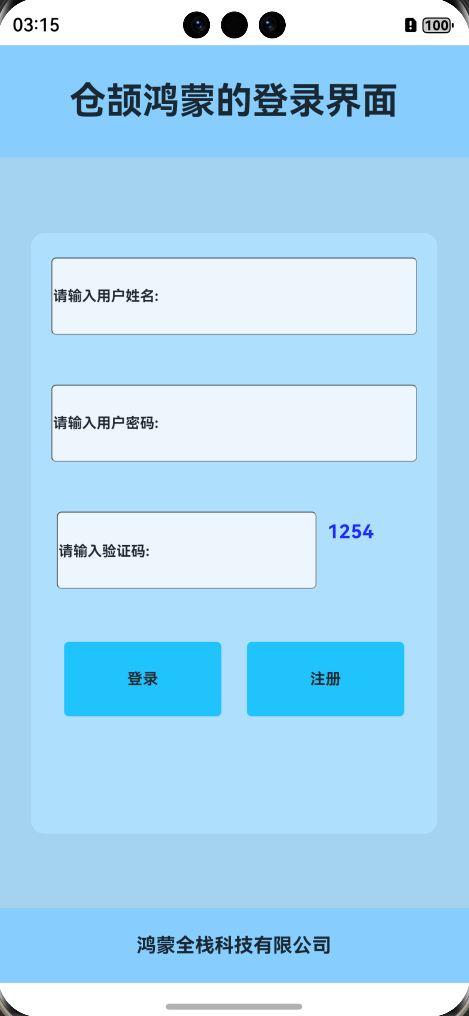
Text("仓颉鸿蒙的登录界面").fontSize(30).fontWeight(FontWeight.Bold)
}.width(100.percent).height(12.percent).backgroundColor(0x87CEFF)
.justifyContent(FlexAlign.Center)
Web(src: this.webPath, controller: this.webController).width(100.percent).height(80.percent)
Row() {
Text("鸿蒙全栈科技有限公司").fontSize(16).fontWeight(FontWeight.Bold)
}.width(100.percent).height(8.percent).backgroundColor(0x87CEFF) .justifyContent(FlexAlign.Center)
}.width(100.percent).height(100.percent)
}
}3.3.2 在resource-->rawfile下创建login.html
html
<!DOCTYPE html>
<html>
<head>
    <meta charset="utf-8">
    <title></title>
    <style type="text/css">
        body{
            margin: 0px;
            padding: 0px;
        }
        .main{
            width: 100%;
            height: 100vh;
            background-color: #A4D3EE;
            display: flex;
            justify-content: center;
            align-items: center;

        }
        .loginview{
            position: relative;
            width: 86%;
            height: 80%;
            background-color: #B0E2FF;
            z-index: 100;
            border: 20px;
            border-radius: 28px;
            display: flex;
            flex-direction: column;
            justify-content: center;
            align-items: center;
            opacity:0.8;
        }
        .inputview{
            width: 90%;
            height: 22%;
            margin: 3px;
            display: flex;
          justify-content: center;
             align-items: center;
        }
        .inputview1{
             width: 90%;
             height: 16%;
             margin: 3px;
             display: flex;
             justify-content: center;
                align-items: center;
          }
         .inputview3{
             width: 90%;
             height: 22%;
             margin: 3px;
             display: flex;
             justify-content: space-around;
                align-items: center;
          }
       .inputview4{
             width: 90%;
             height: 22%;
             margin: 3px;
             display: flex;
             justify-content: space-around;
                align-items: center;
          }
           input::placeholder {
               color: black;
               font-size: 30px;

              }
            .nameview{
          width:100%;
          height:60%;
          font-size:30px;
          font-weight:bold;
          border-radius: 10px;
        }

        .pwdview{
          width:100%;
          height:60%;
          font-size:30px;
          font-weight:bold;
         border-radius: 10px;
        }
        .codeview{
          width:70%;
          height:60%;
          font-size:36px;
          font-weight:bold;
          border-radius: 10px;
        }
        #spancode{
          width:23%;
          height:60%;
          font-size:40px;
          color:blue;
          font-weight:bold;
          display:block;
            margin-top: 30px;
        }
        button{
          width:43%;
          height:60%;
          background-color:#00BFFF;
           font-size:32px;
          font-weight:bold;
          border:none;
          margin-top: 8px;
           border-radius: 10px;

        }

        button:hover{
               background-color:#FF4500;
        }

        h1{

          color:red;
        }
    </style>
</head>
<body>
<div class="main">
    <div class="loginview">
        <div class="inputview">
            <input class="nameview" placeholder="请输入用户姓名:" type="text"/>

        </div>
        <div class="inputview">
            <input class="pwdview" placeholder="请输入用户密码:" type="password"/>

        </div>
        <div class="inputview3">
            <input class="codeview" placeholder="请输入验证码:" type="text"/>
            <span id="spancode"></span>

        </div>


        <div class="inputview4">
            <button value="" onclick="checkLogin()">登录</button>
            <button value="">注册</button>
        </div>

        <div class="inputview1">
        </div>
    </div>

</div>
</body>
<script type="text/javascript">
    let  checkCode = "";
    let  inputCodeObj =   document.getElementsByClassName("codeview")[0];
    let  inputNameObj =   document.getElementsByClassName("nameview")[0];
    let  inputPwdObj =   document.getElementsByClassName("pwdview")[0];
    let  inputView1Obj =   document.getElementsByClassName("inputview1")[0];
    let  spanObj =  document.getElementById("spancode");
    function  checkLogin() {

         let  inputCodeValue  = inputCodeObj.value;
         console.log("1.服务器端传回的数据为:"+inputCodeValue);

          //js的 === 值和类型都相等
         if(inputCodeValue === checkCode) {
              console.log("核实:对的");
              let  nameValue  =  inputNameObj.value;
              let  pwdValue  =  inputPwdObj.value;
              console.log("核实:"+nameValue+","+pwdValue);

              //1. 创建原生ajax对象XMLHttpRequest
              let ajaxObj = new XMLHttpRequest();
              //2.设置请求方法和链接
              ajaxObj.open("get", "http://192.168.1.22:8500/loginparam?name="+nameValue+"&pwd="+pwdValue);
              //3.发送请求
              ajaxObj.send();

              ajaxObj.onreadystatechange = () => {
                       if (ajaxObj.readyState == 4 && ajaxObj.status == 200) {
                              console.log('接受成功');
                              let result = ajaxObj.responseText;
                              let  objdata = JSON.parse(result);
                            let  resultValue = objdata.loginparam;
                            console.log('核实:' +resultValue);

                            if(resultValue == "success") {

                               window.location.href = "demo1.html";

                            }
                            else {
                                       inputView1Obj.innerHTML = "<h1>对不起,用户名或密码输入错误<h1>";
                                             setTimeout(()=>{
                                                  createCode();
                                                    inputView1Obj.innerHTML ="";
                                       },2000)

                            }
                      }

             }

         }
         else {

            console.log("核实:错的");
            inputView1Obj.innerHTML = "<h1>对不起,验证码输入错误<h1>";
            setTimeout(()=>{
               createCode();
                  inputView1Obj.innerHTML ="";
            },2000)

         }
    }

    function  createCode() {
       //1. 创建原生ajax对象XMLHttpRequest
       let ajaxObj = new XMLHttpRequest();
       //2.设置请求方法和链接
       ajaxObj.open("get", "http://192.168.1.22:8500/makecode");
       //3.发送请求
       ajaxObj.send();

       //4.回调,得到服务器传送的数据
       ajaxObj.onreadystatechange = () => {
             if (ajaxObj.readyState == 4 && ajaxObj.status == 200) {
                console.log('接受成功');
                let result = ajaxObj.responseText;
                console.log('核实:' + result);
                console.log('核实:' +typeof result);
                //spanObj.innerText = result;

                let  objdata = JSON.parse(result);
                checkCode = objdata.makecode;
                console.log('核实:' +checkCode);
                spanObj.innerText = checkCode ;
             }

          }
    }
    createCode();
</script>
</html>
3.3.3 修改main_ability.cj文件
实现效果:
运行日志:
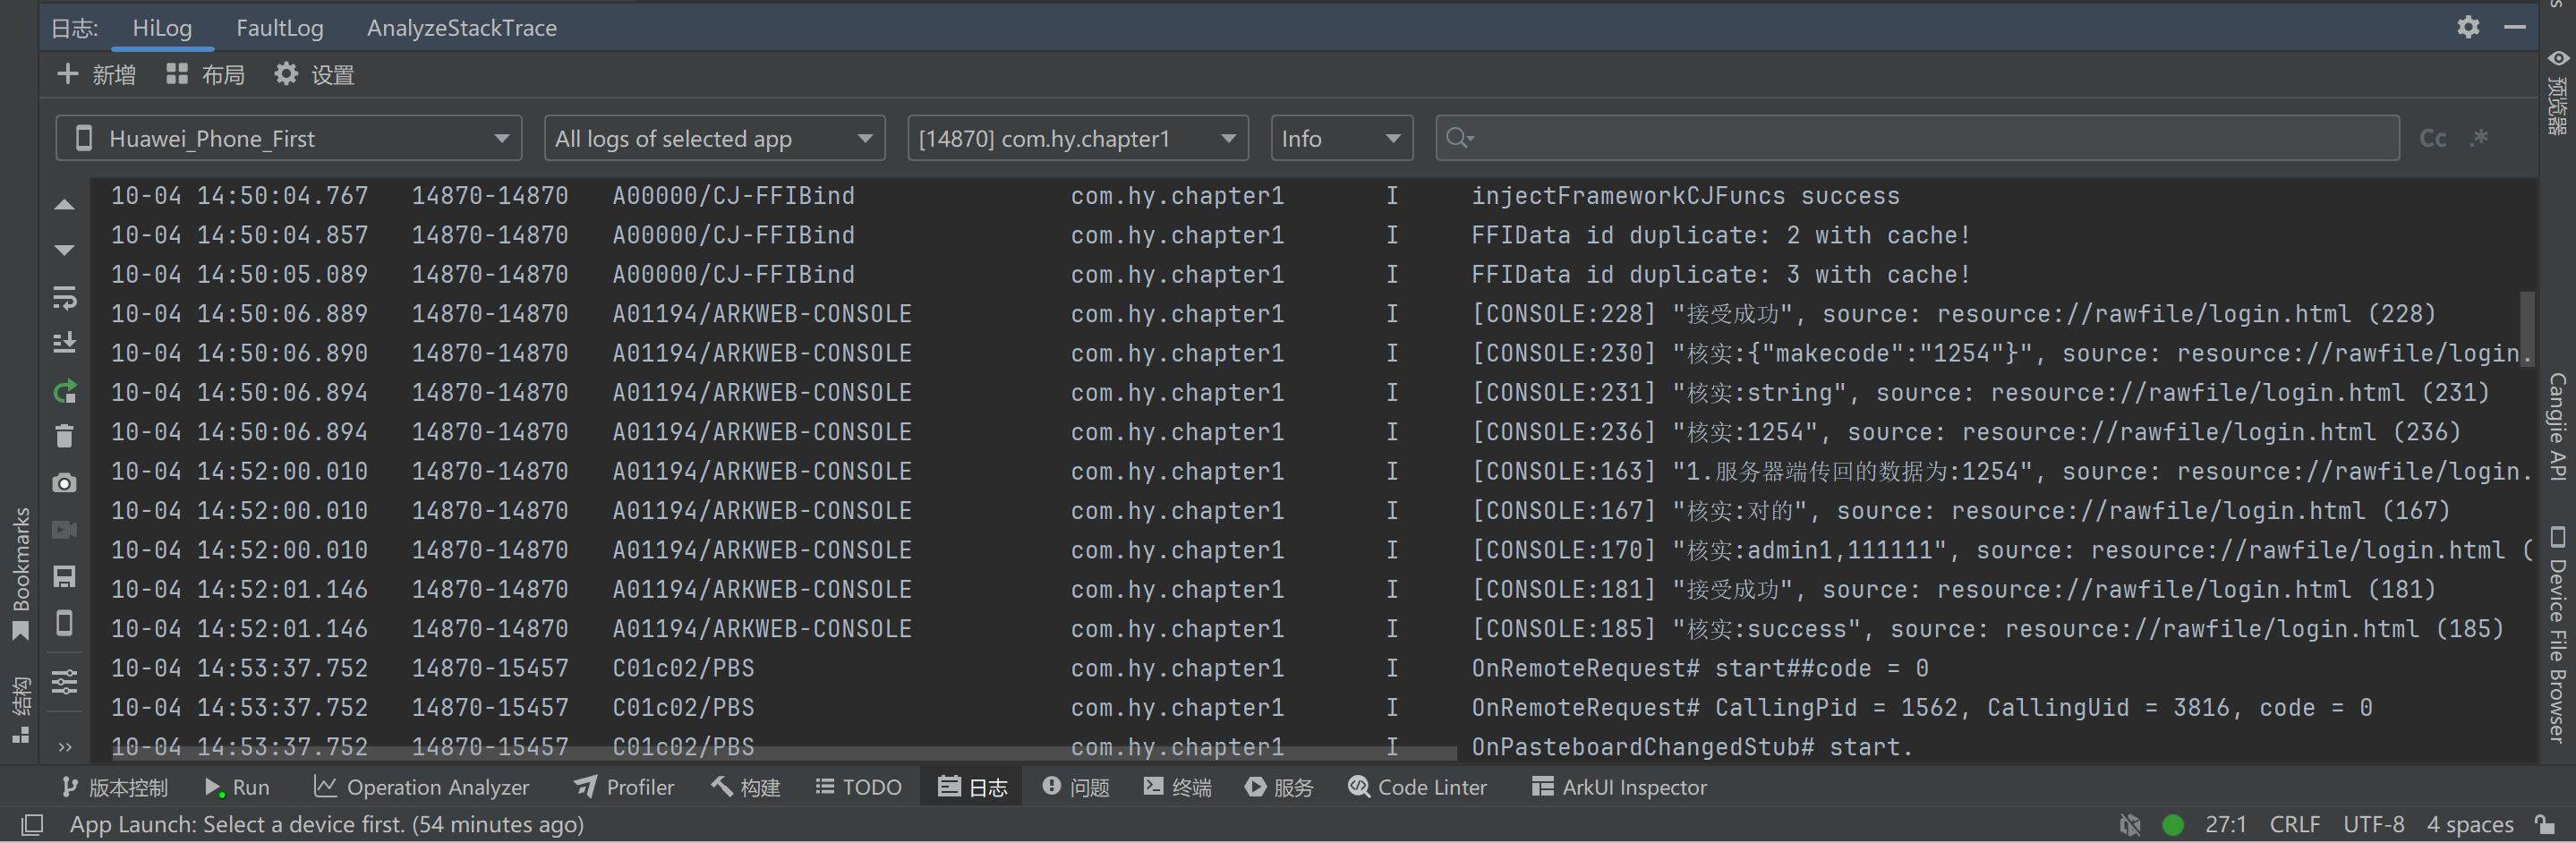
eclipse输出结果:
Hutool Simple Http Server listen on 【0:0:0:0:0:0:0:0:8500】
自定义框架hutoolweb启动
执行。。。。。。。
请求的路径为:/makecode
com.hy.code.impl.NumberCodeImpl
数字验证码执行
结果为:1254
makecode
执行。。。。。。。
请求的路径为:/loginparam
com.hy.user.impl.UserImpl
admin1,111111
admin1,111111
结果为:success
loginparam