【 声明:版权所有,欢迎转载,请勿用于商业用途。 联系信箱:feixiaoxing @163.com】
图形旋转是一种常见的处理方式。有的时候是游戏本身需要旋转,有的时候是仿真需要旋转,至于哪一种就看具体情况。比如说,现在数字孪生比较火,说白了就是拿到传感器和工厂的数据,仿制出一模一样的3d场景。这种情况下,就势必会涉及到旋转了。
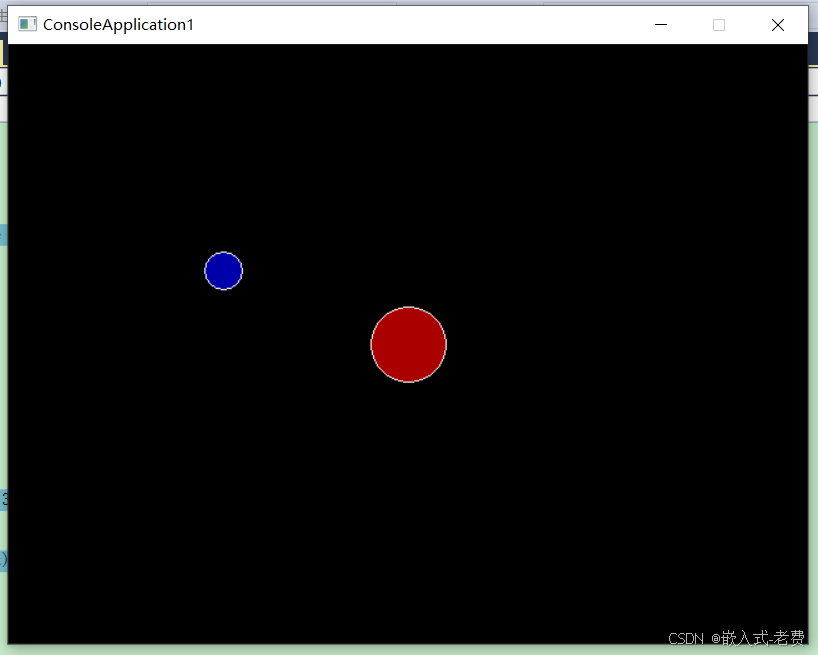
1、围绕某个点的旋转
这种旋转比较好理解,就好像地球绕着太阳转一样,只要我们算好了旋转中心,和旋转点之间的距离,这样就可以处理好旋转的步骤了。
	while (true)
	{
		cleardevice();

#if 0
		angle += 2; // update angle
		if (angle == 360)
		{
			angle = 0;
		}
#else
		if (angle == 0)
		{
			angle = 360;
		}
		angle -= 2;
#endif
		setfillcolor(RED);
		fillcircle(320, 240, 30);

		setfillcolor(BLUE);
		fillcircle(320 + (int)(160.0 * cos(angle *6.28 / 360.0)), 240 + (int)(160.0 * sin(angle*6.28 / 360.0)), 15);
		FlushBatchDraw();

		Sleep(50);
	}
如果是图像效果的话,应该是这样的,
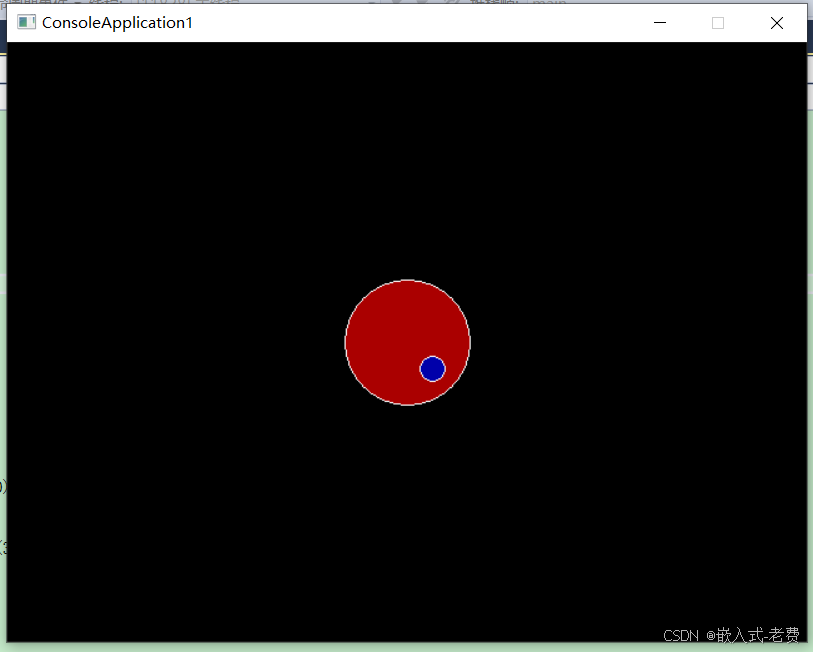
2、围绕自身中心的旋转
这种旋转比较见于圆形物体。大家能够经常看到的圆形旋转,比如扫地机器人,这就是明显的围绕自身中心的旋转。这种旋转一般不太好画,我们通常会在上面再添加一个小圆,这样观察起来就容易多了。写代码的时候,一般是这样,
	while (true)
	{
		cleardevice();

		angle += 2;
		if (angle == 360)
		{
			angle = 0;
		}

		setfillcolor(RED);
		fillcircle(320, 240, 50);

		setfillcolor(BLUE);
		fillcircle(320 + (int)(30.0 * cos(angle *6.28 / 360.0)), 240 + (int)(30.0 * sin(angle*6.28 / 360.0)), 10);

		FlushBatchDraw();

		Sleep(20);
	}
如下面场景所示,虽然画的是里面的小圆,实际我们的感受却是,外面的大圆动了,所以里面的小圆才一起动,
3、非规则图形的旋转
上面的图形旋转相对不是很难,还有一种非规则图形的旋转。**这种旋转一般也是先切分成不同的点,算出每一个点的旋转结果。**再用直线把这些结果link在一起,这样就能得到我们想要的结果了。也就是用fillpoly函数来实现。
		setlinecolor(RED);
		setfillcolor(RED);
		fillpoly(4, new int[8]{ x1, y1, x2, y2, x3, y3, x4, y4 });
如果是效果的话,就是这样的,
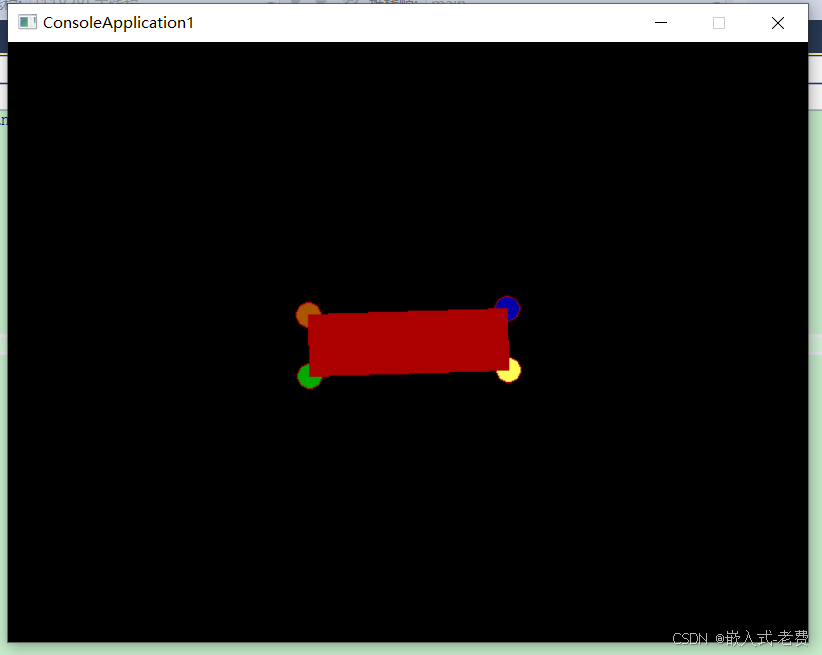
四周画了四个圆形,主要也是为了演示一下旋转的效果。
4、总结
旋转本身是非常务实的一个需求,大家可以好好实现一下。更重要的是,要把它用在自己的项目中,这样才会有更深的感受,明白自己的所学所看是可以有大用处的。最后给出代码,权当抛砖引玉,对大家有所帮助。
#include <graphics.h>
#include <conio.h>
#include <cmath>

#include <graphics.h>
#include <cmath>

int main() // rotate to some point
{
	int angle = 0;
	//int angle = 90;
	//int angle = 180;
	//int angle = 270;

	initgraph(640, 480);

	BeginBatchDraw();
	while (true)
	{
		cleardevice();

#if 0
		angle += 2; // update angle
		if (angle == 360)
		{
			angle = 0;
		}
#else
		if (angle == 0)
		{
			angle = 360;
		}
		angle -= 2;
#endif
		setfillcolor(RED);
		fillcircle(320, 240, 30);

		setfillcolor(BLUE);
		fillcircle(320 + (int)(160.0 * cos(angle *6.28 / 360.0)), 240 + (int)(160.0 * sin(angle*6.28 / 360.0)), 15);
		FlushBatchDraw();

		Sleep(50);
	}
	_getch();
	closegraph();
	return 0;
}

int main2() // rotate to itself
{
	const int WIDTH = 640;
	const int HEIGHT = 480;
	int angle = 90;
	//int angle = 0;
	//int angle = 0;
	//int angle = 0;

	initgraph(WIDTH, HEIGHT);

	BeginBatchDraw();

	while (true)
	{
		cleardevice();

		angle += 2;
		if (angle == 360)
		{
			angle = 0;
		}

		setfillcolor(RED);
		fillcircle(320, 240, 50);

		setfillcolor(BLUE);
		fillcircle(320 + (int)(30.0 * cos(angle *6.28 / 360.0)), 240 + (int)(30.0 * sin(angle*6.28 / 360.0)), 10);

		FlushBatchDraw();

		Sleep(20);
	}

	EndBatchDraw();
	closegraph();
}

int main3()  // not regular shape rotate
{
	const int WIDTH = 640;
	const int HEIGHT = 480;

	int rect_width = 160;
	int rect_height = 50;

	int center_x = WIDTH / 2;
	int center_y = HEIGHT / 2;
	int angle = 0;

	initgraph(WIDTH, HEIGHT);
	BeginBatchDraw();

	while (true)
	{
		cleardevice();

		int x1 = center_x - rect_width / 2; // get position of each point
		int y1 = center_y - rect_height / 2;
		int x2 = center_x + rect_width / 2;
		int y2 = center_y - rect_height / 2;
		int x3 = center_x + rect_width / 2;
		int y3 = center_y + rect_height / 2;
		int x4 = center_x - rect_width / 2;
		int y4 = center_y + rect_height / 2;

		int temp_x;
		int temp_y;
		float radians = (float)(angle * 3.14159 / 180); // translate to theta

		// rotate each point

		temp_x = x1;
		temp_y = y1;
		x1 = center_x + (int)((temp_x - center_x) * cos(radians) - (temp_y - center_y) * sin(radians));
		y1 = center_y + (int)((temp_x - center_x) * sin(radians) + (temp_y - center_y) * cos(radians));

		setfillcolor(BROWN);
		fillcircle(x1, y1, 10);

		temp_x = x2;
		temp_y = y2;
		x2 = center_x + (int)((temp_x - center_x) * cos(radians) - (temp_y - center_y) * sin(radians));
		y2 = center_y + (int)((temp_x - center_x) * sin(radians) + (temp_y - center_y) * cos(radians));

		setfillcolor(BLUE);
		fillcircle(x2, y2, 10);

		temp_x = x3;
		temp_y = y3;
		x3 = center_x + (int)((temp_x - center_x) * cos(radians) - (temp_y - center_y) * sin(radians));
		y3 = center_y + (int)((temp_x - center_x) * sin(radians) + (temp_y - center_y) * cos(radians));

		setfillcolor(YELLOW);
		fillcircle(x3, y3, 10);

		temp_x = x4;
		temp_y = y4;
		x4 = center_x + (int)((temp_x - center_x) * cos(radians) - (temp_y - center_y) * sin(radians));
		y4 = center_y + (int)((temp_x - center_x) * sin(radians) + (temp_y - center_y) * cos(radians));

		setfillcolor(GREEN);
		fillcircle(x4, y4, 10);

		setlinecolor(RED);
		setfillcolor(RED);
		fillpoly(4, new int[8]{ x1, y1, x2, y2, x3, y3, x4, y4 });

		angle += 2;
		if (angle >= 360)
		{
			angle = 0;
		}
		FlushBatchDraw();

		Sleep(20);
	}

	EndBatchDraw();
	closegraph();
	return 0;
}