一直觉得很好的一个组件,网上介绍少得可怜,没办法,只有自己爬官网了,又是对照git又是看doc文档,总算是玩明白了,现在完全抛弃那个谁谁谁了。因人喜好各取所长吧
先来官方参考地址:
这是scalar的.net 集成文档地址
https://guides.scalar.com/scalar/scalar-api-references/integrations/net-aspnet-core/integration
github地址
https://github.com/scalar/scalar
先放个图,诱惑一下,集成了很多主题,还可以自定主题(留给前端去玩吧)
一、简单使用
1.建立一个API项目,(最小,mvc都可)
2.引用包
dotnet add package Scalar.AspNetCore (当前版本2.9.0)
dotnet add package Microsoft.AspNetCore.OpenApi(当前版本10.0)
3.添加引用
using Scalar.AspNetCore;
4.添加配置,在Program.cs中添加下面配置
builder.Services.AddOpenApi();

if (app.Environment.IsDevelopment())
{
    app.MapOpenApi();
    app.MapScalarApiReference();
}
现在运行一下,看看,localhost:xxxx/scalar
是不是看到列出漂亮的界面了?
二、基本配置
1.自定义路由
不想使用/salar,可以换成自己的地址
app.MapScalarApiReference("/api-docs");
app.MapScalarApiReference("/docs");
2.多文当或版本控制
// Chain multiple documents
app.MapScalarApiReference(options =>
{
    options.AddDocument("v1", "Production API", "api/v1/openapi.json")
           .AddDocument("v2-beta", "Beta API", "api/v2-beta/openapi.json", isDefault: true)
           .AddDocument("internal", "Internal API", "internal/openapi.json");
});isDefault: true是默认打开的页面
3.自定义文档的默认调试语言app.MapScalarApiReference(options =>
{
options.WithDefaultHttpClient(ScalarTarget.CSharp, ScalarClient.HttpClient);
});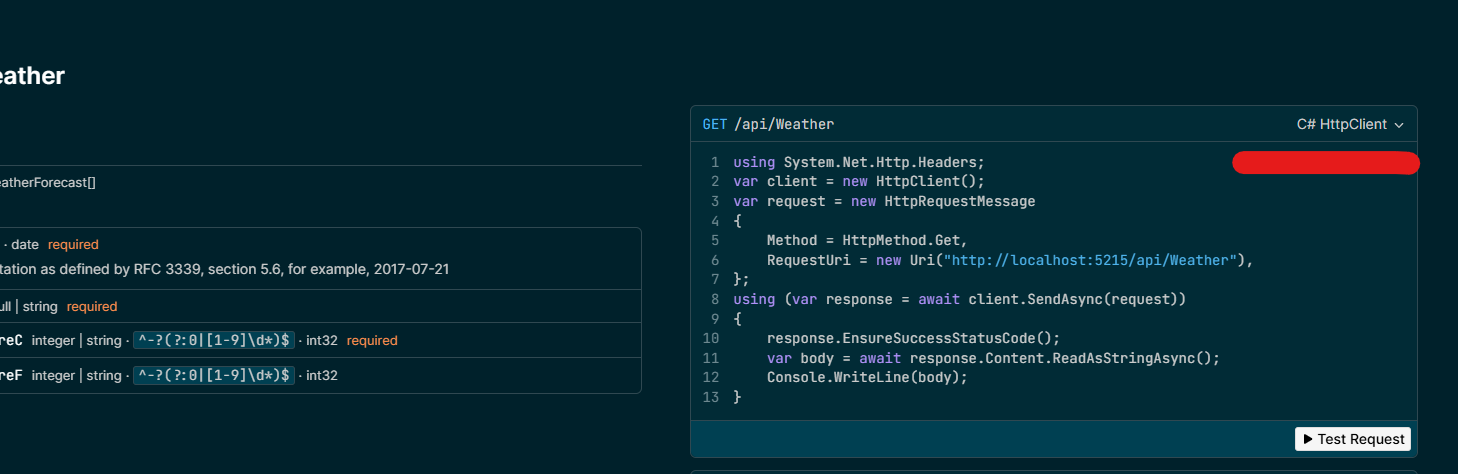
它对应右边窗口的语言,基本上都支持,java,php,rust,py,swift
三、高级配置
之前的老版本使用的硬编码option加配置,2.9.0以后,在界面右上角菜单栏上出现了一个编辑配置功能
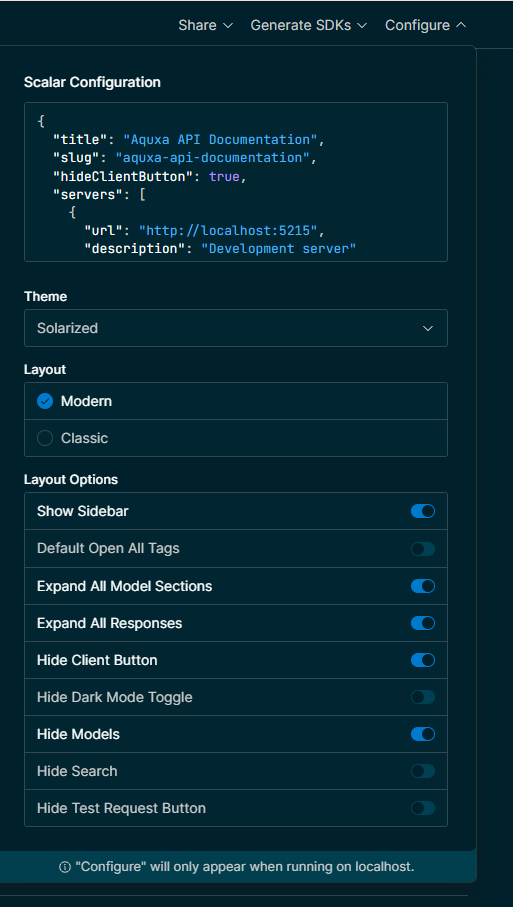
根据自己的喜好,调试编辑完配置文件后,可以复制到文件中单独保存,真是太贴心了
{
  "title": "Aquxa API Documentation",
  "slug": "aquxa-api-documentation",
  "hideClientButton": true,
  "servers": [
    {
      "url": "http://localhost:5215",
      "description": "Development server"
    }
  ],
  "showSidebar": true,
  "showToolbar": "localhost",//这里特别说明一下,编辑完后,不想出现这个菜单栏,就在这里可以关闭showToolbar: "never"
  "operationTitleSource": "summary",
  "theme": "solarized",//主题可以自己选,喜欢哪个选哪个
  "_integration": "dotnet",
  "persistAuth": false,
  "telemetry": true,
  "layout": "modern",
  "isEditable": false,
  "isLoading": false,
  "hideModels": true,
  "documentDownloadType": "both",
  "hideTestRequestButton": false,
  "hideSearch": false,
  "showOperationId": false,
  "hideDarkModeToggle": false,
  "favicon": "favicon.svg",
  "withDefaultFonts": true,
  "defaultOpenAllTags": false,
  "expandAllModelSections": true,
  "expandAllResponses": true,
  "orderSchemaPropertiesBy": "alpha",
  "orderRequiredPropertiesFirst": true,
  "url": "http://localhost:5215/openapi/v1.json"
}PS:这里特别说明一下,编辑完后,不想出现这个菜单栏,就在这里可以关闭showToolbar: "never"
得到这个文件,保存到wwwroot/js/scalar-config.js,注意,一定要保存到能访问的静态目录里,并在program.cs添加静态目录的配置app.UseStaticFiles(). //这个要放在scalar配置的前面,不然访问不到添加配置文件加载
.WithJavaScriptConfiguration("/js/scalar-config.js") 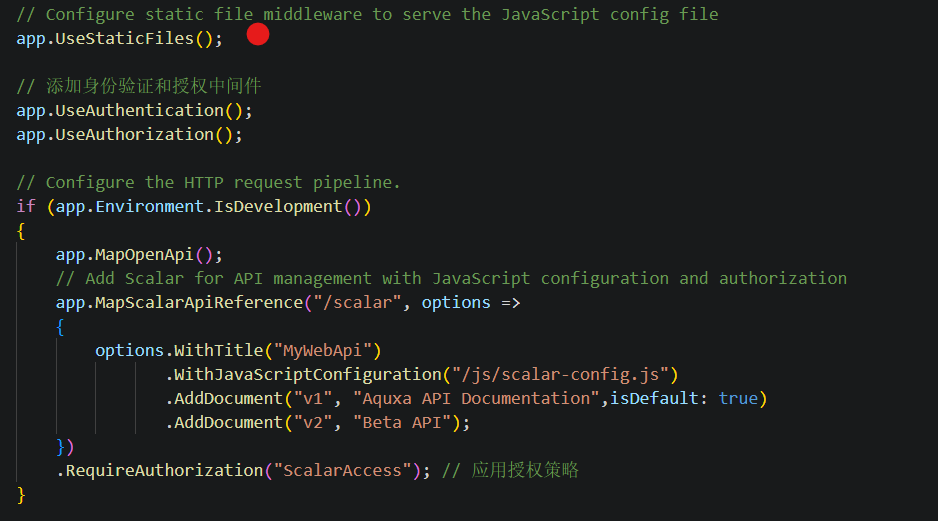
这里费了好大的劲,查官方,看代码,因为官方文档还是老文档,只是简单的概括了一下。最后整出来了
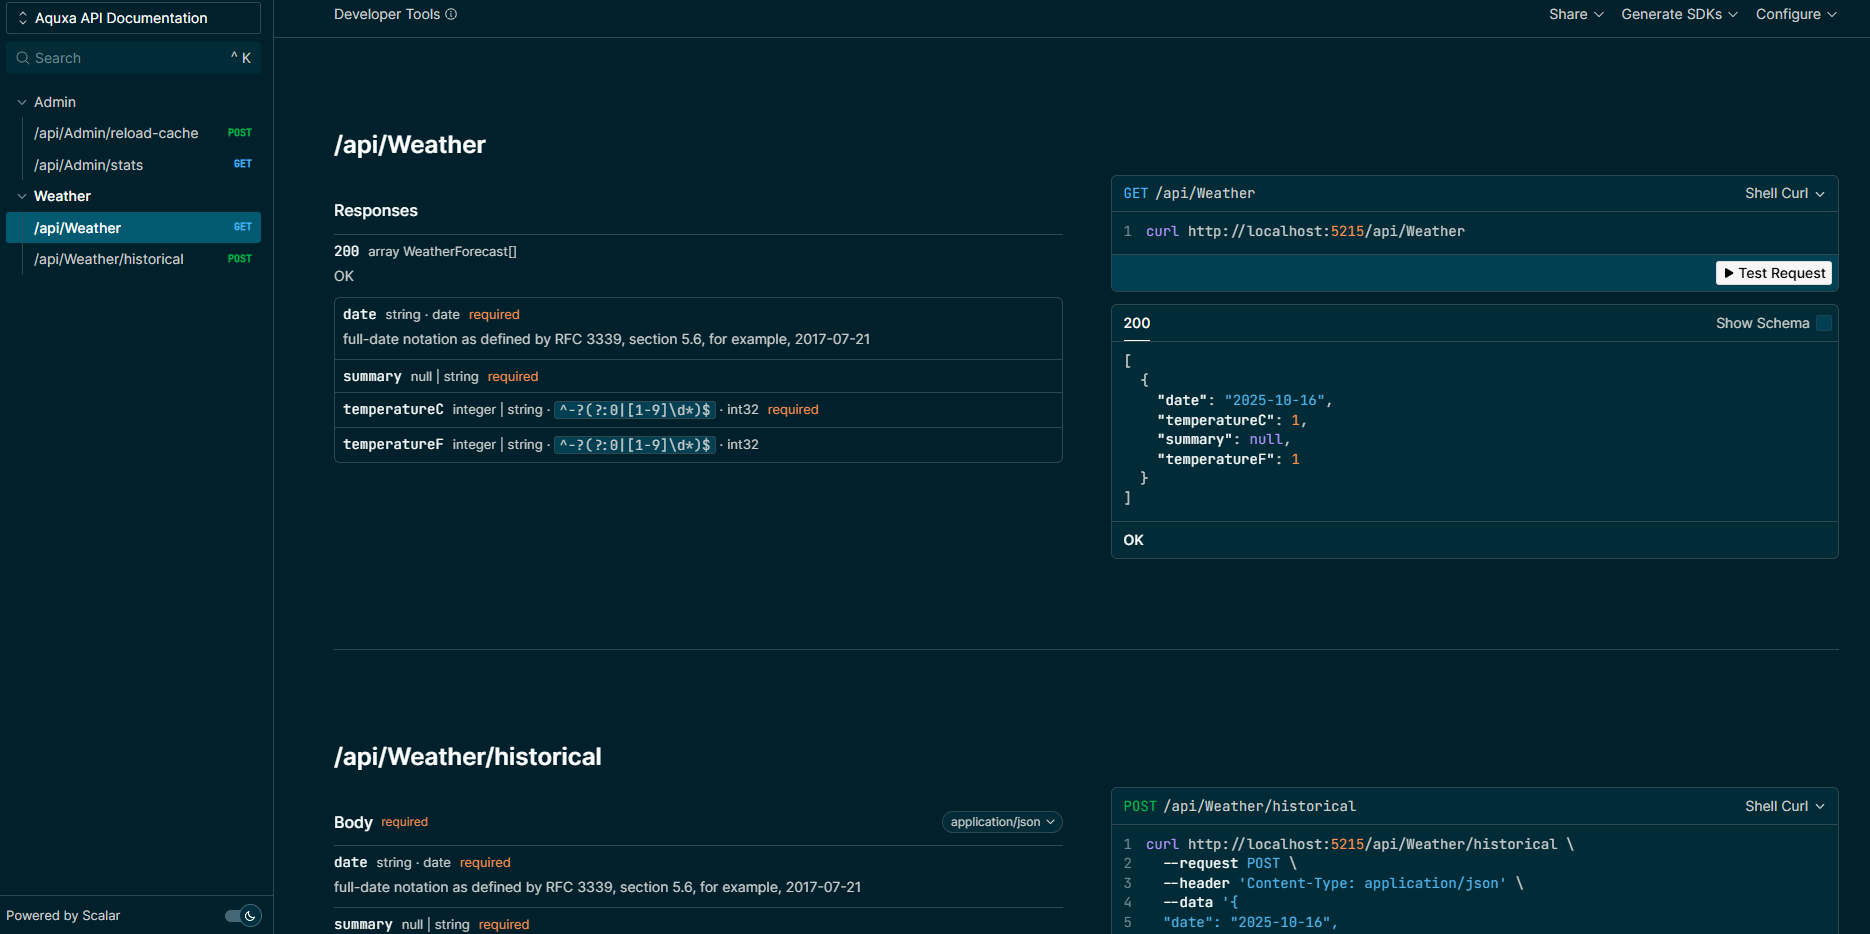
四、文档的编辑
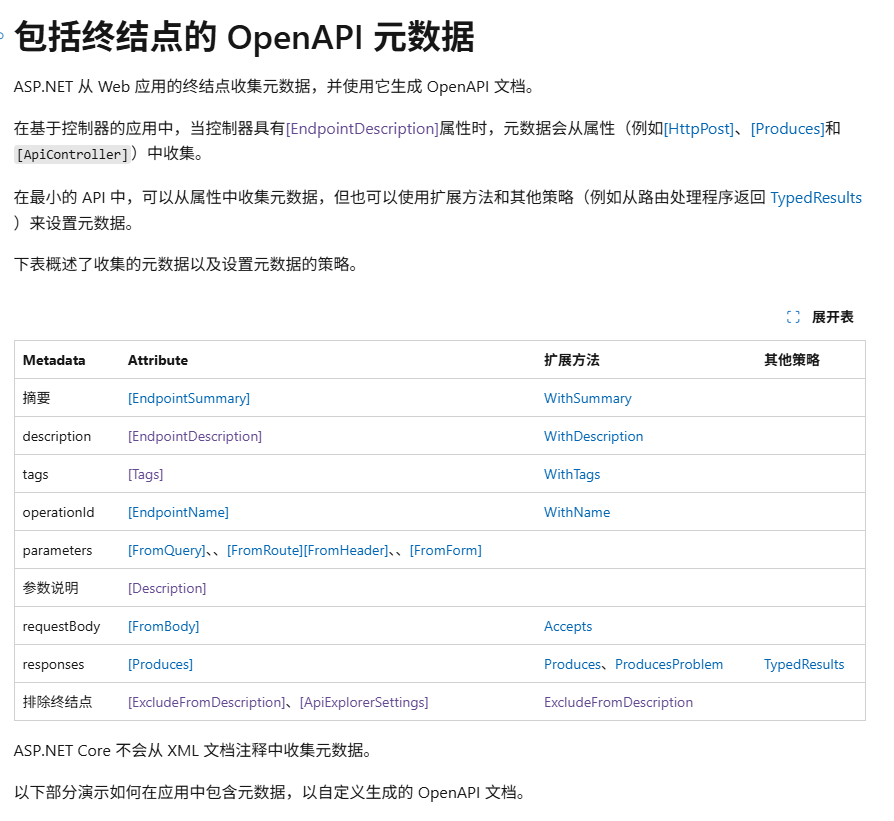
使用最重要的还是API文档编辑,其实它完全用的标准的OpenApi,只要参考这个表就可以完全配置了
[ApiController]
    [Route("api/[controller]")]
    [ApiExplorerSettings(GroupName = "v1")]
    [Tags("Admin")] // 为整个控制器添加标签
    public class AdminController : ControllerBase
    {
        [HttpPost("reload-cache")]
        public IActionResult ReloadCache()
        {
            // 模拟重新加载缓存的操作
            return Ok("Cache reloaded successfully");
        }

        [HttpGet("stats")]
        public IActionResult GetStats()
        {
            return Ok(new { Users = 100, Requests = 1000 });
        }
    }
下面说一下常用的特性
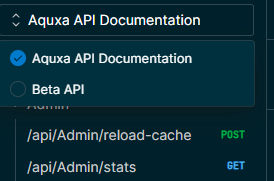
1.API分组
[ApiExplorerSettings]这个比较熟悉,它可以分组,分版本,当你分好版本后ApiExplorerSettings(GroupName = "v1")/ApiExplorerSettings(GroupName = "v2"),会在scalar中左上角可以选择,当然,你也可以把它做为组来用
如果有不想显示的API也可以用ApiExplorerSettings(IgnoreApi = true)来排除显示
[HttpGet("/private")]
[ApiExplorerSettings(IgnoreApi = true)]
public IActionResult PrivateEndpoint() {
return Ok("This is a private endpoint");
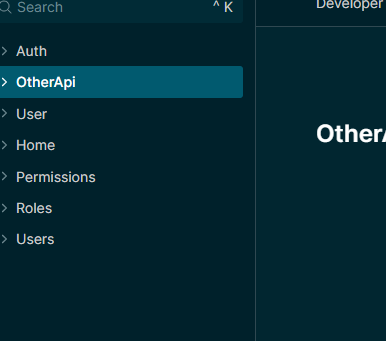
}2.API分类
[Tags]分类的API,会归档在一起,方便查询,这样看起来没有那么乱了
[Tags(["Admin", "OtherAPI"])]
[HttpGet("attributes")]
public IResult Attributes()
{
    return Results.Ok("Hello world!");
}
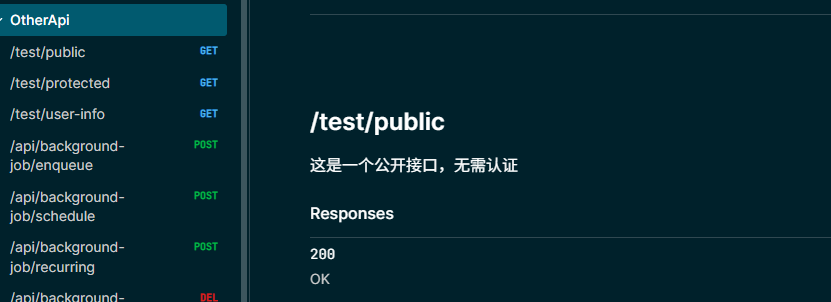
3.描述
[EndpointSummary("OtherApi")]
[EndpointDescription("这是一个公开接口,无需认证")]
[HttpGet("attributes")]
public IResult Attributes()
{
    return Results.Ok("Hello world!");
}
更多编辑文档就看这里吧
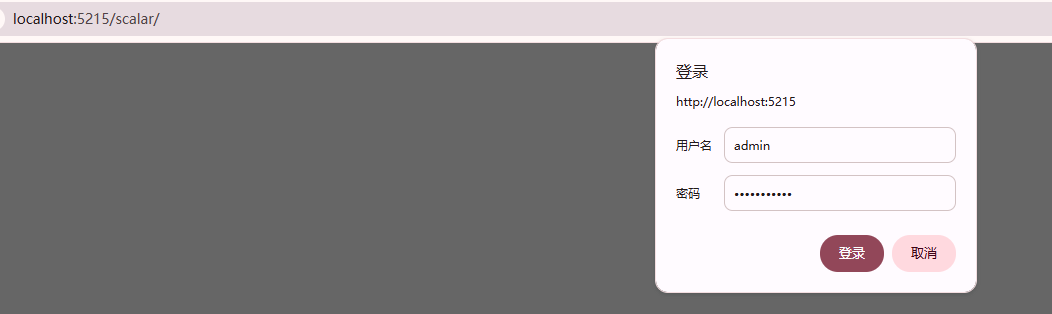
五、认证授权
这里就使用自己的授权就可以,这里就偷懒找AI完成了。参考部分都有备注
using Scalar.AspNetCore;
using Microsoft.AspNetCore.Authentication;
using Microsoft.Extensions.Options;
using System.Security.Claims;
using System.Text.Encodings.Web;
using Microsoft.AspNetCore.Mvc;
using MyWebApi; // 添加对WeatherForecast的引用

var builder = WebApplication.CreateBuilder(args);

// Add services to the container.
// Learn more about configuring OpenAPI at https://aka.ms/aspnet/openapi
builder.Services.AddOpenApi("v1");
builder.Services.AddOpenApi("v2");
// 添加控制器服务
builder.Services.AddControllers();

// 添加身份验证服务
builder.Services.AddAuthentication("BasicAuthentication")
    .AddScheme<AuthenticationSchemeOptions, BasicAuthenticationHandler>("BasicAuthentication", null);

// 添加授权服务
builder.Services.AddAuthorization(options =>
{
    options.AddPolicy("ScalarAccess", policy => policy.RequireAuthenticatedUser());
});

// 配置服务器URL,避免端口冲突
builder.WebHost.UseUrls("http://localhost:5215");
var app = builder.Build();

// Configure static file middleware to serve the JavaScript config file
app.UseStaticFiles();

// 添加身份验证和授权中间件
app.UseAuthentication();
app.UseAuthorization();

// Configure the HTTP request pipeline.
if (app.Environment.IsDevelopment())
{
    app.MapOpenApi();
    // Add Scalar for API management with JavaScript configuration and authorization
    app.MapScalarApiReference("/scalar", options =>
    {
        options.WithTitle("MyWebApi")
               .WithJavaScriptConfiguration("/js/scalar-config.js")
               .AddDocument("v1", "Aquxa API Documentation",isDefault: true)
               .AddDocument("v2", "Beta API");
    })
    .RequireAuthorization("ScalarAccess"); // 应用授权策略
}

// 添加控制器路由
app.MapControllers();

app.Run();

// Basic Authentication Handler
public class BasicAuthenticationHandler : AuthenticationHandler<AuthenticationSchemeOptions>
{
    public BasicAuthenticationHandler(
        IOptionsMonitor<AuthenticationSchemeOptions> options,
        ILoggerFactory logger,
        UrlEncoder encoder)
        : base(options, logger, encoder)
    {
    }

    protected override async Task<AuthenticateResult> HandleAuthenticateAsync()
    {
        // 检查是否有Authorization头
        if (!Request.Headers.ContainsKey("Authorization"))
            return AuthenticateResult.NoResult();

        try
        {
            // 解析Basic认证头
            var authHeader = Request.Headers["Authorization"].ToString();
            if (!authHeader.StartsWith("Basic "))
                return AuthenticateResult.NoResult();

            var encodedCredentials = authHeader.Substring("Basic ".Length).Trim();
            var decodedCredentials = System.Text.Encoding.UTF8.GetString(Convert.FromBase64String(encodedCredentials));
            var credentials = decodedCredentials.Split(':', 2);

            var username = credentials[0];
            var password = credentials[1];

            // 验证用户名和密码(这里使用硬编码,实际应用中应从配置或数据库获取)
            if (username == "admin" && password == "password123")
            {
                var claims = new[] { new Claim(ClaimTypes.Name, username) };
                var identity = new ClaimsIdentity(claims, Scheme.Name);
                var principal = new ClaimsPrincipal(identity);
                var ticket = new AuthenticationTicket(principal, Scheme.Name);

                return AuthenticateResult.Success(ticket);
            }

            return AuthenticateResult.Fail("Invalid username or password");
        }
        catch
        {
            return AuthenticateResult.Fail("Invalid Authorization Header");
        }
    }

    protected override async Task HandleChallengeAsync(AuthenticationProperties properties)
    {
        // 发送WWW-Authenticate头以触发浏览器的认证对话框
        Response.Headers["WWW-Authenticate"] = "Basic realm=\"Scalar API Documentation\"";
        await base.HandleChallengeAsync(properties);
    }
}