安装mongoose
shell
npm install mongoose --savetypescript:
不需要 单独安装 @types/mongoose,因为从 Mongoose 5.11.0 版本开始,Mongoose 官方已经内置了对 TypeScript 的支持,提供了自己的 index.d.ts 类型定义文件。
nodejs,express项目中使用mongoose
js
const express = require('express')
const mongoose = require('mongoose')

const app = express()

const DB = 'mongodb://localhost:27017/test'
// 这里的connect方法返回一个promise
mongoose
  .connect(DB)
  .then(() => {
    console.log('MongoDB connection successfully 👍')
  })
  .catch((error) => {
    console.log(error)
  })

const port = 3000
app.listen(port, 'localhost', () => {
  console.log('App running at http://localhost:3000 👍')
})
注意点:
- mongodb数据库的url比较特殊,他有自己的协议叫
mongodb,所以要写成:
shell
mongodb://localhost:27017/testmongoose.connect()函数返回promise,所以我们可以得到成功和拒绝的状态。
开始学习mongoose
首先建一个目录,叫models,可以在这里定义要映射到数据库的代码。因为mongodb不需要提前建表(集合),所以我们在这里想怎么建就怎么建:
user.js:
js
const { Schema, model } = require('mongoose')
/**
* 定义 Schema:
* Schema 定义了 MongoDB 集合中文档的结构和数据类型,类似于数据库表的蓝图。
* 不能直接用来操作数据库,但用于创建 Model。
*/
const userSchema = new Schema(
{
username: {
type: String, // 注意,大写的String,不是typescript中的小写string
required: true,
unique: true,
},
password: {
type: String,
required: true,
},
email: String,
},
{
timestamps: true, // 自动添加 createdAt 和 updatedAt 字段
},
)
/**
* 定义 Model:
* Model 是一个基于 Schema 的构造函数,用于创建和操作 MongoDB 中的文档。
* 每个 Model 对应 MongoDB 中的一个集合(collection)。
*/
const User = model('User', userSchema)
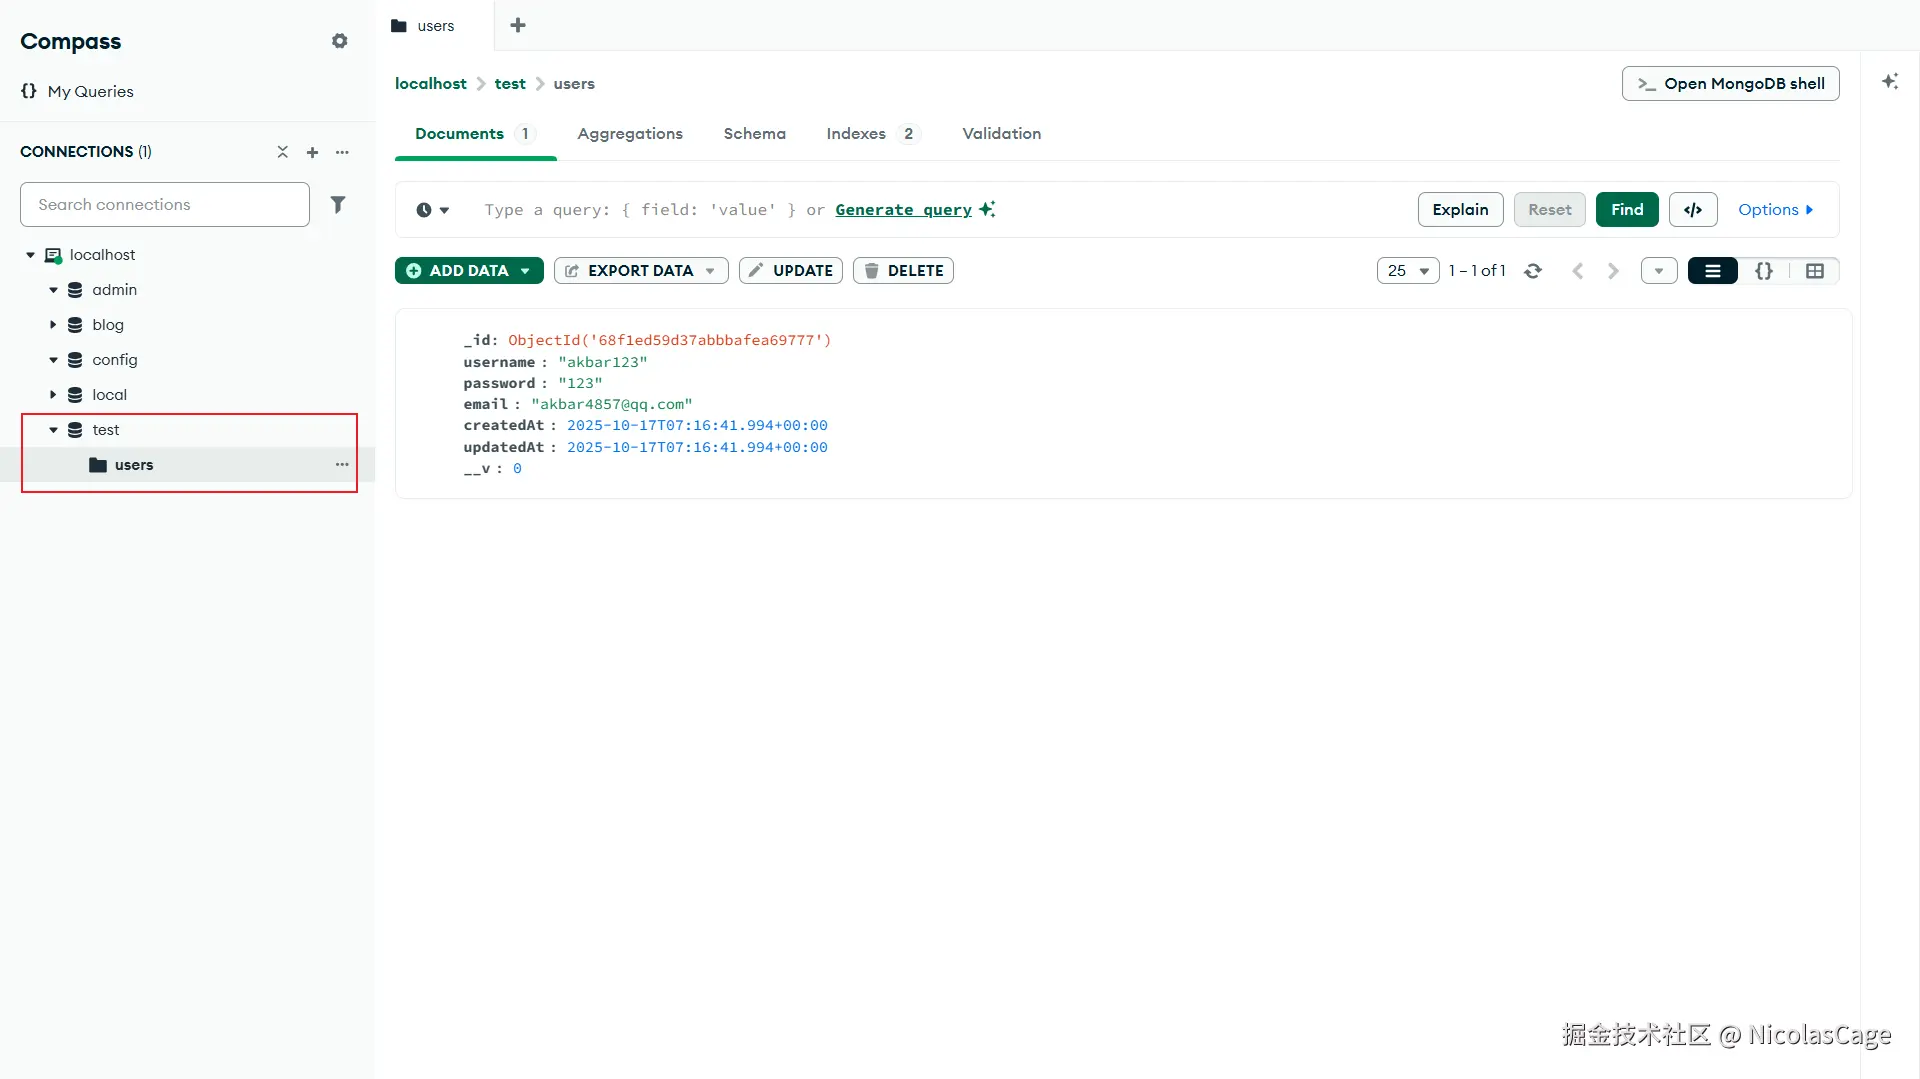
module.exports = Usermongoose.model('User', userSchema)这里的User是什么东西?
- 'User' 是一个字符串,指定了 MongoDB 数据库中集合的名称。
- Mongoose 会根据这个名称在 MongoDB 中查找或创建对应的集合。通常,Mongoose 会将模型名称转换为小写并加上复数形式(如果适用)。例如,'User' 对应的集合名称通常是 users(MongoDB 集合名称通常是小写复数)。
- 这个集合将存储所有基于 userSchema 定义的文档(documents)。每个文档代表一个用户,包含 username、password、email 等字段。
然后插入数据:
js
const { Router } = require('express')
const User = require('../models/user')

const router = Router()

// 添加用户
router.post('/users', async (req, res) => {
  try {
    const newUser = req.body
    // 使用 User 模型创建一个文档实例
    const user = User(newUser)
    // save函数返回一个 Promise。如果 save() 成功,Promise 会解析为保存的文档。
    const savedUser = await user.save(newUser)

    res.json({
      message: 'success',
      data: savedUser,
    })
  } catch (error) {
    res.status(400).json({
      message: 'failed',
      error: error,
    })
  }
})

module.exports = router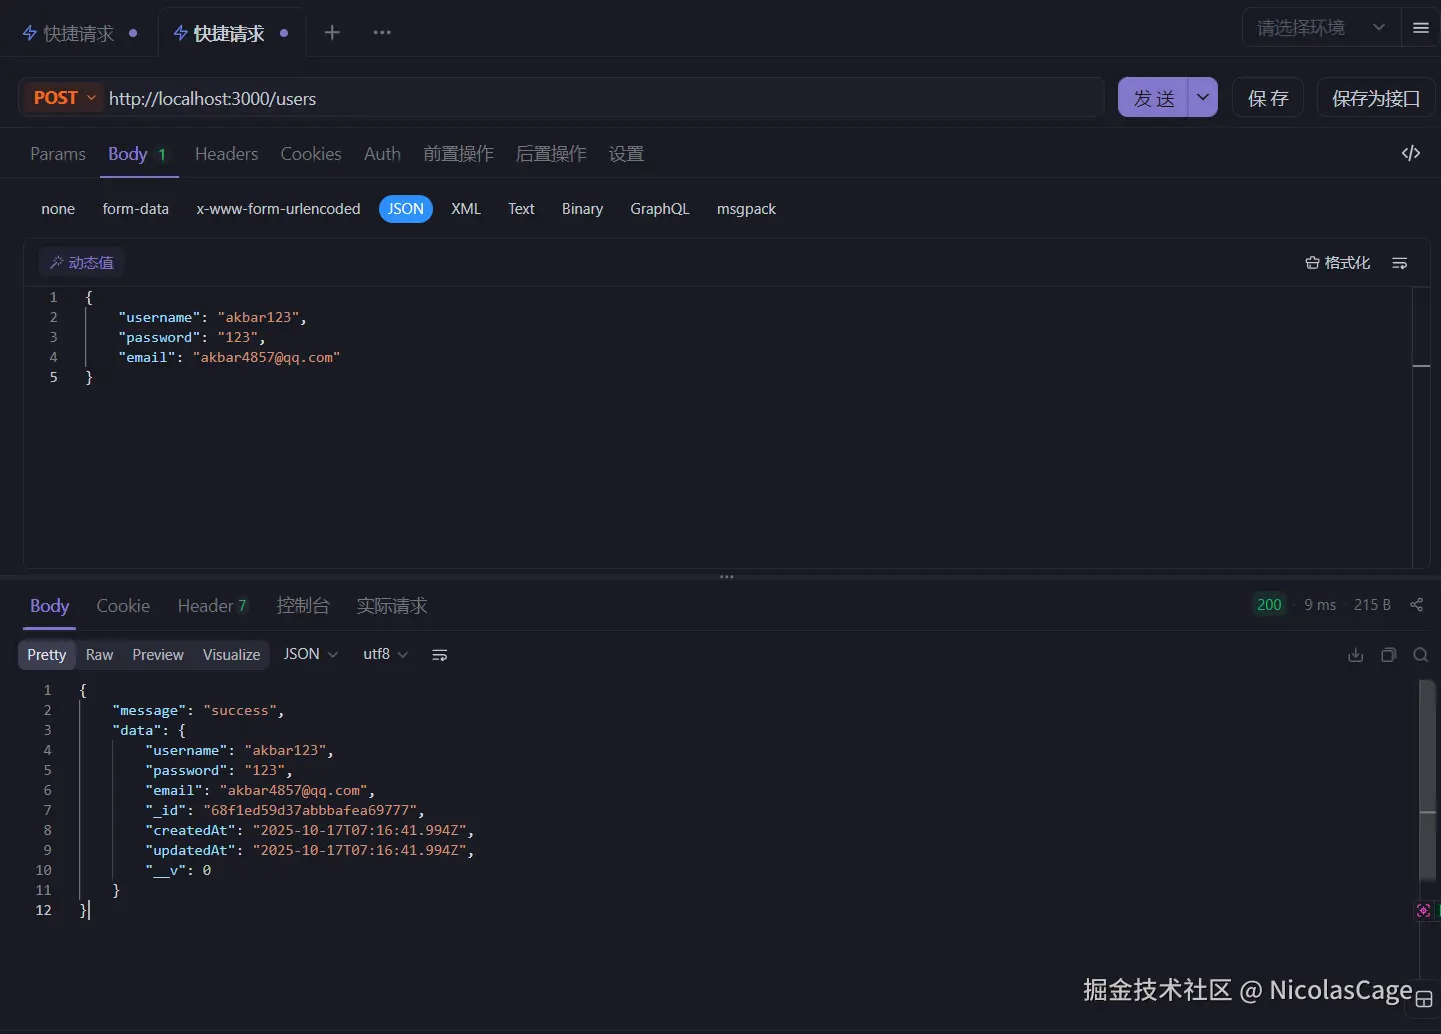
mongoose常用的内置函数
1️⃣ save() ------ 保存文档实例
比如上面讲过的示例:
js
// 添加用户
router.post('/users', async (req, res) => {
  try {
    const newUser = req.body
    const user = User(newUser)
    // save函数返回一个 Promise。如果 save() 成功,Promise 会解析为保存的文档。
    const savedUser = await user.save(newUser)

    res.json({
      message: 'success',
      data: savedUser,
    })
  } catch (error) {
    res.status(400).json({
      message: 'failed',
      error: error,
    })
  }
})
✅ 要点
- 只能在"文档实例"上调用,而不是模型本身。
- 如果是新文档,会触发
insert;如果是已存在的,会执行update。 - 会触发 Mongoose 中定义的中间件(middleware) (例如
pre('save')、post('save'))。
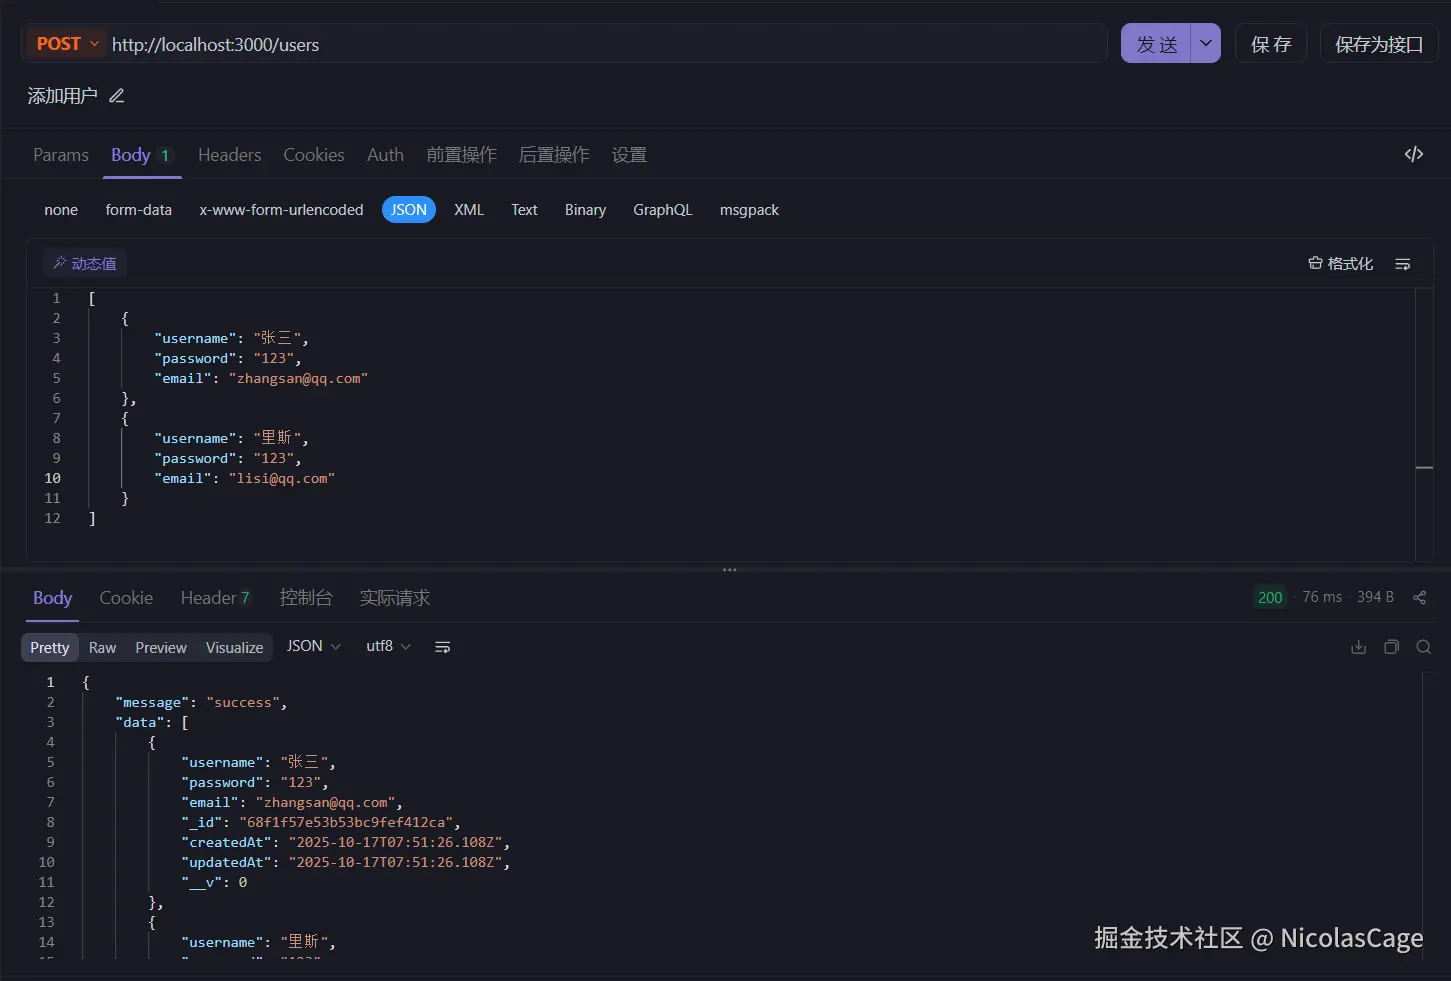
2️⃣ create() ------ 直接创建并保存
官方文档:mongoose.node.org.cn/docs/api/mo...
功能:一步完成"实例化 + 保存"。
js
// 创建用户
router.post('/users', async (req, res) => {
  try {
    // create() 相当于 new + save()
    const createdUser = await User.create(req.body)

    res.json({
      message: 'success',
      data: createdUser,
    })
  } catch (error) {
    res.status(400).json({
      message: 'failed',
      error: error,
    })
  }
})
✅ 要点
- 推荐在直接创建新文档时使用。
- 自动触发验证(validation)与中间件。
- 支持批量创建:
User.create([{}, {}, ...])。
3️⃣ findById() ------ 根据 _id 查询
官方文档:mongoose.node.org.cn/docs/api/mo...
比如请求url:http://localhost:3000/users/68f1f4e43ad19870bd3906b1
js
// 根据id获取用户
router.get('/users/:id', async (req, res) => {
  try {
    const user = await User.findById(req.params.id)
    // 如果用户不存在
    if (!user) return res.status(404).json({ message: '没找到这个用户' })

    res.json({ message: 'success', data: user })
  } catch (error) {
    res.status(400).json({
      message: 'failed',
      error: error,
    })
  }
})
✅ 要点
- 自动将字符串 ID 转为
ObjectId。 - 如果 ID 无效,可能抛出
CastError。
4️⃣ findOne() ------ 查询单个文档
官方文档:mongoose.node.org.cn/docs/api/mo...
js
// 根据用户名查询用户
router.get('/users', async (req, res) => {
  try {
    const user = await User.findOne({ username: req.query.username })
    // 如果用户不存在
    if (!user) return res.status(404).json({ message: '没找到这个用户' })

    res.json({ message: 'success', data: user })
  } catch (error) {
    res.status(400).json({
      message: 'failed',
      error: error,
    })
  }
})
✅ 要点
- 返回单个文档对象或
null。 - 如果你只需要一条结果,性能比
find()更好。
5️⃣find() ------ 查询多个文档
官方文档:mongoose.node.org.cn/docs/api/mo...
js
// 查询所有用户
router.get('/users', async (req, res) => {
  try {
    console.log(req)
    const users = await User.find()

    res.json({ message: 'success', data: users })
  } catch (error) {
    res.status(400).json({
      message: 'failed',
      error: error,
    })
  }
})
✅ 要点
- 返回一个数组(即使只有一个文档)。
- 支持条件:
User.find({ age: { $gte: 18 } }) - 可以链式调用:
.sort(),.limit(),.select()等。
6️⃣ findByIdAndUpdate() ------ 查找并更新
官方文档:mongoose.node.org.cn/docs/api/mo...
js
// 查找并更新
router.put('/users/:id', async (req, res) => {
  try {
    console.log(req)
    const updatedUser = await User.findByIdAndUpdate(
      req.params.id,
      req.body,
      { new: true, runValidators: true } // 返回更新后的文档 + 启用验证
    )

    if (!updatedUser) return res.status(404).json({ message: 'User not found' })

    res.json({ message: 'success', data: updatedUser })
  } catch (error) {
    res.status(400).json({ message: 'failed', error: error.message })
  }
})
✅ 要点
{ new: true }表示返回更新后的文档。{ runValidators: true }开启数据验证。- 不会触发
save()中间件。
7️⃣ findByIdAndDelete() ------ 查找并删除
官方文档:mongoose.node.org.cn/docs/api/mo...
js
// 删除用户
router.delete('/users/:id', async (req, res) => {
  try {
    const deletedUser = await User.findByIdAndDelete(req.params.id)

    if (!deletedUser) return res.status(404).json({ message: 'User not found' })

    res.json({ message: 'success', data: deletedUser })
  } catch (error) {
    res.status(400).json({ message: 'failed', error: error.message })
  }
})
✅ 要点
- 返回被删除的文档(如果存在)。
- 不会触发
remove()或deleteOne()的中间件。
8️⃣ countDocuments() ------ 统计数量
官方文档:mongoose.node.org.cn/docs/api/mo...
js
router.get('/users/count', async (req, res) => {
  try {
    const count = await User.countDocuments({ age: { $gte: 18 } })
    res.json({ message: 'success', data: count })
  } catch (error) {
    res.status(500).json({ message: 'failed', error: error.message })
  }
})
✅ 要点
- 常用于分页、统计。
- 比
estimatedDocumentCount()更精确(但略慢)。
9️⃣ deleteMany() ------ 批量删除
官方文档:mongoose.node.org.cn/docs/api/mo...
js
router.delete('/users', async (req, res) => {
  try {
    const result = await User.deleteMany({ active: false })
    res.json({ message: 'success', data: result })
  } catch (error) {
    res.status(500).json({ message: 'failed', error: error.message })
  }
})
✅ 要点
- 返回
{ acknowledged: true, deletedCount: X }。 - 不会触发
remove()钩子。
1️⃣0️⃣ 分页查询
js
// ✅ 分页查询所有用户
router.get('/users', async (req, res) => {
  try {
    // 从查询参数中获取分页参数
    // 前端传 ?page=2&limit=5
    const page = parseInt(req.query.page) || 1        // 当前页码,默认为 1
    const limit = parseInt(req.query.limit) || 10     // 每页条数,默认为 10

    // 计算要跳过多少条数据
    // 比如页数是2时:(2-1)*10,跳过10个,就是上面一页中的数据
    const skip = (page - 1) * limit

    // 查询用户列表,使用 skip 和 limit 实现分页
    const users = await User.find()
      .skip(skip)     // 跳过前面几条
      .limit(limit)   // 只取本页的数量
      .sort({ createdAt: -1 }) // 可选:按创建时间倒序排序

    // 获取总数,用于计算总页数
    const total = await User.countDocuments()

    res.json({
      message: 'success',
      data: users,
      pagination: {
        total,              // 总记录数
        page,               // 当前页
        limit,              // 每页条数
        totalPages: Math.ceil(total / limit), // 总页数
      },
    })
  } catch (error) {
    res.status(400).json({
      message: 'failed',
      error,
    })
  }
})
条件分页示例:
js
const { page = 1, limit = 10, keyword = '' } = req.query
const filter = keyword ? { name: new RegExp(keyword, 'i') } : {}
const users = await User.find(filter)
  .skip((page - 1) * limit)
  .limit(limit)
时间戳
官方文档:mongoose.node.org.cn/docs/timest...
Mongoose 模式支持 timestamps 选项。如果设置 timestamps: true,Mongoose 会在你的模式中添加两个类型为 Date 的属性
createdAt: 表示该文档创建时间的一个日期updatedAt: 表示该文档最后更新时间的一个日期
Mongoose 随后会在文档首次插入时设置 createdAt,并在你使用 save()、updateOne()、updateMany()、findOneAndUpdate()、update()、replaceOne() 或 bulkWrite() 更新文档时更新 updatedAt。
js
const userSchema = new Schema(
  {
    username: {
      type: String, // 注意,大写的String,不是typescript中的小写string
      required: true,
      unique: true,
    },
    password: {
      type: String,
      required: true,
    },
    email: String,
  },
  {
    timestamps: true, // 自动添加 createdAt 和 updatedAt 字段
  },
)
中间件
预处理中间件
官方文档:mongoose.nodejs.cn/docs/middle...
1. 密码加密示例
js
const userSchema = new Schema(
  {
    username: {
      type: String, // 注意,大写的String,不是typescript中的小写string
      required: true,
      unique: true,
    },
    password: {
      type: String,
      required: true,
    },
    email: String,
  },
  {
    timestamps: true, // 自动添加 createdAt 和 updatedAt 字段
  },
)

// 在执行save操作之前执行
userSchema.pre('save', async function (next) {
  // 如果修改的不是密码,就不用管
  if (!this.isModified('password')) return next()

  // 进行加密
  this.password = await bcrypt.hash(this.password, 12)
})
解释:
js
userSchema.pre('save', ...)- 这个函数会在 每次执行
user.save()或User.create()之前 自动运行。
js
userSchema.pre('save', async function (next) {- 注册一个 "save" 操作的前置中间件。
- 注意这里用的是普通函数
function(),不是箭头函数,因为:- Mongoose 会把
this绑定为当前文档实例。 - 如果用箭头函数,
this就不会指向文档了。
- Mongoose 会把
js
if (!this.isModified('password')) return next()this表示当前要保存的文档对象(例如一个User实例)。.isModified('password')是 Mongoose 的内置方法,详情请看isModified。用来检测该字段是否被修改过。
实例方法
Models 的实例是documents。文档有很多自己的实例方法,比如我们前面用的save()。我们还可以定义自己的自定义文档实例方法。
比如:
js
// 验证密码
userSchema.methods.correctPassword = function (candidatePassword, userPassword) {
  return bcrypt.compare(candidatePassword, userPassword)
}

// 调用
const user = new User()
user.correctPassword(两个参数)