一、技术栈
vue3 + Pina +Typescript + webSocket + Nest + Mysql + Redis + prisma + socket.io
体验地址:摸鱼聊天室
二、效果图


三、前端功能点
1、主题色修改

vue
<template>
<t-color-picker
    v-model="formData.brandTheme"
    :color-modes="['monochrome']"
    format="HEX"
    :on-change="toggleBrandTheme"
  />
</template>
<script lang="ts" setup>
import { useSettingStore } from '@/store';
const settingStore = useSettingStore();
const toggleBrandTheme = () => {
    settingStore.updateConfig({ ...formData.value });
}
</script>
ts
import { Color } from 'tvision-color';

type ModeType = 'dark' | 'light';
type TColorToken = Record<string, string>;
type TColorSeries = Record<string, TColorToken>;

interface State {
    mode: ModeType
    colorList: TColorSeries;
}
export const useSettingStore = defineStore('setting', {
    state: (): State => {
       mode: 'light',
       colorList: {}
    },
    getters: {
      displayMode: (): ModeType => {
          return this.mode;
      }
    },
    changeBrandTheme(brandTheme: string) {
        const mode = this.displayMode;
        // 以主题色加显示模式作为键
        const colorKey = `${brandTheme}[${mode}]`;
        let colorMap = this.colorList[colorKey];
        if (colorMap === undefined) {
          const [{ colors: newPalette, primary: brandColorIndex }] = Color.getColorGradations({
            colors: [brandTheme],
            step: 10,
            remainInput: false, // 是否保留输入 不保留会矫正不合适的主题色
          });

          colorMap = generateColorMap(brandTheme, newPalette, mode, brandColorIndex);
          this.colorList[colorKey] = colorMap;
        }

        insertThemeStylesheet(brandTheme, colorMap, mode);
        document.documentElement.setAttribute('theme-color', brandTheme);
    },
    updateConfig(payload: { brandTheme?: string, mode?: string, }) {
        for (const key in payload) {
             if (key === 'brandTheme') {
                 this.changeBrandTheme(payload[key]);
             }
        }
    }
})
typescript
/**
 * 根据当前主题色、模式等情景 计算最后生成的色阶
 */
export function generateColorMap(theme: string, colorPalette: Array<string>, mode: ModeType, brandColorIdx: number) {
  const isDarkMode = mode === 'dark';

  if (isDarkMode) {
    colorPalette.reverse().map((color) => {
      const [h, s, l] = Color.colorTransform(color, 'hex', 'hsl');
      return Color.colorTransform([h, Number(s) - 4, l], 'hsl', 'hex');
    });
    brandColorIdx = 5;
    colorPalette[0] = `${colorPalette[brandColorIdx]}20`;
  }

  const colorMap: TColorToken = {
    '--td-brand-color': colorPalette[brandColorIdx], // 主题色
    '--td-brand-color-1': colorPalette[0], // light
    '--td-brand-color-2': colorPalette[1], // focus
    '--td-brand-color-3': colorPalette[2], // disabled
    '--td-brand-color-4': colorPalette[3],
    '--td-brand-color-5': colorPalette[4],
    '--td-brand-color-6': colorPalette[5],
    '--td-brand-color-7': brandColorIdx > 0 ? colorPalette[brandColorIdx - 1] : theme, // hover
    '--td-brand-color-8': colorPalette[brandColorIdx], // 主题色
    '--td-brand-color-9': brandColorIdx > 8 ? theme : colorPalette[brandColorIdx + 1], // click
    '--td-brand-color-10': colorPalette[9],
  };
  return colorMap;
}

/**
 * 将生成的样式嵌入头部
 */
export function insertThemeStylesheet(theme: string, colorMap: TColorToken, mode: ModeType) {
  const isDarkMode = mode === 'dark';
  const root = !isDarkMode ? `:root[theme-color='${theme}']` : `:root[theme-color='${theme}'][theme-mode='dark']`;

  const styleSheet = document.createElement('style');
  styleSheet.type = 'text/css';
  styleSheet.textContent = `${root}{
    --td-brand-color: ${colorMap['--td-brand-color']};
    --td-brand-color-1: ${colorMap['--td-brand-color-1']};
    --td-brand-color-2: ${colorMap['--td-brand-color-2']};
    --td-brand-color-3: ${colorMap['--td-brand-color-3']};
    --td-brand-color-4: ${colorMap['--td-brand-color-4']};
    --td-brand-color-5: ${colorMap['--td-brand-color-5']};
    --td-brand-color-6: ${colorMap['--td-brand-color-6']};
    --td-brand-color-7: ${colorMap['--td-brand-color-7']};
    --td-brand-color-8: ${colorMap['--td-brand-color-8']};
    --td-brand-color-9: ${colorMap['--td-brand-color-9']};
    --td-brand-color-10: ${colorMap['--td-brand-color-10']};
  }`;

  document.head.appendChild(styleSheet);
}
2、暗黑模式切换

vue
<template>
  <t-tooltip :content="formData.mode !== 'light' ? '黑夜' : '白天'" placement="right">
      <t-button theme="default" shape="square" @click="toggleMode">
        <t-icon :name="formData.mode !== 'light' ? 'mode-light' : 'mode-dark'" />
      </t-button>
    </t-tooltip>
</template>
<script lang="ts" setup>
import { useSettingStore } from '@/store';
const settingStore = useSettingStore();
const toggleMode = () => {
  formData.value.mode = formData.value.mode === 'light' ? 'dark' : 'light';
  settingStore.updateConfig({ ...formData.value });
};
</script>
typescript
import { Color } from 'tvision-color';

type ModeType = 'dark' | 'light';
type TColorToken = Record<string, string>;
type TColorSeries = Record<string, TColorToken>;

interface State {
    mode: ModeType
    colorList: TColorSeries;
}
export const useSettingStore = defineStore('setting', {
    state: (): State => {
       mode: 'light',
       colorList: {}
    },
    getters: {
      displayMode: (): ModeType => {
          return this.mode;
      }
    },
    async changeMode(mode: ModeType) {
        let theme = mode;
        const isDarkMode = theme === 'dark';
        document.documentElement.setAttribute('theme-mode', isDarkMode ? 'dark' : '');
    },
    updateConfig(payload: { brandTheme?: string, mode?: string, }) {
        for (const key in payload) {
             if (key === 'brandTheme') {
                 this.changeBrandTheme(payload[key]);
             }

             if (key === 'mode') {
               this.changeMode(payload[key] as ModeType);
             }
        }
    }
})
3、随机头像

vue
<template>
    <div class="ava" v-html="getRamdonPic(user)"></div>
</template>
<script setup lang="ts">
import type { UserInfo } from '@/api/model/user';
import { useRandomPic } from '@/hooks';

const getRamdonPic = (row: UserInfo) => {
  const { getPic } = useRandomPic(row.nickName);
  return getPic();
};
</script>
typescript
import multiavatar from '@multiavatar/multiavatar/esm';
export const useRandomPic = (name: string, timeStamp?: boolean) => {
  let randomId = `avatar_${name}}`;
  if (timeStamp) {
    randomId = `${randomId}_${new Date().getTime()}`;
  }

  const getPic = () => {
    // @ts-ignore
    return multiavatar(randomId);
  };
  return {
    getPic,
  };
};
4、webSocket 使用
typescript
import { io } from 'socket.io-client';

// 启动 websocket
startSocket(userId: string) {
  if (!this.socket) {
    this.socket = io(domain);
    this.socket.on('connect', () => {
      this.socket.emit('join', userId);

      // 监听
      this.socket.on('message', (payload: { [key: string]: any }) => {
        // 加入聊天室
        if (payload.type === 'joinRoom') {
          if (+payload.userId !== +userId && payload.chatroomName) {
            MessagePlugin.success({
              content: `${payload.nickName} 加入了${payload.chatroomName}`,
              placement: 'top-right',
            });
          }
        }

        // 发送消息
        if (payload.type === 'sendMessage') {
          const { sendUserId, chatroomId, message, chatType } = payload;
          const { content } = message;
        }

        // 好友申请
        if (payload.type === 'addFriendRequest') {
          MessagePlugin.success({
            content: `${payload.data.nickName} 向您发送了好友申请`,
            placement: 'top',
          });
        }

        // 好友通过/拒绝
        if (payload.type === 'friendRequest') {
          if (payload.data.status === 1) {
            MessagePlugin.success({
              content: `${payload.data.nickName} 同意了您的好友申请`,
              placement: 'top',
            });
          } else if (payload.data.status === 2) {
            MessagePlugin.error({
              content: `${payload.data.nickName} 拒绝了您的好友申请`,
              placement: 'top',
            });
          }
        }
      });
    });
  }
}
四、后端功能点
1、redis 使用
案例:模拟注册校验验证码是否正确

- 配置 redis
typescript
// redis.module.ts

import { Global, Module } from '@nestjs/common';
import { RedisService } from './redis.service';
import { createClient } from 'redis';

@Global()
@Module({
  providers: [
    RedisService,
    {
      provide: 'REDIS_CLIENT',
      async useFactory() {
        const client = createClient({
            socket: {
                host: 'localhost',
                port: 6379
            },
        });
        await client.connect();
        return client;
      }
    }
  ],
  exports: [RedisService]
})
export class RedisModule {}
typescript
// redis.service

import { Inject, Injectable } from '@nestjs/common';
import { RedisClientType } from 'redis';

@Injectable()
export class RedisService {
  @Inject('REDIS_CLIENT')
  private redisClient: RedisClientType;

  async get(key: string) {
    return await this.redisClient.get(key);
  }

  async set(key: string, value: string | number, ttl?: number) {
    await this.redisClient.set(key, value);

    if (ttl) {
      await this.redisClient.expire(key, ttl);
    }
  }
}- 导入 redis
typescript
// app.module.ts

import { RedisModule } from './redis/redis.module';
@Module({
    imports:[
        RedisModule, // 导入
    ],
    controllers: [AppController],
    providers:[
        AppService
    ]
})
export class AppModule {}- 使用
typescript
import { RedisService } from 'src/redis/redis.service';
export class UserController {
  @Inject(RedisService)
  private redisService: RedisService;

  // 获取校验码
  @Get('captcha')
  async captcha(@Query('email') email: string) {
     const code = Math.random().toString().slice(0, 8);
     await this.redisService.set(`captcha_${address}`, code, 5 * 60);

     // 发送验证码
     await this.emailService.sendMail({
        to: email,
        subject: '注册验证码',
        html: `<p>你的注册验证码是 ${code}</p>`,
      });
      return '发送成功';
  }

  // 注册
  @Post('register')
  async register(@Body() registerUser: RegisterUserDto) {
      const captcha = await this.redisService.get(`captcha_${user.email}`);

      if (!captcha) {
        throw new HttpException('验证码已失效', HttpStatus.BAD_REQUEST);
      }

      if (user.captcha !== captcha) {
        throw new HttpException('验证码不正确', HttpStatus.BAD_REQUEST);
      }

      // TODO 处理注册
  }
}
2、prisma 使用
案例:获取当前用户信息

- 定义 prisma
typescript
// prisma.module.ts

import { Global, Module } from '@nestjs/common';
import { PrismaService } from './prisma.service';

@Global()
@Module({
  providers: [PrismaService],
  exports: [PrismaService],
})
export class PrismaModule {}
typescript
// prisma.service.ts
import { Injectable, OnModuleInit } from '@nestjs/common';
import { PrismaClient } from '@prisma/client';

@Injectable()
export class PrismaService extends PrismaClient implements OnModuleInit {
  [x: string]: any;
  constructor() {
    super({
      log: [
        {
          emit: 'stdout',
          level: 'query',
        },
      ],
    });
  }

  async onModuleInit() {
    await this.$connect();
  }
}- 导入 prisma
typescript
// app.module.ts

import { PrismaModule } from './prisma/prisma.module';
@Module({
    imports:[
        PrismaModule, // 导入
    ],
    controllers: [AppController],
    providers:[
        AppService
    ]
})
export class AppModule {}- 定义表结构
properties
// 用户表
model User {
  id           Int      @id @default(autoincrement())
  userName     String   @unique @db.VarChar(50)
  password     String   @db.VarChar(50)
  nickName     String   @db.VarChar(50)
  email        String   @db.VarChar(50)
  headPic      String   @default("") @db.VarChar(100)
  createTime   DateTime @default(now())
  updateTime   DateTime @updatedAt
  // 主题色
  theme        String?  @default("") @db.VarChar(50)
  // 1 在线 2 离线 3 隐身
  status       Int?     @default(3)
  // 是否开启邮件通知(添加好友通知)0 不开启
  notification Int?     @default(0)
  // 个性签名
  motto        String?  @default("此人没个性 没有个性签名") @db.VarChar(100)

  friends        Friendship[] @relation("userToFriend")
  inverseFriends Friendship[] @relation("friendToUser")

  toUserInfo   FriendRequest[] @relation("toUserId")
  fromUserInfo FriendRequest[] @relation("fromUserId")
}- 执行命令
txt
npx prisma generate  生成 docs client
npx prisma migrate reset  重置数据库
npx prisma migrate dev --name xxx 创建 model- 使用 prisma
typescript
// user.service.ts
import { PrismaService } from 'src/prisma/prisma.service';
export class UserService {
  @Inject(PrismaService)
  private prismaService: PrismaService;

  async findUserDetailById(userID: number) {
    const userfield = this.userfield;
    const user = await this.prismaService.user.findUnique({
      where: {
        id: userId,
      },
      select: {
        ...userfield,
        email: true,
      },
    });
    return user;
  }
}
更多 prisma 使用方式,可以执行命令 npx prisma generate
3、权限校验
案例:校验用户是否已登录

- 中间件
typescript
import { CanActivate, ExecutionContext, Inject, Injectable, UnauthorizedException } from '@nestjs/common';
import { Reflector } from '@nestjs/core';
import { JwtService } from '@nestjs/jwt';
import { Request, Response } from 'express';
import { Observable } from 'rxjs';

interface JwtUserData {
  userId: number;
  userName: string;
  nickName: string;
}

declare module 'express' {
  interface Request {
    user: JwtUserData;
  }
}

@Injectable()
export class AuthGuard implements CanActivate {
  @Inject()
  private reflector: Reflector;

  @Inject(JwtService)
  private jwtService: JwtService;

  canActivate(context: ExecutionContext): boolean | Promise<boolean> | Observable<boolean> {
    const request: Request = context.switchToHttp().getRequest();
    const response: Response = context.switchToHttp().getResponse();

    /*
     * 用 reflector 从目标 controller 和 handler 上拿到 require-login 的 metadata
     * @SetMetadata('require-login', true)
     */
    const requireLogin = this.reflector.getAllAndOverride('require-login', [context.getClass(), context.getHandler()]);


    // 如果没有 metadata,就是不需要登录,返回 true 放行
    if (!requireLogin) {
      return true;
    }

    const authorization = request.headers.authorization;

    if (!authorization) {
      throw new UnauthorizedException('用户未登录');
    }

    try {
      const token = authorization.split(' ')[1];
      const data = this.jwtService.verify<JwtUserData>(token);

      // 刷新 token 续登录时长
      response.header(
        'token',
        this.jwtService.sign(
          {
            userId: data.userId,
            userName: data.userName,
            nickName: data.nickName,
          },
          {
            expiresIn: '7d',
          },
        ),
      );

      return true;
    } catch (e) {
      const message = e?.response?.message || 'token 失效,请重新登录';
      throw new UnauthorizedException(message);
    }
  }
}- 中间件注册
typescript
import { JwtModule } from '@nestjs/jwt';
import { AuthGuard } from './auth.guard';
import { APP_GUARD } from '@nestjs/core';
@Module({
    imports:[
      JwtModule.registerAsync({
          global: true,
          useFactory() {
            return {
              secret: 'asdkjfeoc',
              signOptions: {
                expiresIn: '30m', // 默认 30 分钟
              },
            };
          },
        }),
    ],
    controllers: [AppController],
    providers:[
       AppService,
       {
          provide: APP_GUARD,
          useClass: AuthGuard,
        },
    ]
})
export class AppModule {}- 使用
typescript
import { JwtService } from '@nestjs/jwt';
import { RequireLogin } from 'src/custom.decorator';
import { SetMetadata } from '@nestjs/common';

export class UserController {
  @Inject(JwtService)
  private jwtService: JwtService;

  @Post('login')
  async login(@Body() loginUser: LoginUserDto) {
      // 校验账号密码正确后,保存用户信息

      const token = this.jwtService.sign(
        {
           userId: user.id,
           userName: user.userName,
           nickName: user.nickName,
        },
        {
          expiresIn: '1d',
        }
      )

      return {
          token,
      }
  }


  // 获取用户信息(需登录)
  @Get('info')
  SetMetadata('require-login', true) // 校验是否已登录
  async info(@UserInfo('userId') userId: number) {
    return this.userService.findUserDetailById(userId);
  }
}
4、发送邮件
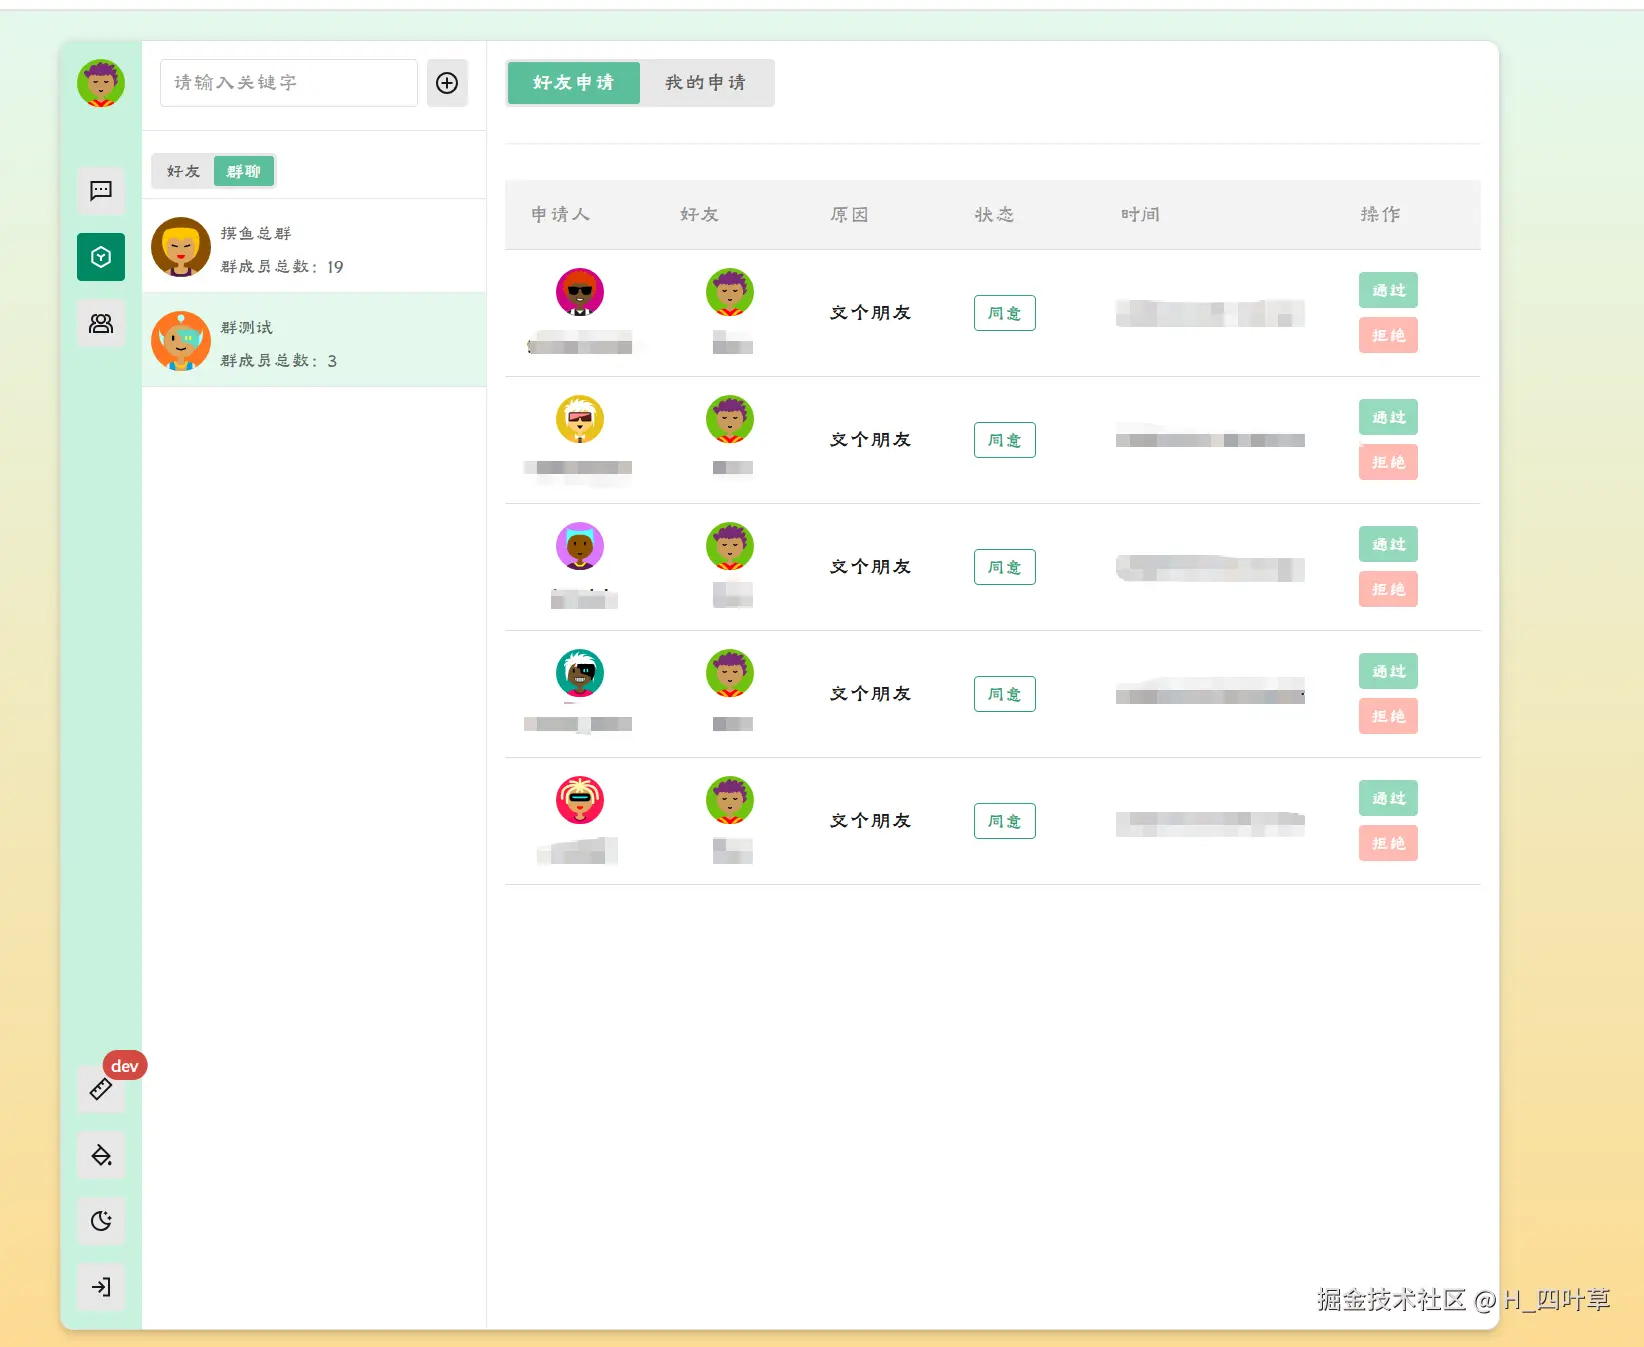
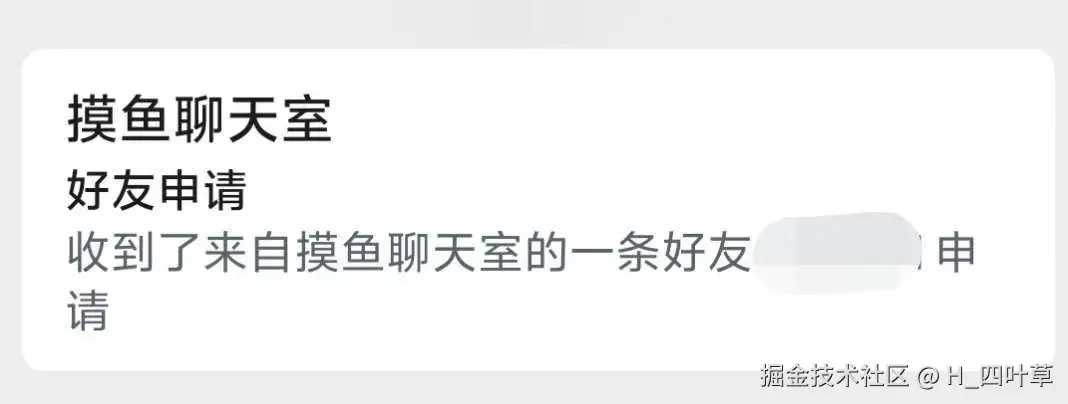
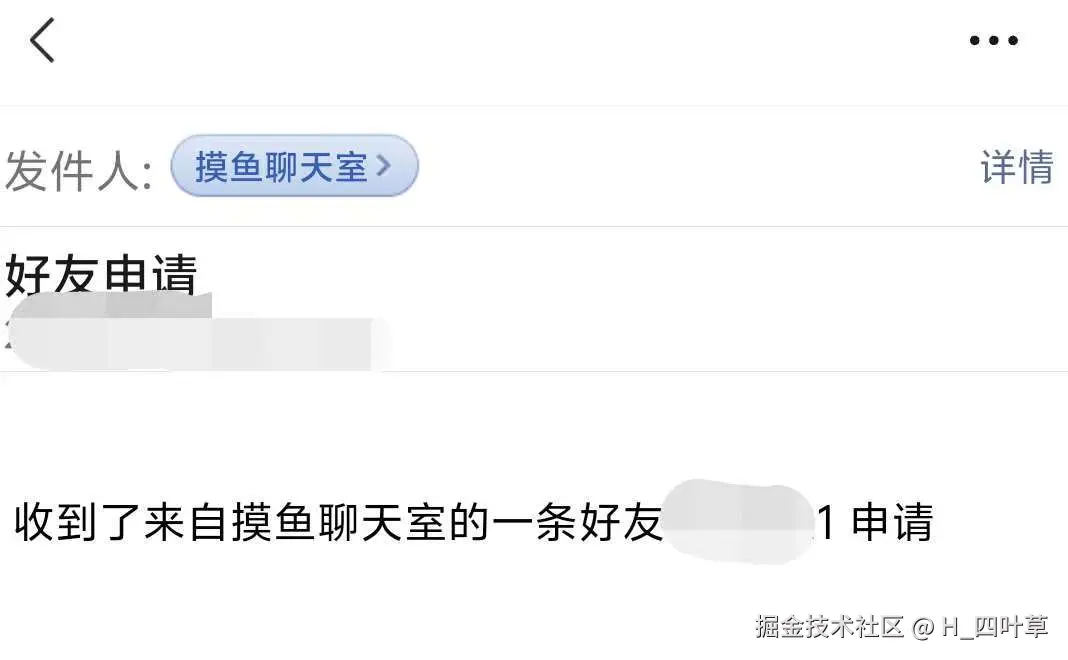
案例:发送好友申请通知
- 定义 Email
typescript
// email.controller.ts
import { Controller } from '@nestjs/common';
import { EmailService } from './email.service';

@Controller('email')
export class EmailController {
  constructor(private readonly emailService: EmailService) {}
}
typescript
// email.module.ts
import { Global, Module } from '@nestjs/common';
import { EmailService } from './email.service';
import { EmailController } from './email.controller';

@Global()
@Module({
  controllers: [EmailController],
  providers: [EmailService],
  exports: [EmailService]
})
export class EmailModule {}
typescript
// email.service.ts
import { Injectable } from '@nestjs/common';
import { createTransport, Transporter } from 'nodemailer';

@Injectable()
export class EmailService {
  transporter: Transporter;

  constructor() {
    this.transporter = createTransport({
      host: 'smtp.qq.com',
      port: 587,
      secure: false,
      auth: {
        user: '', // 发送者(开发者)的邮箱地址
        pass: '', // 发送者(开发者)的 token
      },
    });
  }

  async sendMail({ to, subject, html }) {
    await this.transporter.sendMail({
      from: {
        name: '', // 主题
        address: '', // 发送者(开发者)的邮箱地址
      },
      to,
      subject,
      html,
    });
  }
}- 导入 email
typescript
// app.module.ts

import { EmailModule } from './email/email.module';
@Module({
    imports:[
        EmailModule, // 导入
    ],
    controllers: [AppController],
    providers:[
        AppService
    ]
})
export class AppModule {}- 使用
typescript
// friendApplication.controller.ts

import { EmailService } from 'src/email/email.service';
import { UserService } from 'src/user/user.service';

export class FriendApplicationController {

  @Inject(UserService)
  private userService: UserService;

  @Inject(EmailService)
  private emailService: EmailService;

  @Post('add_request')
  async add(@Body() friendAddDto: FriendAddDto, @Body('userId') userId: number, @Body('nickName') nickName: string) {
      // 添加一条好友申请记录
      const res = await this.friendApplicationService.add(friendAddDto, userId);

      // 获取用户邮箱
      const detail = await this.userService.findUserDetailById(+friendAddDto.friendId);
      // 邮件通知
      if (detail.email && detail.notification) {
          await this.emailService.sendMail({
            to: detail.email,
            subject: '好友申请',
            html: `<p>收到了来自摸鱼聊天室的一条好友 ${nickName} 申请</p>`,
          });
      }
  }
}
5、socket 使用
- 定义 gateway
typescript
import { MessageBody, SubscribeMessage, WebSocketGateway, WebSocketServer } from '@nestjs/websockets';
import { ChatService } from './chat.service';
import { Server, Socket } from 'socket.io';
import { Inject } from '@nestjs/common';
import { ChatHistoryService } from 'src/chat-history/chat-history.service';
import { ChatroomService } from 'src/chatroom/chatroom.service';

interface JoinRoomPayload {
  chatroomId: number
  userId: number
  chatroomName: string
}

interface SendMessagePayload {
  sendUserId: number;
  chatroomId: number;
  message: {
    type: 'text' | 'image',
    content: string
  }
}

@WebSocketGateway({cors: { origin: '*' }})
export class ChatGateway {
  constructor(private readonly chatService: ChatService) {}

  @Inject(ChatHistoryService)
  private chatHistoryService: ChatHistoryService

  @WebSocketServer() server: Server;

  @Inject(ChatroomService)
  private chatroomService: ChatroomService;

  // 加入聊天室
  @SubscribeMessage('joinRoom')
  async joinRoom(client: Socket, payload: JoinRoomPayload) {
    const userIdList = await this.chatroomService.members(payload.chatroomId);

    const item = userIdList.find(item => +item.id === +payload.userId);
    const nickName = item.nickName;
    for (let i = 0; i < userIdList.length; i++) {
      const { id } = userIdList[i];
      this.server.to(id.toString()).emit('message', {
        type: 'joinRoom',
        userId: payload.userId,
        nickName: nickName,
        chatroomName: payload.chatroomName
      });
    }
  }

  // 通过 userId 链接 socket
  @SubscribeMessage('join')
  join(client: Socket, userId: number): void {
    const key = userId.toString();

    client.join(key);
  }

  // 发送消息
  @SubscribeMessage('sendMessage')
  async sendMessage(@MessageBody() payload: SendMessagePayload) {
    // const roomName = payload.chatroomId.toString();

    await this.chatHistoryService.add(payload.chatroomId, {
      content: payload.message.content,
      type: payload.message.type === 'image' ? 1 : 0,
      chatroomId: payload.chatroomId,
      senderId: payload.sendUserId
    });

    // 查找该聊天室的所有成员
    const userIdList = await this.chatroomService.members(payload.chatroomId);

    for(let i = 0; i < userIdList.length; i++) {
      const { id } = userIdList[i];
      this.server.to(id.toString()).emit('message', {
        type: 'sendMessage',
        ...payload,
      });
    }
  }
}
其他文章