本文以阿里云服务器和域名为示例,详细讲解从「域名解析」到「Nginx 反向代理」再到「HTTPS 加密配置」的全流程。无论是新手还是有经验的开发者,都能按照步骤轻松实现:
- 域名解析:让阿里云域名指向服务器 IP;
- Nginx 反向代理:通过域名直接访问(无需带端口);
- HTTPS 加密:申请免费 SSL 证书,实现
https://安全访问,并自动将 HTTP 流量重定向到 HTTPS。
前提:已在阿里云购买域名并完成 ICP 备案
可先阅读上一篇《从零开始:在阿里云 Ubuntu 服务器部署 Node+Express 接口》
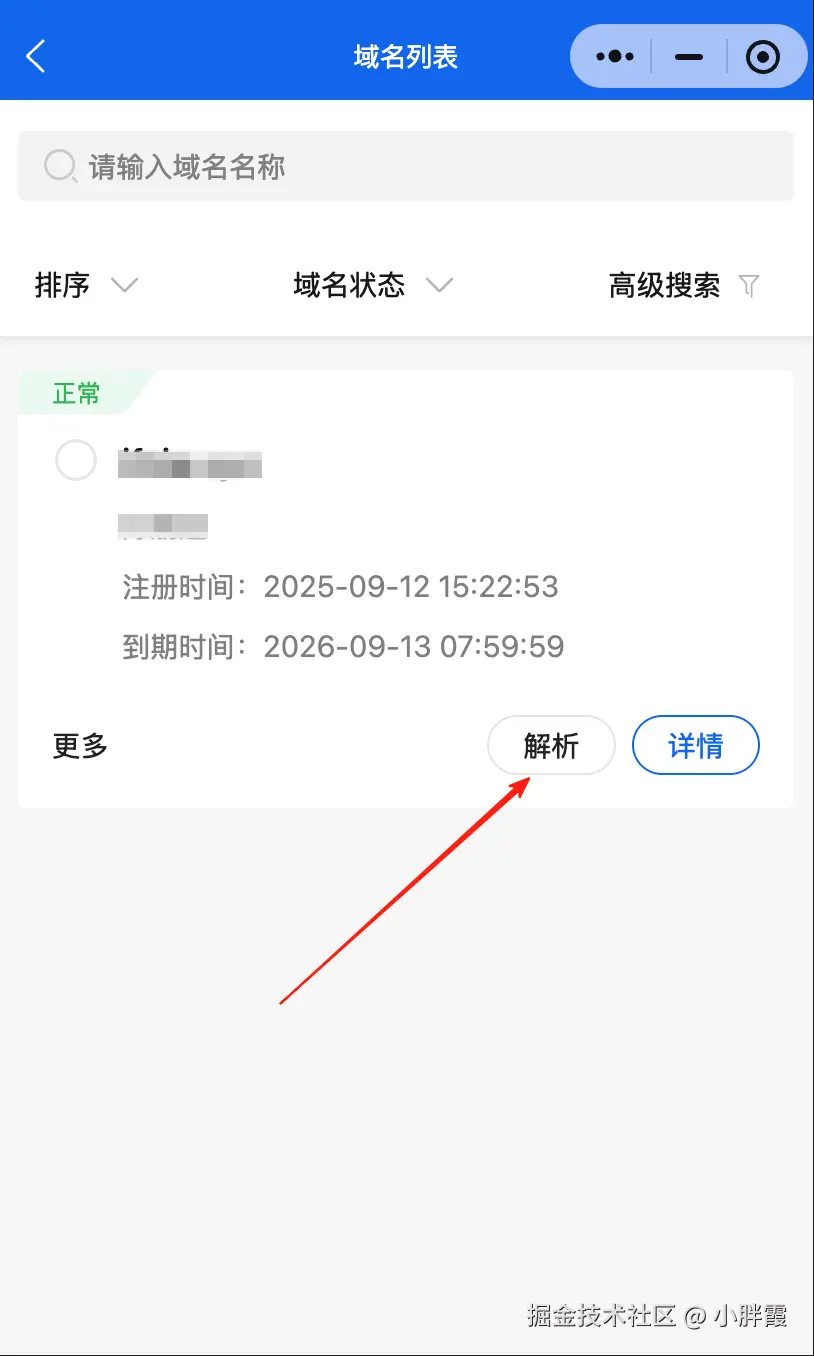
- 登录阿里云万网小程序
- 个人中心找到自己的域名,点进进入,点击解析
 添加解析记录:
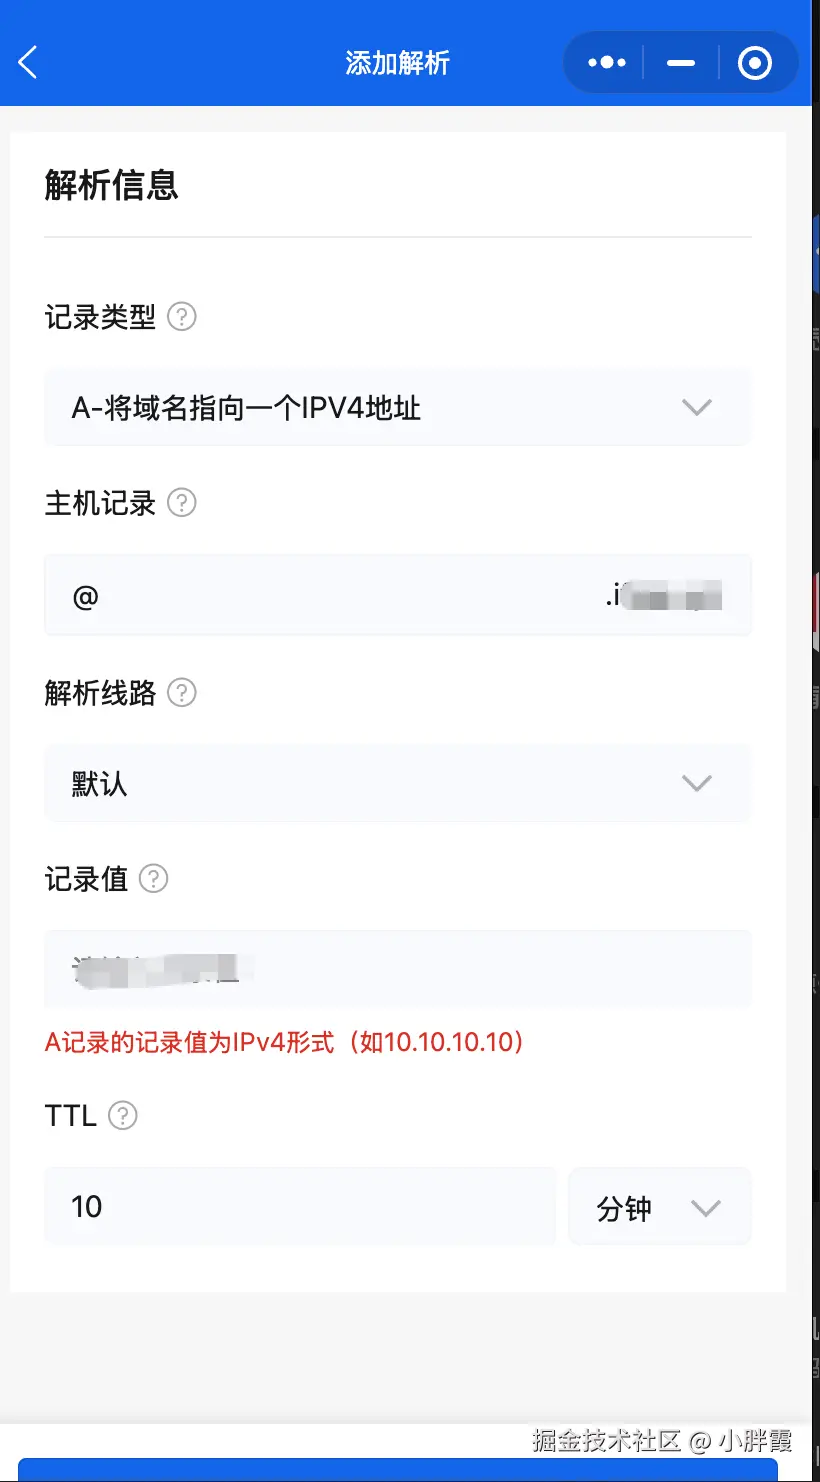
- 记录类型:
A(将域名指向 IP); - 主机记录:
@(填@ 表示主域名); - 记录值:服务器公网 IP(如
47.101.xxx.xxx); - TTL:默认 10 分钟(解析生效时间)。
点击「确认」,等待 10-30 分钟,解析生效(可通过ping 域名验证,返回服务器 IP 即成功)。
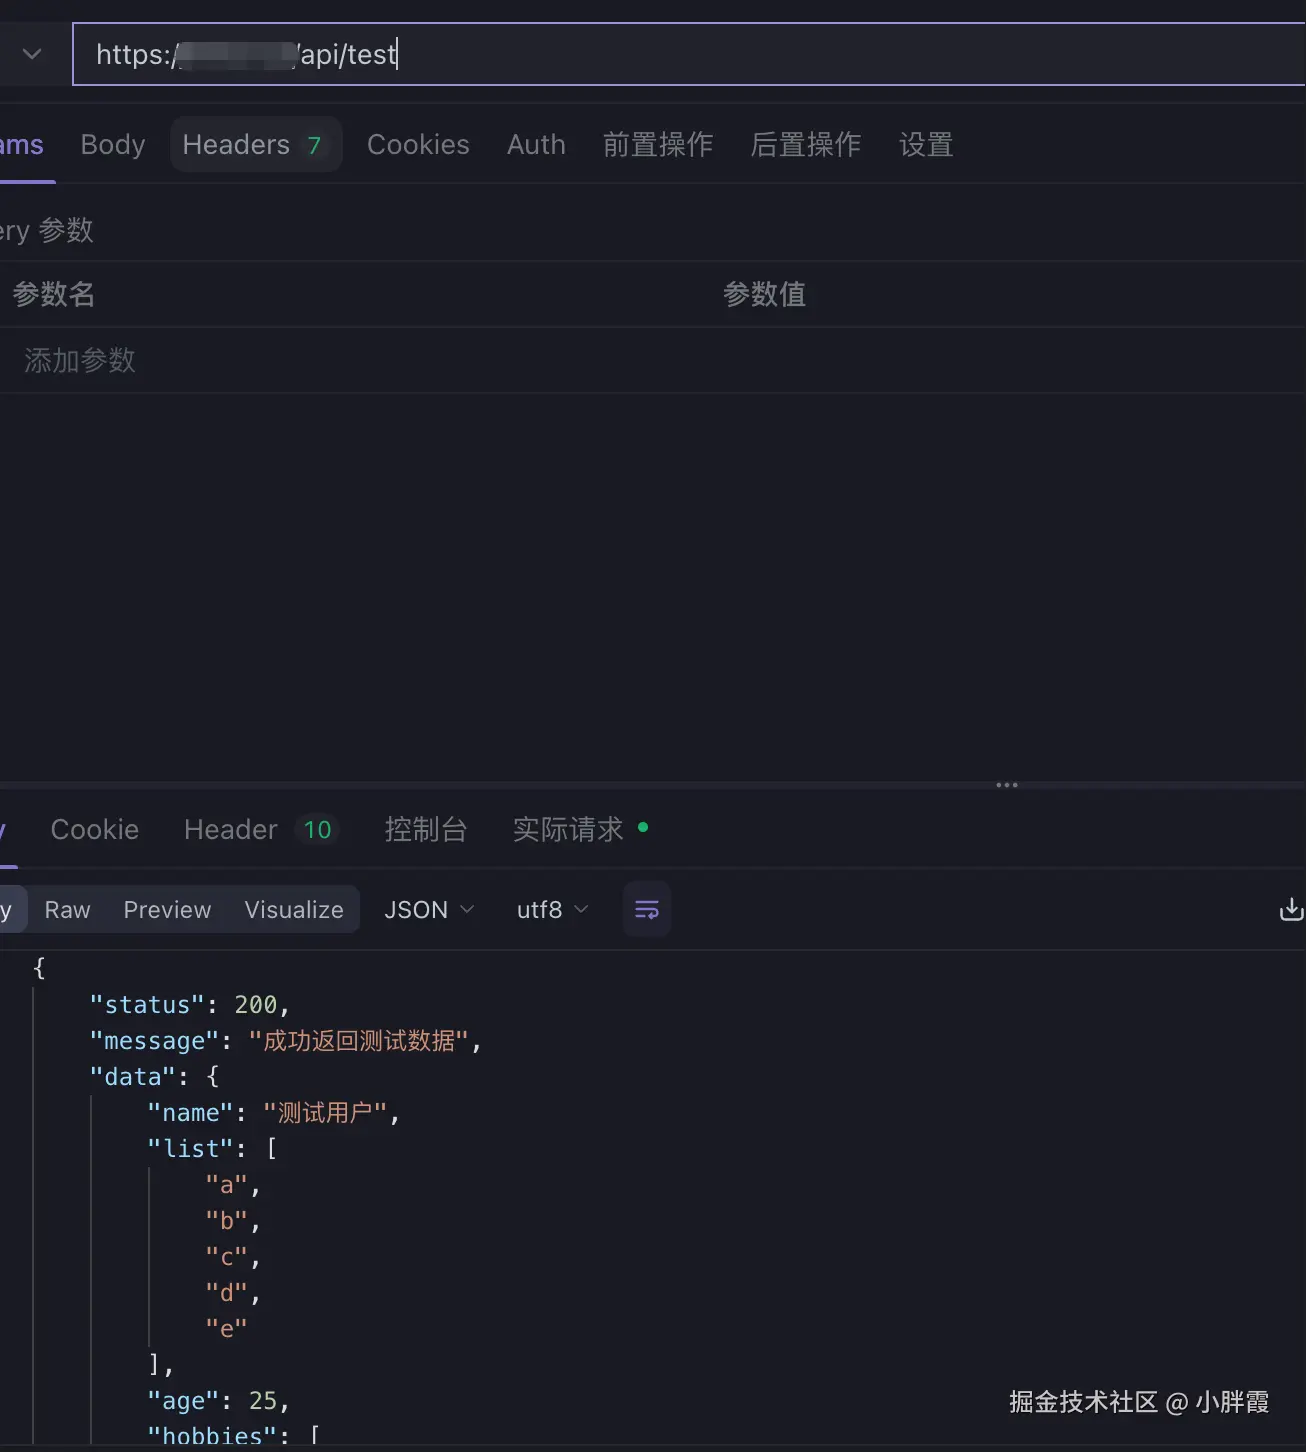
根据我们上一篇的文章,通过ip访问的接口,现在通过域名访问试下效果:,已经可以了
配置 Nginx 反向代理
场景说明
通过 Nginx 反向代理,将域名的 HTTP 请求(如 http://xxxx.com/api/test)转发到服务器本地运行的 Node 服务(默认监听 3000 端口),实现无端口访问 (无需带 :3000)。
提条件
- 域名已完成 ICP 备案(如
ixxx.com)。 - 域名已解析到服务器 IP(通过 DNS 解析设置,
ping xxx.com能返回服务器 IP)。 - Node 服务已启动并正常运行(
curl http://localhost:3000/api/test可返回数据)。 - 服务器已安装 Nginx(未安装可参考步骤 0)。
- 已开放 80 端口(HTTP 默认端口,阿里云控制台 + 服务器防火墙)。
步骤 0:安装 Nginx(若未安装),已安装就不用了
登录自己的服务器:
bash
# 更新系统包
sudo apt update

# 安装 Nginx
sudo apt install nginx -y

# 启动 Nginx 并设置开机自启
sudo systemctl start nginx
sudo systemctl enable nginx

# 验证 Nginx 是否启动成功(输出 active (running) 即为正常)
sudo systemctl status nginx
步骤 1:开放 80 端口(防火墙配置)
1.1 服务器内部防火墙(UFW)
bash
# 允许 80 端口(HTTP 访问)
sudo ufw allow 80/tcp

# 确认端口已开放(输出包含 80/tcp ALLOW)
sudo ufw status
1.2 云服务商控制台防火墙(以阿里云为例)默认是开启的
-
登录阿里云控制台 → 进入目标服务器 → 「安全组」→「配置规则」。
-
添加入方向规则:
- 端口范围:
80/80 - 授权对象:
0.0.0.0/0(允许所有 IP 访问) - 优先级:默认(如 1)
- 端口范围:
-
保存规则。
步骤 2:创建 Nginx 反向代理配置文件
bash
# 进入 Nginx 配置目录,创建域名专用配置文件
sudo nano /etc/nginx/sites-available/域名.conf粘贴以下配置(请将 xxx 替换为你的实际域名)
bash
# 配置 HTTP 服务,监听 80 端口
server {
    # 监听 80 端口(HTTP 默认端口)
    listen 80;
    # 绑定域名(主域名,多个用空格分隔)
    server_name xxxx;

    # 核心:将所有请求反向代理到 Node 服务的 3000 端口
    location / {
        # 转发目标:本地 Node 服务的 3000 端口
        proxy_pass http://localhost:3000;
        # 传递 HTTP 协议版本
        proxy_http_version 1.1;
        # 支持 WebSocket(如果服务需要)
        proxy_set_header Upgrade $http_upgrade;
        proxy_set_header Connection 'upgrade';
        # 传递客户端访问的域名(避免 Node 服务获取到 localhost)
        proxy_set_header Host $host;
        # 传递客户端真实 IP
        proxy_set_header X-Real-IP $remote_addr;
        # 不缓存动态内容
        proxy_cache_bypass $http_upgrade;
    }
}
保存并退出:按 Ctrl+O → 回车确认 → Ctrl+X。
步骤 3:启用配置文件(创建软链接)
Nginx 会从 sites-enabled 目录加载配置,需将 sites-available 中的配置文件链接到该目录:
bash
# 创建软链接(确保文件名与 sites-available 中一致)
sudo ln -s /etc/nginx/sites-available/ifxia.xyz.conf /etc/nginx/sites-enabled/ifxia.xyz.conf

# 禁用 Nginx 默认配置(避免冲突,重要!)
sudo rm -f /etc/nginx/sites-enabled/default
步骤 4:检查 Nginx 配置语法(关键步骤)
Nginx 对配置语法要求严格,必须先验证:
bash
sudo nginx -t成功提示(继续下一步):
bash
nginx: configuration file /etc/nginx/nginx.conf test is successful-
失败提示(常见问题及解决):
- 错误:
directive "server_name" is not terminated by ";"解决:检查配置文件中server_name等指令末尾是否遗漏分号(必须以;结尾)。 - 错误:
open() "/etc/nginx/sites-enabled/域名.conf" failed解决:确认sites-available目录中存在域名.conf,重新创建软链接。
- 错误:
步骤 5:重启 Nginx 使配置生效
bash
# 重启
Nginx sudo systemctl restart nginx
步骤 6:验证反向代理是否生效
- 直接访问测试 :在浏览器中打开
http://域名/api/test,应返回与http://IP:3000/api/test相同的结果。 - 确认无端口访问 :访问时无需带
:3000,直接用域名即可。
- 若日志显示
connect() failed (111: Connection refused) while connecting to upstream,说明 Node 服务未启动,执行pm2 start node-api-test即可。
在反向代理基础上配置 HTTPS(加密访问)
在已实现 HTTP 反向代理的基础上,通过 Let's Encrypt 申请免费 SSL 证书,将访问地址从 http:// 升级为 https://(如 https://ifxia.xyz/api/test),并自动将 HTTP 请求重定向到 HTTPS。
前提条件
- 已完成第一部分的 Nginx 反向代理配置(
http://域名/api/test可正常访问)。 - 已开放 443 端口(HTTPS 默认端口,阿里云控制台 + 服务器防火墙)。
详细步骤
步骤 1:开放 443 端口(HTTPS 端口)
1.1 服务器内部防火墙(UFW)
bash
# 允许 443 端口(HTTPS 访问)
sudo ufw allow 443/tcp

# 确认 80/443 端口均已开放
sudo ufw status
1.2 云服务商控制台防火墙(以阿里云为例)
-
进入服务器安全组配置,添加入方向规则:(默认是开启的,不应管)
- 端口范围:
443/443 - 授权对象:
0.0.0.0/0
- 端口范围:
-
保存规则。
步骤 2:安装 Certbot(Let's Encrypt 证书工具)
bash
# 更新系统包
sudo apt update

# 安装 Certbot 及 Nginx 插件(自动配置 Nginx HTTPS)
sudo apt install certbot python3-certbot-nginx -y
步骤 3:申请 SSL 证书并自动配置 Nginx
bash
# 替换为你的域名(与 Nginx 配置中的 server_name 一致)
sudo certbot --nginx -d 你的域名
执行过程中的交互选项:
- 输入邮箱(用于证书过期提醒)→ 回车。
- 同意服务条款(输入
A)→ 回车。 - 是否共享邮箱(输入
N拒绝)→ 回车。 - 选择是否将 HTTP 流量重定向到 HTTPS(推荐选
2,强制 HTTPS)
bash
Please choose whether or not to redirect HTTP traffic to HTTPS, removing HTTP access.
- - - - - - - - - - - - - - - - - - - - - - - - - - - - - - - - - - - - - - - - -
1: No redirect - Make no further changes to the webserver configuration.
2: Redirect - Make all requests redirect to secure HTTPS access.
- - - - - - - - - - - - - - - - - - - - - - - - - - - - - - - - - - - - - - - - -
Select the appropriate number [1-2] then [enter] (press 'c' to cancel): 2
成功标志:
输出包含以下内容,说明证书申请并配置成功:
bash
Successfully received certificate.
Certificate is saved at: /etc/letsencrypt/live/ifxia.xyz/fullchain.pem
Key is saved at:         /etc/letsencrypt/live/ifxia.xyz/privkey.pem
Deploying certificate
Successfully deployed certificate for ifxia.xyz to /etc/nginx/sites-enabled/ifxia.xyz.conf
Congratulations! You have successfully enabled HTTPS on https://xxxx
步骤 4:验证 HTTPS 配置
- 访问测试 :在浏览器中打开
https://ifxia.xyz/api/test,地址栏会显示小锁图标(表示加密连接),并返回正常数据。 - 重定向测试 :访问
http://ifxia.xyz/api/test(HTTP),会自动跳转到https://版本。 - 证书信息查看:点击浏览器地址栏的小锁 →「证书」,可查看证书有效期(默认 90 天)。
步骤 5:配置证书自动续期(重要)
Let's Encrypt 证书有效期为 90 天,需设置自动续期:
bash
# 测试自动续期功能(无错误输出即为正常)
sudo certbot renew --dry-run

# 添加定时任务(每天自动检查续期)
sudo crontab -e
在打开的文件中添加一行(每天凌晨 2 点执行续期检查):
js
0 2 * * * /usr/bin/certbot renew --quiet保存退出:Ctrl+O → 回车 → Ctrl+X。
步骤 6:确认 Nginx 配置已自动更新(可选)
Certbot 会自动修改 Nginx 配置以支持 HTTPS,可查看确认:
bash
sudo nano /etc/nginx/sites-enabled/ifxia.xyz.conf配置中会新增 HTTPS 相关内容(如 listen 443 ssl、证书路径等),无需手动修改。
总结
- 第一部分通过 Nginx 反向代理实现了
http://域名/api/test无端口访问。 - 第二部分通过 Certbot 申请 SSL 证书,将访问升级为
https://域名/api/test,并配置自动重定向和证书续期。
按步骤操作后,你的服务将通过加密域名安全访问,且无需手动管理证书过期问题。