实验目的:
- 理解北向接口的作用;
- 掌握使用Postman调用北向接口的方法;
实验内容:
- 了解Postman北向接口工具
- 学习并掌握使用Postman工具实现简易防火墙的方法。
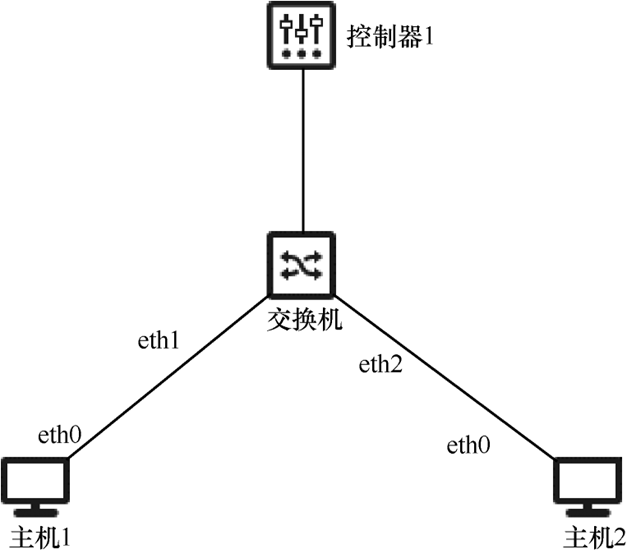
实验拓扑:
实验步骤:
1. 创建拓扑并连接ODL控制器
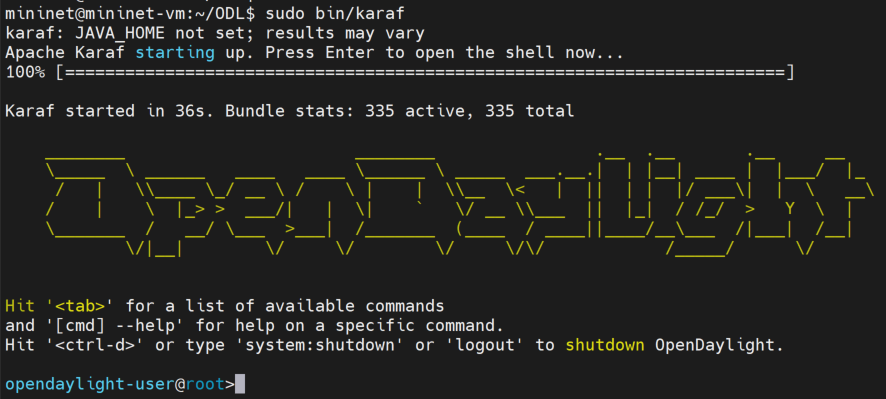
1.1启动ODL控制器
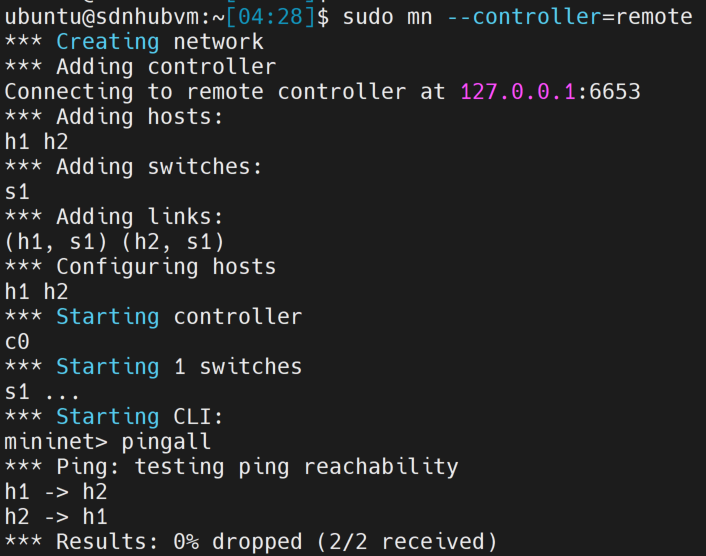
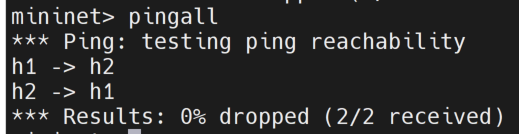
1.2 创建拓扑连接ODL控制器,并进行pingall测试
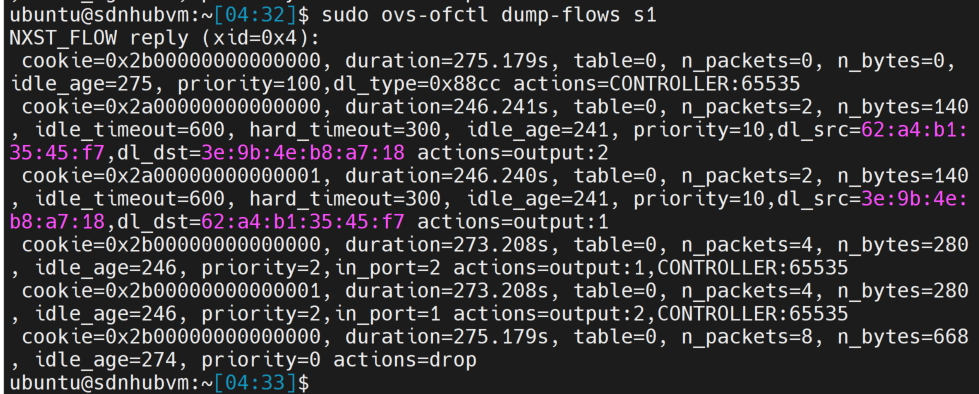
1.3 查看流表
1.4 浏览器中查看拓扑
打开浏览器,在地址栏输入http://127.0.0.1:8181/index.html,用户名和密码都是admin
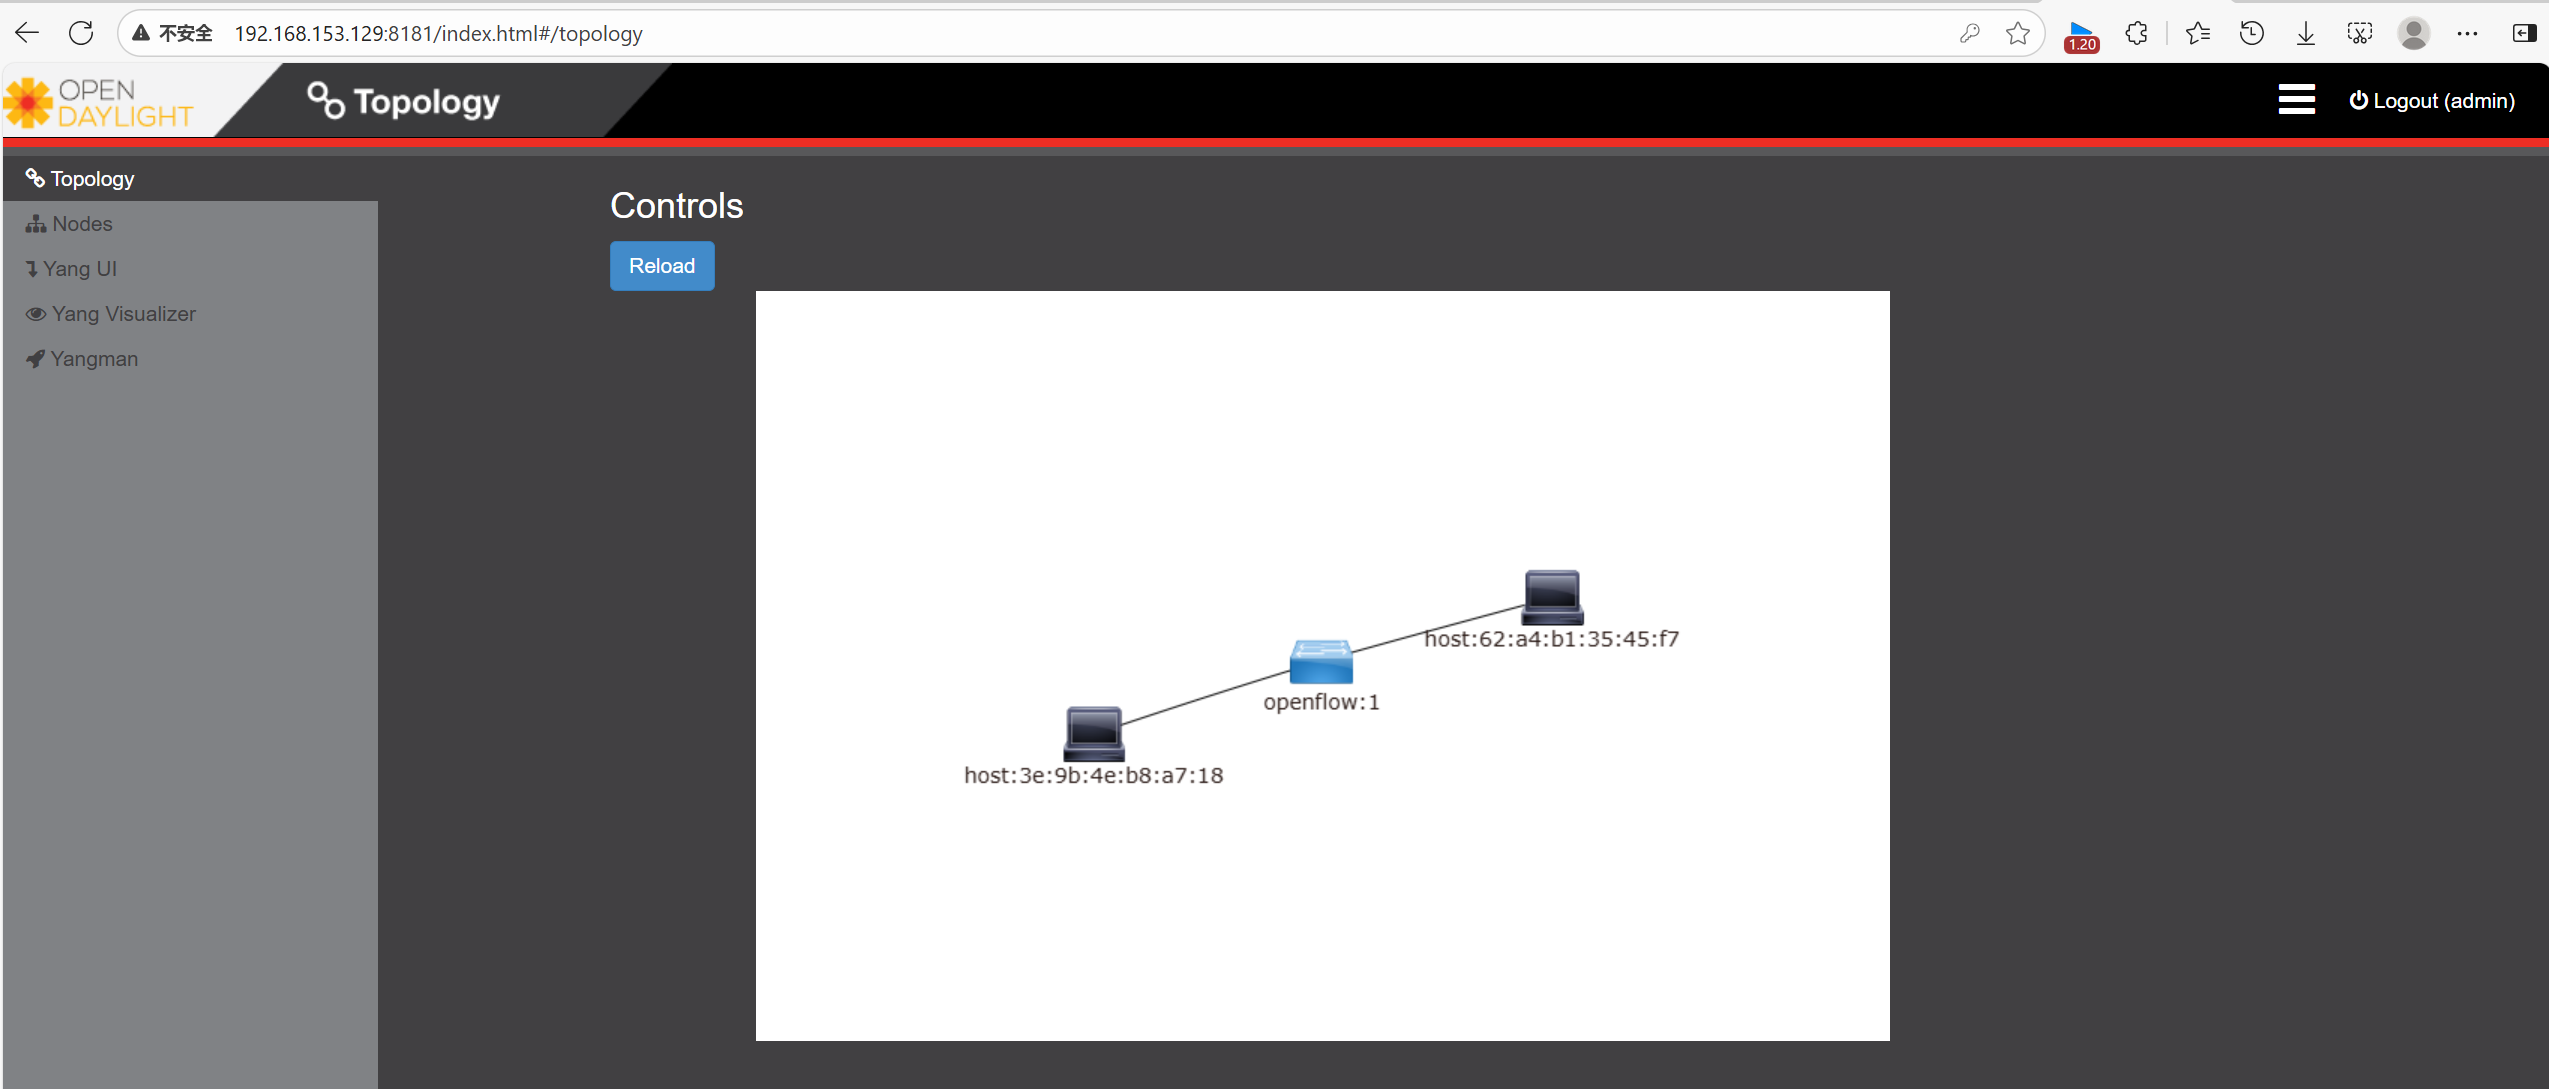
1.5 查看nodeid
点击左侧菜单栏的Node,查看交换机的nodeid

2.使用postman下发流表,使h1与h2不能ping通。
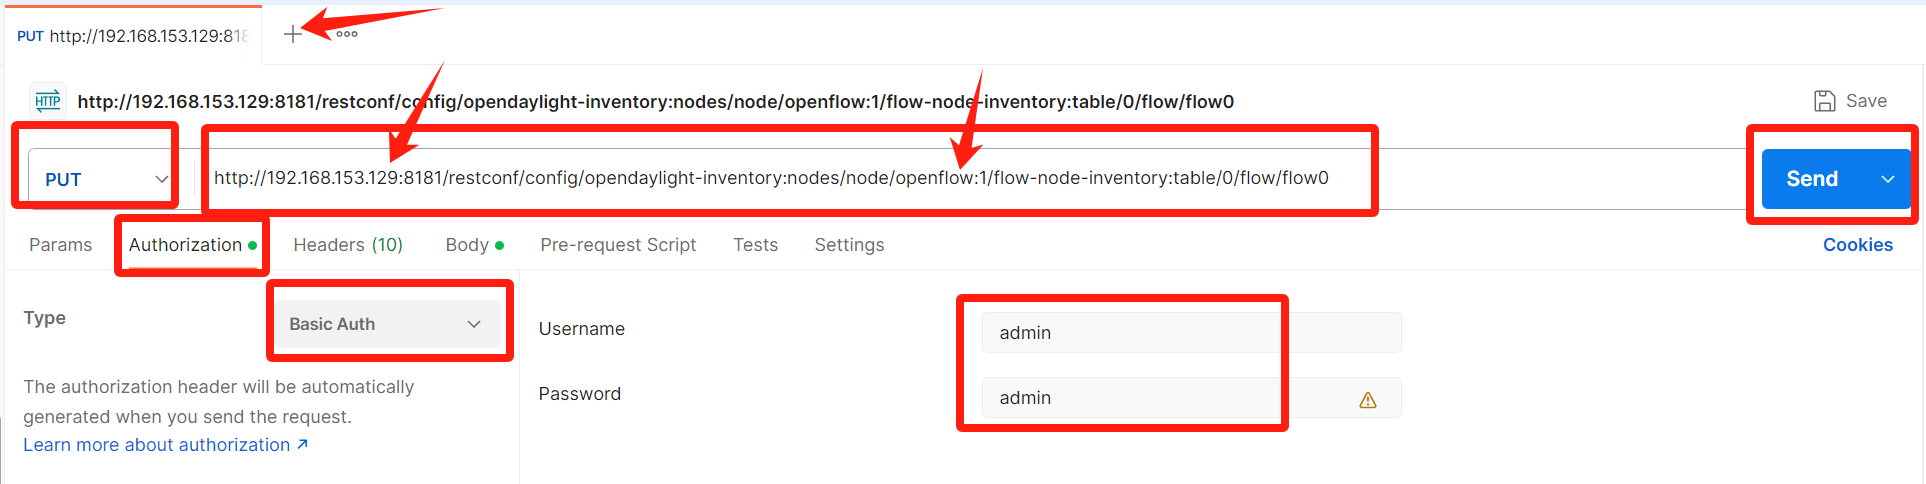
2.1 打开Postman工具,在Postman主界面,点"+"新增一个请求,
- 输入URL :http:// controller-ip:8181/restconf/config/opendaylight-inventory:nodes/node/node-id/flow-node-inventory:table/0/flow/flow6
controller-ip为当前控制器的数据层的ip,node-id即步骤4)中获得的node id - 请求类型选择PUT。
- 单击Authorization,type选择basic auth。输入用户名和密码,用户名和密码都是admin
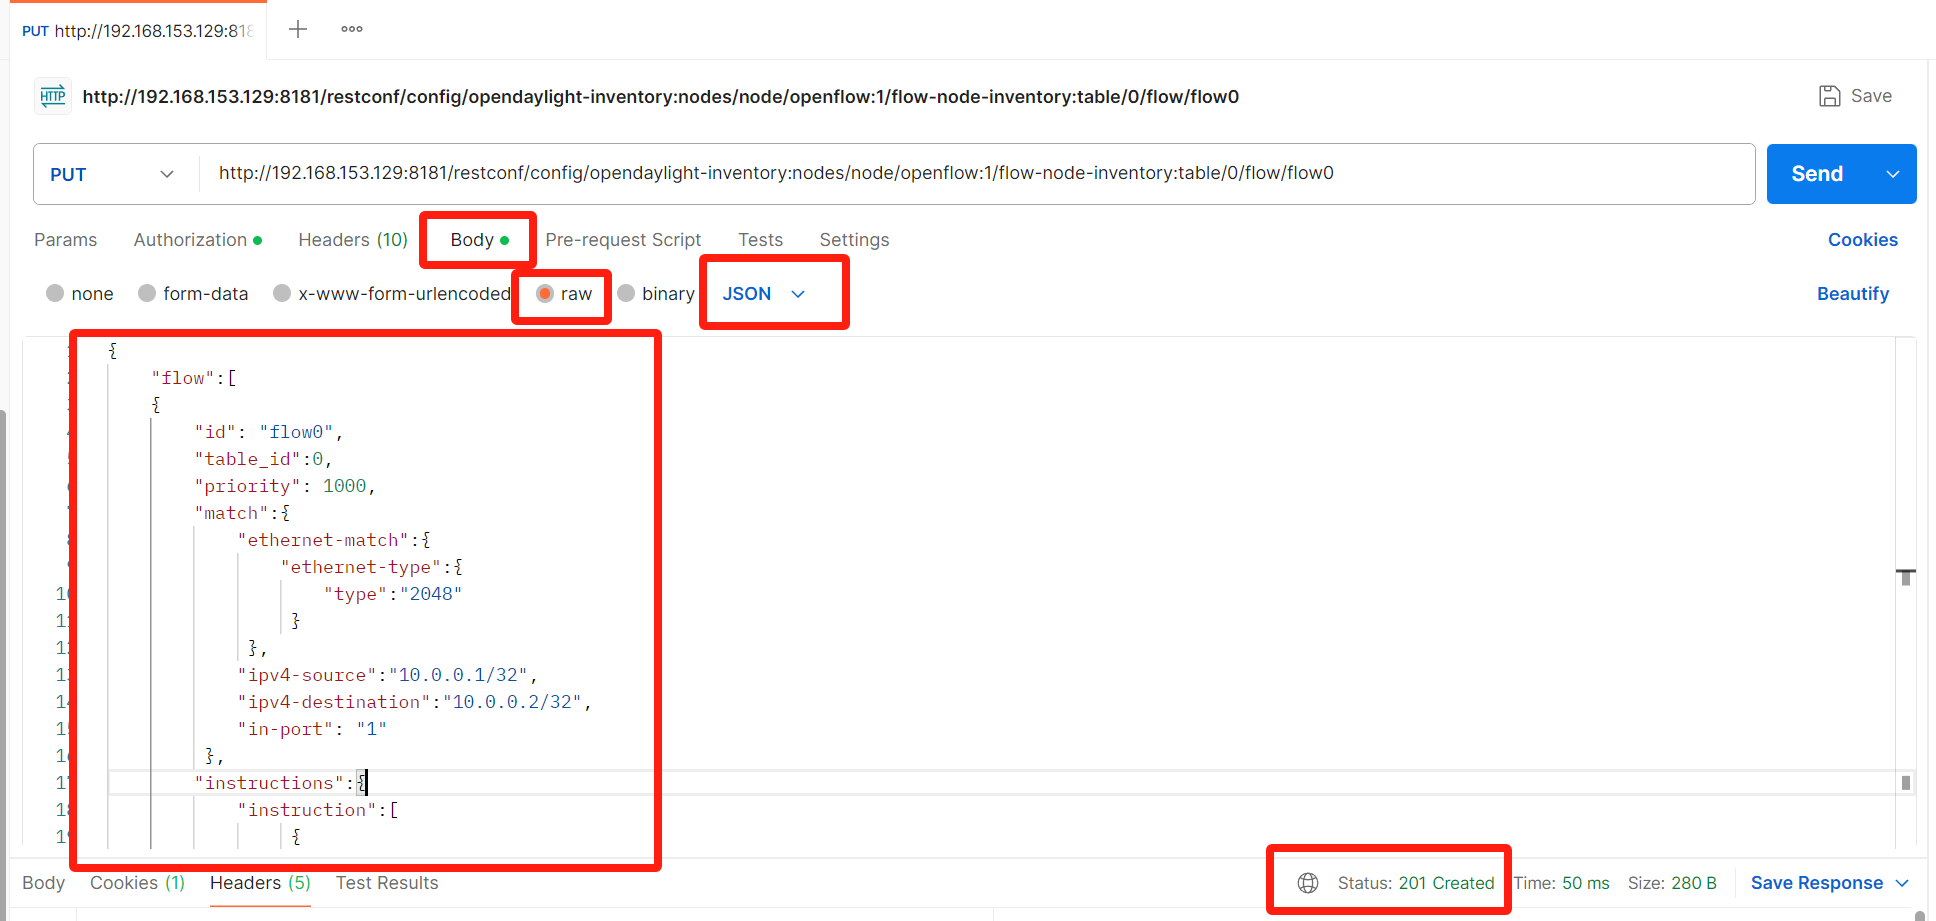
2.2 下发流表
- 选择BODY的类型raw ->JSON。
- Body内容如下:
{
"flow": { "id": "flow0", "table_id":0, "priority": 300, "match":{ "ethernet-match":{ "ethernet-type":{ "type":"2048" } }, "ipv4-source":"10.0.0.1/32", "ipv4-destination":"10.0.0.2/32", "in-port": "1" }, "instructions":{ "instruction":\[ { "order":"0", "apply-actions":{ "action":\[ { "order":"0", "drop-action":{} }
}
}
]
}
}
]
} - 在Postman点击Send,发送请求后,查看响应是否正常。结果为200OK或201Created都是正确。
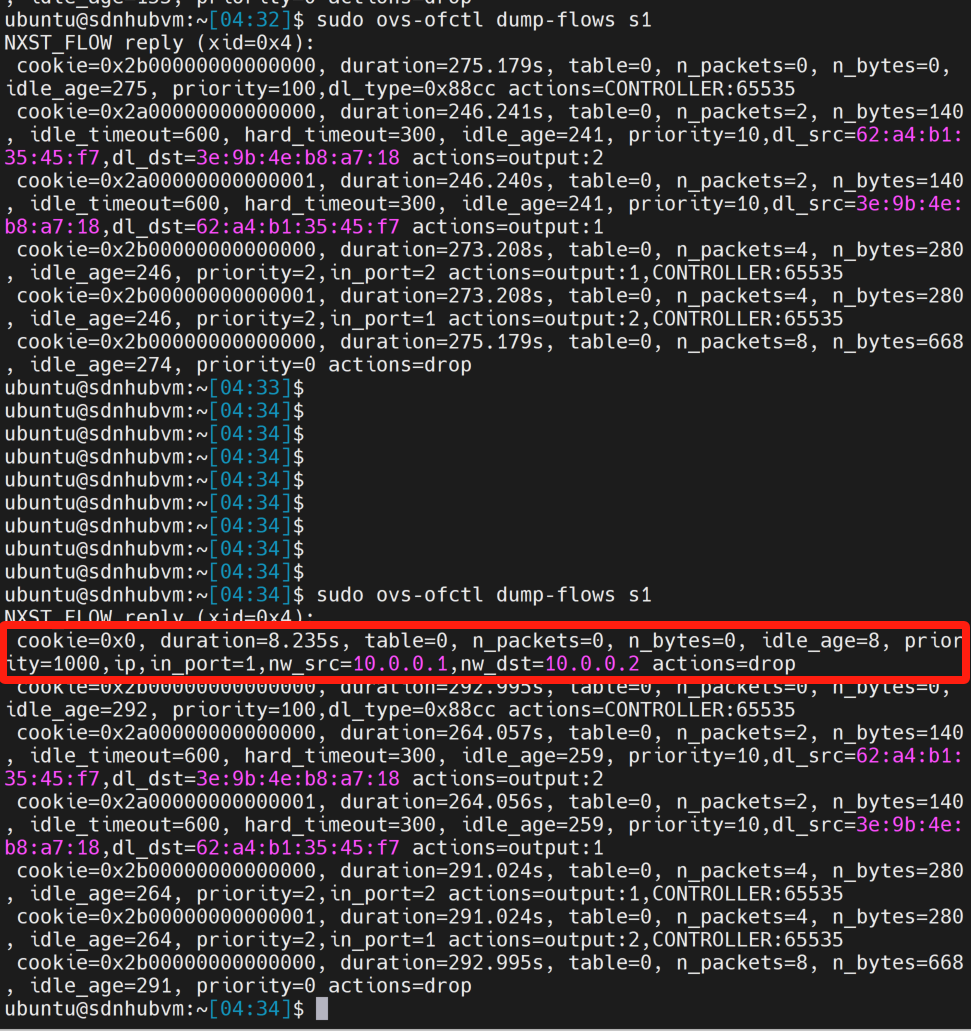
2.3 查看流表下发是否成功
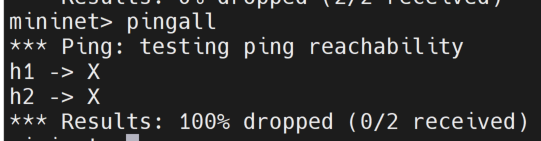
2.4 再次验证连通性
3. 使用Postman删除流表,使h1与h2能ping通
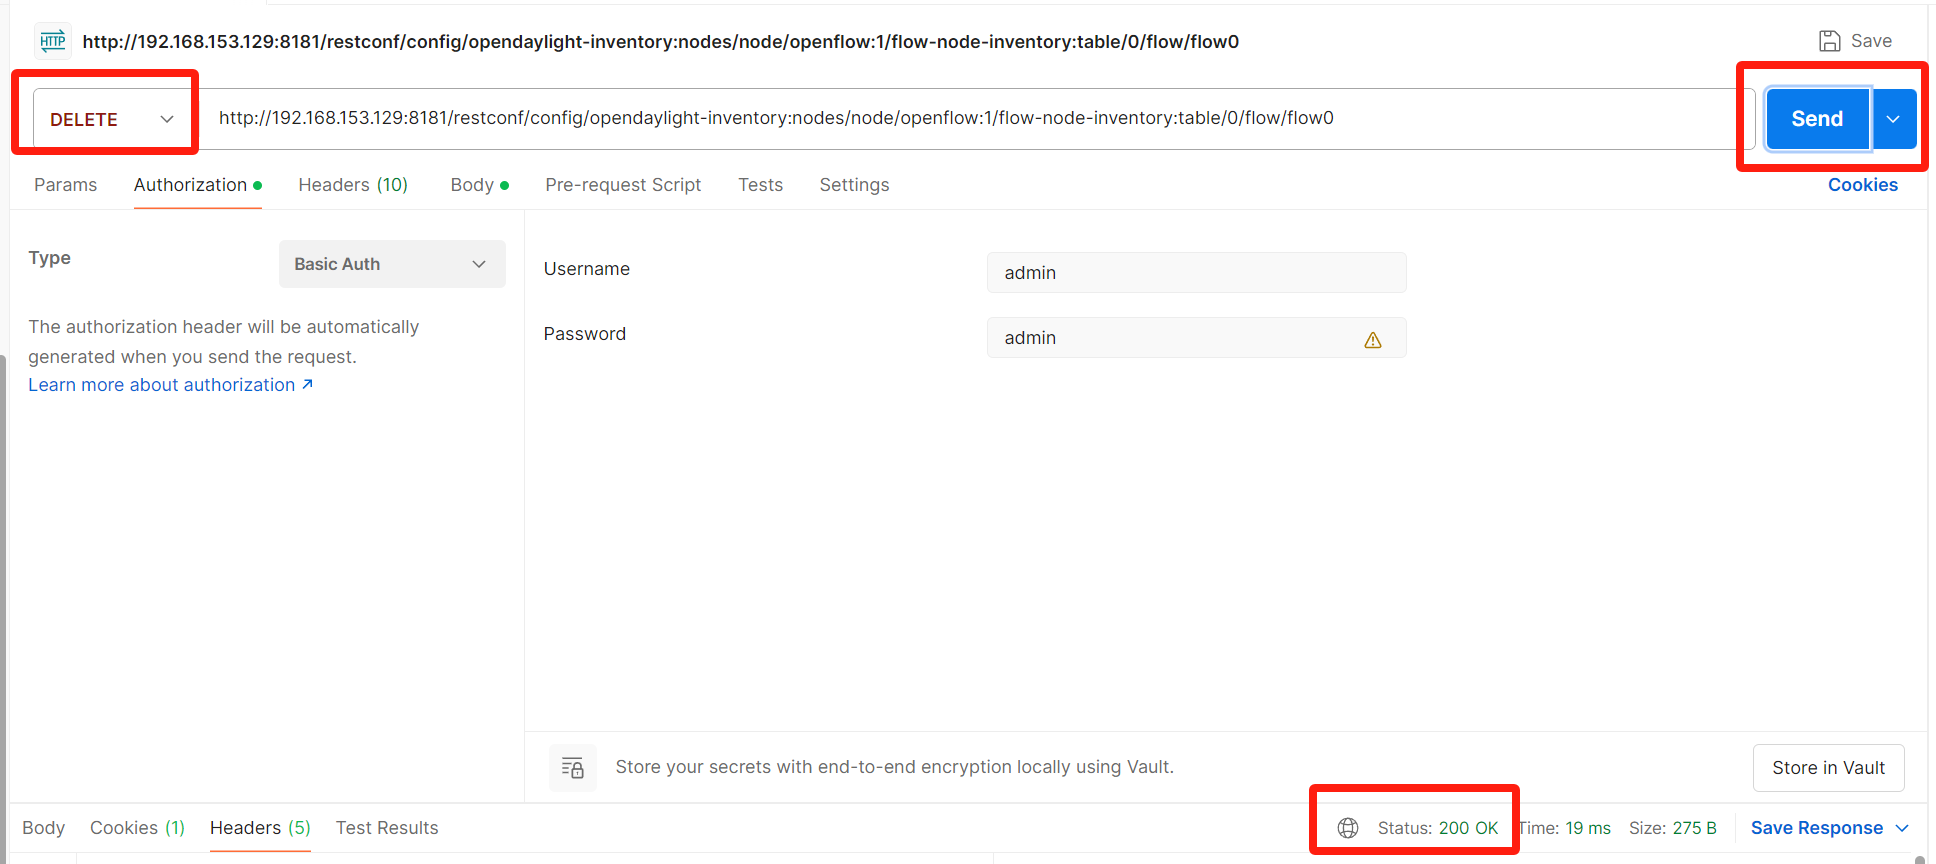
3.1 在Postman新创建一个请求
- URL输入如下:
http://controller-ip:8181/restconf/config/opendaylight-inventory:nodes/node/node-id/table/0/flow/flow0 - 请求类型选择DELETE访问一个页面需要输入用户名和密码,单击Authorization,type选择basic auth。输入用户名和密码,用户名和密码都是admin。点击Send。
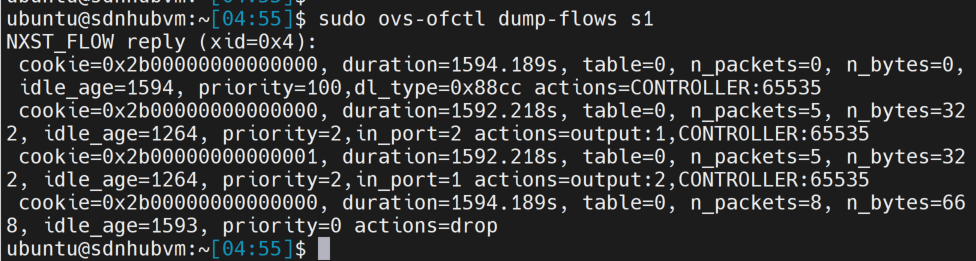
3.2 查看流表项是否删除成功
3.3 验证h1与h2能ping通。
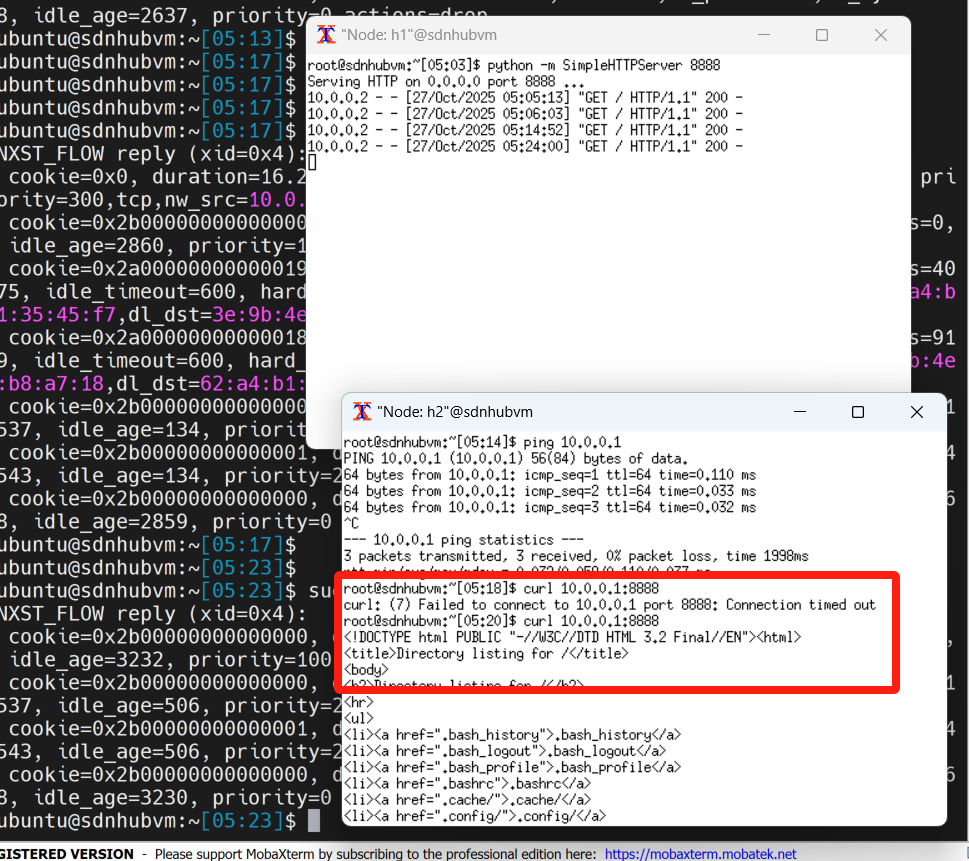
4. 使用Postman下发流表,禁止h2访问h1中的web服务,允许h2能ssh登录到h1。
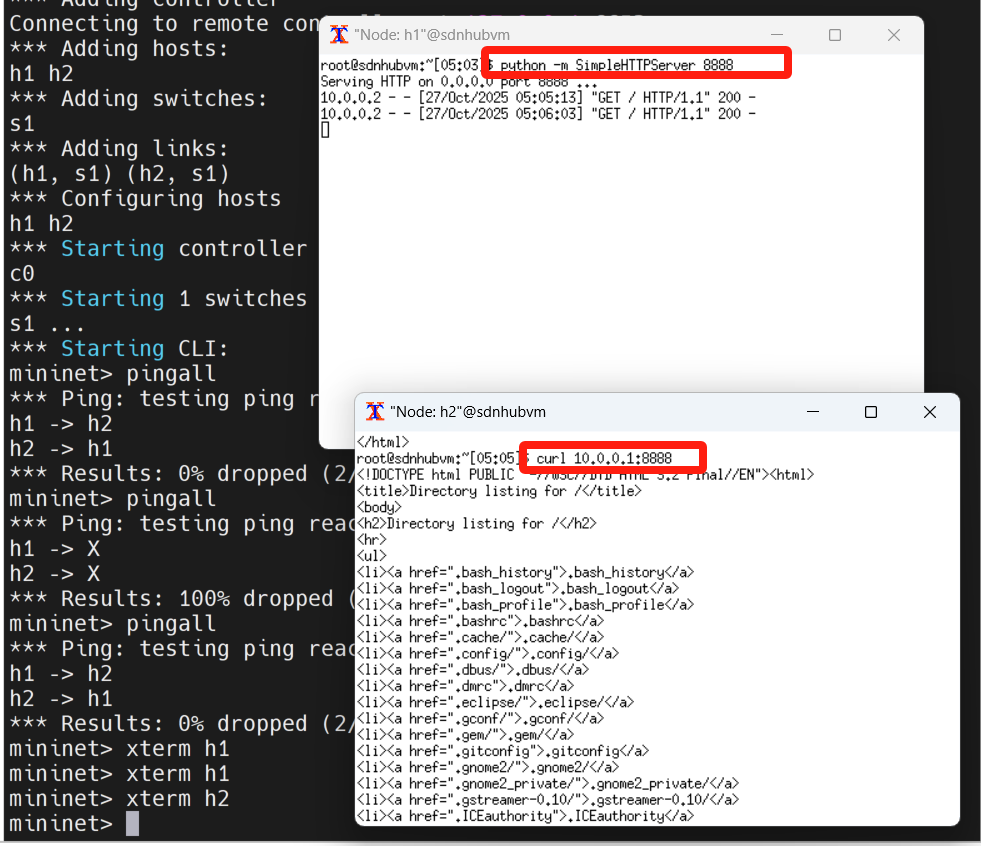
4.1 在h1开启了SimpleHTTPServer服务
- 打开h1的终端
- 开启SimpleHTTPServer服务,并使用8888端口向外提供服务
- 使用xterm登录h2,访问地址:10.0.0.1,验证可以正常访问h1的web服务
4.2 使用Postman下发流表项
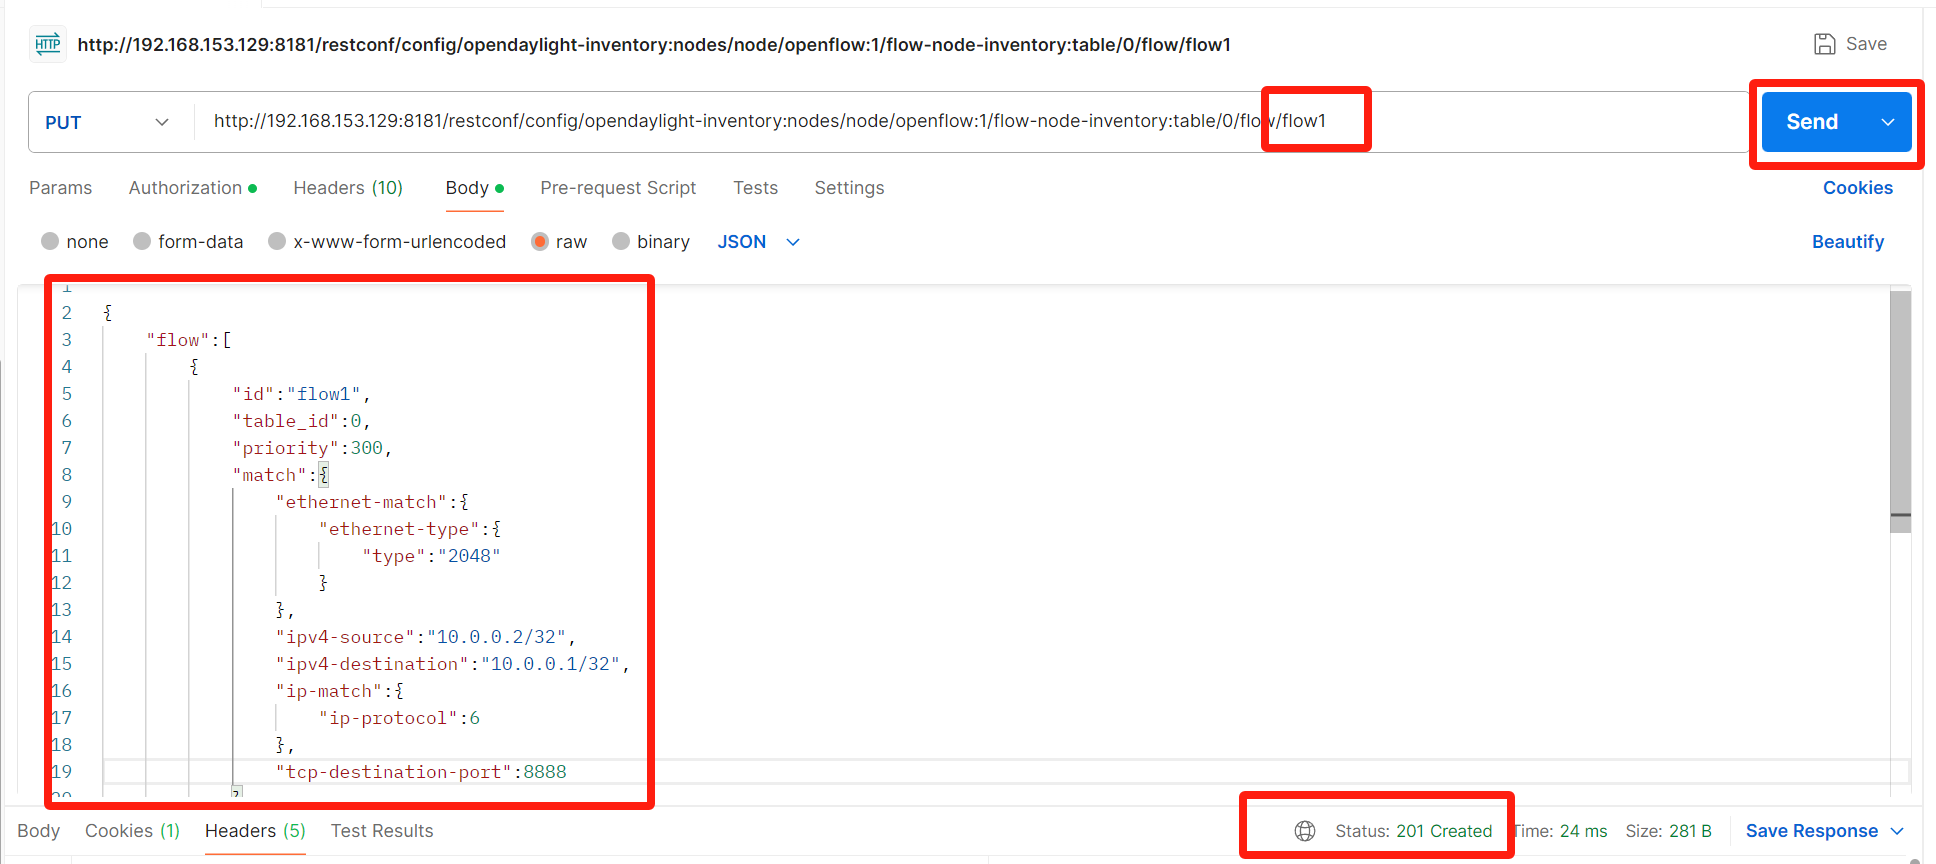
4.2.1 打开Postman工具,创建请求
- 输入URL :http://controller-ip:8181/restconf/config/opendaylight-inventory:nodes/node/node-id/flow-node-inventory:table/0/flow/flow1
- 请求类型选择PUT。单击Authorization,type选择basic auth。输入用户名和密码,用户名和密码都是admin。
- 选择BODY的类型raw ->JSON。
- Body内容:
css
{
    "flow":[
        {
            "id":"flow1",
            "table_id":0,
            "priority":300,
            "match":{
                "ethernet-match":{
                    "ethernet-type":{
                        "type":"2048"
                    }
                },
                "ipv4-source":"10.0.0.2/32",
                "ipv4-destination":"10.0.0.1/32",
                "ip-match":{
                    "ip-protocol":6
                },
                "tcp-destination-port":8888
            },
            "instructions":{
                "instruction":[
                    {
                        "order":"0",
                        "apply-actions":{
                            "action":[
                                {
                                    "order":"0",
                                    "drop-action":{

                                    }
                                }
                            ]
                        }
                    }
                ]
            }
        }
    ]
}
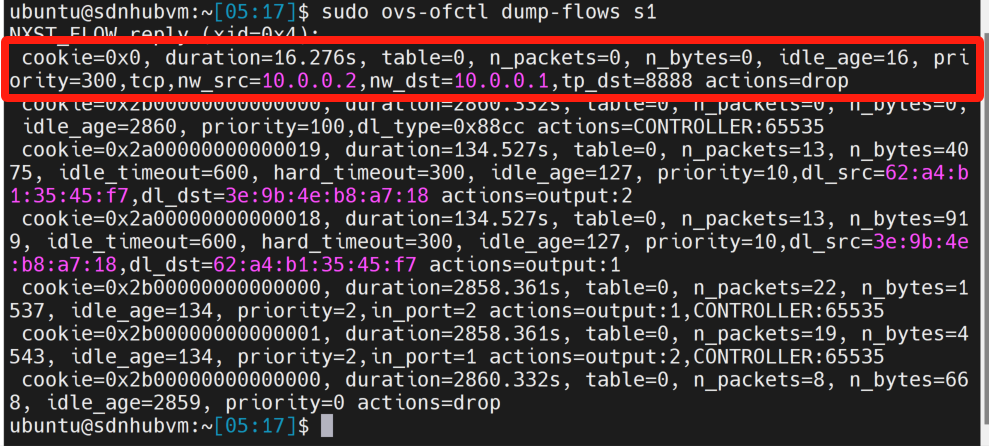
4.2.2 查看流表项是否下发成功
4.3 验证
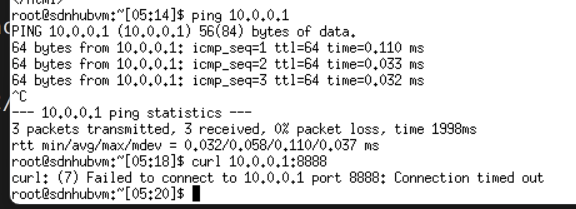
登录h2,验证h2无法访问h1的web服务,验证h2可以正常ping通h1
5. 打开Postman,发送请求,删除步骤4.3添加的流表项。并验证删除流表项后,h2可以正常访问h1的web服务。
5.1 在Postman新创建一个请求
- URL输入如下:
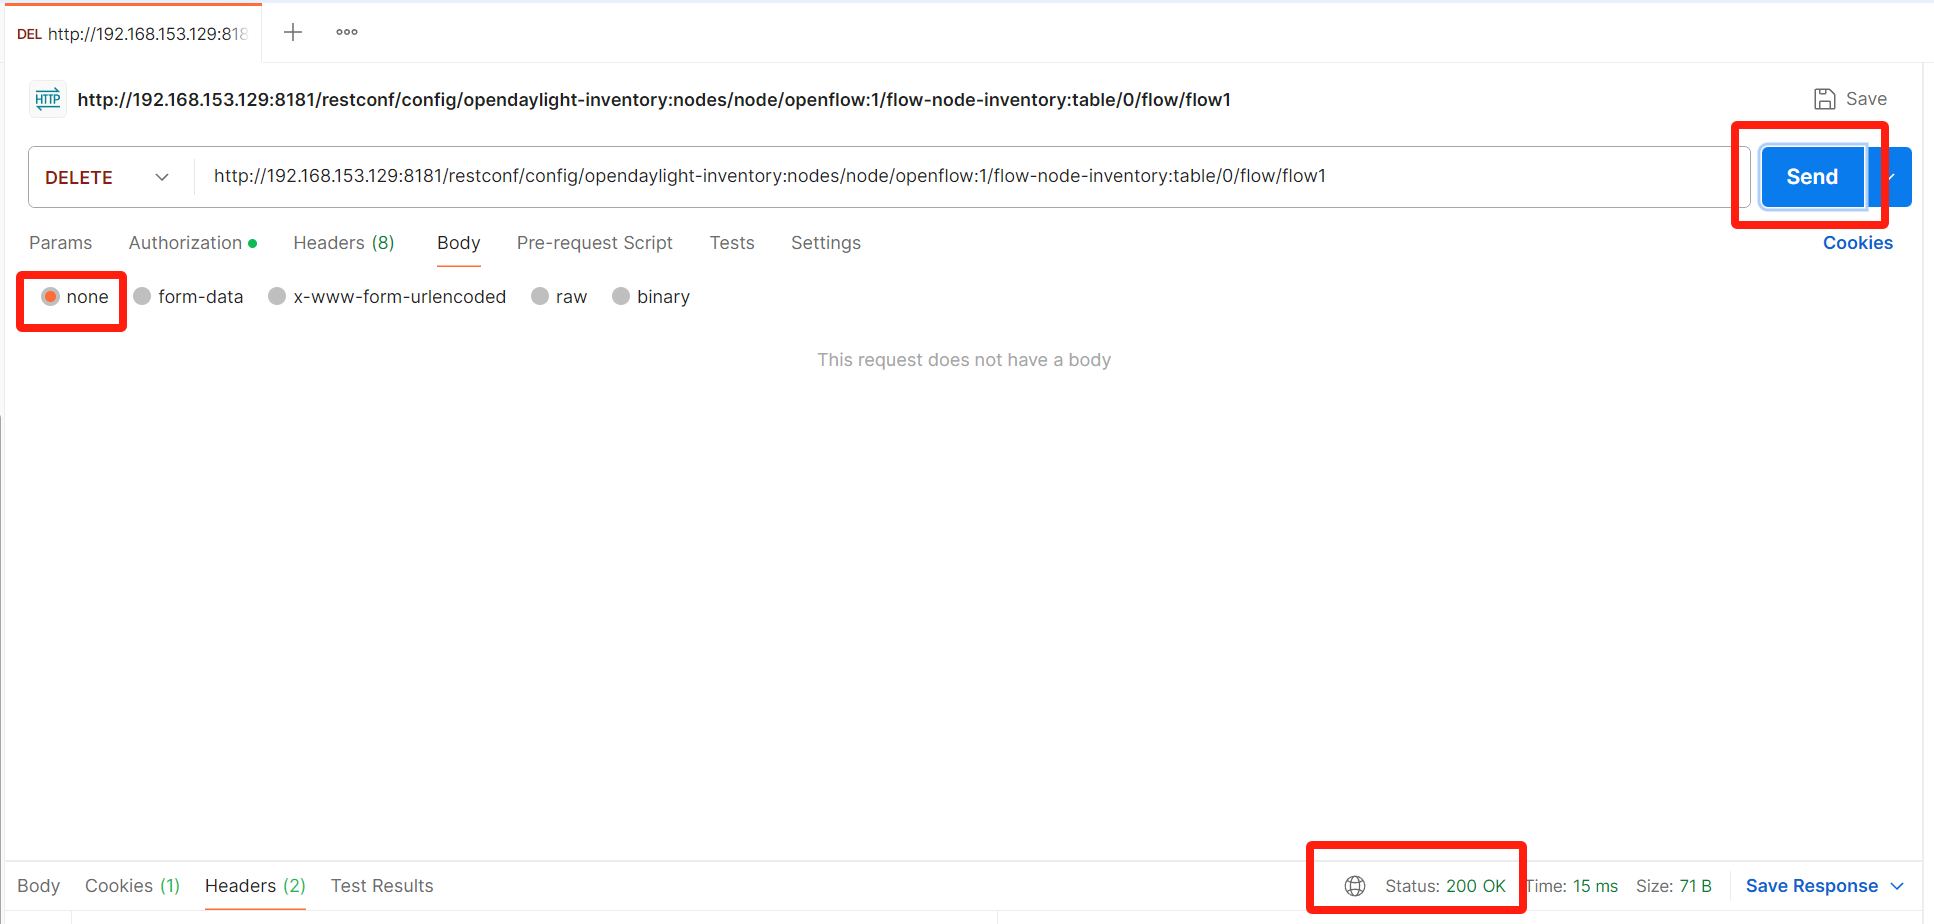
http://controller-ip:8181/restconf/config/opendaylight-inventory:nodes/node/node-id/table/0/flow/flow1。 - 单击Authorization,type选择basic auth。输入用户名和密码,用户名和密码都是admin。
- Body选择None,点击Send。
5.2 查看流表项是否删除成功
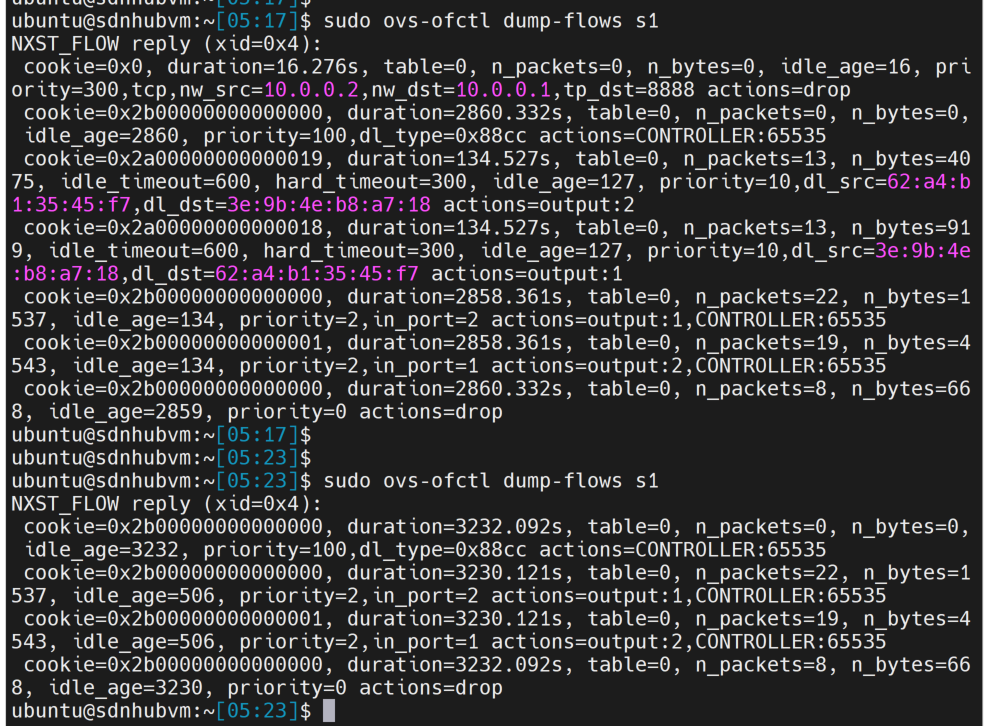
5.3 登录h2,看是否能正常访问h1的web服务