elasticsearch
elk下载地址:https://www.elastic.co/cn/downloads
一、elasticsearch简介
Elasticsearch(简称ES)是一个开源的分布式搜索引擎 ,也是一个分布式文档数据库 。所以它提供了大量数据的存储 功能,快速的搜索 与分析功能。
二、elasticsearch部署
2.1 确定jdk版本(使用系统自带的openjdk就ok)
 [root@es1 ~]# java -version
 openjdk version "1.8.0_412"
 OpenJDK Runtime Environment (build 1.8.0_412-b08)
 OpenJDK 64-Bit Server VM (build 25.412-b08, mixed mode)
2.2 es的安装配置
[root@es1 ~]# ls
anaconda-ks.cfg elasticsearch-6.5.2.rpm
[root@es1 ~]# rpm -ivh elasticsearch-6.5.2.rpm 2.3 单机es的配置与服务启动
 vim /etc/elasticsearch/elasticsearch.yml
 cluster.name: elk-cluster # 可以自定义一个集群名称,不配置的话默认会取名为elasticsearch
 path.data: /var/lib/elasticsearch
 path.logs: /var/log/elasticsearch
 network.host: 0.0.0.0   # 监听所有
http.port: 9200 # 监听端口9200 [root@es1 ~]# systemctl daemon-reload
[root@es1 ~]# systemctl restart
elasticsearch.service
[root@es1 ~]# systemctl enable elasticsearch.service
Created symlink from /etc/systemd/system/multi-user.target.wants/elasticsearch.service to /usr/lib/systemd/system/elasticsearch.service. [root@es1 ~]# ss -anlt |grep -E '(9200|9300)'
LISTEN 0 128 :::9200 :::*
LISTEN 0 128 :::9300 :::* 9200是数据传输端口
9300端口是集群通信端口(我们暂时还没有配置集群,现在是单点elasticsearch)
2.4 查看状态
使用curl命令或浏览器访问http://ip:9200/cluster/health?pretty
 curl http://192.168.100.10:9200/_cluster/health?pretty
 {
   "cluster_name" : "elk-cluster",
   "status" : "green",
   "timed_out" : false,
   "number_of_nodes" : 1,
   "number_of_data_nodes" : 1,
   "active_primary_shards" : 0,
   "active_shards" : 0,
   "relocating_shards" : 0,
   "initializing_shards" : 0,
   "unassigned_shards" : 0,
   "delayed_unassigned_shards" : 0,
   "number_of_pending_tasks" : 0,
   "number_of_in_flight_fetch" : 0,
   "task_max_waiting_in_queue_millis" : 0,
   "active_shards_percent_as_number" : 100.0
 }
三、elasticsearch集群部署
集群部署主要注意以下几个方面
1.集群配置参数:
-
discovery.zen.ping.unicast.hosts,Elasticsearch默认使用Zen Discovery来做节点发现机制,推荐使用unicast来做通信方式,在该配置项中列举出Master节点。
-
discovery.zen.minimum_master_nodes,该参数表示集群中Master节点可工作Master的最小票数,默认值是1。为了提高集群的可用性,避免脑裂现象。官方推荐设置为(N/2)+1,其中 N是具有Master资格的节点的数量。
-
discovery.zen.ping_timeout,表示节点在发现过程中的等待时间,默认值是30秒,可以根据自身网络环境进行调整,一定程度上提供可用性。
2.集群节点:
-
节点类型主要包括Master节点和data节点(client节点和ingest节点不讨论)。通过设置两个配 置项node.master和node.data为true或false来决定将一个节点分配为什么类型的节点。
-
尽量将Master节点和Data节点分开,通常Data节点负载较重,需要考虑单独部署。
3.内存:
- Elasticsearch默认设置的内存是1GB,对于任何一个业务部署来说,这个都太小了。通过指定ES_HEAP_SIZE环境变量,可以修改其堆内存大小,服务进程在启动时候会读取这个变量,并 相应的设置堆的大小。建议设置系统内存的一半给Elasticsearch,但是不要超过32GB。
4.硬盘空间:
- Elasticsearch默认将数据存储在/var/lib/elasticsearch路径下,随着数据的增长,一定会出现硬盘空间不够用的情形,大环境建议把分布式存储挂载到/var/lib/elasticsearch目录下以方便扩容。
配置参考文档: https://www.elastic.co/guide/en/elasticsearch/reference/index.html
首先在ES集群所有节点都安装ES(步骤省略)
可以使用两台或两台以上ES做集群, 以下就是两台ES做集群的配置
[root@es1 ~]# vim /etc/elasticsearch/elasticsearch.yml
cluster.name: elk-cluster
node.name: 192.168.100.10 # 本机IP或主机名
node.master: false # 指定不为master节点
path.data: /var/lib/elasticsearch
path.logs: /var/log/elasticsearch
network.host: 0.0.0.0
http.port: 9200
discovery.zen.ping.unicast.hosts: ["192.168.100.10", "192.168.100.20"] # 集群所有节点IP
systemctl restart elasticsearch.service [root@es2 ~]# vim /etc/elasticsearch/elasticsearch.yml
/etc/elasticsearch/elasticsearch.yml
cluster.name: elk-cluster
node.name: 192.168.100.10 # 本机IP或主机名
node.master: true# 指定为master节点
path.data: /var/lib/elasticsearch
path.logs: /var/log/elasticsearch
network.host: 0.0.0.0
http.port: 9200
discovery.zen.ping.unicast.hosts: ["192.168.100.10", "192.168.100.20"] # 集群所有节点IP
[root@es2 ~]# systemctl daemon-reload
[root@es2 ~]# systemctl restart elasticsearch.service
[root@es2 ~]# systemctl enable elasticsearch.service
Created symlink from /etc/systemd/system/multi-user.target.wants/elasticsearch.service to /usr/lib/systemd/system/elasticsearch.service.查看状态
访问ES集群中任一个节点IP都可以
 [root@es1 ~]# curl http://192.168.100.10:9200/_cluster/health?pretty
 {
   "cluster_name" : "elk-cluster",
   "status" : "green",
   "timed_out" : false,
   "number_of_nodes" : 2,
   "number_of_data_nodes" : 2,
   "active_primary_shards" : 0,
   "active_shards" : 0,
   "relocating_shards" : 0,
   "initializing_shards" : 0,
   "unassigned_shards" : 0,
   "delayed_unassigned_shards" : 0,
   "number_of_pending_tasks" : 0,
   "number_of_in_flight_fetch" : 0,
   "task_max_waiting_in_queue_millis" : 0,
   "active_shards_percent_as_number" : 100.0
 }
四、elaticsearch基础概念
主要的基础概念有:Node, Index,Type,Document,Field,shard和replicas.
**Node(节点):**运行单个ES实例的服务器
**Cluster(集群):**一个或多个节点构成集群
**Index(索引):**索引是多个文档的集合
**Type(类型):**一个Index可以定义一种或多种类型,将Document逻辑分组
**Document(文档):**Index里每条记录称为Document,若干文档构建一个Index
**Field(字段):**ES存储的最小单元
**Shards(分片):**ES将Index分为若干份,每一份就是一个分片
**Replicas(副本):**Index的一份或多份副本
为了便于理解,我们和mysql这种关系型数据库做一个对比:
| 关系型数据库(如mysql,oracle等) | elasticsearch |
|---|---|
| database或schema | index |
| table | type |
| row | document |
| column或field | field |
ES是分布式搜索引擎,每个索引有一个或多个分片(shard),索引的数据被分配到各个分片上。你可以看作是一份数据分成了多份给不同的节点。
当ES集群增加或删除节点时,shard会在多个节点中均衡分配。默认是5个primary shard(主分片)和1个 replica shard(副本,用于容错)。
五、elaticsearch基础API操作
前面我们通过http://ip:9200/cluster/health?pretty查看ES集群状态,其实就是它的一种API操作。
API应用程序编程接口,就是无需访问程序源码或理解内部工作机制就能实现一些相关功能的接口。
RestFul API 格式
curl -X<verb> ‘<protocol>://<host>:<port>/<path>?<query_string>’-d ‘<body>’| 参数 | 描述 |
|---|---|
| verb | HTTP方法,比如GET、POST、PUT、HEAD、DELETE |
| host | ES集群中的任意节点主机名 |
| port | ES HTTP服务端口,默认9200 |
| path | 索引路径 |
| query_string | 可选的查询请求参数。例如?pretty参数将返回JSON格式数据 |
| -d | 里面放一个GET的JSON格式请求主体 |
| body | 自己写的JSON格式的请求主体 |
elasticseearch的API很多, 我们运维人员主要用到以下几个要介绍的较简单的API。
5.1 查看节点信息
通过curl或浏览器访问http://ip:9200/_cat/nodes?v IP为ES节点IP,如果有ES集群,则为ES任意节点IP。
 [root@es1 ~]# curl http://192.168.100.10:9200/_cat/nodes?v
 ip             heap.percent ram.percent cpu load_1m load_5m load_15m node.role master name
 192.168.100.20           28          47   0    0.00    0.01     0.05 mdi       *      192.168.100.20
 192.168.100.10           25          47   0    0.05    0.03     0.05 di        -      192.168.100.10
5.2 查看索引信息
通过curl或浏览器访问http://ip:9200/_cat/indices?v
 [root@es1 ~]# curl http://192.168.100.10:9200/_cat/indices?v
 health status index uuid pri rep docs.count docs.deleted store.size pri.store.size
默认现在没有任何索引
5.3 新增索引
 [root@es1 ~]# curl -X PUT http://192.168.100.10:9200/nginx_access_log
{"acknowledged":true,"shards_acknowledged":true,"index":"nginx_access_log"} [root@es1 ~]# curl http://192.168.100.10:9200/_cat/indices?v
health status index uuid pri rep docs.count docs.deleted store.size pri.store.size
green open nginx_access_log sNlcZx2TTxyiX57tV_2tHw 5 1 0 0 2.2kb 1.1kb**green:**所有的主分片和副本分片都已分配。你的集群是100%可用的。
**yellow:**所有的主分片已经分片了,但至少还有一个副本是缺失的。不会有数据丢失,所以搜索结果依然是完整的。不过,你的高可用性在某种程度上被弱化。如果更多的分片消失,你就会丢数据了。把yellow想象成一个需要及时调查的警告。
**red:**至少一个主分片(以及它的全部副本)都在缺失中。这意味着你在缺少数据:搜索只能返回部分数据,而分配到这个分片上的写入请求会返回一个异常。
5.4 删除索引
[root@es1 ~]# curl -X DELETE http://192.168.100.10:9200/nginx_access_log [root@es1 ~]# curl http://192.168.100.10:9200/_cat/indices?v
health status index uuid pri rep docs.count docs.deleted store.size pri.store.size六、elasticsearch-head
elasticsearch-head是集群管理、数据可视化、增删改查、查询语句可视化工具。从ES5版本后安装方式和ES2以上的版本有很大的不同,在ES2中可以直接在bin目录下执行plugin install xxxx 来进行安装,但是在ES5中这种安装方式变了,要想在ES5中安装Elasticsearch Head必须要安装NodeJs,然后通过NodeJS来启动Head。
官网地址:https://github.com/mobz/elasticsearch-head
elasticsearch-head安装
安装到ES集群master节点上
官网有安装说明,可以通过git安装,也可以下载zip包解压安装
下载相应的软件包,并拷贝到ES集群的一个节点上
6.1 安装nodejs
 [root@es2 ~]# ls
 anaconda-ks.cfg          elasticsearch-head
elasticsearch-6.5.2.rpm node-v10.24.1-linux-x64.tar.xz [root@es2 ~]# tar -xf node-v10.24.1-linux-x64.tar.xz -C /usr/local/
[root@es2 ~]# cd /usr/local/
[root@es2 local]# ls
bin games lib libexec sbin src
etc include lib64 node-v10.24.1-linux-x64 share
[root@es2 local]# mv node-v10.24.1-linux-x64/ nodejs
[root@es2 local]# ls
bin etc games include lib lib64 libexec nodejs sbin share src
[root@es2 local]# ln -s /usr/local/nodejs/bin/npm /bin/npm
[root@es2 local]# ln -s /usr/local/nodejs/bin/node /bin/node6.2 安装es-head
[root@es2 ~]# yum -y install git
[root@es2 ~]# git clone https://github.com/mobz/elasticsearch-head
Cloning into 'elasticsearch-head'...
remote: Enumerating objects: 4377, done.
remote: Counting objects: 100% (40/40), done.
remote: Compressing objects: 100% (27/27), done.
remote: Total 4377 (delta 12), reused 34 (delta 12), pack-reused 4337 (from 1)
Receiving objects: 100% (4377/4377), 2.54 MiB | 1.27 MiB/s, done.
Resolving deltas: 100% (2429/2429), done.先使用npm安装grunt
先使用npm安装grunt
npm(node package manager):node包管理工具,类似yum
Grunt是基于Node.js的项目构建工具
[root@es2 ~]# cd elasticsearch-head/
[root@es2 elasticsearch-head]# npm install -g grunt-cli
[root@es2 elasticsearch-head]# npm install安装可能有很多错误(重点注意红色的ERR!,黄色的WARN不用管)
解决方法:
[root@es2 elasticsearch-head]# npm install phantomjs-prebuilt@2.1.16 --ignore-script此命令执行后不用再返回去执行npm install了,直接开始启动
[root@es2 elasticsearch-head]# nohup npm run start &6.4 浏览器访问
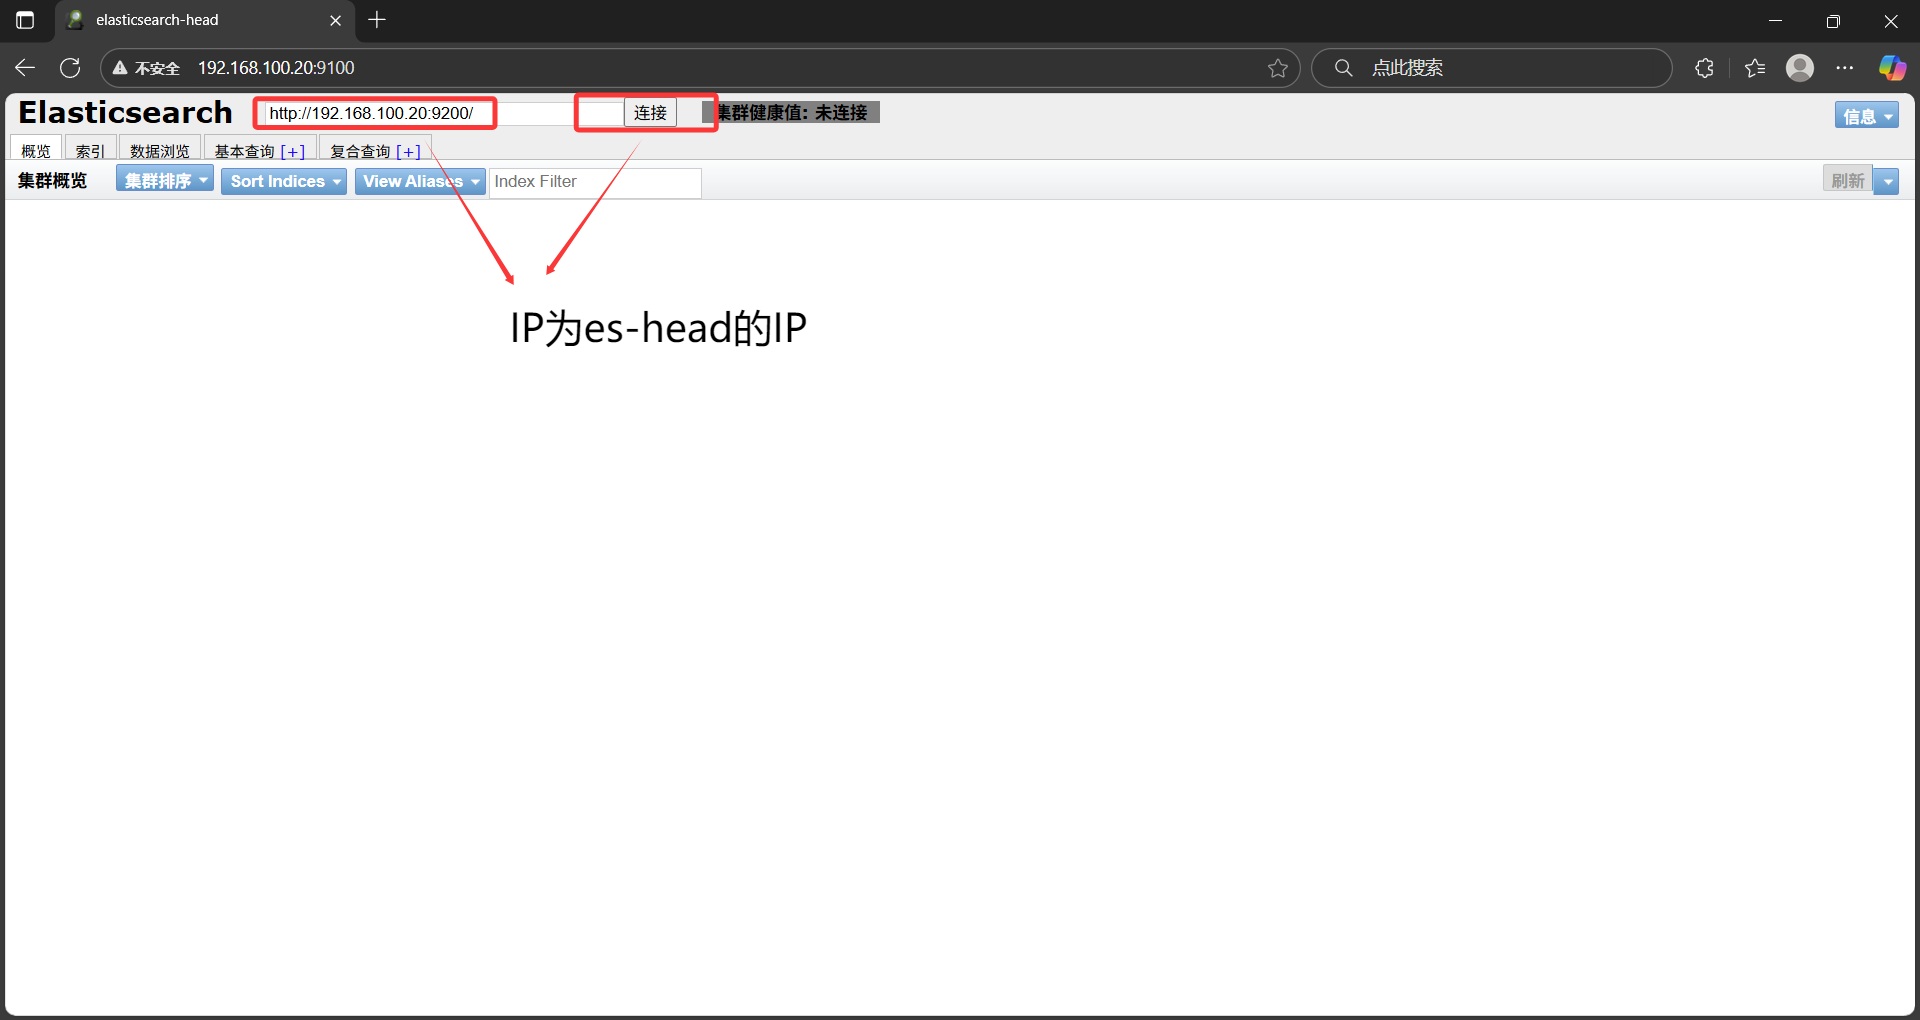
浏览器访问http://ip:9100
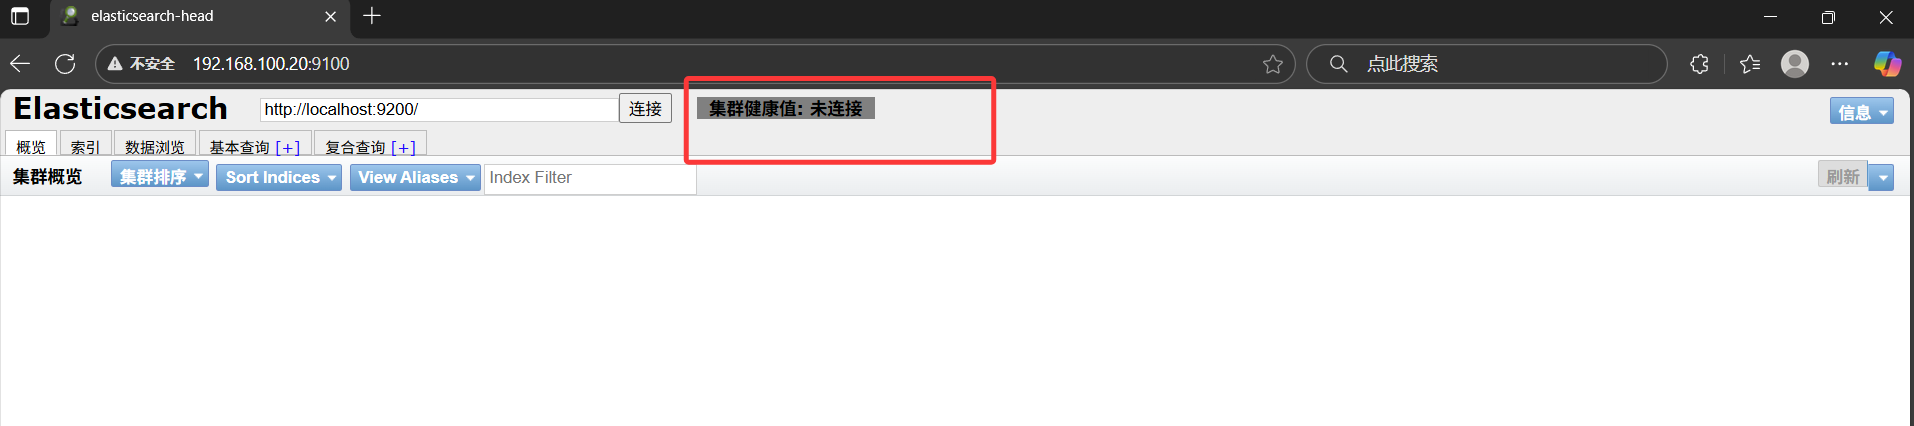
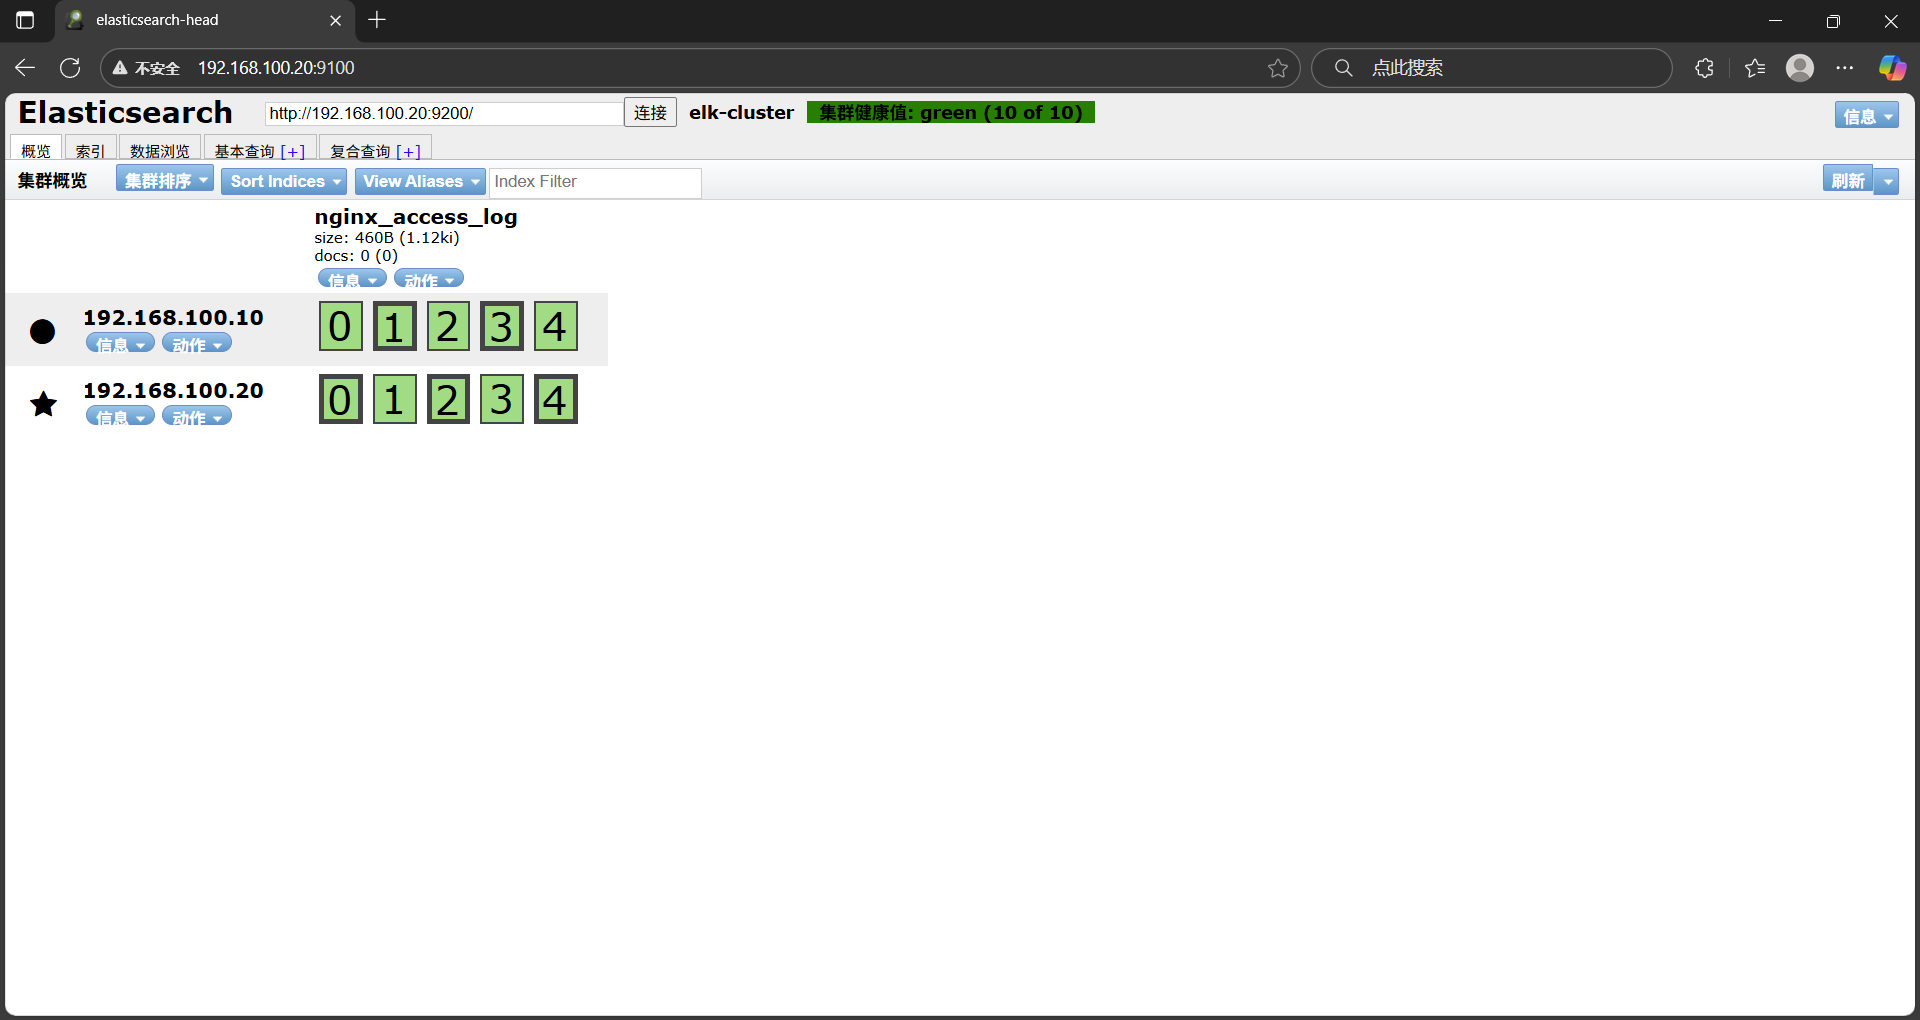
6.5 修改ES集群配置文件,重启服务
ES集群都要修改
 vim /etc/elasticsearch/elasticsearch.yml
 http.cors.enabled: true
 http.cors.allow-origin: "*"
加上以上两句
systemctl restart elasticsearch.service