1、安装Docker
2、安装Swagger
2.1、方式1
2.1.1、安装swagger-editor
bash
docker pull swaggerapi/swagger-editor
docker run -d --name swagger-editor -p 8080:8080 swaggerapi/swagger-editor
2.1.2、安装swagger-ui
bash
mkdir -p /root/swaggerapi/swagger-ui/data
bash
docker pull swaggerapi/swagger-ui
docker run -d --name swagger-ui -v /root/swaggerapi/swagger-ui/data:/usr/share/nginx/html/data -p 3000:8080 swaggerapi/swagger-ui
2.2、方式2
2.2.1、安装swagger-editor
创建目录;
bash
mkdir -p /root/swaggerapi/swagger-editor
cd /root/swaggerapi/swagger-editor/
下载:
bash
wget https://github.com/swagger-api/swagger-editor/archive/refs/tags/v4.14.5.tar.gz解压:
bash
tar -xf v4.14.5.tar.gz项目结构:
bash
# 命令:
tree -L 1 swagger-editor/

# 内容:
swagger-editor/
|-- swagger-editor-4.14.5
`-- v4.14.5.tar.gz

1 directory, 1 file
查看Dockerfile文件:
bash
# 命令;
cd swagger-editor-4.14.5
cat Dockerfile


# 内容:
FROM nginx:1.27.4-alpine

LABEL maintainer="vladimir.gorej@smartbear.com" \
      org.opencontainers.image.authors="vladimir.gorej@smartbear.com" \
      org.opencontainers.image.url="https://editor.swagger.io" \
      org.opencontainers.image.source="https://github.com/swagger-api/swagger-editor"

ENV BASE_URL="/" \
    PORT="8080"

RUN apk update && apk add --no-cache "tiff>=4.4.0-r4"

COPY nginx.conf /etc/nginx/templates/default.conf.template

COPY ./index.html /usr/share/nginx/html/
COPY ./dist/oauth2-redirect.html /usr/share/nginx/html/
COPY ./dist/* /usr/share/nginx/html/dist/
COPY ./docker-run.sh /docker-entrypoint.d/91-docker-run.sh

RUN chmod +x /docker-entrypoint.d/91-docker-run.sh

EXPOSE 8080
构建镜像:
bash
docker build -t swagger-editor:v1 .启动容器:
bash
docker run -d --name swagger-editor -p 8080:8080 swagger-editor:v12.2.2、安装swagger-ui
创建目录;
bash
mkdir -p /root/swaggerapi/swagger-ui/data
cd /root/swaggerapi/swagger-ui/
下载:
bash
wget https://github.com/swagger-api/swagger-ui/archive/refs/tags/v5.21.0.tar.gz解压:
bash
tar -xf v5.21.0.tar.gz项目结构:
bash
# 命令:
tree -L 1 swagger-ui/

# 内容:
swagger-ui/
|-- data
|-- swagger-ui-5.21.0
`-- v5.21.0.tar.gz

2 directories, 1 file
查看Dockerfile文件:
bash
# 命令:
cd swagger-ui-5.21.0
cat Dockerfile


# 内容:
# Looking for information on environment variables?
# We don't declare them here --- take a look at our docs.
# https://github.com/swagger-api/swagger-ui/blob/master/docs/usage/configuration.md

FROM nginx:1.27.4-alpine

LABEL maintainer="vladimir.gorej@gmail.com" \
      org.opencontainers.image.authors="vladimir.gorej@gmail.com" \
      org.opencontainers.image.url="docker.swagger.io/swaggerapi/swagger-ui" \
      org.opencontainers.image.source="https://github.com/swagger-api/swagger-ui" \
      org.opencontainers.image.description="SwaggerUI Docker image" \
      org.opencontainers.image.licenses="Apache-2.0"

RUN apk add --update-cache --no-cache "nodejs" "libxml2>=2.13.4-r5" "libexpat>=2.7.0-r0" "libxslt>=1.1.42-r2" "xz-libs>=5.6.3-r1" "c-ares>=1.34.5-r0"

LABEL maintainer="char0n"

ENV API_KEY="**None**" \
    SWAGGER_JSON="/app/swagger.json" \
    PORT="8080" \
    PORT_IPV6="" \
    BASE_URL="/" \
    SWAGGER_JSON_URL="" \
    CORS="true" \
    EMBEDDING="false"

COPY --chown=nginx:nginx --chmod=0666 ./docker/default.conf.template ./docker/cors.conf ./docker/embedding.conf /etc/nginx/templates/

COPY --chmod=0666 ./dist/* /usr/share/nginx/html/
COPY --chmod=0555 ./docker/docker-entrypoint.d/ /docker-entrypoint.d/
COPY --chmod=0666 ./docker/configurator /usr/share/nginx/configurator

# Simulates running NGINX as a non root; in future we want to use nginxinc/nginx-unprivileged.
# In future we will have separate unpriviledged images tagged as v5.1.2-unprivileged.
RUN chmod 777 /usr/share/nginx/html/ /etc/nginx/conf.d/ /etc/nginx/conf.d/default.conf /var/cache/nginx/ /var/run/

EXPOSE 8080
构建镜像:
bash
docker build -t swagger-ui:v1 .启动容器:
bash
docker run -d --name swagger-ui -v /root/swaggerapi/swagger-ui/data:/usr/share/nginx/html/data -p 3000:8080 swagger-ui:v13、浏览器访问
bash
假设当前ip为192.168.186.128
浏览器访问swagger-editor:http://192.168.186.128:8080
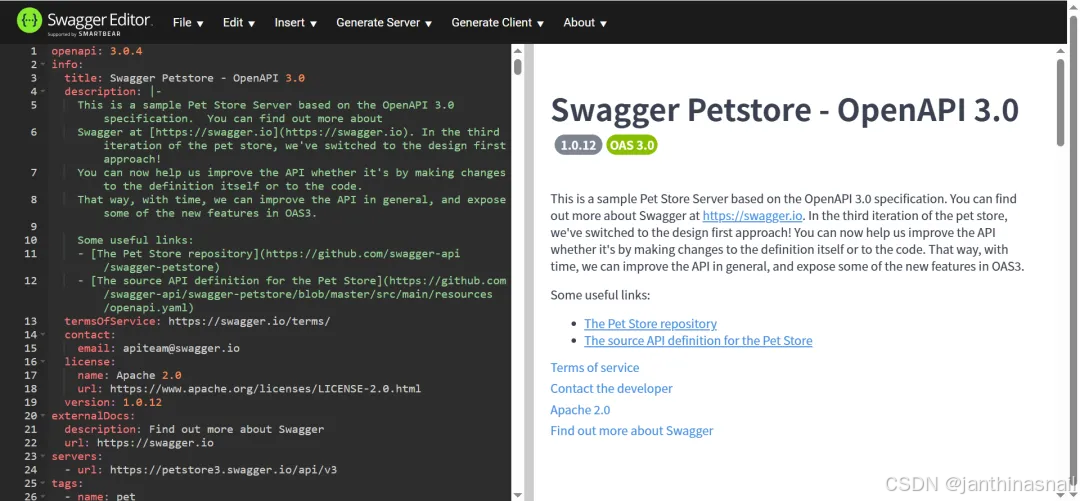
浏览器访问swagger-ui:http://192.168.186.128:3000浏览器访问swagger-editor:
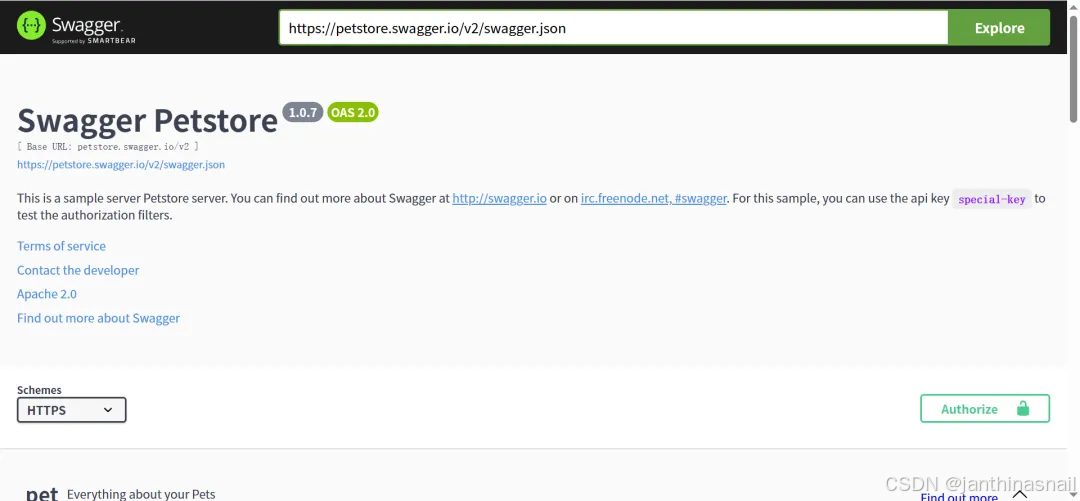
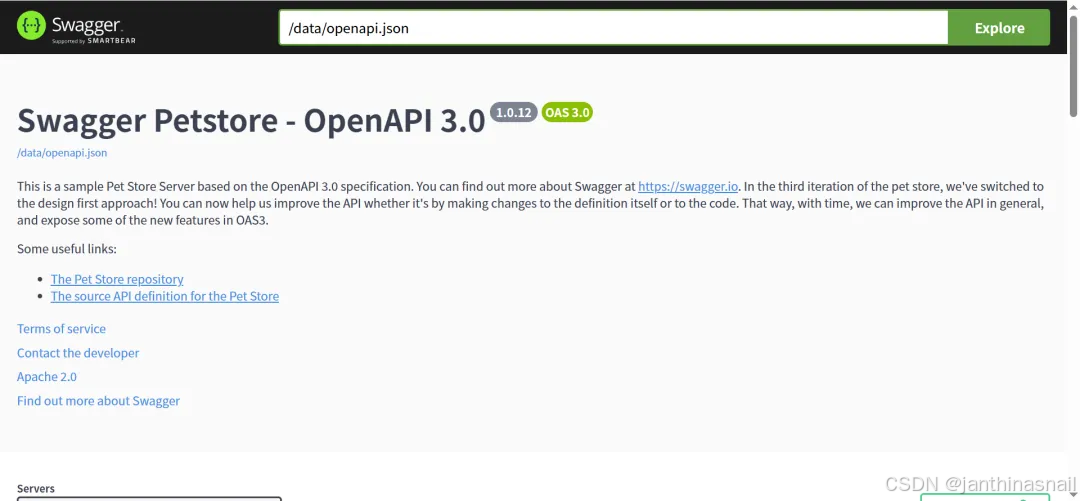
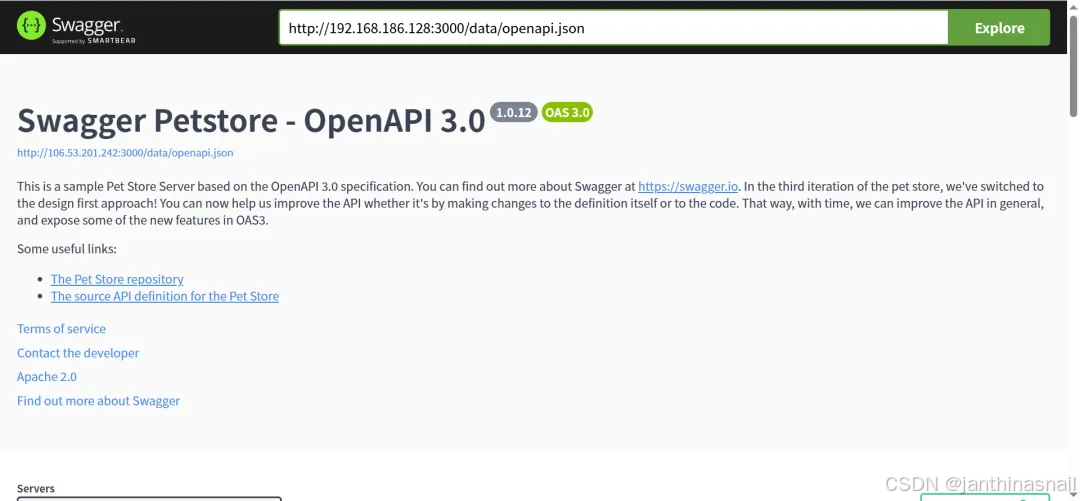
浏览器访问swagger-ui:
4、测试
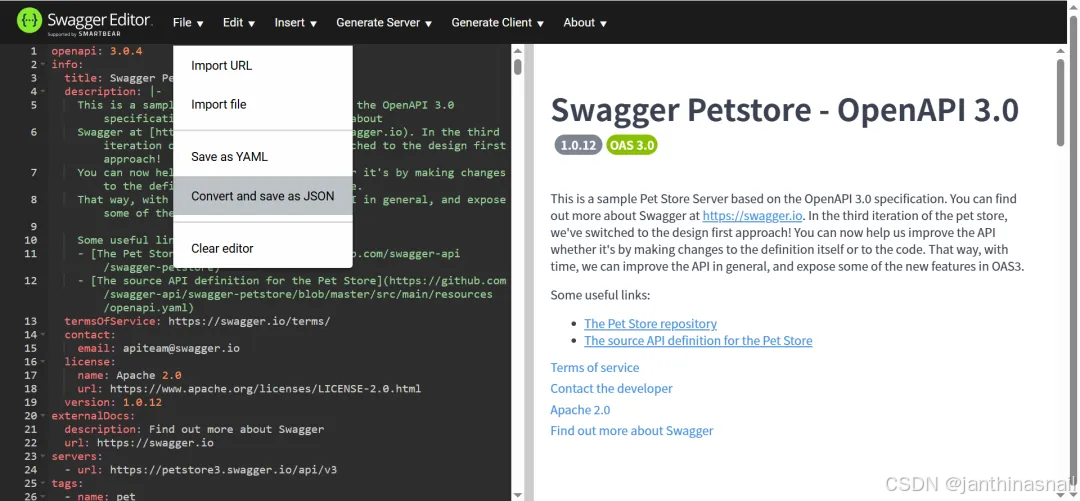
点击"swagger-editor"页面的"File",选择"Convert and save as JSON":
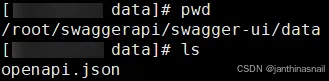
将下载的文件上传到服务器的"/root/swaggerapi/swagger-ui/data":
在"swagger-editor"页面的输入框填写"/data/openapi.json"或者"url",点击"Explore":
5、详见
bash
https://swagger.io/
https://github.com/swagger-api/swagger-editor
https://github.com/swagger-api/swagger-ui