1、安装【注意:my@example.com要替换成自己的邮箱】
直接使用官方地址,下载和安装
bash
curl https://get.acme.sh | sh -s email=my@example.com如果无法使用,可以使用git下载资源后,手动安装
git clone --depth 1 https://github.com/acmesh-official/acme.sh.git国内的建议使用gitee资源
git clone --depth 1 https://gitee.com/neilpang/acme.sh.git安装命令
./acme.sh --install -m my@example.com安装完成后要自行重启命令行 ,或者重新加载一下.bashrc文件 (source ~/.bashrc)。执行成功后,才可以直接使用acme.sh命令
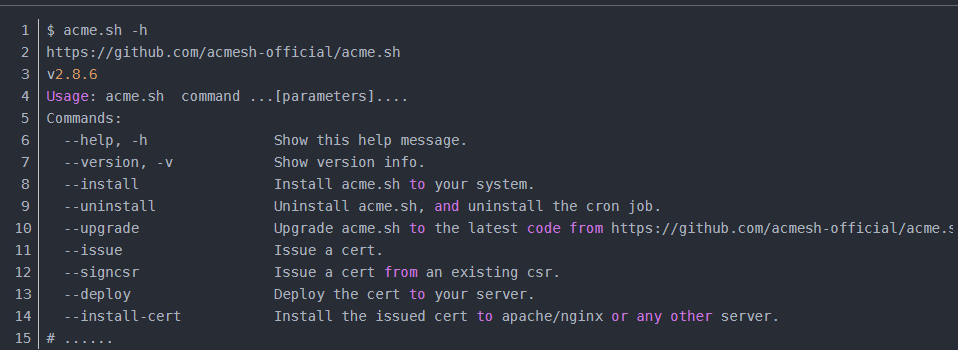
验证安装是否OK,执行 acme.sh -h,如果输出版本等信息,则表示OK
2、签发证书
签发 SSL 证书需要证明这个域名是属于你的,即域名所有权,一般有两种方式验证:http 和 dns 验证。
这里以单域名证书和HTTP验证为例
这种方式 acme.sh 会自动在你的网站根目录下放置一个文件,来验证你的域名所有权,验证之后就签发证书,最后会自动删除验证文件。
前提是要绑定的域名已经绑定到了所在服务器上,且可以通过公网进行访问!
2.1 Webroot mode
假设服务器在运行着的,网站域名为 example.com,根目为/home/wwwroot/example.com。那么只需要执行下面这条语句就行
bash
acme.sh --issue -d example.com -w /home/wwwroot/example.com2.2 Apache / Nginx mode
如果用的是 Apache 或者 Nginx 服务器,可以自动寻找配置文件来进行签发
bash
acme.sh  --issue  -d example.com  --apache  # Apache
acme.sh  --issue  -d example.com  --nginx   # Nginx
如果找不到配置文件的话可以自行配置。
bash
acme.sh  --issue  -d example.com  --nginx /etc/nginx/nginx.conf  # 指定nginx的conf
acme.sh  --issue  -d example.com  --nginx /etc/nginx/conf.d/example.com.conf  # 指定网站的conf
如果是nginx服务器时,出现"seems that the nginx config is not correct, cannot continue.",可以查看文末的常见问题
3、安装使用证书
签发证书成功后,需要把证书安装或者复制到真正需要的地方,如 nginx / apache 的目录下。官方说必须用下面的命令来安装证书,不能直接用 ~/.acme.sh/目录下的证书文件,因为那只能内部使用,且未来目录结构可能会更改。
我们只需要使用 --installcert 命令,指定目标位置,然后证书文件就会被 copy 到相应的位置了。
其中域名是必须的,其他参数是可选的。
在命令中的 reloadcmd 参数很重要! 这个用来指定证书更新(Renew)后执行的命令,从而使续期后的证书生效。
默认 60 天就会续期一次,上面这些参数会记录下来并自动执行
3.1 nginx
bash
acme.sh --installcert -d example.com \
--key-file       /path/to/keyfile/in/nginx/key.pem  \
--fullchain-file /path/to/fullchain/nginx/cert.pem \
--reloadcmd     "service nginx force-reload"
可以在 nginx 的目录下新建一个 ssl 目录,然后把证书安装 / copy 过去
bash
acme.sh --installcert -d example.com \
        --key-file   /etc/nginx/ssl/example.com.key \
        --fullchain-file /etc/nginx/ssl/example.com.fullchain.cer \
        --reloadcmd  "service nginx force-reload"
3.2 Apache
bash
acme.sh --install-cert -d example.com \
--cert-file      /path/to/certfile/in/apache/cert.pem  \
--key-file       /path/to/keyfile/in/apache/key.pem  \
--fullchain-file /path/to/fullchain/certfile/apache/fullchain.pem \
--reloadcmd     "service apache2 force-reload"
4、常见问题
4.1 nginx服务出现"seems that the nginx config is not correct, cannot continue"错误提示?
原因:新版本nginx的nginx.conf增加了一行"include /etc/nginx/sites-enabled/*",
而这个目录底下有一个default文件,这个文件定义了:
bash
server {
    listen 80 default_server;
    listen [::]:80 default_server;
    root /var/www/html;
    index index.html index.htm index.nginx-debian.html;
    server_name _;
    location / {
        # First attempt to serve request as file, then
        # as directory, then fall back to displaying a 404.
        try_files $uri $uri/ =404;
    }
}
由于该include指令在nginx.conf文件中是最后一个,所以,前面配置的
bash
server{
    listen 80;
    location / {
        # 所有你的配置都不会生效,会被后面的缺省配置覆盖掉!!
        proxy_pass http://localhost:8080/
    }
}
如此一来,如果需要配置80的代理,你不能在ngnix 文件,或者conf.d目录下,而应该替换/etc/nginx/sites-enabled/default文件中的配置。
或者把include /etc/nginx/sites-enabled/*注释掉
4.2 签发速度太慢,acme默认使用的是ZeroSSL ca服务商,对国内不友好,可以更改默认ca服务商为letsencrypt,提高签发速度。
更改默认ca服务商指令
bash
acme.sh --set-default-ca --server letsencrypt5.参考链接
链接1:https://blog.csdn.net/luolianxi/article/details/113174510
链接2:https://zhuanlan.zhihu.com/p/696959995
链接3:https://blog.csdn.net/weixin_28746207/article/details/112810432