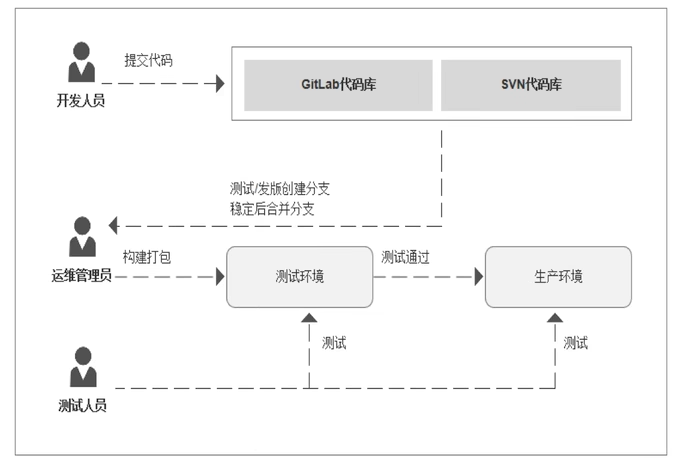
传统传统应用开发模式
开发本地开发、测试,提交到代码版本管理库
运维把应用部署到测试环境,供 QA 测试,测试通过部署到生产环境
QA 进行测试,通过后通知运维发布到生产
问题
错误发现不及时
人工错误发生
团队沟通效率
自动化运维环境开发模式
持续集成(Continuous Integration,CI):代码合并、部署、自动化测试都在一起,不断执行过程,反馈结果
持续交付(Continuous Delivery,CD):一种软件工程方法,让软件的产出过程在一个短周期内完成,保持随时可发布状态。与持续集成相比,持续交付偏向可交付的产物
持续部署(Continuous Deployment,CD):通过自动化部署的手段将软件频繁的交付,部署到期望的环境。
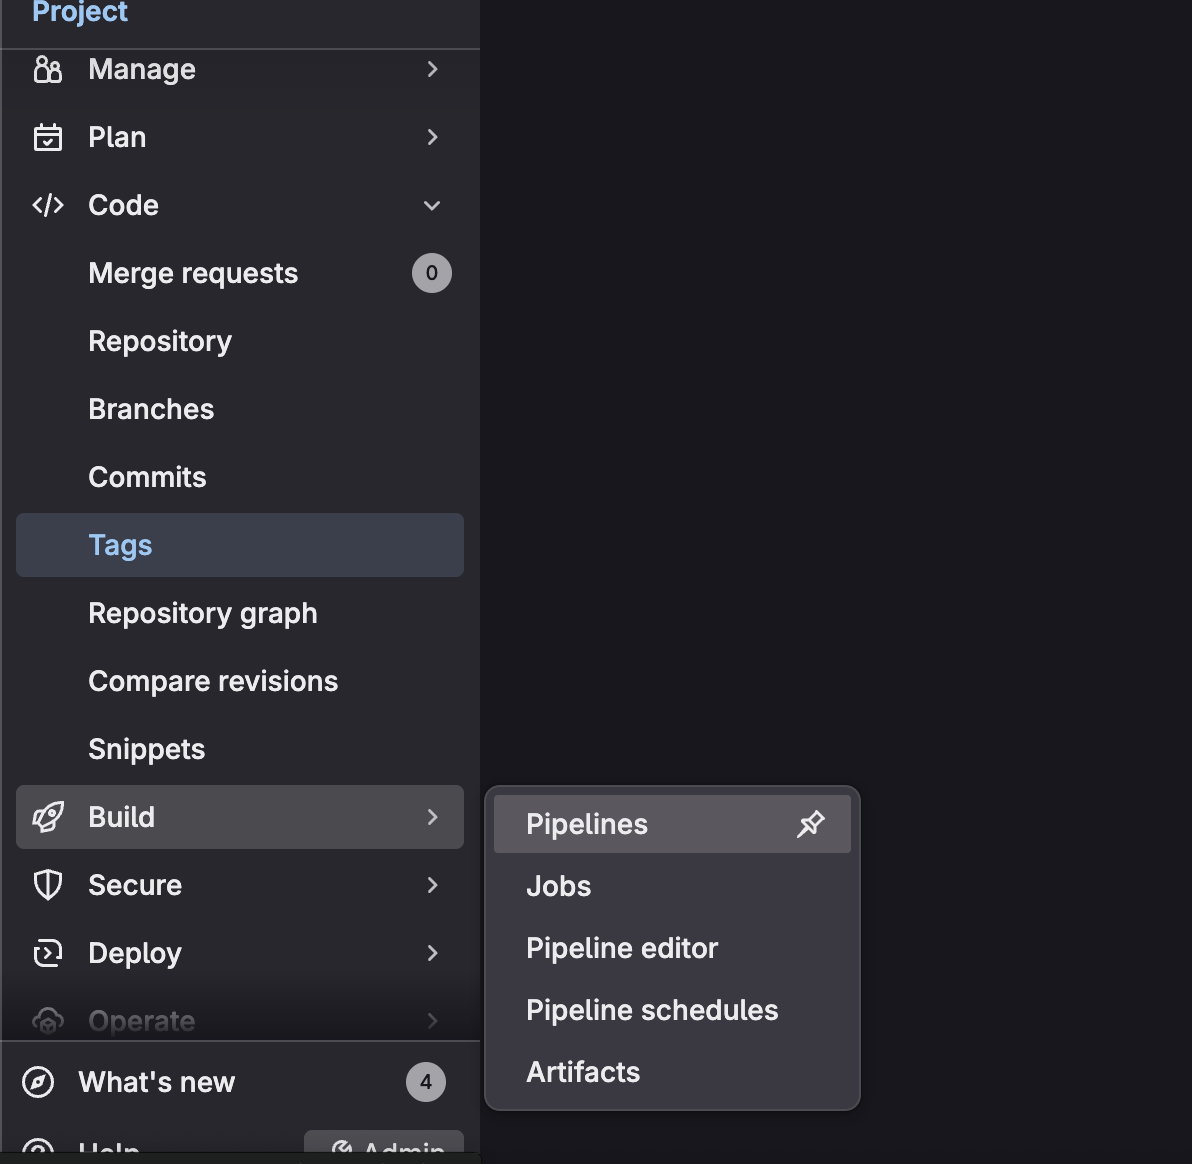
Gitlab CI/CD
代码审查、问题跟踪、项目 wiki、多角色、CI 工具集成,有开源版本
Gitlab CI/CD
- Gitlab 的一部分
- Gitlab Runner,一个处理构建的应用程序,可单独部署,可通过 API 与 Gitlab CI/CD 一起使用
- .gitlab-ci.yml
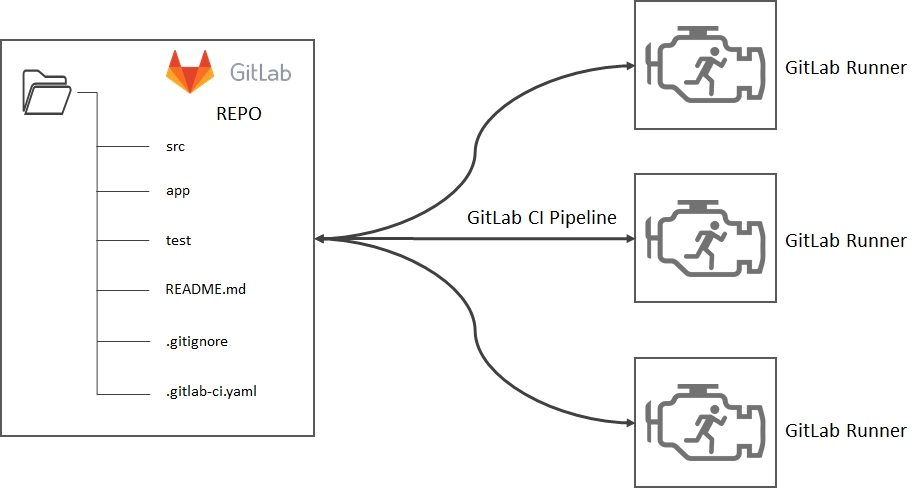
将代码托管到 Git 仓库
在项目根目录创建 ci 文件.gitlab-ci.yml,在文件中指定构建,测试和部署脚本
Gitlab 将检测到它并使用名为 Gitlab Runner 的工具运行脚本
脚本被分组作业,它们共同组成一个管道
安装 Gitlab
rpm 方式
kubernetes 方式
docker 方式
graphql
docker pull docker.xuanyuan.run/gitlab/gitlab-ce:latest
docker image ls
docker tag fef3e02c1cc7 gitlab/gitlab-ce
docker image rm docker.xuanyuan.run/gitlab/gitlab-ce

vim /etc/hosts
mkdir -p ~/data/gitlab/config ~/data/gitlab/logs ~/data/gitlab/data
docker run -d  -p 443:443 -p 80:80 -p 2222:22 --name gitlab --memory 4g --cpus 2 --restart always -v /root/data/gitlab/config:/etc/gitlab -v /root/data/gitlab/logs:/var/log/gitlab -v /root/data/gitlab/data:/var/opt/gitlab gitlab/gitlab-ce:latest

vim /root/data/gitlab/config/gitlab.rb
external_url 'http://192.168.1.28'
gitlab_rails['gitlab_shell_ssh_port'] = 2222

docker exec -it gitlab /bin/bash
gitlab-ctl reconfigure

docker exec -it gitlab cat /etc/gitlab/initial_root_password
# WARNING: This password is only valid if ALL of the following are true:
#          • You set it manually via the GITLAB_ROOT_PASSWORD environment variable
#            OR the gitlab_rails['initial_root_password'] setting in /etc/gitlab/gitlab.rb
#          • You set it BEFORE the initial database setup (typically during first installation)
#          • You have NOT changed the password since then (via web UI or command line)
#
#          If this password doesn't work, reset the admin password using:
#          https://docs.gitlab.com/security/reset_user_password/#reset-the-root-password

Password: 85yB+P0RKPxDFAi4LIlXRb6ZmLwNrXiCZqkjJEgt+ag=

# NOTE: This file is automatically deleted after 24 hours on the next reconfigure run.
user:root
pass:85yB+P0RKPxDFAi4LIlXRb6ZmLwNrXiCZqkjJEgt+ag=

账户密码的修改
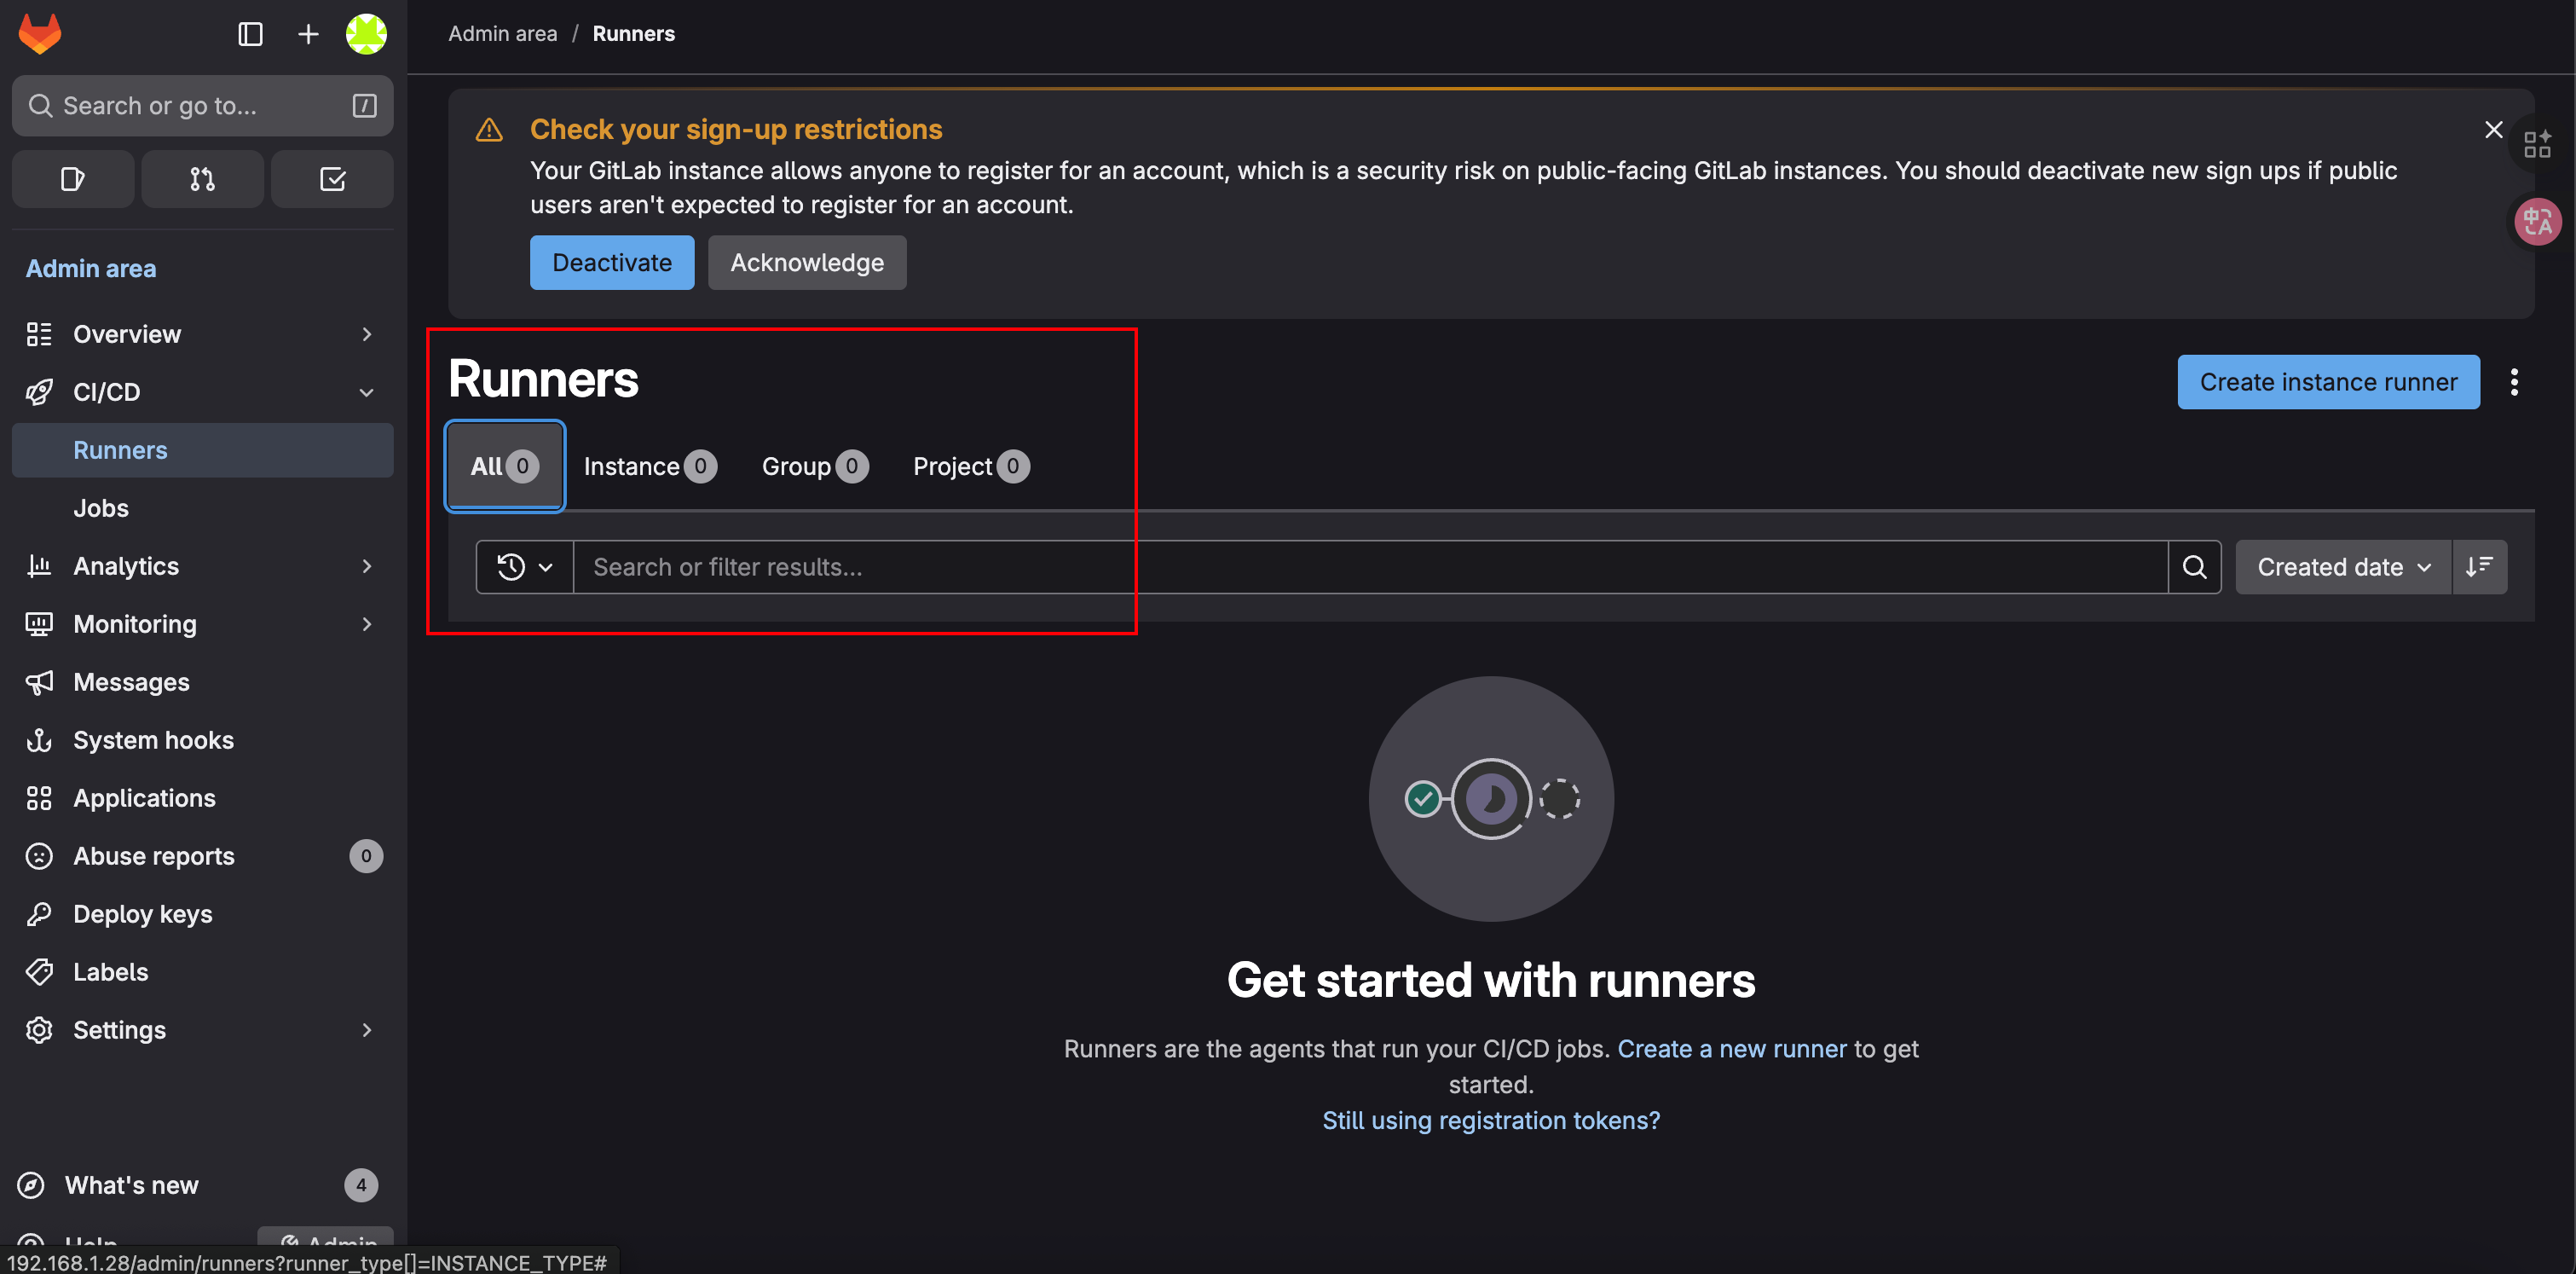
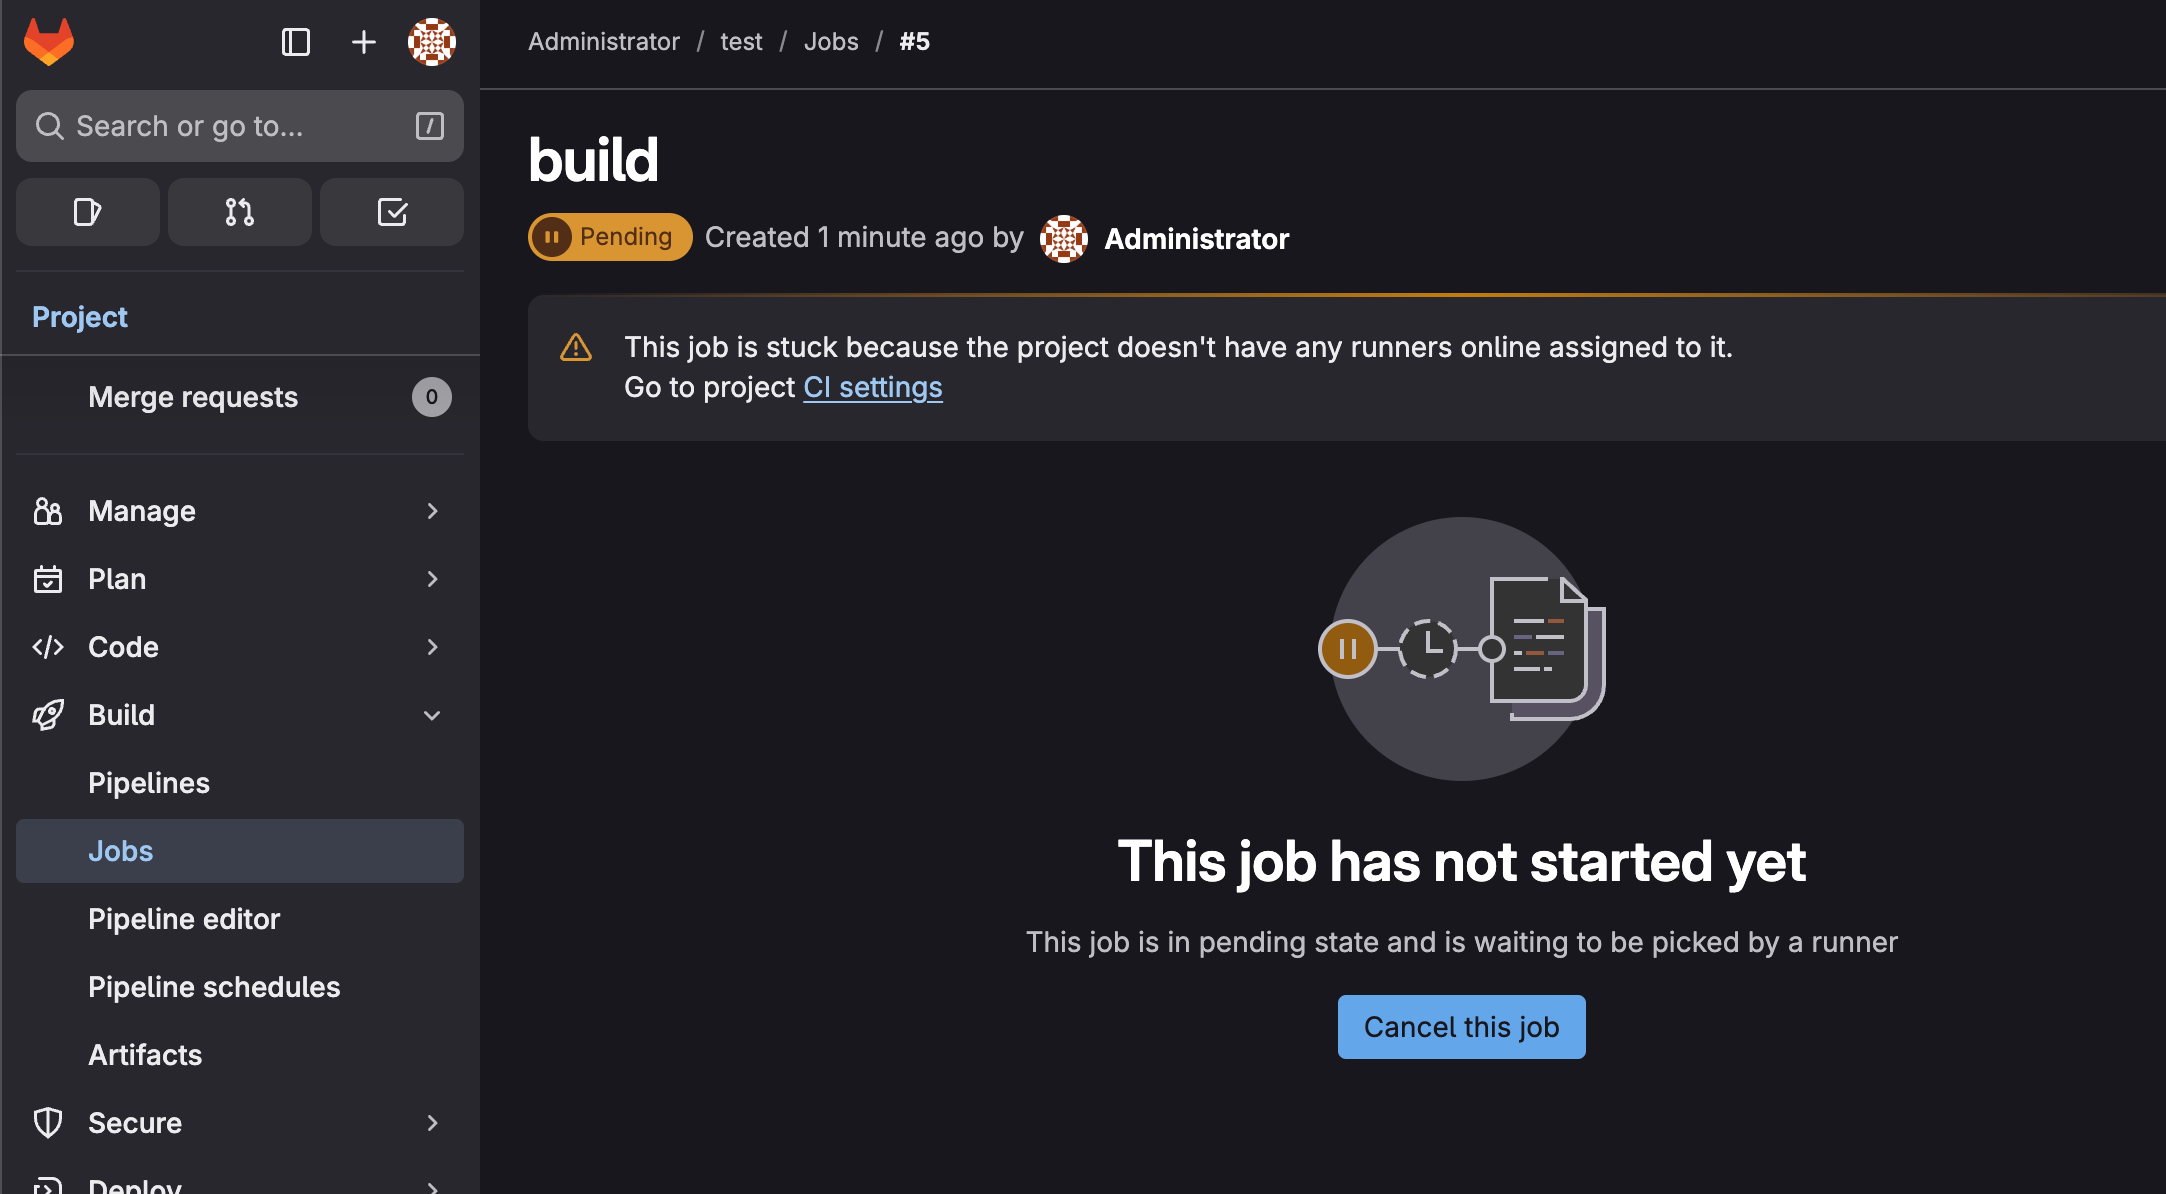
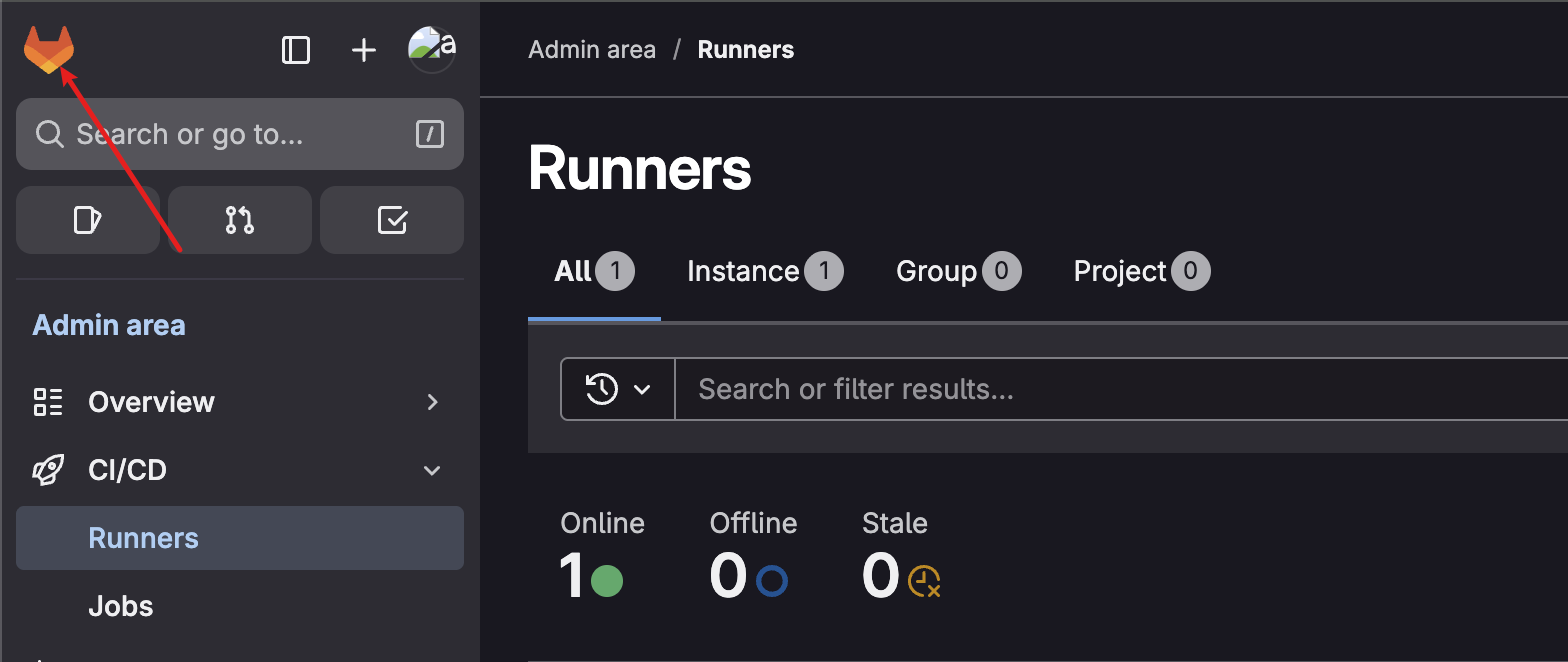
Runner
https://docs.gitlab.com/runner/install/linux-repository/
https://mirrors.tuna.tsinghua.edu.cn/gitlab-runner/
graphql
根据自己的发行版安装对应版本

lsb_release -a
GitLab Runner 是一个与 GitLab CI/CD 配合使用的应用程序,用于在流水线中运行作业。可以理解为 agent
Runner 需要独立部署且版本最好跟 gitlab 同步版本
runner 支持本地、docker、windows 等
支持热加载,修改配置,无需重启
graphql
docker 部署
mkdir -p ~/data/devops/gitlab-runner/config

docker pull docker.xuanyuan.run/gitlab/gitlab-runner:bleeding
docker image ls
docker tag e7e660656e98 gitlab/gitlab-runner
docker image rm docker.xuanyuan.run/gitlab/gitlab-runner:bleeding
docker run --rm -t -id -v ~/data/gitlab-runner/config:/etc/gitlab-runner gitlab/gitlab-runner:latest


注册
gitlab-runner register
Runner 类型与状态(旧版)
- shared,共享类型,运行整个平台的作业(gitlab)
- group ,项目组类型,运行特定 group 下的所有项目作业(group)
- specific,项目类型,运行指定的项目作业(project)
状态
- locked,锁定状态,无法运行项目作业
- paused,暂停状态,暂时不会接受新的作业
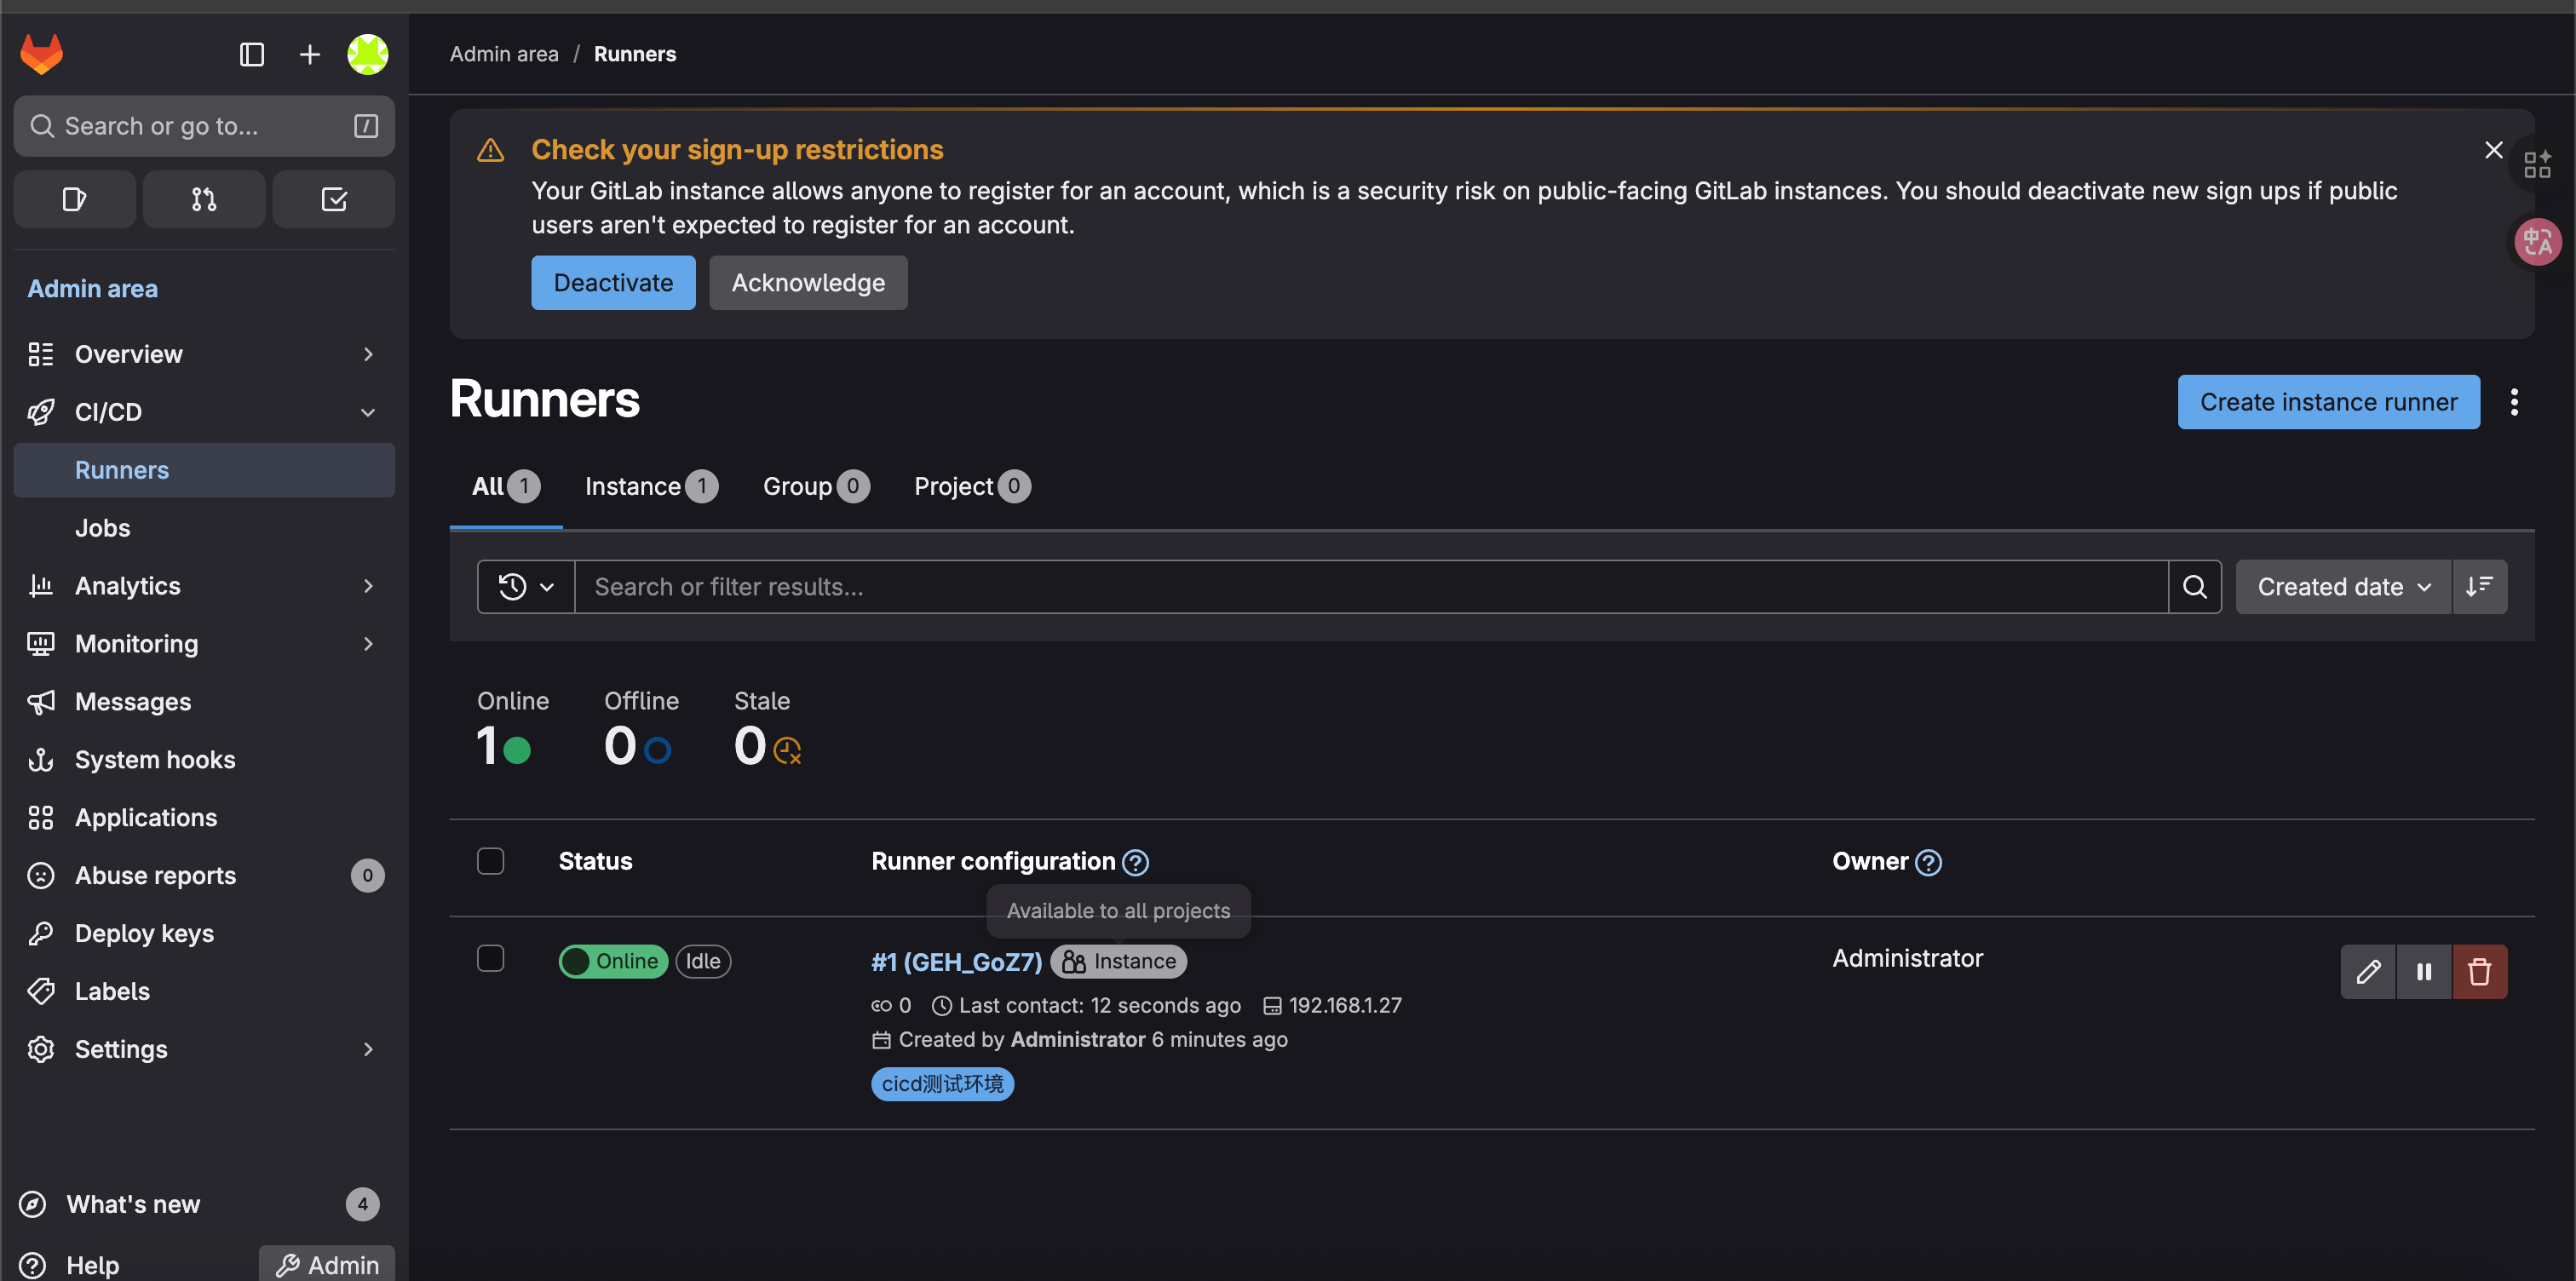
Runner 类型与状态(新版)
- Instance,整个实例,对应shared
- group,项目组类型,对应group
- project,某个项目,对应specific
状态
- locked,锁定状态,无法运行项目作业
- paused,暂停状态,暂时不会接受新的作业
其实没有区别,基本上是继承状态,只是名字换了
Runner 注册
获取 runner token ------》注册
旧版:gitlab-runner register
新版:gitlab-runner register 或 gitlab-runner register --url ... --token ...
创建 runner
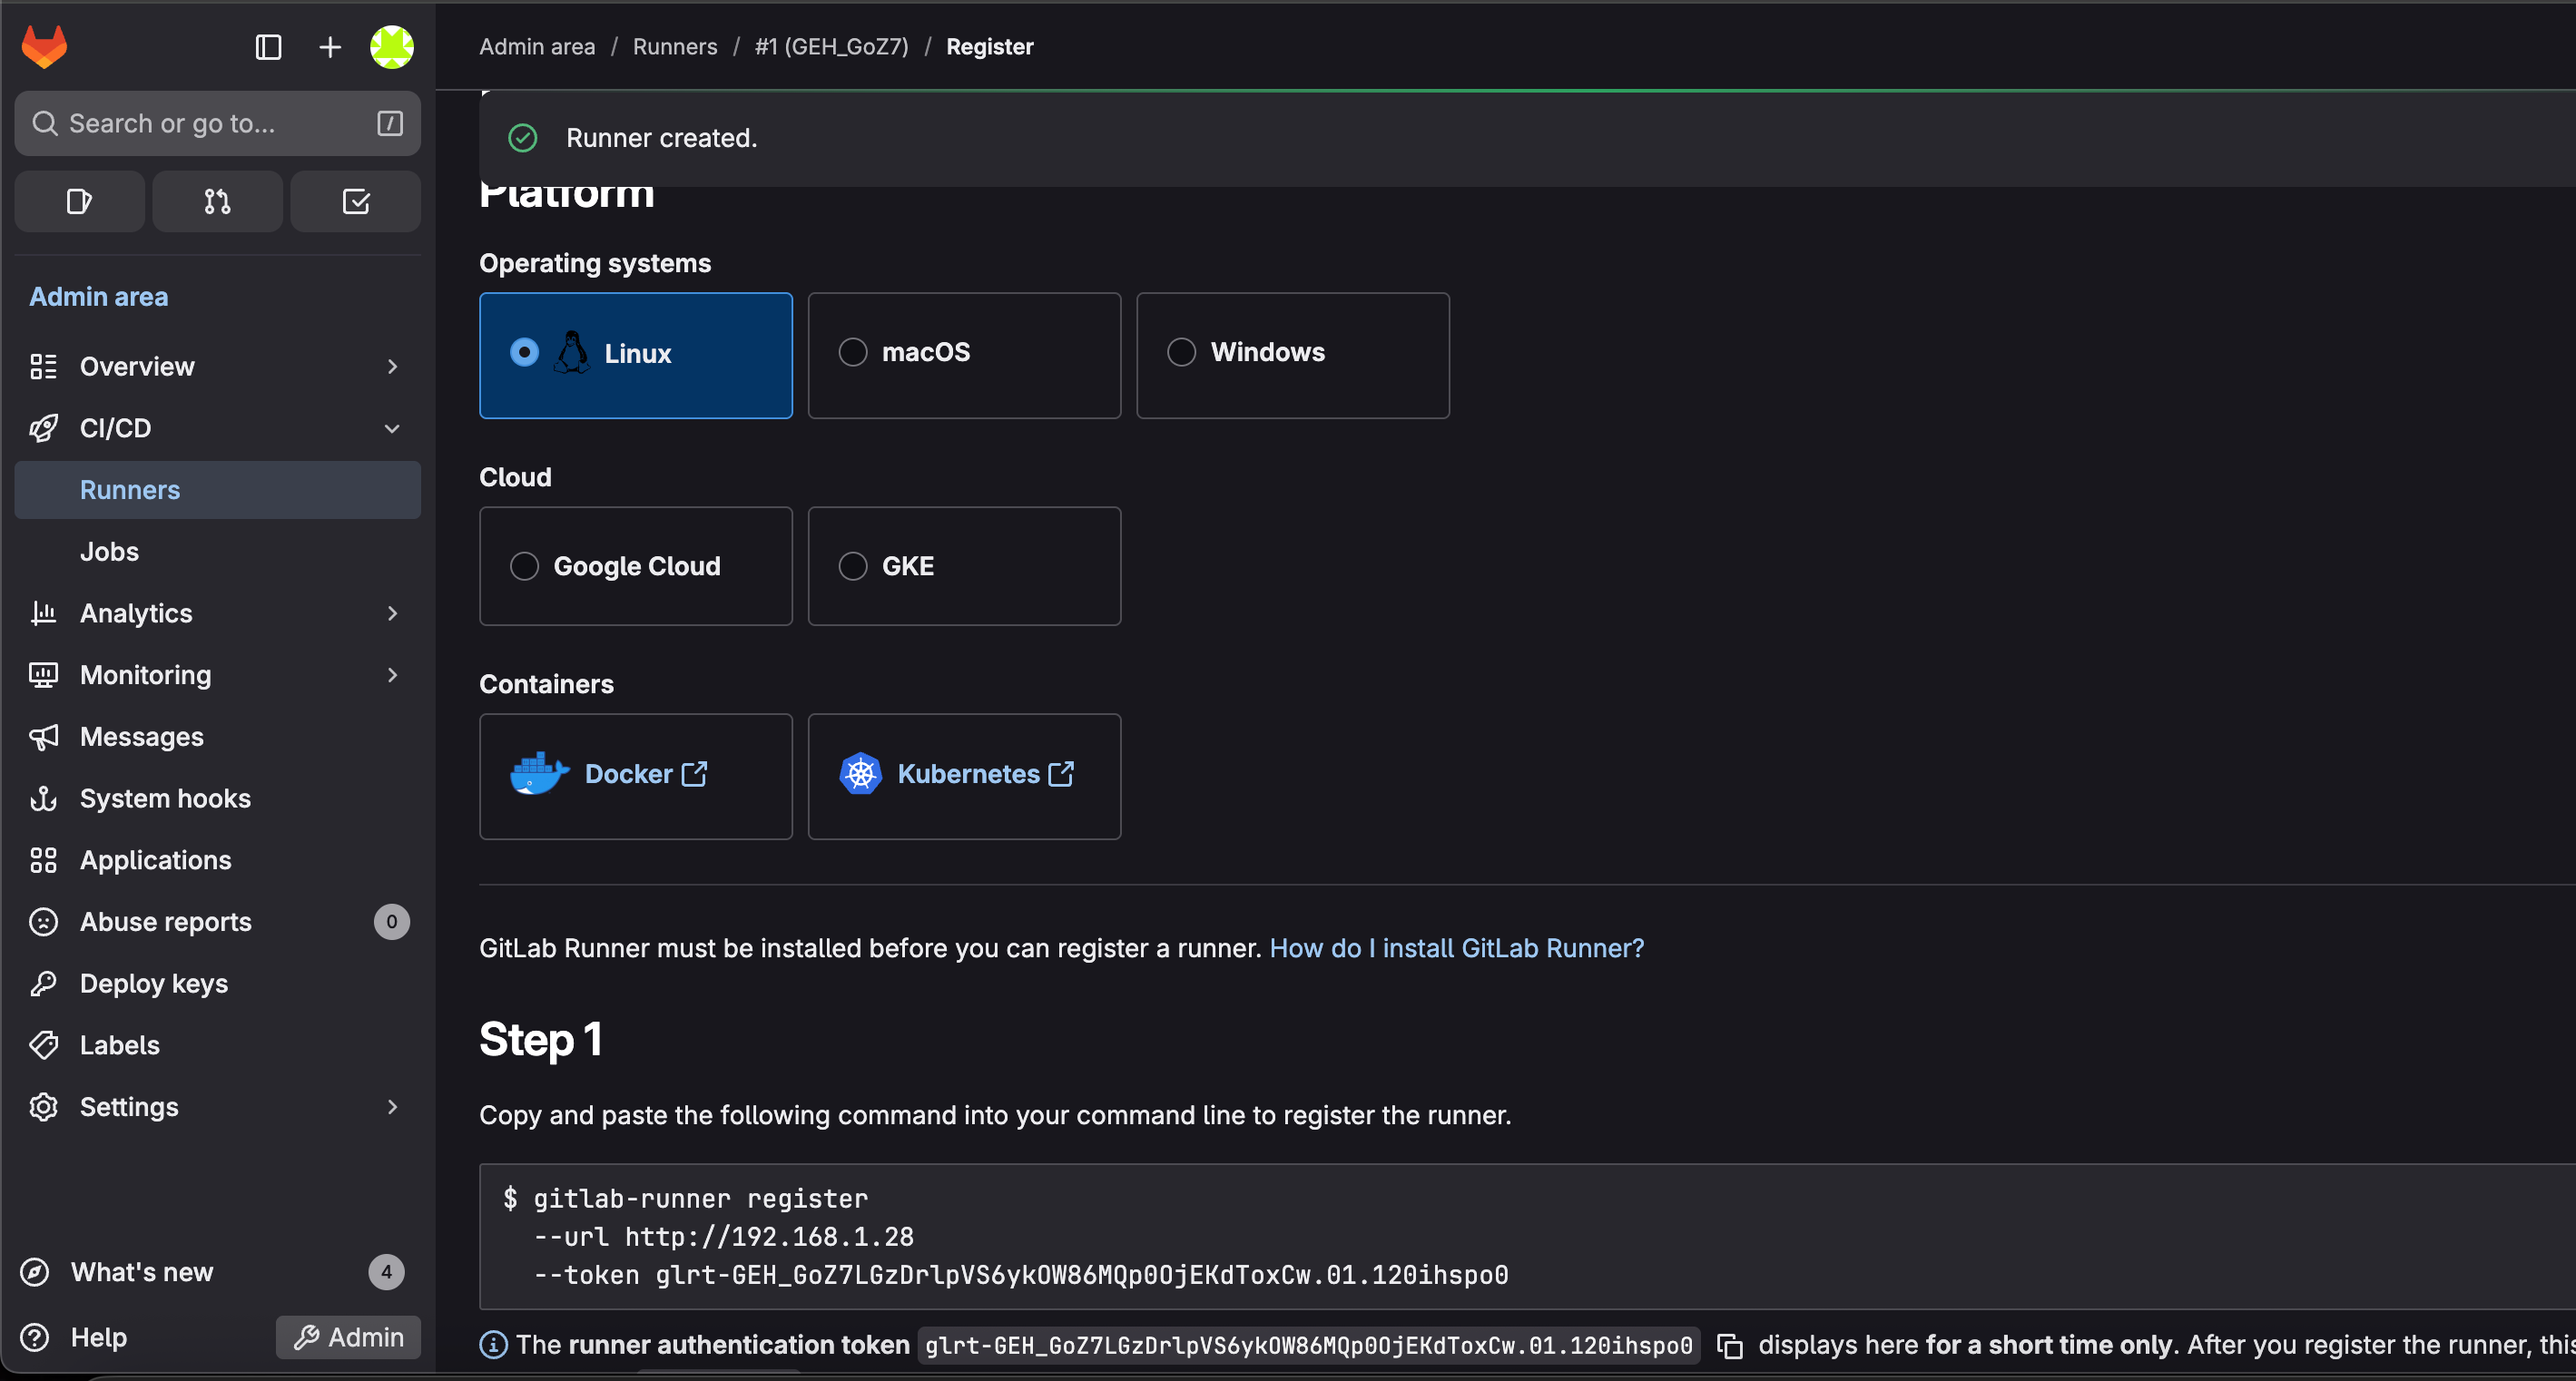
复制命令执行就行了
执行器
- Docker 执行器 → 在容器里执行 Job;
- Shell 执行器 → 直接在宿主机上执行;
- Kubernetes 执行器 → 在 K8s Pod 中执行;
一台机器上可以做多台 runner,只要资源允许
Runner 命令
启动命令
graphql
gitlab-runner --debug <command>   #调试模式排查错误特别有用。
gitlab-runner <command> --help    #获取帮助信息
gitlab-runner run       #普通用户模式  配置文件位置 ~/.gitlab-runner/config.toml
sudo gitlab-runner run  # 超级用户模式  配置文件位置/etc/gitlab-runner/config.toml
注册命令
graphql
gitlab-runner register  #默认交互模式下使用,非交互模式添加 --non-interactive
gitlab-runner list      #此命令列出了保存在配置文件中的所有运行程序
gitlab-runner verify    #此命令检查注册的runner是否可以连接,但不验证GitLab服务是否正在使用runner。 --delete 删除
gitlab-runner unregister   #该命令使用GitLab取消已注册的runner。


#使用令牌注销
gitlab-runner unregister --url http://gitlab.example.com/ --token t0k3n

#使用名称注销(同名删除第一个)
gitlab-runner   --name test-runner

#注销所有
gitlab-runner unregister --all-runners
服务管理
graphql
gitlab-runner install --user=gitlab-runner --working-directory=/home/gitlab-runner

# --user指定将用于执行构建的用户
#`--working-directory  指定将使用**Shell** executor 运行构建时所有数据将存储在其中的根目录

gitlab-runner uninstall #该命令停止运行并从服务中卸载GitLab Runner。

gitlab-runner start     #该命令启动GitLab Runner服务。

gitlab-runner stop      #该命令停止GitLab Runner服务。

gitlab-runner restart   #该命令将停止,然后启动GitLab Runner服务。

gitlab-runner status #此命令显示GitLab Runner服务的状态。当服务正在运行时,退出代码为零;而当服务未运行时,退出代码为非零。
测试 Runner
测试流水线
pipeline 语法
pipeline 语法 1
job
每个项目中,使用.gitlab.ci.yml 的 yaml 文件配置 gitlab ci/cd
- 可以定义多个作业(job)
- 每个作业必须唯一
- 每个作业独立执行
- 一个作业最少包含一个 script
yaml
job1:
	script:"execute-script-for-job1"
job2:
	script:"execute-script-for-job2"
# 这里在pipeline中定义了两个作业,每个作业运行不同的命令。命令可以是shell或脚本。
script
yaml
job:
  script:
    - uname -a
    - bundle exec rspec
有时, script命令将需要用单引号或双引号引起来. 例如,包含冒号命令( : )需要加引号,以便被包裹的YAML解析器知道来解释整个事情作为一个字符串,而不是一个"键:值"对. 使用特殊字符时要小心: : , { , } , , , , , & , * , # , ? , | , - , < , > , = ! , % , @ , ```.
before_script
用于作业之前运行,必须是一个数组。指定 script 与主脚本中指定的任何脚本串联在一起,并在单个 shell 中一起执行,job 里的 before_script 会覆盖全局 before_script
after_script
用于定义每个作业(包括失败的)之后运行的命令,必须是一个数组。指定脚本在新的 shell 中执行,与任何 before_script 或 script 脚本分开。
可以在全局定义,也可以在 job 中定义。在 job 中定义会覆盖全局
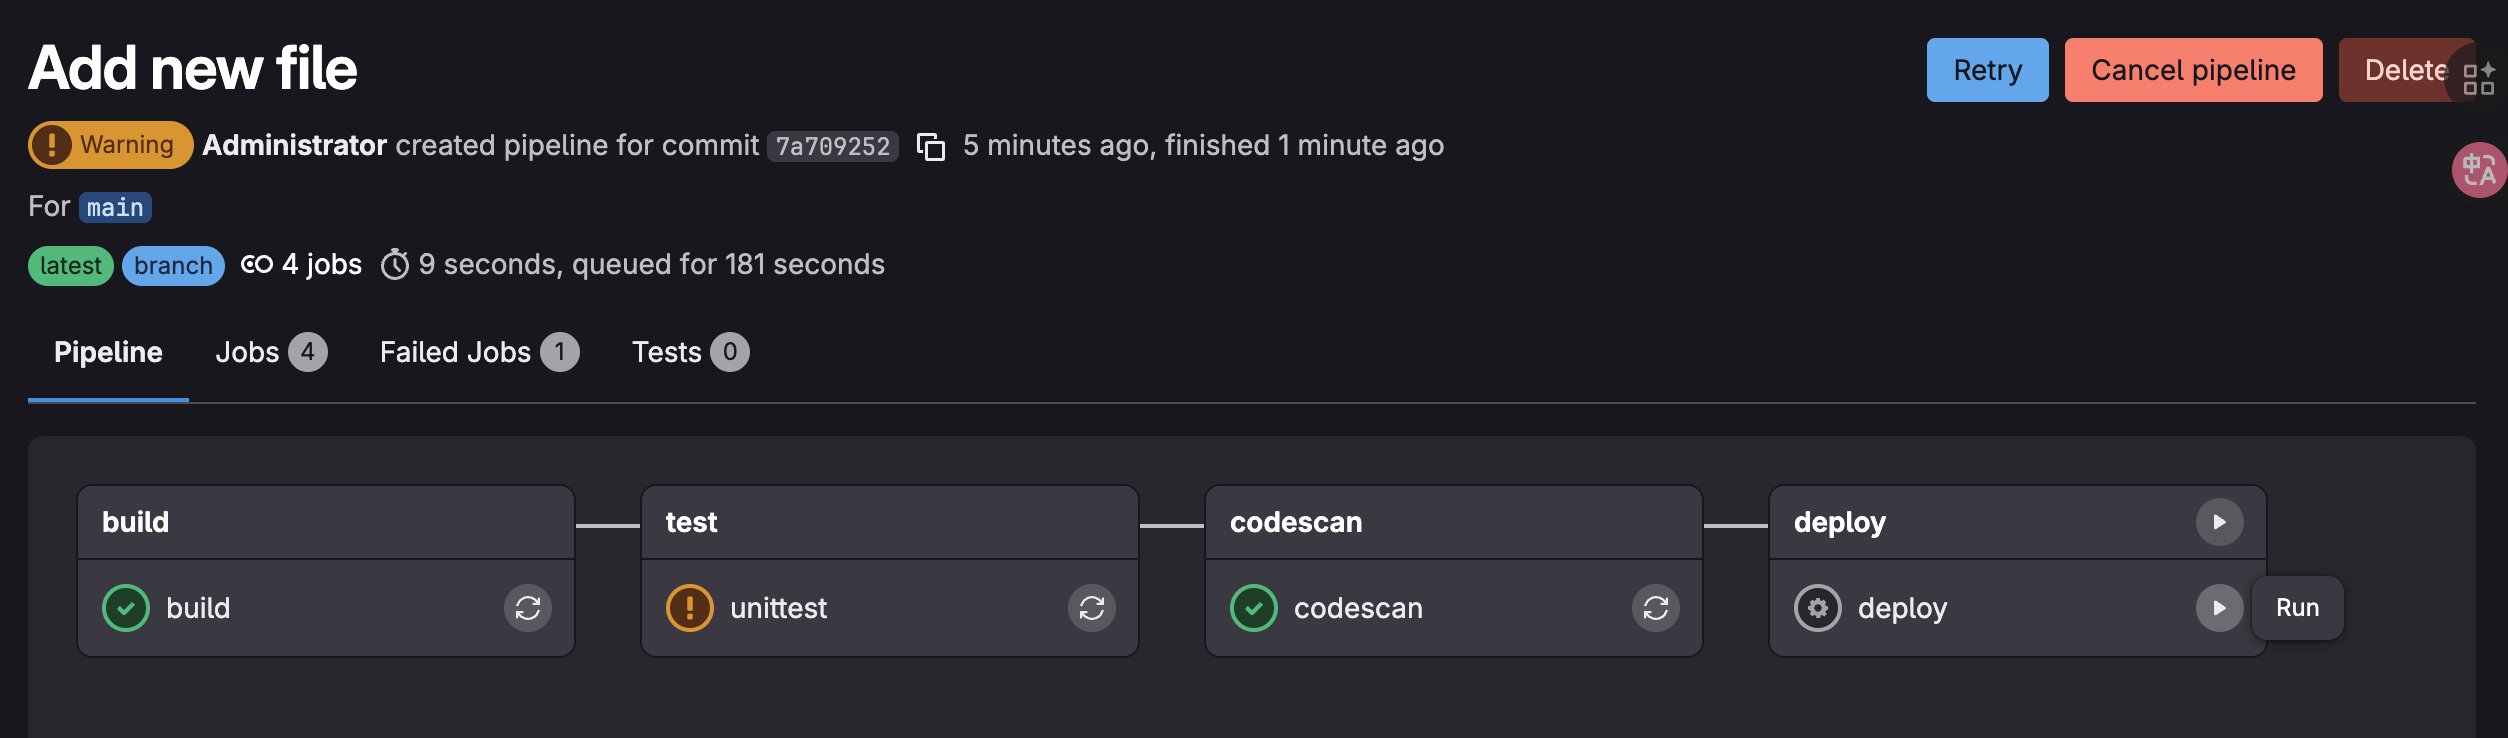
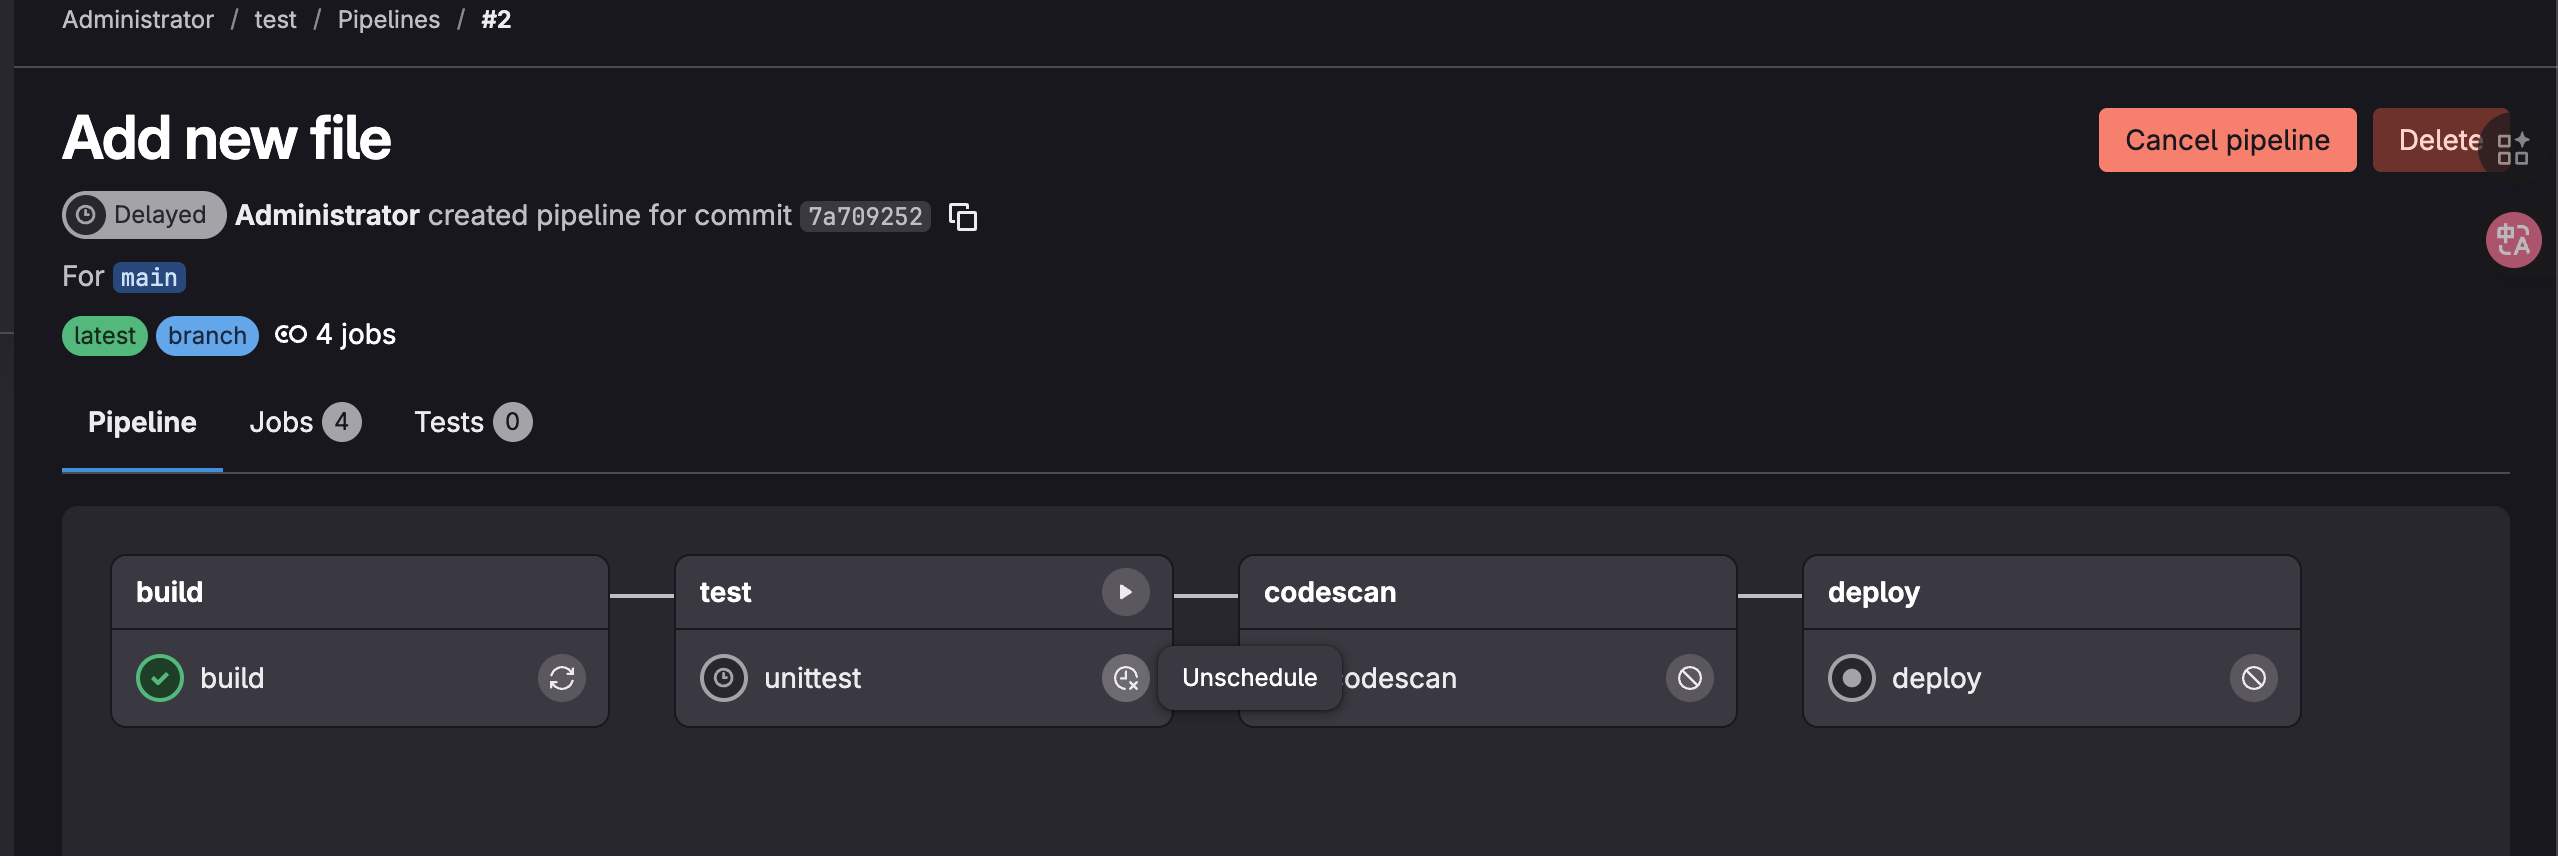
stages & stage
阶段,用于控制作业使用的阶段,全局定义,通过 stages 定义阶段顺序与 job,
可以并行 job,但是 job 的名字必须唯一, stage 声明这里是那个阶段,下面的流水线可以是乱的,只要 stage 声明好,stages 做好顺序就行
并行的时候,如果是一个 runner,会依次执行,如果需要同时执行,最要使用两个 runner,或者 /etc/gitlab-runner/config.toml 里配置
plain
# 同时运行 10 个job任务
concurrent = 10
yaml
stages:
  - build
  - test
  - deploy

......
build1:
  stage: build

build2:
	stage: build

test:
	stage: echo "run test"
before_script (全局):
echo "before-script!!" - 这个会在每个 job 执行前运行
variables:
定义了一个全局变量 DOMAIN: example.com,所有 job 都可以使用
stages:
定义了两个阶段:build 作业和 deploy 作业,将按顺序执行
yaml
before_script:
  - echo "before-script!!"

variables:
  DOMAIN: example.com

stages:
  - build
  - deploy


build:
  before_script:
    - echo "before-script in job"
  stage: build
  script:
    - echo "mvn clean "
    - echo "mvn install"
  after_script:
    - echo "after script in job"


deploy:
  stage: deploy
  script:
    - echo "hello deploy"

after_script:
  - echo "after-script"
.pre & .post
.pre始终是整个管道的第一个运行阶段,.post始终是整个管道的最后一个运行阶段。 用户定义的阶段都在两者之间运行。.pre和.post的顺序无法更改。如果管道仅包含.pre或.post阶段的作业,则不会创建管道。
variables
全局变量,pipeline 变量、job 变量、Runne 变量。job 变量优先级最大
pipeline 语法 2
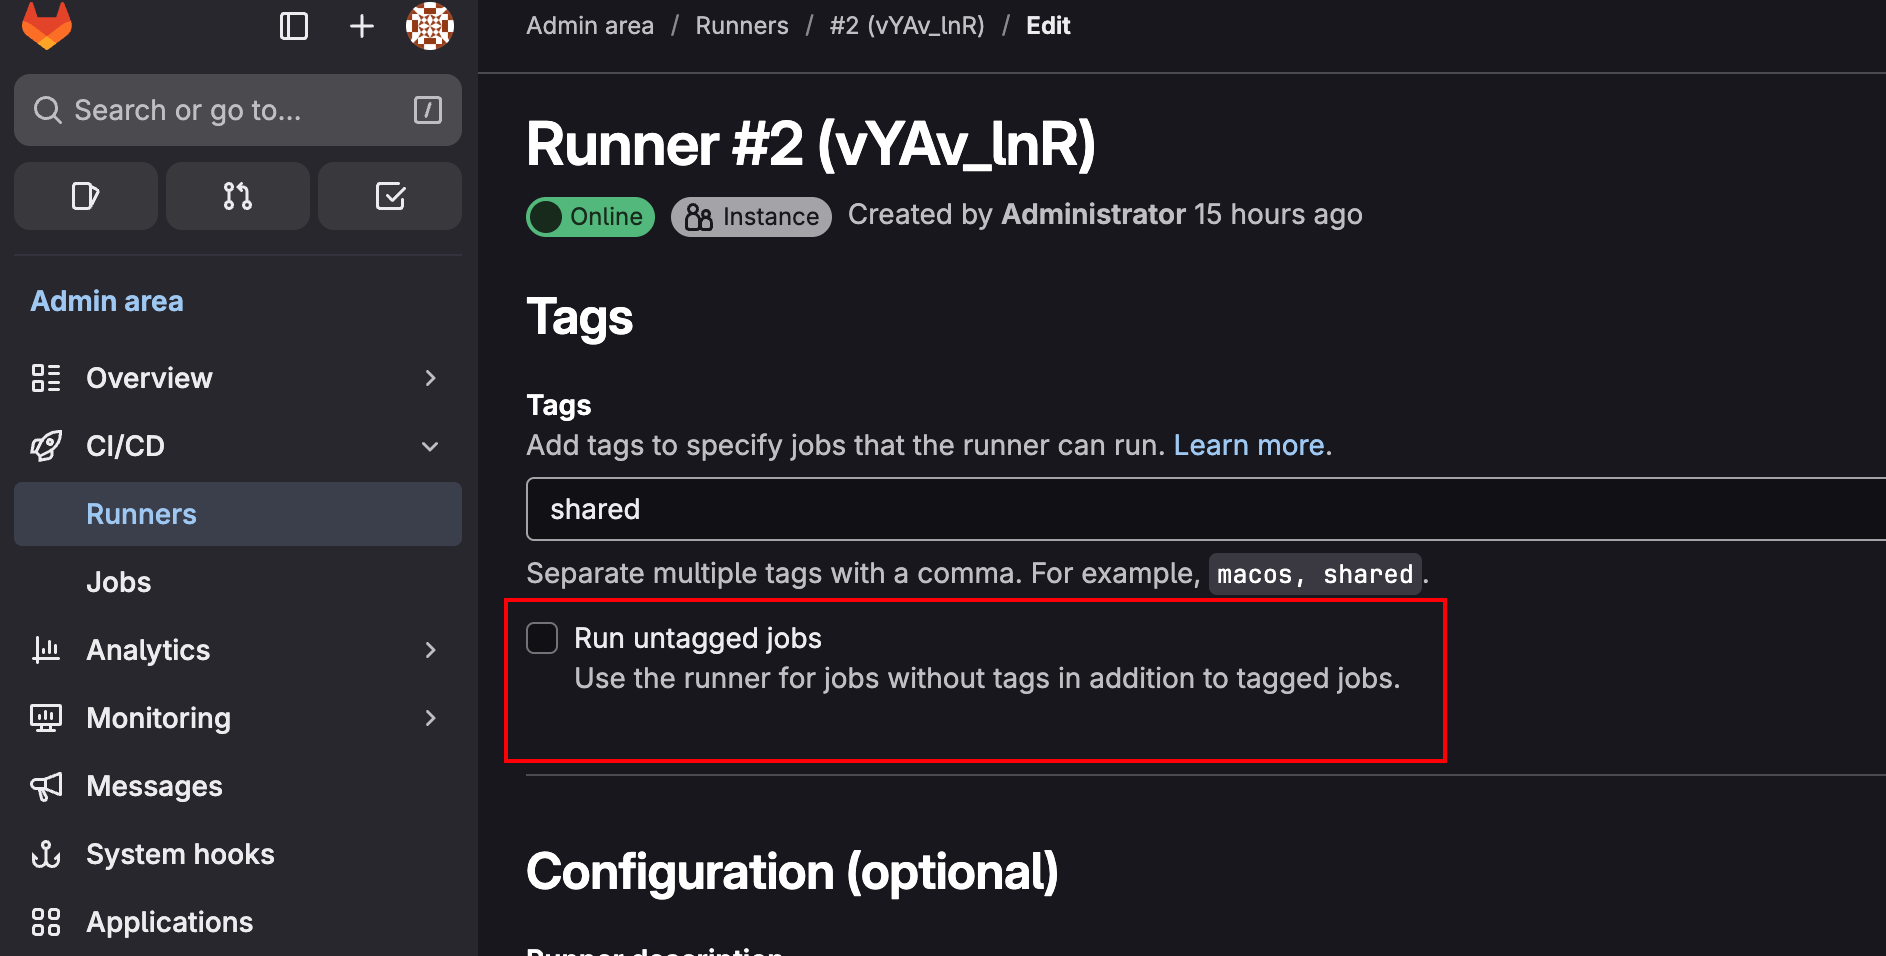
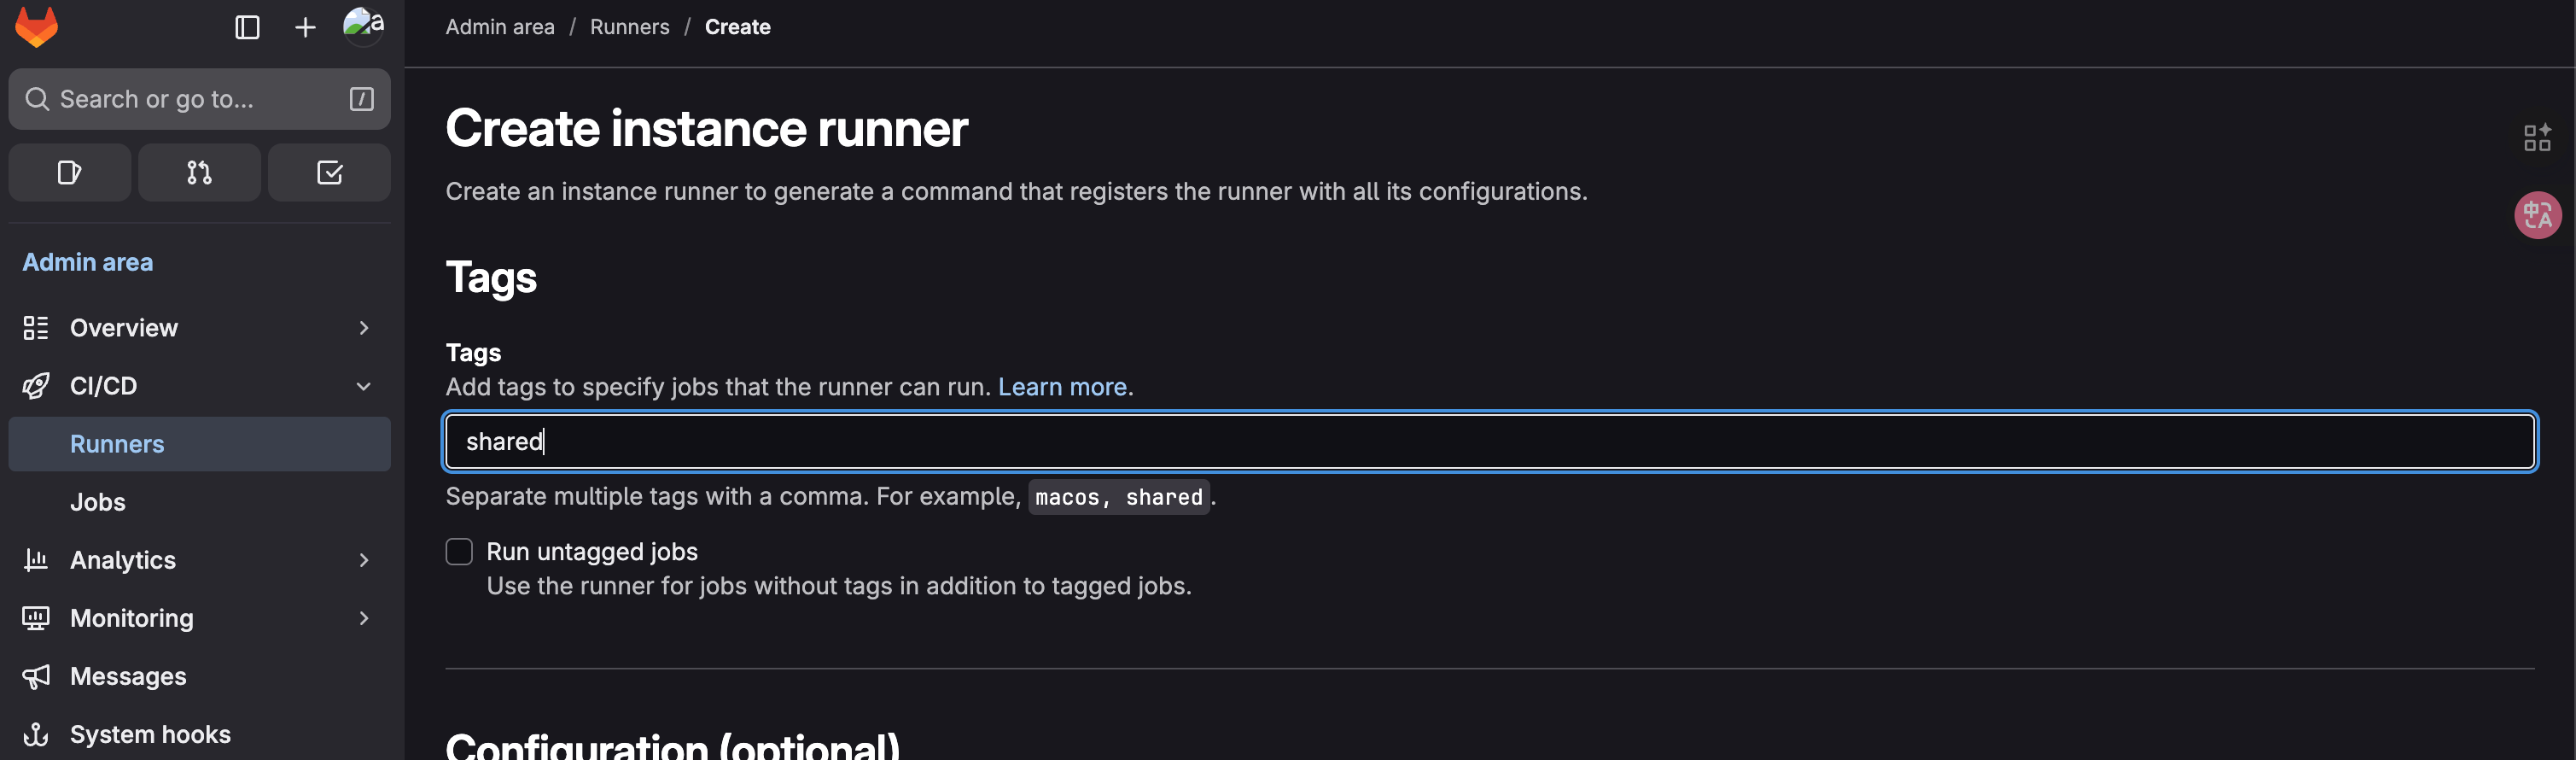
tags
指定 job 在那个 runner 上运行
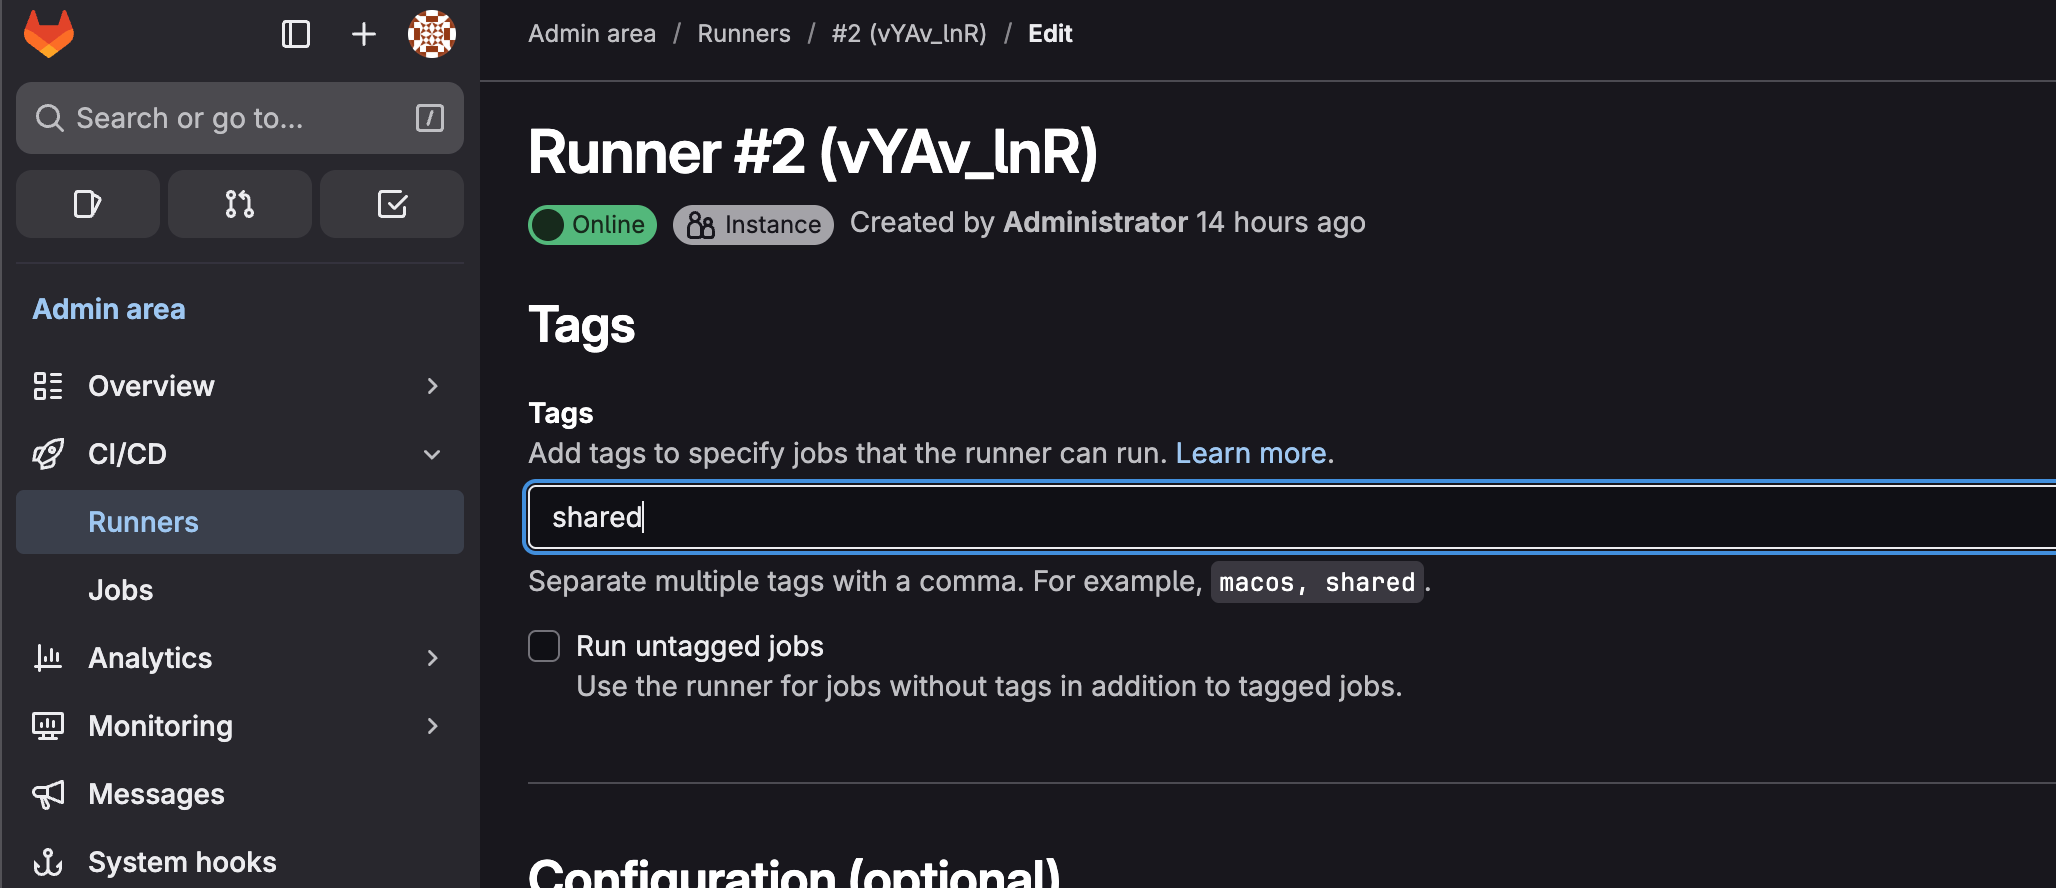
开启运行未指定 runner 的 job
plain
job:
  tags:
    - ruby
    - postgres
    - shared
allow_failure
允许作业失败,默认为 false,默认不允许失败,如果 allow_failure: true,失败了也会继续运行。
false 不允许失败
true 允许失败
plain
job1:
  stage: test
  script:
    - execute_script_that_will_fail
  allow_failure: true
when
控制作业允许
- on_success:默认值,前面的作业都成功了才执行这个作业
- on_failure:当前面作业失败了,才执行这个作业
- always:总是执行作业
- manual:手动执行作业
- delayed:延迟执行作业
需要手动执行
延迟执行
测试.gitlab.ci.yml 文件
yaml
before_script:
  - echo "before-script!!"

variables:
  DOMAIN: example.com

stages:
  - build
  - test
  - codescan
  - deploy

build:
  before_script:
    - echo "before-script in job"
  stage: build
  script:
    - echo "mvn clean "
    - echo "mvn install"
    - echo "$DOMAIN"
  after_script:
    - echo "after script in buildjob"

unittest:
  stage: test
  script:
    - ech "run test"
  when: delayed
  start_in: '10'
  allow_failure: true


deploy:
  stage: deploy
  script:
    - echo "hello deploy"
    - sleep 2;
  when: manual

codescan:
  stage: codescan
  script:
    - echo "codescan"
    - sleep 5;
  when: on_success

after_script:
  - echo "after-script"
  - ech
retry
失败重试次数
yaml
deploy:
  stage: deploy
  script:
    - echo "hello deploy"
    - sleep 2;
  when: manual
  retry: 2
max:最大重试次数
when :重试失败的案例
最大重试次数必须小于或等于 2
yaml
unittest:
  stage: test
  script:
    - ech "run test"
  when: delayed
  start_in: '3'
  retry:
    max: 2
    when:
      - script_failure
yaml
always :在发生任何故障时重试(默认).
unknown_failure :当失败原因未知时。
script_failure :脚本失败时重试。
api_failure :API失败重试。
stuck_or_timeout_failure :作业卡住或超时时。
runner_system_failure :运行系统发生故障。
missing_dependency_failure: 如果依赖丢失。
runner_unsupported :Runner不受支持。
stale_schedule :无法执行延迟的作业。
job_execution_timeout :脚本超出了为作业设置的最大执行时间。
archived_failure :作业已存档且无法运行。
unmet_prerequisites :作业未能完成先决条件任务。
scheduler_failure :调度程序未能将作业分配给运行scheduler_failure。
data_integrity_failure :检测到结构完整性问题。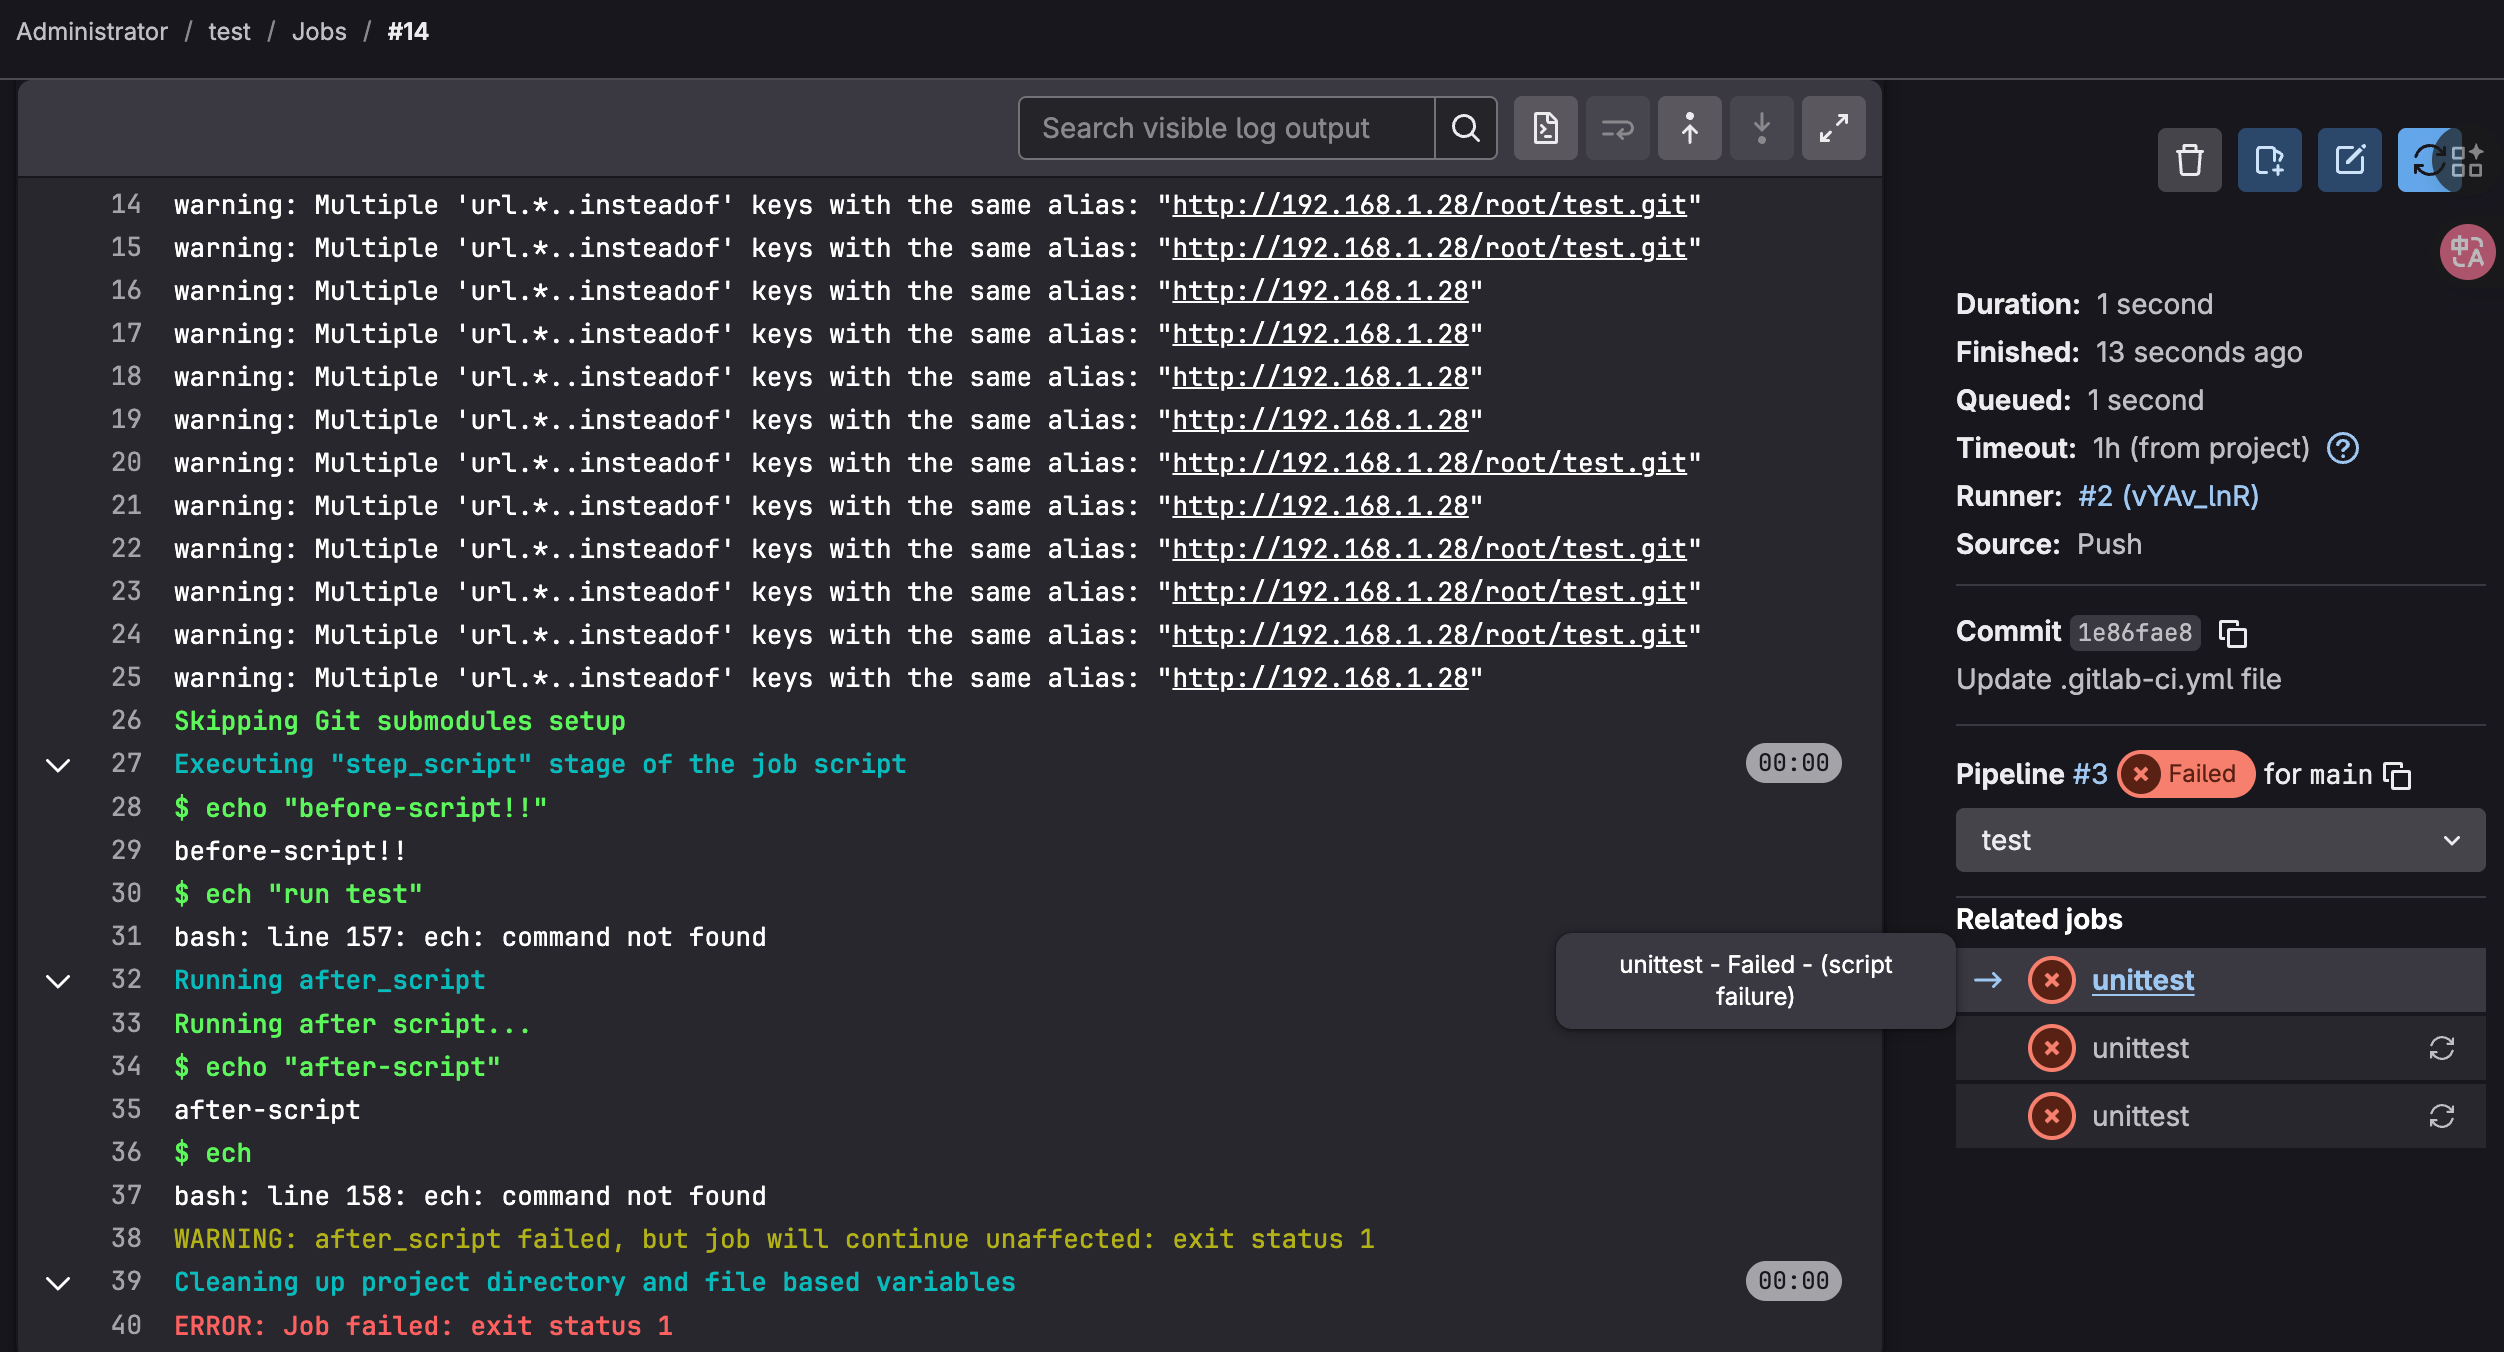
timeout
作业超时,两种写法
yaml
build:
  script: build.sh
  timeout: 1 hours 30 minutes

or

test:
  script: rspec
  timeout: 3h 30m
Runner 的超时
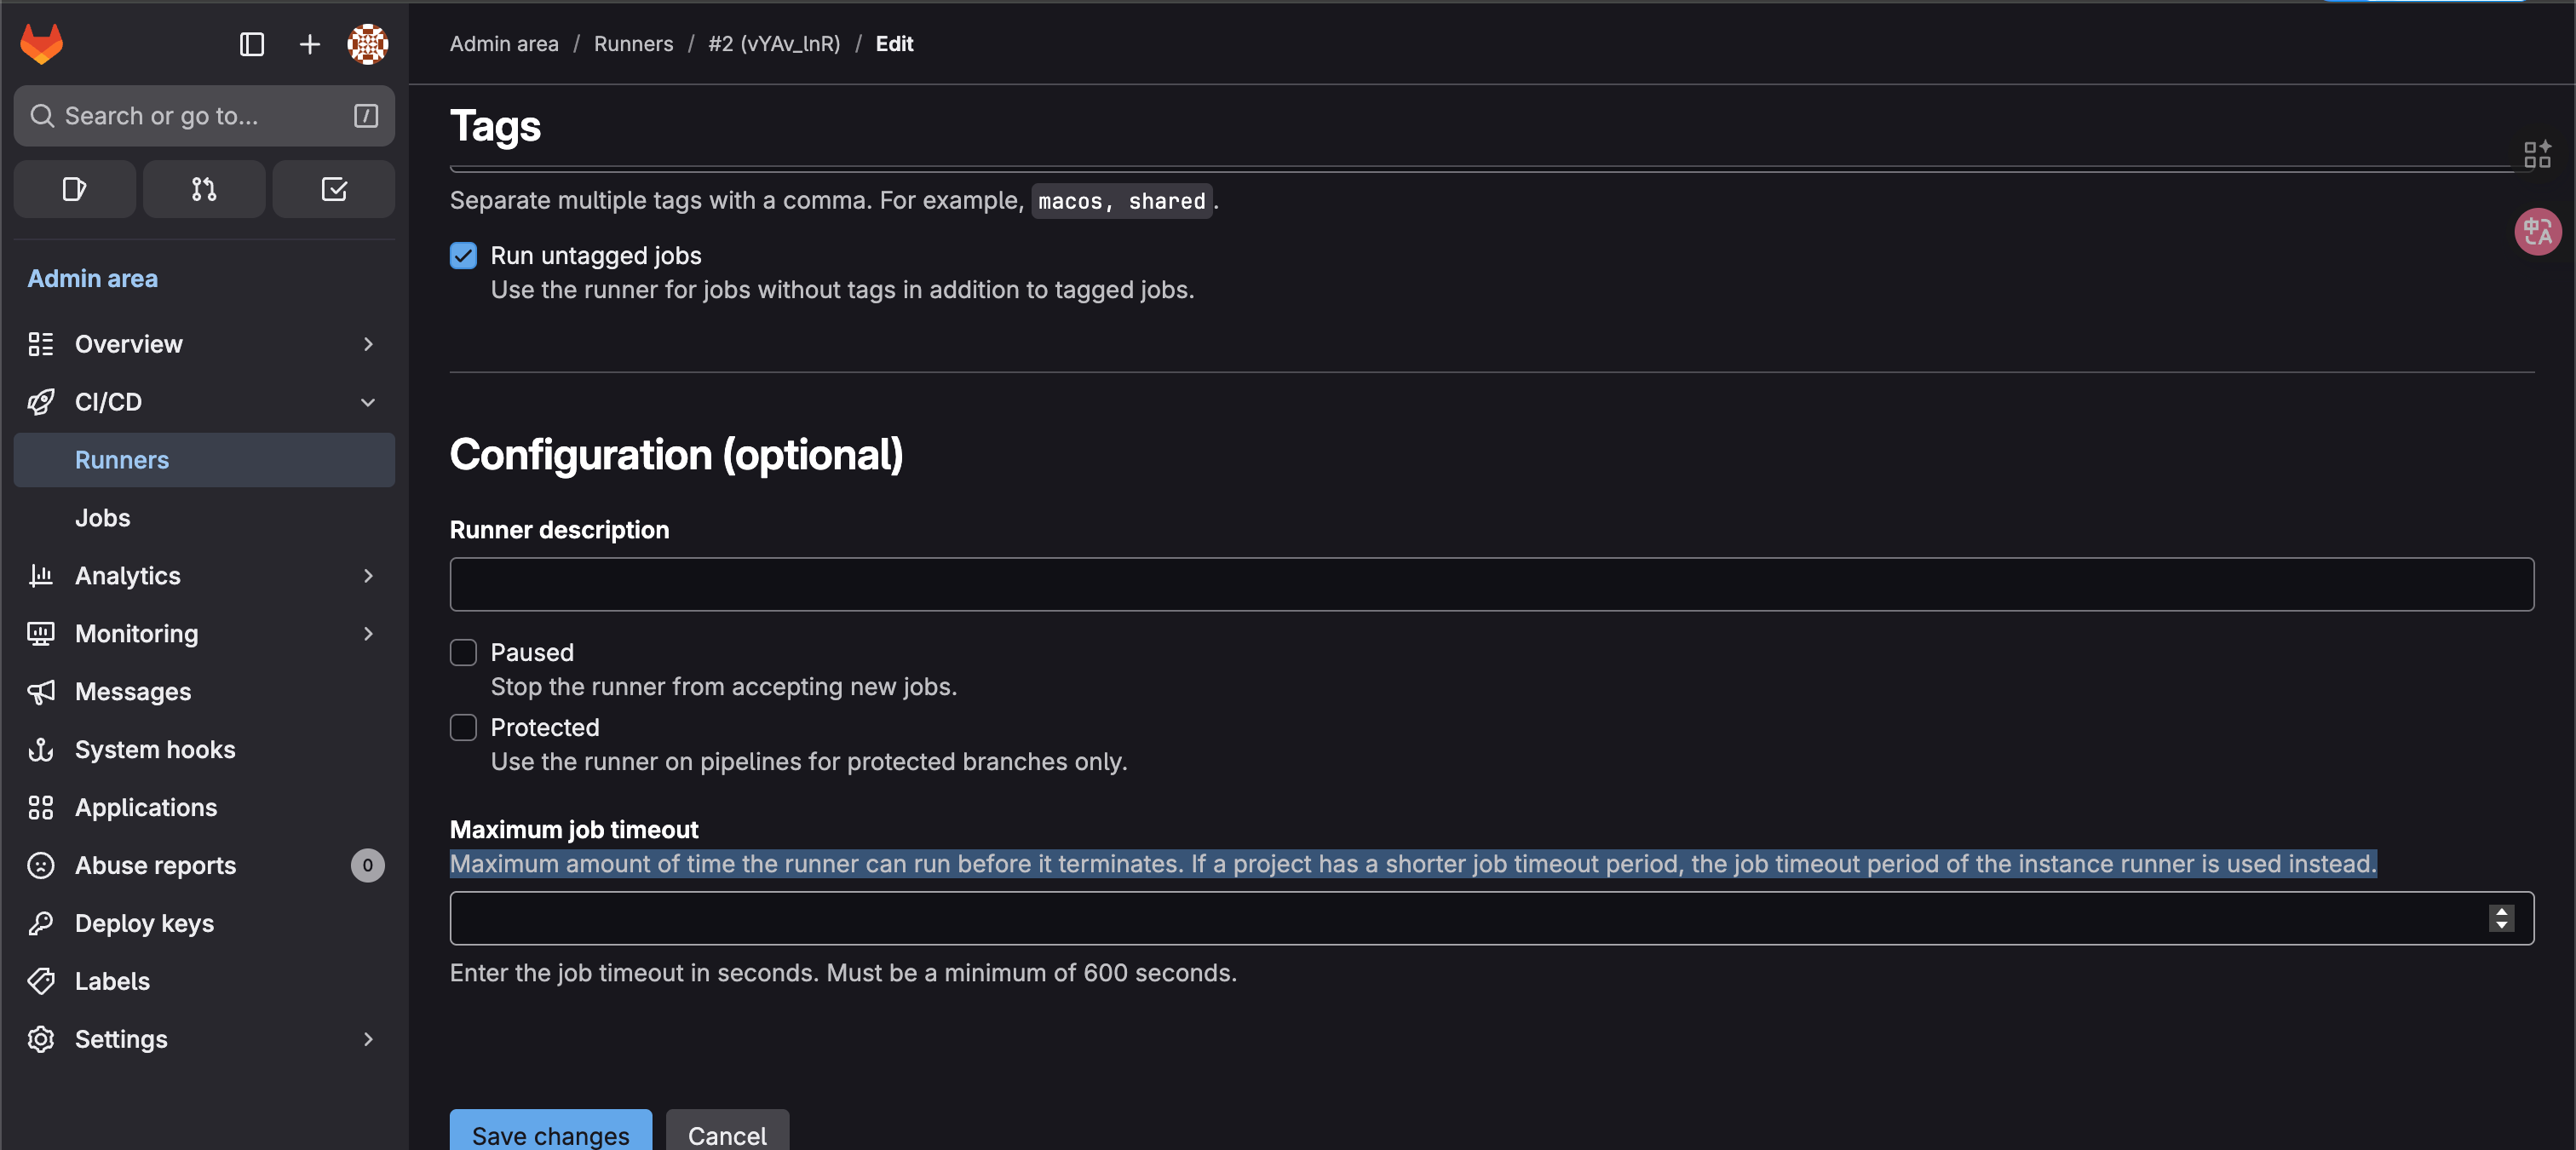
runner 设置 24h,项目 cicd 设置 为 2 小时,该工作超时为 2 小时
runner 不设置,项目 cide 设置 2 小时,该工作超时 为 2 小时
parallel
并行作业,配置要并行运行的作业实例数,此值必须大于或等于2并且小于或等于50。
yaml
codescan:
  stage: codescan
  script:
    - echo "codescan"
    - sleep 2;
  when: on_success
  parallel: 5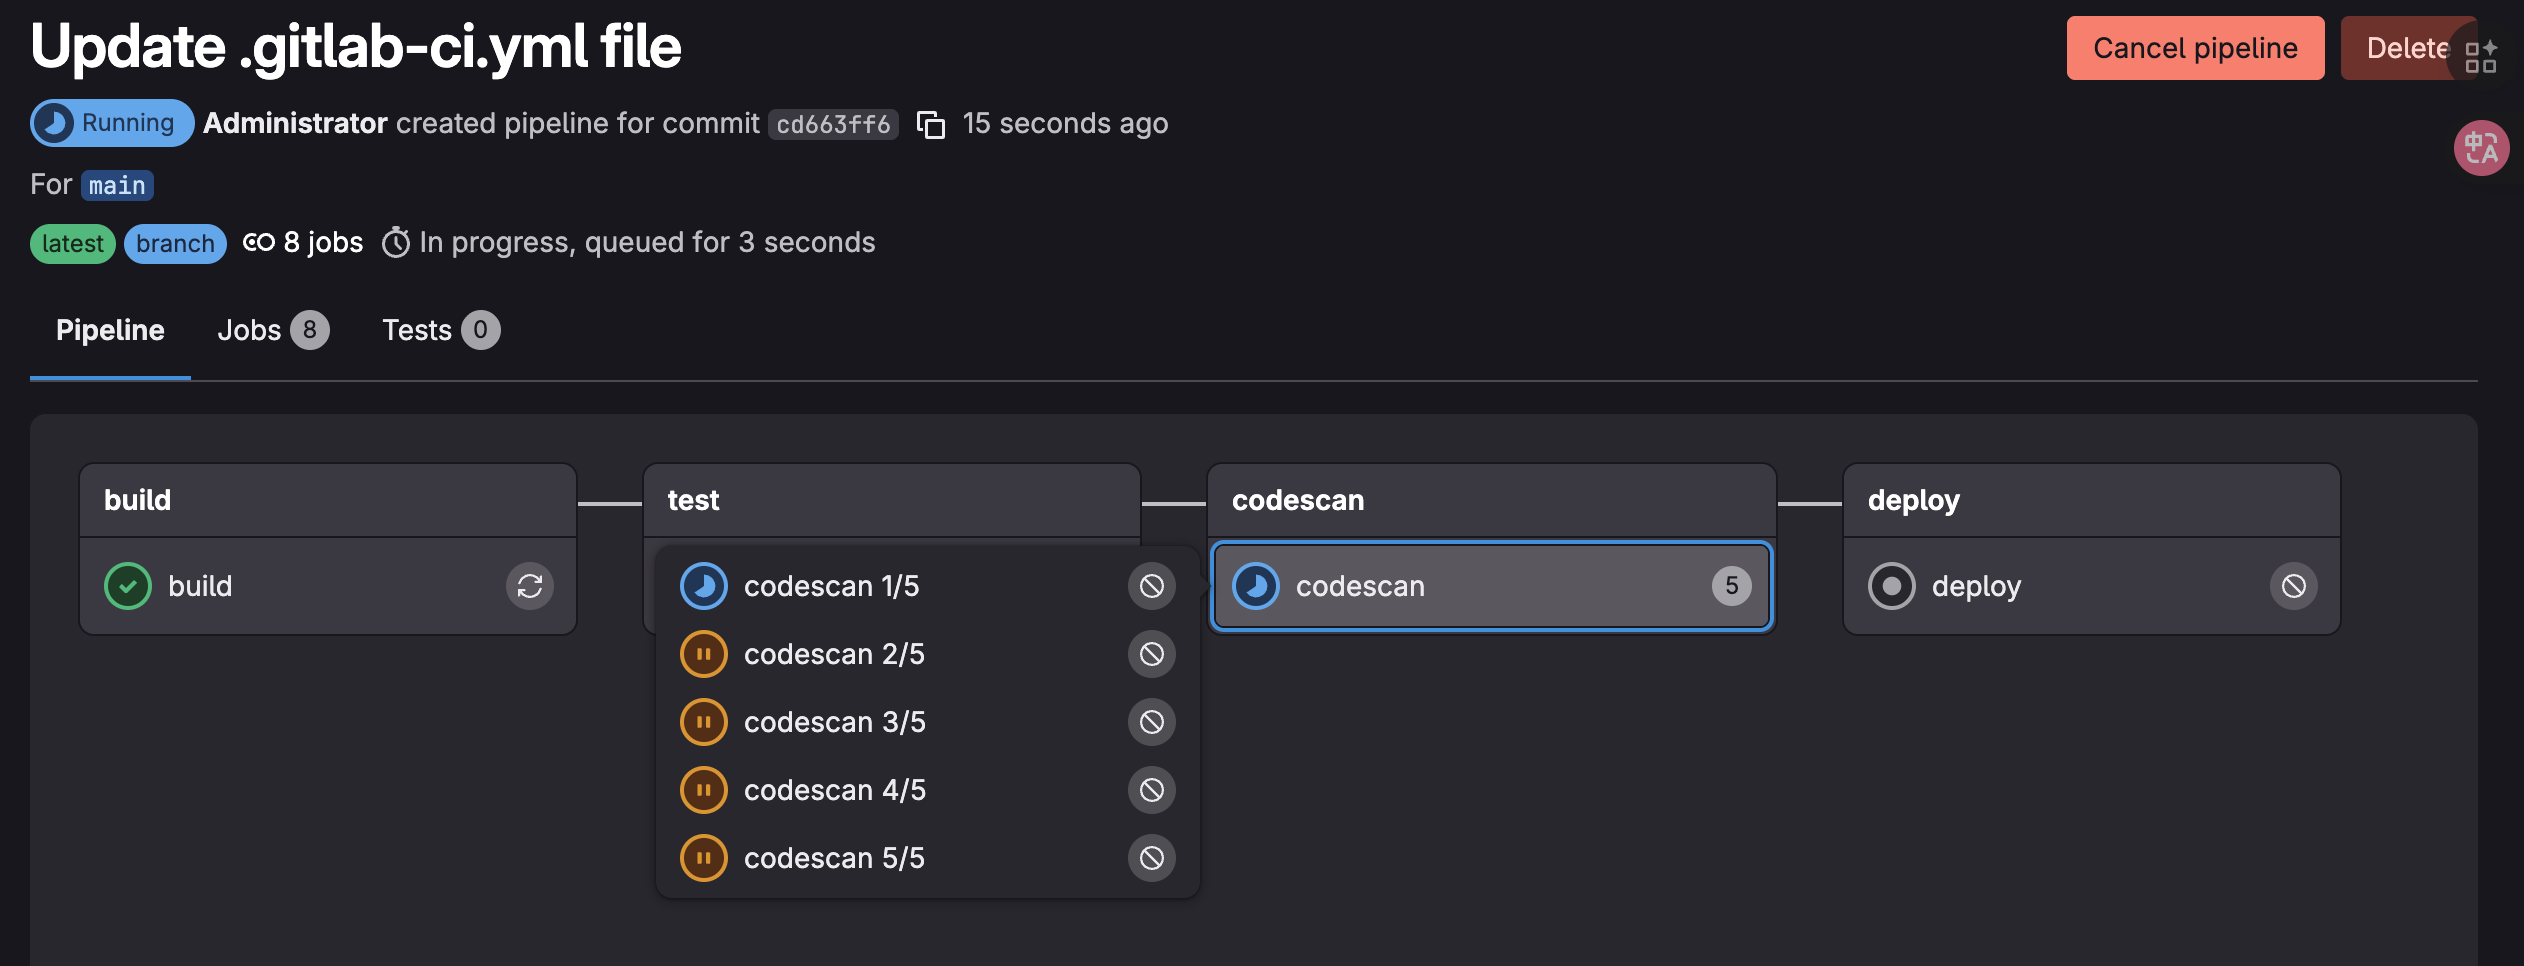
pipeline 语法 3
only & except
only 和 except 是两个参数用分支策略来限制jobs构建
- only定义哪些分支和标签的git项目将会被job执行
- except定义哪些分支和标签的git项目将不会被job执行
逐渐遗弃
只执行 issus 分支,通过正则匹配,其他分支排除
yaml
job:
  # use regexp
  only:
    - /^issue-.*$/
  # use special keyword
  except:
    - branches
rules
构建规则,按顺序匹配,第一个不匹配往下,直到匹配
rules 不能与 only/except 组合使用
yaml
if (通过条件匹配)
changes ( 检查文件内容是否被修改)
exists(检查文件是否存在)执行 when: manual
否则往下执行,执行 on_success
if
yaml
deploy:
  stage: deploy
  script:
    - echo "hello deploy"
    - sleep 2;
  when: manual
  rules:
    - if: '$DOMAIN == "example.com"'
      when: manual
    - when: on_success
changes
如果 test.txt 发生了变化,执行手动作业,如果没有发生变化,执行on_failure
yaml
deploy:
  stage: deploy
  script:
    - echo "hello deploy"
    - sleep 2;
  when: manual
  rules:
    - changes:
      - test.txt
      when: manual
    - when: on_failure
exists
如果 test1.txt 存在,执行 延迟 5 秒
yaml
codescan:
  stage: codescan
  script:
    - echo "codescan"
    - sleep 5;
  when: on_success
  rules:
    - exists:
      - test1.txt
      when: delayed
      start_in: 5s
workflow:rules
顶级workflow:关键字适用于整个管道,并将确定是否创建管道。when :可以设置为always或never . 如果未提供,则默认值always。
yaml
variables:
  DOMAIN: 1example.com

workflow:
  rules:
    - if: '$DOMAIN == "example.com"'
    - when: always
pipeline 语法 4
cache
缓存,存储项目在编译时候产生的依赖,在项目空间中需要传递的文件或目录
yaml
cache:paths(指定缓存文件或目录)
cache:key(缓存标记)
cache:police(策略)
paths
在job build中定义缓存,将会缓存target目录下的所有.jar文件。
yaml
build:
  script: test
  cache:
    paths:
      - target/*.jar
key
由于缓存是在job之间共享的,如果不同的job使用不同的路径就出现了缓存覆盖的问题。如何让不同的job缓存不同的cache呢?设置不同的cache:key。
为不同的 job 定义了不同的 cache:key 时,会为每个 job 分配独立的 cache
cache:key 变量可以使用任何预定义变量,默认 default
yaml
cache:
  paths:
    - my/files

build:
  script: echo "hello"
  cache:
    key: build
    paths:
      - target/
files,最多可以指定两个文件,这两个文件发生变化,重新产生缓存
prefix,略
yaml
cache:
  key:
    files:
      - Gemfile.lock
      - package.json
  paths:
    - vendor/ruby
    - node_modules
police
缓存策略,默认:在执行开始时下载文件,并在结束时重新上传文件。称为" pull-push缓存策略
比如 job1 打包,job2 测试,job1 不需要缓存,它是产生缓存的,但它执行后给到 job2,job2 需要缓存测试,所以可使用 police 跳过下载步骤
policy: pull 跳过下载步骤
policy: push 跳过上传步骤
流水线第一次运行的结果会被下一次运行直接使用,如果出现构建失败的情况,可以在 runner 里去把缓存清掉,尝试重新构建/home/gitlab-runner/
yaml
stages:
  - setup
  - test

prepare:
  stage: setup
  cache:
    key: gems
    paths:
      - vendor/bundle
  script:
    - bundle install --deployment

rspec:
  stage: test
  cache:
    key: gems
    paths:
      - vendor/bundle
    policy: pull
  script:
    - bundle exec rspec ...
aftifacts
制品,用于指定在作业成功或者失败时应附加到作业的文件或目录的列表。作业完成后,工件将被发送到GitLab,并可在GitLab UI中下载。
yaml
aftifacts:paths(指定制品路径)
artifacts:expose_as(在合并请求UI中公开作业都工件)
artifacts:name(定义创建工件时候都名称,默认是artifacts)
artifacts:when(仅在作业失败时上传工件)
artifacts:expire_in(制品的有效期,从上传和存储到GitLab的时间开始算起。如果未定义过期时间,则默认为30天)
artifacts:reports(用于从作业中收集测试报告,代码质量报告和安全报告. 在GitLab的UI中显示这些报告)
artifacts:reports:junit()
artifacts:paths
路径是相对于项目目录的,不能直接链接到项目目录之外
将制品设置为target目录
yaml
artifacts:
  paths:
    - target/
artifacts:expose_as
关键字expose_as可用于在合并请求 UI中公开作业工件。
- 每个合并请求最多可以公开10个作业工件。
- 如果指定了目录,那么如果目录中有多个文件,则该链接将指向指向作业工件浏览器。
- 如果开启GitlabPages可以对.html .htm .txt .json .log扩展名单个文件工件渲染工件。
yaml
test:
  script:
    - echo 1
  artifacts:
    expose_as: 'artifact 1'
    paths:
      - path/to/file.txt
artifacts:name
通过name指令定义所创建的工件存档的名称。可以为每个存档使用唯一的名称。 artifacts:name变量可以使用任何预定义变量。默认名称是artifacts,下载artifacts改为artifacts.zip
yaml
job:
  artifacts:
    name: "$CI_JOB_NAME"
    paths:
      - binaries/
artifacts:when
用于在作业失败时或尽管失败而上传工件。on_success仅在作业成功时上载工件。这是默认值。on_failure仅在作业失败时上载工件。always 上载工件,无论作业状态如何。
要仅在作业失败时上传工件:
yaml
job:
  artifacts:
    when: on_failure
artifacts:expire_in
制品的有效期,从上传和存储到GitLab的时间开始算起。如果未定义过期时间,则默认为30天。
expire_in的值以秒为单位的经过时间,除非提供了单位。可解析值的示例:
yaml
job:
  artifacts:
    expire_in: 1 week
artifacts:reports
用于从作业中收集测试报告,代码质量报告和安全报告. 在GitLab的UI中显示这些报告。
注意:无论作业结果(成功或失败),都将收集测试报告。
artifacts:reports:junit
收集junit单元测试报告,收集的JUnit报告将作为工件上传到GitLab,并将自动显示在合并请求中
yaml
build:
stage: build
tags:
- build
only:
- master
script:
- mvn test
- mvn cobertura:cobertura
- ls target
artifacts:
name: "$CI_JOB_NAME-$CI_COMMIT_REF_NAME"
when: on_success
expose_as: 'artifact 1'
paths:
- target/*.jar
reports:
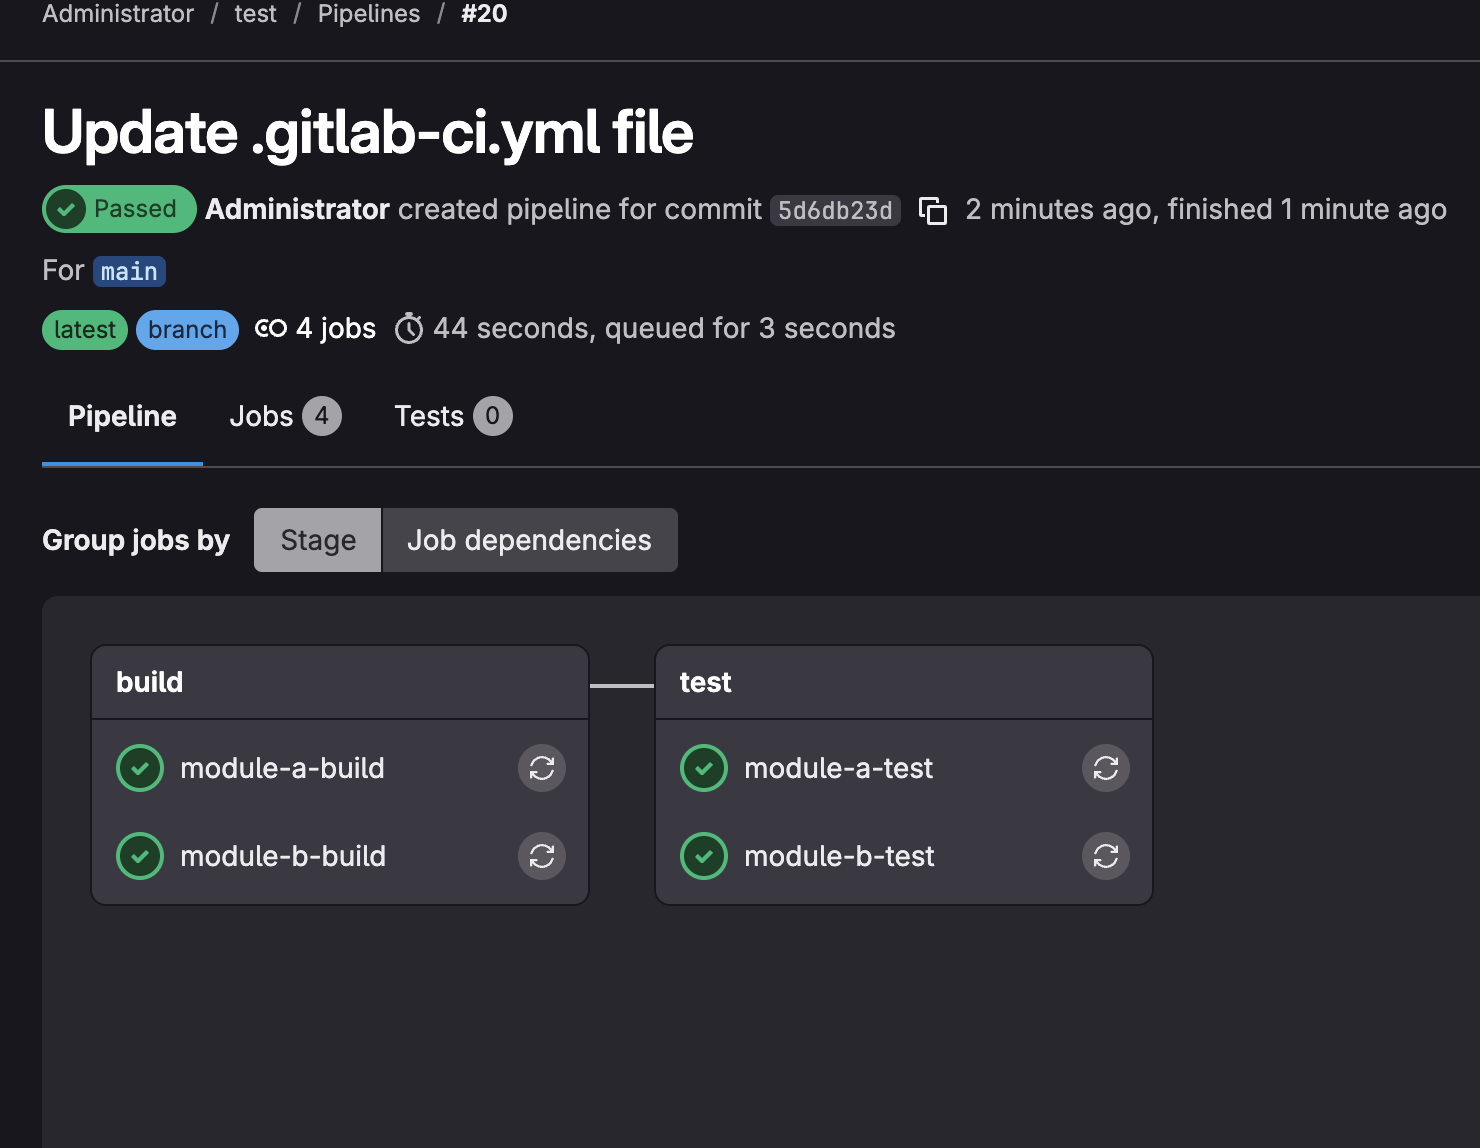
junit: target/surefire-reports/TEST-*.xmlpipeline 语法 5
needs
并行阶段,可无序执行作业,无需按照阶段顺序运行某些作业,可以让多个阶段同时运行。
needs: "module-a-build",在执行module-a-build 的时候执行当前 job
yaml
stages:
  - build
  - test
  - deploy

module-a-build:
  stage: build
  script:
    - echo "hello3a"
    - sleep 10

module-b-build:
  stage: build
  script:
    - echo "hello3b"
    - sleep 10

module-a-test:
  stage: test
  script:
    - echo "hello3a"
    - sleep 10
  needs: ["module-a-build"]

module-b-test:
  stage: test
  script:
    - echo "hello3b"
    - sleep 10
  needs: ["module-b-build"]
制品下载
在使用needs,可通过artifacts: true或artifacts: false来控制工件下载。 默认不指定为true。
yaml
module-a-test:
  stage: test
  script:
    - echo "hello3a"
    - sleep 10
  needs:
    - job: "module-a-build"
      artifacts: true
include
可以允许引入外部YAML文件,文件具有扩展名.yml或.yaml 。使用合并功能可以自定义和覆盖包含本地定义的CI / CD配置。相同的job会合并,参数值以源文件为准。
yaml
include:local(引入本地文件)引入同一存储库中的文件,使用相对于根目录的完整路径进行引用,与配置文件在同一分支上使用。
ci/localci.yml: 定义一个作业用于发布。
yaml
stages:
  - deploy

deployjob:
  stage: deploy
  script:
    - echo 'deploy'
.gitlab-ci.yml 引入本地的CI文件'ci/localci.yml'。
1.yaml 的文件存放在项目根目录的 ci 下
yaml
include:
  - local: "ci/1.yaml"

stages:
  - build
  - test
  - deploy

buildjob:
  stage: build
  script: ls

testjob:
  stage: test
  script: ls && id
一个简单项目
基础环境:
两台 ubuntu server 2404
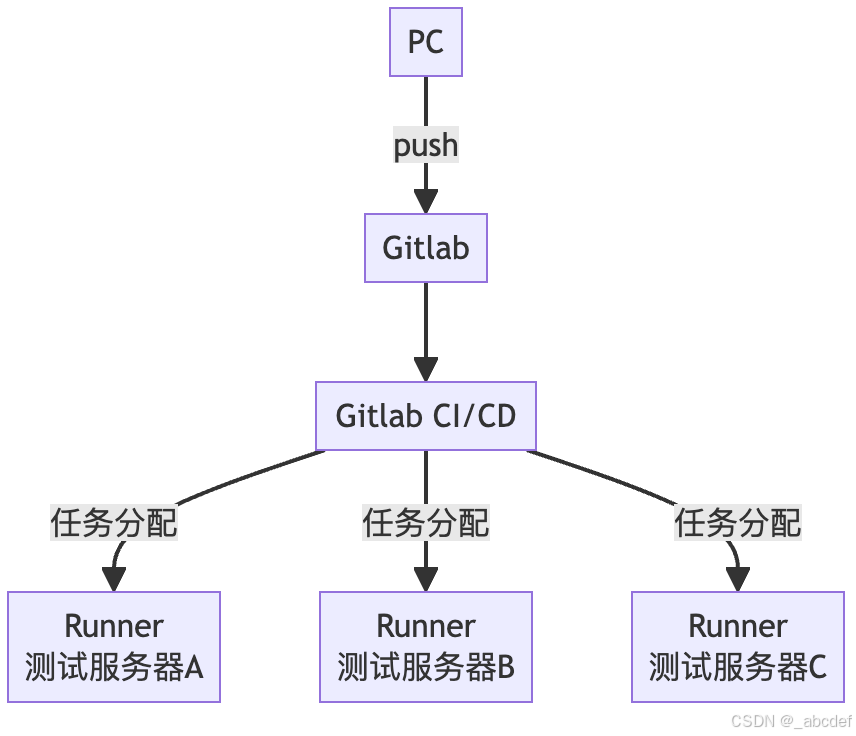
- 192.168.1.28 - Gitlab 服务器(已安装 Docker)
- 192.168.1.27 - Gitlab Runner (已安装 Docker)

部署 Gitlab 容器
graphql
#docker volume rm gitlab-etc
#docker volume rm gitlab-log
#docker volume rm gitlab-opt

docker volume create gitlab-etc
docker volume create gitlab-log
docker volume create gitlab-opt

docker run --name gitlab \
--hostname 192.168.1.28 \
--restart=always \
-p 80:80 \
-p 443:443 \
-v gitlab-etc:/etc/gitlab \
-v gitlab-log:/var/log/gitlab \
-v gitlab-opt:/var/opt/gitlab \
-d gitlab/gitlab-ce:latest


docker logs -f gitlab

sudo docker exec -it gitlab grep 'Password:' /etc/gitlab/initial_root_password
部署 Runner
安装 JDK21
graphql
cd /usr/local
wget https://download.java.net/java/GA/jdk21.0.1/415e3f918a1f4062a0074a2794853d0d/12/GPL/openjdk-21.0.1_linux-x64_bin.tar.gz -O openjdk-21.0.1_linux-x64_bin.tar.gz
tar -xzvf openjdk-21.0.1_linux-x64_bin.tar.gz

cat >> /etc/profile <<-'EOF'
export JAVA_HOME=/usr/local/jdk-21.0.1
export PATH=$PATH:$JAVA_HOME/bin
EOF

source /etc/profile
java -version
安装 Apache Maven
graphql
cd /usr/local
wget --no-check-certificate wget  https://manongbiji.oss-cn-beijing.aliyuncs.com/ittailkshow/devops/download/apache-maven-3.8.6-bin.tar.gz
tar -xzvf apache-maven-3.8.6-bin.tar.gz

cat >> /etc/profile <<-'EOF'
export PATH=$PATH:/usr/local/apache-maven-3.8.6/bin
EOF

source /etc/profile
mvn -v
安装 Runner
graphql
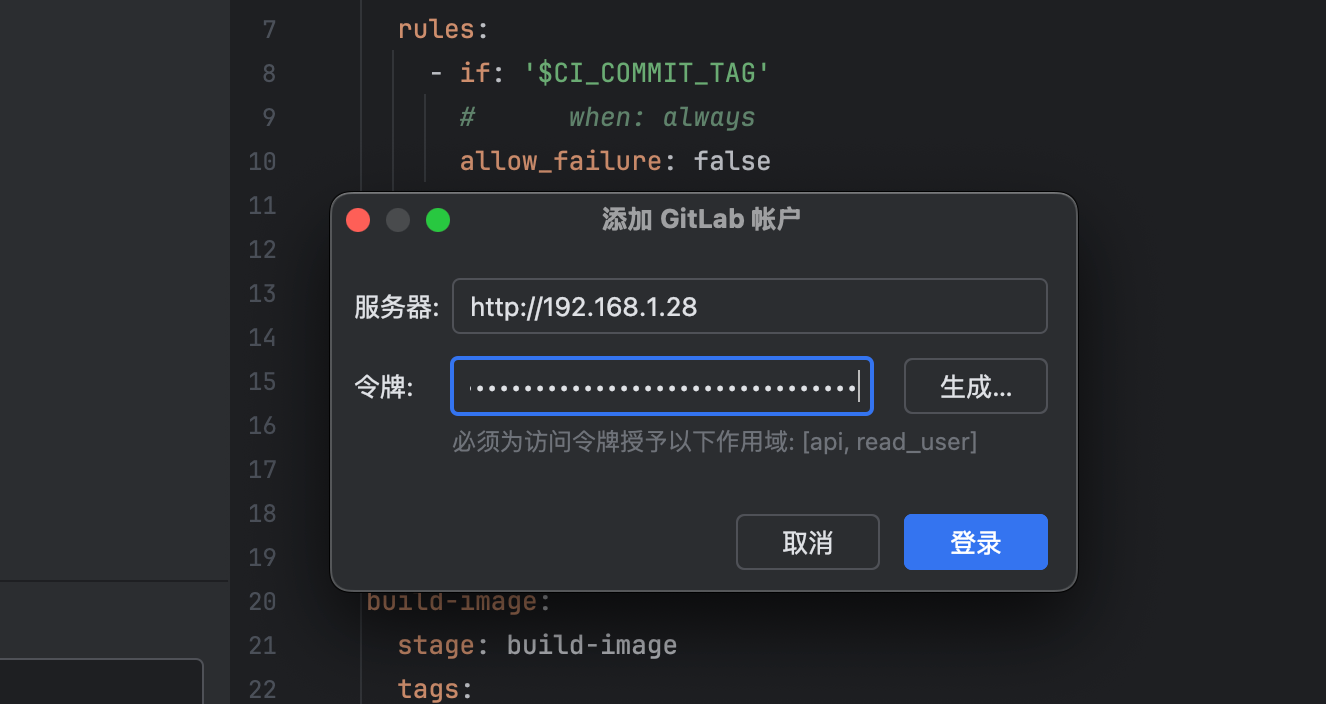
curl -L "https://mirrors.tuna.tsinghua.edu.cn/gitlab-runner/ubuntu/pool/noble/main/g/gitlab-runner/gitlab-runner_18.5.0-1_amd64.deb" -o /tmp/gitlab-runner.deb && sudo dpkg -i /tmp/gitlab-runner.deb && sudo apt -f install注册 Runner

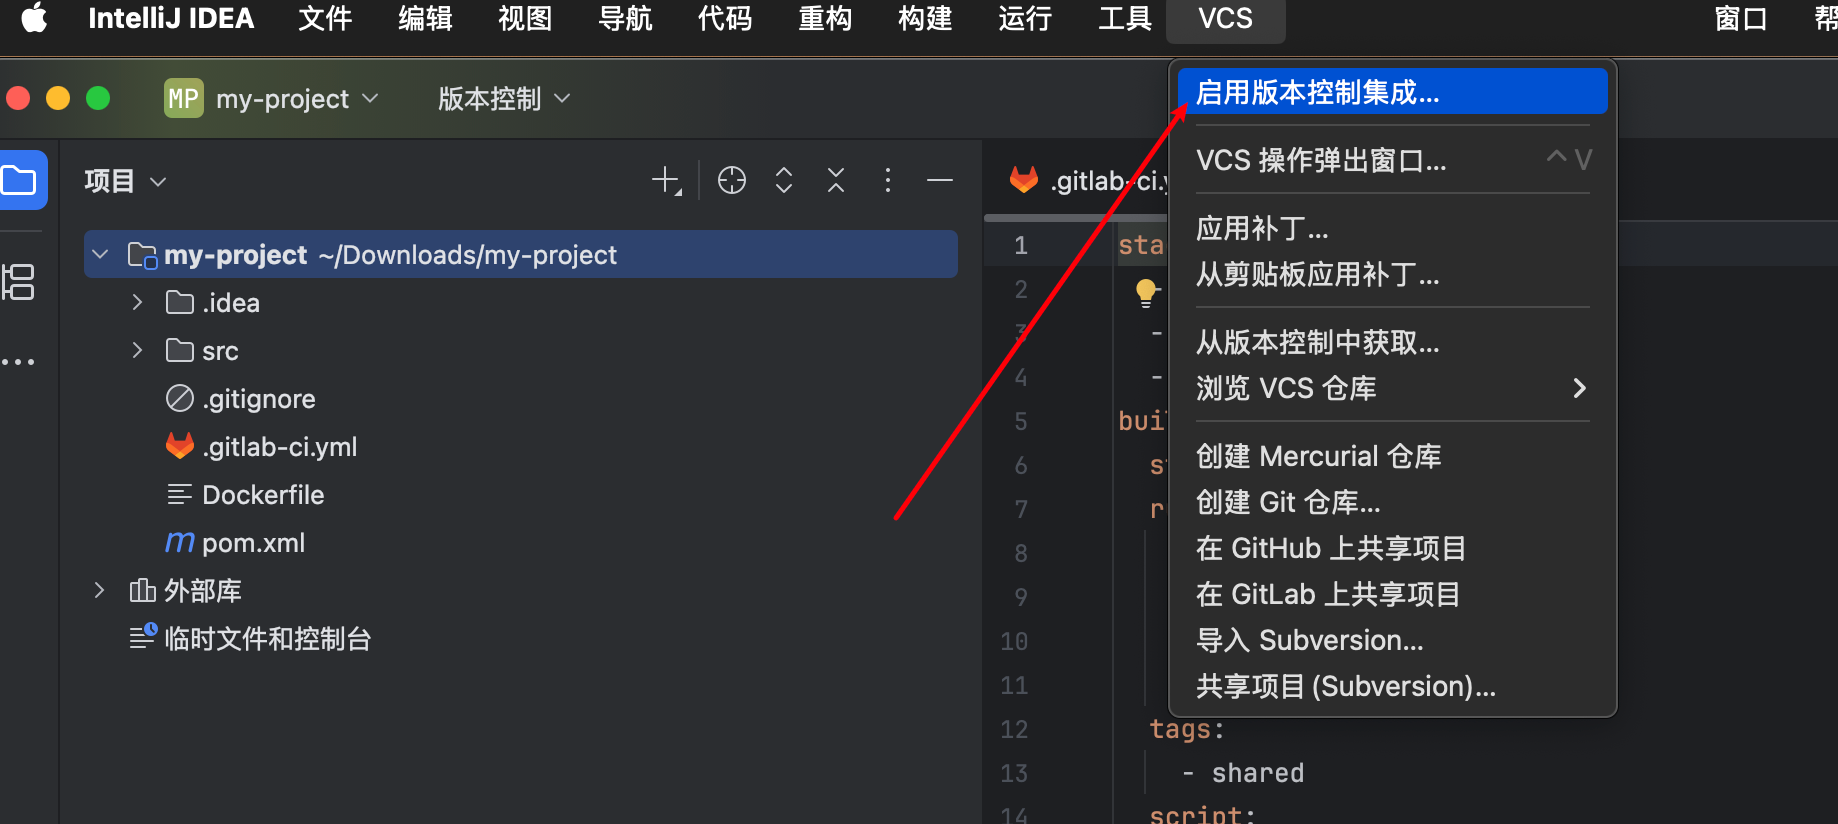
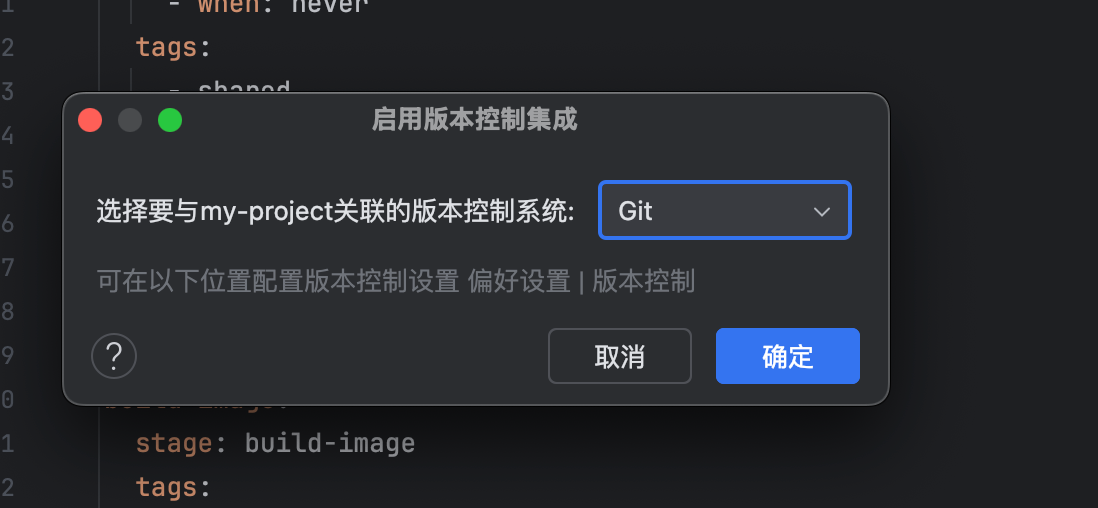
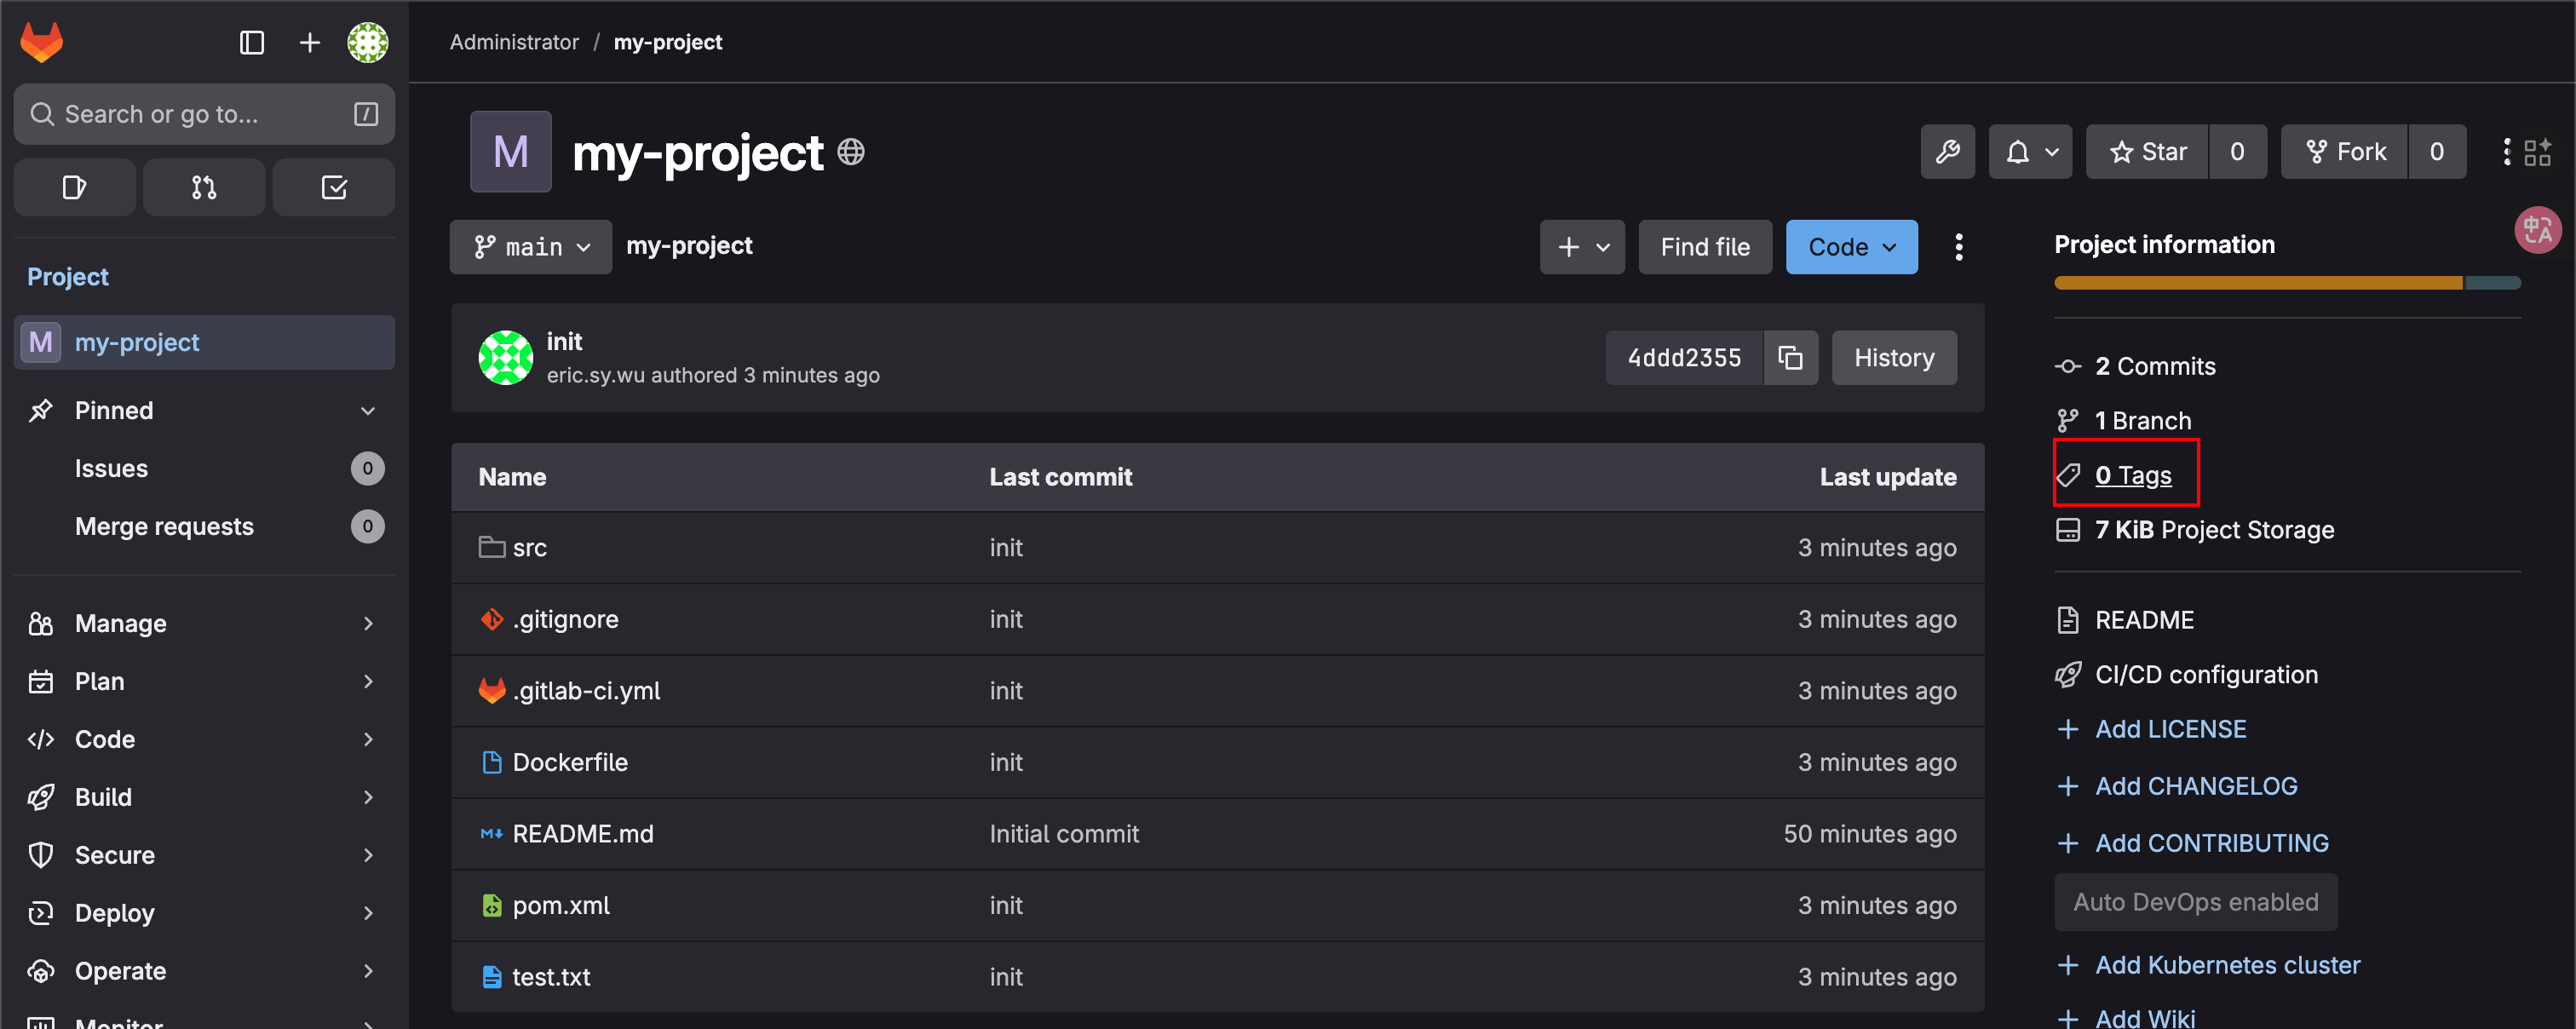
创建仓库
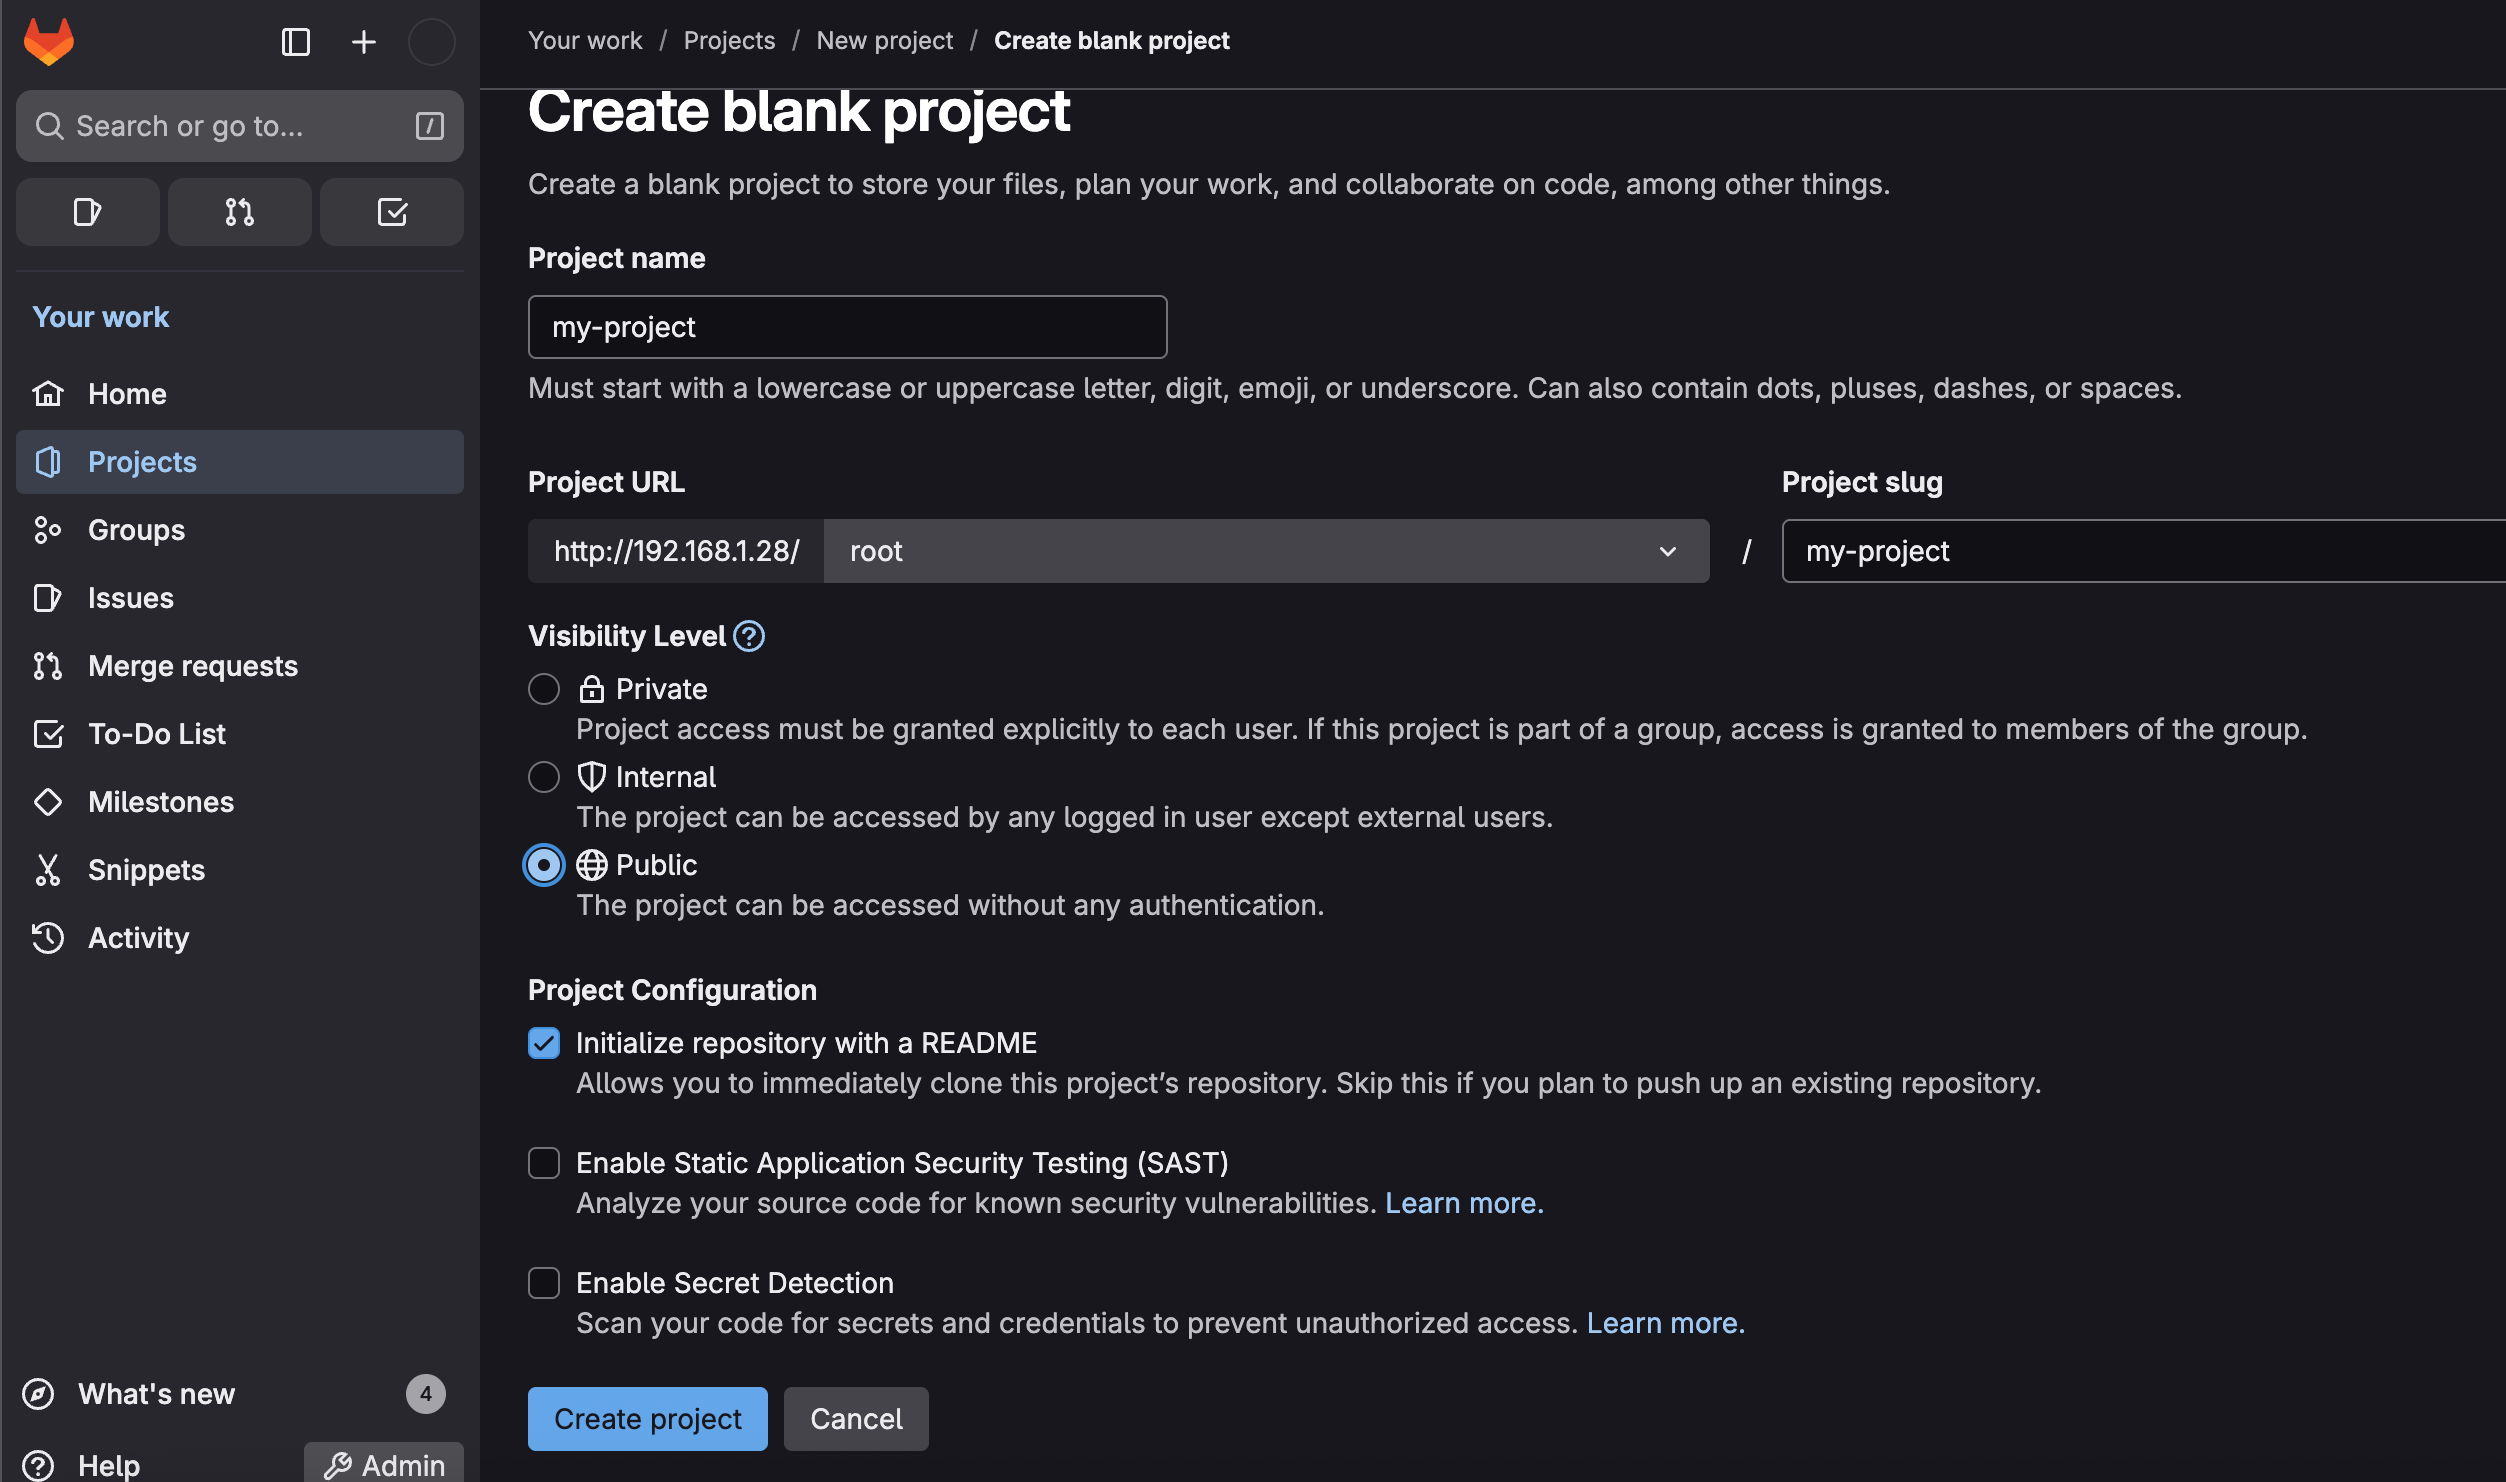
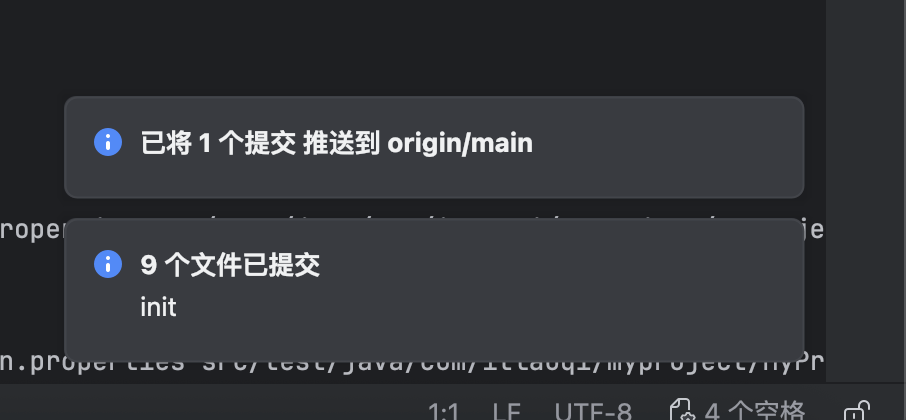
git clone my-project
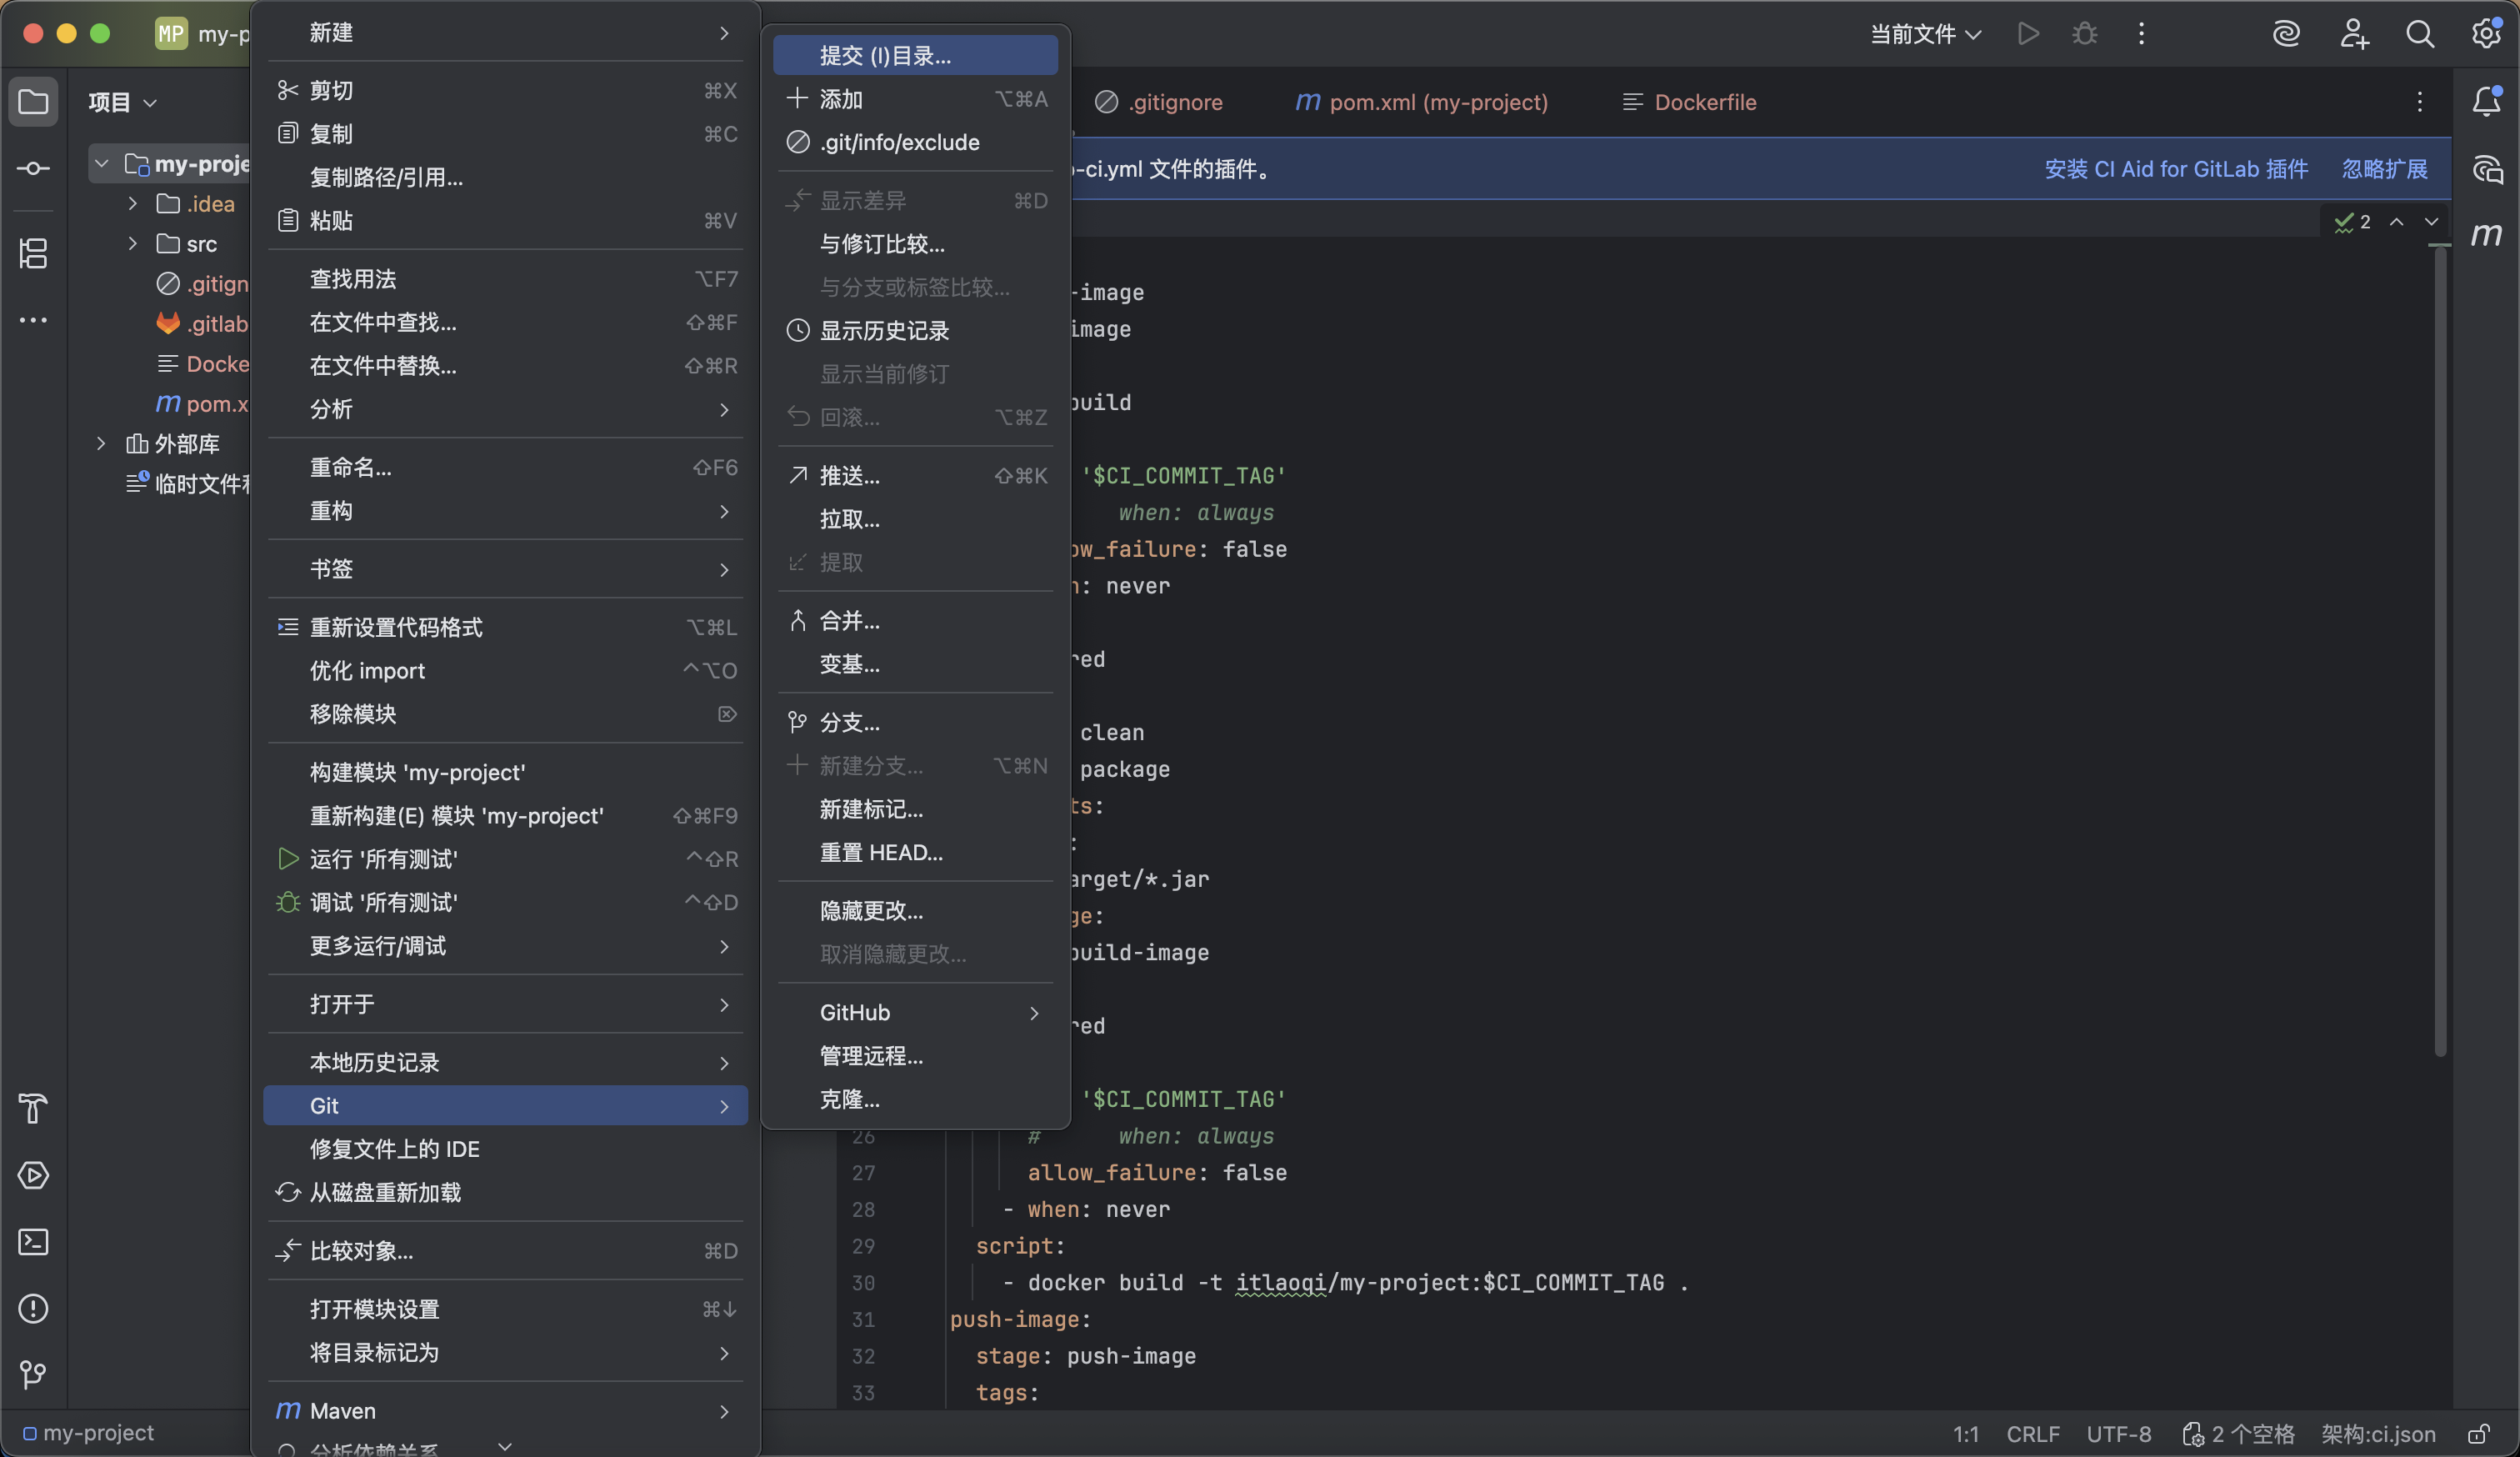
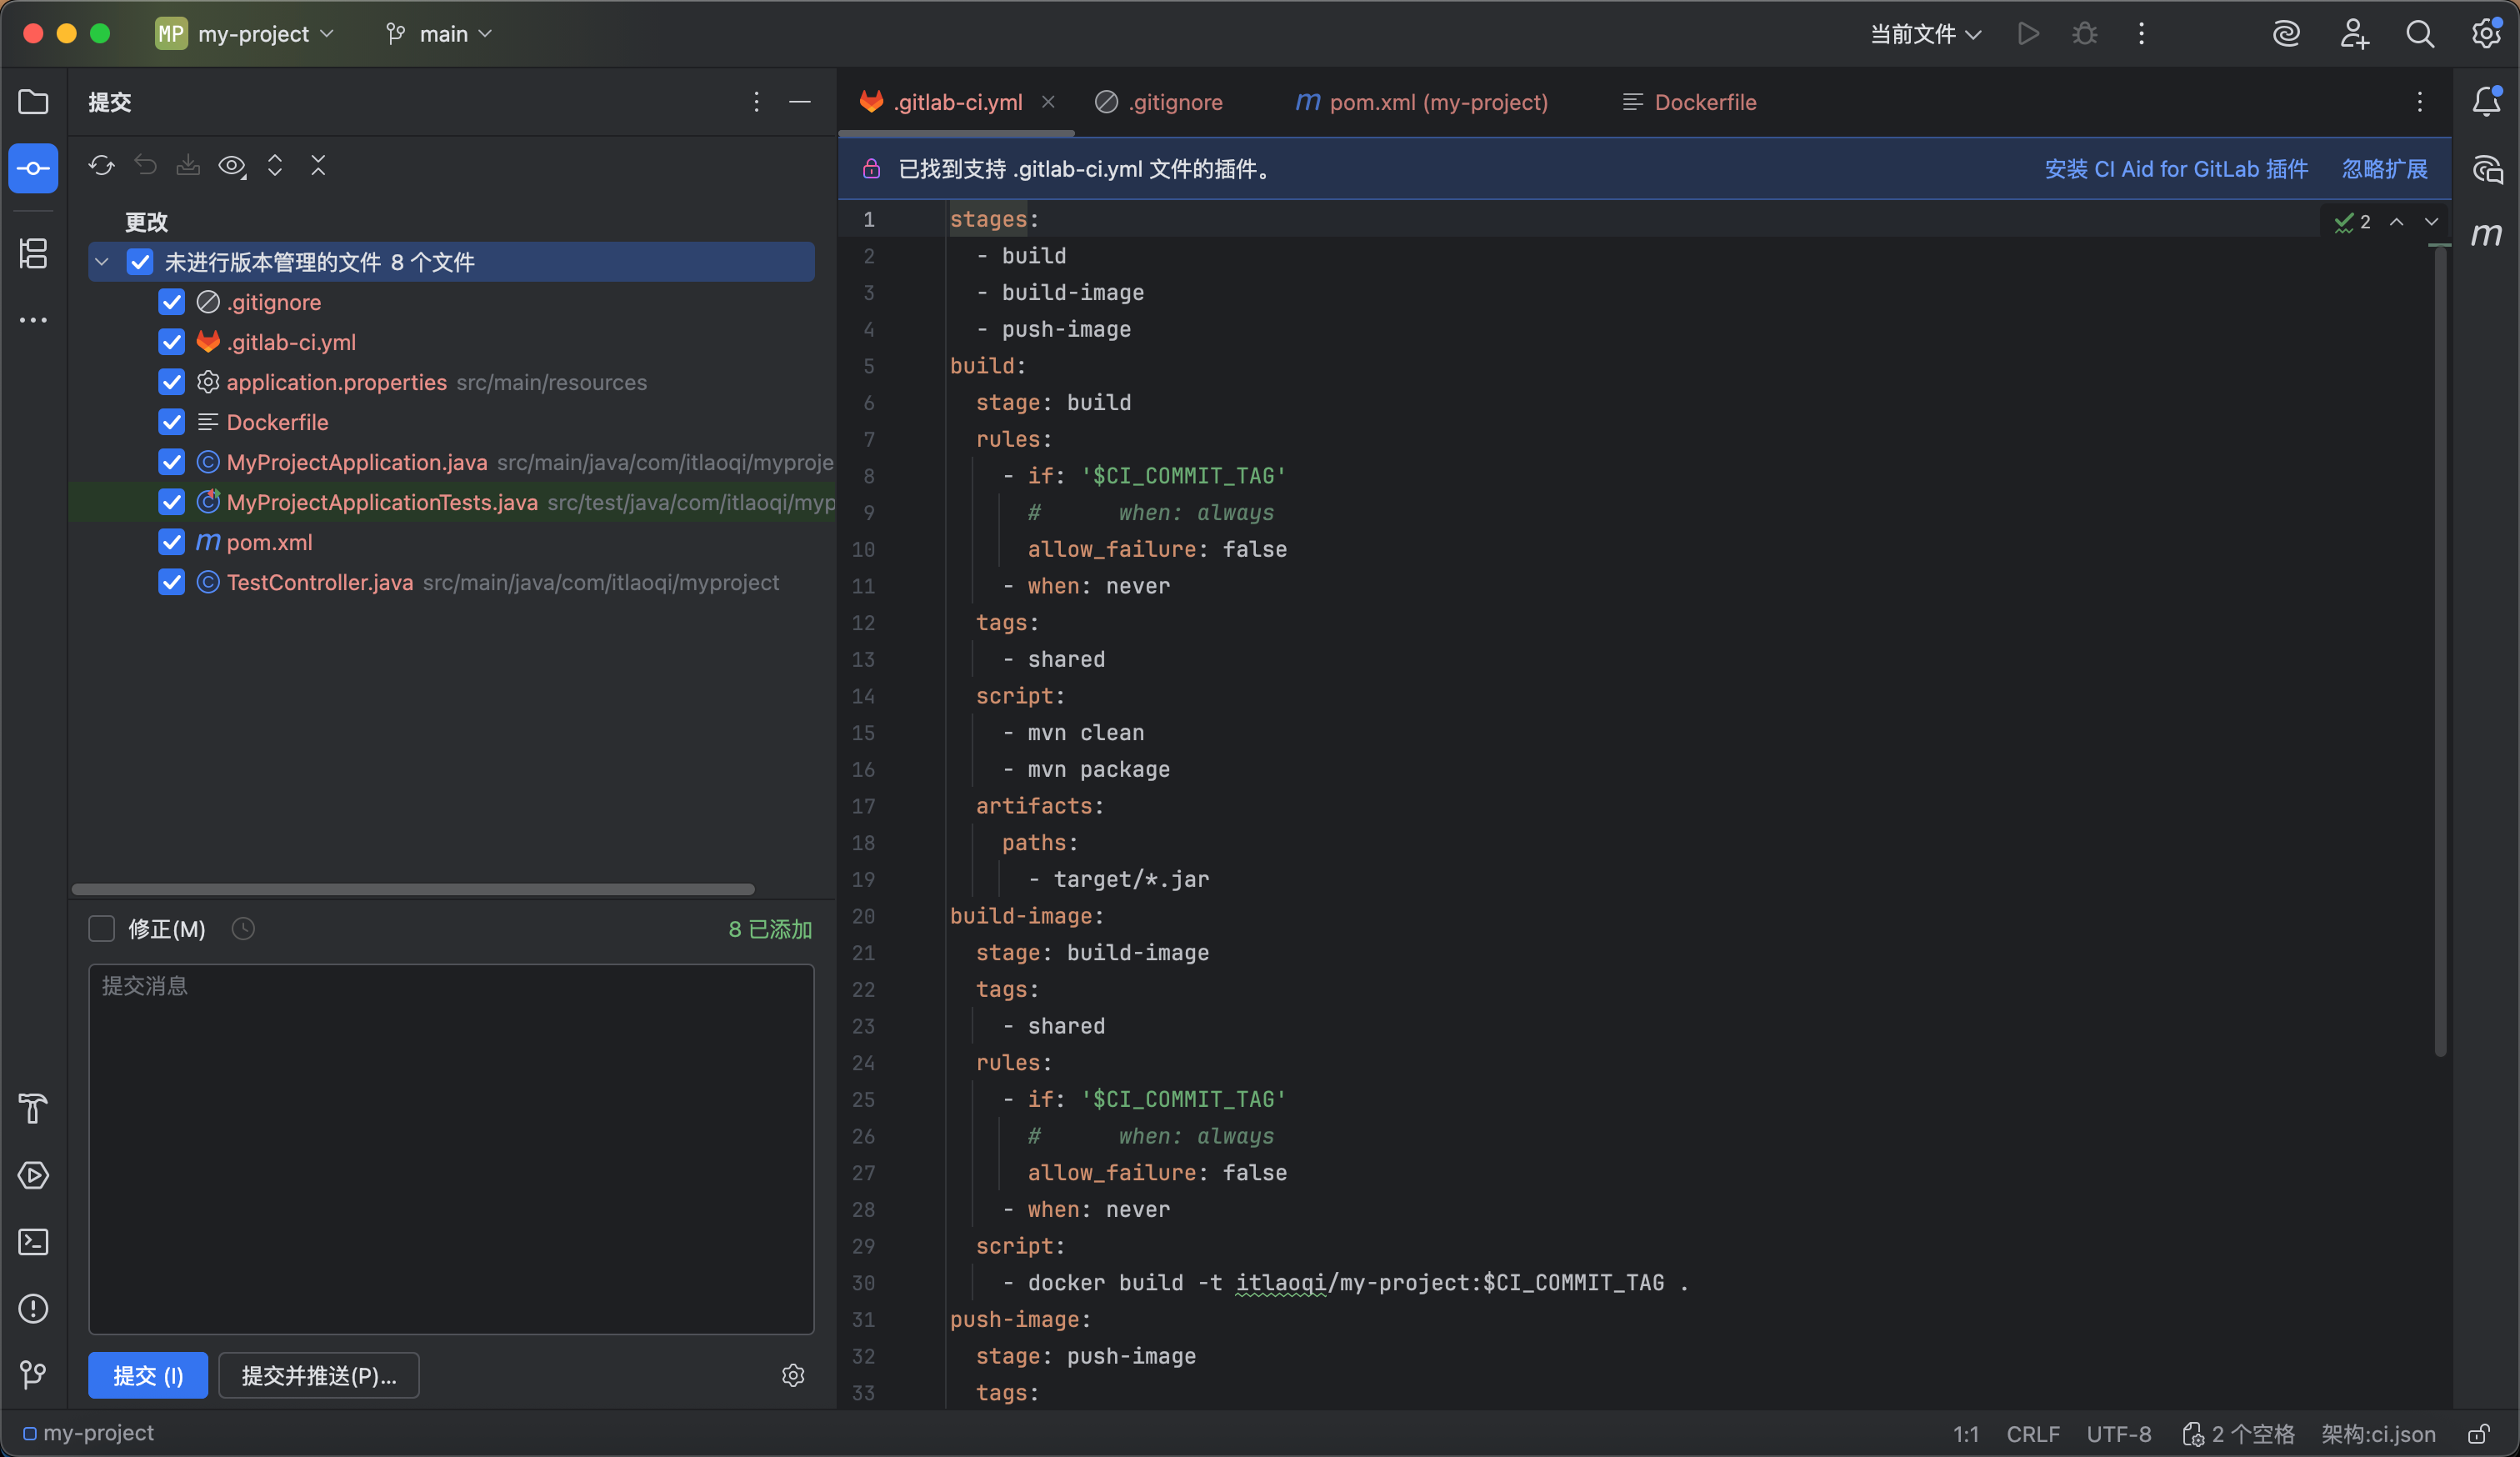

推送代码
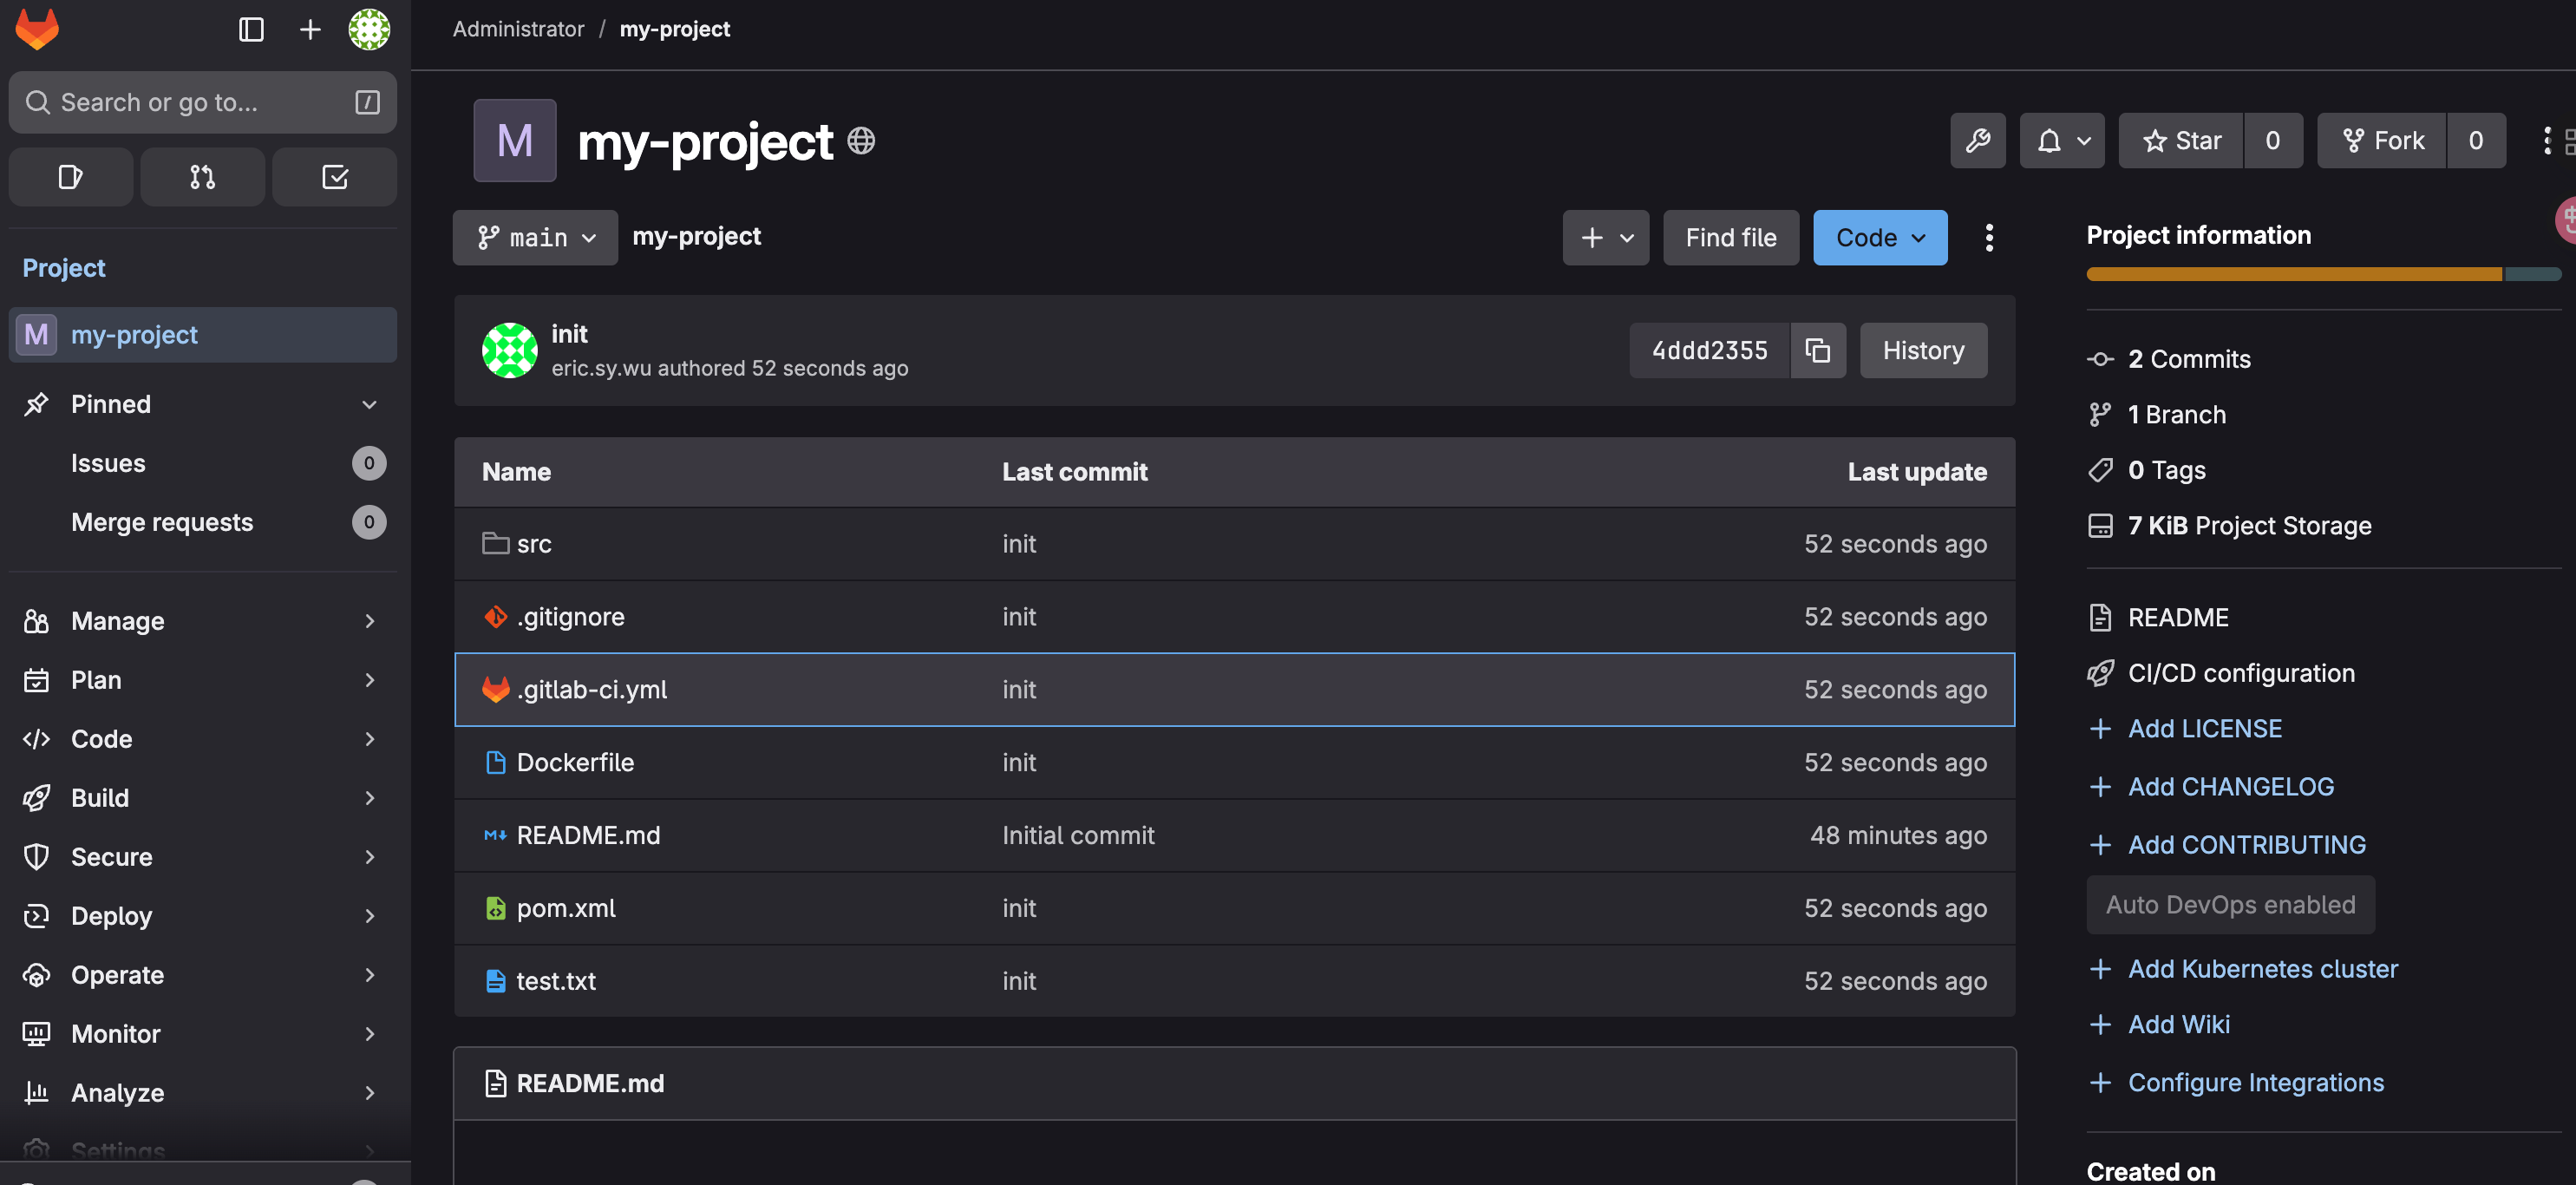
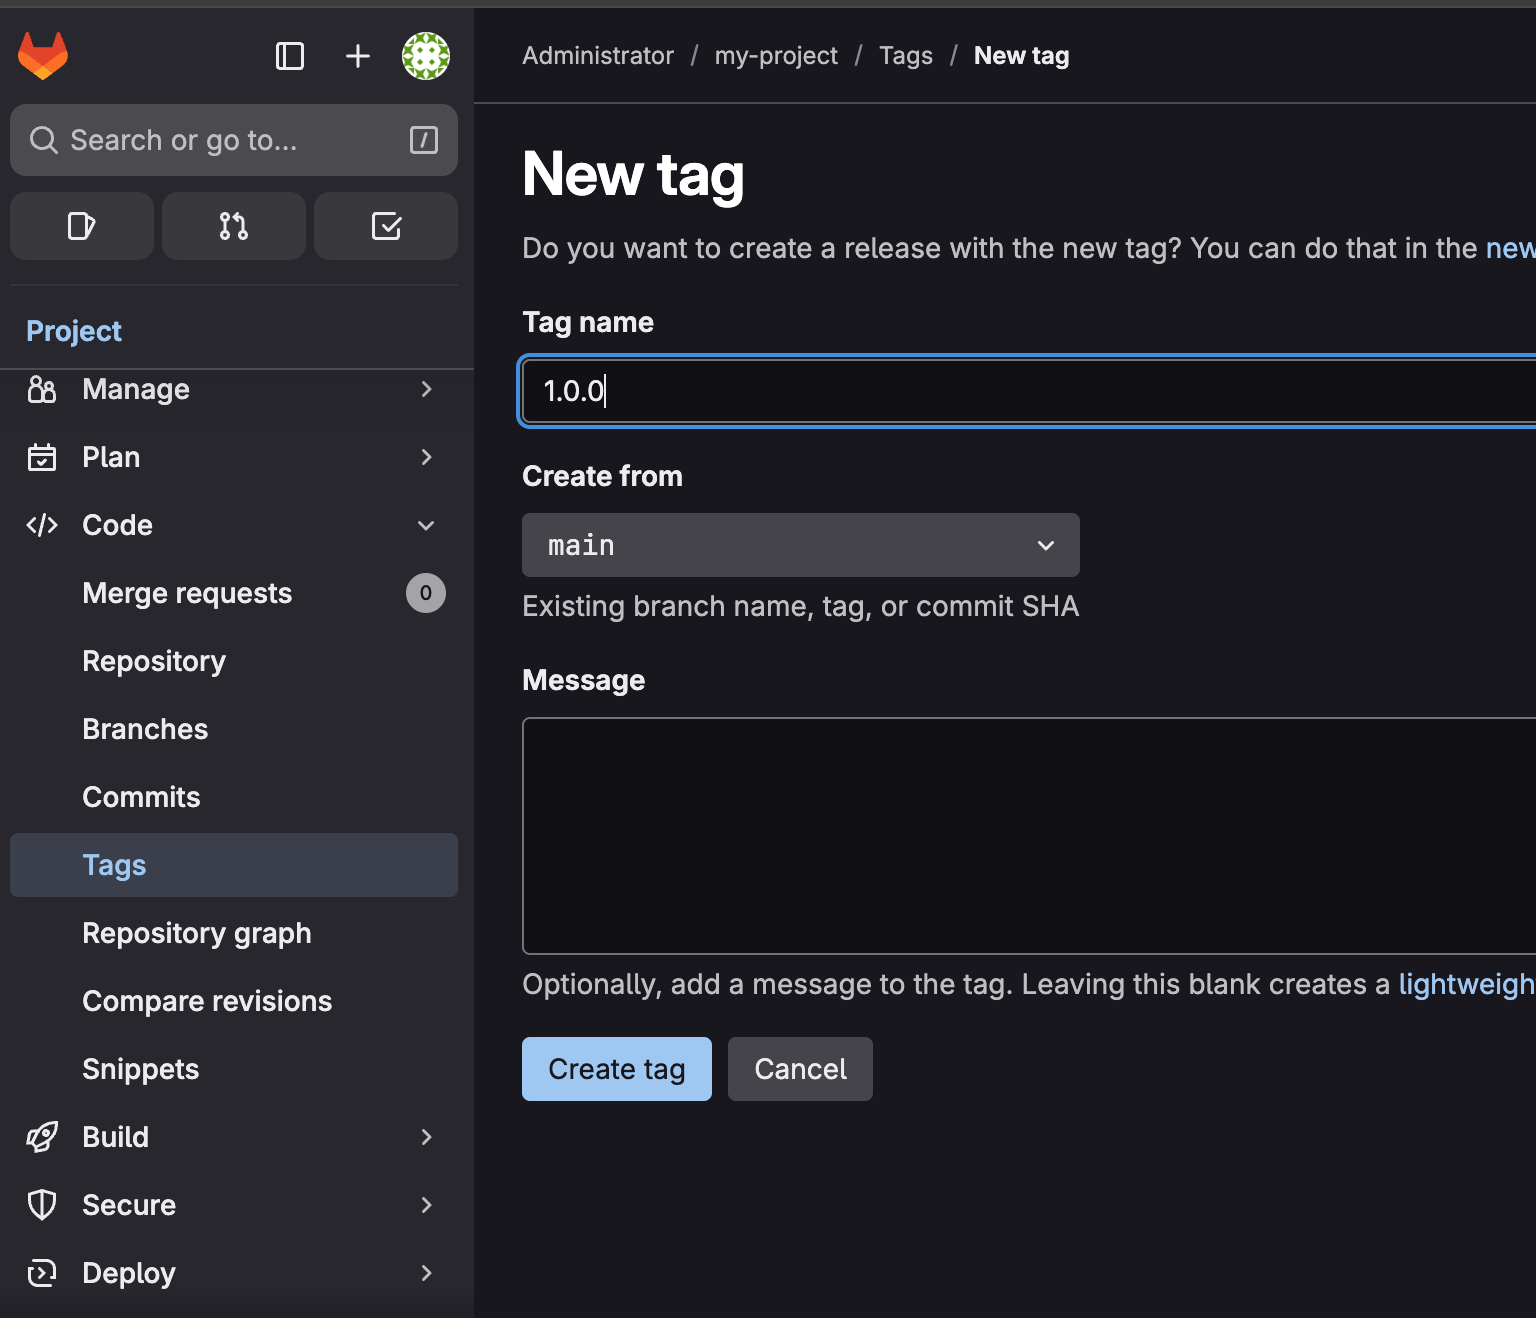
根据触发条件,打一个 tag,触发流水线
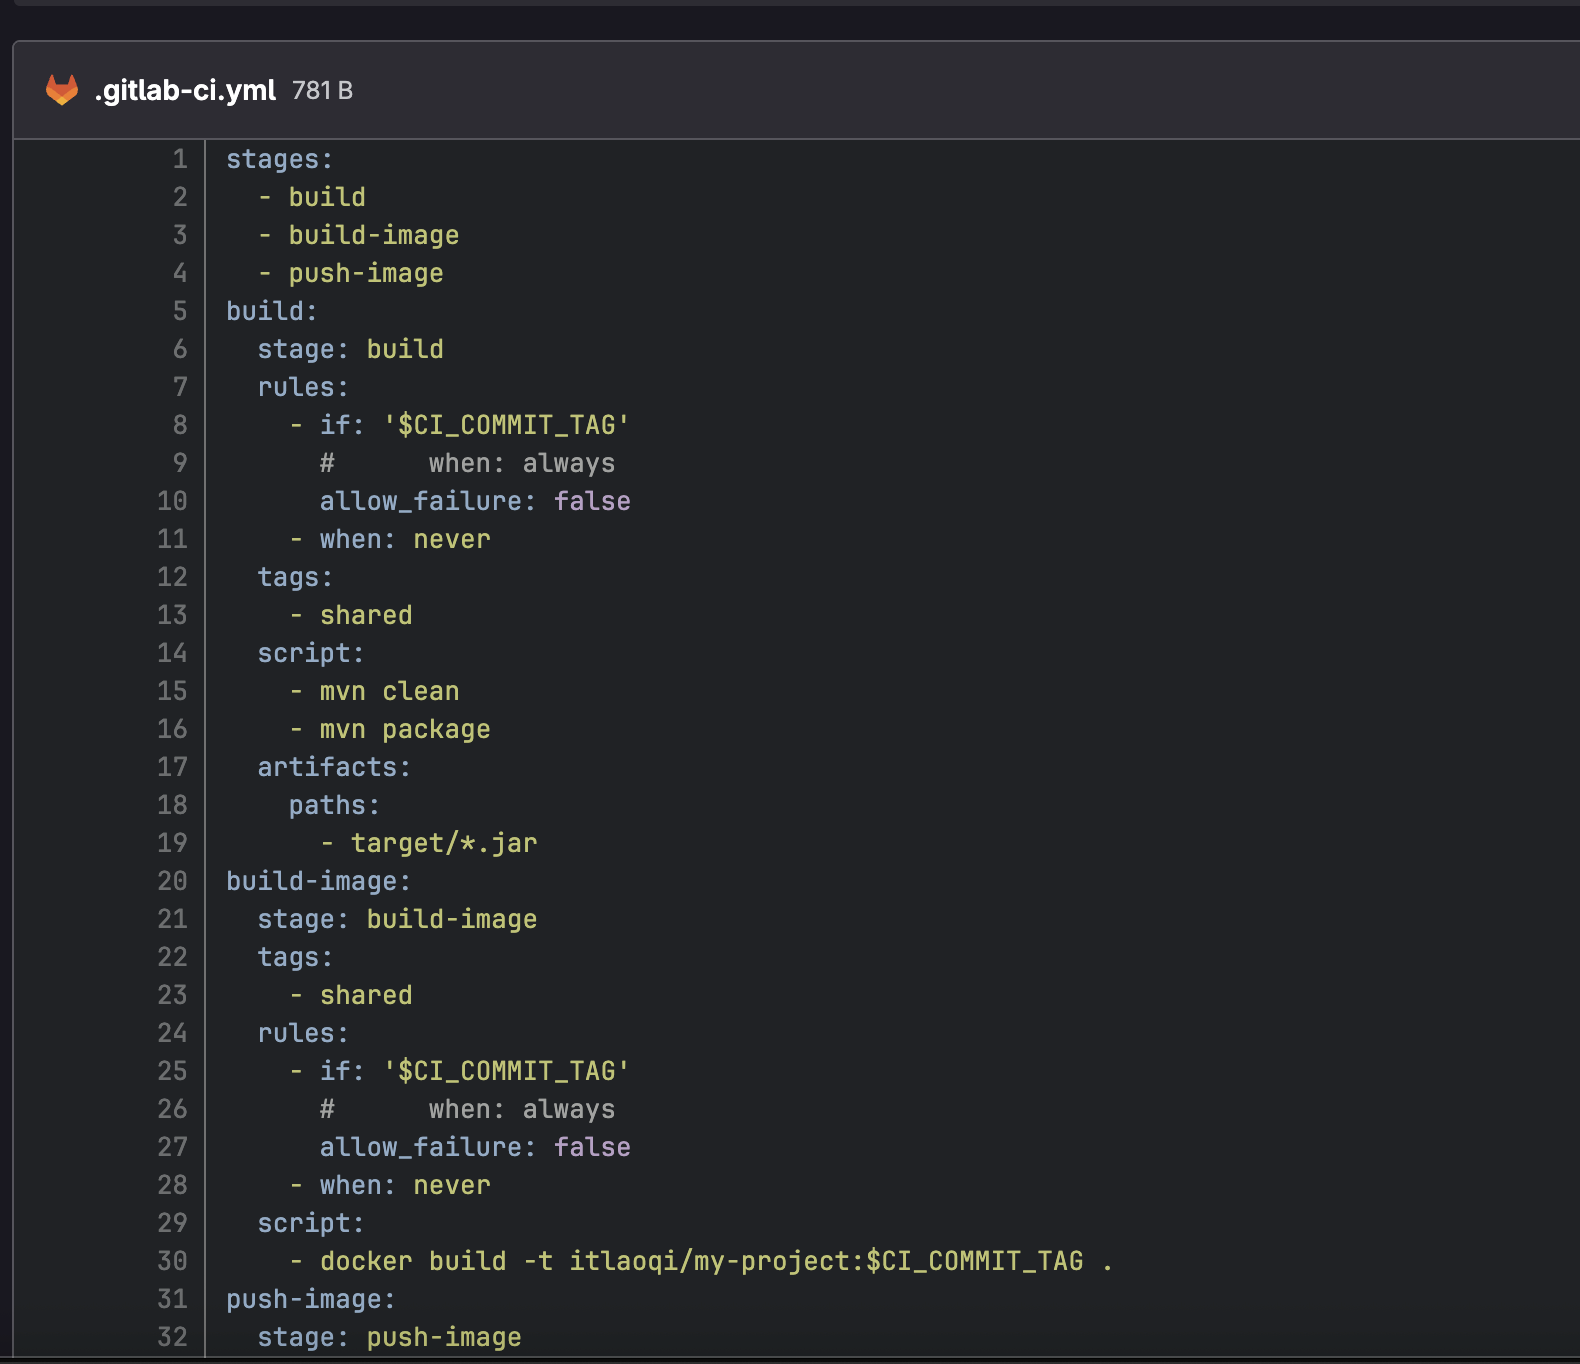
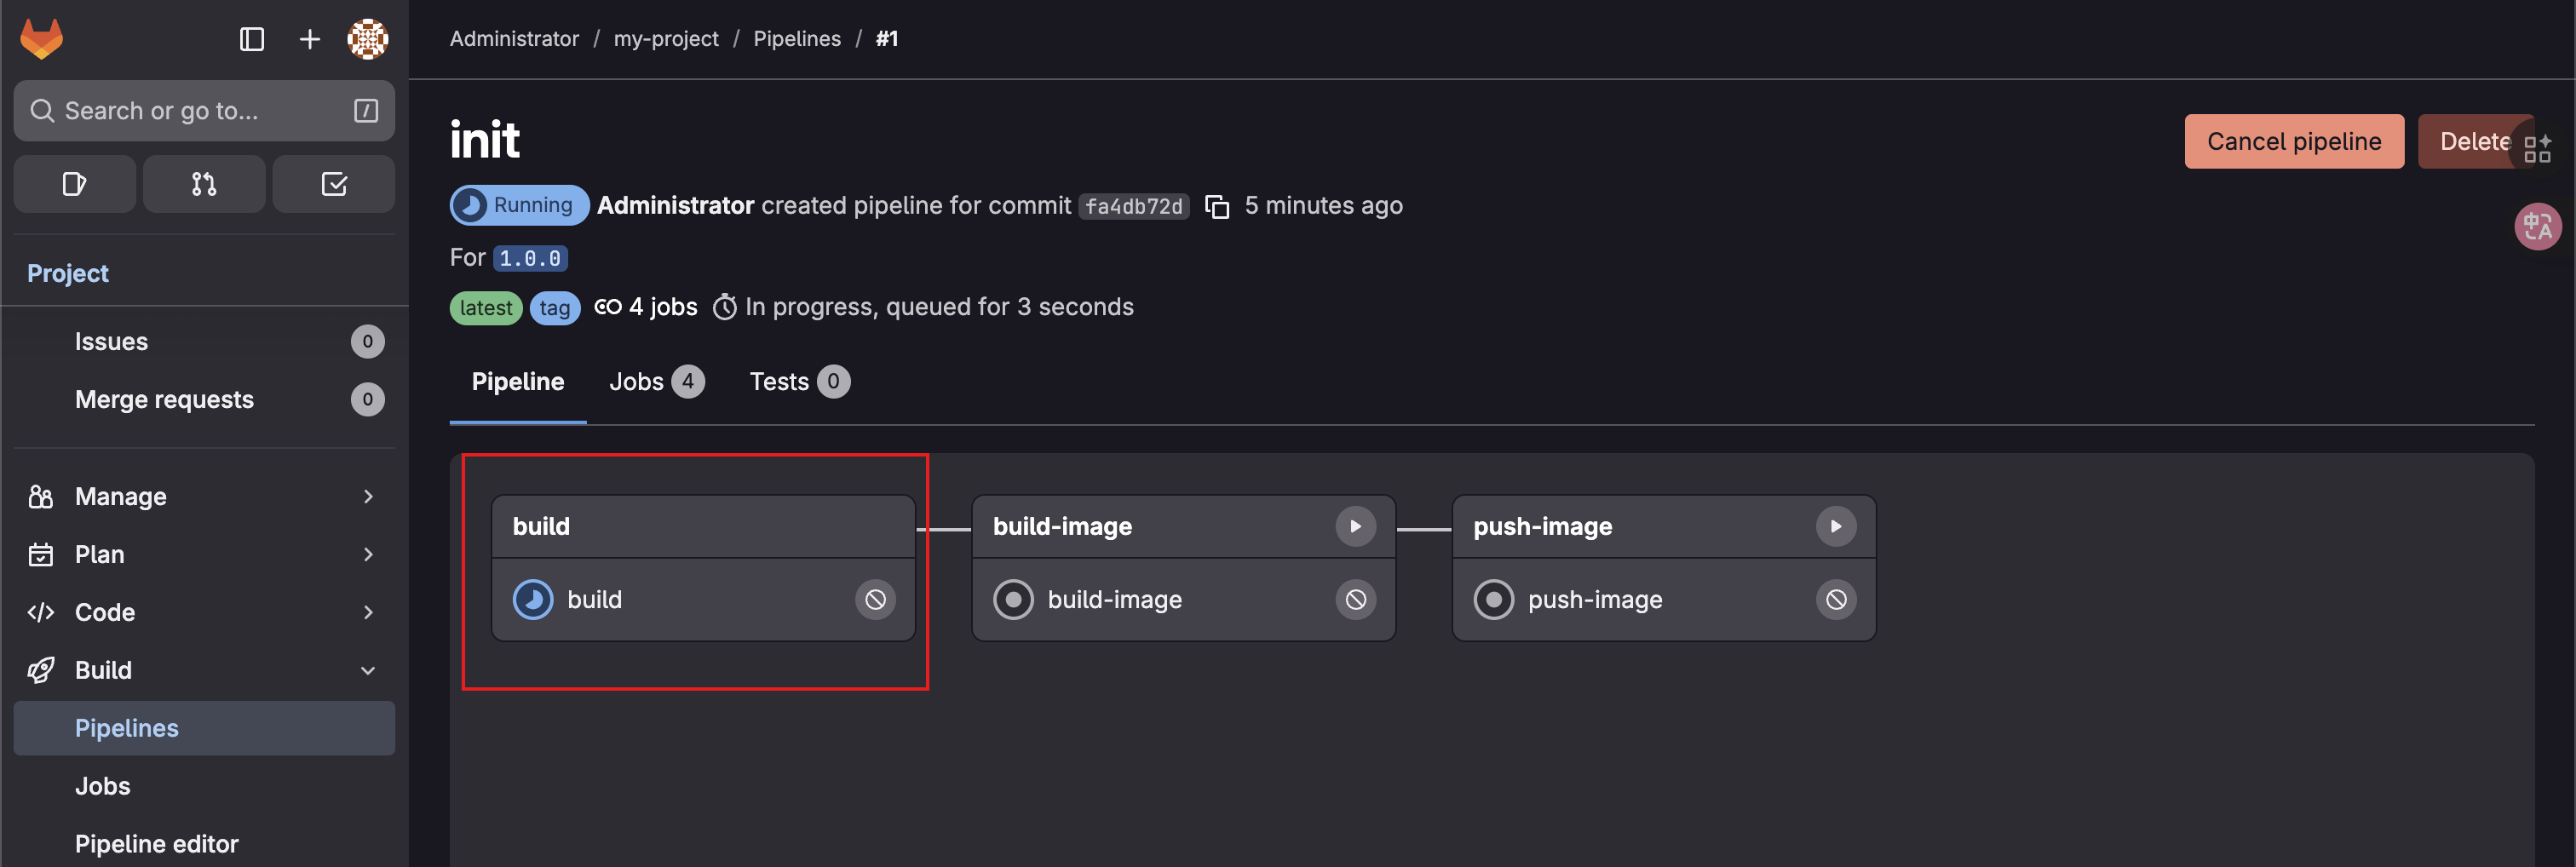
查看 pipelines 流水线
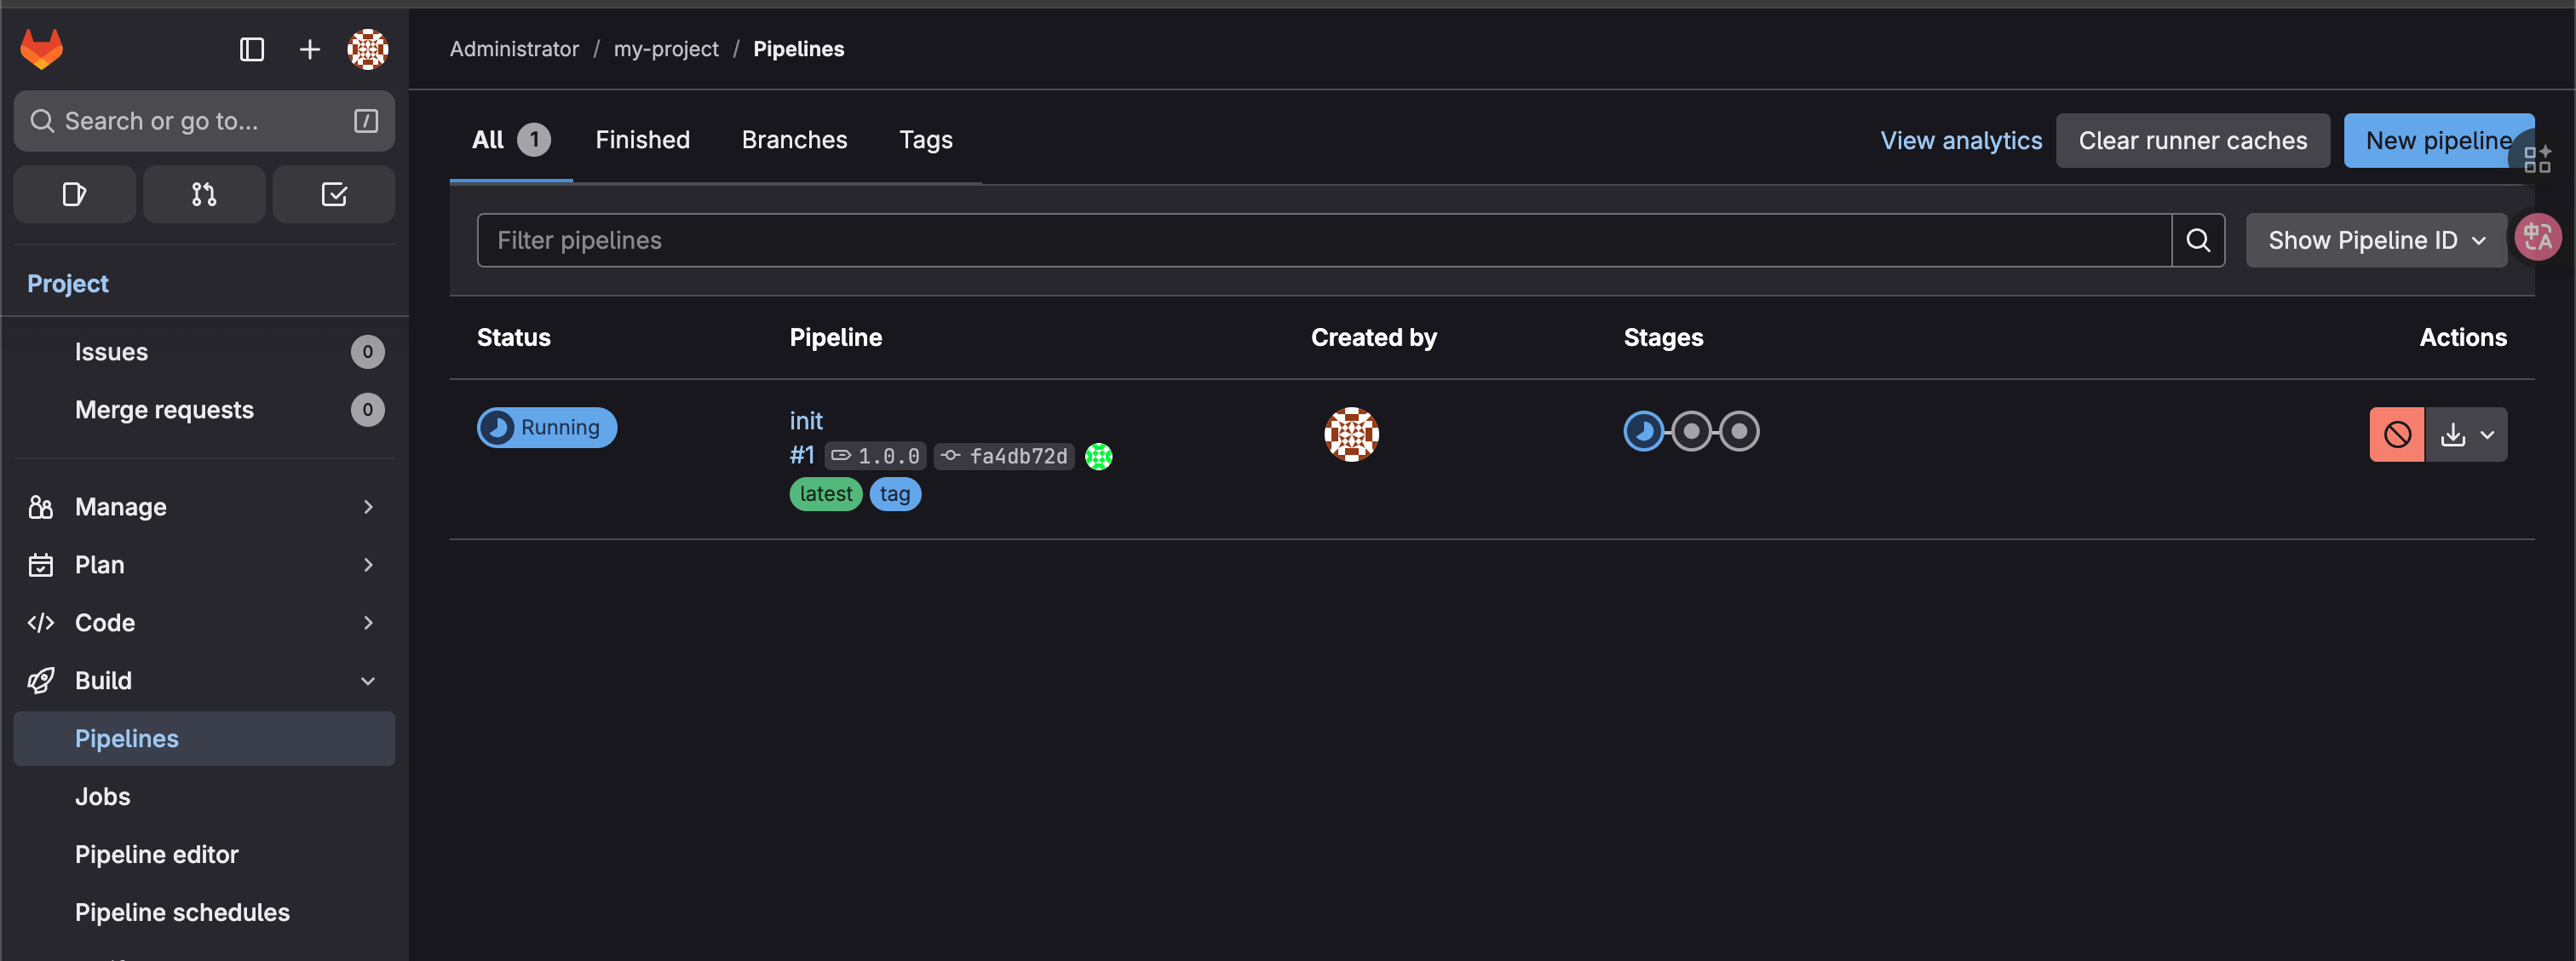
第一步 编译 jar,第二步打包成 image,第三步 push 到 dockerhub