1-快速上手VUE项目
2-整体理解Vue3项目
3-理解数据双向绑定
双向绑定是Vue最为核心的功能。简单理解就是<template>中的页面数据和<script>中的脚本数据进行绑定,其中任何一个数据发生了变化,另一个数据也随之发生变化。
1、vue2语法的双向绑定
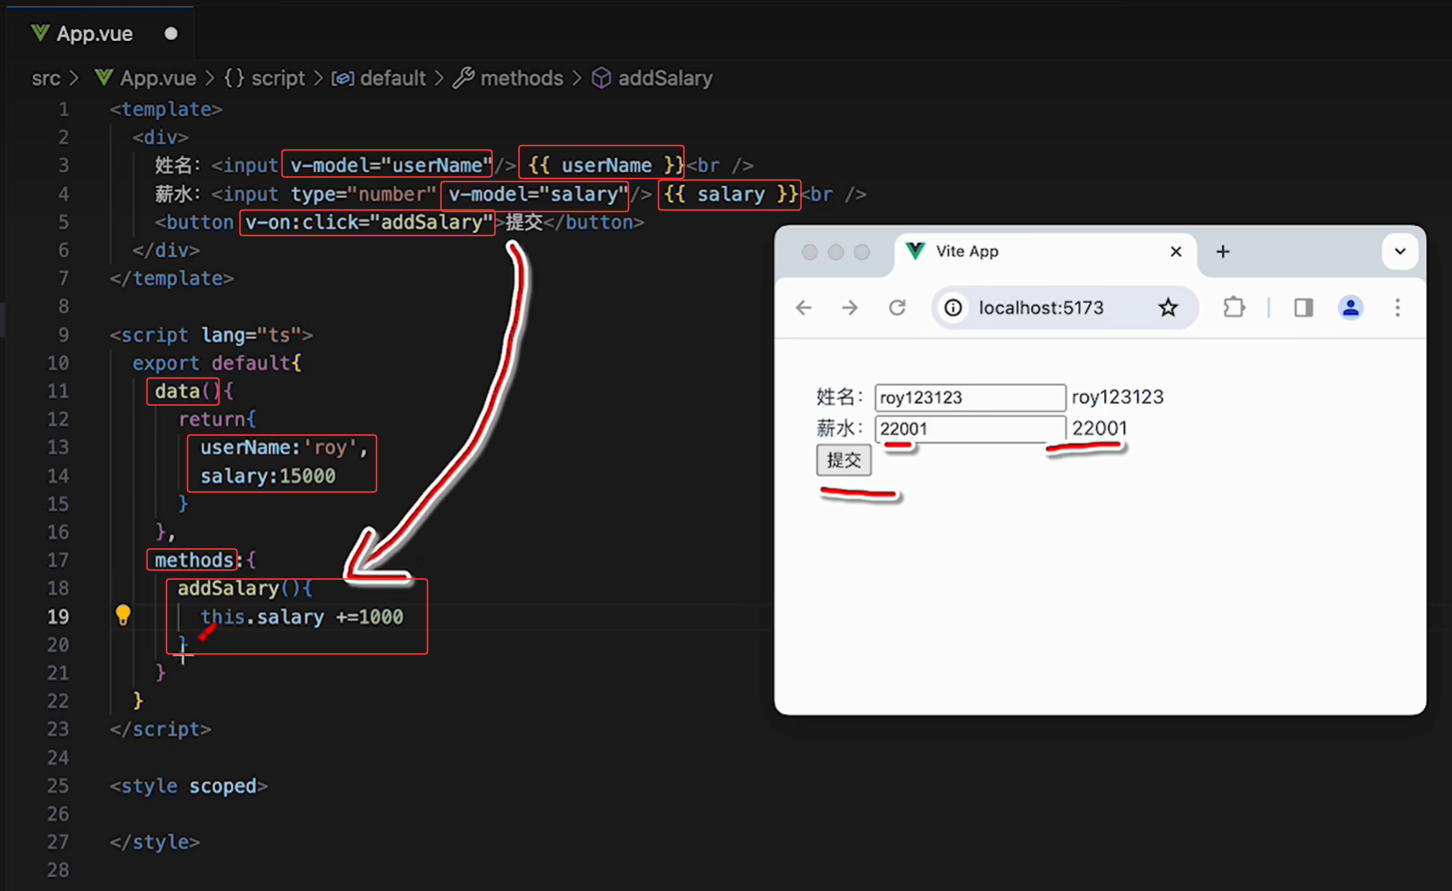
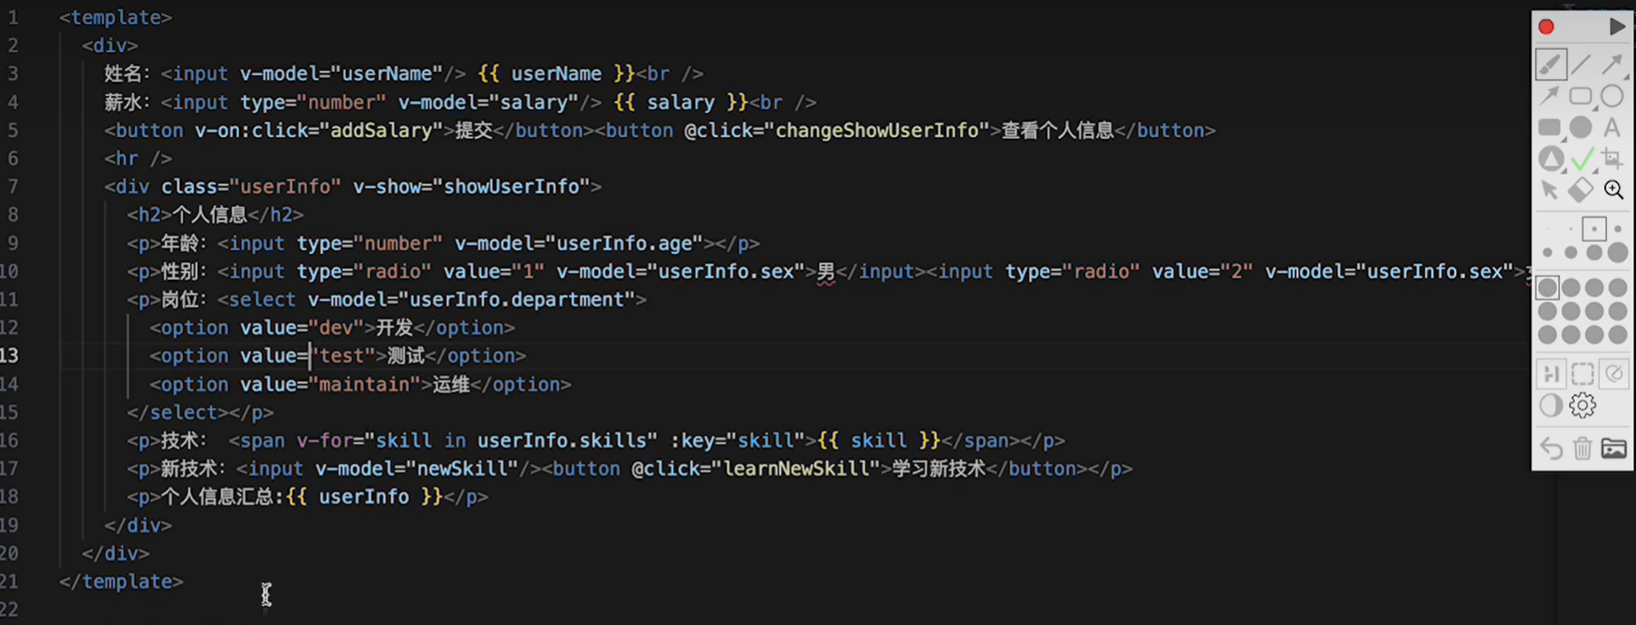
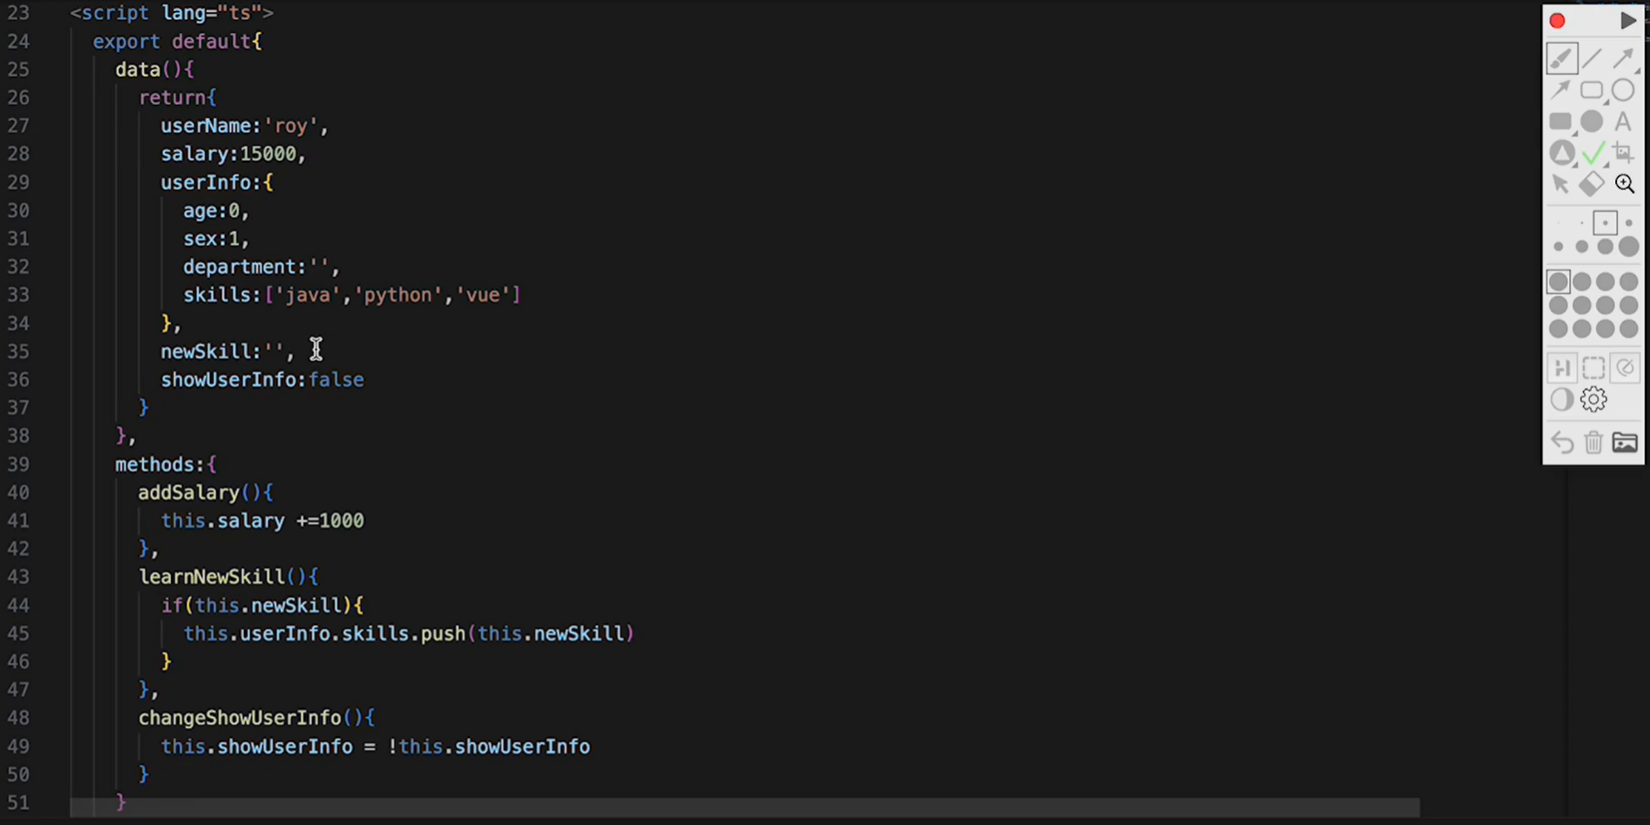
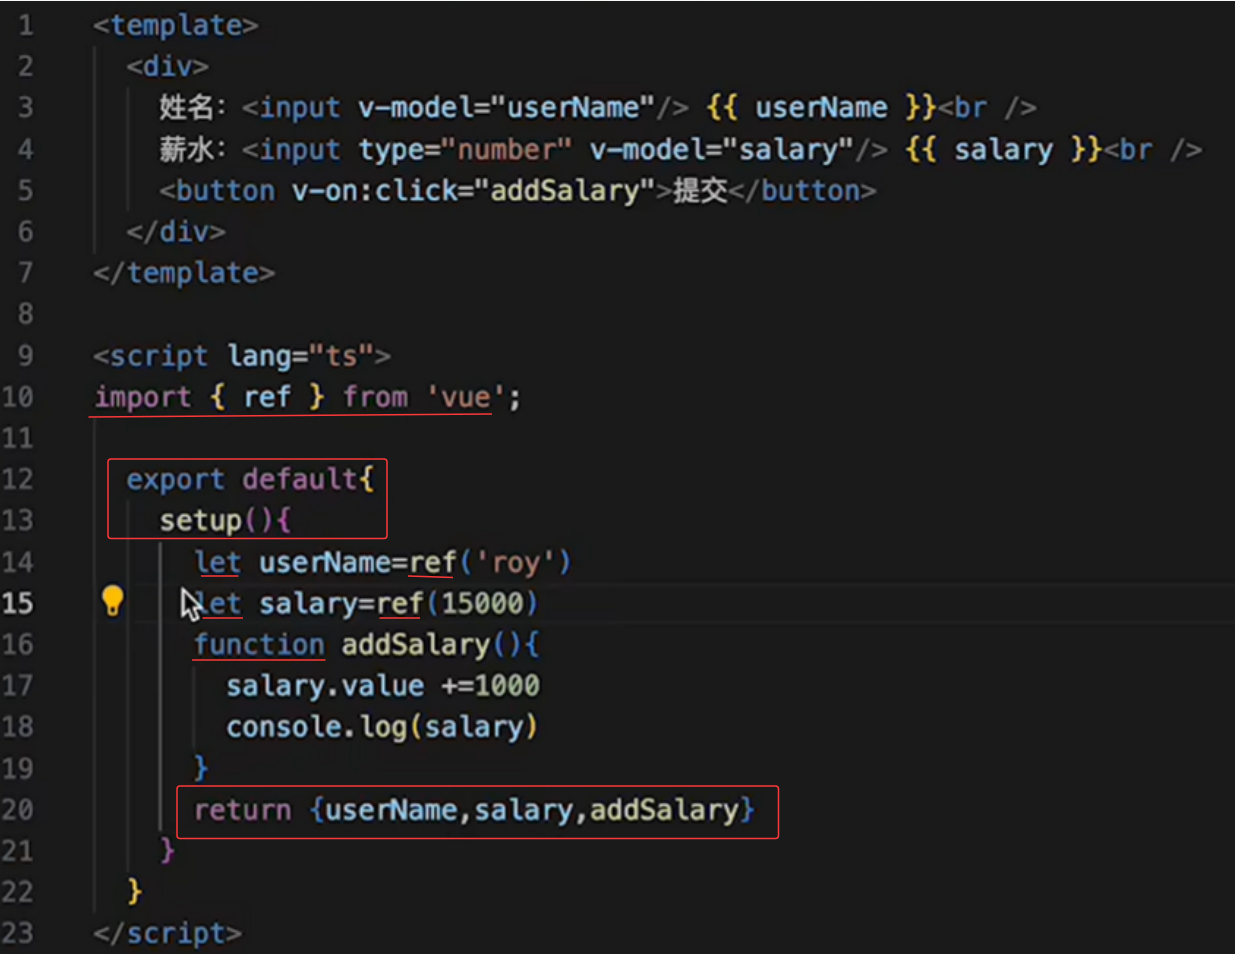
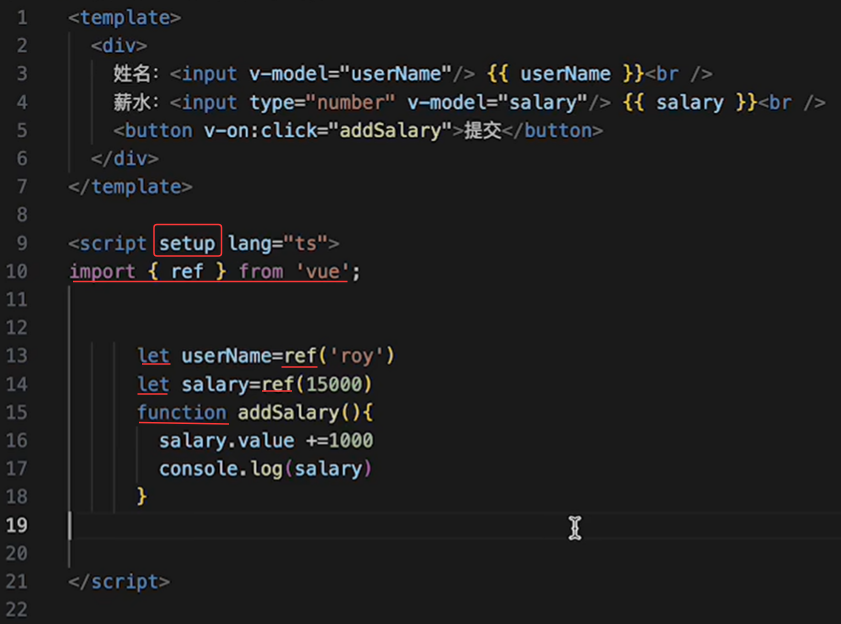
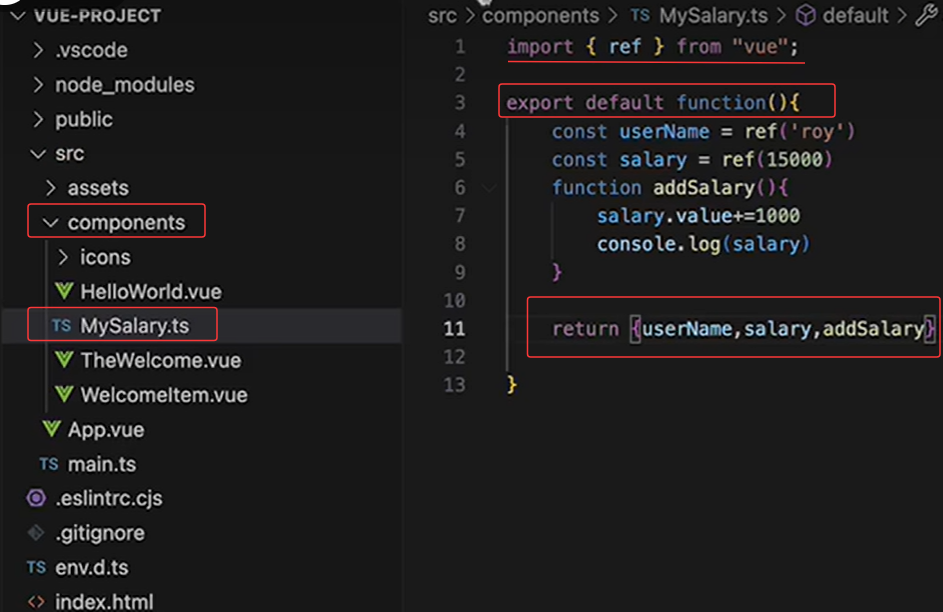
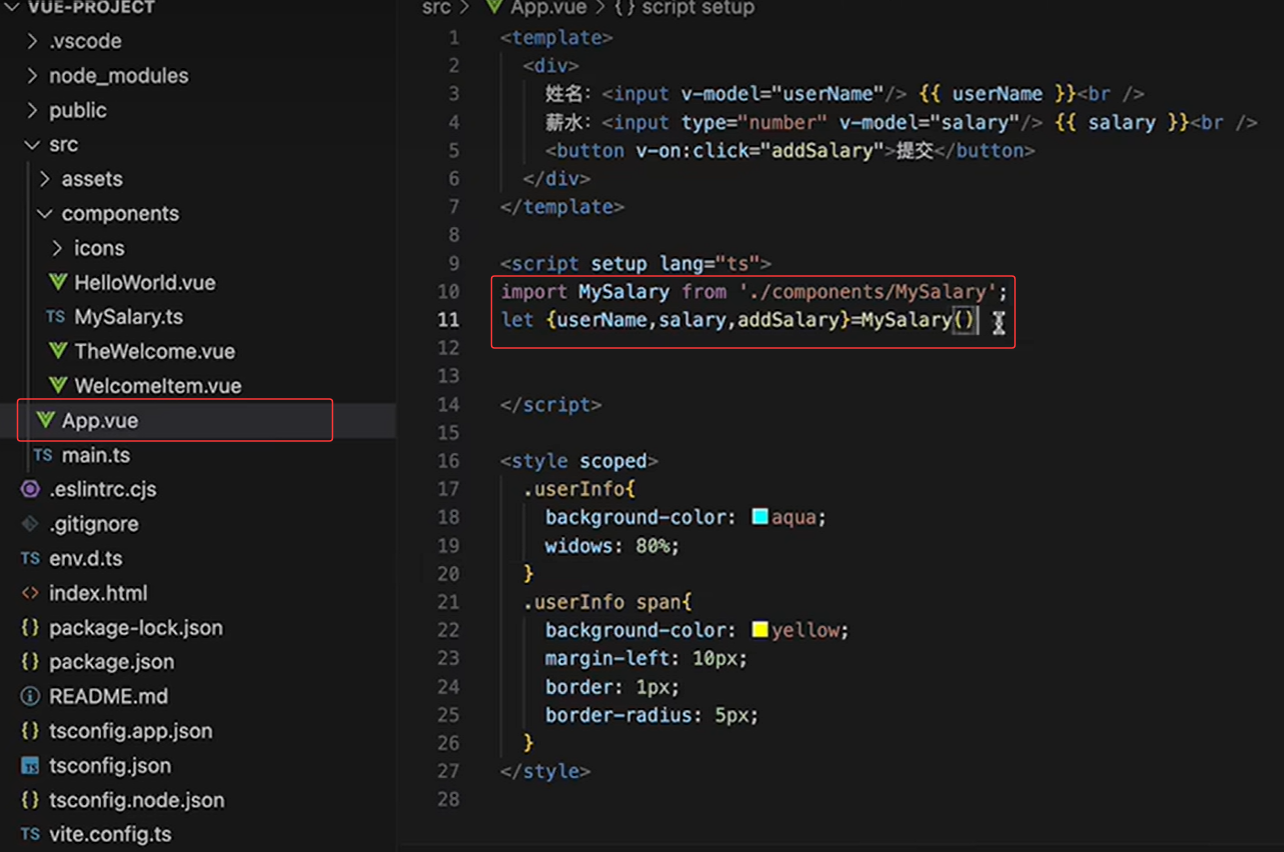
4-双向绑定案例
vue2示例
5-OptionsAPI和CompositionAPI
vue2使用的选项/配置API vue3使用的混合/组合API
组合API
hr-----------------------------------------------------------------------
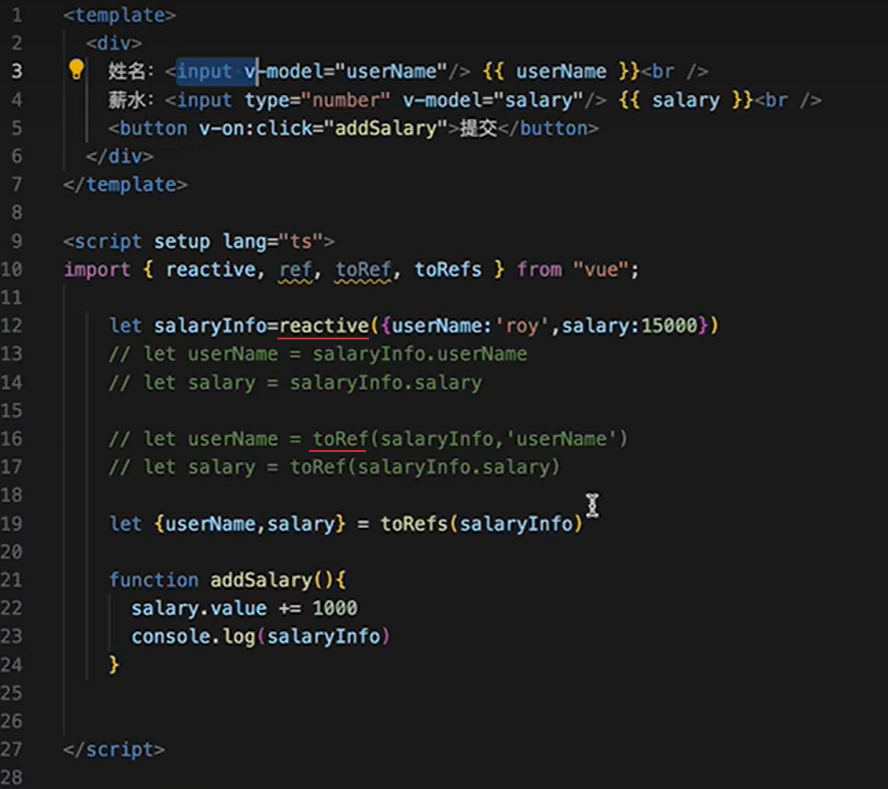
6-Vue3的数据双向绑定
拆包:
数据用ref
对象用reactive
引用对象用toRef toRefs
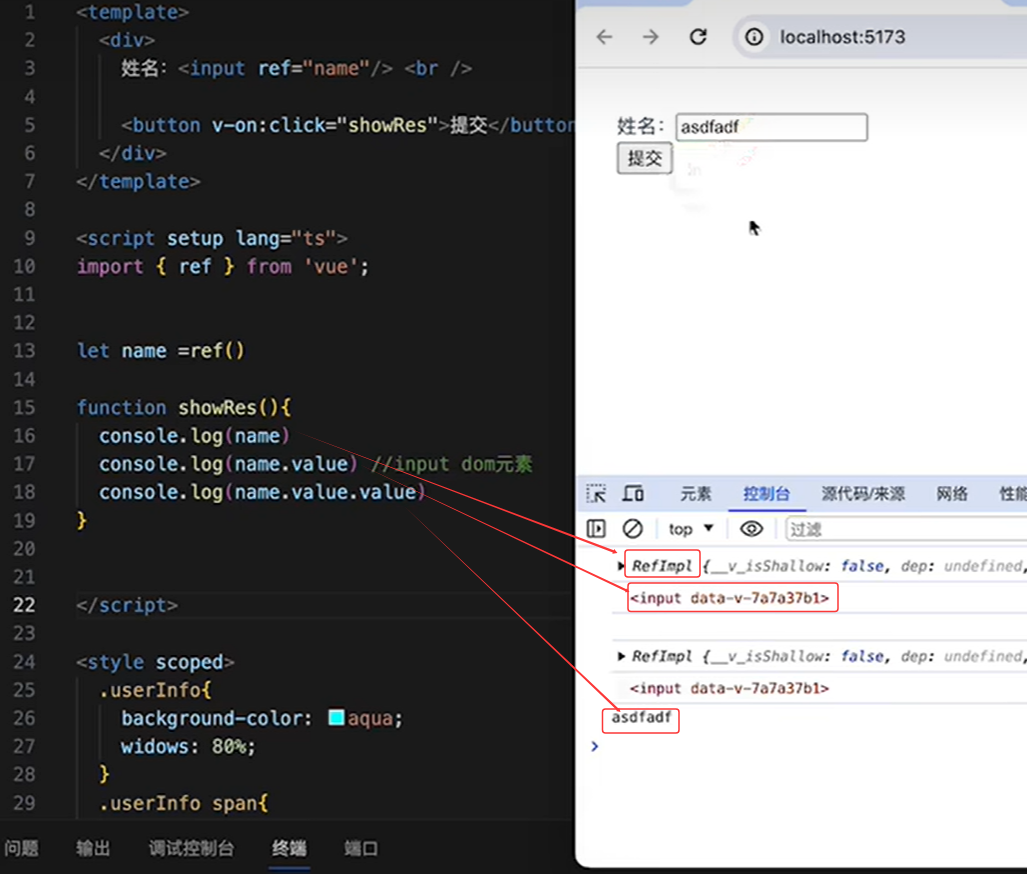
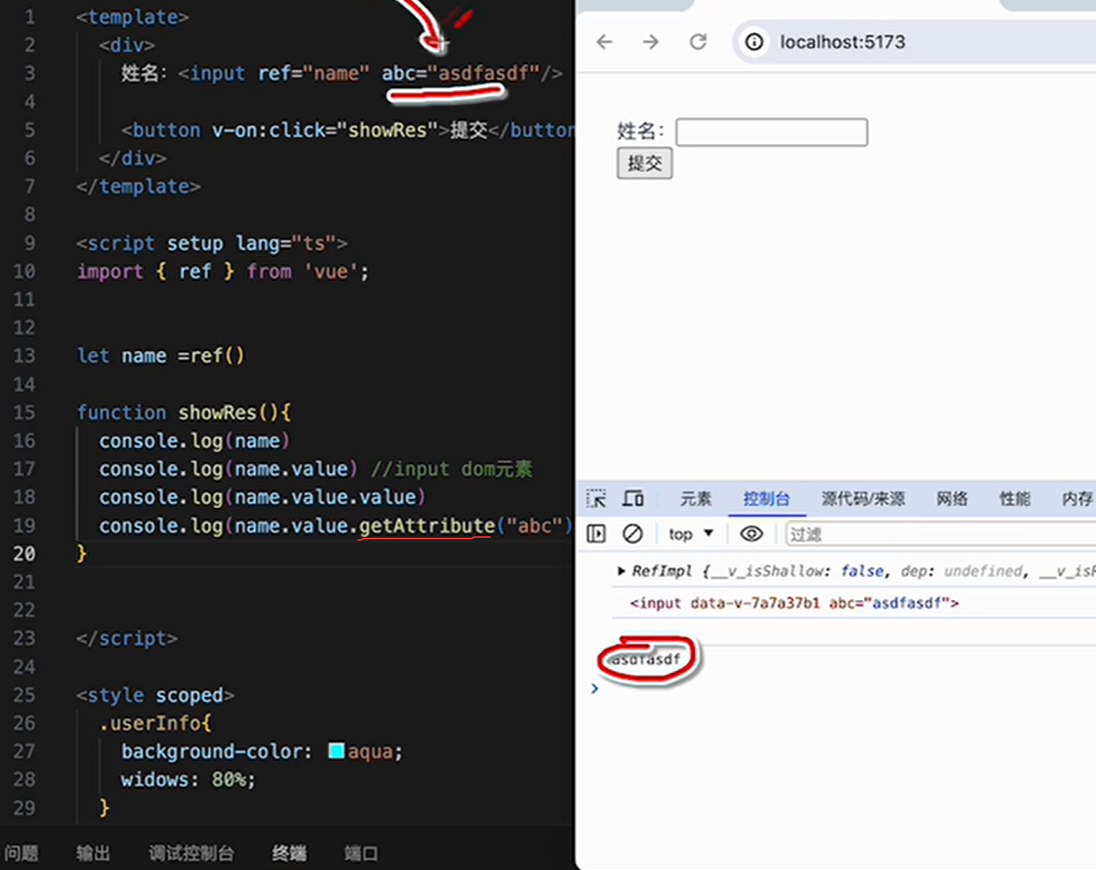
给输入框设ref
ref=name-----name代表ref本身
1个.value------代表输入框
2个.value-------代表输入框里面的值
getAttribute获取某某的值
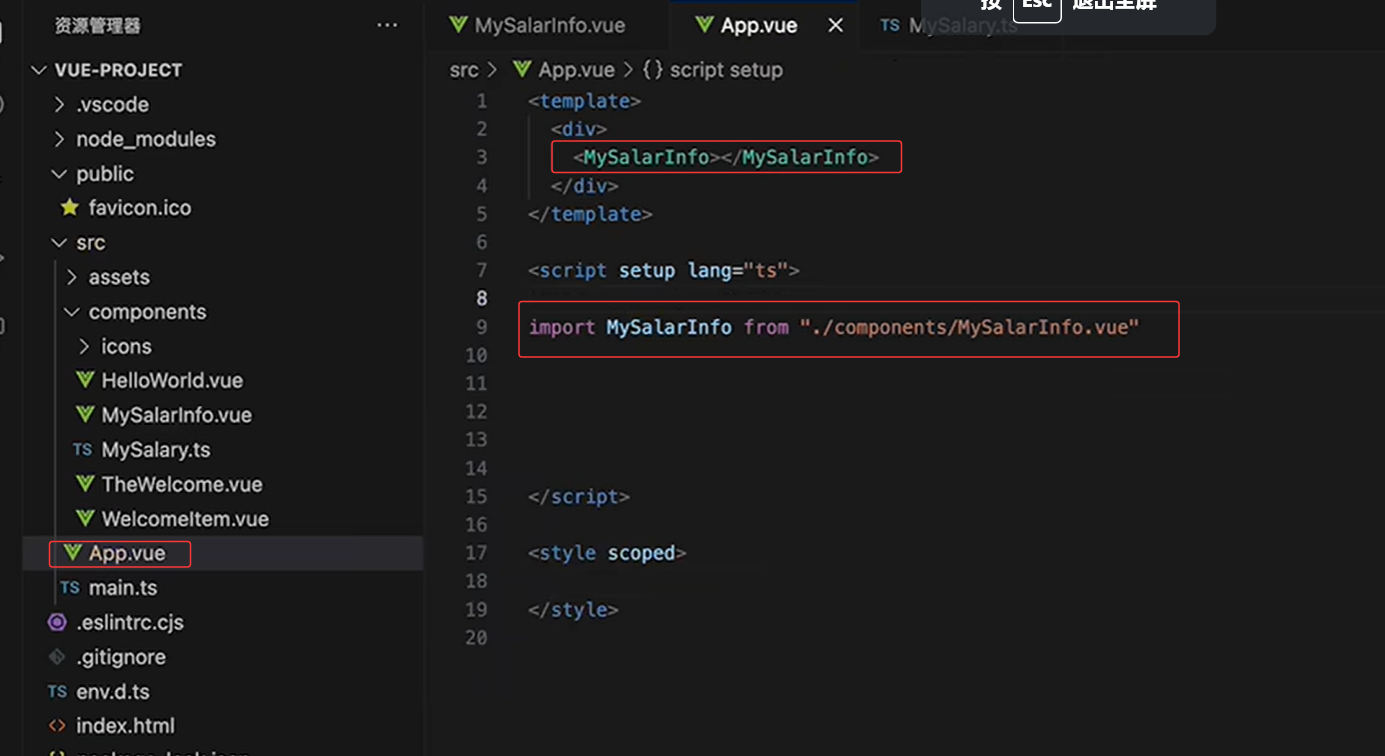
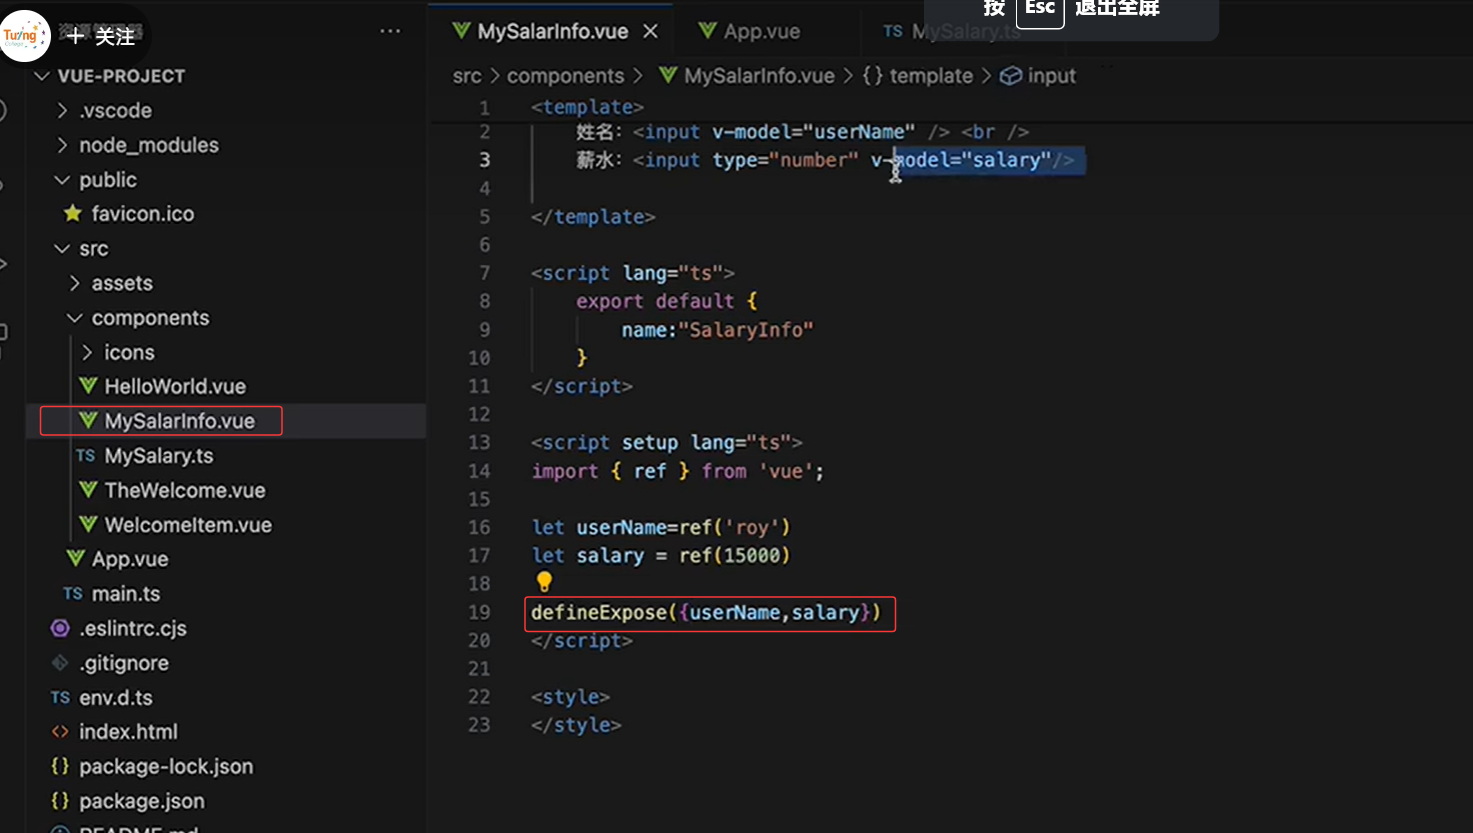
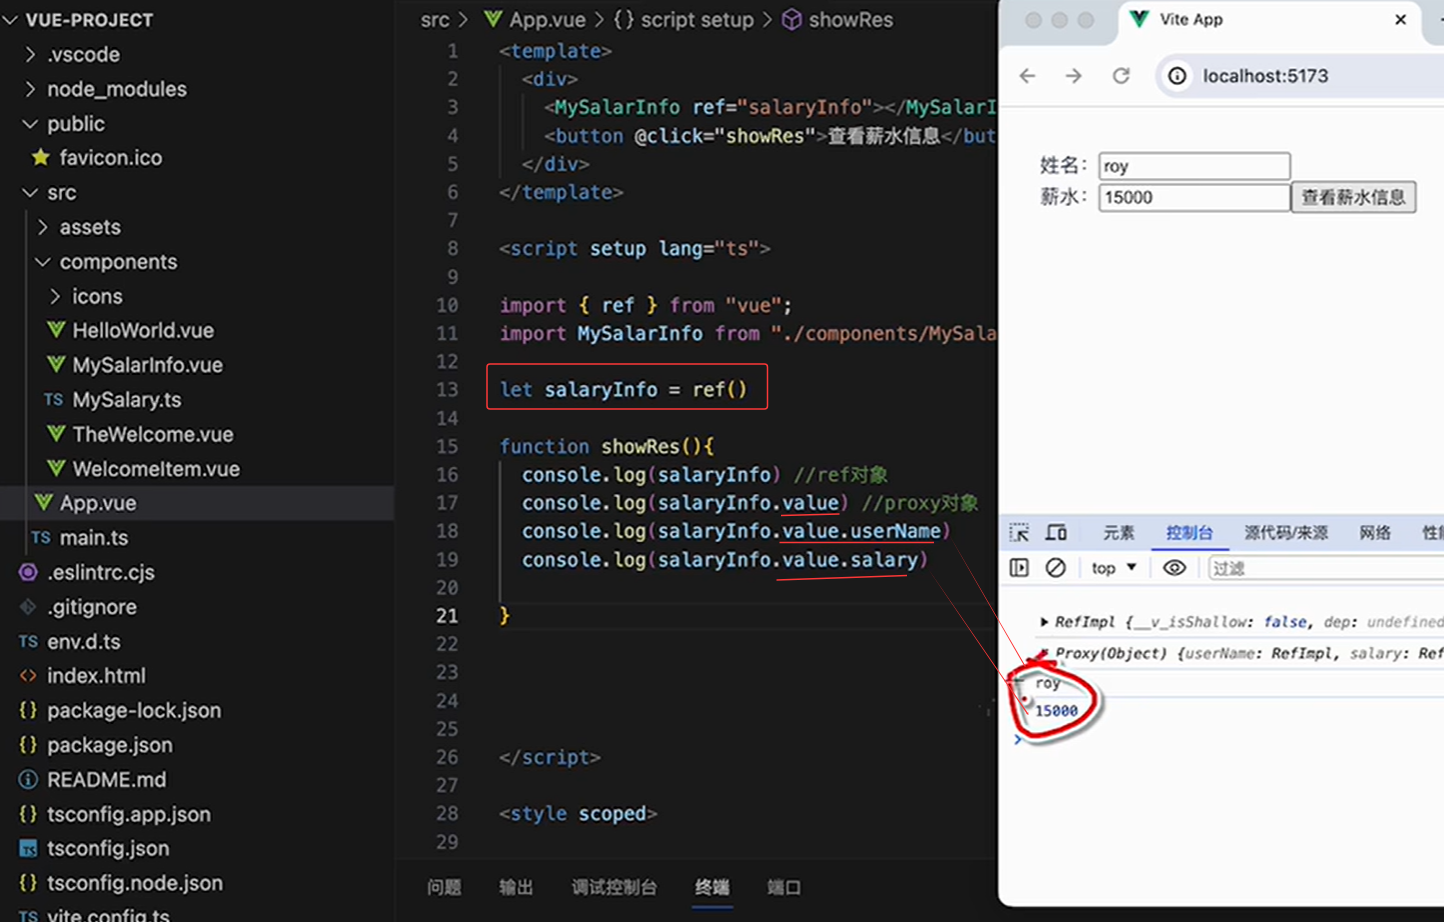
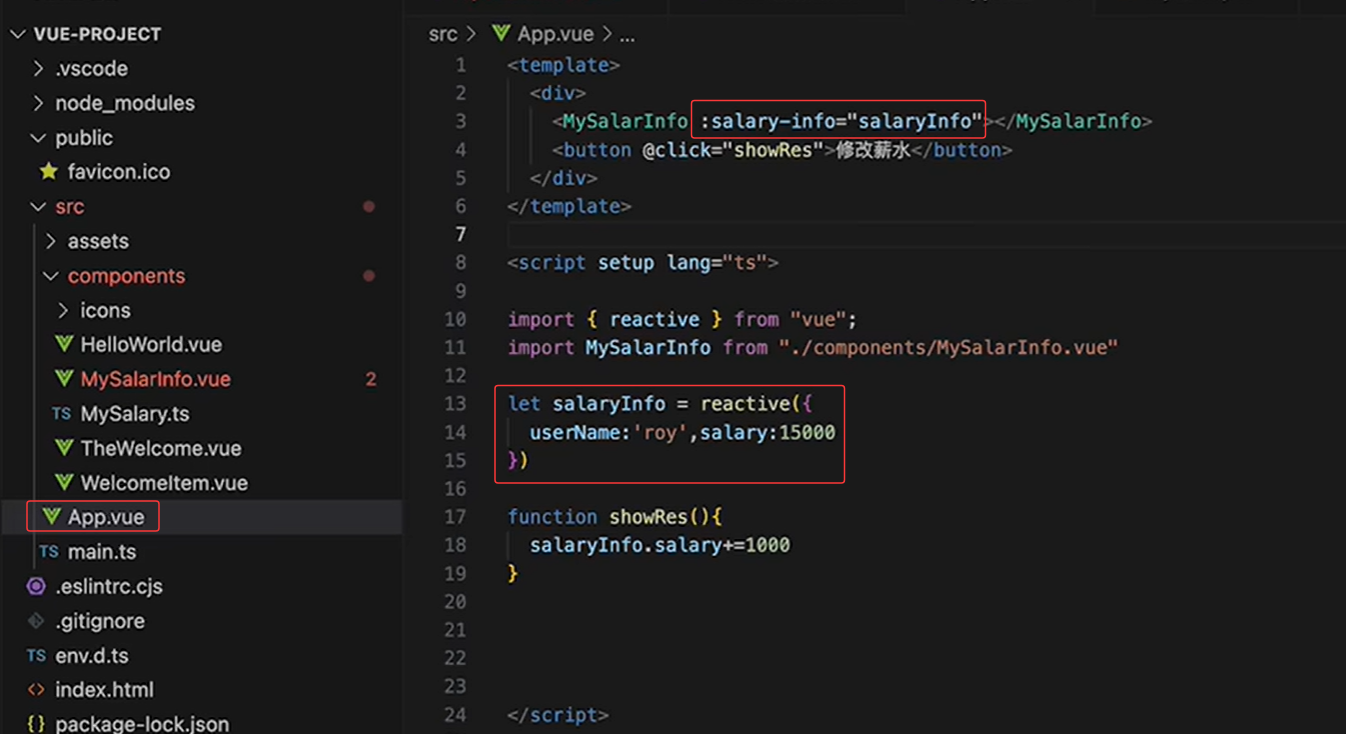
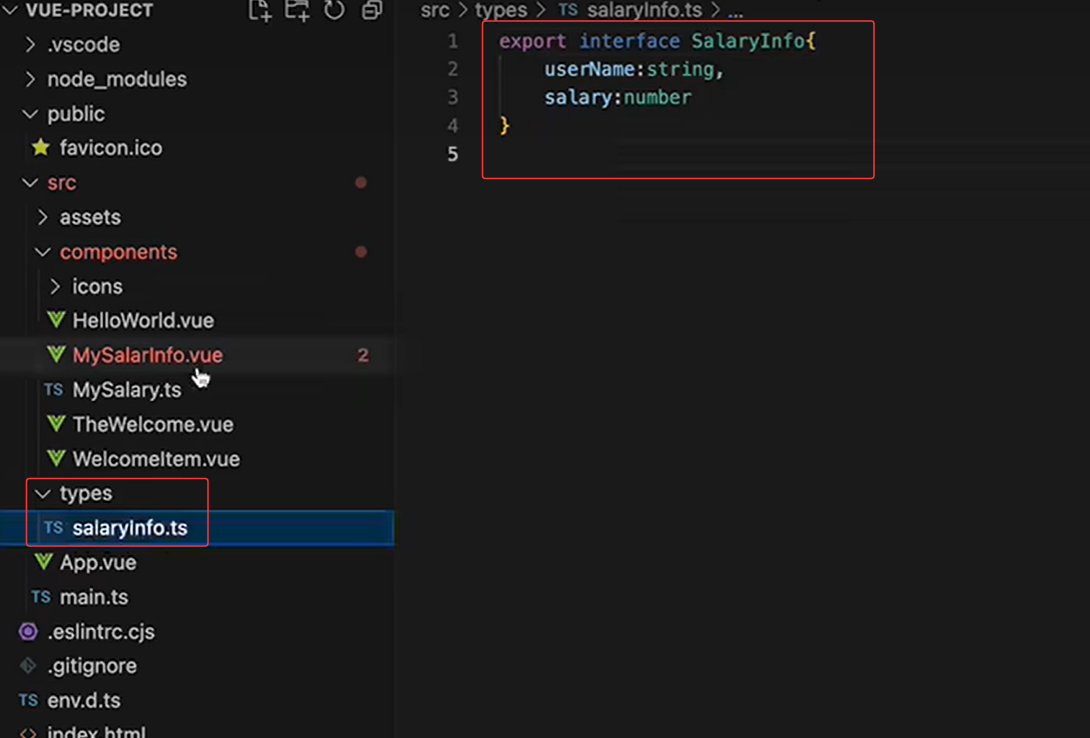
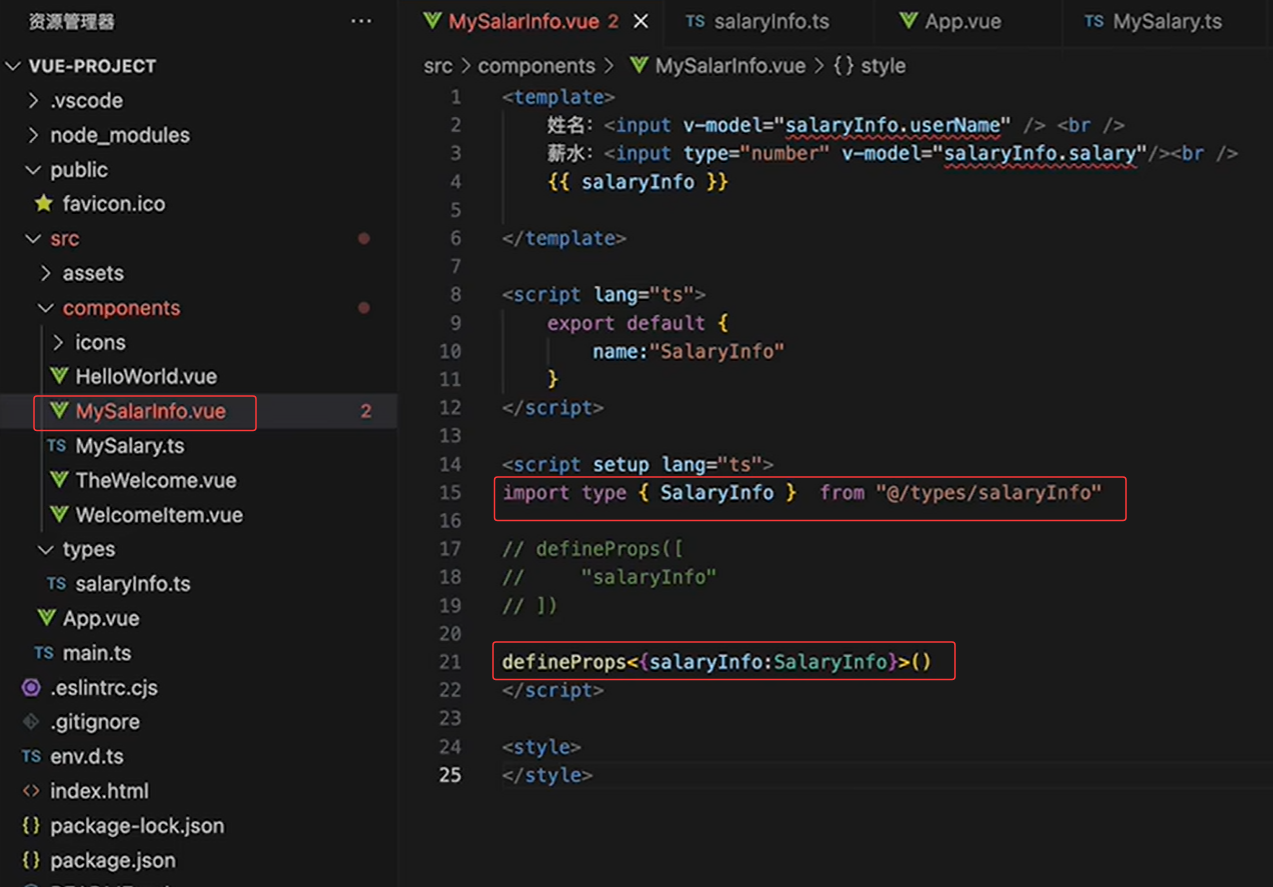
7-自定义组件传参
hr-----------------------------------------------------------------------------------
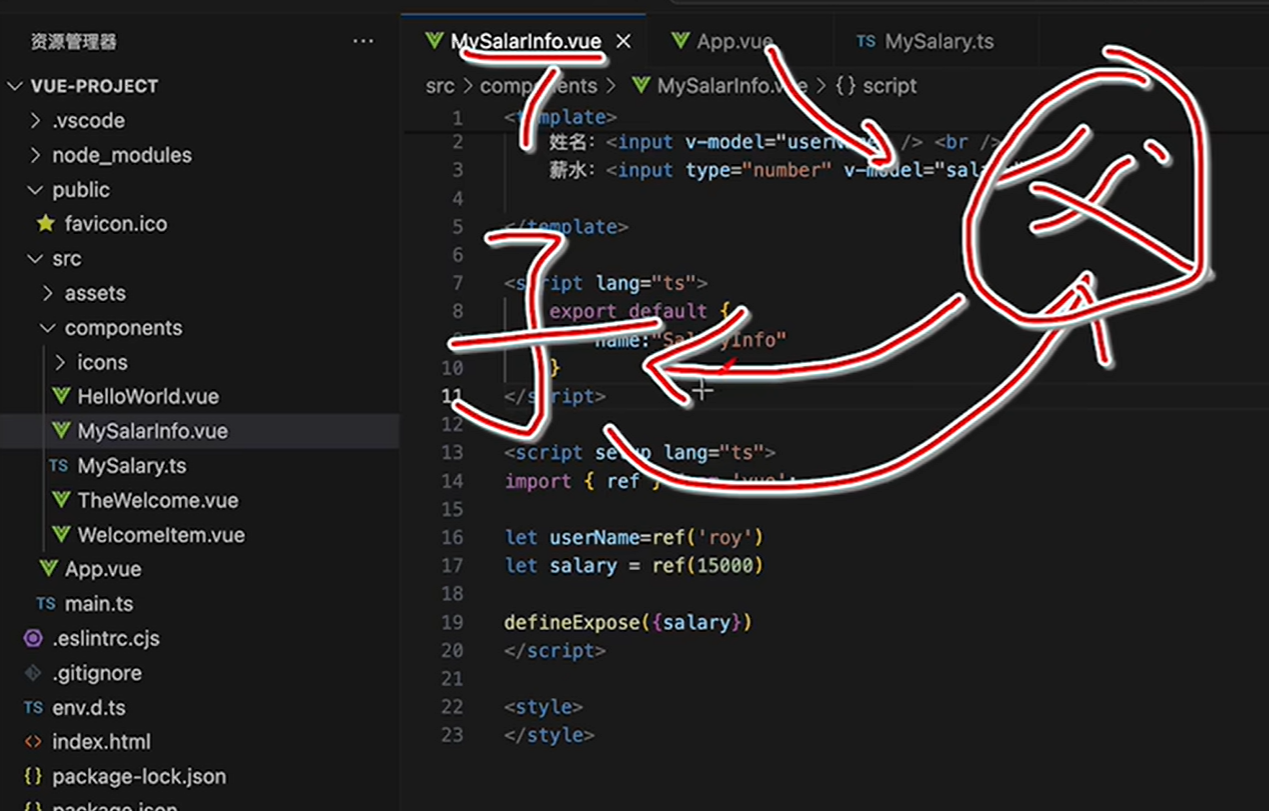
defineExpose()暴露自定义的值出去,暴露给父组件
defineProps()父组件传到子组件
给自定义设ref的话
ref="salaryInfo"
salaryInfo代表ref本身
1个.value代表自定义本身
hr-----------------------------------------------------------------------------------
hr--------------------------------------------------------------------------------------


8-组件生命周期
每个Vue组件实例在创建时都需要经历一系列的初始化步骤,比如设置好数据侦听,编译模板,挂载实例到DOM,以及在数据改变时更新DOM。在此过程中,它也会运行被称为生命周期钩子的函数,让开发者有机会在特定阶段运行自己的代码。
生命周期有四个阶段:创建,挂载,更新,销毁。每个阶段有一前一后两个函数
OptionsAPI的生命周期函数:
●创建阶段:beforecreate、created
●挂载阶段:beforeMount、mounted
●更新阶段:beforeUpdate、updated
●销毁阶段:beforeDestroy、destroyed
CompositionAPI的生命周期函数:
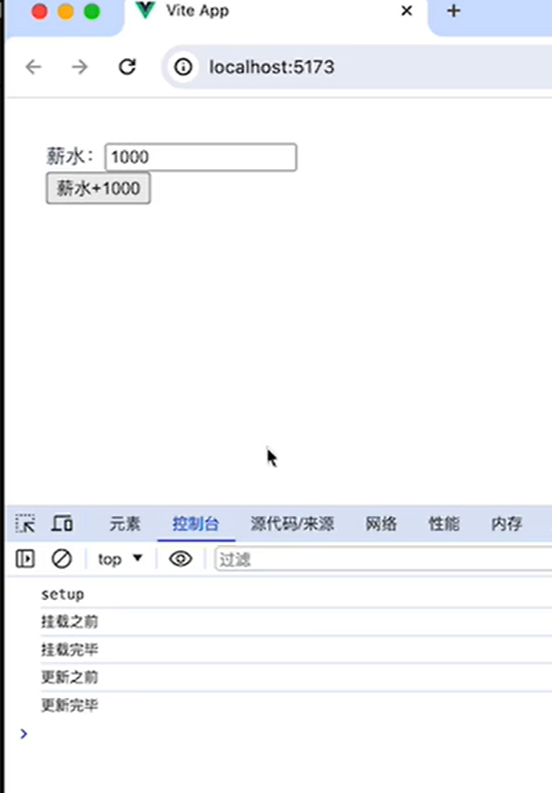
●创建阶段:setup
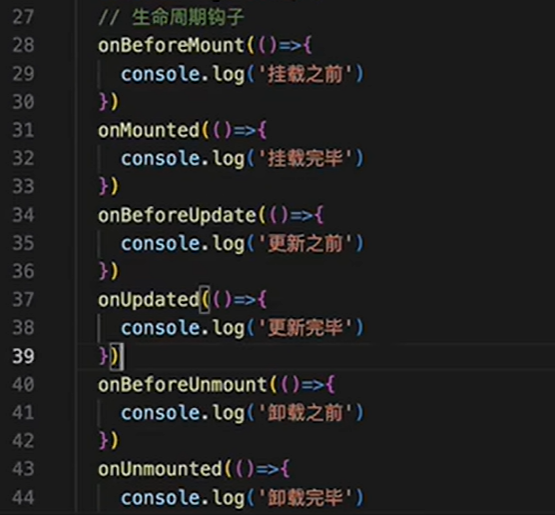
●挂载阶段:onBeforeMount、onMounted
●更新阶段:onBeforeUpdate、onUpdated
●卸载阶段:onBeforeUnmount、onUnmounted
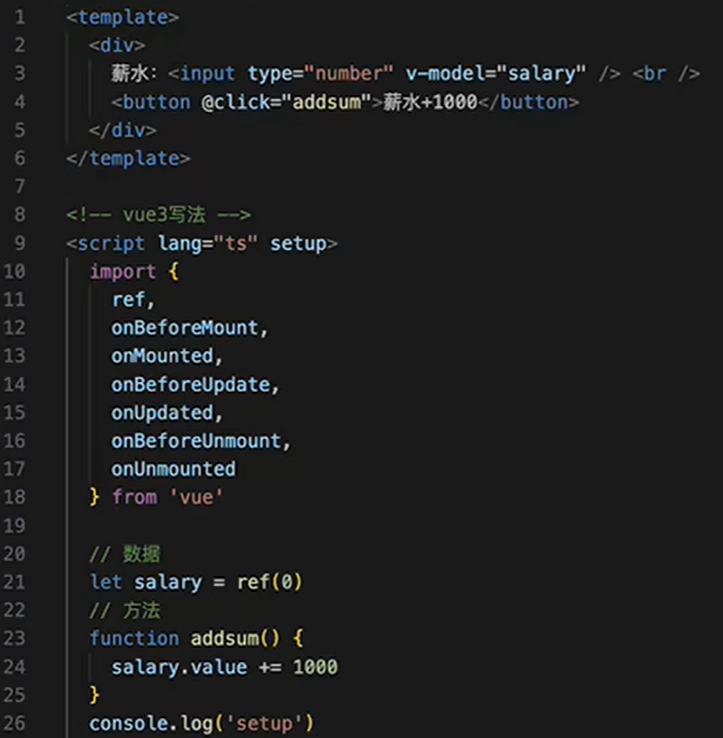
实例
TypeScript<template> <div> 薪水:<input type="number"v-model="salary"/><br /> <button@click="addsum">薪水+1ooe</button> </div> </template> <!-- vue3写法--> <script lang="ts"setup> import{ ref, onBeforeMount, onMounted, onBeforeUpdate, onUpdated, onBeforeUnmount, onUnmounted }from'vue' //数据 let salary = ref(e) //方法 function addsum(){ salary.value += 1000 } console.log('setup') //生命周期钩子 onBeforeMount((=>{ console.log('挂载之前') } onMounted(()=>{ console.log('挂载完毕') } onBeforeUpdate(()=>{ console.log('更新之前') } onUpdated(()=>{ console.log('更新完毕') } onBeforeUnmount((=>{ console.log('卸载之前') } onUnmounted((=>{ console.log('卸载完毕') }
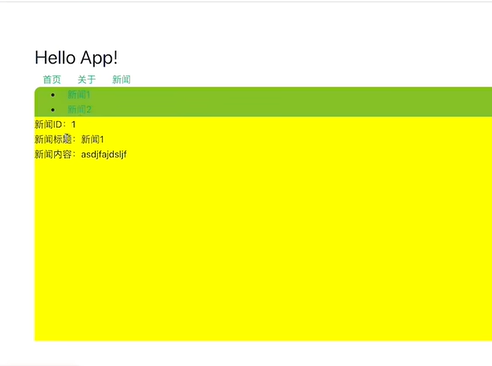
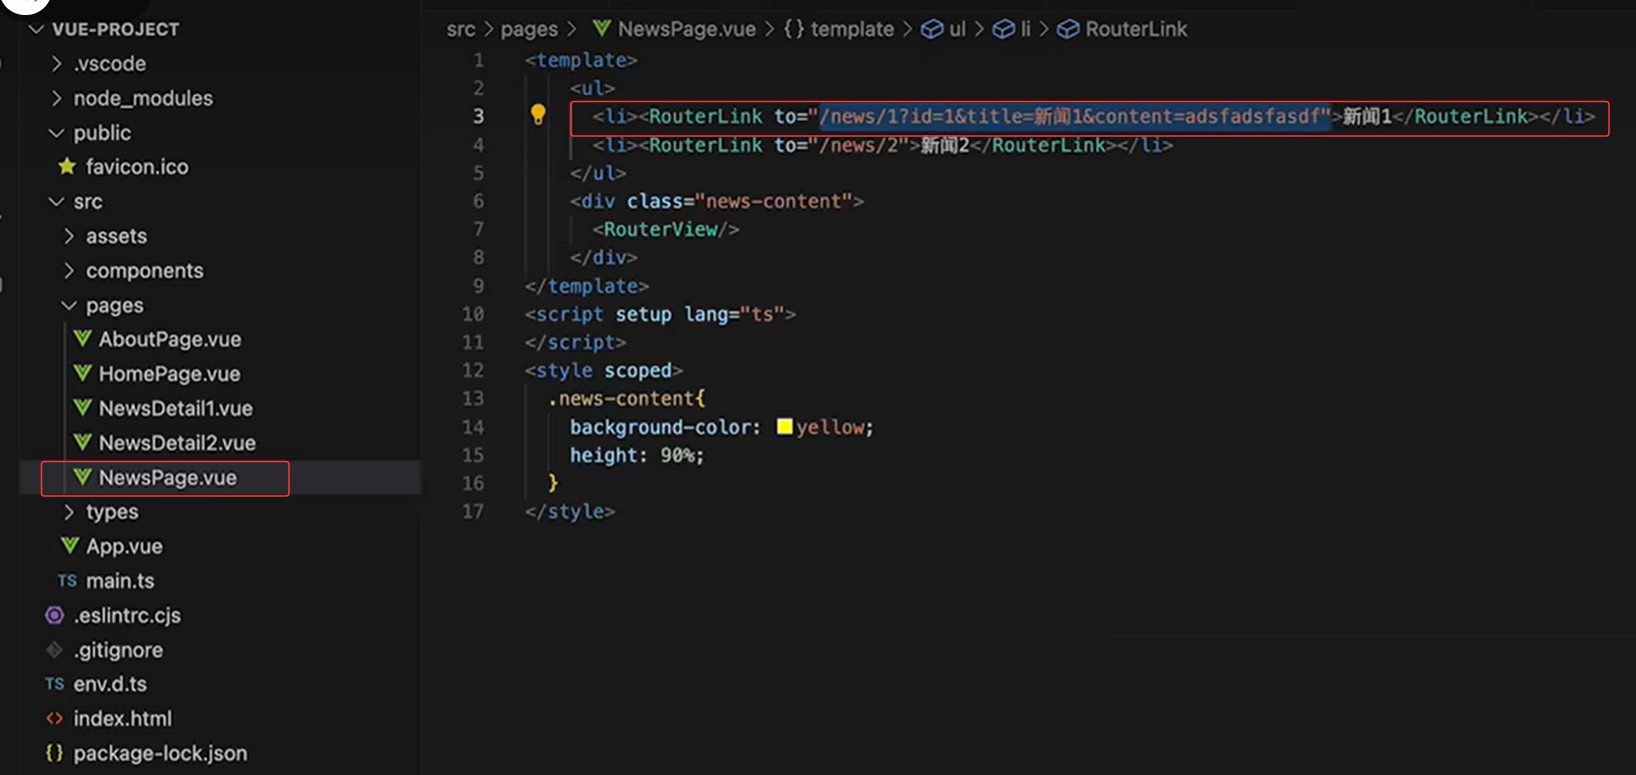
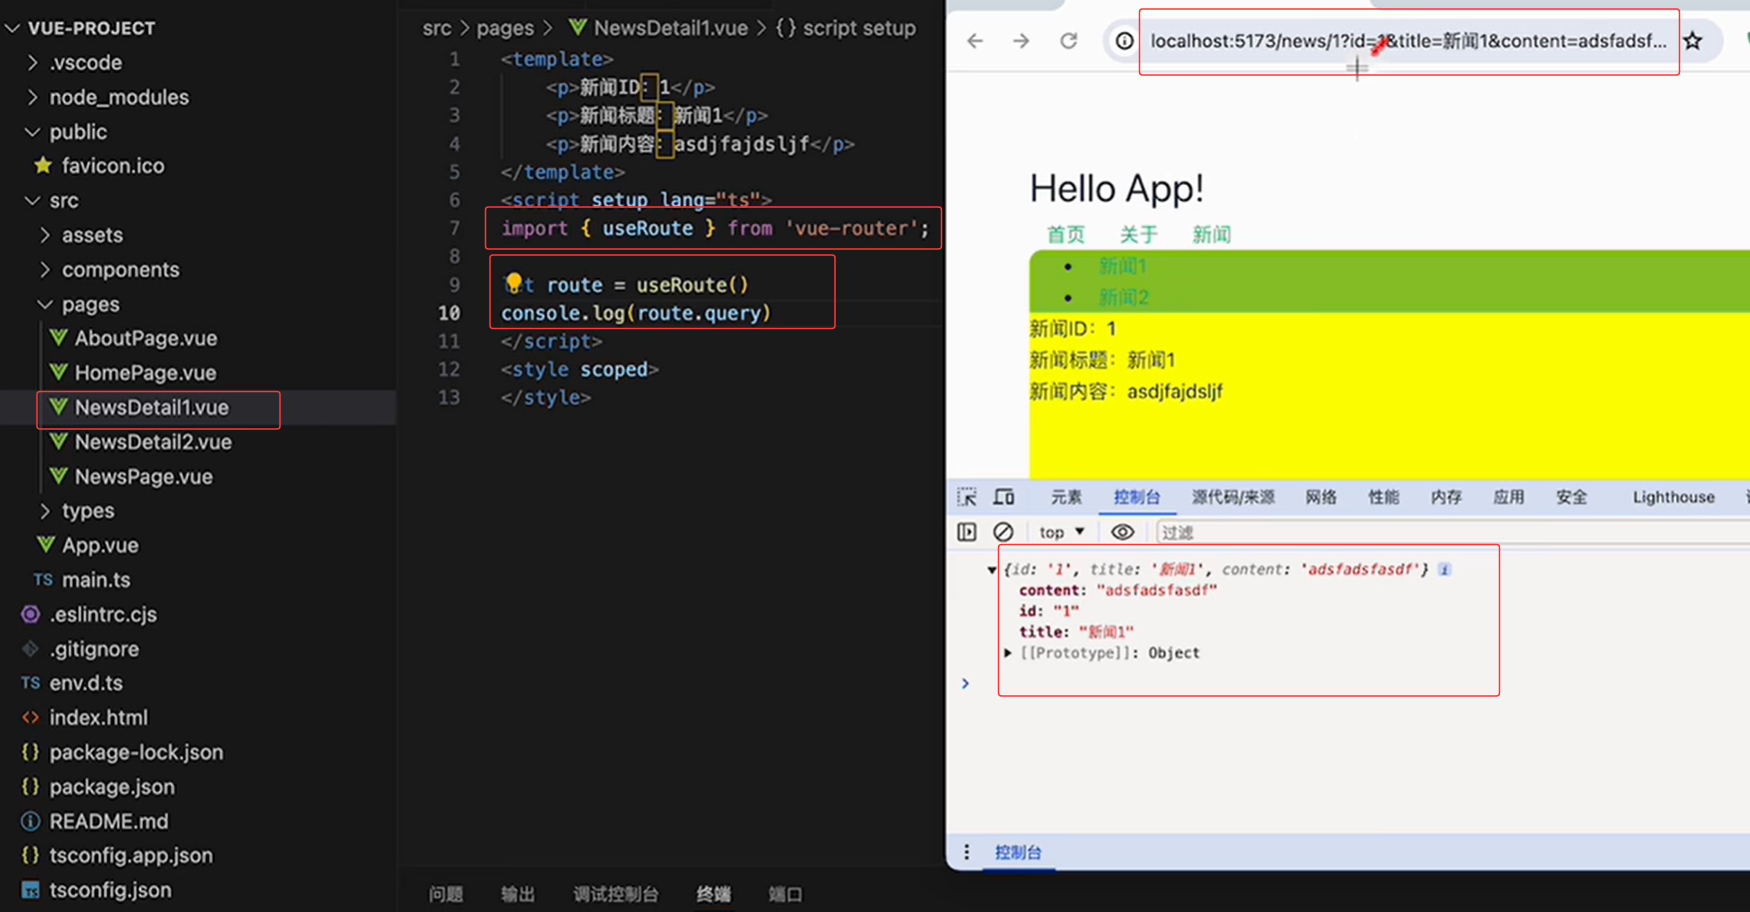
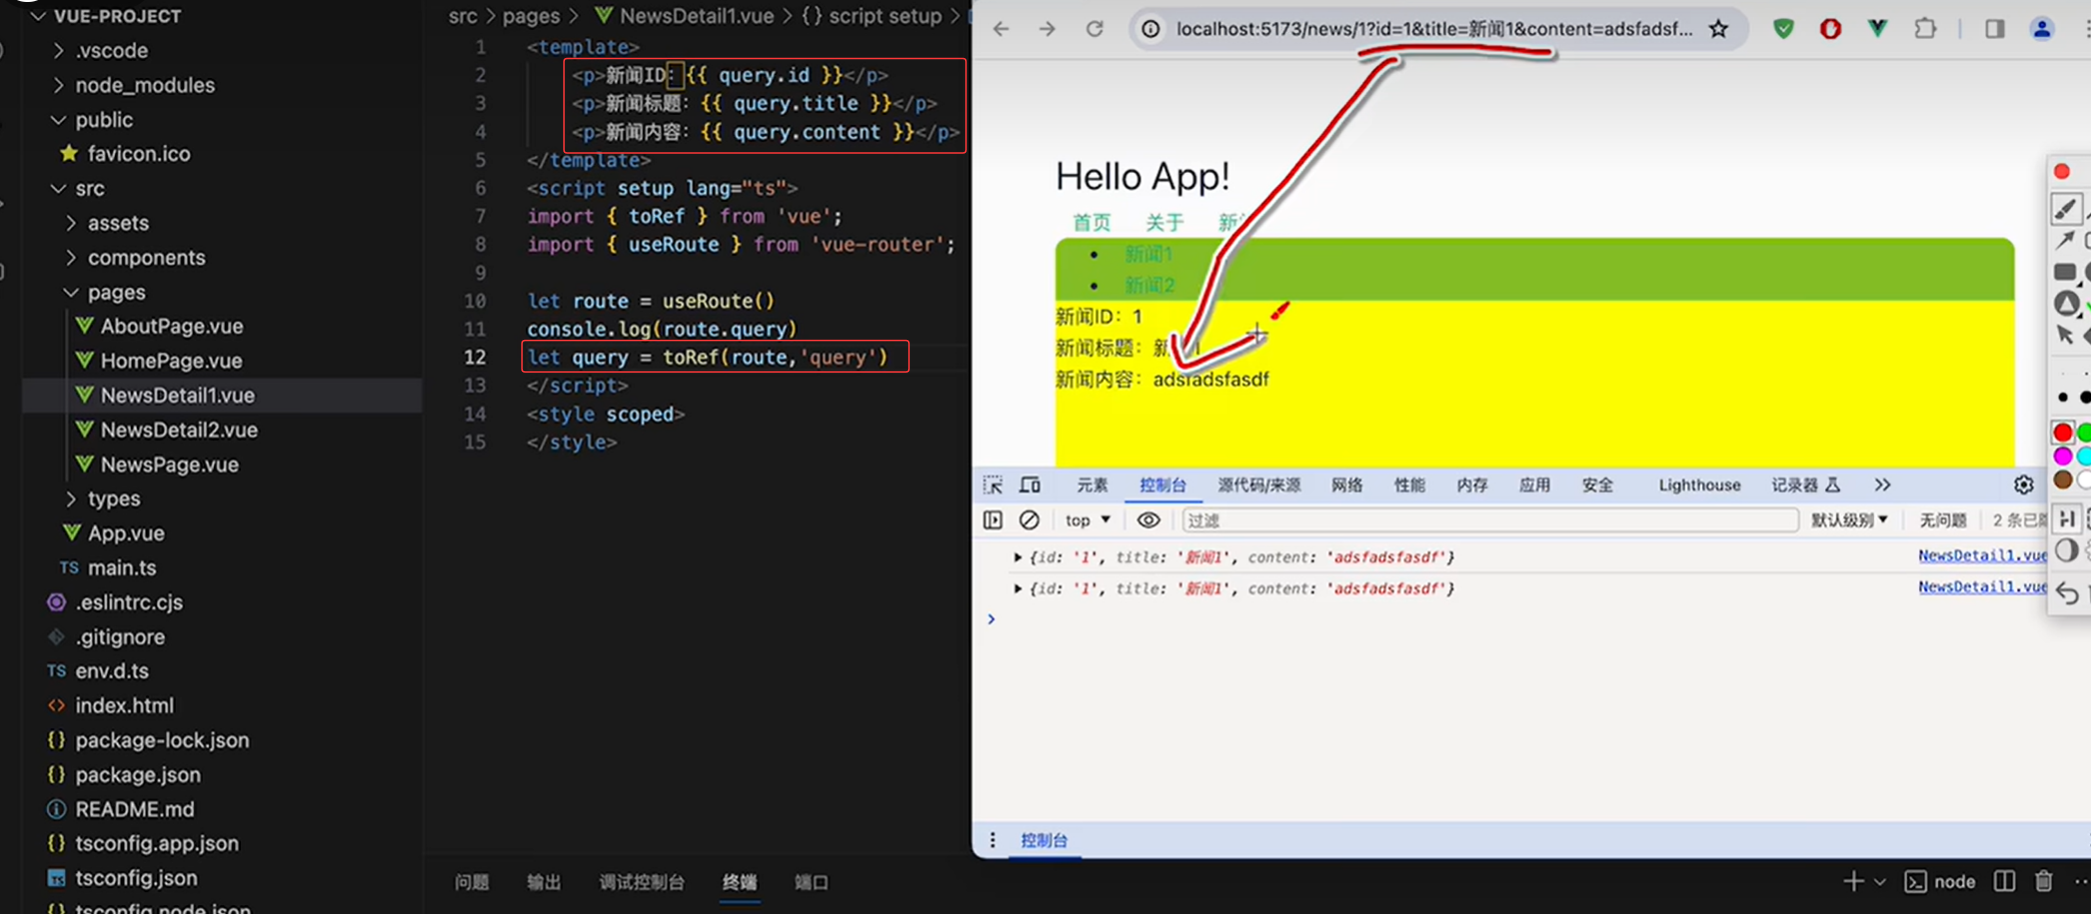
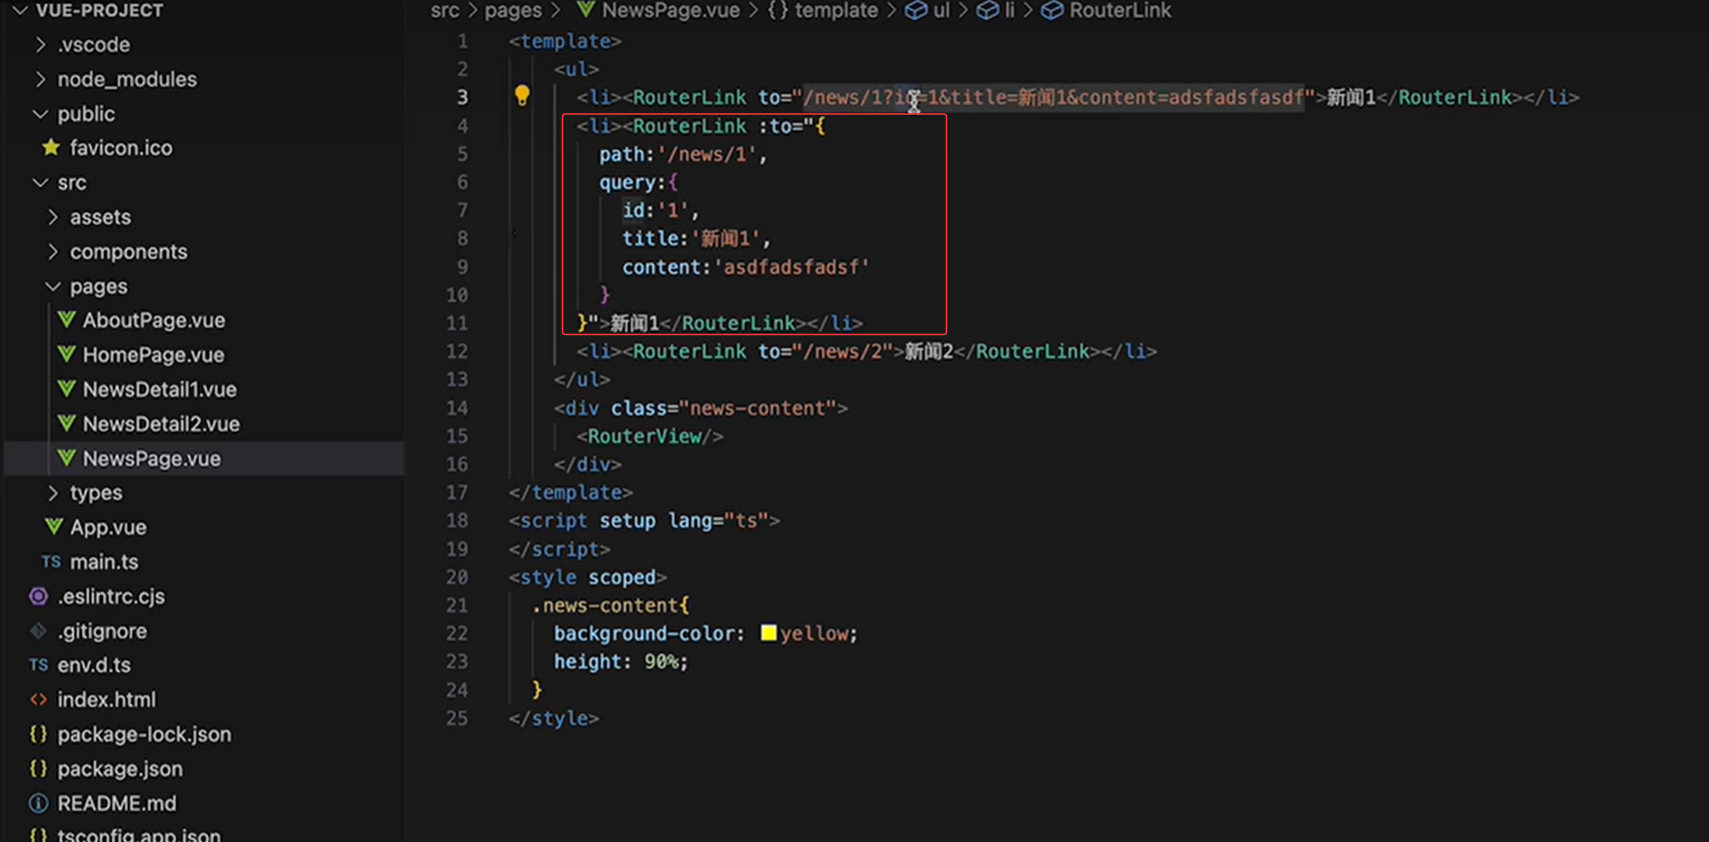
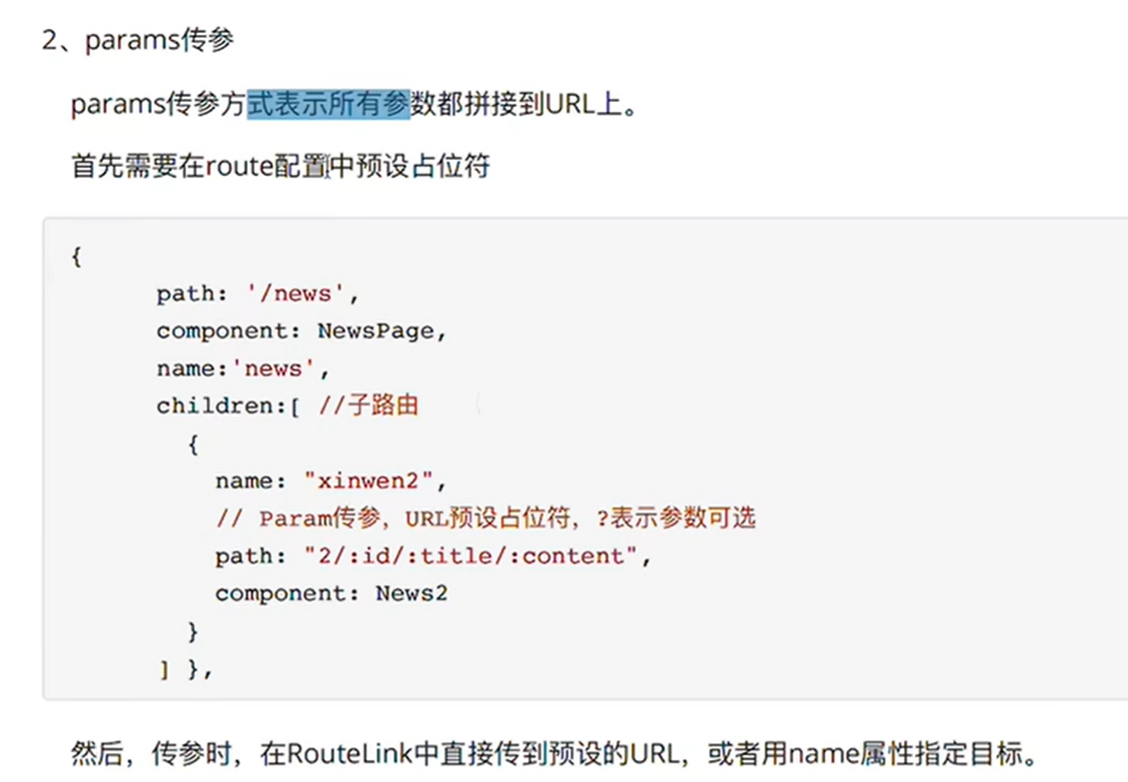
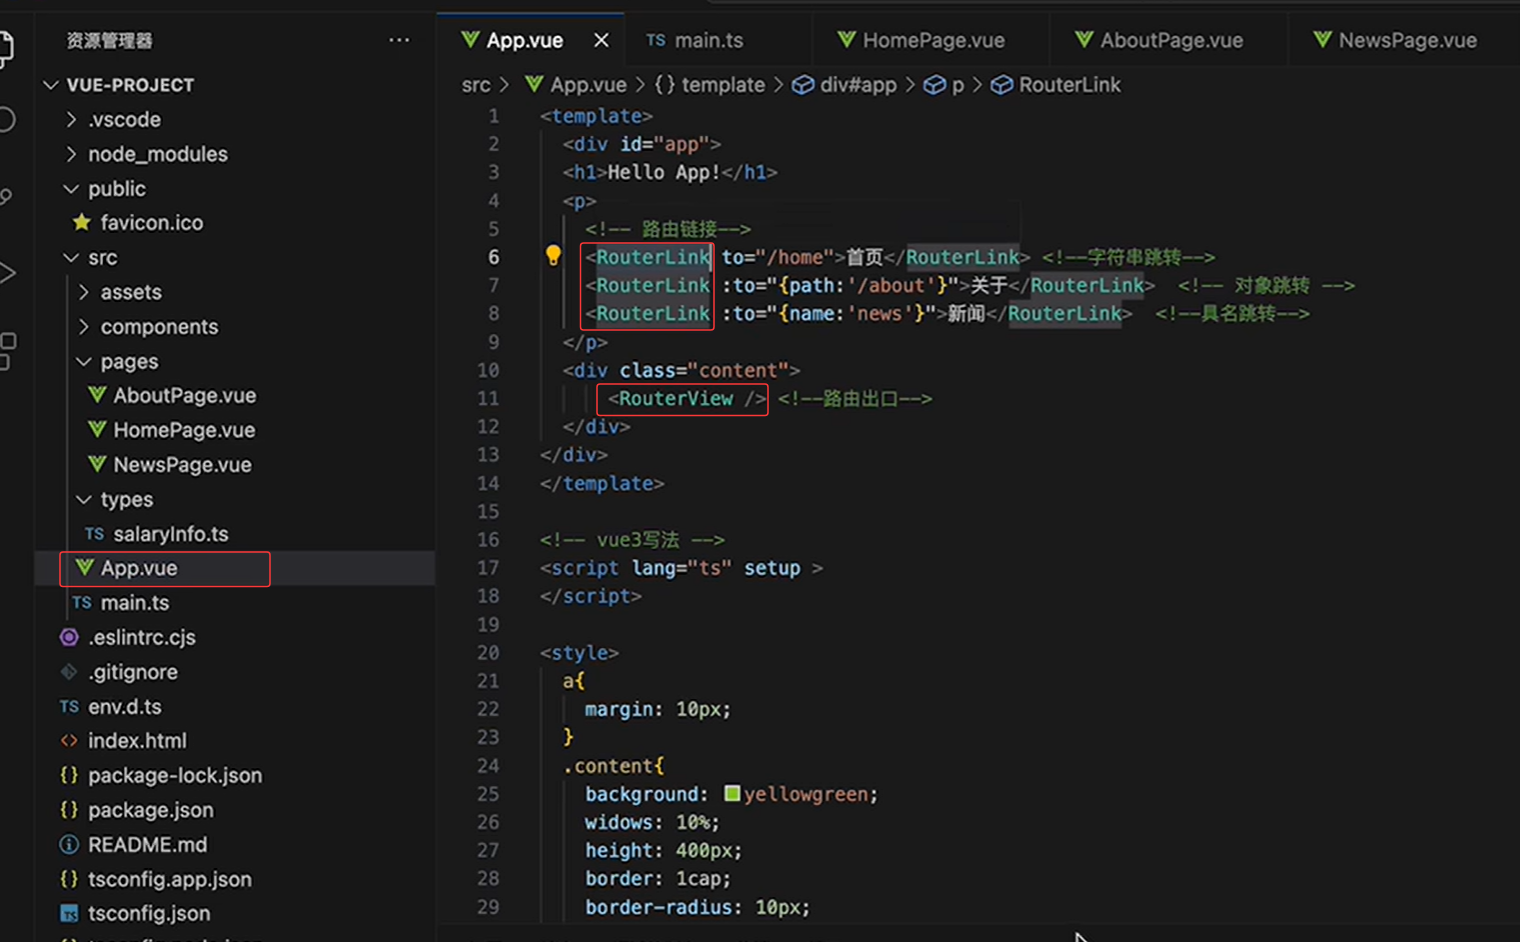
9-路由插件基础使用
npm install vue-router@4
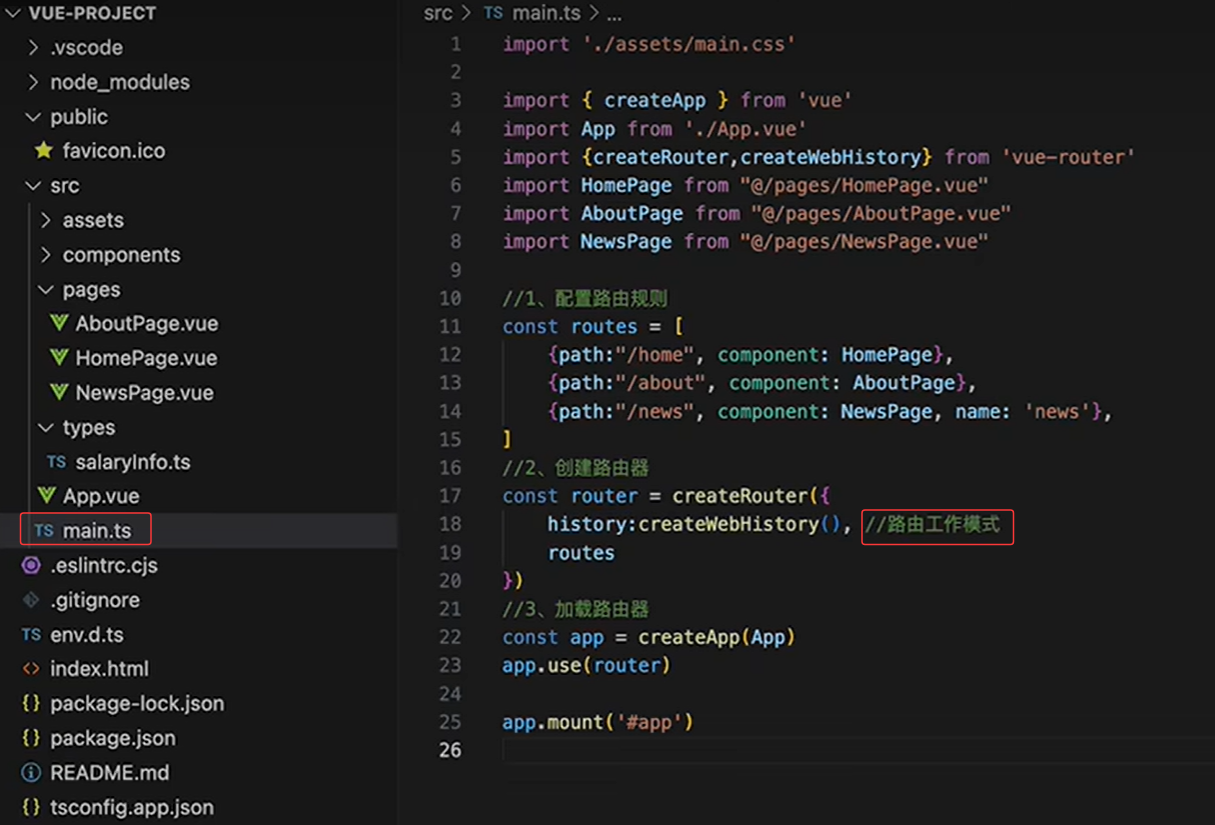
main.ts
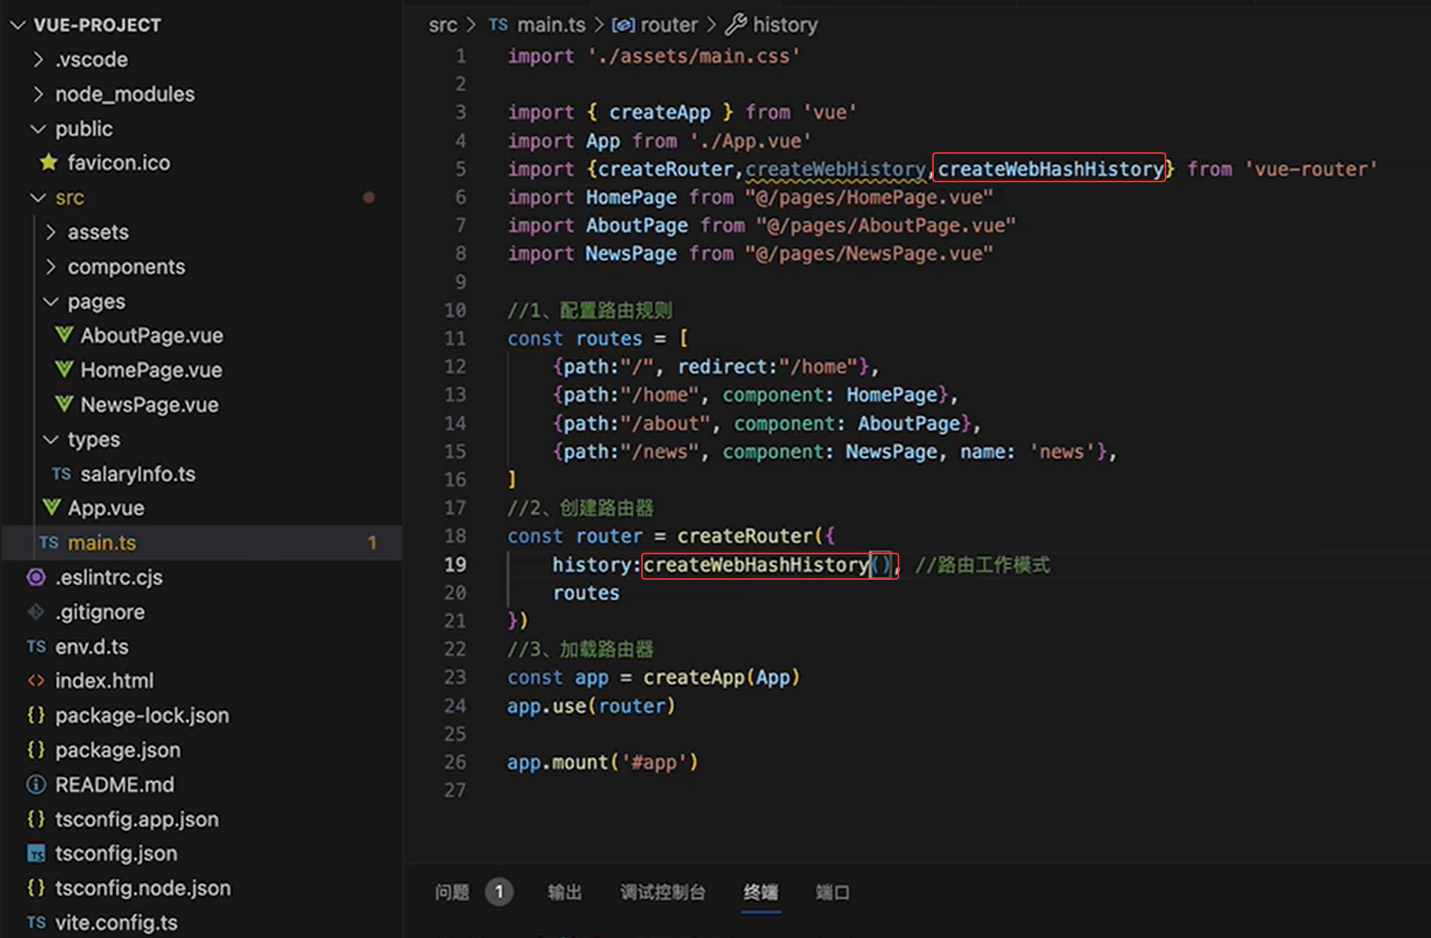
TypeScriptimport'./assets/main.css' import{createApp }from'vue' import App from'./App.vue' import {createRouter,createwebHistory} from'vue-router' import HomePage from "@/pages/HomePage.vue" import AboutPage from"@/pages/AboutPage.vue" import NewsPage from"@/pages/NewsPage.vue" //1、配置路由规则 const routes=[ {path:"/home", component:HomePage}, {path:"/about",component: AboutPage}, {path:"/news",component:NewsPage}, ] //2、创建路由器 const router = createRouter({ history:createwebHistory(),//路由工作模式 rotes )} //3、加载路由器 const app = createApp(App) app.use(router) app.mount('#app')
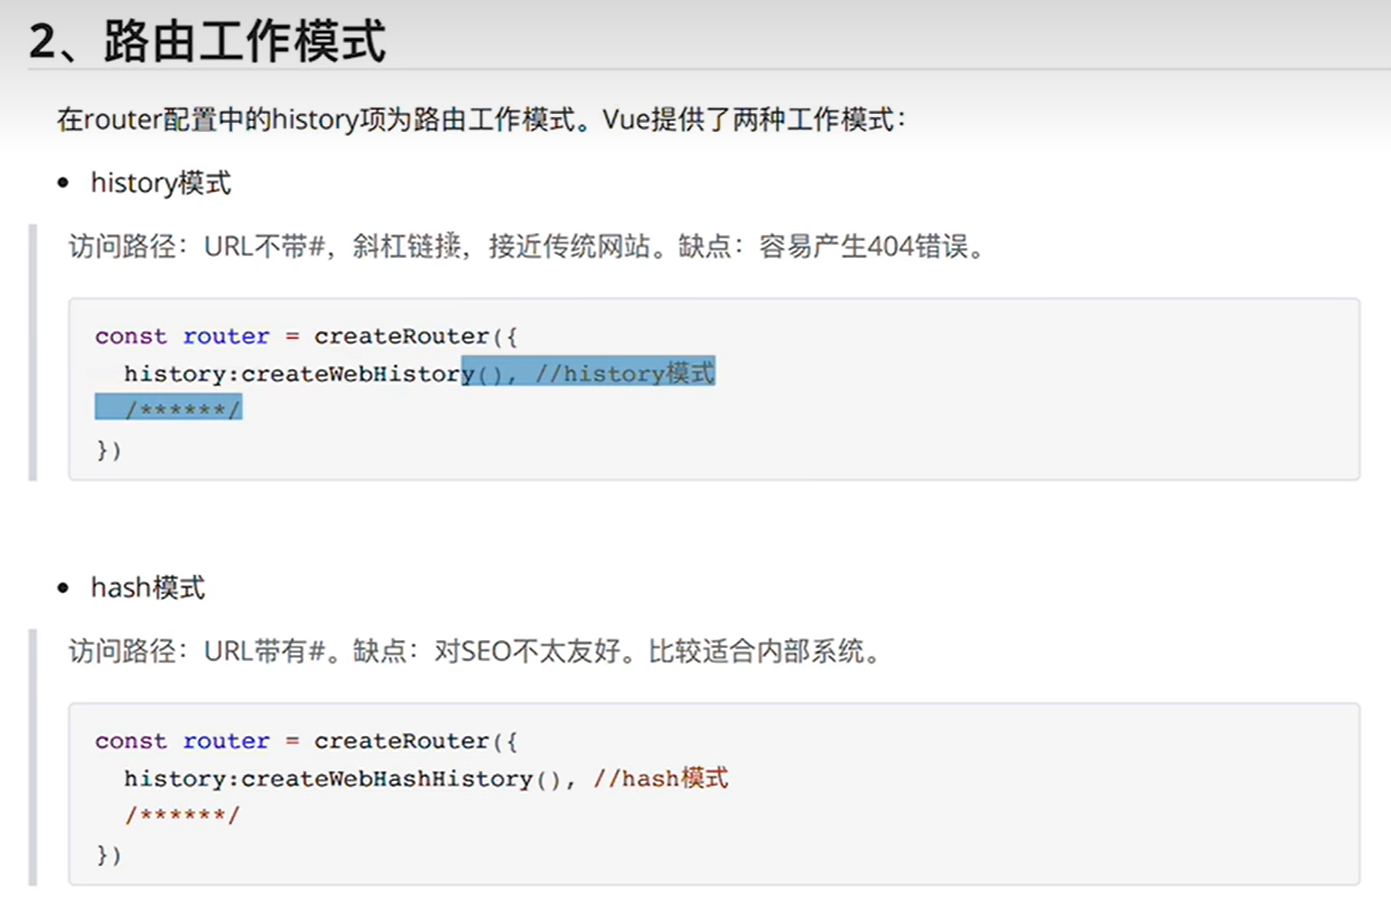
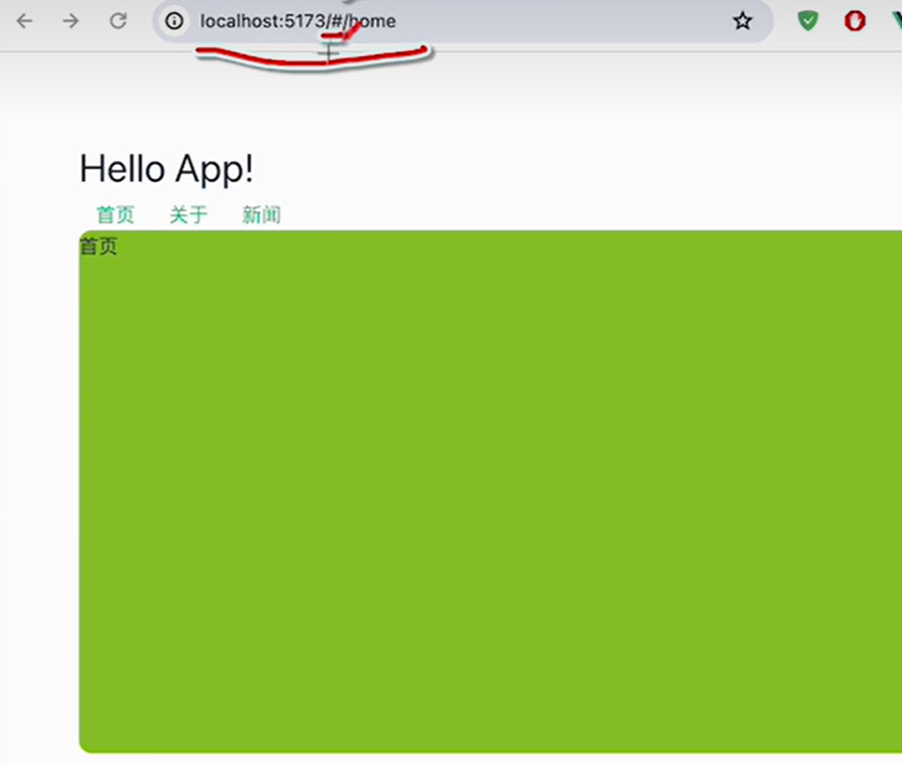
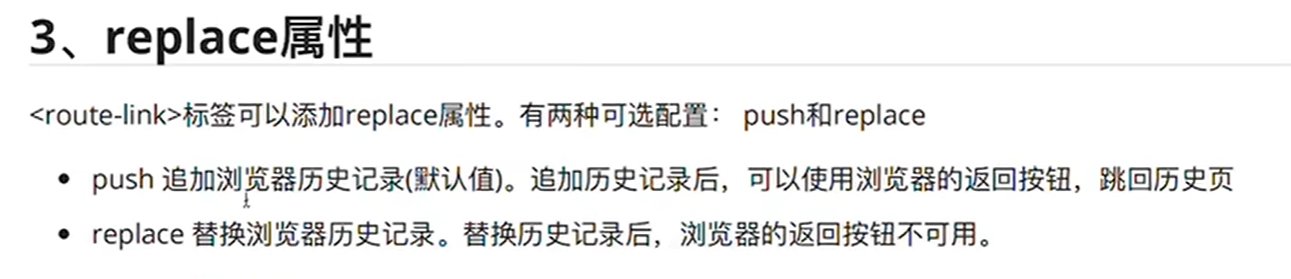
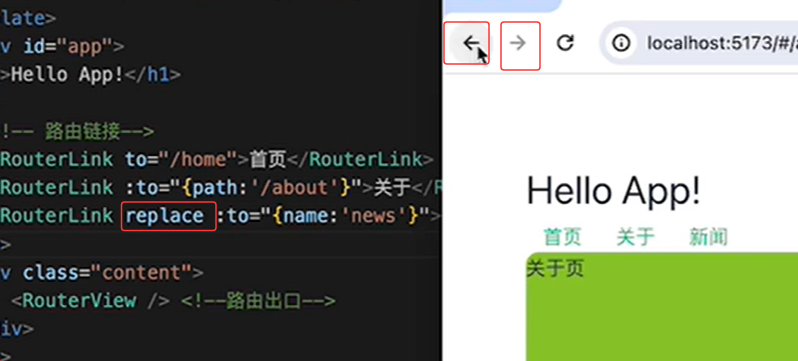
10-路由工作模式和replace属性

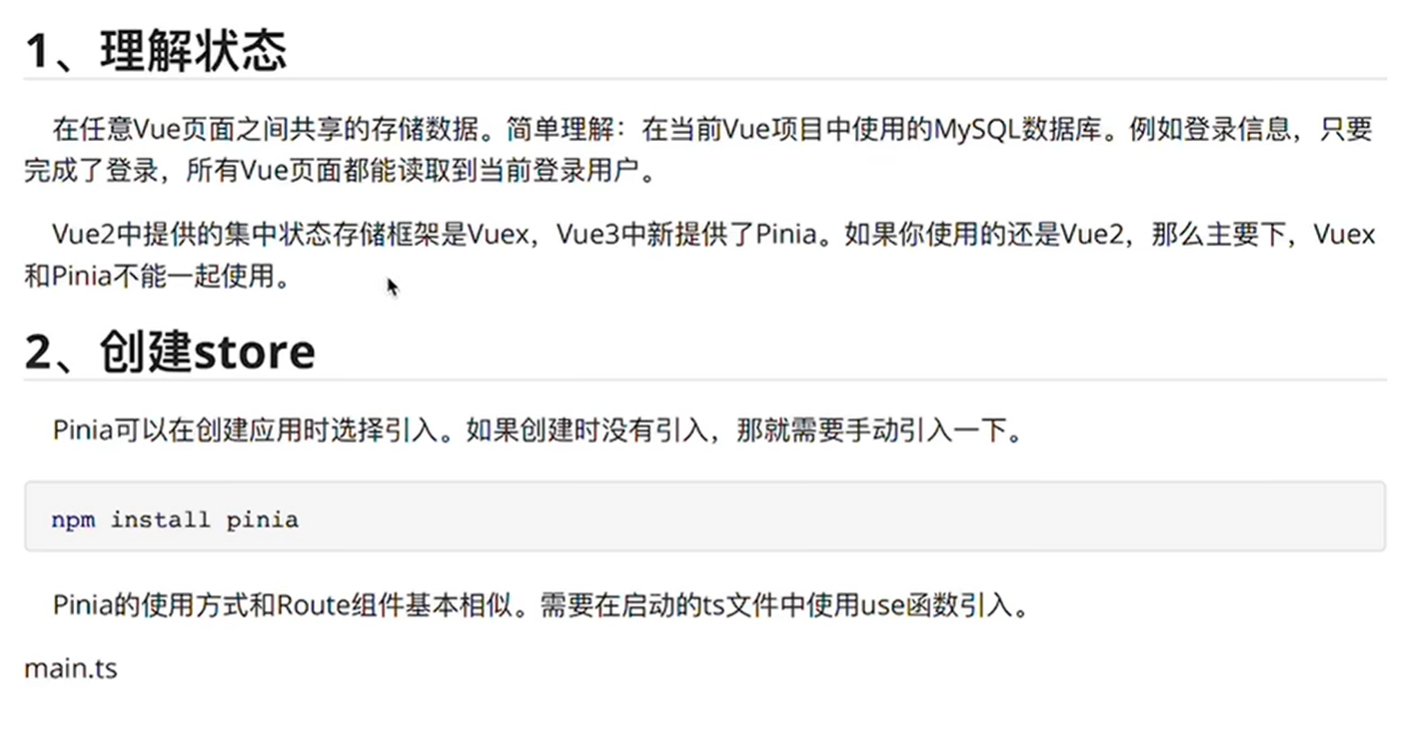
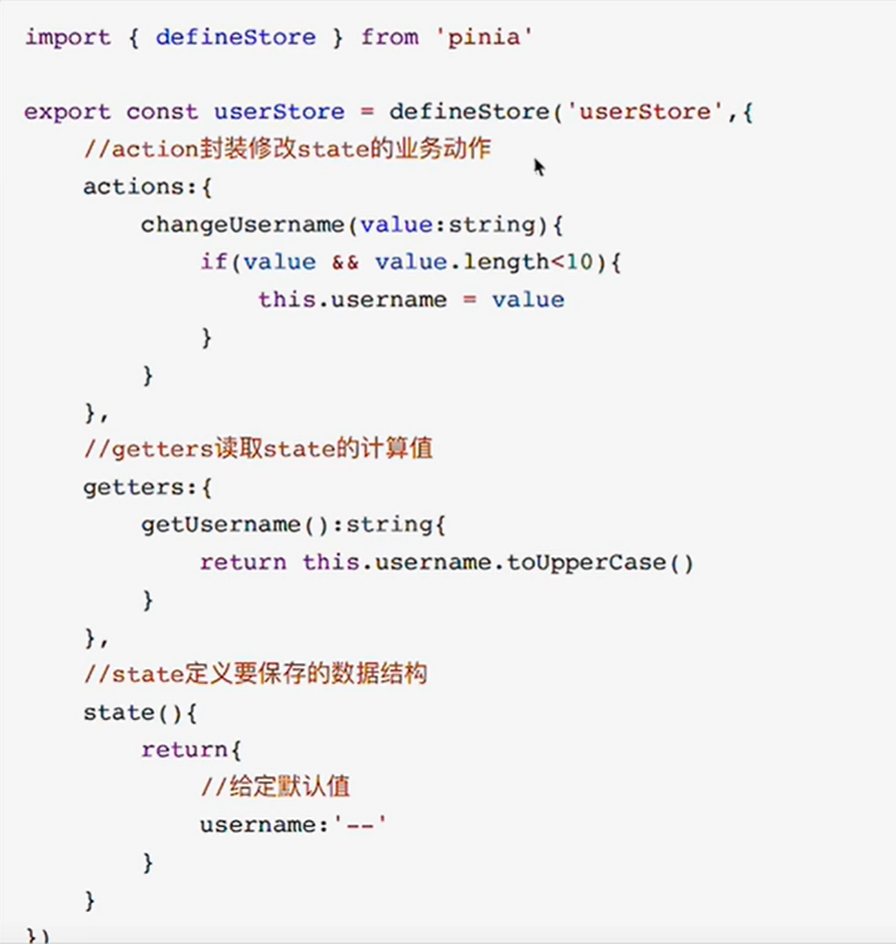
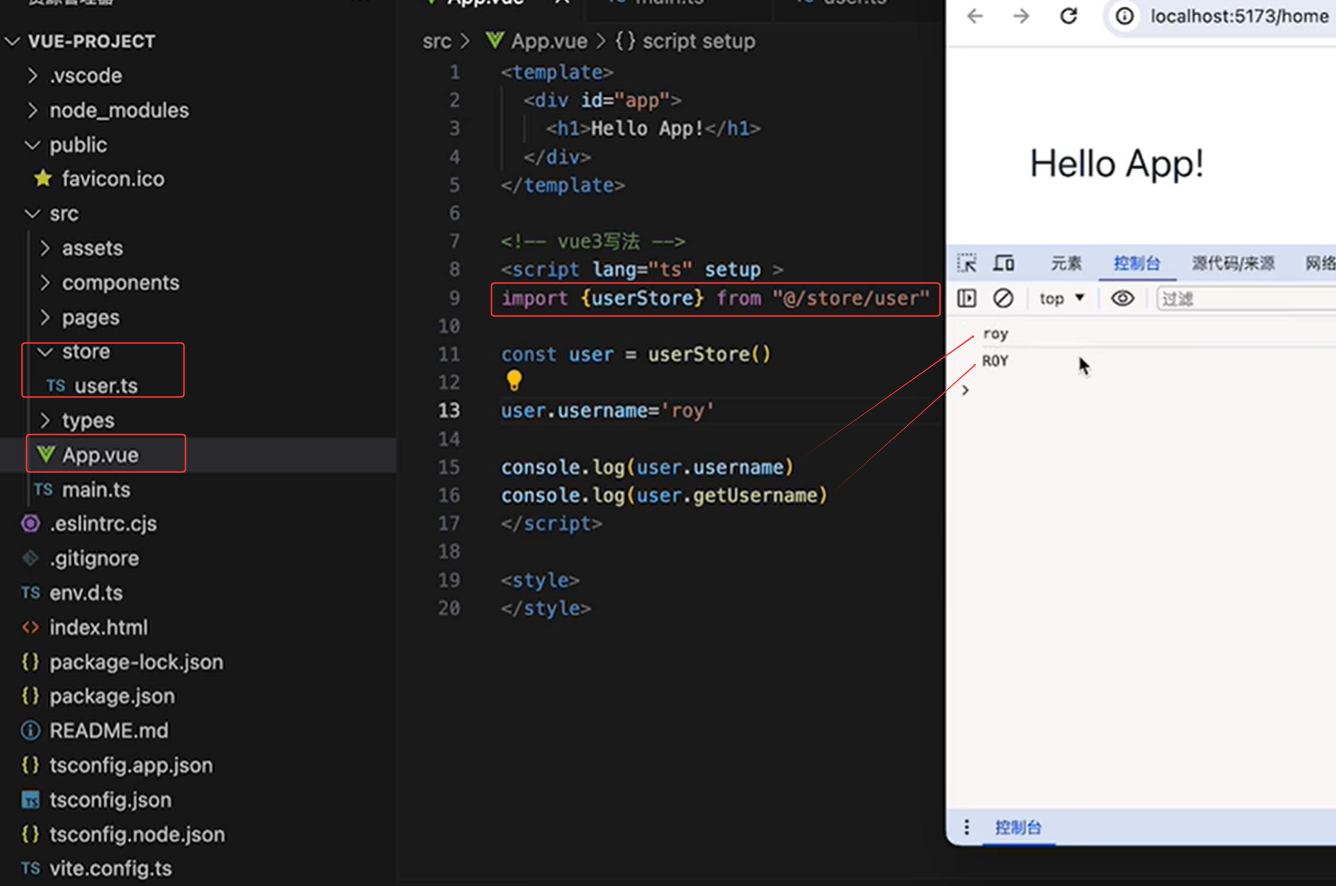
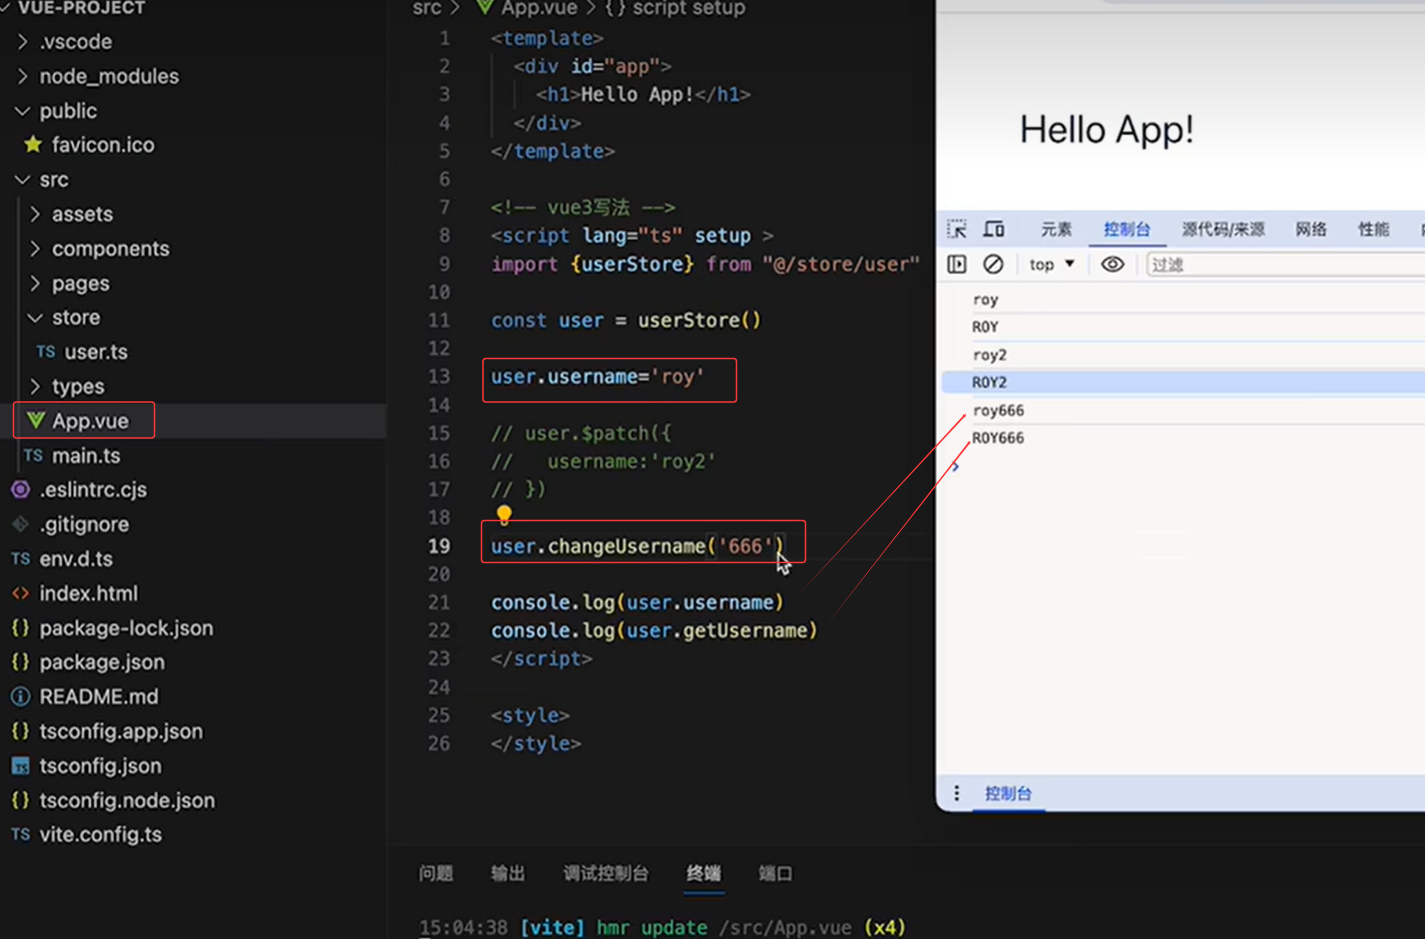
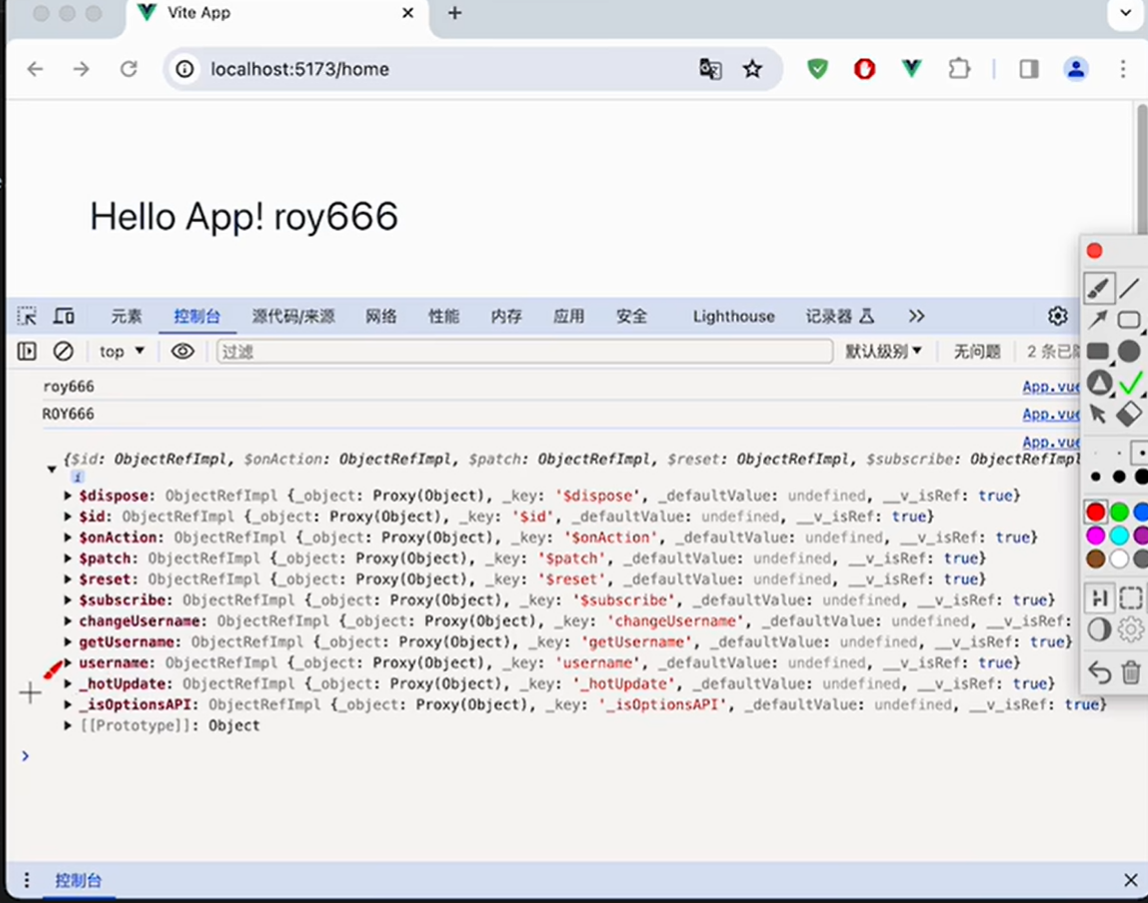
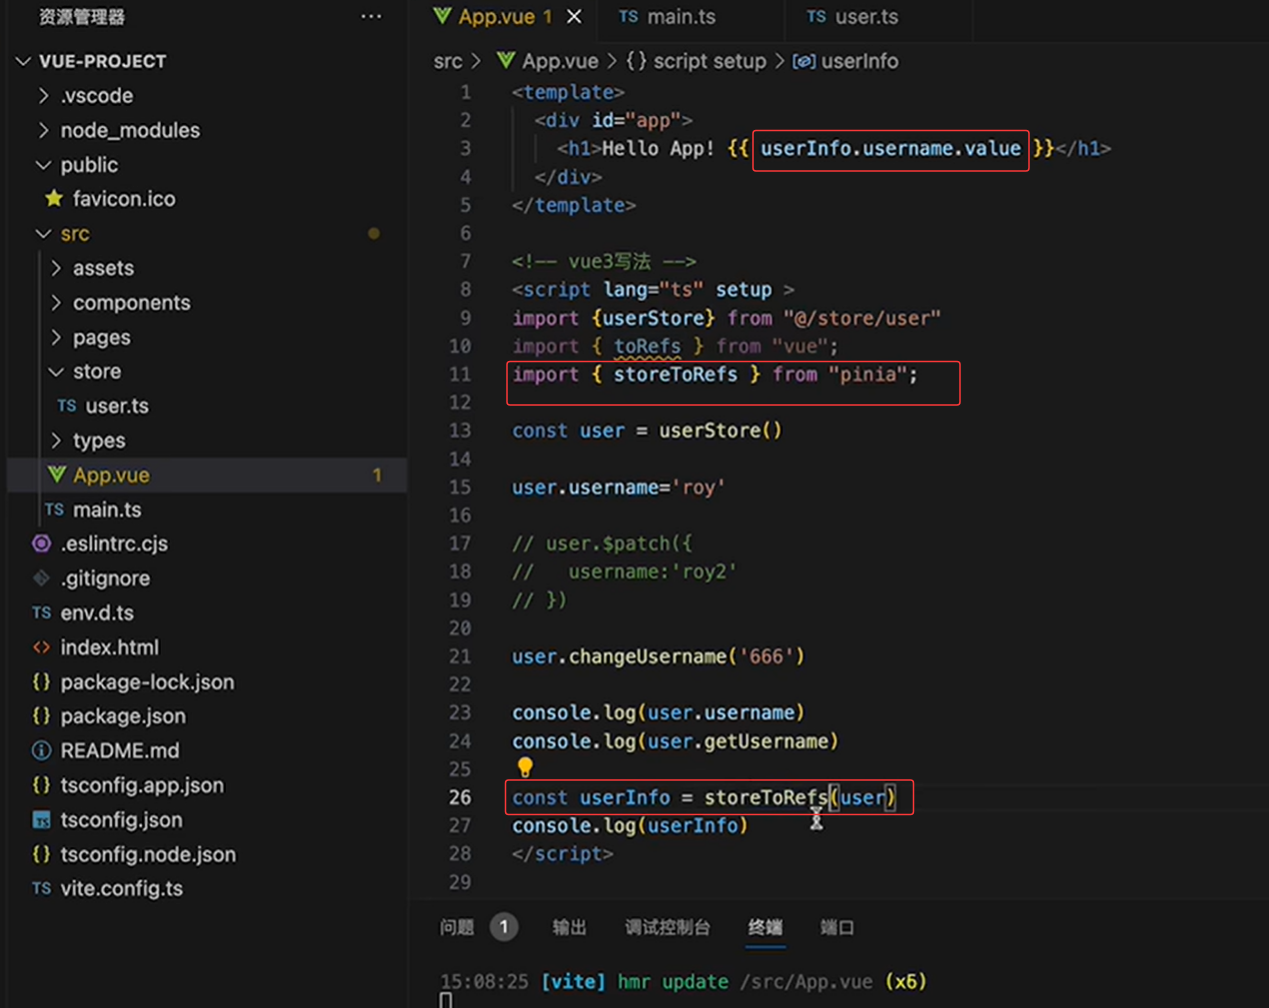
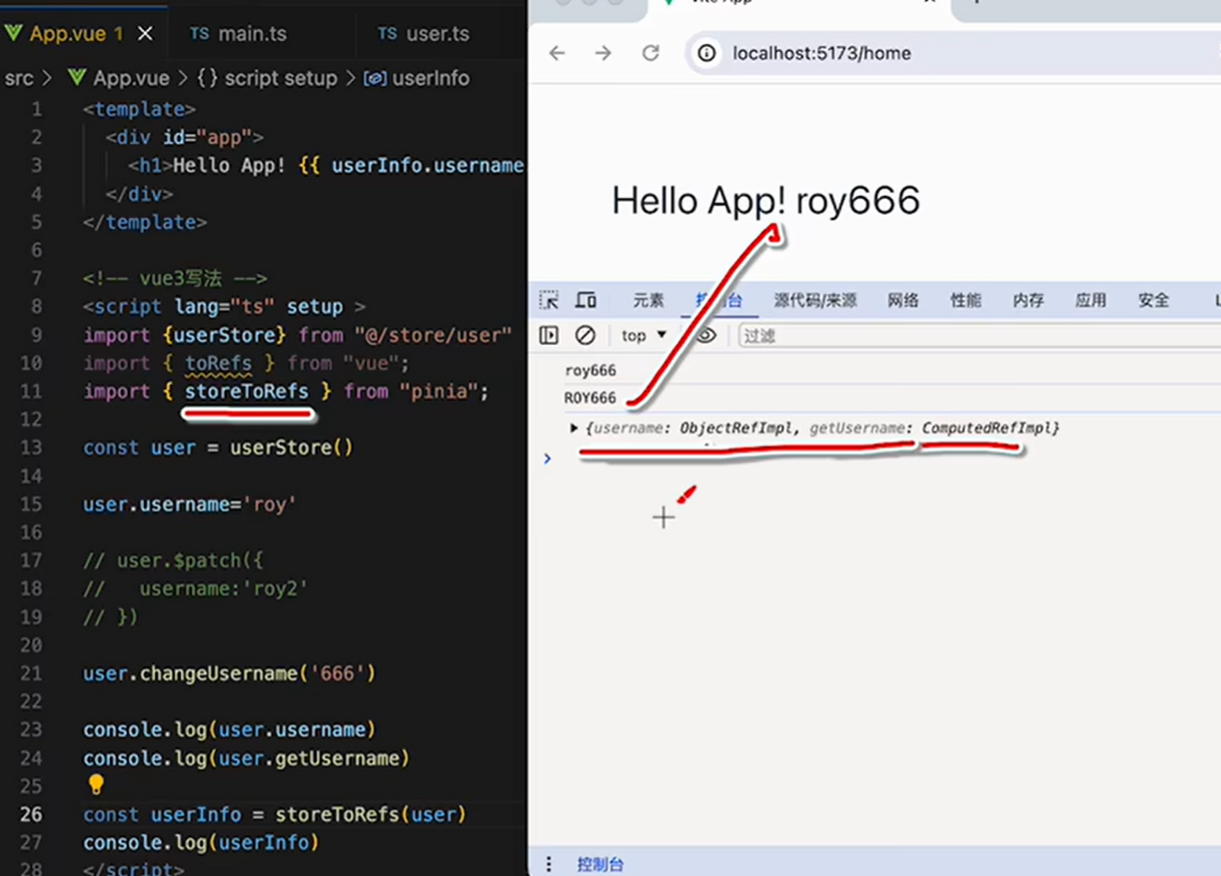
11-pinia集中状态存储
npm install pinia
TypeScriptimport'./assets/main.css' import{createApp }from'vue' import App from'./App.vue' import {createRouter,createwebHistory} from'vue-router' import HomePage from "@/pages/HomePage.vue" import AboutPage from"@/pages/AboutPage.vue" import NewsPage from"@/pages/NewsPage.vue" //1、配置路由规则 const routes=[ {path:"/home", component:HomePage}, {path:"/about",component: AboutPage}, {path:"/news",component:NewsPage}, ] //2、创建路由器 const router = createRouter({ history:createwebHistory(),//路由工作模式 rotes )} //3、加载路由器 const app = createApp(App) app.use(router) //4、状态存储 import { createPinia } from 'pinia' const pinia = createPinia() app.use(pinia) app.mount('#app')