文章的目的为了记录使用Objective-C 进行IOS app 开发学习的经历。本职为嵌入式软件开发,公司安排开发app,临时学习,完成app的开发。开发流程和要点有些记忆模糊,赶紧记录,防止忘记。
相关链接:
开源 Objective-C IOS 应用开发(一)macOS 的使用
开源 Objective-C IOS 应用开发(二)Xcode安装
开源 Objective-C IOS 应用开发(三)第一个iPhone的APP
开源 Objective-C IOS 应用开发(四)Xcode工程文件结构
开源 Objective-C IOS 应用开发(五)iOS操作(action)和输出口(Outlet)
开源 Objective-C IOS 应用开发(六)Objective-C 和 C语言
开源 Objective-C IOS 应用开发(七)Objective-C核心代码示例
开源 Objective-C IOS 应用开发(八)常见控件UI
开源 Objective-C IOS 应用开发(九)复杂控件-tableview
开源 Objective-C IOS 应用开发(十)数据持久化--文件
开源 Objective-C IOS 应用开发(十一)数据持久化--sqlite
开源 Objective-C IOS 应用开发(十二)通讯--ble
开源 Objective-C IOS 应用开发(十三)通讯--Http访问
开源 Objective-C IOS 应用开发(十四)传感器--陀螺仪和gps
开源 Objective-C IOS 应用开发(十五)通讯--蓝牙ble扫描
开源 Objective-C IOS 应用开发(十六)Storyboard模式下的纯代码界面
开源 Objective-C IOS 应用开发(十七)CAF音频的录制
开源 Objective-C IOS 应用开发(十八)音频的播放
开源 Objective-C IOS 应用开发(十九)视频的播放
开源 Objective-C IOS 应用开发(二十)多线程处理
开源 Objective-C IOS 应用开发(二十一)自定义控件--示波器
开源 Objective-C IOS 应用开发(二十二)自定义控件--车速仪表盘
推荐链接:
开源 Arkts 鸿蒙应用 开发(一)工程文件分析-CSDN博客
开源 Arkts 鸿蒙应用 开发(二)封装库.har制作和应用-CSDN博客
开源 Arkts 鸿蒙应用 开发(三)Arkts的介绍-CSDN博客
开源 Arkts 鸿蒙应用 开发(四)布局和常用控件-CSDN博客
开源 Arkts 鸿蒙应用 开发(五)控件组成和复杂控件-CSDN博客
开源 Arkts 鸿蒙应用 开发(六)数据持久--文件和首选项存储-CSDN博客
开源 Arkts 鸿蒙应用 开发(七)数据持久--sqlite关系数据库-CSDN博客
开源 Arkts 鸿蒙应用 开发(八)多媒体--相册和相机-CSDN博客
开源 Arkts 鸿蒙应用 开发(九)通讯--tcp客户端-CSDN博客
开源 Arkts 鸿蒙应用 开发(十)通讯--Http-CSDN博客
开源 Arkts 鸿蒙应用 开发(十一)证书和包名修改-CSDN博客
开源 Arkts 鸿蒙应用 开发(十二)传感器的使用-CSDN博客
开源 Arkts 鸿蒙应用 开发(十三)音频--MP3播放_arkts avplayer播放音频 mp3-CSDN博客
开源 Arkts 鸿蒙应用 开发(十四)线程--任务池(taskpool)-CSDN博客
开源 Arkts 鸿蒙应用 开发(十五)自定义绘图控件--仪表盘-CSDN博客
开源 Arkts 鸿蒙应用 开发(十六)自定义绘图控件--波形图-CSDN博客
开源 Arkts 鸿蒙应用 开发(十七)通讯--http多文件下载-CSDN博客
开源 Arkts 鸿蒙应用 开发(十八)通讯--Ble低功耗蓝牙服务器-CSDN博客
推荐链接:
开源 java android app 开发(一)开发环境的搭建-CSDN博客
开源 java android app 开发(二)工程文件结构-CSDN博客
开源 java android app 开发(三)GUI界面布局和常用组件-CSDN博客
开源 java android app 开发(四)GUI界面重要组件-CSDN博客
开源 java android app 开发(五)文件和数据库存储-CSDN博客
开源 java android app 开发(六)多媒体使用-CSDN博客
开源 java android app 开发(七)通讯之Tcp和Http-CSDN博客
开源 java android app 开发(八)通讯之Mqtt和Ble-CSDN博客
开源 java android app 开发(九)后台之线程和服务-CSDN博客
开源 java android app 开发(十)广播机制-CSDN博客
开源 java android app 开发(十一)调试、发布-CSDN博客
开源 java android app 开发(十二)封库.aar-CSDN博客
本章内容主要是iphone中自定义波形图控件。
目录:
1.手机演示
2.所有源码
3.源码分析
一、手机演示
二、所有源码
AppDelegate.h文件
#import <UIKit/UIKit.h>

@interface AppDelegate : UIResponder <UIApplicationDelegate>

@property (strong, nonatomic) UIWindow *window;

@end
AppDelegate.m文件
#import "AppDelegate.h"
#import "CustomViewController.h"

@interface AppDelegate ()

@end

@implementation AppDelegate


- (BOOL)application:(UIApplication *)application didFinishLaunchingWithOptions:(NSDictionary *)launchOptions {

    self.window = [[UIWindow alloc] initWithFrame:[[UIScreen mainScreen] bounds]];

    // 使用自定义的ViewController
    CustomViewController *customVC = [[CustomViewController alloc] init];
    self.window.rootViewController = customVC;

    [self.window makeKeyAndVisible];

    return YES;
}

// ... 其他方法保持不变
@end
CustomViewController.h文件
#import <UIKit/UIKit.h>

NS_ASSUME_NONNULL_BEGIN

@interface CustomViewController : UIViewController

@end

NS_ASSUME_NONNULL_END
CustomViewController.m文件
#import "CustomViewController.h"
#import "OscilloscopeView.h"
@interface CustomViewController ()
@end
@implementation CustomViewController
- (void)viewDidLoad {
[super viewDidLoad];
self.view.backgroundColor = [UIColor darkGrayColor];
// 创建示波器视图
CGRect oscilloscopeFrame = CGRectMake(20, 100, self.view.frame.size.width - 40, 300);
NSArray *lineColors = @[[UIColor redColor], [UIColor greenColor], [UIColor blueColor]];
OscilloscopeView *oscilloscope = [[OscilloscopeView alloc] initWithFrame:oscilloscopeFrame lineColors:lineColors];
oscilloscope.showAxes = YES;
oscilloscope.axesColor = [UIColor whiteColor];
oscilloscope.lineWidth = 2.0;
[self.view addSubview:oscilloscope];
// 添加标题
UILabel *titleLabel = [[UILabel alloc] initWithFrame:CGRectMake(20, 60, self.view.frame.size.width - 40, 30)];
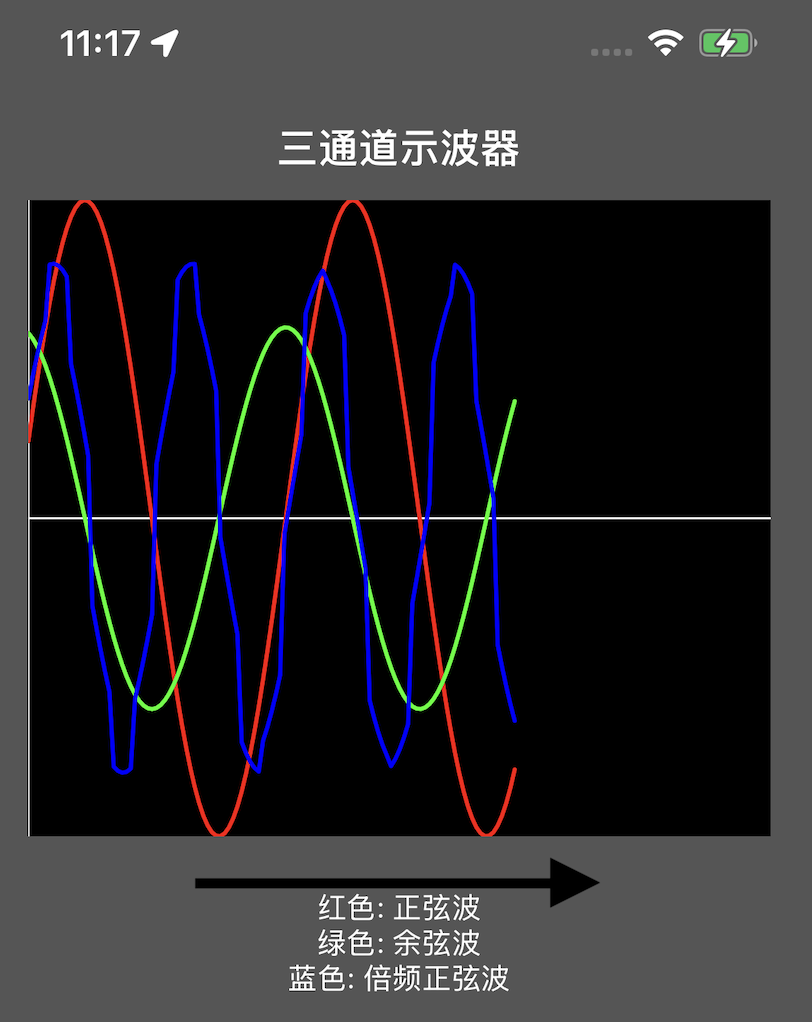
titleLabel.text = @"三通道示波器";
titleLabel.textColor = [UIColor whiteColor];
titleLabel.textAlignment = NSTextAlignmentCenter;
titleLabel.font = [UIFont boldSystemFontOfSize:20];
[self.view addSubview:titleLabel];
// 添加说明标签
UILabel *infoLabel = [[UILabel alloc] initWithFrame:CGRectMake(20, 420, self.view.frame.size.width - 40, 60)];
infoLabel.text = @"红色: 正弦波\n绿色: 余弦波\n蓝色: 倍频正弦波";
infoLabel.textColor = [UIColor whiteColor];
infoLabel.textAlignment = NSTextAlignmentCenter;
infoLabel.font = [UIFont systemFontOfSize:14];
infoLabel.numberOfLines = 0;
[self.view addSubview:infoLabel];
}
@endOscilloscopeView.h文件
#import <UIKit/UIKit.h>

NS_ASSUME_NONNULL_BEGIN

@interface OscilloscopeView : UIView

// 初始化方法
- (instancetype)initWithFrame:(CGRect)frame lineColors:(NSArray<UIColor *> *)lineColors;

// 配置属性
@property (nonatomic, strong) NSArray<UIColor *> *lineColors;
@property (nonatomic, assign) CGFloat lineWidth;
@property (nonatomic, assign) BOOL showAxes;
@property (nonatomic, strong) UIColor *axesColor;
@property (nonatomic, assign) CGFloat axesWidth;

// 数据更新方法
- (void)updateWithChannel1Data:(NSArray<NSNumber *> *)data1
                 channel2Data:(NSArray<NSNumber *> *)data2
                 channel3Data:(NSArray<NSNumber *> *)data3;

// 清除所有数据
- (void)clearAllData;

@end

NS_ASSUME_NONNULL_END
OscilloscopeView.m文件
#import "OscilloscopeView.h"

@interface OscilloscopeView ()

@property (nonatomic, strong) NSMutableArray<NSMutableArray<NSNumber *> *> *channelData;
@property (nonatomic, assign) NSInteger maxDataPoints;
@property (nonatomic, strong) CADisplayLink *displayLink;

@end

@implementation OscilloscopeView

- (instancetype)initWithFrame:(CGRect)frame lineColors:(NSArray<UIColor *> *)lineColors {
    self = [super initWithFrame:frame];
    if (self) {
        _lineColors = lineColors ?: @[[UIColor redColor], [UIColor greenColor], [UIColor blueColor]];
        _lineWidth = 2.0;
        _showAxes = YES;
        _axesColor = [UIColor whiteColor];
        _axesWidth = 1.0;

        _channelData = [NSMutableArray array];
        for (int i = 0; i < 3; i++) {
            [_channelData addObject:[NSMutableArray array]];
        }

        // 根据视图宽度计算最大数据点数
        _maxDataPoints = (NSInteger)(frame.size.width / 2);

        self.backgroundColor = [UIColor blackColor];

        // 设置定时器用于数据更新演示
        [self setupDisplayLink];
    }
    return self;
}

- (void)setupDisplayLink {
    self.displayLink = [CADisplayLink displayLinkWithTarget:self selector:@selector(updateDisplay)];
    [self.displayLink addToRunLoop:[NSRunLoop mainRunLoop] forMode:NSRunLoopCommonModes];
    self.displayLink.preferredFramesPerSecond = 2; // 每500ms更新一次
}

- (void)updateWithChannel1Data:(NSArray<NSNumber *> *)data1
                 channel2Data:(NSArray<NSNumber *> *)data2
                 channel3Data:(NSArray<NSNumber *> *)data3 {

    if (data1) {
        [self.channelData[0] addObjectsFromArray:data1];
        // 限制数据点数
        if (self.channelData[0].count > self.maxDataPoints) {
            [self.channelData[0] removeObjectsInRange:NSMakeRange(0, self.channelData[0].count - self.maxDataPoints)];
        }
    }

    if (data2) {
        [self.channelData[1] addObjectsFromArray:data2];
        if (self.channelData[1].count > self.maxDataPoints) {
            [self.channelData[1] removeObjectsInRange:NSMakeRange(0, self.channelData[1].count - self.maxDataPoints)];
        }
    }

    if (data3) {
        [self.channelData[2] addObjectsFromArray:data3];
        if (self.channelData[2].count > self.maxDataPoints) {
            [self.channelData[2] removeObjectsInRange:NSMakeRange(0, self.channelData[2].count - self.maxDataPoints)];
        }
    }

    [self setNeedsDisplay];
}

- (void)clearAllData {
    for (NSMutableArray *channel in self.channelData) {
        [channel removeAllObjects];
    }
    [self setNeedsDisplay];
}

- (void)updateDisplay {
    // 生成模拟数据用于演示
    NSMutableArray *data1 = [NSMutableArray array];
    NSMutableArray *data2 = [NSMutableArray array];
    NSMutableArray *data3 = [NSMutableArray array];

    for (int i = 0; i < 5; i++) {
        CGFloat time = CACurrentMediaTime();
        [data1 addObject:@(sin(time + i * 0.1) * 0.5 + 0.5)];
        [data2 addObject:@(cos(time + i * 0.1) * 0.3 + 0.5)];
        [data3 addObject:@(sin(time * 2 + i * 0.1) * 0.4 + 0.5)];
    }

    [self updateWithChannel1Data:data1 channel2Data:data2 channel3Data:data3];
}

- (void)drawRect:(CGRect)rect {
    [super drawRect:rect];

    CGContextRef context = UIGraphicsGetCurrentContext();
    CGContextSetLineCap(context, kCGLineCapRound);
    CGContextSetLineJoin(context, kCGLineJoinRound);

    // 绘制坐标轴
    if (self.showAxes) {
        [self drawAxesInContext:context rect:rect];
    }

    // 绘制三条波形线
    for (int channel = 0; channel < 3; channel++) {
        [self drawChannel:channel inContext:context rect:rect];
    }
}

- (void)drawAxesInContext:(CGContextRef)context rect:(CGRect)rect {
    CGContextSetStrokeColorWithColor(context, self.axesColor.CGColor);
    CGContextSetLineWidth(context, self.axesWidth);

    // X轴
    CGContextMoveToPoint(context, 0, rect.size.height / 2);
    CGContextAddLineToPoint(context, rect.size.width, rect.size.height / 2);

    // Y轴
    CGContextMoveToPoint(context, 0, 0);
    CGContextAddLineToPoint(context, 0, rect.size.height);

    CGContextStrokePath(context);
}

- (void)drawChannel:(NSInteger)channel inContext:(CGContextRef)context rect:(CGRect)rect {
    NSArray<NSNumber *> *data = self.channelData[channel];
    if (data.count < 2) return;

    UIColor *lineColor = channel < self.lineColors.count ? self.lineColors[channel] : [UIColor whiteColor];
    CGContextSetStrokeColorWithColor(context, lineColor.CGColor);
    CGContextSetLineWidth(context, self.lineWidth);

    CGFloat xStep = rect.size.width / (self.maxDataPoints - 1);
    CGFloat yScale = rect.size.height;

    CGContextBeginPath(context);

    for (NSInteger i = 0; i < data.count; i++) {
        CGFloat x = i * xStep;
        CGFloat y = (1.0 - [data[i] floatValue]) * yScale;

        if (i == 0) {
            CGContextMoveToPoint(context, x, y);
        } else {
            CGContextAddLineToPoint(context, x, y);
        }
    }

    CGContextStrokePath(context);
}

- (void)dealloc {
    [self.displayLink invalidate];
    self.displayLink = nil;
}

@end
info.plist中删除mainifest选项
三、源码分析
- OscilloscopeView.h 头文件
接口声明
@interface OscilloscopeView : UIView- 继承自
UIView,表示这是一个自定义视图控件
初始化方法
- (instancetype)initWithFrame:(CGRect)frame lineColors:(NSArray<UIColor *> *)lineColors;功能:自定义初始化方法
参数:
-
frame:视图的位置和尺寸 -
lineColors:三条波形线的颜色数组作用:创建具有特定尺寸和线条颜色的示波器视图
属性声明
@property (nonatomic, strong) NSArray<UIColor *> *lineColors;
@property (nonatomic, assign) CGFloat lineWidth;
@property (nonatomic, assign) BOOL showAxes;
@property (nonatomic, strong) UIColor *axesColor;
@property (nonatomic, assign) CGFloat axesWidth;
功能:配置示波器的外观属性
作用:允许外部修改线条颜色、宽度、坐标轴显示等
数据更新方法
- (void)updateWithChannel1Data:(NSArray<NSNumber *> *)data1
                 channel2Data:(NSArray<NSNumber *> *)data2
                 channel3Data:(NSArray<NSNumber *> *)data3;
功能:更新三个通道的波形数据
参数:三个NSNumber数组,包含0.0-1.0范围的归一化数据
作用:外部调用此方法传入新的波形数据点
- OscilloscopeView.m 实现文件
初始化方法实现
- (instancetype)initWithFrame:(CGRect)frame lineColors:(NSArray<UIColor *> *)lineColors {
    self = [super initWithFrame:frame];
    if (self) {
        _lineColors = lineColors ?: @[[UIColor redColor], [UIColor greenColor], [UIColor blueColor]];
        _lineWidth = 2.0;
        _showAxes = YES;
        _axesColor = [UIColor whiteColor];
        _axesWidth = 1.0;

        _channelData = [NSMutableArray array];
        for (int i = 0; i < 3; i++) {
            [_channelData addObject:[NSMutableArray array]];
        }

        _maxDataPoints = (NSInteger)(frame.size.width / 2);
        self.backgroundColor = [UIColor blackColor];

        [self setupDisplayLink];
    }
    return self;
}
详细分析:
-
调用父类初始化
[super initWithFrame:frame] -
设置默认参数:使用传入的颜色或默认红绿蓝三色
-
初始化
_channelData数组,包含3个可变数组对应三个通道 -
_maxDataPoints = (NSInteger)(frame.size.width / 2):根据视图宽度计算最大数据点数,确保数据密度合适 -
设置黑色背景
-
调用
setupDisplayLink启动定时更新
定时器设置
- (void)setupDisplayLink {
    self.displayLink = [CADisplayLink displayLinkWithTarget:self selector:@selector(updateDisplay)];
    [self.displayLink addToRunLoop:[NSRunLoop mainRunLoop] forMode:NSRunLoopCommonModes];
    self.displayLink.preferredFramesPerSecond = 2; // 每500ms更新一次
}
详细分析:
-
CADisplayLink是专门用于屏幕重绘的定时器 -
target:self selector:@selector(updateDisplay):每帧调用updateDisplay方法 -
addToRunLoop:forMode::添加到主运行循环 -
preferredFramesPerSecond = 2:设置每秒2帧,即500ms更新一次
数据更新核心方法
- (void)updateWithChannel1Data:(NSArray<NSNumber *> *)data1
                 channel2Data:(NSArray<NSNumber *> *)data2
                 channel3Data:(NSArray<NSNumber *> *)data3 {

    if (data1) {
        [self.channelData[0] addObjectsFromArray:data1];
        if (self.channelData[0].count > self.maxDataPoints) {
            [self.channelData[0] removeObjectsInRange:NSMakeRange(0, self.channelData[0].count - self.maxDataPoints)];
        }
    }
    // ... 同样处理channel2和channel3

    [self setNeedsDisplay];
}
详细分析:
-
分别处理三个通道的数据
-
addObjectsFromArray::将新数据追加到对应通道 -
数据量检查:如果超过最大点数,移除最早的数据
removeObjectsInRange:NSMakeRange(0, count - maxDataPoints):从开头移除多余数据
-
[self setNeedsDisplay]:标记需要重绘,触发drawRect:调用
模拟数据生成
- (void)updateDisplay {
    NSMutableArray *data1 = [NSMutableArray array];
    NSMutableArray *data2 = [NSMutableArray array];
    NSMutableArray *data3 = [NSMutableArray array];

    for (int i = 0; i < 5; i++) {
        CGFloat time = CACurrentMediaTime();
        [data1 addObject:@(sin(time + i * 0.1) * 0.5 + 0.5)];
        [data2 addObject:@(cos(time + i * 0.1) * 0.3 + 0.5)];
        [data3 addObject:@(sin(time * 2 + i * 0.1) * 0.4 + 0.5)];
    }

    [self updateWithChannel1Data:data1 channel2Data:data2 channel3Data:data3];
}
详细分析:
-
CACurrentMediaTime():获取当前精确时间,用于生成动态波形 -
生成三角函数波形:
-
通道1:正弦波
sin(time + i * 0.1) * 0.5 + 0.5 -
通道2:余弦波
cos(time + i * 0.1) * 0.3 + 0.5 -
通道3:倍频正弦波
sin(time * 2 + i * 0.1) * 0.4 + 0.5
-
-
* 0.5 + 0.5:将值从-1,1映射到0,1范围,适应视图坐标
核心绘制方法
- (void)drawRect:(CGRect)rect {
    [super drawRect:rect];

    CGContextRef context = UIGraphicsGetCurrentContext();
    CGContextSetLineCap(context, kCGLineCapRound);
    CGContextSetLineJoin(context, kCGLineJoinRound);

    if (self.showAxes) {
        [self drawAxesInContext:context rect:rect];
    }

    for (int channel = 0; channel < 3; channel++) {
        [self drawChannel:channel inContext:context rect:rect];
    }
}
详细分析:
-
获取当前图形上下文
UIGraphicsGetCurrentContext() -
设置线条样式:圆角线帽和连接点
-
条件绘制坐标轴
-
循环绘制三个通道的波形
坐标轴绘制
- (void)drawAxesInContext:(CGContextRef)context rect:(CGRect)rect {
    CGContextSetStrokeColorWithColor(context, self.axesColor.CGColor);
    CGContextSetLineWidth(context, self.axesWidth);

    // X轴 - 水平中线
    CGContextMoveToPoint(context, 0, rect.size.height / 2);
    CGContextAddLineToPoint(context, rect.size.width, rect.size.height / 2);

    // Y轴 - 左侧边线
    CGContextMoveToPoint(context, 0, 0);
    CGContextAddLineToPoint(context, 0, rect.size.height);

    CGContextStrokePath(context);
}
详细分析:
-
设置坐标轴颜色和宽度
-
X轴:从左侧中点
(0, height/2)到右侧中点(width, height/2) -
Y轴:从左上角
(0, 0)到左下角(0, height) -
CGContextStrokePath:执行绘制
波形线绘制
- (void)drawChannel:(NSInteger)channel inContext:(CGContextRef)context rect:(CGRect)rect {
    NSArray<NSNumber *> *data = self.channelData[channel];
    if (data.count < 2) return;

    UIColor *lineColor = channel < self.lineColors.count ? self.lineColors[channel] : [UIColor whiteColor];
    CGContextSetStrokeColorWithColor(context, lineColor.CGColor);
    CGContextSetLineWidth(context, self.lineWidth);

    CGFloat xStep = rect.size.width / (self.maxDataPoints - 1);
    CGFloat yScale = rect.size.height;

    CGContextBeginPath(context);

    for (NSInteger i = 0; i < data.count; i++) {
        CGFloat x = i * xStep;
        CGFloat y = (1.0 - [data[i] floatValue]) * yScale;

        if (i == 0) {
            CGContextMoveToPoint(context, x, y);
        } else {
            CGContextAddLineToPoint(context, x, y);
        }
    }

    CGContextStrokePath(context);
}
详细分析:
-
数据检查:至少需要2个点才能绘制线条
-
设置线条颜色:根据通道索引获取对应颜色
-
计算坐标变换:
-
xStep:X轴步进,根据数据点数和视图宽度计算 -
yScale:Y轴缩放系数,使用视图高度
-
-
坐标转换:
(1.0 - value) * height将0,1数据映射到视图坐标(iOS坐标系Y轴向下) -
构建路径:第一个点使用
MoveToPoint,后续点使用AddLineToPoint -
绘制路径
内存管理
- (void)dealloc {
    [self.displayLink invalidate];
    self.displayLink = nil;
}
作用:在对象销毁时停止定时器,防止内存泄漏
- CustomViewController 分析
视图加载
- (void)viewDidLoad {
    [super viewDidLoad];

    self.view.backgroundColor = [UIColor darkGrayColor];

    CGRect oscilloscopeFrame = CGRectMake(20, 100, self.view.frame.size.width - 40, 300);
    NSArray *lineColors = @[[UIColor redColor], [UIColor greenColor], [UIColor blueColor]];

    OscilloscopeView *oscilloscope = [[OscilloscopeView alloc] initWithFrame:oscilloscopeFrame lineColors:lineColors];
    [self.view addSubview:oscilloscope];
}
作用:创建并配置示波器视图,添加到控制器视图层级中