Kubernetes集成ELK日志
由于我们使用Helm部署ELK,这里将分别部署Elasticsearch、Kibana和Logstash。同时,我们还需要部署Filebeat作为日志收集器
步骤:
- 添加Elastic Helm仓库
- 部署Elasticsearch
- 部署Kibana
- 部署Logstash(可选,因为Filebeat也可以直接发送到Elasticsearch,但通常用于更复杂的处理)
- 部署Filebeat
各组件说明
Elasticsearch : 一个分布式、RESTful 风格的搜索和分析引擎。它是整个架构的核心,负责存储、搜索和分析从各种来源收集来的海量数据
Kibana : 一个为 Elasticsearch 设计的开源数据可视化和管理工具。用户可以通过 Kibana 在网页上直接与 Elasticsearch 中的数据交互
Logstash : 一个服务器端的数据处理管道,可以同时从多个来源接收数据,对数据进行转换和丰富,然后将其发送到像 Elasticsearch 这样的"存储库"中
Filebeat: 一个轻量级的、用于转发和集中日志数据的工具。Filebeat 被安装在需要收集日志的服务器上,监视指定的日志文件或位置,并将日志事件转发到 Logstash 或 Elasticsearch 进行索引
一个最常见的数据流是这样的:
应用日志 --> Filebeat --> Logstash --> Elasticsearch --> Kibana
前置条件
- 一个正在运行的 Kubernetes 集群。
参考: k8s入门
- 已安装
kubectl并配置好对集群的访问
- 已安装
Helm。
参考: k8s使用helm简化安装
部署ELK Stack到Kubernetes
1. 添加Elastic Helm仓库
sh
# 添加Elastic官方仓库
helm repo add elastic https://helm.elastic.co
helm repo update elastic
2. 创建命名空间
sh
kubectl create namespace logging3. 部署Elasticsearch
3.1 创建自定义values文件
elasticsearch-values.yaml
yaml
# elasticsearch-values.yaml
clusterName: "elasticsearch"
nodeGroup: "master"

replicas: 2

# 资源配置
resources:
  requests:
    cpu: "1000m"
    memory: "2Gi"
  limits:
    cpu: "2000m"
    memory: "4Gi"

# 持久化配置
volumeClaimTemplate:
  accessModes: [ "ReadWriteOnce" ]
  storageClassName: "local-path"  # 根据你的存储类修改
  resources:
    requests:
      storage: 50Gi

# 配置参数
esConfig:
  elasticsearch.yml: |
    xpack.security.enabled: true
    xpack.monitoring.collection.enabled: true

# 环境变量
extraEnvs:
  - name: "ES_JAVA_OPTS"
    value: "-Xms2g -Xmx2g"

# 启用服务
service:
  type: ClusterIP
  loadBalancerIP: ""

# 安全配置
secret:
  enabled: true
  passwords:
    elastic: "admin123!"  # 修改为强密码

# 探针配置
readinessProbe:
  failureThreshold: 3
  initialDelaySeconds: 10
  periodSeconds: 10
  successThreshold: 3
  timeoutSeconds: 5

livenessProbe:
  failureThreshold: 3
  initialDelaySeconds: 10
  periodSeconds: 10
  successThreshold: 3
  timeoutSeconds: 5
3.2 部署Elasticsearch
sh
helm install elasticsearch elastic/elasticsearch \
  --namespace logging \
  --values elasticsearch-values.yaml \
  --version 8.5.1
3.3 验证Elasticsearch部署
sh
# 检查Pod状态
kubectl get pods -n logging -l app=elasticsearch-master

# 检查服务
kubectl get svc -n logging

# 端口转发
kubectl port-forward svc/elasticsearch-master -n logging 9200:9200

# curl
curl -u elastic:elastic123! http://localhost:9200
正常应该有下面这样输出
text
{
  "name" : "elasticsearch-master-0",
  "cluster_name" : "elasticsearch",
  "cluster_uuid" : "iZdUU_7eSDGOtwcg6KqRaQ",
  "version" : {
    "number" : "7.17.3",
    "build_flavor" : "default",
    "build_type" : "docker",
    "build_hash" : "5ad023604c8d7416c9eb6c0eadb62b14e766caff",
    "build_date" : "2022-04-19T08:11:19.070913226Z",
    "build_snapshot" : false,
    "lucene_version" : "8.11.1",
    "minimum_wire_compatibility_version" : "6.8.0",
    "minimum_index_compatibility_version" : "6.0.0-beta1"
  },
  "tagline" : "You Know, for Search"
}
4. 部署Kibana
4.1 创建Kibana values文件
kibana-values.yaml
yaml
# kibana-values.yaml
elasticsearchHosts: "http://elasticsearch-master.logging.svc.cluster.local:9200"

# 服务配置
service:
  type: LoadBalancer  # 或者使用NodePort/ClusterIP + Ingress
  loadBalancerIP: ""
  port: 5601

# Elasticsearch连接配置
elasticsearch:
  username: "elastic"
  password: "YourElasticPassword123"  # 与Elasticsearch相同的密码

# 配置参数
kibanaConfig:
  kibana.yml: |
    server:
      name: kibana
      host: "0.0.0.0"
    monitoring:
      ui:
        enabled: true
    xpack:
      security:
        enabled: true

# 探针配置
readinessProbe:
  httpGet:
    path: /api/status
    port: 5601
  initialDelaySeconds: 10
  timeoutSeconds: 5
  periodSeconds: 10

livenessProbe:
  httpGet:
    path: /api/status
    port: 5601
  initialDelaySeconds: 10
  timeoutSeconds: 5
  periodSeconds: 30
4.2 部署Kibana
sh
helm install kibana elastic/kibana \
  --namespace logging \
  --values kibana-values.yaml \
  --version 7.17.3
4.3 访问Kibana
sh
kubectl get svc -n logging kibana-kibana

kubectl port-forward -n logging svc/kibana-kibana 5601:5601
访问 http://localhost:5601,用户名:elastic,密码:elastic123!
4.4 使用Ingress暴露Kibana
kibana-ingress.yaml
yaml
apiVersion: networking.k8s.io/v1
kind: Ingress
metadata:
  name: kibana-ingress
  namespace: logging
  annotations:
    nginx.ingress.kubernetes.io/rewrite-target: /
    nginx.ingress.kubernetes.io/ssl-redirect: "false"
    nginx.ingress.kubernetes.io/force-ssl-redirect: "false"
spec:
  ingressClassName: nginx
  rules:
  - host: kibana.wilson.local
    http:
      paths:
      - path: /
        pathType: Prefix
        backend:
          service:
            name: kibana-kibana
            port:
              number: 5601
部署Kibana Ingress
sh
kubectl apply -f kibana-ingress.yaml5. 部署Filebeat
5.1 创建Filebeat values文件
创建 filebeat-values.yaml
yaml
# filebeat-values-clean.yaml
clusterRoleRules:
  - apiGroups: [coordination.k8s.io]
    resources: [leases]
    verbs: ['get', 'create', 'update']
  - apiGroups: [""]
    resources: ["nodes", "nodes/stats", "events", "endpoints", "pods", "services"]
    verbs: ["get", "list", "watch"]

# 如果不需要采集容器日志,可以注释掉以下部分
daemonset:
  enabled: true
  # 确保卷定义不重复
  volumes:
    - name: varlog
      hostPath:
        path: /var/log
    - name: varlibdockercontainers
      hostPath:
        path: /var/lib/docker/containers
    - name: varlogpods
      hostPath:
        path: /var/log/pods
    - name: varlibcontainers
      hostPath:
        path: /var/lib/containers

  volumeMounts:
    - name: varlog
      mountPath: /var/log
      readOnly: true
    - name: varlibdockercontainers
      mountPath: /var/lib/docker/containers
      readOnly: true
    - name: varlogpods
      mountPath: /var/log/pods
      readOnly: true
    - name: varlibcontainers
      mountPath: /var/lib/containers
      readOnly: true

  # 环境变量配置 - 确保不重复
  env:
    - name: NODE_NAME
      valueFrom:
        fieldRef:
          fieldPath: spec.nodeName

filebeatConfig:
  filebeat.yml: |
    filebeat.inputs:
    - type: container
      paths:
        - /var/log/containers/*.log
      processors:
        - add_kubernetes_metadata:
            host: ${NODE_NAME}
            matchers:
            - logs_path:
                logs_path: "/var/log/containers/"

    output.elasticsearch:
      hosts: ['elasticsearch-master:9200']
      username: "elastic"
      password: "elastic123!"
5.2 部署Filebeat
sh
helm install filebeat elastic/filebeat \
  --namespace logging \
  --values filebeat-values.yaml \
  --version 7.17.3
5.3 验证Filebeat部署
sh
kubectl get pods --namespace=logging -l app=filebeat-filebeat -w

kubectl get svc -n logging
6. 部署Logstash
6.1 创建Logstash values文件
创建 logstash-values.yaml
6.2 部署Logstash
sh
helm install logstash elastic/logstash \
  --namespace logging \
  --values logstash-values.yaml \
  --version 7.17.3
6.3 验证Logstash部署
sh
kubectl get pods --namespace=logging -l app=logstash-logstash -w测试日志收集
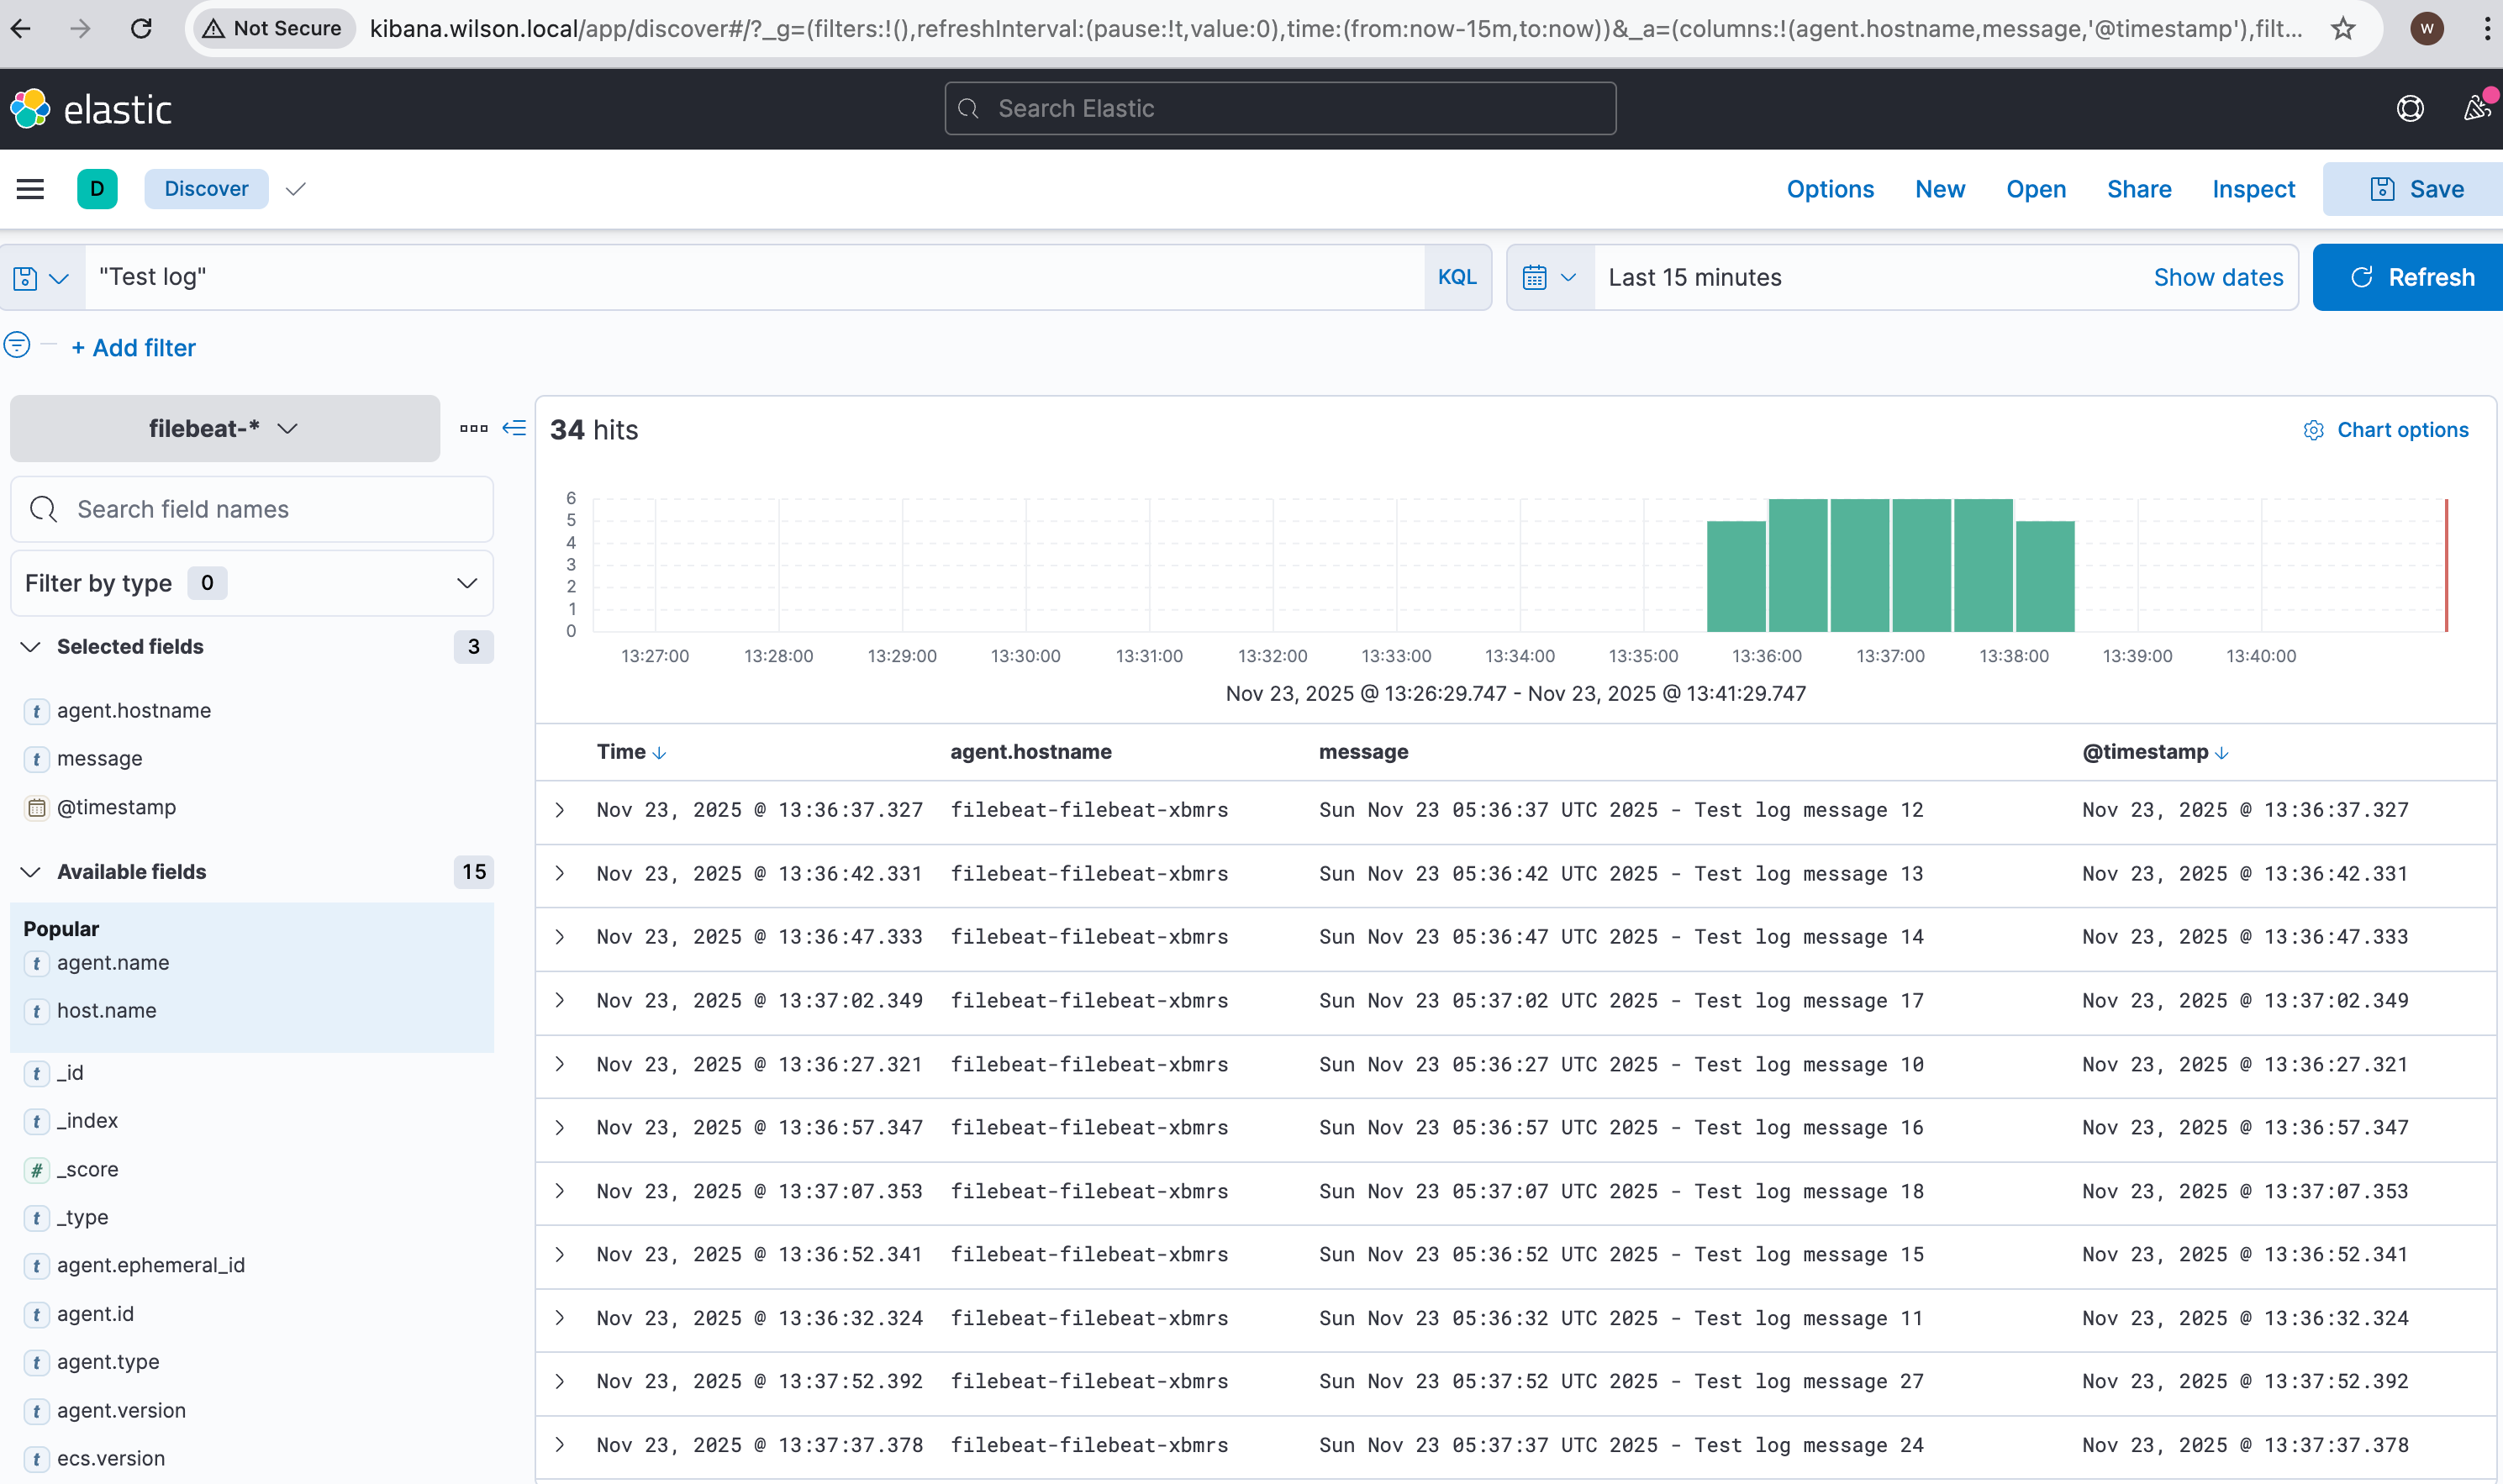
sh
kubectl run test-logger --image=busybox --restart=Never -- /bin/sh -c 'i=0; while true; do echo "$(date) - Test log message $i"; i=$((i+1)); sleep 5; done'在Kibana中创建索引模式并查看日志
清理资源
sh
# 删除所有ELK组件
helm uninstall filebeat -n logging
helm uninstall logstash -n logging
helm uninstall kibana -n logging
helm uninstall elasticsearch -n logging

# 删除命名空间
kubectl delete namespace logging

# 清理持久卷(如果不再需要)
kubectl delete pvc -n logging --all