架构
以下图片来自网络
支持
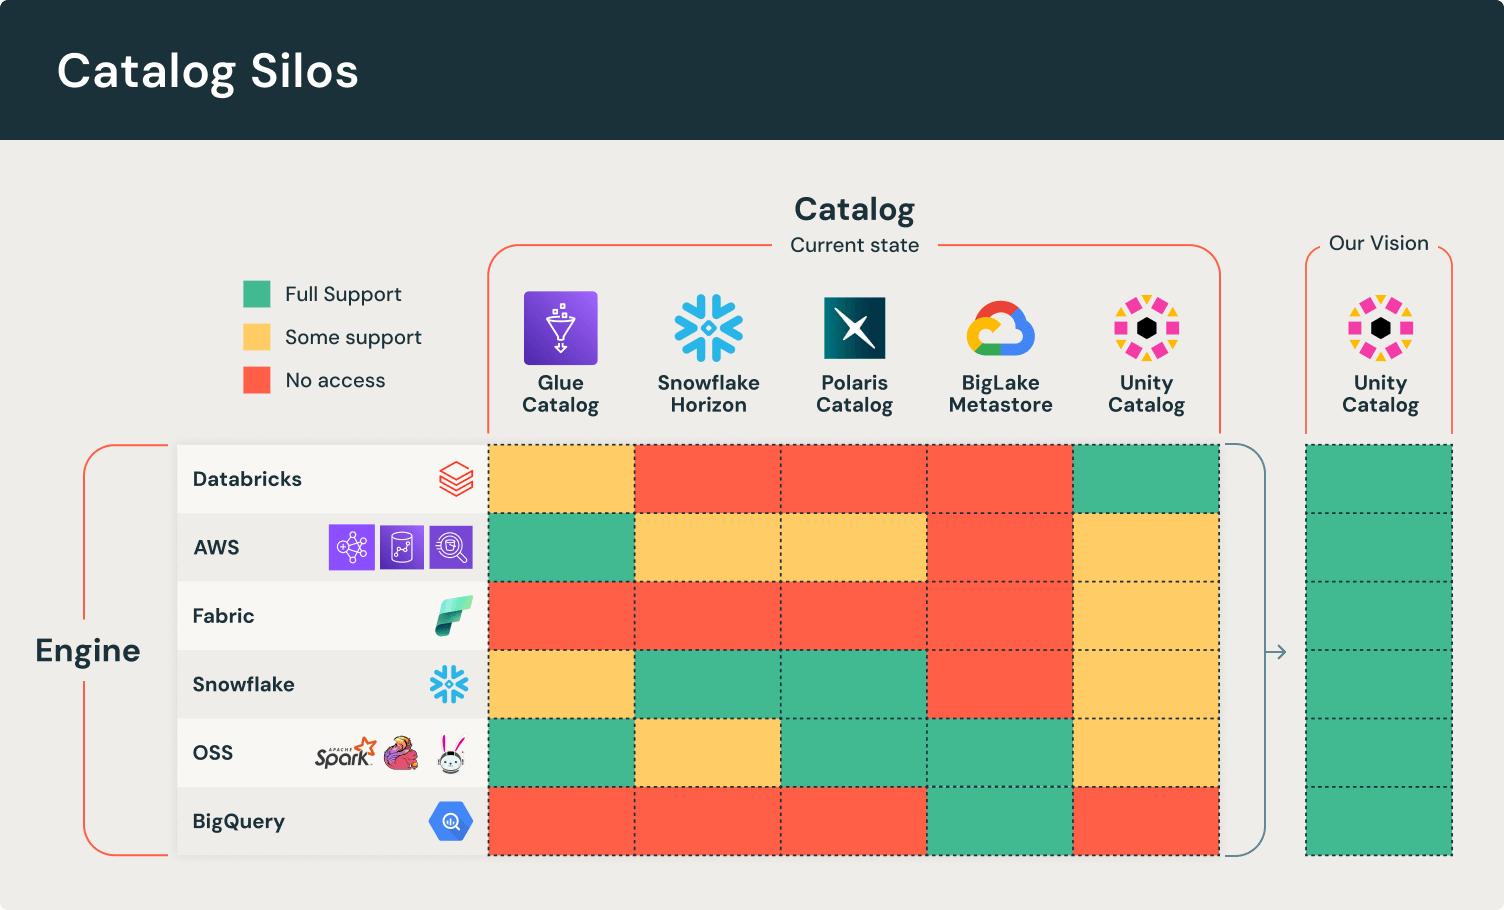
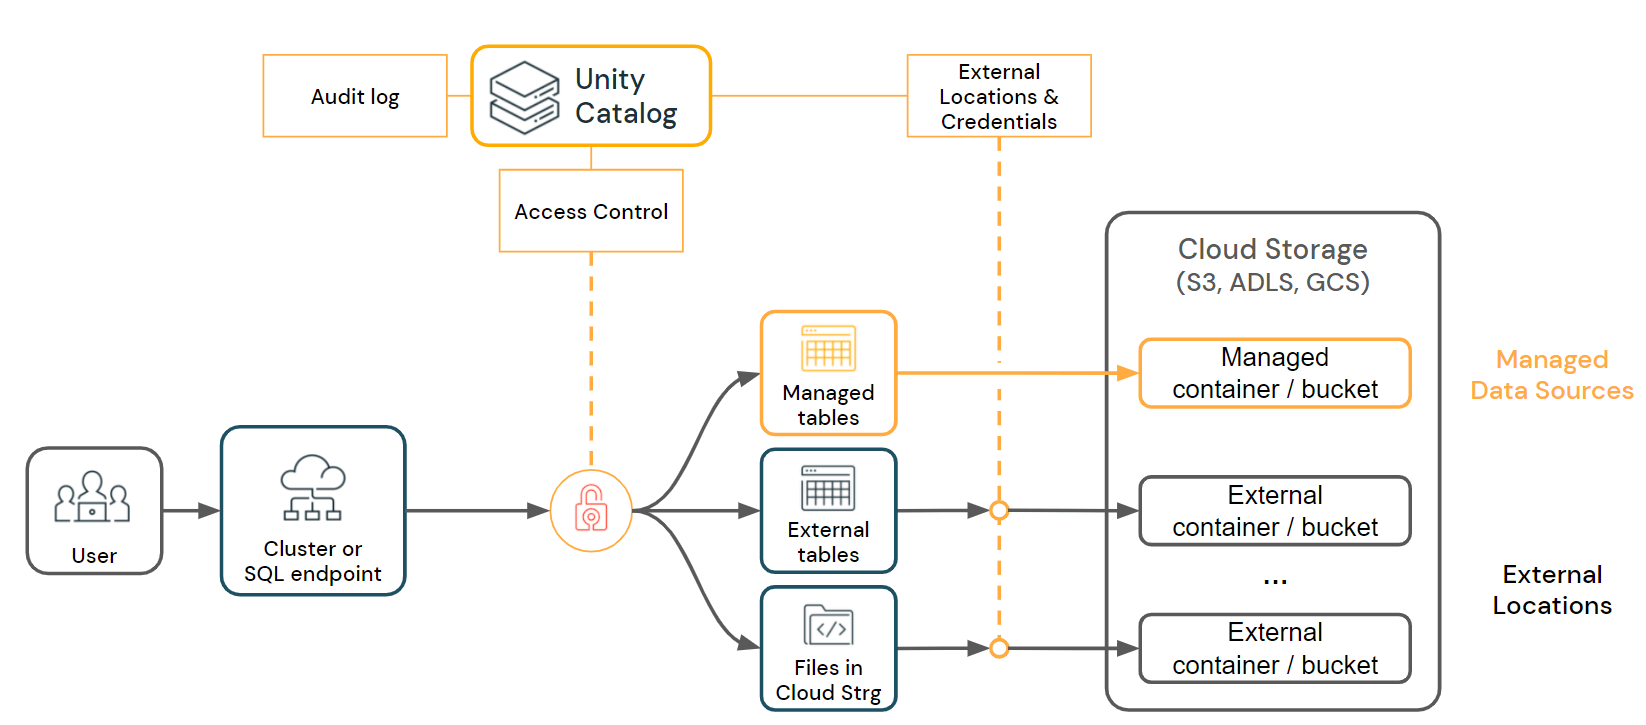
架构
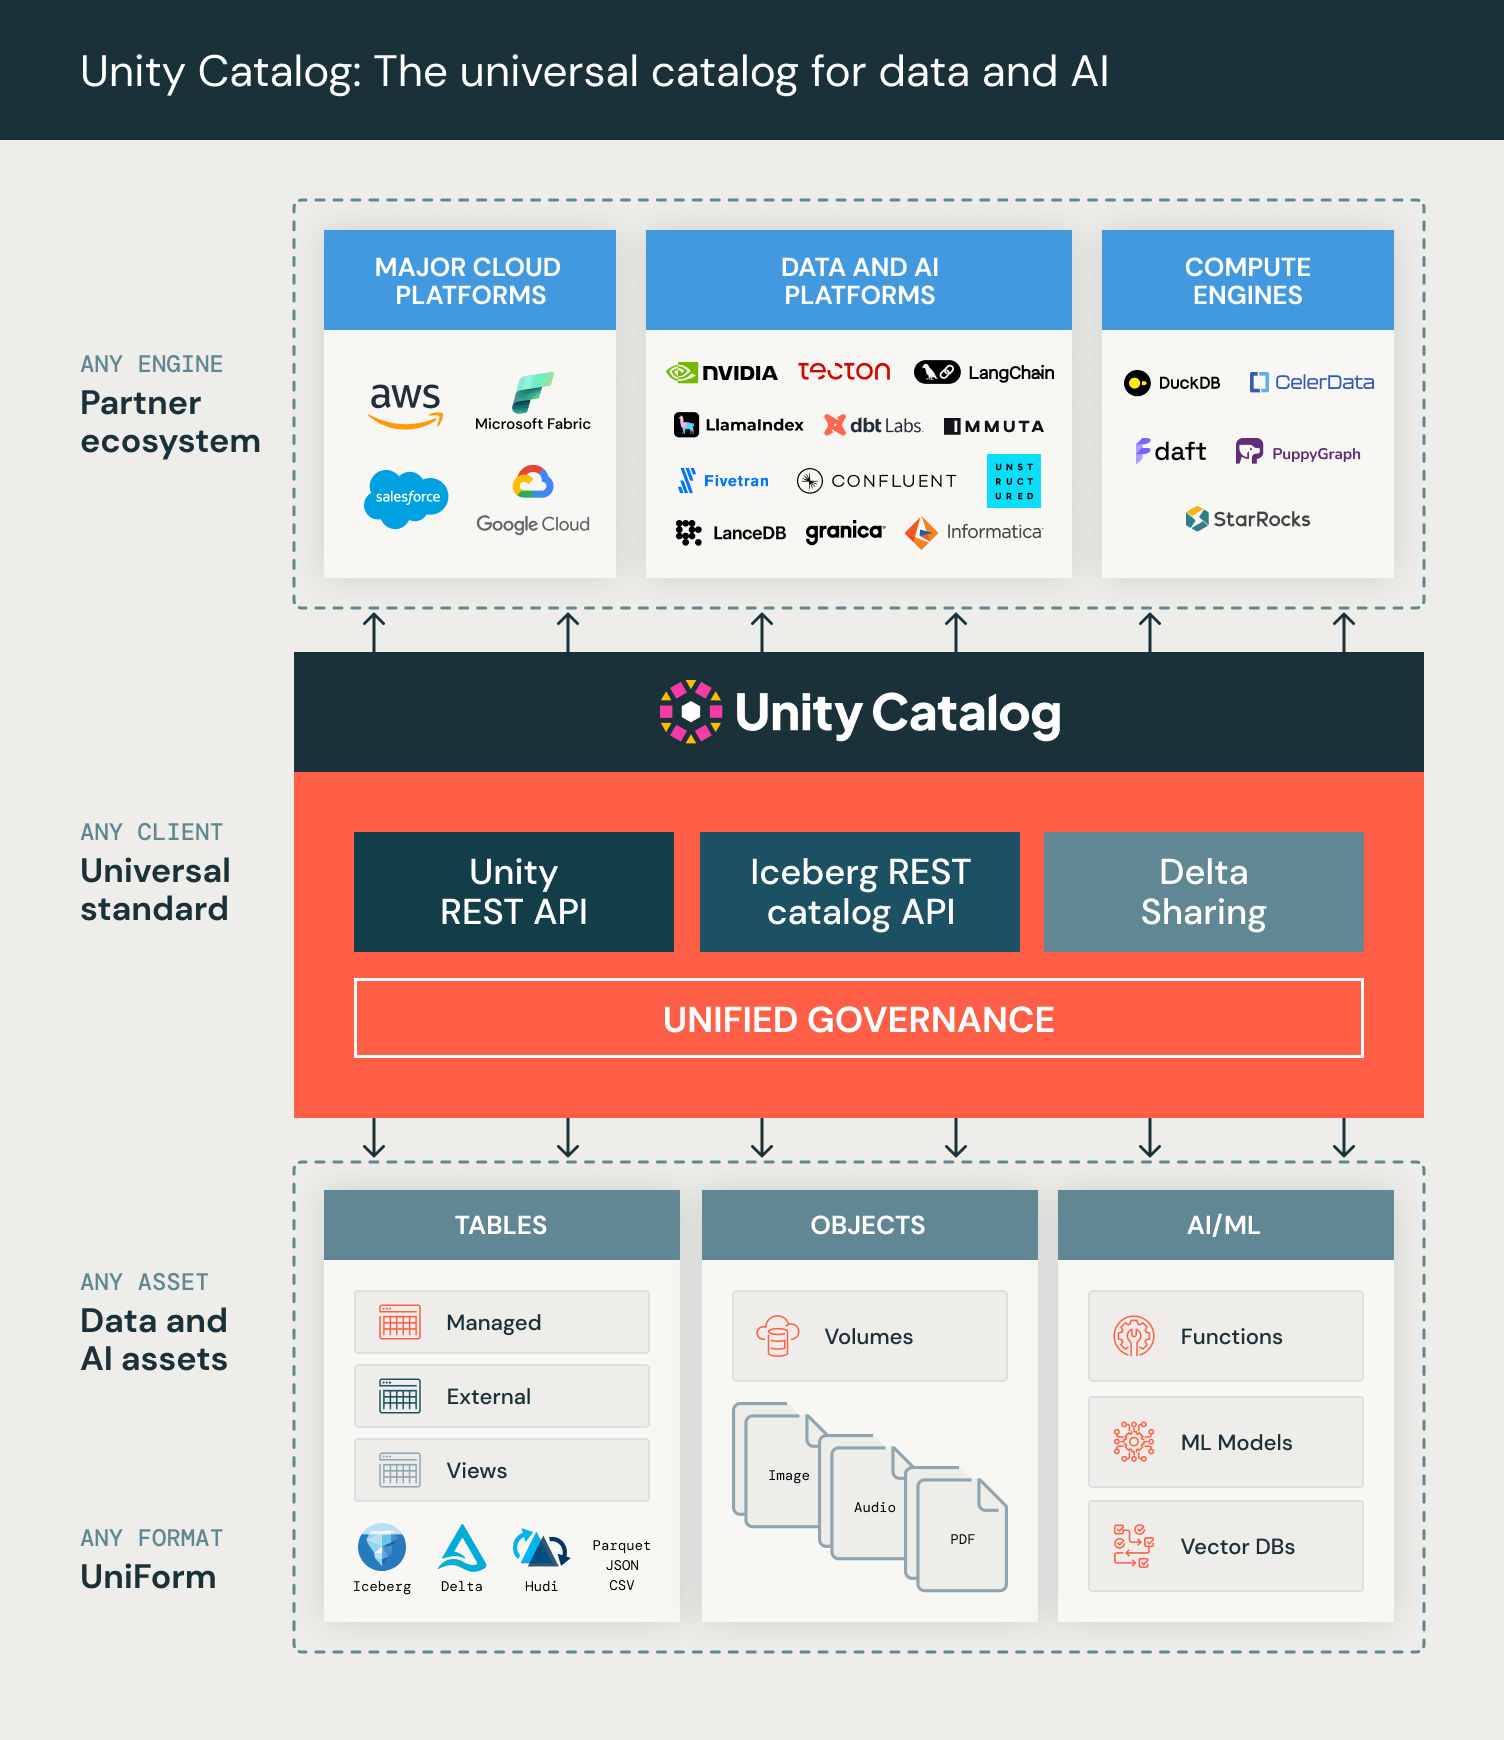
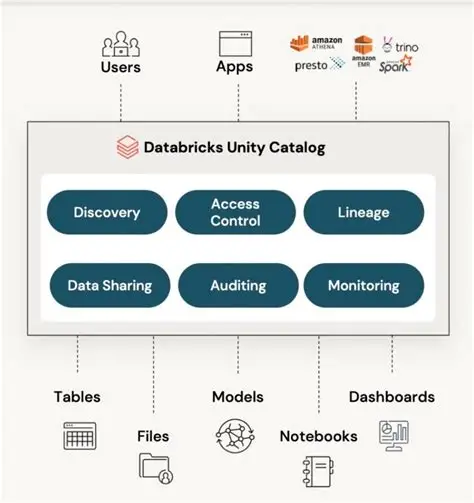
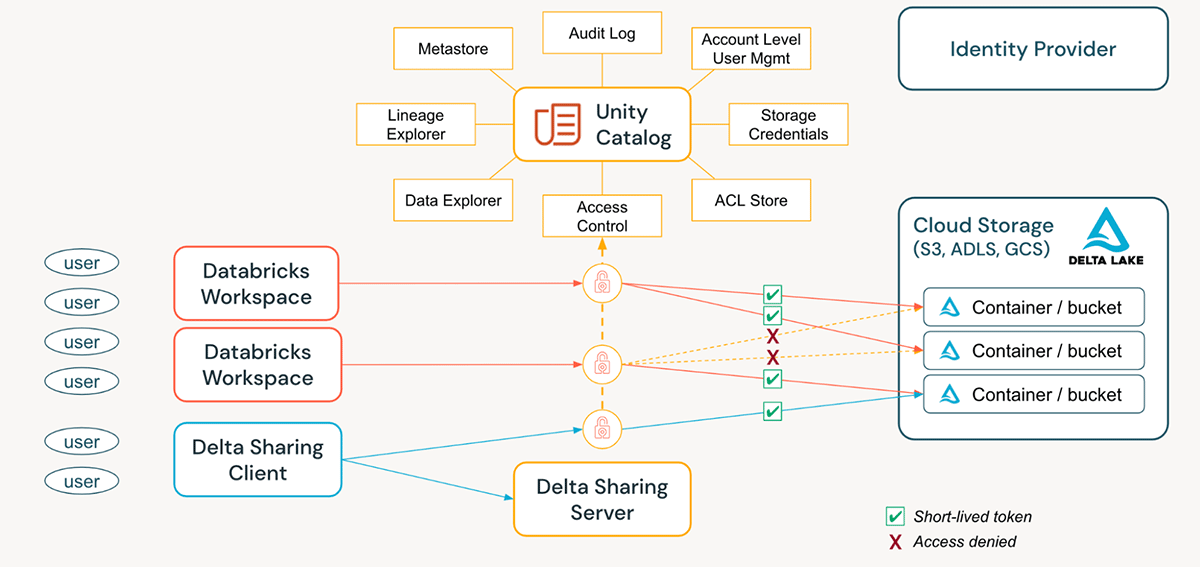
功能

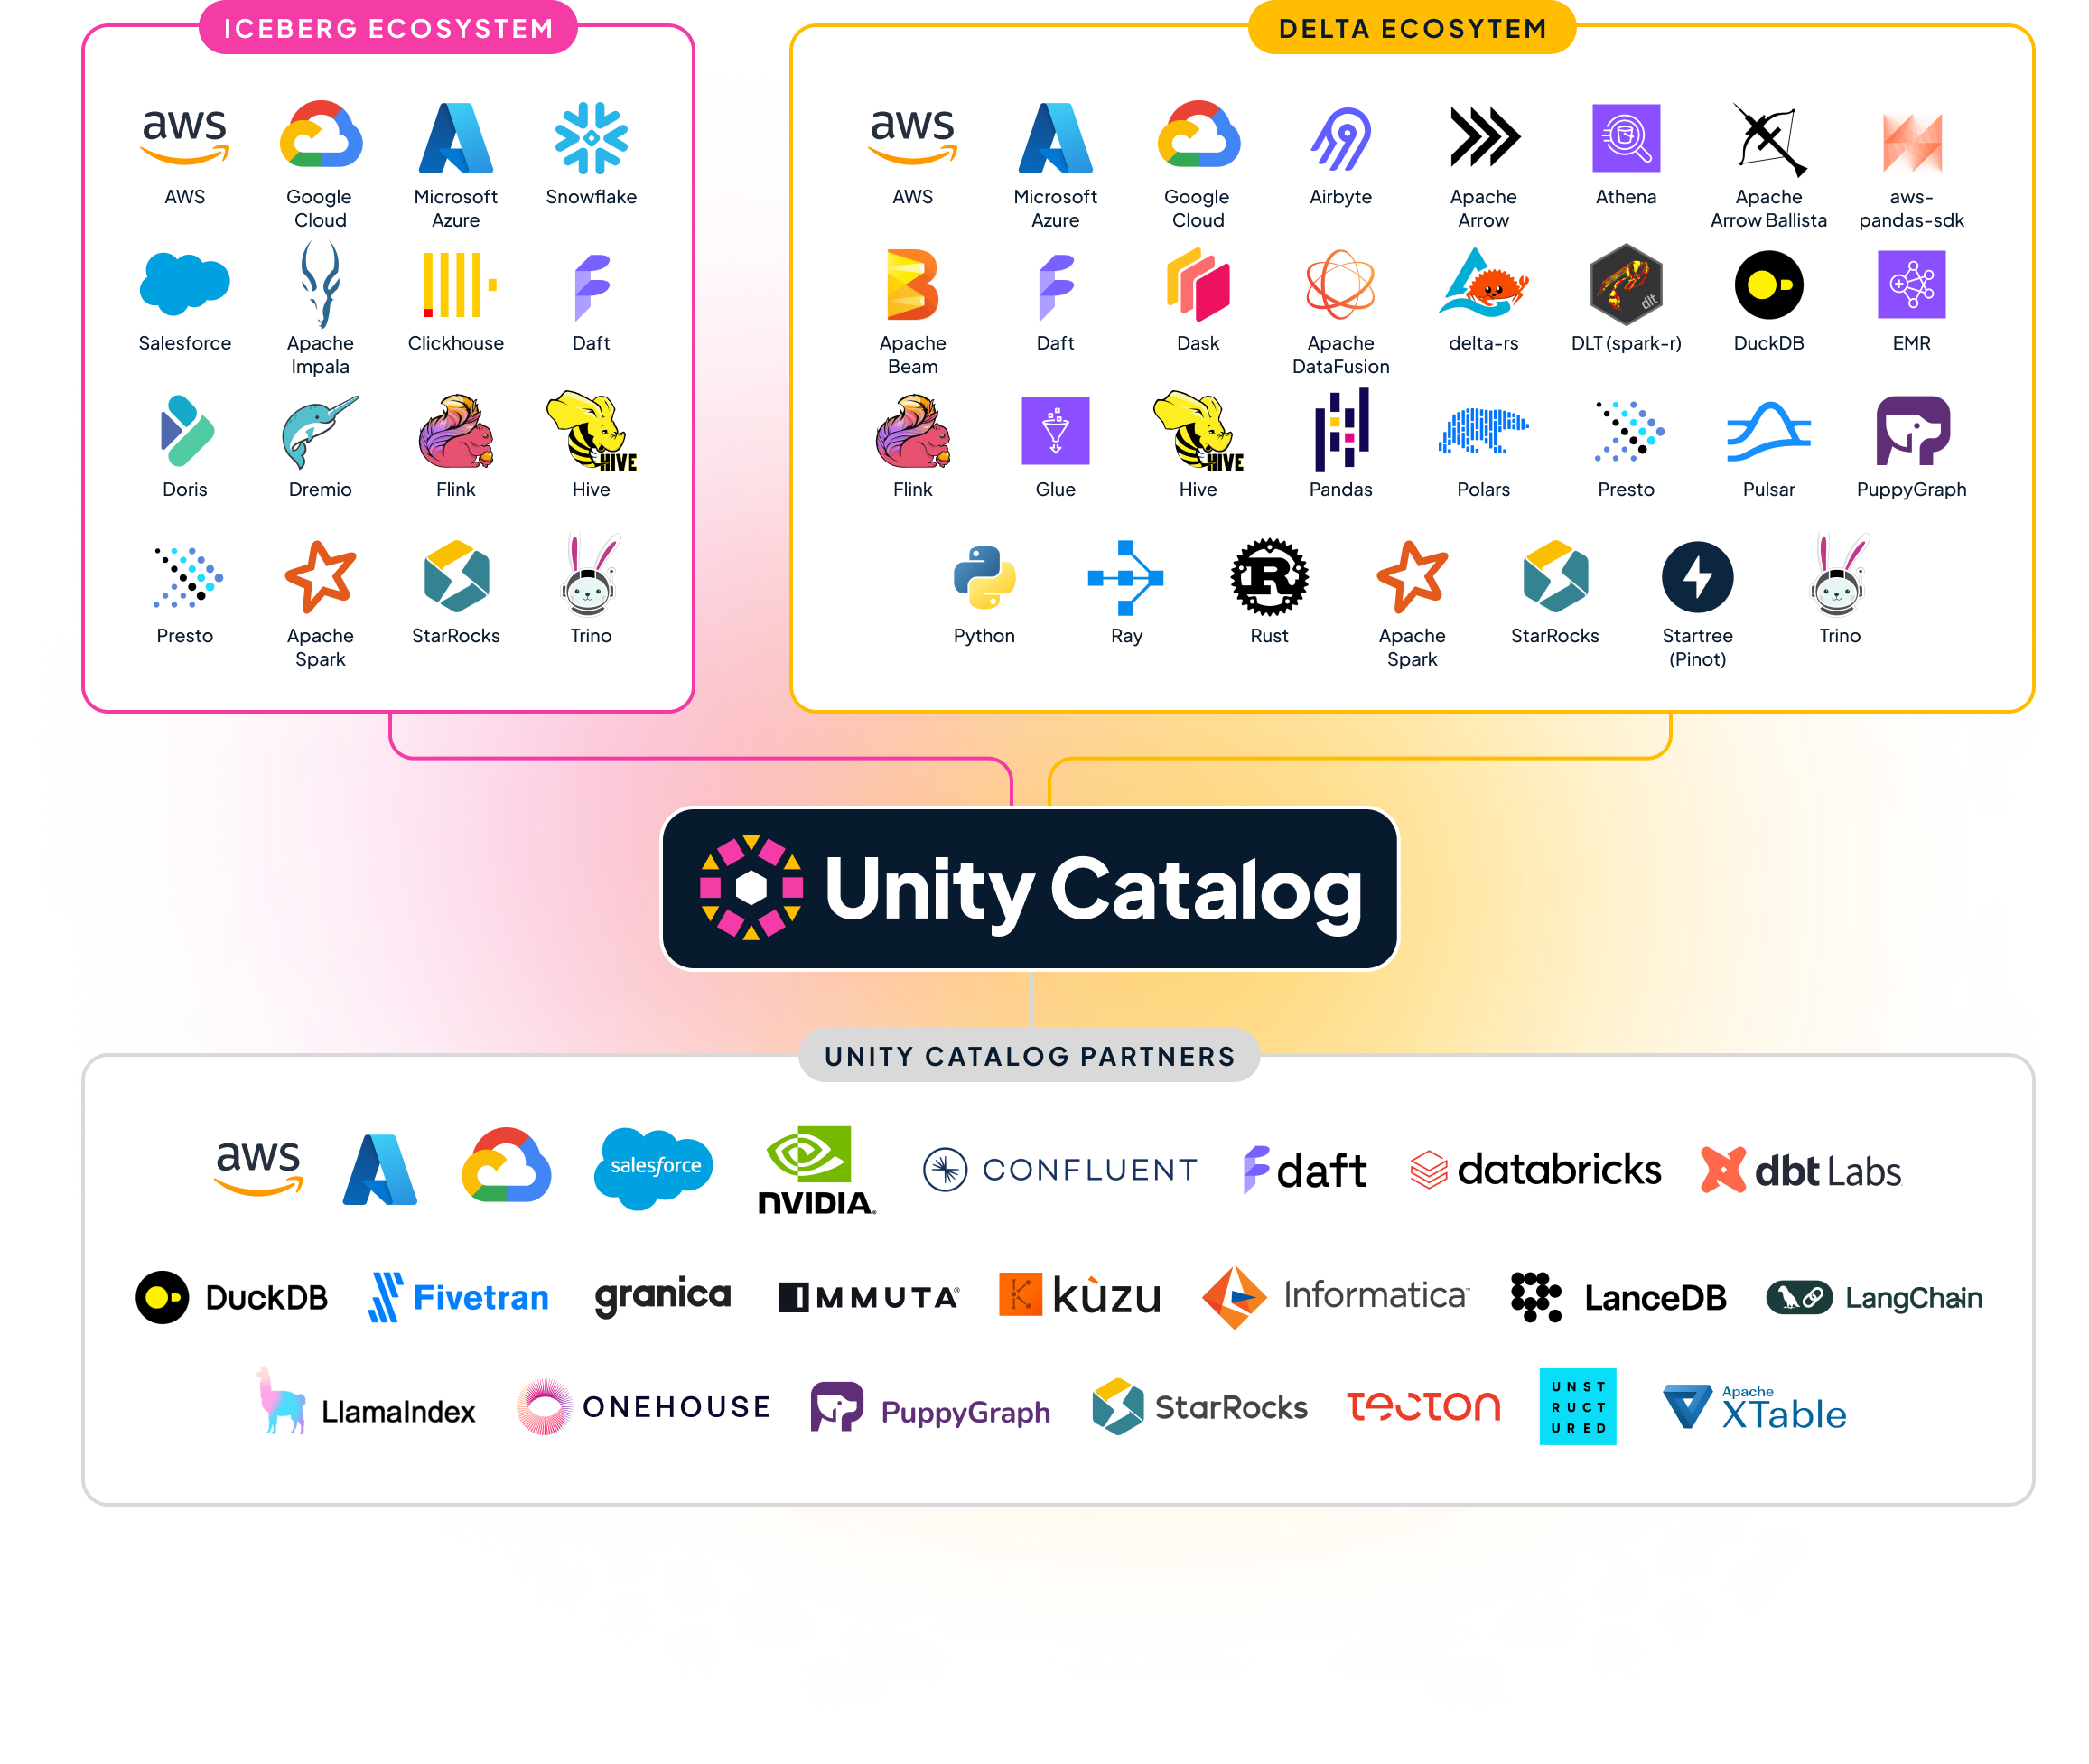
生态
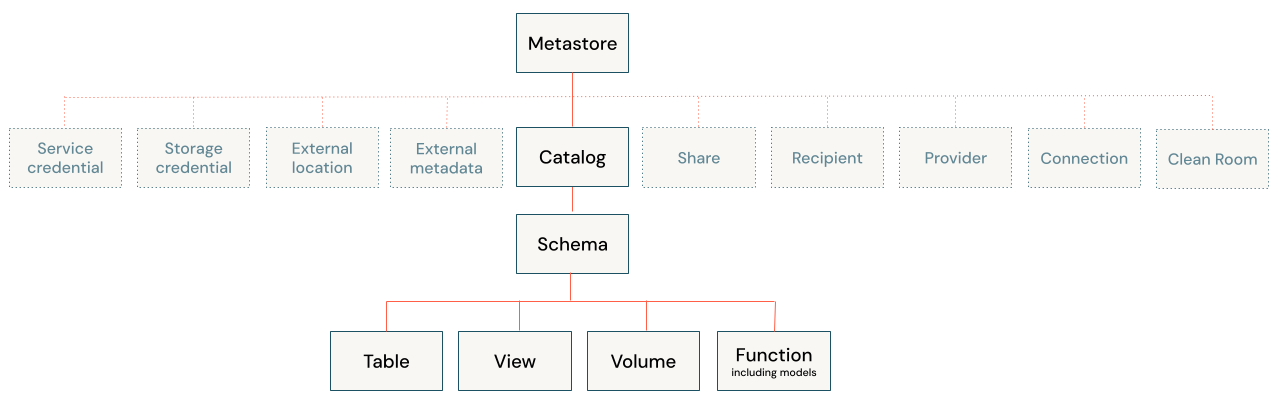
目录对象模型
安装
克隆 Unity Catalog 源码
bash
git clone git@github.com:unitycatalog/unitycatalog.git检查 JAVA 版本,需要 17

执行命令(编译加启动)
bash
# 服务启动默认使用 8080 端口
./bin/start-uc-server

# 在特定端口启动
./bin/start-uc-server -p <port_number>
./bin/start-uc-server -port <port_number>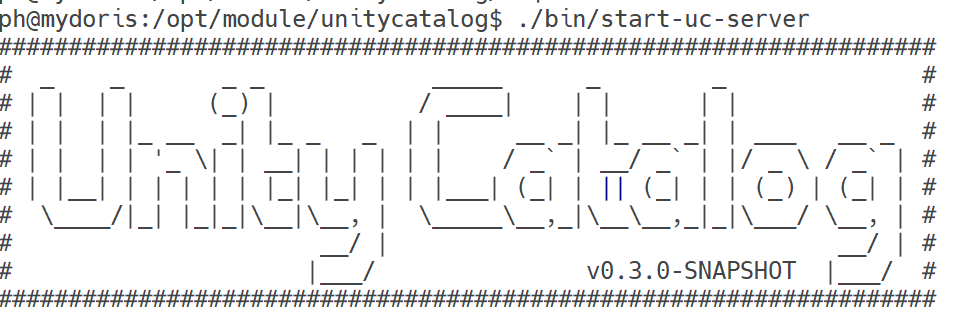
打包
首先停止start-uc-server
打包
bash
./build/sbt createTarball

解压安装
bash
tar -xvf /opt/module/unitycatalog/target/unitycatalog-0.3.0-SNAPSHOT.tar.gz -C /opt/module/unitycatalog-0.3.0-SNAPSHOT管理
配置
配置文件
vim ./etc/conf/server.properties

bash
server.env=dev
## Identity Provider authorization parameters
# examples:
# authorization=enable
# authorization-url=https://accounts.google.com/o/oauth2/auth
# token-url=https://oauth2.googleapis.com/token
# client-id=111122223333-abab1212cdcd3434.apps.googleusercontent.com
# client-secret=GOCSPX-ababfoobarcdcd-5q
server.authorization=disable
server.authorization-url=
server.token-url=
server.client-id=
server.client-secret=
server.redirect-port=
# D-Days H-Hours M-Minutes S-Seconds (P5D = 5 days,PT5H = 5 hours, PT5M = 5 minutes, PT5S = 5 seconds)
server.cookie-timeout=P5D

## Experimental Feature Flags
# Enable MANAGED table (experimental feature)
# Default: false (disabled)
server.managed-table.enabled=false

# Define the model storage root.  Cloud storage or file based allowed.
# If no root specified, the current working directory of the server is used.

#storage-root.models=s3://my-s3-bucket/root
#storage-root.models=abfs://file_system@account_name.dfs.core.windows.net/root
#storage-root.models=gs://my-gc-bucket/root
storage-root.models=file:///tmp/ucroot

# Define the managed table storage root. Cloud storage or file based allowed.
# If no root specified, defaults to file:///tmp/ucroot
# Managed tables will be stored under this root in the path: {storage-root.tables}/tables/{tableId}

#storage-root.tables=s3://my-s3-bucket/tables
#storage-root.tables=abfs://file_system@account_name.dfs.core.windows.net/tables
#storage-root.tables=gs://my-gc-bucket/tables
storage-root.tables=file:///tmp/ucroot

## S3 Storage Config (Multiple configs can be added by incrementing the index)
s3.bucketPath.0=
s3.region.0=
s3.awsRoleArn.0=
# Optional (If blank, it will use DefaultCredentialsProviderChain)
s3.accessKey.0=
s3.secretKey.0=
# Test Only (If you provide a session token, it will just use those session creds, no downscoping)
s3.sessionToken.0=

## ADLS Storage Config (Multiple configs can be added by incrementing the index)
adls.storageAccountName.0=
adls.tenantId.0=
adls.clientId.0=
adls.clientSecret.0=

## GCS Storage Config (Multiple configs can be added by incrementing the index)
gcs.bucketPath.0=
# Optional (If blank, it will use Default Application chain to find credentials)
gcs.jsonKeyFilePath.0=
日志
日志文件 etc/logs/server.log
配置日志级别 etc/conf/server.log4j2.properties
验证 Server
bash
# 1. 列出所有 catalogs(应返回 {"catalogs": [...]})
curl http://127.0.0.1:8080/api/2.1/unity-catalog/catalogs

# 2. 创建一个 catalog(可选)
curl -X POST http://127.0.0.1:8080/api/2.1/unity-catalog/catalogs \
  -H "Content-Type: application/json" \
  -d '{"name": "test_catalog", "comment": "Test"}'

# 3. 再次列出 catalogs
curl http://127.0.0.1:8080/api/2.1/unity-catalog/catalogs