《博主简介》
小伙伴们好,我是阿旭。
专注于计算机视觉领域,包括目标检测、图像分类、图像分割和目标跟踪等项目开发,提供模型对比实验、答疑辅导等。
《------往期经典推荐------》
二、机器学习实战专栏【链接】 ,已更新31期,欢迎关注,持续更新中~~
三、深度学习【Pytorch】专栏【链接】
四、【Stable Diffusion绘画系列】专栏【链接】
五、YOLOv8改进专栏【链接】,持续更新中~~
六、YOLO性能对比专栏【链接】,持续更新中~
《------正文------》
目录
- 引言
- 主要流程
- 步骤详解
-
- [1. 模型初始化与配置](#1. 模型初始化与配置)
- [2. 图像预处理](#2. 图像预处理)
- [3. 文本提示设置](#3. 文本提示设置)
-
- [4. 结果后处理](#4. 结果后处理)
- [5. 结果可视化](#5. 结果可视化)
- 更多示例
- 总结
引言
SAM3视觉大模型支持以文本提示的方式进行图片与视频中的目标分割,同时继承了之前SAM的特点也支持点、框等提示方式进行目标分割。我将以SAM3系列文章的方式详细介绍各种使用方法以及示例。感兴趣的小伙伴可以关注一下后续更新。
本文将详细介绍如何使用 SAM3 模型通过文本提示来分割图像中的目标物体,包括主要步骤和核心代码实现。
主要流程
SAM3 的文本提示分割图像目标主要包括以下几个关键步骤:
- 模型初始化与配置
- 图像预处理
- 文本提示设置
- 模型推理
- 结果后处理与可视化
步骤详解
1. 模型初始化与配置
首先需要导入库,并加载 SAM3 模型并创建相应的处理器:
python
import torch
from sam3.model_builder import build_sam3_image_model
from sam3.model.sam3_image_processor import Sam3Processor
import supervision as sv
import matplotlib
matplotlib.use('TkAgg')
from PIL import Image
from typing import Optional

# 设置运行设备
DEVICE = "cuda" if torch.cuda.is_available() else "cpu"

# 初始化图像模型并加载预训练权重
checkpoint_path = "models/sam3.pt"
bpe_path = "assets/bpe_simple_vocab_16e6.txt.gz"
image_model = build_sam3_image_model(
    checkpoint_path=str(checkpoint_path),
    bpe_path=str(bpe_path),
    device=DEVICE
)

# 创建图像处理器实例
image_predictor = Sam3Processor(image_model, device=DEVICE)
这一步完成了模型权重的加载和处理器的初始化,为后续的图像处理做好准备。
2. 图像预处理
在进行模型推理前,需要对输入图像进行适当的预处理:
python
image_path = "assets/images/test_image.jpg"
image = Image.open(image_path).convert('RGB')
inference_state = image_predictor.set_image(image)
这里使用 PIL.Image.open() 加载图像,并通过 convert('RGB')确保图像为 RGB 格式,然后调用 Sam3Processor.set_image()方法完成图像的预处理和特征提取。
3. 文本提示设置
设置用于指导分割的文本提示,这里设置的是"穿红衣服的人"
python
text_prompt = "person in red"
output = image_predictor.set_text_prompt(state=inference_state, prompt=text_prompt)
通过 Sam3Processor.set_text_prompt()方法将文本提示与已处理的图像状态相结合,为模型提供分割指导信息。
4. 结果后处理
将模型输出转换为标准的检测格式并过滤低置信度结果:
python
detections = from_sam(sam_result=output)
detections = detections[detections.confidence > 0.5]
其中 from_sam()函数负责将原始模型输出转换为 sv.Detections 对象:
python
def from_sam(sam_result: dict) -> sv.Detections:
    xyxy = sam_result["boxes"].to(torch.float32).cpu().numpy()
    confidence = sam_result["scores"].to(torch.float32).cpu().numpy()

    mask = sam_result["masks"].to(torch.bool)
    mask = mask.reshape(mask.shape[0], mask.shape[2], mask.shape[3]).cpu().numpy()
    return sv.Detections(
        xyxy=xyxy,
        confidence=confidence,
        mask=mask
    )
5. 结果可视化
最后将分割结果可视化展示:
python
annotated_image = annotate(image, detections, label=text_prompt)
annotated_image.show()
annotate()函数利用 supervision 库的功能在原图上绘制分割掩码、边界框和标签:
python
def annotate(image: Image.Image, detections: sv.Detections, label: Optional[str] = None) -> Image.Image:
    mask_annotator = sv.MaskAnnotator(
        color=COLOR,
        color_lookup=sv.ColorLookup.INDEX,
        opacity=0.6
    )
    box_annotator = sv.BoxAnnotator(
        color=COLOR,
        color_lookup=sv.ColorLookup.INDEX,
        thickness=1
    )

    annotated_image = image.copy()
    annotated_image = mask_annotator.annotate(annotated_image, detections)
    annotated_image = box_annotator.annotate(annotated_image, detections)
    if label:
     labels = [
         f"{label} {confidence:.2f}"
         for confidence in detections.confidence
     ]
     annotated_image = label_annotator.annotate(annotated_image, detections, labels)

    return annotated_image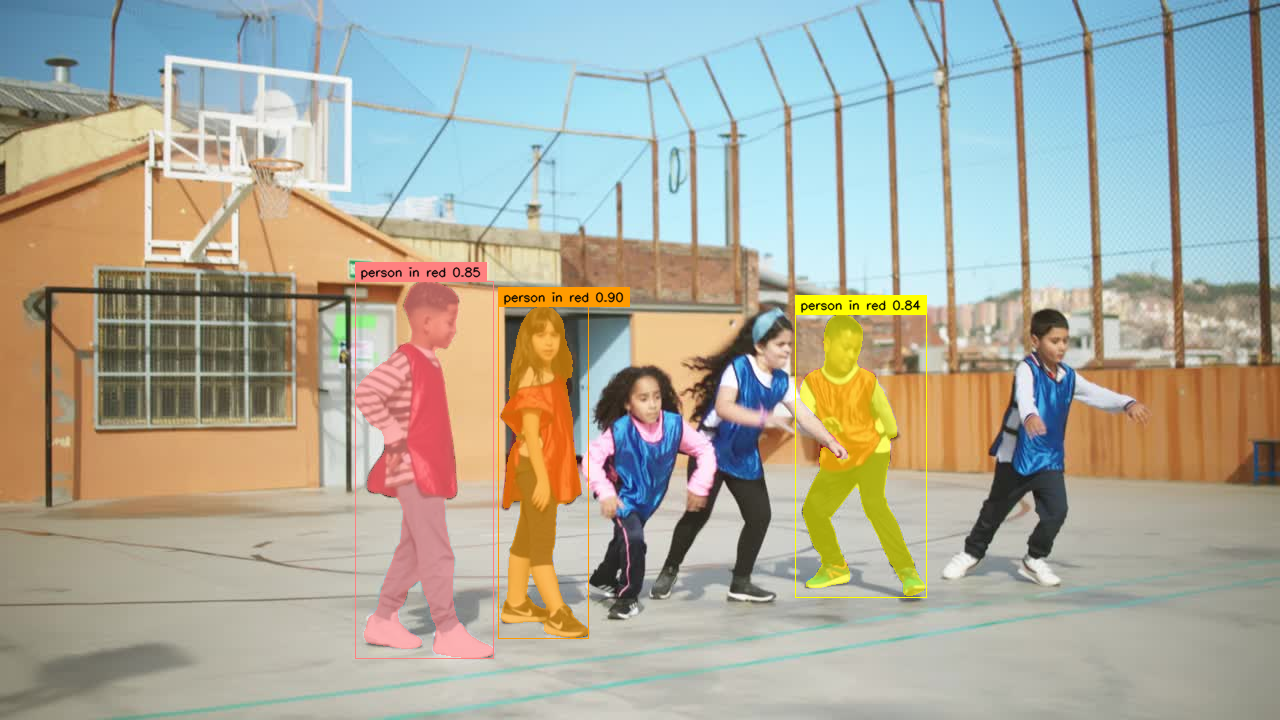
可以发现,SAM3很好的根据提示对目标进行分割。
更多示例
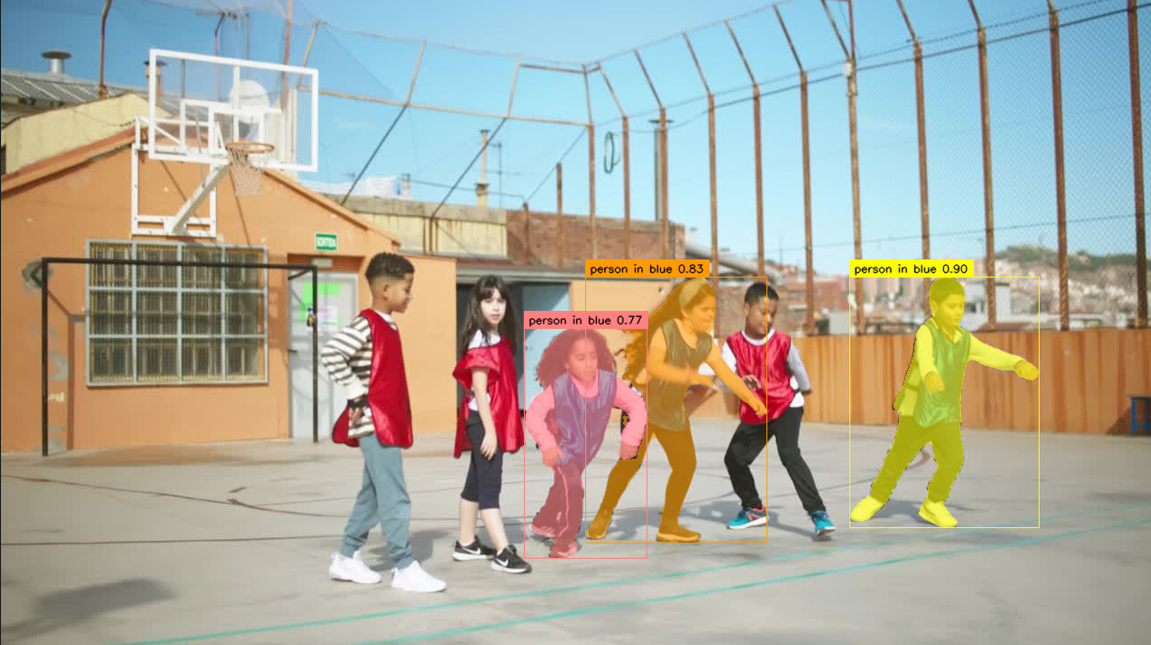
示例1
原图:

提示文本:person in blue
SAM3分割结果:
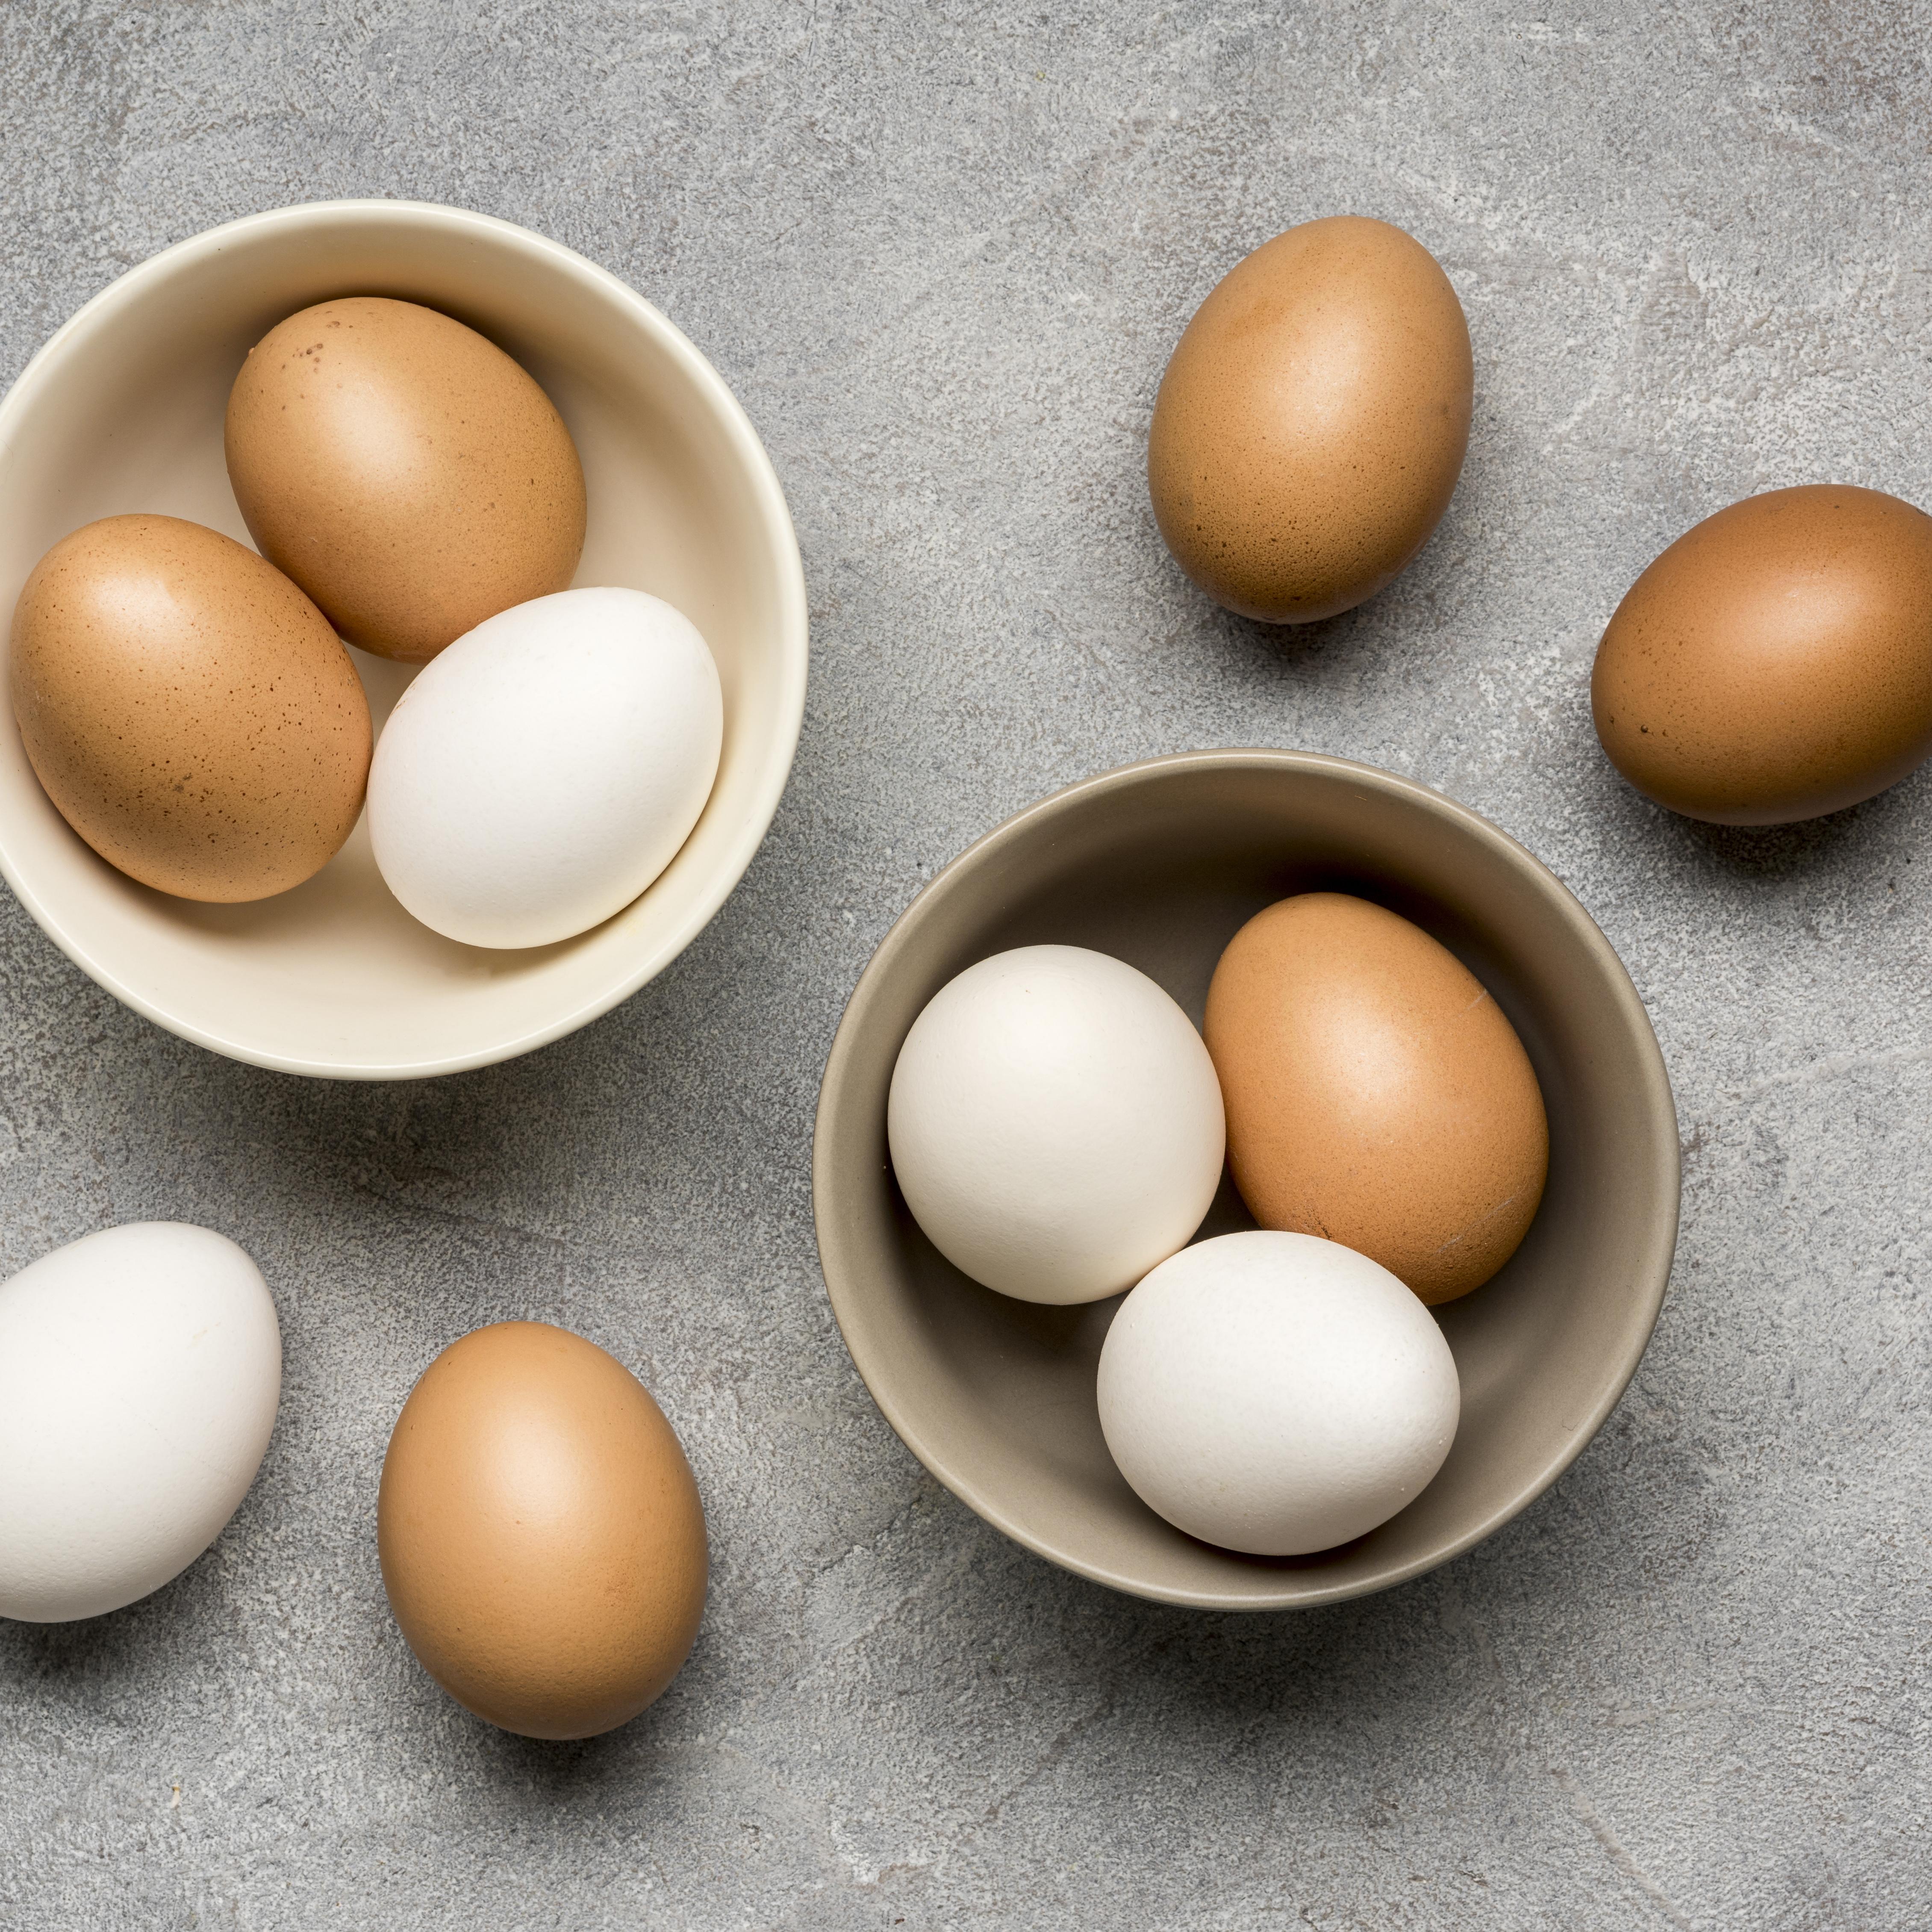
示例2
原图:
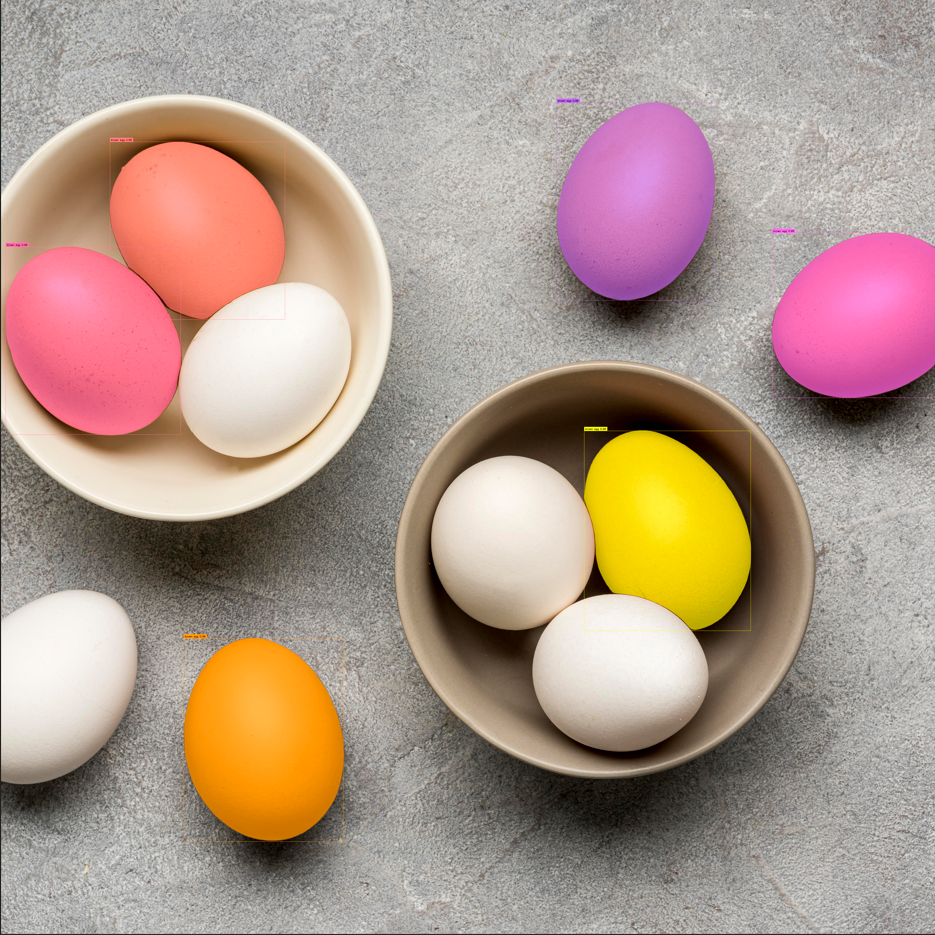
提示文本1:white egg
SAM3分割结果:
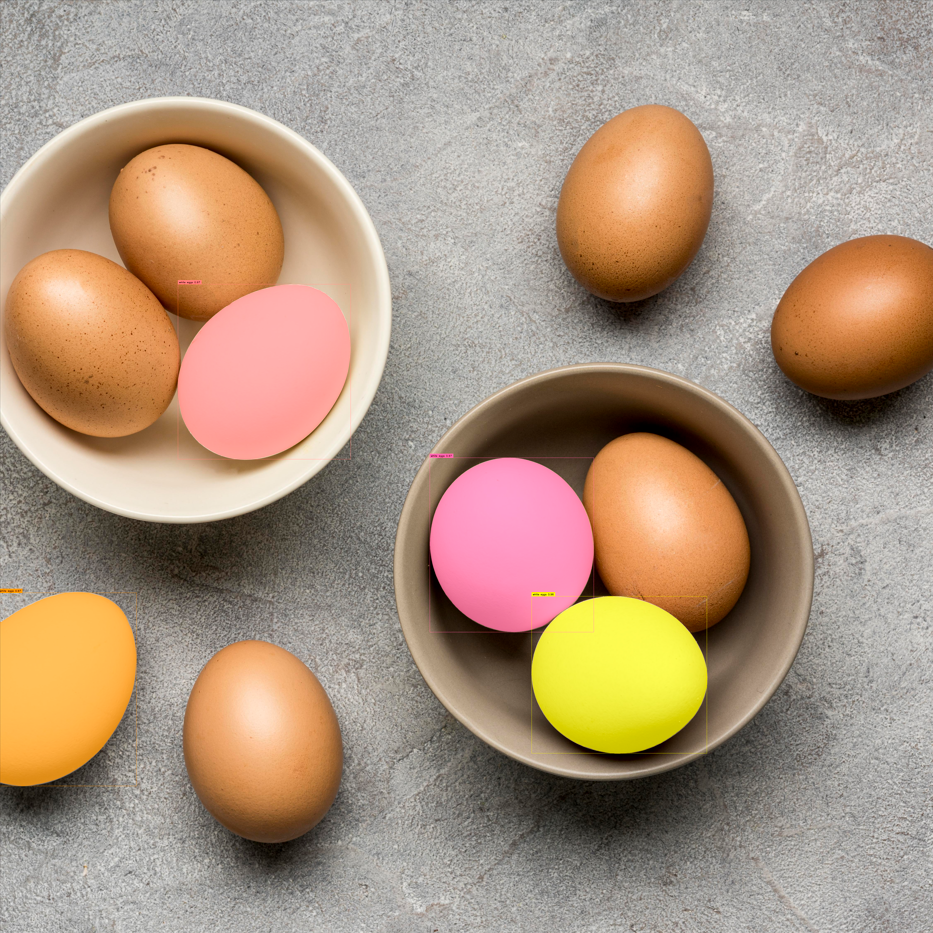
提示文本2:brown egg
SAM3分割结果:
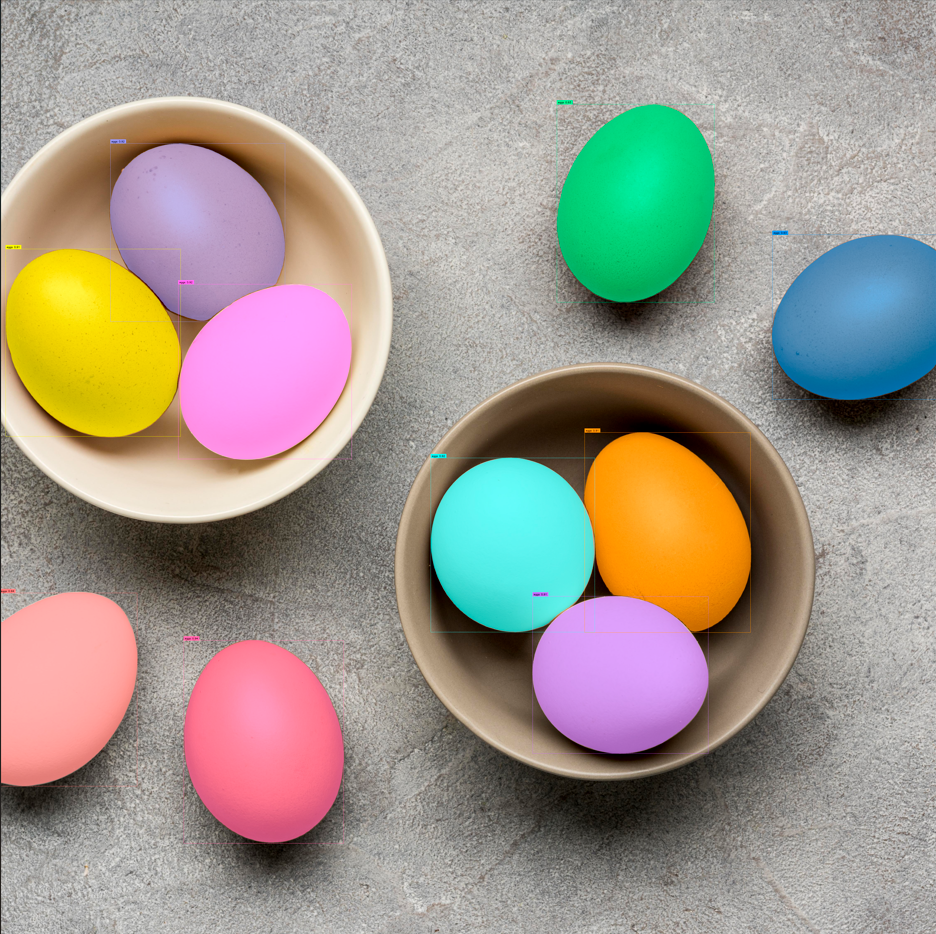
提示文本3:egg
SAM3分割结果:
示例3
原图:
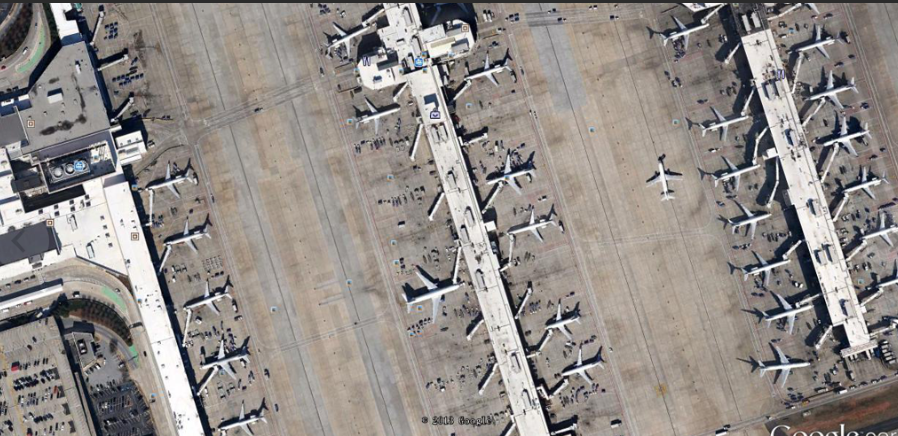
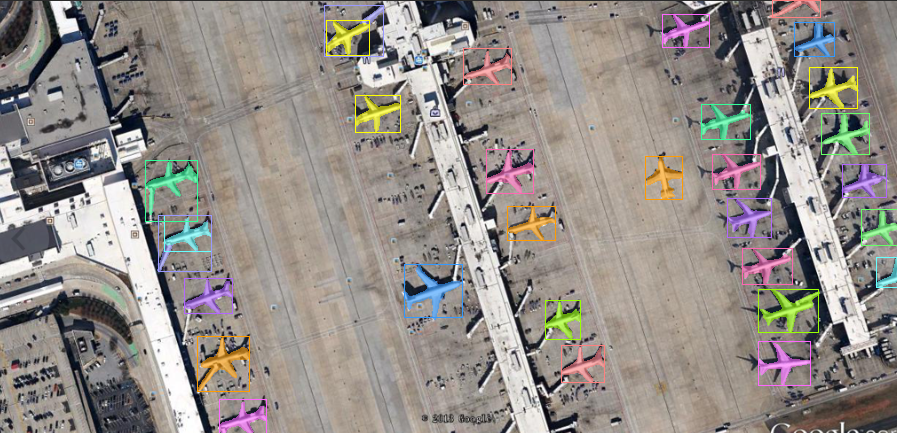
提示文本:plane
SAM3分割结果:
示例4
原图:
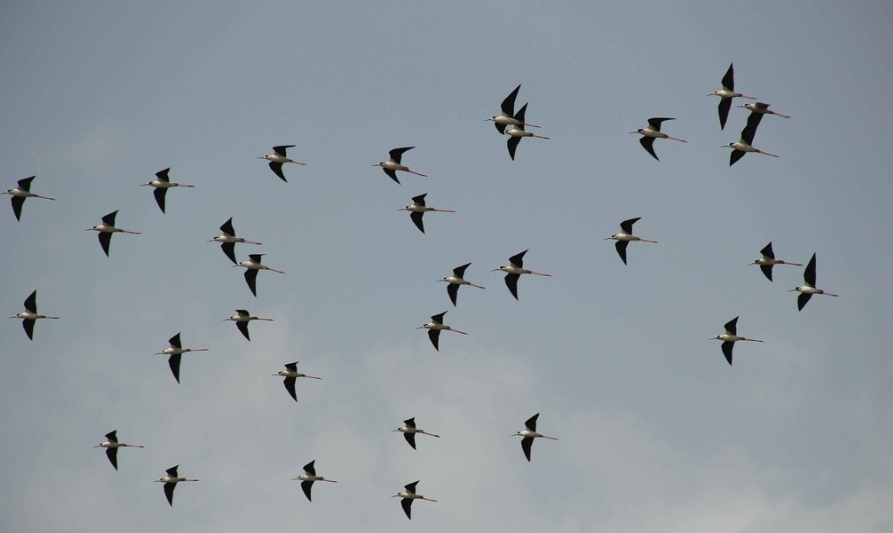
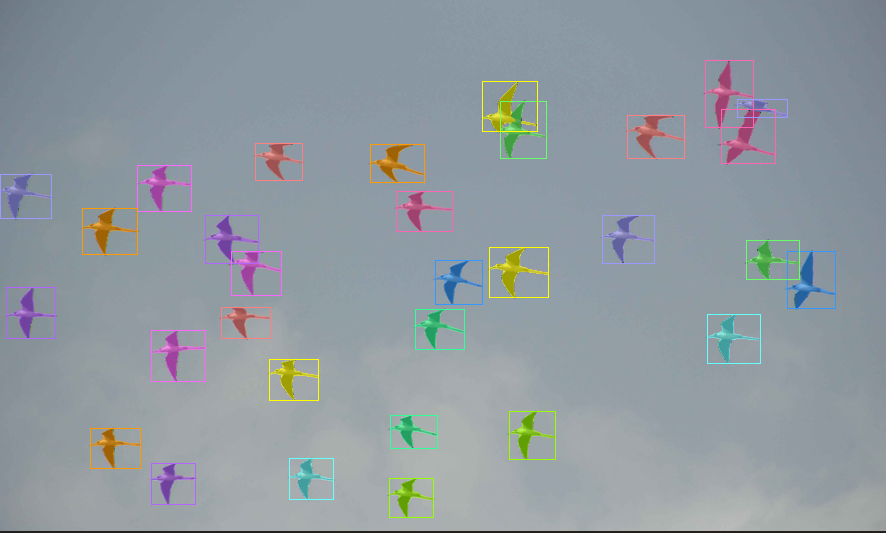
提示文本:bird
SAM3分割结果:
总结
SAM3 通过文本提示进行图像分割的流程清晰且高效,主要包括模型初始化、图像预处理、文本提示设置、模型推理和结果可视化等步骤。这种基于文本提示的分割方式大大提升了交互性和实用性,使得用户可以通过简单的文本描述来精确分割感兴趣的图像区域。
好了,这篇文章就介绍到这里,喜欢的小伙伴感谢给点个赞和关注,更多精彩内容持续更新~~
关于本篇文章大家有任何建议或意见,欢迎在评论区留言交流!