一、背景介绍
OAuth 2.0是目前最流行的授权框架,它允许第三方应用程序在不获取用户凭据的情况下,安全地访问用户在另一个服务上的资源。随着微服务架构的兴起和API安全需求的增加,OAuth 2.0已经成为现代应用程序的标配。
Spring Security提供了完整的OAuth 2.0实现,包括授权服务器、资源服务器和客户端。Spring Boot 4.0进一步简化了OAuth 2.0的配置和使用,使得开发者可以快速搭建安全可靠的OAuth 2.0服务。
本文将介绍如何使用Spring Boot 4.0实现一个最简版的OAuth 2.0 Server和Client,包括授权码模式的实现、客户端配置和资源访问流程。
二、实现目标
- 搭建一个OAuth 2.0授权服务器,支持授权码模式
- 配置客户端应用,实现与授权服务器的集成
- 实现用户认证和授权流程
- 测试客户端应用获取用户信息的功能
- 确保整个流程的安全性
三、实现过程
1. 环境准备
- JDK 17+
- Spring Boot 4.0
- Maven 3.8+
2. 实现OAuth2 Server
2.1 创建Spring Boot项目
使用Spring Initializr创建一个Spring Boot项目,添加以下依赖:
xml
<dependencies>
    <dependency>
        <groupId>org.springframework.boot</groupId>
        <artifactId>spring-boot-starter-security</artifactId>
    </dependency>
    <dependency>
        <groupId>org.springframework.boot</groupId>
        <artifactId>spring-boot-starter-oauth2-authorization-server</artifactId>
    </dependency>
    <dependency>
        <groupId>org.springframework.boot</groupId>
        <artifactId>spring-boot-starter-web</artifactId>
    </dependency>
</dependencies>
2.2 配置授权服务器
在application.yml中配置授权服务器的基本信息:
yaml
server:
  port: 9000

logging:
  level:
    org.springframework.security: trace

spring:
  security:
    user:
      name: "user"
      password: "password"
      roles:
        - "USER"
    oauth2:
      authorizationserver:
        issuer: http://localhost:9000
        client:
          login-client:
            registration:
              client-id: "login-client"
              client-secret: "{noop}openid-connect"
              client-authentication-methods:
                - "client_secret_basic"
              authorization-grant-types:
                - "authorization_code"
                - "refresh_token"
              redirect-uris:
                - "http://127.0.0.1:8080/login/oauth2/code/login-client"
                - "http://127.0.0.1:8080/authorized"
              scopes:
                - "openid"
                - "profile"
                - "email"
                - "address"
            require-authorization-consent: true
2.3 启动类
创建一个简单的启动类:
java
package com.example.oauth2.server;

import org.springframework.boot.SpringApplication;
import org.springframework.boot.autoconfigure.SpringBootApplication;

@SpringBootApplication
public class Oauth2ServerApplication {

    public static void main(String[] args) {
        SpringApplication.run(Oauth2ServerApplication.class, args);
    }

}
3. 实现OAuth2 Client
3.1 创建Spring Boot项目
使用Spring Initializr创建一个Spring Boot项目,添加以下依赖:
xml
<dependencies>
    <dependency>
        <groupId>org.springframework.boot</groupId>
        <artifactId>spring-boot-starter-security</artifactId>
    </dependency>
    <dependency>
        <groupId>org.springframework.boot</groupId>
        <artifactId>spring-boot-starter-oauth2-client</artifactId>
    </dependency>
    <dependency>
        <groupId>org.springframework.boot</groupId>
        <artifactId>spring-boot-starter-thymeleaf</artifactId>
    </dependency>
    <dependency>
        <groupId>org.springframework.boot</groupId>
        <artifactId>spring-boot-starter-web</artifactId>
    </dependency>
</dependencies>
3.2 配置客户端
在application.yml中配置客户端信息:
yaml
server:
  port: 8080

logging:
  level:
    root: INFO
    org.springframework.web: INFO
    org.springframework.security: INFO
#    org.springframework.boot.autoconfigure: DEBUG

spring:
  thymeleaf:
    cache: false
  security:
    oauth2:
      client:
        registration:
          login-client:
            provider: spring
            client-id: login-client
            client-secret: openid-connect
            client-authentication-method: client_secret_basic
            authorization-grant-type: authorization_code
            redirect-uri: http://127.0.0.1:8080/login/oauth2/code/login-client
            scope: openid,profile,email,address
            client-name: Spring
        provider:
          spring:
            authorization-uri: http://localhost:9000/oauth2/authorize
            token-uri: http://localhost:9000/oauth2/token
            jwk-set-uri: http://localhost:9000/oauth2/jwks
3.3 实现登录控制器
创建一个简单的控制器,用于处理登录后的请求:
java
package com.example.oauth2.client.controller;

import org.springframework.security.core.annotation.AuthenticationPrincipal;
import org.springframework.security.oauth2.client.OAuth2AuthorizedClient;
import org.springframework.security.oauth2.client.annotation.RegisteredOAuth2AuthorizedClient;
import org.springframework.security.oauth2.core.user.OAuth2User;
import org.springframework.stereotype.Controller;
import org.springframework.ui.Model;
import org.springframework.web.bind.annotation.GetMapping;

@Controller
public class OAuth2LoginController {

    @GetMapping("/")
    public String index(Model model,
                        @RegisteredOAuth2AuthorizedClient OAuth2AuthorizedClient authorizedClient,
                        @AuthenticationPrincipal OAuth2User oauth2User) {
        model.addAttribute("userName", oauth2User.getName());
        model.addAttribute("clientName", authorizedClient.getClientRegistration().getClientName());
        model.addAttribute("userAttributes", oauth2User.getAttributes());
        return "index";
    }

}
3.4 创建filter解决localhost访问时多次重定向问题
创建filter包并添加LoopbackIpRedirectFilter 类
java
package com.example.oauth2.client.filter;

import jakarta.annotation.Nonnull;
import jakarta.servlet.FilterChain;
import jakarta.servlet.ServletException;
import jakarta.servlet.http.HttpServletRequest;
import jakarta.servlet.http.HttpServletResponse;
import org.springframework.core.Ordered;
import org.springframework.core.annotation.Order;
import org.springframework.stereotype.Component;
import org.springframework.web.filter.OncePerRequestFilter;
import org.springframework.web.util.UriComponents;
import org.springframework.web.util.UriComponentsBuilder;

import java.io.IOException;

@Component
@Order(Ordered.HIGHEST_PRECEDENCE)
public class LoopbackIpRedirectFilter extends OncePerRequestFilter {

	@Override
	protected void doFilterInternal(HttpServletRequest request, @Nonnull HttpServletResponse response,
                                    @Nonnull FilterChain filterChain)
			throws ServletException, IOException {
		if (request.getServerName().equals("localhost") && request.getHeader("host") != null) {
			UriComponents uri = UriComponentsBuilder.fromUriString(request.getRequestURL().toString())
				.host("127.0.0.1")
				.build();
			response.sendRedirect(uri.toUriString());
			return;
		}
		filterChain.doFilter(request, response);
	}

}
3.5 创建视图模板
在src/main/resources/templates目录下创建index.html文件:
html
<!DOCTYPE html>
<html xmlns:th="http://www.thymeleaf.org">
<head>
    <meta charset="UTF-8">
    <title>OAuth2 Login</title>
</head>
<body>
    <h1>Welcome, <span th:text="${userName}"></span>!</h1>
    <p>You logged in with: <span th:text="${clientName}"></span></p>
    <h2>User Attributes:</h2>
    <ul>
        <li th:each="attr : ${userAttributes}">
            <span th:text="${attr.key}"></span>: <span th:text="${attr.value}"></span>
        </li>
    </ul>
</body>
</html>
4. 一些说明
1、和springboot4配套的spring-boot-starter-oauth2-authorization-server版本是4.0, 对应的authorization-server的版本是7.0.0,在这个版本中默认使用OIDC模式且开启PKCE更安全,相对之前的版本也有一些配置API的改动。
2、OIDC流程中有一些固定的server端API,如/.well-known/openid-configuration、/oauth2/jwks等。
3、默认生成的jwks信息使用的是随机的key,保存在内存中,所有每次启动都会更新,这个会导致服务端重启后客户端需要重新登录。解决方式是可以使用自定义的key文件。
4、在本文中默认使用的都是配置文件,如用户和客户端信息的配置,当然也可以使用代码Bean注册的方式注入这些信息。
5、目前所有客户端和用户信息都保存在内存中,且客户端使用的基本都是默认配置,后续我们会继续更新将这些信息维护到数据库或者redis中。
5. 测试流程及效果
-
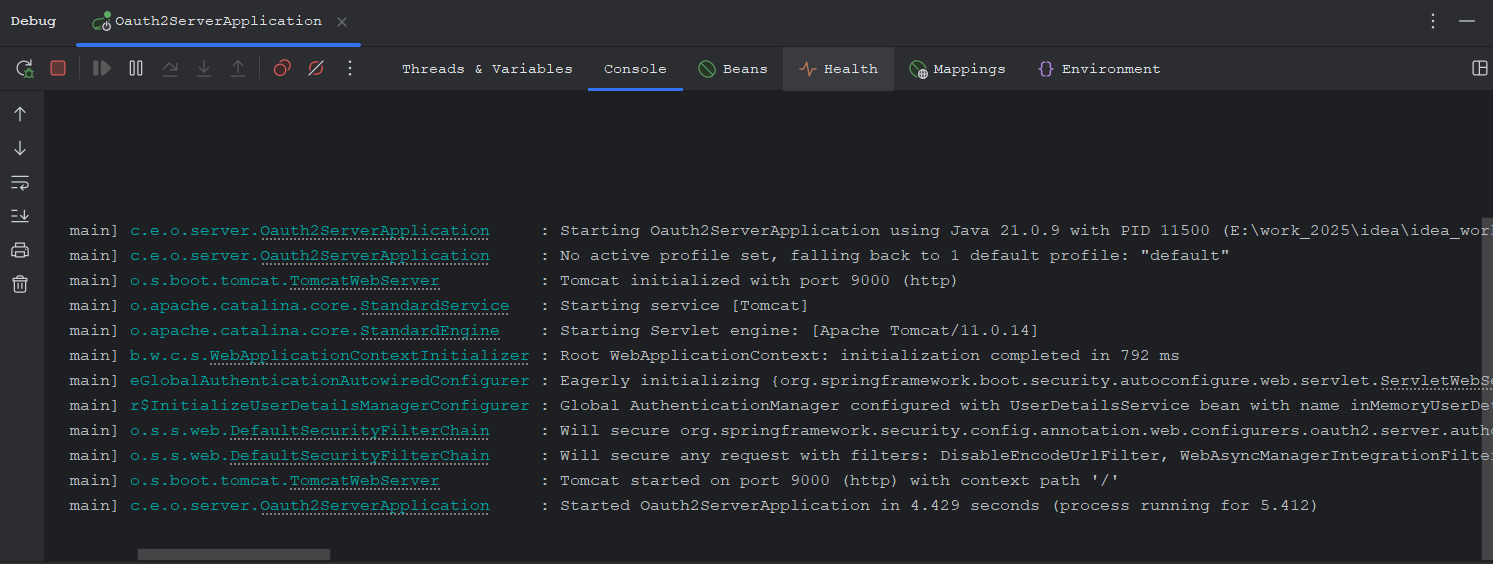
启动OAuth2 Server(端口9000)
-
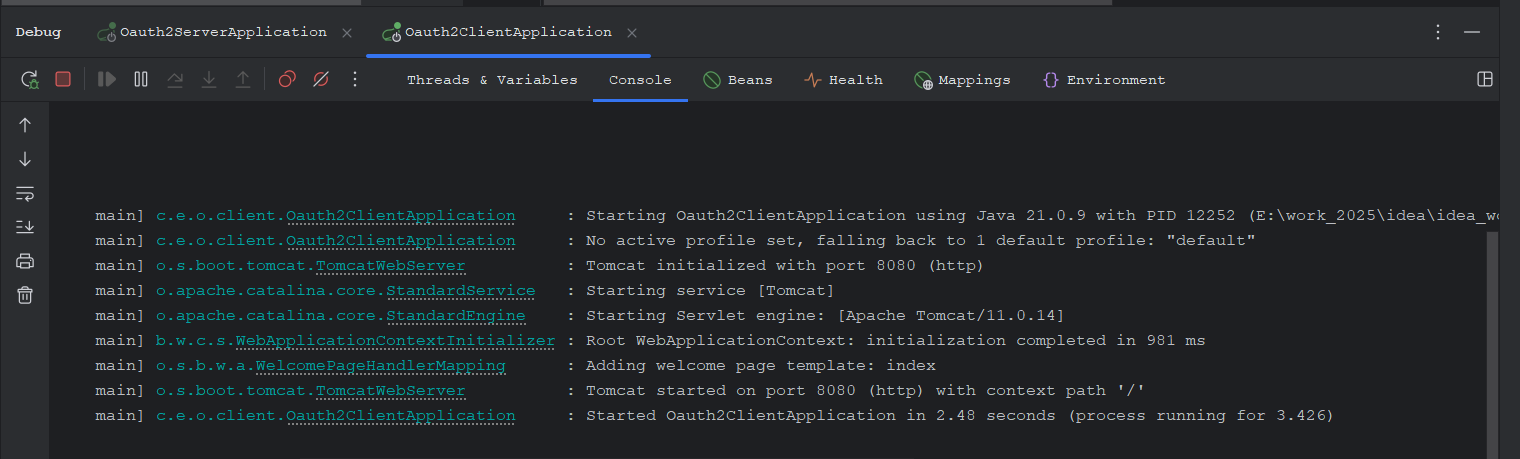
启动OAuth2 Client(端口8080)
-
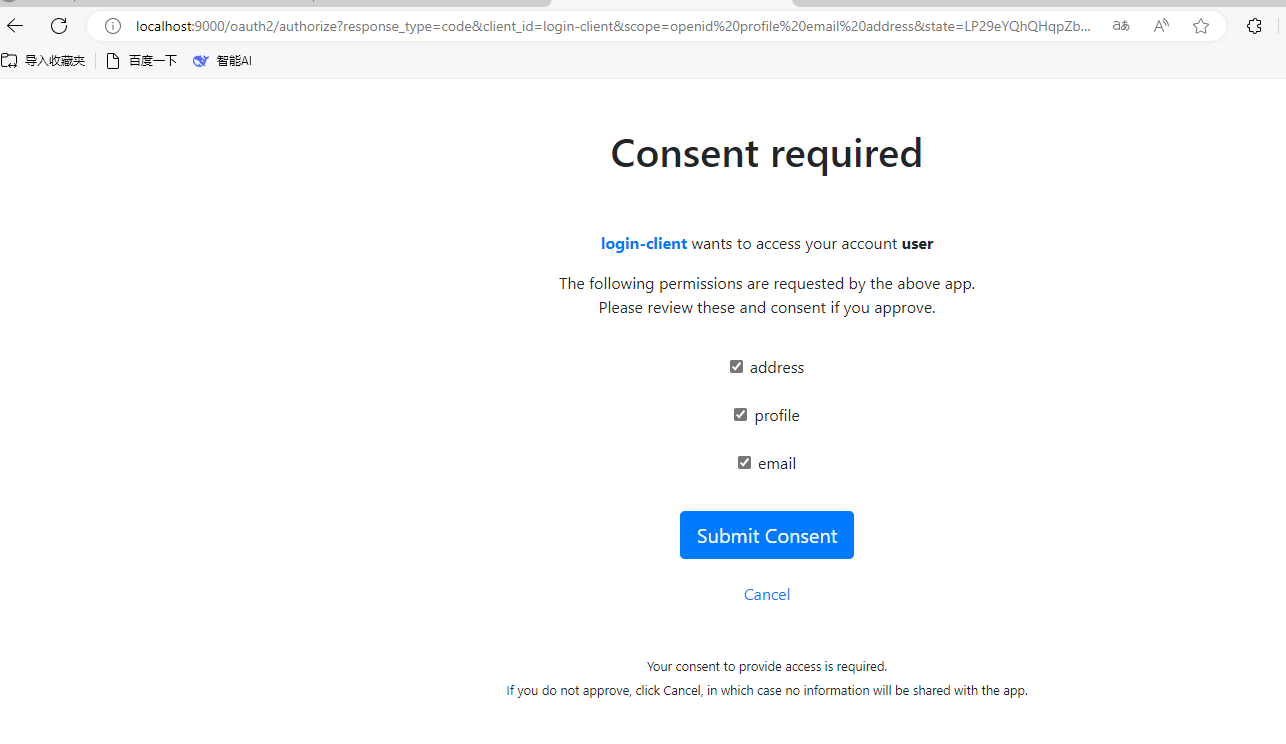
在浏览器中访问
http://localhost:8080 -
系统会重定向到OAuth2 Server的登录页面

-
使用用户名
user和密码password登录 -
授权客户端访问权限
-
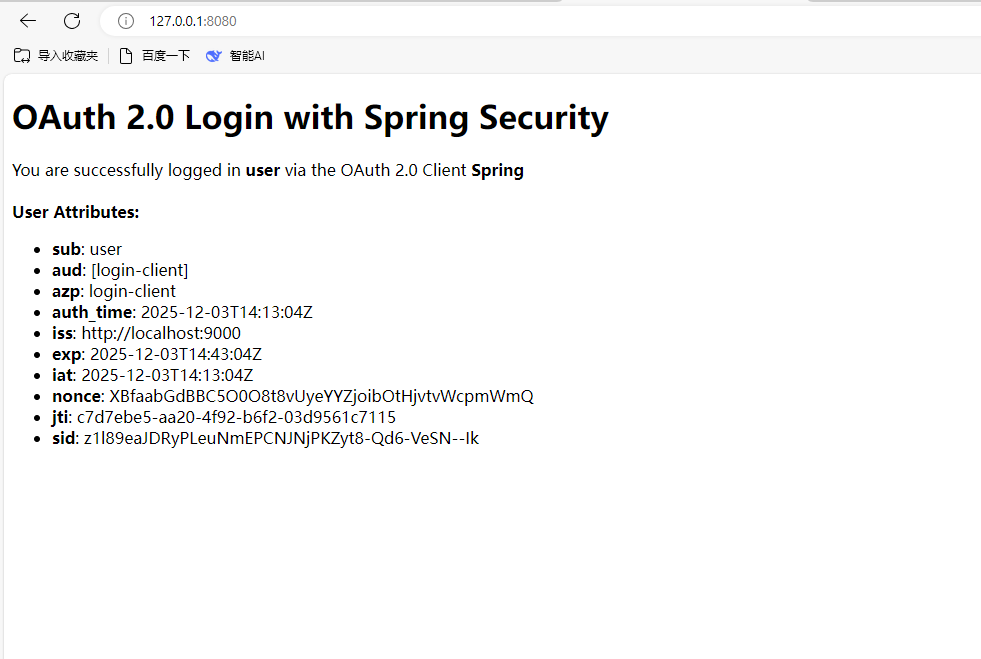
授权完成后系统会重定向回客户端应用,并显示用户信息
四、改进点
1. 安全性增强
- 使用更安全的客户端认证方式,如
client_secret_post或private_key_jwt - 配置HTTPS,确保通信安全
- 实现更细粒度的权限控制
- 添加访问令牌的有效期管理
2. 功能扩展
- 引入数据库和redis,存储用户信息、客户端配置、授权码、访问令牌等
- 自定义登录页面、授权页面等
- 自定义jwks相关配置
3. 性能优化
- 实现令牌缓存机制
- 优化授权服务器的响应速度
- 配置适当的连接池和线程池
4. 监控和日志
- 添加详细的日志记录
- 实现监控指标收集
- 添加健康检查端点
- 实现告警机制
五、总结
本文介绍了如何使用Spring Boot 4.0实现一个最简版的OAuth 2.0 Server和Client。通过Spring Security OAuth2 Authorization Server和OAuth2 Client的集成,我们可以快速搭建一个安全可靠的OAuth 2.0服务。
Spring Boot 4.0大大简化了OAuth 2.0的配置和使用,使得开发者可以专注于业务逻辑的实现,而不必关心底层的安全细节。同时,Spring Security提供了丰富的扩展点,允许开发者根据自己的需求进行定制。
在实际项目中,我们还需要考虑更多的安全性、性能和扩展性问题,如使用HTTPS、实现细粒度的权限控制、添加监控和日志等。通过不断的优化和改进,我们可以构建一个更加安全、可靠和高效的OAuth 2.0服务。
OAuth 2.0是现代应用程序的重要组成部分,掌握OAuth 2.0的实现和使用对于开发者来说是非常重要的。希望本文能够帮助大家更好地理解和使用OAuth 2.0。