第一步:安装
使用包管理器 npm 或 yarn来安装 VueQuill。
bash
npm install @vueup/vue-quill@latest --save
# 或者
yarn add @vueup/vue-quill@latest
第二步:完成配置
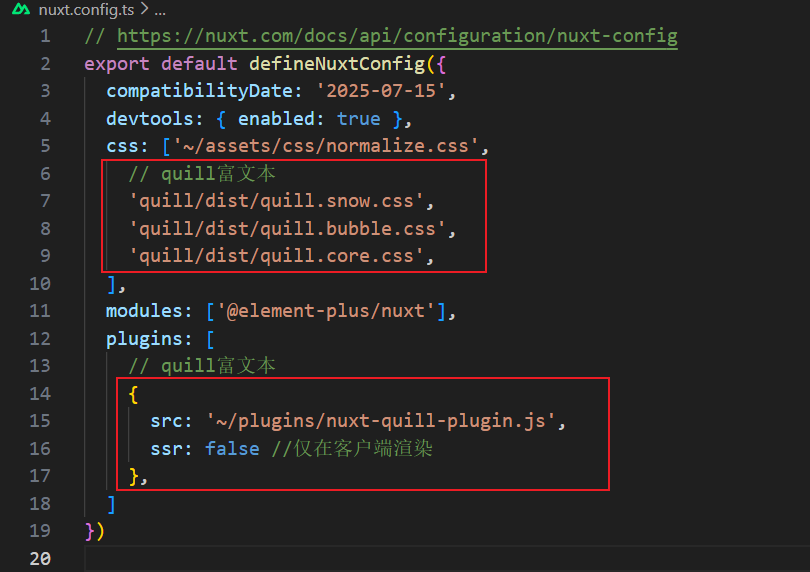
(1)打开nuxt.js的nuxt.config.ts配置文件,添加如下配置:
js
export default defineNuxtConfig({
  css: [
    // quill富文本
    'quill/dist/quill.snow.css',
    'quill/dist/quill.bubble.css',
    'quill/dist/quill.core.css',
  ],
  plugins: [
    // quill富文本
    {
      src: '~/plugins/nuxt-quill-plugin.js',
      ssr: false //仅在客户端渲染
    },
  ]
})
如下图所示:
(2)在nuxt.js的app目录下新建plugins文件夹,在该文件夹下新建nuxt-quill-plugin.js文件,nuxt-quill-plugin.js文件内容如下:
import Vue from "vue";
let VueQuillEditor;
if (process.browser) {
  VueQuillEditor = require("vue-quill-editor/dist/ssr");
}

Vue.use(VueQuillEditor);
注意:编译器可能会报警告:
WARN Plugin E:/xxxxx/app/plugins/nuxt-quill-plugin.js has no default export and will be ignored at build time. Add export default defineNuxtPlugin(() => {}) to your plugin.,建议无视它。
第三步:封装MyEditor.vue富文本组件
在在nuxt.js的app目录下的components文件夹中新建MyEditor.vue文件,文件内容如下:
html
<template>
    <div>
        <client-only>
            <QuillEditor theme="snow" :options="options" :content="content" contentType="html" />
        </client-only>
    </div>
</template>

<script setup>
import { ref } from 'vue'
import { QuillEditor } from '@vueup/vue-quill';
const props = defineProps({
    content: {
        type: String,
        default: ""
    }
})


const options = {
    readOnly: false,
    placeholder: '请输入内容',
    theme: 'snow',
    modules: {
        toolbar: [
            ['bold', 'italic', 'underline', 'strike'],        // 切换按钮
            ['blockquote', 'code-block'],
            [{ 'header': 1 }, { 'header': 2 }],               // 标题自定义按钮值
            [{ 'list': 'ordered' }, { 'list': 'bullet' }],   // 列表
            [{ 'script': 'sub' }, { 'script': 'super' }],      // 上标或下标
            [{ 'indent': '-1' }, { 'indent': '+1' }],          // 减少缩进/缩进
            [{ 'direction': 'rtl' }],                         // 文本方向
        ]
    }
}

</script>

<style lang="scss" scoped></style>
注意:一定要用nuxt.js的
<client-only>包裹<QuillEditor>
第四步:引用组件
如下代码所示:
<template>
  <div>
 	<MyEditor :content="content" />
  </div>
</template>
<script setup>
import { ref } from 'vue';
const content = ref("<h2>这是文本标题内容</h2>")
</script>

<style scoped>

</style>
至此,就完成了