一 异步编程
1. 协程
协程不是计算机提供的,是人员创造的;也可以称为微线程,是一种用户态上下文切换技术。简而言之,就是通过一个县程序实现代码相互切换执行。人为控制在一个函数之间来回切换
python
def func1():
    print(1)
    ...
    print(2)

def func2():
    print(3)
    ...
    pirnt(4)


func1()
func2()
实现协程有以下几种方式
- greenlet,早期模块
- yield关键字
- asyncio装饰器(py3.4)
- async, await关键字(py3.5)
2.协程的实现方式
2.1 greenlet
python
pip/pip3 install greenlet实现
python
form greenlet import greenlet

def func1():
    print(1)
    gr2.switch()  #切换到func2函数
    print(2)
    gr2.switch()  #切换到func2函数,从上一次执行位置继续向后执行

def func2():
    print(3)
    gr1.switch() #切换到func1函数,从上一次执行位置继续向后执行
    print(4)


gr1 = greenlet(func1)
gr2 = greenlet(func2)

gr1.switch()  #执行func1函数

#输出顺序 -》 1,3,2,4
2.2 yield 关键字
python
def func1():
    yield 1
    yield from func2()
    yield 2

def func2():
    yield 3
    yield 4

f1 = func1()

for item in f1:
    print(item)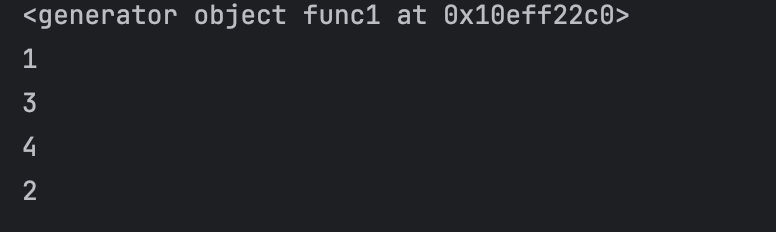
2.3 asyncio
python3.4 之后
python
@asyncio.coroutine
def func1():
    print(1)
    yield from asyncio.sleep(2) #遇到IO耗时操作,自动化切换到tasks的其他任务
    print(2)

@asyncio.coroutine
def func2():
    print(3)
    yield from asyncio.sleep(2) #遇到IO耗时操作,自动化切换到tasks的其他任务
    print(4)

tasks = [
    asyncio.ensure_future(func1()),
    asyncio.ensure_future(func2()),
]

loop = asyncio.get_event_loop()
loop.run_until_complete(asyncio.wait(tasks))

#打印 出来也是1324
和前端js的宏任务,微任务一样,有点放在队列的意思
2.4 async await
python 3.5 及以后版本
python
async def func1():
    print(1)
    await asyncio.sleep(2)  # IO耗时操作时,自动切换到其他任务
    print(2)


async def func2():
    print(3)
    await asyncio.sleep(2)  # IO耗时操作时,自动切换到其他任务
    print(4)


# 主协程:所有异步逻辑的入口(必须用 async def 定义)
async def main():
    # 1. 用 create_task() 替代 ensure_future()(3.13 推荐创建任务的方式)
    task1 = asyncio.create_task(func1())
    task2 = asyncio.create_task(func2())

    # 2. 等待所有任务完成(两种方式任选,效果一致)
    # 方式一:逐个 await(适合任务数量少的情况)
    await task1
    await task2

    # 方式二:用 gather() 批量等待(适合任务多的情况,更简洁)
    # await asyncio.gather(task1, task2)


if __name__ == "__main__":
    # 3. 用 asyncio.run() 启动主协程(3.13 唯一推荐的启动方式)
    # 自动创建/管理/关闭事件循环,无需手动操作 loop
    asyncio.run(main())
3. 协程的意义
在一个线程中,如果遇到了io等待的时间,线程不会等待,会利用空闲的时候再去干点其他的事情
案例: 下载图片
3.1 传统方式(同步)
python
pip/pip3 install requests
python
import requests
def dowload_images(url):
    print("开始下载", url)
    response = requests.get(url)
    print("下载完成")
    print(response)
    file_name = url.split("/")[-1]

    # 以2进制的方式写入文件,直接下载到当前文件夹
    with open(file_name, mode="wb") as file_object:
        file_object.write(response.content)

url_list = [
    'https://car2.autoimg.cn/cardfs/series/g31/M07/74/F8/400x300_autohomecar__ChxoHWYU1RCAPDx5AAjYvgS1ZC8852.png.png',
    'https://car3.autoimg.cn/cardfs/series/g33/M06/AD/95/400x300_autohomecar__ChxpVWkRnliACHALAC3azVUgZSs382.png.png'
]

for item in url_list:
    dowload_images(item)

# 按照写法,假设一张图片需要下载2分钟,那么2张图就是4分钟
按照协程的写法(异步)
python
#aiohttp -Python 异步 HTTP 请求库,专门用于在异步程序中发送 HTTP/HTTPS 请求(对应同步的 requests 库);
# 核心用途:支持异步请求,不会因为等待一个请求的响应而阻塞其他任务(这是并发下载的关键
import aiohttp

#导入 Python 内置的异步编程核心库 ------ 负责管理事件循环、创建任务、调度协程等,是所有 Python 异步
#程序的 "发动机"。
import asyncio

# 返回一个协程对象
async def fetch(session, url):
        print("发送请求", url)
        async with session.get(url, verify_ssl=False) as response:
            print("请求成功")
            content = await response.content.read()
            file_name = url.split('_')[-1]
            with open(file_name, 'wb') as f:
                print("写入开始")
                f.write(content)
                print("写入成功")

async def main():
    async  with aiohttp.ClientSession() as session:
        url_list = [
            'https://car2.autoimg.cn/cardfs/series/g31/M07/74/F8/400x300_autohomecar__ChxoHWYU1RCAPDx5AAjYvgS1ZC8852.png.png',
            'https://car3.autoimg.cn/cardfs/series/g33/M06/AD/95/400x300_autohomecar__ChxpVWkRnliACHALAC3azVUgZSs382.png.png'
        ]
        tasks = [ asyncio.create_task(fetch(session, url)) for url in url_list]
        await  asyncio.wait(tasks)

if __name__ == '__main__':
    asyncio.run(main())

#可以看到打印,请求是一起发送的
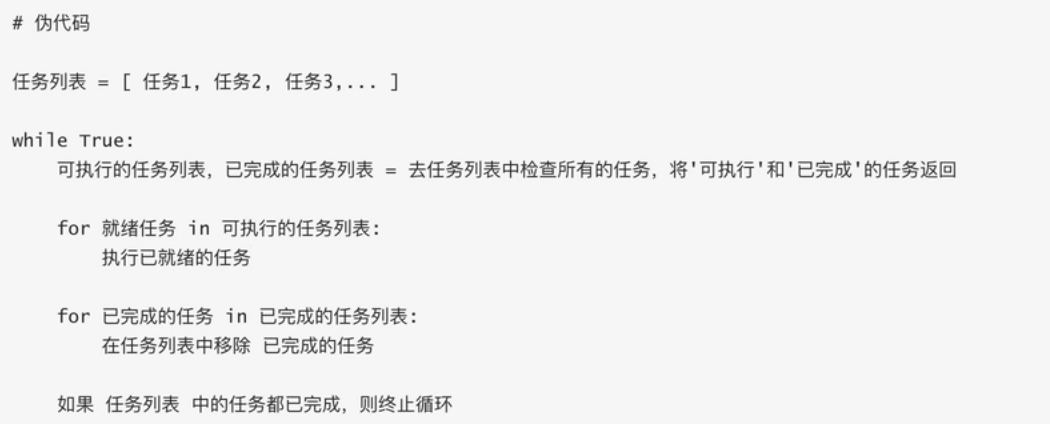
4. 异步编程
4.1 事件循环
检测并执行某些代码
4.2 快速上手
协程函数: 定义函数的时候 async def 函数名
协程对象:执行协程函数得到的对象
python
async def func():
    pass

result = func()
注意:创建协程函数创建协程对象,函数内部不会执行
python
improt asyncio
async def func():
pirnt("开始执行了")
result = func()
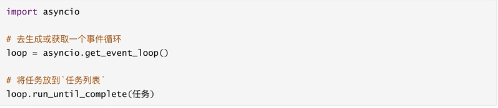
#获取事件循环,执行事件循环
# loop = asyncio.get_event_loop()
# loop.run_until_complete(result )
asyncio.run( result ) #pyhon3.7 后写法4.3 await
await + 可等待对象(协程对象,Future, Task对象 -> IO等待)
python
import asyncio

async def func():
    print("执行1")
    respones = await asyncio.sleep(2)
    print("结束")

asyncio.run( func() )
python
import asyncio

async def others():
    print("others1")
    await asyncio.sleep(2)
    print("others2")
    return "返回值"

async def func():
    print("我是func1-1")
    r = await others()
    print(r)

    r1 = await others()
    print(r1)
    print("我是func1-2")

asyncio.run(func())
4.4 Task对象
帮助在事件循环中添加多个任务

python
import asyncio

async def func():
    print(1)
    await asyncio.sleep(1)
    print(2)
    return "返回值"

async def main():
    print("main开始")

    #创建task对象,将当前执行函数添加到事件循环中
    # task1 = asyncio.create_task(func())
    # task2 = asyncio.create_task(func())

    # ret1 = await task1
    # ret2 = await task2

    # name,加入队列的名称
    task_list = [
        asyncio.create_task(func(), name='task1'),
        asyncio.create_task(func(), name='task2')
    ]

    #timeout 是否延迟执行, 返回两种状态,done中是执行完成后的结果列表
    done ,pendding= await asyncio.wait(task_list, timeout=None)
    print(done)


# 创建事件循环队列,并将main添加在里面
asyncio.run(main())
4.5 asyncio.Future 对象
_state 维护了一个状态
Task继承了Future,Task内部await结果的处理基于Future对象来的
python
import asyncio
async def main():
    # 获取到当前事件循环对象
    loop = asyncio.get_event_loop()
    # 创建一个任务(Future对象) 这个任务什么都不干
    fut = loop.create_future()

    await fut
asyncio.run(main())
python
import asyncio
async def func(fut):
print(1)
await asyncio.sleep(1)
fut.set_result(66)
async def main():
# 获取到当前事件循环对象
loop = asyncio.get_event_loop()
# 创建一个任务(Future对象) 这个任务什么都不干
fut = loop.create_future()
#创建一个任务(task对象),绑定了func函数在1s后,会给fut赋值
#即手动设置了future任务的最终结果
await loop.create_task(func(fut))
r = await fut
print(r)
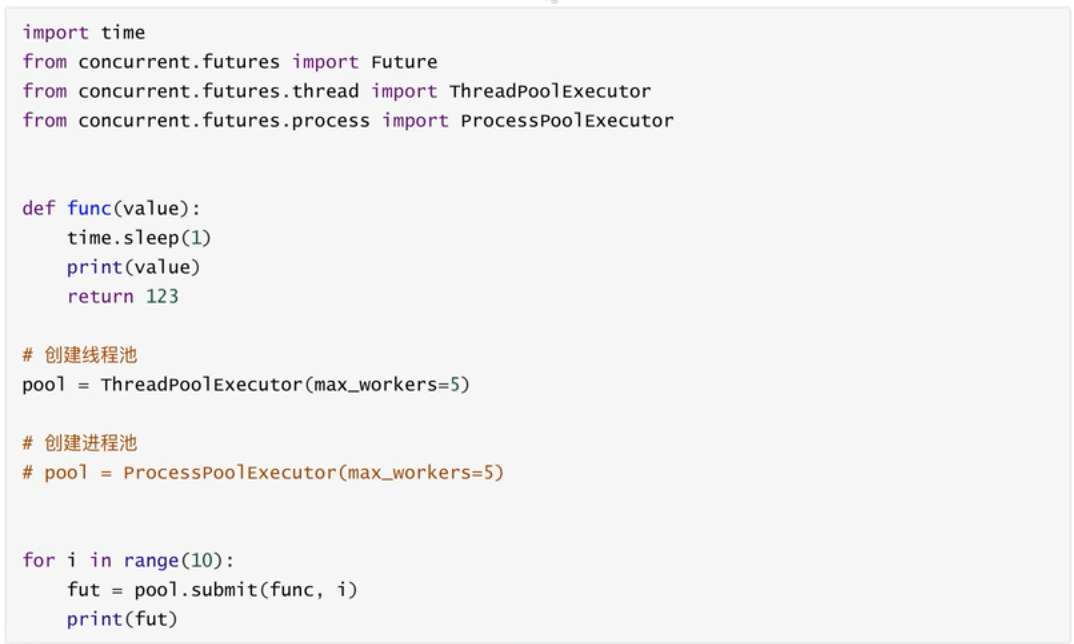
asyncio.run(main())4.6 concurrent的Future对象
使用线程池,进程池实现异步操作时用到的对象
4.7 异步可迭代对象
可在async for 语句中被使用的对象。
创建一个异步迭代对象,循环生成 1~99 的数字,直到生成第 100 次时停止迭代
python
import asyncio

class Reader(object):

    def __init__(self):
        self.count = 0

    async def readline(self):
        self.count += 1
        if self.count == 100:
            return None
        return self.count

    def __aiter__(self):
        return self

    async def __anext__(self):
        val = await self.readline()
        if val is None:
            raise StopAsyncIteration
        return val

async def func():
    obj = Reader()
    async for item in obj:
        print(item)

asyncio.run(func())
5. 详细讲解 async await
5.1. 定义协程函数:async def
要创建一个 "能异步执行的函数",必须用 async def 开头(不能用普通 def):
python
# 这是一个协程函数(注意 async def)
async def my_coroutine():
    print("协程开始执行")
    return "协程执行完成"
注意:协程函数不能直接调用!
如果像普通函数一样调用 my_coroutine(),不会执行函数内部代码,只会返回一个 "协程对象":
python
result = my_coroutine()  # 不会打印任何内容
print(type(result))       # 输出:<class 'coroutine'>(是协程对象,不是返回值)
5.2. 运行协程:asyncio.run()
要真正执行协程函数,必须通过 asyncio.run()(Python 3.7+ 内置,最简单的启动方式):
python
import asyncio  # 必须导入异步库

async def my_coroutine():
    print("协程开始执行")
    return "协程执行完成"

# 用 asyncio.run() 启动协程(这是异步程序的入口)
final_result = asyncio.run(my_coroutine())
print(final_result)  # 输出:协程执行完成
执行流程:
asyncio.run()会创建一个 "事件循环"(可以理解为 "任务调度中心",负责安排协程执行);- 事件循环运行
my_coroutine协程,执行函数内部代码; - 协程执行完后,
asyncio.run()会返回协程的返回值; - 最后关闭事件循环。
5.3. 暂停协程:await
await 是 "等待" 的意思,只能用在 协程函数内部,作用是:
- 暂停当前协程的执行,去执行其他协程或异步操作;
- 等被等待的操作完成后,再恢复当前协程的执行。
语法格式:
python
async def 协程A():
    # 等待 协程B 执行完成,拿到返回值后再继续
    result = await 协程B()
    print(result)
示例:用 await 等待另一个协程
python
import asyncio

# 定义一个需要"耗时"的协程(模拟 IO 操作,比如网络请求)
async def fake_io_operation():
    print("开始执行耗时操作(比如下载文件)")
    await asyncio.sleep(2)  # 模拟 2 秒耗时(注意:必须用 asyncio.sleep,不能用 time.sleep!)
    return "耗时操作完成"

# 主协程
async def main():
    print("主协程开始")
    # 等待 fake_io_operation 完成,拿到返回值
    result = await fake_io_operation()
    print("主协程继续执行,拿到结果:", result)

# 启动主协程
asyncio.run(main())
执行结果(会等待 2 秒):
plaintext
python
主协程开始
开始执行耗时操作(比如下载文件)
# 此处暂停 2 秒(期间事件循环可以安排其他任务,但这个例子只有一个任务)
主协程继续执行,拿到结果: 耗时操作完成
关键提醒:
await后面必须跟 "可等待对象" (常见的是:协程对象、asyncio.Task、asyncio.Future等);- 绝对不能在普通
def函数里用await; - 不能用
time.sleep(2)模拟耗时!time.sleep是 "同步阻塞",会让整个事件循环卡住;asyncio.sleep是 "异步非阻塞",会让当前协程暂停,事件循环可以去做其他事。
5.4 案例
5.4.1 为什么要用异步
"为什么要用异步?同步不是挺好吗?" 看这个对比案例就懂了!
场景:模拟 3 个耗时任务(比如下载 3 个文件,每个任务耗时 2 秒)
1. 同步版本(普通 def + time.sleep)
python
import time

# 同步函数:每个任务耗时 2 秒
def sync_task(name):
    print(f"同步任务 {name} 开始")
    time.sleep(2)  # 同步阻塞,整个程序都要等
    print(f"同步任务 {name} 结束")

# 同步执行3个任务
def sync_main():
    start_time = time.time()
    sync_task("A")
    sync_task("B")
    sync_task("C")
    end_time = time.time()
    print(f"同步总耗时:{end_time - start_time:.2f} 秒")

sync_main()
执行结果(总耗时~6 秒):
同步任务 A 开始
同步任务 A 结束
同步任务 B 开始
同步任务 B 结束
同步任务 C 开始
同步任务 C 结束
同步总耗时:6.01 秒
→ 问题:任务 A、B、C 按顺序执行,每个都要等前一个完成,总耗时是 2+2+2=6 秒。
2. 异步版本(async def + await + asyncio.sleep)
python
import asyncio
import time

# 异步任务:每个任务"耗时"2秒(非阻塞)
async def async_task(name):
    print(f"异步任务 {name} 开始")
    await asyncio.sleep(2)  # 异步暂停,事件循环可以去执行其他任务
    print(f"异步任务 {name} 结束")

# 异步执行3个任务
async def async_main():
    start_time = time.time()
    # 同时启动3个异步任务(关键:不是顺序执行,是并发执行)
    await asyncio.gather(
        async_task("A"),
        async_task("B"),
        async_task("C")
    )
    end_time = time.time()
    print(f"异步总耗时:{end_time - start_time:.2f} 秒")

# 启动异步主协程
asyncio.run(async_main())
执行结果(总耗时~2 秒):
异步任务 A 开始
异步任务 B 开始
异步任务 C 开始
异步任务 A 结束
异步任务 B 结束
异步任务 C 结束
异步总耗时:2.01 秒
→ 奇迹:3 个任务 "同时执行",总耗时只有 2 秒!
关键解释:
asyncio.gather(task1, task2, task3):让多个协程 "并发执行"(同时启动,不用等前一个开始);- 当
async_task(A)执行到await asyncio.sleep(2)时,会暂停自己,事件循环立刻去执行async_task(B); async_task(B)暂停后,再去执行async_task(C);- 2 秒后,3 个任务的
sleep都完成,各自恢复执行,打印 "结束"。
这就是异步的核心价值:在等待某个耗时操作时,不闲着,去处理其他任务,大幅节省总时间。
5.4.2 异步获取网页
实际开发中,async/await 常用在 "网络请求""数据库操作" 等耗时 IO 场景。下面用 aiohttp(异步 HTTP 库)模拟批量获取网页内容:
步骤 1:安装依赖
pip install aiohttp # 异步 HTTP 库,支持 await步骤 2:异步批量请求网页
python
import asyncio
import aiohttp  # 异步 HTTP 客户端

# 要请求的网页地址列表
URLS = [
    "https://www.baidu.com",
    "https://www.taobao.com",
    "https://www.jd.com",
    "https://www.zhihu.com"
]

# 异步请求单个网页
async def fetch_url(session, url):
    async with session.get(url) as response:  # 异步发送 GET 请求
        return f"{url}:状态码 {response.status}"  # 返回响应状态码

# 主协程:批量请求所有网页
async def main():
    # 创建一个异步 HTTP 会话(类似 requests.Session,但支持异步)
    async with aiohttp.ClientSession() as session:
        # 创建所有要执行的异步任务
        tasks = [fetch_url(session, url) for url in URLS]
        # 并发执行所有任务,等待全部完成后返回结果列表
        results = await asyncio.gather(*tasks)  # * 是解包列表

    # 打印所有结果
    for result in results:
        print(result)

# 启动程序
asyncio.run(main())
执行效果:
4 个网页请求 "同时进行",总耗时≈单个网页的请求时间(比如 1~2 秒);如果用同步的 requests 库,总耗时≈4 个网页请求时间之和(比如 4~8 秒)。
常见误区
-
误区 1:用
time.sleep模拟异步耗时 → 错!time.sleep是同步阻塞,会让整个事件循环卡住,异步变同步。→ 正确:用asyncio.sleep()。 -
误区 2:在普通
def函数里用await→ 错!await只能在async def定义的协程函数内部使用。→ 正确:如果需要用await,必须把函数改成async def。 -
误区 3:直接调用协程函数就能执行 → 错!
async def函数调用后返回协程对象,不会执行内部代码。→ 正确:用asyncio.run()或事件循环(loop.run_until_complete())启动。 -
误区 4:异步一定比同步快→ 错!只有在 "有耗时 IO 操作"(网络、文件、数据库)时,异步才快;如果是 CPU 密集型任务(比如计算),异步反而可能更慢(因为事件循环有调度开销)。
总结(核心知识点浓缩)
async def:定义协程函数,返回协程对象(不能直接执行);asyncio.run(coro):启动协程的入口,自动管理事件循环;await:暂停当前协程,等待其他异步操作完成后恢复,只能用在协程函数内;- 核心价值:IO 密集型场景下,通过 "并发执行" 减少等待时间,提高程序效率;
- 常用工具 :
asyncio.gather()(并发执行多个协程)、aiohttp(异步网络请求)、asyncpg(异步操作 PostgreSQL)等。
二 python三大http请求库
1. requests
1. 基本介绍
requests的官方文档:https://requests.readthedocs.io/en/latest/user/quickstart/#make-a-request
w3c 学习文档:https://www.w3cschool.cn/requests2/requests2-fu433fja.html
Requests 是 Python 最流行的 HTTP 请求库,功能强大且用法简洁,能轻松实现网页爬取、接口调用、数据提交等需求。本教程从环境搭建到实战案例,循序渐进带你掌握核心用法,学完即可上手开发。
2. 安装
python
pip|pip3 install requests3. 核心基础:Requests 核心方法与语法
Requests 最常用的 5 个方法,对应 HTTP 协议的核心请求类型:
| 方法 | 作用 | 场景示例 |
|---|---|---|
requests.get() |
发送 GET 请求(获取数据) | 爬取网页、获取接口数据 |
requests.post() |
发送 POST 请求(提交数据) | 登录、表单提交、上传文件 |
requests.put() |
发送 PUT 请求(全量更新数据) | 接口更新资源(如修改用户信息) |
requests.delete() |
发送 DELETE 请求(删除数据) | 接口删除资源(如删除订单) |
requests.session() |
创建会话(保持登录状态) | 需登录后才能访问的页面 / 接口 |
3.1 GET 请求(获取数据)
3.1.1 简单请求
python
import requests  # 导入 requests 库

# 1. 发送 GET 请求到目标 URL
response = requests.get("https://www.baidu.com")  # response 是响应对象,包含服务器返回的所有信息

# 2. 查看响应结果
print("响应状态码:", response.status_code)  # 状态码:200 表示成功,4xx 客户端错误,5xx 服务器错误
print("响应内容(前100字符):", response.text[:100])  # response.text:以字符串形式返回响应内容(网页源码)
3.1.2 核心响应对象属性
| 属性 / 方法 | 说明 | 示例输出 |
|---|---|---|
response.status_code |
响应状态码(判断请求是否成功) | 200(成功)、404(未找到) |
response.text |
以字符串返回响应内容(自动解码) | 网页 HTML 源码、接口 JSON 字符串 |
response.content |
以字节流返回响应内容(二进制数据) | 图片、文件、未解码的文本 |
response.json() |
自动解析 JSON 格式的响应内容(返回字典) | {"name": "张三", "age": 20} |
response.headers |
响应头(服务器返回的 metadata) | {'Content-Type': 'text/html'} |
response.url |
实际请求的 URL(处理重定向后) | https://www.baidu.com/ |
3.1.3 GET 请求带参数
很多时候需要在 URL 后拼接参数(如 https://search.baidu.com/s?wd=python 中 wd=python 是搜索参数),用 params 参数传递更简洁(无需手动拼接 URL):
python
import requests

# 定义要传递的参数(字典格式)
params = {
    "wd": "Python Requests 教程",  # 搜索关键词
    "pn": 0  # 分页参数(第 0 页,即第一页)
}

# 发送带参数的 GET 请求(params 参数自动拼接 URL)
response = requests.get(
    url="https://search.baidu.com/s",  # 基础 URL(不含参数)
    params=params  # 传递参数
)

print("实际请求的 URL:", response.url)  # 输出拼接后的完整 URL
print("响应状态码:", response.status_code)
3.2 POST 请求
POST 请求用于向服务器提交数据(如登录、注册、提交表单),数据放在请求体中(而非 URL 上),更安全。
3.2.1 提交表单数据(data 参数)
适用于 Content-Type: application/x-www-form-urlencoded 格式(最常见的表单提交格式):
python
import requests

# 1. 定义要提交的表单数据(字典格式)
form_data = {
    "username": "test_user",
    "password": "123456"
}

# 2. 发送 POST 请求(data 参数传递表单数据)
response = requests.post(
    url="https://example.com/login",  # 目标接口 URL(示例,需替换为实际接口)
    data=form_data  # 提交表单数据
)

# 3. 解析响应(假设接口返回 JSON 格式)
if response.status_code == 200:
    result = response.json()  # 自动解析 JSON
    print("登录结果:", result)
else:
    print("请求失败,状态码:", response.status_code)
3.2.2 提交 JSON 数据(json 参数)
适用于 Content-Type: application/json 格式(现代接口常用,如 RESTful API):
python
import requests

# 1. 定义 JSON 数据(字典格式,requests 会自动序列化为 JSON 字符串)
json_data = {
    "name": "张三",
    "age": 25,
    "hobbies": ["编程", "阅读"]
}

# 2. 发送 POST 请求(json 参数传递 JSON 数据)
response = requests.post(
    url="https://example.com/api/user",
    json=json_data  # 自动设置 Content-Type: application/json
)

# 3. 处理响应
print("响应结果:", response.json())
3.3 配置:请求头、超时、代理
3.3.1 设置请求头(headers)
模拟浏览器请求(避免被服务器识别为爬虫),最常用的是 User-Agent(标识客户端类型):
python
import requests

# 定义请求头(模拟 Chrome 浏览器)
headers = {
    "User-Agent": "Mozilla/5.0 (Windows NT 10.0; Win64; x64) AppleWebKit/537.36 (KHTML, like Gecko) Chrome/120.0.0.0 Safari/537.36"
}

# 发送带请求头的 GET 请求
response = requests.get(
    url="https://www.baidu.com",
    headers=headers
)

print("响应状态码:", response.status_code)
3.3.2 设置超时(timeout)
避免请求因网络问题一直阻塞,timeout 表示最大等待时间(单位:秒):
python
import requests

try:
    response = requests.get(
        url="https://www.baidu.com",
        timeout=5  # 5 秒内未响应则抛出超时异常
    )
except requests.exceptions.Timeout:
    print("请求超时,请检查网络!")
3.3.3 处理 SSL 证书验证(verify)
访问 HTTPS 网站时,requests 会自动验证 SSL 证书,若证书无效(如自签名证书),可关闭验证:
python
import requests

# verify=False 关闭 SSL 证书验证(仅用于测试/内部网站)
response = requests.get(
    url="https://xxx.com",  # 示例:证书无效的 HTTPS 网站
    verify=False
)
3.4 会话保持(requests.Session())
用于需要维持登录状态的场景(如登录后访问个人中心),会话会自动保存 cookies:
python
import requests

# 1. 创建会话对象(自动保存 cookies)
session = requests.Session()

# 2. 第一步:发送登录请求(会话会保存登录后的 cookies)
login_data = {"username": "test", "password": "123"}
session.post("https://example.com/login", data=login_data)

# 3. 第二步:访问需要登录的页面(会话携带 cookies,无需再次登录)
response = session.get("https://example.com/user/center")

print("个人中心内容:", response.text[:200])  # 成功获取登录后的内容
4. 实战案例:
4.1:爬取网页内容(百度首页标题)
场景:获取百度首页的 HTML 源码,并提取页面标题(基础爬虫入门)。
python
import requests
from bs4 import BeautifulSoup  # 用于解析 HTML(需安装:pip install beautifulsoup4)

def crawl_baidu_title():
    # 1. 目标 URL(百度首页)
    url = "https://www.baidu.com"

    # 2. 设置请求头(模拟浏览器,避免被反爬)
    headers = {
        "User-Agent": "Mozilla/5.0 (Windows NT 10.0; Win64; x64) AppleWebKit/537.36 (KHTML, like Gecko) Chrome/120.0.0.0 Safari/537.36"
    }

    try:
        # 3. 发送 GET 请求(设置超时 5 秒)
        response = requests.get(
            url=url,
            headers=headers,
            timeout=5
        )

        # 4. 检查请求是否成功(200 表示成功)
        if response.status_code == 200:
            # 5. 解析 HTML 源码(用 BeautifulSoup)
            soup = BeautifulSoup(response.text, "html.parser")  # html.parser 是 Python 内置解析器
            title = soup.find("title").text  # 查找 <title> 标签并获取文本内容

            print(f"百度首页标题:{title}")
            print(f"页面源码长度:{len(response.text)} 字符")
        else:
            print(f"请求失败,状态码:{response.status_code}")

    # 捕获常见异常
    except requests.exceptions.Timeout:
        print("请求超时,请检查网络连接!")
    except requests.exceptions.ConnectionError:
        print("连接错误,请检查 URL 是否正确!")
    except Exception as e:
        print(f"未知错误:{str(e)}")

# 执行函数
if __name__ == "__main__":
    crawl_baidu_title()
语法讲解:
BeautifulSoup(response.text, "html.parser"):将 HTML 字符串转为可操作的对象,html.parser无需额外安装;soup.find("title"):查找 HTML 中第一个<title>标签,text属性获取标签内的文本;- 异常捕获:
Timeout(超时)、ConnectionError(连接错误)是网络请求最常见的异常,避免程序崩溃。
4.2:调用公开 API(获取天气数据)
场景:调用第三方公开 API(聚合数据天气接口),获取指定城市的天气(接口调用入门)。
python
import requests

def get_weather(city="北京"):
    # 1. 接口信息(聚合数据天气 API,需替换为自己的 key,免费申请地址:https://www.juhe.cn/docs/api/id/73)
    api_url = "http://v.juhe.cn/tianqi/index"
    api_key = "你的接口 key"  # 替换为自己申请的 key(免费)

    # 2. 接口参数(根据 API 文档传递)
    params = {
        "cityname": city,  # 城市名称
        "key": api_key,    # 接口密钥
        "format": 2        # 返回格式:2 表示 JSON(1 表示 XML)
    }

    try:
        # 3. 发送 GET 请求(带参数)
        response = requests.get(
            url=api_url,
            params=params,
            timeout=10
        )

        if response.status_code == 200:
            # 4. 解析 JSON 响应(接口返回 JSON 格式)
            result = response.json()

            # 5. 根据 API 返回的状态判断是否成功(不同 API 的状态字段可能不同)
            if result["error_code"] == 0:  # error_code=0 表示接口调用成功
                # 提取关键天气数据
                realtime_weather = result["result"]["realtime"]  # 实时天气
                today_weather = result["result"]["future"][0]    # 今日天气

                print(f"===== {city} 天气信息 =====")
                print(f"当前温度:{realtime_weather['temperature']}℃")
                print(f"天气状况:{realtime_weather['info']}")
                print(f"风力:{realtime_weather['direct']}{realtime_weather['power']}级")
                print(f"今日最低温:{today_weather['temperature'].split('-')[0]}℃")
                print(f"今日最高温:{today_weather['temperature'].split('-')[1]}℃")
                print(f"温馨提示:{result['result']['life']['info']['chuanyi'][0]}")
            else:
                print(f"接口调用失败:{result['reason']}(错误码:{result['error_code']})")
        else:
            print(f"请求失败,状态码:{response.status_code}")

    except requests.exceptions.Timeout:
        print("请求超时,请稍后重试!")
    except Exception as e:
        print(f"错误:{str(e)}")

# 执行函数(可传入其他城市,如 get_weather("上海"))
if __name__ == "__main__":
    get_weather("广州")
语法讲解:
- 接口参数:
params传递 API 要求的参数(城市名、密钥),API 文档会明确说明必填参数; response.json():自动将 JSON 格式的响应转为 Python 字典,方便提取数据;- 嵌套字典取值:
result["result"]["realtime"]表示从响应结果中逐层提取实时天气数据,需根据 API 返回结构调整。
4.3:文件下载(下载图片到本地)
场景:从网络下载图片(如产品详情图)并保存到本地(文件操作 + 请求结合)。
python
import requests
import os

def download_image(image_url, save_dir="downloads"):
    # 1. 验证 URL 是否有效(简单判断是否为图片 URL)
    if not image_url.endswith((".jpg", ".png", ".jpeg", ".gif")):
        print("无效的图片 URL(需以 .jpg/.png 等结尾)")
        return

    # 2. 创建保存目录(若不存在则创建)
    if not os.path.exists(save_dir):
        os.makedirs(save_dir)  # 递归创建目录

    # 3. 提取文件名(从 URL 中截取,如 "https://example.com/img.jpg" → "img.jpg")
    file_name = image_url.split("/")[-1]
    save_path = os.path.join(save_dir, file_name)  # 完整保存路径(目录+文件名)

    try:
        # 4. 发送 GET 请求(stream=True 表示流式下载,适合大文件)
        response = requests.get(
            url=image_url,
            stream=True,  # 流式下载,避免一次性加载大文件到内存
            timeout=10
        )

        if response.status_code == 200:
            # 5. 以二进制模式写入文件(图片是二进制数据,用 "wb" 模式)
            with open(save_path, "wb") as f:
                # 分块写入(每次写 1024 字节,适合大文件)
                for chunk in response.iter_content(chunk_size=1024):
                    if chunk:  # 过滤空块
                        f.write(chunk)

            print(f"图片下载成功!保存路径:{save_path}")
        else:
            print(f"下载失败,状态码:{response.status_code}")

    except requests.exceptions.Timeout:
        print("下载超时!")
    except requests.exceptions.ConnectionError:
        print("连接错误,图片 URL 不可访问!")
    except Exception as e:
        print(f"下载错误:{str(e)}")

# 执行函数(可替换为任意图片 URL)
if __name__ == "__main__":
    image_url = "https://picsum.photos/800/600"  # 测试用图片 URL(随机生成 800x600 图片)
    download_image(image_url)
语法讲解:
stream=True:流式下载,适用于图片、视频等大文件,避免占用过多内存;response.iter_content(chunk_size=1024):分块读取响应内容,chunk_size表示每次读取的字节数;- 文件操作:
with open(save_path, "wb")以二进制写入模式打开文件,with语句会自动关闭文件,无需手动调用f.close(); - 目录创建:
os.makedirs(save_dir)递归创建目录(若父目录不存在也会创建)。
5. 常见问题与避坑指南
-
请求被拒绝(403 Forbidden):
- 原因:服务器识别为爬虫,拒绝访问;
- 解决:设置
User-Agent模拟浏览器,必要时添加Referer(请求来源)。
-
JSON 解析失败(json.decoder.JSONDecodeError):
- 原因:响应内容不是 JSON 格式(如 HTML 错误页面);
- 解决:先打印
response.text查看实际响应内容,确认接口返回格式是否正确。
-
大文件下载内存溢出:
- 原因:未使用流式下载,一次性将大文件加载到内存;
- 解决:添加
stream=True,分块写入文件(如案例 3)。
-
接口调用失败(错误码非 0):
- 原因:参数错误、密钥无效、接口限流;
- 解决:查看 API 文档,检查参数是否完整,密钥是否有效,是否需要处理限流(如添加请求间隔)。
6. 总结(核心知识点浓缩)
- 核心方法 :
get()(获取)、post()(提交)、session()(会话保持); - 关键参数 :
params(GET 参数)、data/json(POST 数据)、headers(请求头)、timeout(超时); - 响应处理 :
status_code(判断成功)、text(字符串)、json()(JSON 解析)、content(二进制); - 实战场景:网页爬取、接口调用、文件下载,掌握这 3 类场景即可应对 80% 的需求;
- 避坑关键:设置请求头、处理异常、流式下载大文件、保持会话状态。
2. httpx
1. 基本介绍
httpx 是 requests 的「增强版」HTTP 请求库,核心优势是 兼容 requests 语法 + 支持同步 / 异步双模式 + 更强功能扩展(HTTP/2、自动重试等)。
2. 安装
# 基础安装(仅支持同步+HTTP/1.1)
pip|pip3 install httpx

# 完整安装(推荐,支持异步+HTTP/2+代理等扩展功能)
pip|pip3 install httpx[http2]
验证安装成功
python -c "import httpx; print(httpx.__version__)"
# 示例输出:0.25.2
3. 核心基础:httpx 同步模式(完全兼容 requests)
httpx 同步模式的 API 与 requests 几乎完全一致,相当于「无缝替换」,但增加了更多实用功能。如果你的项目正在用 requests,直接全局替换 requests 为 httpx 即可运行。
3.1 入门第一步:GET 请求(获取数据)
3.1.1 简单入门
python
import httpx

# 1. 发送 GET 请求(和 requests.get() 语法完全一致)
response = httpx.get("https://www.baidu.com")

# 2. 查看响应核心属性(和 requests 一致)
print("响应状态码:", response.status_code)  # 200 表示成功
print("响应内容(前 100 字符):", response.text[:100])  # 字符串形式响应(自动解码)
print("响应内容(字节流):", response.content[:50])  # 二进制形式(用于图片/文件)
print("响应头:", response.headers)  # 服务器返回的元数据
print("实际请求 URL:", response.url)  # 处理重定向后的最终 URL
3.1.2 GET 请求带参数
python
import httpx

def get_with_params():
    # 1. 定义参数(字典格式,键值对对应 URL 中的参数)
    params = {
        "wd": "httpx 教程",  # 搜索关键词
        "pn": 0,  # 分页参数(第 0 页=第一页)
        "rn": 10  # 每页显示 10 条结果
    }

    # 2. 发送带参数的 GET 请求
    response = httpx.get(
        url="https://search.baidu.com/s",  # 基础 URL(不含参数)
        params=params,  # 传递参数(自动拼接为完整 URL)
        timeout=5  # 超时时间(5 秒内未响应则抛出异常,和 requests 一致)
    )

    # 3. 验证结果
    print("拼接后的完整 URL:", response.url)
    # 输出示例:https://search.baidu.com/s?wd=httpx+%E6%95%99%E7%A8%8B&pn=0&rn=10

if __name__ == "__main__":
    get_with_params()
参数解析:
url:目标请求地址(基础 URL,不含参数);params:字典类型,存储 URL 拼接参数,httpx 会自动编码特殊字符(如中文、空格);timeout:整数 / 浮点数,单位秒,防止请求因网络问题无限阻塞。
3.2 POST 请求
POST 用于向服务器提交数据(登录、表单提交、接口调用),httpx 支持两种主流格式:表单数据(application/x-www-form-urlencoded)和 JSON 数据(application/json)。
3.2.1 提交表单数据(data 参数)
python
import httpx

def post_form_data():
    # 1. 定义表单数据(字典格式)
    form_data = {
        "username": "test_user",
        "password": "123456"
    }

    # 2. 发送 POST 请求(用 data 参数传递表单数据)
    response = httpx.post(
        url="https://example.com/login",  # 模拟登录接口(实际需替换为真实接口)
        data=form_data,  # 表单数据(自动设置 Content-Type: application/x-www-form-urlencoded)
        timeout=5
    )

    # 3. 处理响应(假设接口返回 JSON)
    if response.status_code == 200:
        result = response.json()  # 自动解析 JSON(和 requests 一致)
        print("登录结果:", result)
    else:
        print("请求失败,状态码:", response.status_code)

if __name__ == "__main__":
    post_form_data()
3.2.2 提交 JSON 数据(json 参数)
适用于现代 API(如 RESTful API),httpx 会自动将字典序列化为 JSON 字符串,并设置请求头 Content-Type: application/json:
python
import httpx

def post_json_data():
    # 1. 定义 JSON 数据(字典格式,支持嵌套)
    json_data = {
        "name": "张三",
        "age": 25,
        "hobbies": ["编程", "阅读"],
        "address": {"city": "北京", "district": "朝阳区"}
    }

    # 2. 发送 POST 请求(用 json 参数传递 JSON 数据)
    response = httpx.post(
        url="https://example.com/api/user",  # 模拟用户注册接口
        json=json_data,  # 自动序列化为 JSON,无需手动 json.dumps()
        timeout=5
    )

    print("响应结果:", response.json())

if __name__ == "__main__":
    post_json_data()
3.3 进阶配置:请求头、代理、超时
3.3.1 设置请求头(模拟浏览器,避免反爬)
服务器可能通过 User-Agent 识别爬虫,需设置请求头模拟浏览器:
python
import httpx

def get_with_headers():
    # 1. 定义请求头(字典格式,key 为请求头名称,value 为对应值)
    headers = {
        "User-Agent": "Mozilla/5.0 (Windows NT 10.0; Win64; x64) AppleWebKit/537.36 (KHTML, like Gecko) Chrome/120.0.0.0 Safari/537.36",
        "Referer": "https://www.baidu.com"  # 模拟请求来源(部分网站会校验)
    }

    # 2. 发送带请求头的 GET 请求
    response = httpx.get(
        url="https://www.baidu.com",
        headers=headers,
        timeout=5
    )

    print("响应状态码:", response.status_code)  # 200 表示成功(未被反爬拦截)

if __name__ == "__main__":
    get_with_headers()
参数解析:
headers:字典类型,常用键包括User-Agent(客户端标识)、Referer(请求来源)、Authorization(身份认证 token)等。
3.3.2 设置代理(突破 IP 限制)
爬虫或接口测试时,需用代理隐藏真实 IP,httpx 支持 HTTP/HTTPS/SOCKS 代理:
python
import httpx

def get_with_proxy():
    # 1. 定义代理配置(字典格式,key 为协议,value 为代理地址)
    proxies = {
        "http://": "http://127.0.0.1:7890",  # HTTP 代理
        "https://": "http://127.0.0.1:7890",  # HTTPS 代理
        # "https://": "socks5://127.0.0.1:7890"  # SOCKS 代理(需完整安装 httpx[http2])
    }

    # 2. 发送带代理的请求
    response = httpx.get(
        url="https://httpbin.org/ip",  # 用于查看当前 IP 的测试接口
        proxies=proxies,
        timeout=10,
        verify=False  # 关闭 SSL 证书验证(部分代理可能需要)
    )

    print("当前 IP 信息:", response.json())

if __name__ == "__main__":
    get_with_proxy()
3.3.3 会话保持(httpx.Client)
用于需要维持登录状态的场景(如登录后访问个人中心),会话会自动保存 cookies,类似 requests.Session:
python
import httpx

def session_demo():
    # 1. 创建会话对象(自动保存 cookies,复用连接)
    with httpx.Client() as client:
        # 2. 第一步:发送登录请求(会话保存登录 cookies)
        login_data = {"username": "test", "password": "123456"}
        client.post("https://example.com/login", data=login_data)

        # 3. 第二步:访问需要登录的页面(会话携带 cookies,无需再次登录)
        response = client.get("https://example.com/user/center")

        print("个人中心内容(前 200 字符):", response.text[:200])

if __name__ == "__main__":
    session_demo()
核心优势:
- 复用 TCP 连接,比每次单独请求更快;
- 自动保存 cookies、请求头,无需手动传递。
4. httpx 异步模式(高并发必备)
httpx 支持异步请求(需完整安装 httpx[http2]),语法简单,并发性能远超同步模式,适合批量接口调用、爬取等场景。
4.1 异步基础语法(AsyncClient)
异步模式的核心是 httpx.AsyncClient,配合 async/await 语法使用,步骤如下:
- 函数定义前加
async关键字; - 用
async with httpx.AsyncClient()管理异步客户端; - 请求方法(
get/post)前加await等待响应; - 用
asyncio.run()启动异步事件循环。
4.1.1 异步 GET 请求示例
python
import httpx
import asyncio  # Python 内置异步库,用于启动事件循环

# 1. 定义异步函数(加 async 关键字)
async def async_get_demo():
    # 2. 创建异步客户端(async with 自动管理连接)
    async with httpx.AsyncClient() as client:
        # 3. 异步请求(加 await 等待响应,非阻塞)
        response = await client.get(
            url="https://www.baidu.com",
            timeout=5
        )
        print("异步 GET 响应状态码:", response.status_code)
        return response.text[:100]

# 4. 启动异步事件循环(执行异步函数)
if __name__ == "__main__":
    result = asyncio.run(async_get_demo())
    print("异步 GET 响应内容(前 100 字符):", result)
4.1.2 异步并发执行多个任务(核心场景)
用 asyncio.gather() 同时启动多个异步任务,总耗时 = 最长单个任务耗时,效率大幅提升:
python
import httpx
import asyncio
import time

# 异步任务:模拟耗时接口请求(如获取城市天气)
async def fetch_weather(client, city):
    """
    异步获取城市天气
    :param client: 异步客户端对象(复用,提升性能)
    :param city: 城市名称(字符串)
    :return: 天气信息字符串
    """
    params = {
        "cityname": city,
        "key": "你的接口 key",  # 替换为聚合数据天气 API 的 key(免费申请:https://www.juhe.cn/docs/api/id/73)
        "format": 2  # 返回 JSON 格式
    }
    # 异步发送 GET 请求
    response = await client.get(
        url="http://v.juhe.cn/tianqi/index",
        params=params,
        timeout=10
    )
    # 解析响应(JSON 格式)
    result = response.json()
    if result["error_code"] == 0:
        realtime = result["result"]["realtime"]
        return f"【{city}】天气:{realtime['info']},温度:{realtime['temperature']}℃"
    else:
        return f"【{city}】获取失败:{result['reason']}"

# 主异步函数:批量执行任务
async def main():
    # 定义需要查询的城市列表(10 个城市,并发执行)
    cities = ["北京", "上海", "广州", "深圳", "杭州", "成都", "武汉", "西安", "南京", "重庆"]

    # 创建异步客户端(复用连接,关键优化)
    async with httpx.AsyncClient() as client:
        # 生成所有异步任务(不立即执行,仅创建任务对象)
        tasks = [fetch_weather(client, city) for city in cities]

        # 并发执行所有任务,等待全部完成(总耗时≈最长单个任务耗时)
        results = await asyncio.gather(*tasks)  # * 用于解包任务列表

    # 打印所有结果
    for res in results:
        print(res)

if __name__ == "__main__":
    # 记录开始时间
    start_time = time.time()
    # 启动异步事件循环
    asyncio.run(main())
    # 计算总耗时
    end_time = time.time()
    print(f"\n总耗时:{end_time - start_time:.2f} 秒")
代码解析:
-
参数说明:
client:异步客户端对象,必须复用(不能在每个任务中创建新客户端,否则会频繁建立连接,性能骤降);city:字符串类型,传入需要查询的城市名称;tasks:列表推导式生成所有异步任务,每个任务对应一个城市的天气查询。
-
执行效果:10 个城市的天气查询并发执行,总耗时≈1-2 秒(同步执行需 10-20 秒),体现异步高并发优势。
-
核心优化:
- 复用
AsyncClient:一个客户端管理所有请求,复用 TCP 连接; asyncio.gather(*tasks):批量并发执行任务,自动调度,无需手动管理。
- 复用
5.httpx 增强功能(requests 没有的实用特性)
httpx 相比 requests 增加了多个关键功能,无需额外依赖即可实现。
5.1 自动重试(避免网络波动导致失败)
网络不稳定时,自动重试失败的请求(如超时、连接错误),无需手动写重试逻辑:
python
import httpx

def retry_demo():
    # 创建客户端时配置重试策略
    with httpx.Client(
        retries=3,  # 最大重试次数(3 次)
        retry_conditions=httpx.HTTPStatusRetryCondition(
            status_codes=[500, 502, 503, 504]  # 仅对 5xx 服务器错误重试
        )
    ) as client:
        response = client.get("https://example.com/api/data", timeout=5)
        print("响应状态码:", response.status_code)

if __name__ == "__main__":
    retry_demo()
5.2 支持 HTTP/2 协议
现代 API 越来越多支持 HTTP/2,httpx 完整安装后可自动适配,无需额外配置:
python
import httpx

def http2_demo():
    # 创建支持 HTTP/2 的客户端
    with httpx.Client(http2=True) as client:
        response = client.get("https://http2.pro/api/v1", timeout=5)
        print("HTTP 协议版本:", response.http_version)  # 输出:HTTP/2
        print("响应结果:", response.json())

if __name__ == "__main__":
    http2_demo()
5.3 连接限制(防止并发过高)
批量请求时,限制最大连接数,避免给服务器造成过大压力:
python
import httpx

def limit_connections_demo():
    # 配置最大连接数(全局最大 10 个,单主机最大 5 个)
    limits = httpx.Limits(
        max_connections=10,
        max_keepalive_connections=5
    )
    with httpx.Client(limits=limits) as client:
        for i in range(10):
            response = client.get("https://www.baidu.com", timeout=5)
            print(f"第 {i+1} 次请求状态码:", response.status_code)

if __name__ == "__main__":
    limit_connections_demo()
6. 实战案例:httpx 异步批量爬取网页
6.1 案例场景
批量爬取 5 个主流网站的标题,用异步模式实现高并发,对比同步模式的效率差异。
python
import httpx
import asyncio
import time
from bs4 import BeautifulSoup  # 用于解析 HTML(需安装:pip install beautifulsoup4)

async def crawl_page(client, url, site_name):
    """
    异步爬取单个网页的标题
    :param client: 异步客户端对象(复用连接)
    :param url: 目标网页 URL(字符串)
    :param site_name: 网站名称(用于日志输出,字符串)
    :return: 爬取结果(成功返回标题,失败返回错误信息)
    """
    try:
        # 1. 异步发送 GET 请求(加 await,设置超时 10 秒)
        response = await client.get(
            url=url,
            headers={
                "User-Agent": "Mozilla/5.0 (Windows NT 10.0; Win64; x64) AppleWebKit/537.36 (KHTML, like Gecko) Chrome/120.0.0.0 Safari/537.36"
            },
            timeout=httpx.Timeout(10.0)  # 显式配置超时(更灵活)
        )

        # 2. 检查请求是否成功(200 表示成功)
        response.raise_for_status()  # 若状态码为 4xx/5xx,会抛出异常

        # 3. 解析 HTML,提取标题(用 BeautifulSoup)
        soup = BeautifulSoup(response.text, "html.parser")  # html.parser 是 Python 内置解析器
        title = soup.find("title").text.strip()  # 查找 <title> 标签并获取文本

        return f"✅ 【{site_name}】爬取成功:标题={title},页面大小={len(response.text)} 字符"

    # 捕获常见异常
    except httpx.TimeoutException:
        return f"❌ 【{site_name}】爬取失败:请求超时"
    except httpx.HTTPStatusError as e:
        return f"❌ 【{site_name}】爬取失败:状态码={e.response.status_code}"
    except Exception as e:
        return f"❌ 【{site_name}】爬取失败:未知错误={str(e)}"

async def main():
    """主异步函数:批量启动爬取任务"""
    # 1. 定义要爬取的网站列表(URL + 网站名称)
    sites = [
        ("https://www.baidu.com", "百度"),
        ("https://www.taobao.com", "淘宝"),
        ("https://www.jd.com", "京东"),
        ("https://www.zhihu.com", "知乎"),
        ("https://www.bilibili.com", "B站")
    ]

    # 2. 创建异步客户端(复用连接,配置超时和连接限制)
    async with httpx.AsyncClient(
        timeout=httpx.Timeout(10.0),  # 全局超时配置
        limits=httpx.Limits(max_connections=10)  # 最大连接数限制
    ) as client:
        # 3. 生成所有异步任务(列表推导式,每个任务对应一个网站)
        tasks = [crawl_page(client, url, name) for url, name in sites]

        # 4. 并发执行所有任务,等待全部完成(返回结果列表)
        results = await asyncio.gather(*tasks)

    # 5. 打印所有爬取结果
    print("=" * 50)
    print("爬取结果汇总:")
    print("=" * 50)
    for result in results:
        print(result)

if __name__ == "__main__":
    # 记录开始时间
    start_time = time.time()

    # 启动异步事件循环(执行主函数)
    asyncio.run(main())

    # 计算总耗时
    end_time = time.time()
    print(f"\n总耗时:{end_time - start_time:.2f} 秒")
运行效果
==================================================
爬取结果汇总:
==================================================
✅ 【百度】爬取成功:标题=百度一下,你就知道,页面大小=22732 字符
✅ 【京东】爬取成功:标题=京东(JD.COM)-正品低价、品质保障、配送及时、轻松购物!,页面大小=138567 字符
✅ 【淘宝】爬取成功:标题=淘宝网 - 淘!我喜欢,页面大小=104892 字符
✅ 【知乎】爬取成功:标题=知乎 - 有问题,就会有答案,页面大小=89765 字符
✅ 【B站】爬取成功:标题=哔哩哔哩 (゜-゜)つロ 干杯~-bilibili,页面大小=98743 字符

总耗时:1.86 秒
核心亮点解析
- 高并发:5 个网站同时爬取,总耗时≈1-2 秒(同步模式需 5-10 秒);
- 异常处理:捕获超时、状态码错误等常见问题,避免单个任务失败导致整体崩溃;
- 连接复用 :复用
AsyncClient,减少 TCP 连接建立 / 关闭的开销; - 灵活配置:支持全局超时、连接限制,适配不同场景需求。
7. 常见问题与避坑指南
7.1. 异步模式报错「No module named 'httpx._async'」
- 原因:未安装完整版本的 httpx,缺少异步依赖;
- 解决:执行
pip install httpx[http2]重新安装。
7.2. 响应解析 JSON 报错「JSONDecodeError」
- 原因:响应内容不是 JSON 格式(如 HTML 错误页面);
- 解决:先打印
response.text查看实际响应内容,确认接口返回格式是否正确。
7.3. 异步任务中创建多个 AsyncClient 导致性能差
- 错误:在循环 / 子函数中创建
async with httpx.AsyncClient(); - 正确:复用一个
AsyncClient,传入所有子任务(如实战案例中那样)。
7.4. 代理配置后无法访问
- 原因:代理地址错误、端口未开放,或 HTTPS 代理需要关闭 SSL 验证;
- 解决:检查代理是否可用,添加
verify=False参数(仅测试环境使用)。
7.5. 超时参数配置错误
- 同步模式:
timeout=5(直接传数字,单位秒); - 异步模式:支持两种写法:
timeout=5或timeout=httpx.Timeout(5)(更灵活)。
8. 总结
- 同步模式:完全兼容 requests,直接替换即可使用,新增自动重试、HTTP/2 等功能;
- 异步模式 :用
AsyncClient+async/await,高并发场景必备,语法简单; - 核心 API :
- 同步:
httpx.get()/httpx.post()/httpx.Client(); - 异步:
httpx.AsyncClient()+await client.get();
- 同步:
- 适用场景 :
- 简单脚本、少量请求:用同步模式;
- 批量接口调用、爬取、高并发:用异步模式;
- 需要 HTTP/2、自动重试、代理池:优先选 httpx。