背景需求:
之前做了通义万相艺术字空心福字贴,
【教学类-89-10】20251204新年篇06------福字贴(通义万相AI福字空心字)![]() https://mp.csdn.net/mp_blog/creation/editor/155533650
https://mp.csdn.net/mp_blog/creation/editor/155533650
现在我想配套一个姓名的对联
把小2班幼儿的姓名做成对联


为了安全,用虚拟名字

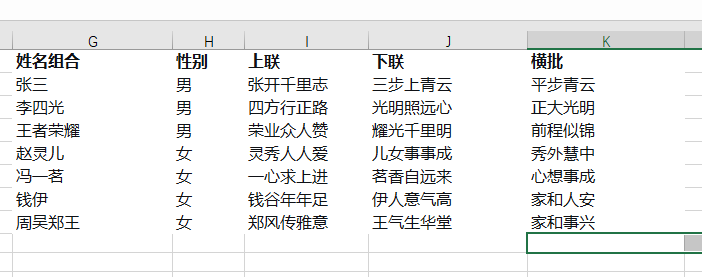
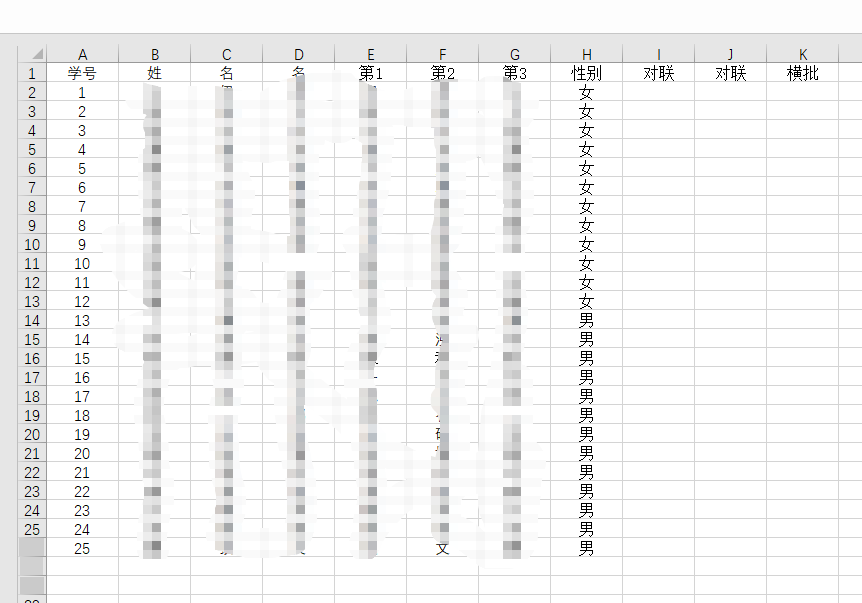
excel文字变成图片
python
'''
读取excle,制作+对联+横批的图片
豆包,阿夏
20251209
'''
import os
from openpyxl import load_workbook
from PIL import Image, ImageDraw, ImageFont
# ===================== 全局颜色变量(统一管理) =====================
TEXT_COLOR = (192, 192, 192) # 统一的灰色值,替换原有的black
BORDER_COLOR = (192, 192, 192) # 圆形边框也用相同灰色
# 1. 读取Excel文件
def read_excel_data(file_path):
"""
读取Excel文件中I、J、K列的数据(从第2行开始)
"""
workbook = load_workbook(file_path, data_only=True)
sheet = workbook.active
data = []
for row in range(2, sheet.max_row + 1): # 从第2行开始
col_i = sheet.cell(row=row, column=9).value # I列是第9列
col_j = sheet.cell(row=row, column=10).value # J列是第10列
col_k = sheet.cell(row=row, column=11).value # K列是第11列
# 处理I列(上联)和J列(下联)的数据
if col_i and isinstance(col_i, str) and len(col_i.strip()) == 5:
# 上联数据
data.append({
'type': '上联',
'text': col_i.strip(),
'row_num': row,
'j_col': col_j,
'k_col': col_k
})
# 检查J列(下联)是否也有5个汉字
if col_j and isinstance(col_j, str) and len(col_j.strip()) == 5:
# 下联数据
data.append({
'type': '下联',
'text': col_j.strip(),
'row_num': row,
'i_col': col_i,
'k_col': col_k
})
# 检查K列(横批)是否有数据(2-4个汉字)
if col_k and isinstance(col_k, str):
clean_text = col_k.strip()
if 2 <= len(clean_text) <= 4:
# 横批数据
data.append({
'type': '横批',
'text': clean_text,
'row_num': row,
'i_col': col_i,
'j_col': col_j
})
return data
# 2. 创建竖排文字图片(用于上联/下联)
def create_vertical_text_image(text, font_size=320, img_width=347, img_height=1820, student_number=1):
"""
创建竖排文字图片(白色背景,灰色文字),底部添加带学号的圆形
"""
# 创建白色背景图片
image = Image.new('RGB', (img_width, img_height), 'white')
draw = ImageDraw.Draw(image)
# 使用系统字体(Windows系统通常有隶书)
try:
# Windows系统字体路径
font_path = "C:/Windows/Fonts/simli.ttf" # 隶书字体
font = ImageFont.truetype(font_path, font_size)
except:
try:
# macOS系统字体路径
font_path = "/System/Library/Fonts/STHeiti Light.ttc"
font = ImageFont.truetype(font_path, font_size)
except:
# 如果找不到字体,使用默认字体
print("警告:未找到隶书字体,使用默认字体")
font = ImageFont.load_default()
# 计算文字尺寸(单个汉字)
try:
# 获取单个汉字的宽度和高度
char_bbox = draw.textbbox((0, 0), "汉", font=font)
char_width = char_bbox[2] - char_bbox[0]
char_height = char_bbox[3] - char_bbox[1]
except:
# 备用方案
char_width = font_size
char_height = font_size
# 计算总文字高度(5个汉字 + 4个间隔)
total_text_height = char_height * 5 + char_height * 0.5 * 4 # 汉字间加0.5倍行距
# 计算起始Y位置(垂直居中)
start_y = (img_height - total_text_height) // 2 - 200
# 计算X位置(水平居中)
start_x = (img_width - char_width) // 2
# 纵向排列,从上到下写每个汉字
current_y = start_y
for char in text:
# 计算每个汉字的位置(水平居中)
char_x = start_x
char_y = current_y
# 绘制文字(灰色,加粗效果通过多次绘制实现)
draw.text((char_x, char_y), char, fill=TEXT_COLOR, font=font)
# 加粗效果:向右下角轻微偏移再绘制一次
draw.text((char_x + 1, char_y + 1), char, fill=TEXT_COLOR, font=font)
# 更新Y位置(下一个汉字的位置)
current_y += char_height * 1.6 # 1.5倍行距
# 在图片底部添加带学号的圆形
add_student_number_circle(draw, img_width, img_height, student_number)
return image
# 3. 创建横排文字图片(用于横批)
def create_horizontal_text_image(text, font_size=220, img_width=925, img_height=385, student_number=1):
"""
创建横排文字图片(白色背景,灰色文字),横向排列,居中显示,上部添加圆形
"""
# 创建白色背景图片(横向:925*385)
image = Image.new('RGB', (img_width, img_height), 'white')
draw = ImageDraw.Draw(image)
# 使用系统字体(隶书)
try:
# Windows系统字体路径
font_path = "C:/Windows/Fonts/simli.ttf" # 隶书字体
font = ImageFont.truetype(font_path, font_size)
except:
try:
# macOS系统字体路径
font_path = "/System/Library/Fonts/STHeiti Light.ttc"
font = ImageFont.truetype(font_path, font_size)
except:
# 如果找不到字体,使用默认字体
print("警告:未找到隶书字体,使用默认字体")
font = ImageFont.load_default()
# 计算整段文字的尺寸
try:
text_bbox = draw.textbbox((0, 0), text, font=font)
text_width = text_bbox[2] - text_bbox[0]
text_height = text_bbox[3] - text_bbox[1]
except:
# 备用方案
text_width = font_size * len(text)
text_height = font_size
# 计算文字位置(居中)
text_x = (img_width - text_width) // 2
text_y = (img_height - text_height) // 2 + 50
# 绘制文字(灰色,加粗效果通过多次绘制实现)
draw.text((text_x, text_y), text, fill=TEXT_COLOR, font=font)
draw.text((text_x + 1, text_y + 1), text, fill=TEXT_COLOR, font=font) # 加粗效果
# 在图片上部添加圆形
add_top_circle(draw, img_width, img_height, student_number)
return image
def add_top_circle(draw, img_width, img_height, student_number):
"""
在横批图片上部绘制带学号的圆形
"""
# 圆形参数
circle_diameter = 150 # 直径50像素
border_width = 10 # 边框宽度10磅(像素)
top_margin = 10 # 与顶部的间距10磅
# 计算圆形的位置(上部居中,与顶部保持10磅间距)
circle_x = img_width // 2 # 圆心X坐标
# 圆心Y坐标 = 顶部间距(10) + 圆形半径(25) + 边框宽度(10)
circle_y = top_margin + (circle_diameter // 2) + border_width
# 计算圆的边界框
radius = circle_diameter // 2
left = circle_x - radius
top = circle_y - radius
right = circle_x + radius
bottom = circle_y + radius
# 绘制白色圆形(填充)
draw.ellipse([left, top, right, bottom], fill='white', outline=None)
# 绘制灰色边框(10磅)
draw.ellipse([left, top, right, bottom], fill=None, outline=BORDER_COLOR, width=border_width)
# 在圆形中心添加学号
add_student_number_to_top_circle(draw, circle_x, circle_y, student_number, circle_diameter)
def add_student_number_to_top_circle(draw, center_x, center_y, student_number, circle_diameter):
"""
在横批上部圆形中心添加学号
"""
# 学号数字
number_text = str(student_number)
# 根据数字位数调整字体大小(最多2位数,因为最大是25)
if student_number < 10:
font_size = 120 # 1位数用30磅(小圆用较小字体)
else:
font_size = 100 # 2位数用24磅(小圆用较小字体)
# 数字字体(使用Arial字体,适合数字显示)
try:
# Windows系统
number_font_path = "C:/Windows/Fonts/arial.ttf"
number_font = ImageFont.truetype(number_font_path, font_size)
except:
try:
# macOS系统
number_font_path = "/System/Library/Fonts/Arial.ttf"
number_font = ImageFont.truetype(number_font_path, font_size)
except:
# Linux系统或备用
number_font_path = "/usr/share/fonts/truetype/dejavu/DejaVuSans.ttf"
if os.path.exists(number_font_path):
number_font = ImageFont.truetype(number_font_path, font_size)
else:
# 备用字体
number_font = ImageFont.load_default()
number_font.size = font_size
# 计算数字的尺寸
try:
num_bbox = draw.textbbox((0, 0), number_text, font=number_font)
num_width = num_bbox[2] - num_bbox[0]
num_height = num_bbox[3] - num_bbox[1]
except:
# 备用方案
num_width = font_size * len(number_text) * 0.6
num_height = font_size
# 计算数字的位置(居中)
num_x = center_x - (num_width // 2)
num_y = center_y - (num_height // 2) - 20
# 绘制学号数字(灰色)
draw.text((num_x, num_y), number_text, fill=TEXT_COLOR, font=number_font)
def add_student_number_circle(draw, img_width, img_height, student_number):
"""
在图片底部绘制带学号的圆形(仅用于上联/下联)
"""
# 圆形参数
circle_diameter = 200 # 直径200像素
border_width = 10 # 边框宽度10磅(像素)
bottom_margin = 10 # 与底部的间距10磅
# 计算圆形的位置(底部居中,与底部保持10磅间距)
circle_x = img_width // 2 # 圆心X坐标
circle_y = img_height - bottom_margin - (circle_diameter // 2) - border_width
# 计算圆的边界框
radius = circle_diameter // 2
left = circle_x - radius
top = circle_y - radius
right = circle_x + radius
bottom = circle_y + radius
# 绘制白色圆形(填充)
draw.ellipse([left, top, right, bottom], fill='white', outline=None)
# 绘制灰色边框(10磅)
draw.ellipse([left, top, right, bottom], fill=None, outline=BORDER_COLOR, width=border_width)
# 在圆形中心添加学号
add_student_number_to_circle(draw, circle_x, circle_y, student_number, circle_diameter)
def add_student_number_to_circle(draw, center_x, center_y, student_number, circle_diameter):
"""
在圆形中心添加学号(只显示数字,不显示"上联"/"下联"文字)
"""
# 学号数字
number_text = str(student_number)
# 根据数字位数调整字体大小(最多2位数,因为最大是25)
if student_number < 10:
font_size = 120 # 1位数用120磅
else:
font_size = 100 # 2位数用100磅
# 数字字体(使用Arial字体,适合数字显示)
try:
# Windows系统
number_font_path = "C:/Windows/Fonts/arial.ttf"
number_font = ImageFont.truetype(number_font_path, font_size)
except:
try:
# macOS系统
number_font_path = "/System/Library/Fonts/Arial.ttf"
number_font = ImageFont.truetype(number_font_path, font_size)
except:
# Linux系统或备用
number_font_path = "/usr/share/fonts/truetype/dejavu/DejaVuSans.ttf"
if os.path.exists(number_font_path):
number_font = ImageFont.truetype(number_font_path, font_size)
else:
# 备用字体
number_font = ImageFont.load_default()
number_font.size = font_size
# 计算数字的尺寸
try:
num_bbox = draw.textbbox((0, 0), number_text, font=number_font)
num_width = num_bbox[2] - num_bbox[0]
num_height = num_bbox[3] - num_bbox[1]
except:
# 备用方案
num_width = font_size * len(number_text) * 0.6
num_height = font_size
# 计算数字的位置(居中)
num_x = center_x - (num_width // 2)
num_y = center_y - (num_height // 2) - 20
# 绘制学号数字(灰色)
draw.text((num_x, num_y), number_text, fill=TEXT_COLOR, font=number_font)
# 4. 主函数
def main():
# 文件路径
path = r'D:\20251204福字'
excel_file = path + r"\对联小2.xlsx"
# 检查Excel文件是否存在
if not os.path.exists(excel_file):
print(f"错误:文件 {excel_file} 不存在")
return
# 读取数据
print("正在读取Excel数据...")
data = read_excel_data(excel_file)
if not data:
print("未找到符合条件的数据")
return
# 分别创建输出文件夹
upper_output_dir = path + r"\上联"
lower_output_dir = path + r"\下联"
horizontal_output_dir = path + r"\横批"
os.makedirs(upper_output_dir, exist_ok=True)
os.makedirs(lower_output_dir, exist_ok=True)
os.makedirs(horizontal_output_dir, exist_ok=True)
# 分别分离不同类型的数据
upper_data = [item for item in data if item['type'] == '上联']
lower_data = [item for item in data if item['type'] == '下联']
horizontal_data = [item for item in data if item['type'] == '横批']
print(f"上联数据: {len(upper_data)} 条")
print(f"下联数据: {len(lower_data)} 条")
print(f"横批数据: {len(horizontal_data)} 条")
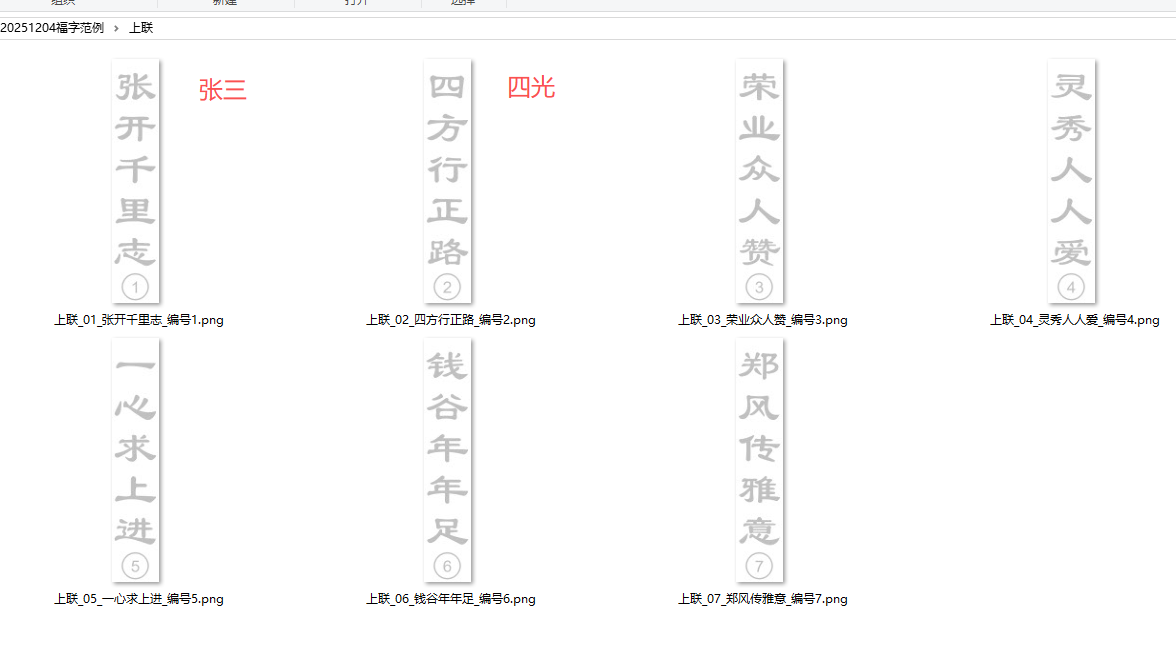
# 处理上联数据(编号1-25)
print("\n开始处理上联数据...")
for i, item in enumerate(upper_data, 1):
text = item['text']
student_number = i # 上联独立编号:1, 2, 3, ..., 25
print(f"处理上联第 {i} 条数据: {text} (编号: {student_number})")
# 创建竖排图片
image = create_vertical_text_image(
text=text,
font_size=320,
img_width=347,
img_height=1820,
student_number=student_number
)
# 保存图片到上联文件夹
filename = f"上联_{i:02d}_{text}_编号{student_number}.png"
filepath = os.path.join(upper_output_dir, filename)
image.save(filepath)
print(f" 已保存: {filepath}")
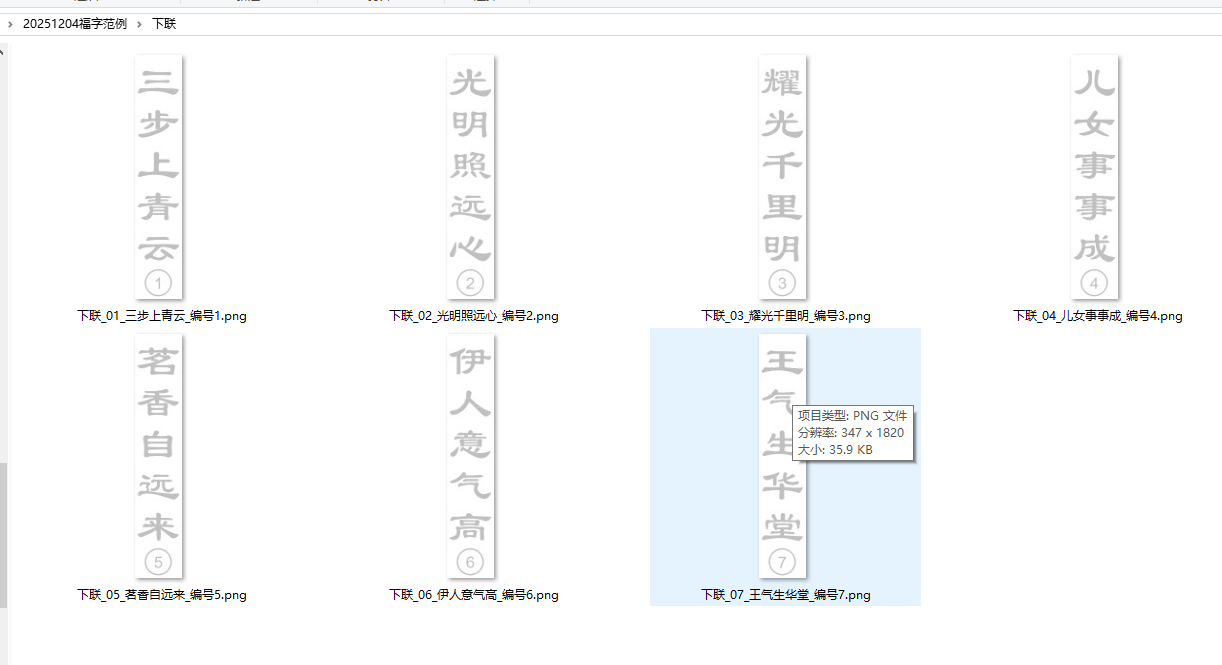
# 处理下联数据(编号1-25)
print("\n开始处理下联数据...")
for i, item in enumerate(lower_data, 1):
text = item['text']
student_number = i # 下联独立编号:1, 2, 3, ..., 25
print(f"处理下联第 {i} 条数据: {text} (编号: {student_number})")
# 创建竖排图片
image = create_vertical_text_image(
text=text,
font_size=320,
img_width=347,
img_height=1820,
student_number=student_number
)
# 保存图片到下联文件夹
filename = f"下联_{i:02d}_{text}_编号{student_number}.png"
filepath = os.path.join(lower_output_dir, filename)
image.save(filepath)
print(f" 已保存: {filepath}")
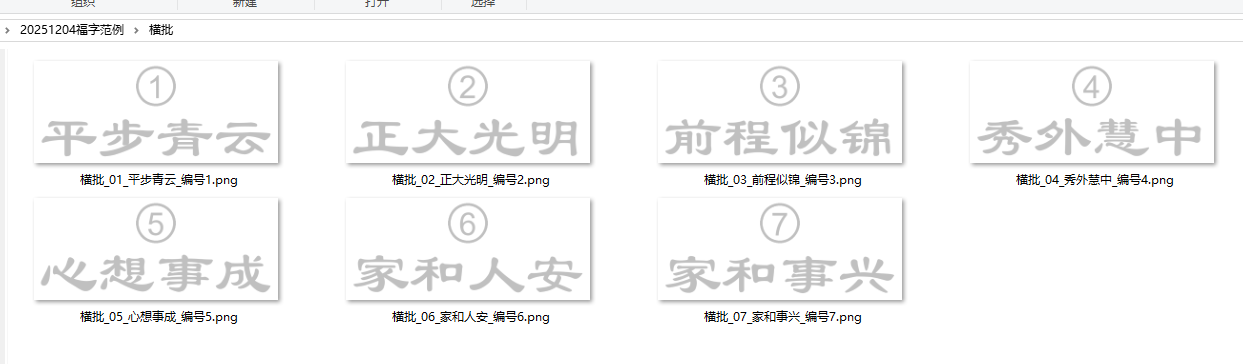
# 处理横批数据(编号1-25)
print("\n开始处理横批数据...")
for i, item in enumerate(horizontal_data, 1):
text = item['text']
student_number = i # 横批独立编号:1, 2, 3, ..., 25
print(f"处理横批第 {i} 条数据: {text} (编号: {student_number})")
# 创建横排图片(925*385横向)
image = create_horizontal_text_image(
text=text,
font_size=220, # 横批字体稍小
img_width=925, # 横向宽度
img_height=385, # 横向高度
student_number=student_number
)
# 保存图片到横批文件夹
filename = f"横批_{i:02d}_{text}_编号{student_number}.png"
filepath = os.path.join(horizontal_output_dir, filename)
image.save(filepath)
print(f" 已保存: {filepath}")
print(f"\n处理完成!")
print(f"上联图片已保存到: {upper_output_dir}")
print(f"下联图片已保存到: {lower_output_dir}")
print(f"横批图片已保存到: {horizontal_output_dir}")
# 5. 运行主函数
if __name__ == "__main__":
main()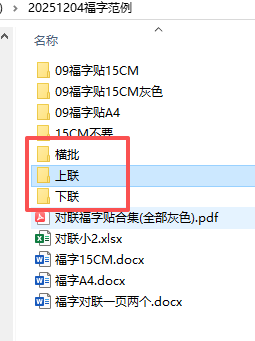
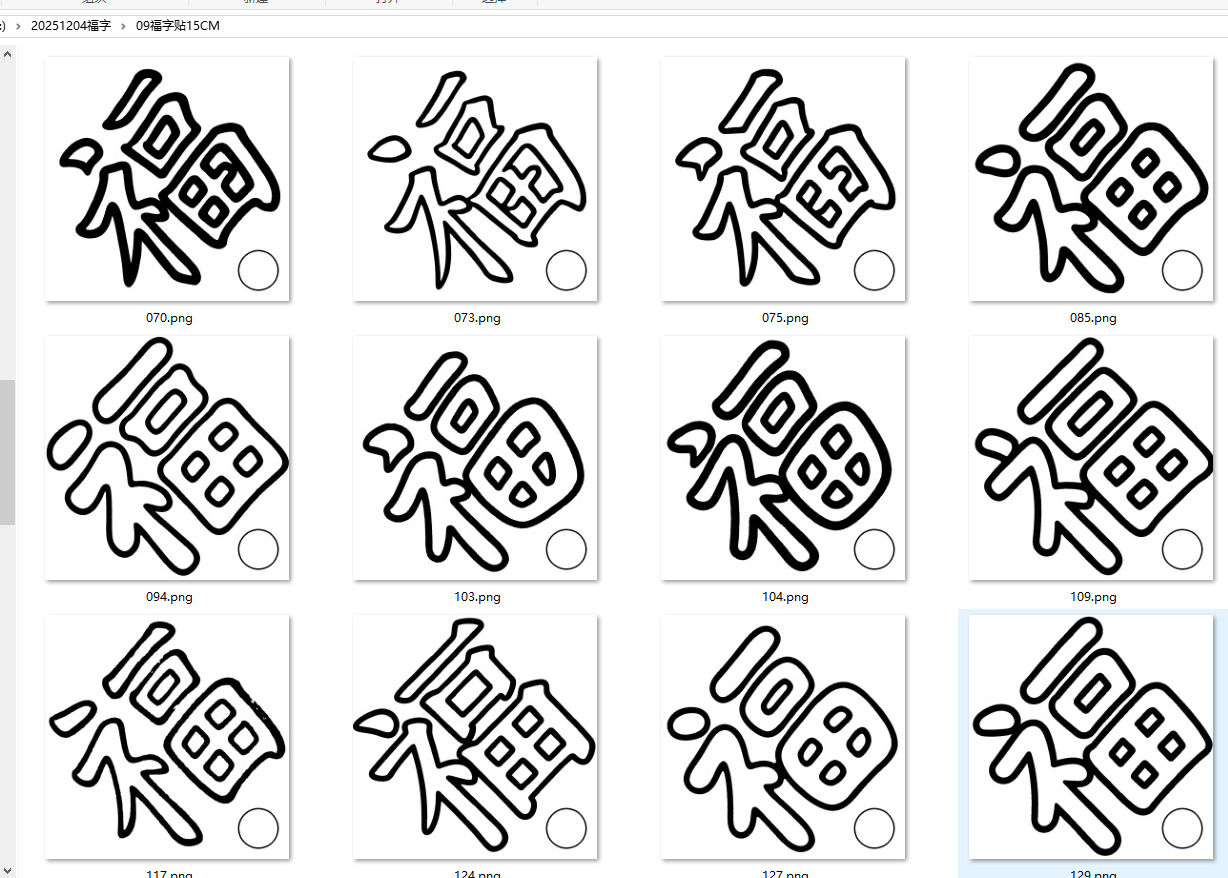
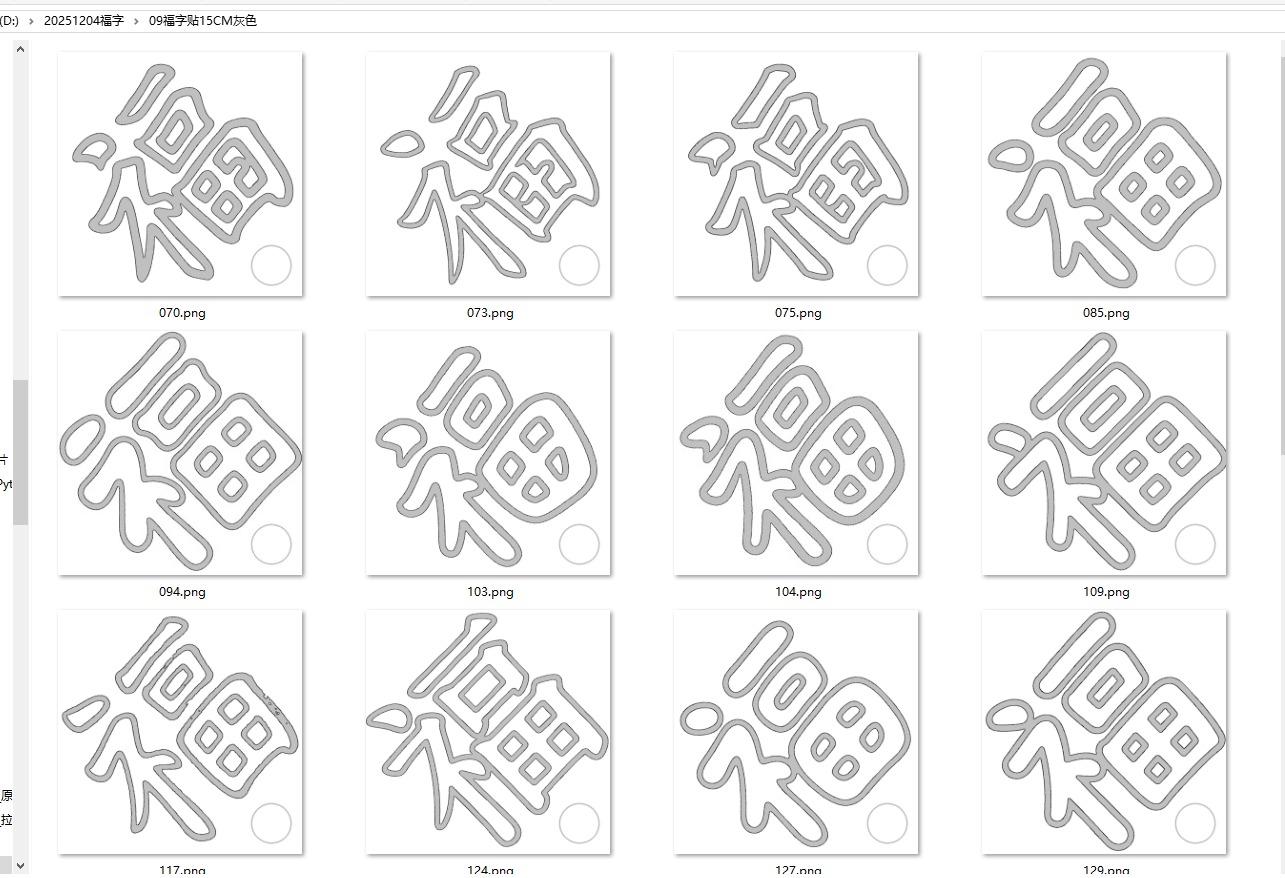
福字从黑色变成灰色
python
'''
将福字黑色(0,0,0)变成福字灰色(192,192,192)
豆包,阿夏
20251209
'''

import os
from PIL import Image

# ===================== 配置参数(可根据实际需求修改) =====================
path=r'D:\20251204福字'
INPUT_FOLDER = path+r"\09福字贴15CM"  # 源图片文件夹路径
OUTPUT_FOLDER = path+r"\09福字贴15CM灰色"  # 处理后图片保存路径
TARGET_COLOR = (0, 0, 0)  # 要替换的目标颜色(纯黑色)
REPLACE_COLOR = (192, 192, 192)  # 替换后的颜色(灰色)
SUPPORTED_FORMATS = ('.jpg', '.jpeg', '.png', '.bmp', '.gif', '.tiff')  # 支持的图片格式

def process_image(img_path, output_path):
    """
    处理单张图片:替换指定颜色并保存
    :param img_path: 源图片路径
    :param output_path: 处理后图片保存路径
    """
    try:
        # 打开图片并转换为RGB模式(避免透明通道干扰)
        with Image.open(img_path) as img:
            img = img.convert("RGB")  # 统一转为RGB模式,兼容所有图片
            pixels = img.load()  # 获取像素访问对象

            # 获取图片宽高
            width, height = img.size

            # 遍历所有像素,替换目标颜色
            for x in range(width):
                for y in range(height):
                    # 获取当前像素的RGB值
                    current_r, current_g, current_b = pixels[x, y]
                    # 判断是否为目标颜色(0,0,0)
                    if (current_r, current_g, current_b) == TARGET_COLOR:
                        # 替换为灰色(192,192,192)
                        pixels[x, y] = REPLACE_COLOR

            # 保存处理后的图片(保持原格式)
            img.save(output_path)
            print(f"✅ 处理完成:{os.path.basename(img_path)} → {output_path}")

    except Exception as e:
        print(f"❌ 处理失败:{os.path.basename(img_path)} | 错误:{str(e)}")

def main():
    # 创建输出文件夹(不存在则创建)
    os.makedirs(OUTPUT_FOLDER, exist_ok=True)

    # 遍历源文件夹下的所有图片
    img_files = [
        f for f in os.listdir(INPUT_FOLDER)
        if f.lower().endswith(SUPPORTED_FORMATS)
    ]

    if not img_files:
        print(f"⚠️ 源文件夹 {INPUT_FOLDER} 中未找到支持格式的图片!")
        return

    # 批量处理每张图片
    for filename in img_files:
        # 拼接源图片路径和输出图片路径
        input_path = os.path.join(INPUT_FOLDER, filename)
        output_path = os.path.join(OUTPUT_FOLDER, filename)
        # 处理图片
        process_image(input_path, output_path)

    print(f"\n🎉 所有图片处理完成!处理后的图片已保存至:{OUTPUT_FOLDER}")

if __name__ == "__main__":
    main()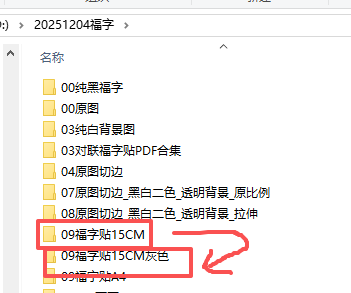
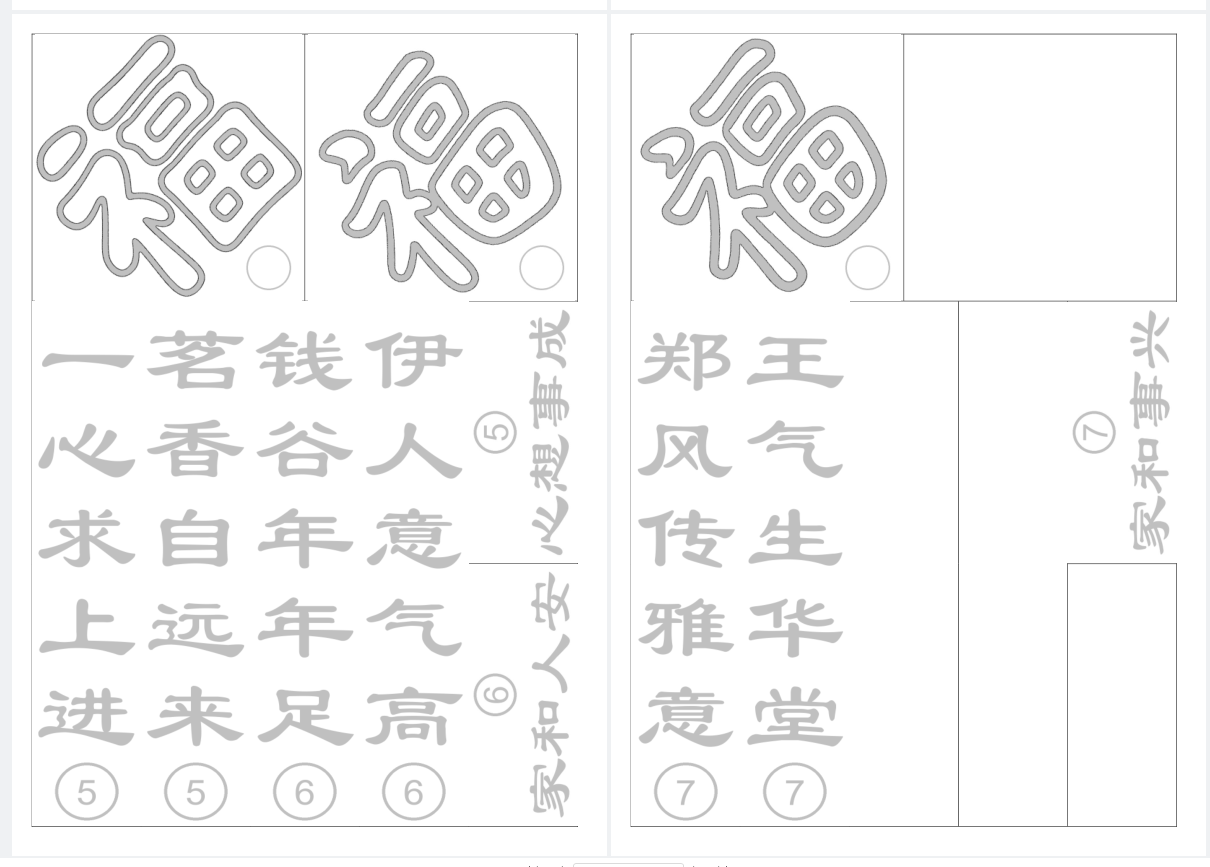
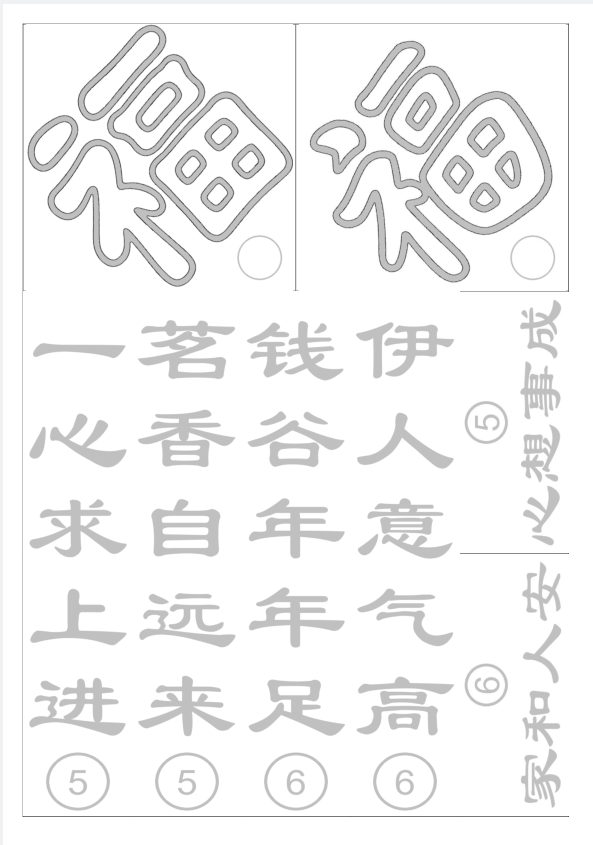
模板word

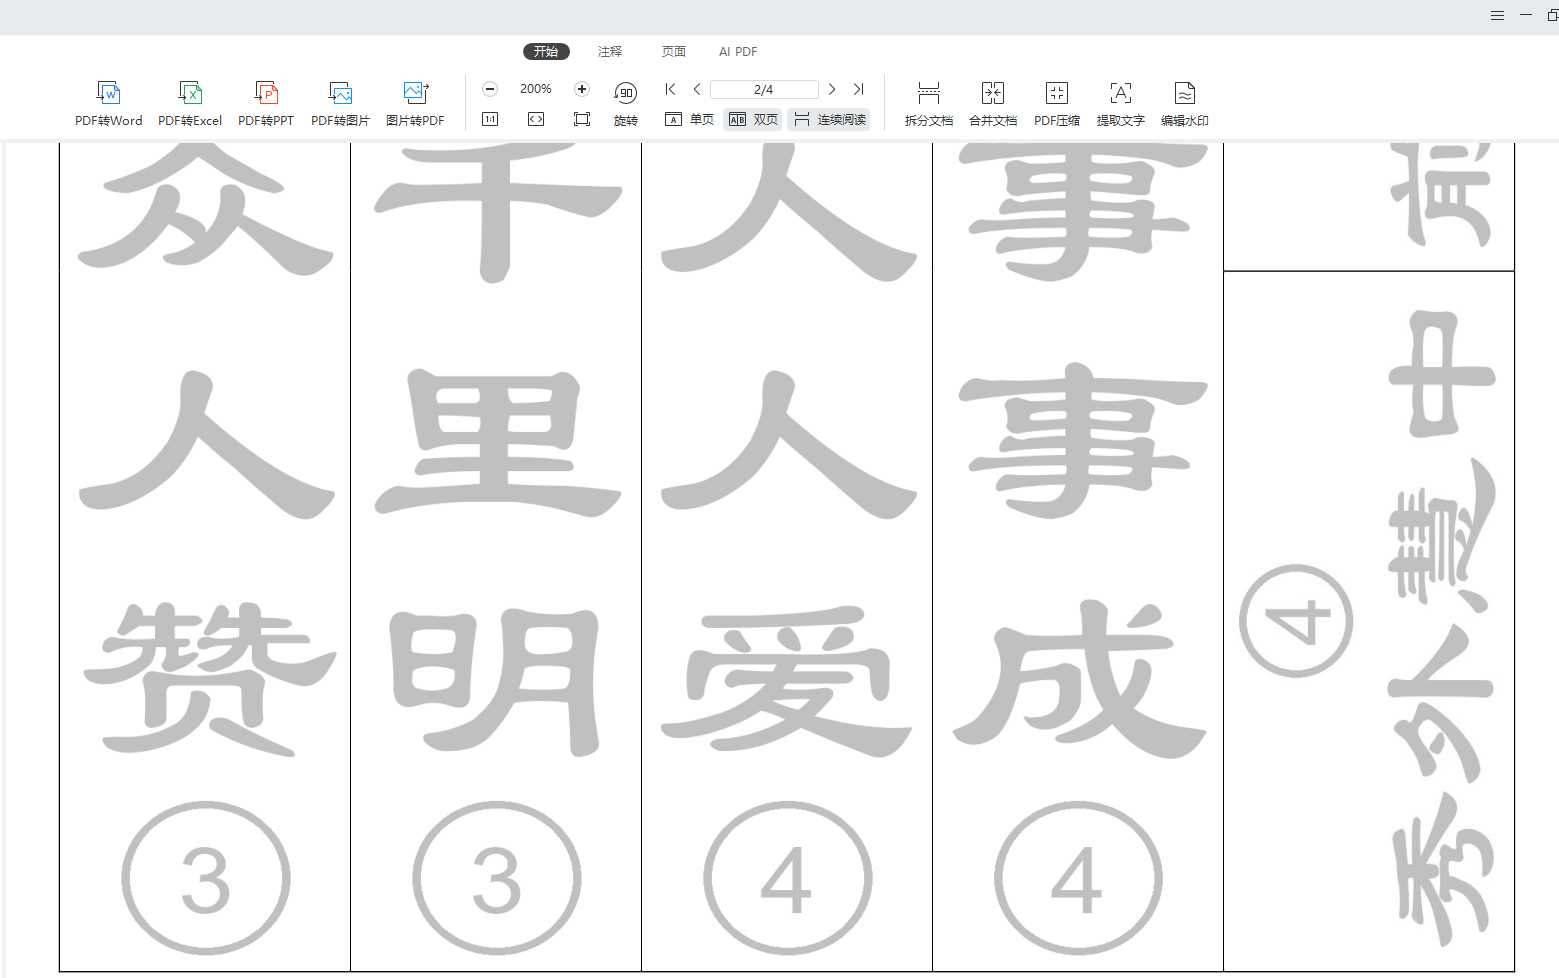
制作PDF
python
'''
将福字+对联+横批的图片插入word模板(全部都是灰色的)
豆包,阿夏
20251209
'''
import os
import shutil
from docx import Document
from docx.shared import Cm
from docx2pdf import convert
from PyPDF2 import PdfMerger, PdfReader # 新增PdfReader校验PDF有效性
from PIL import Image
import io
import time # 新增:避免文件占用
# ===================== 1. 基础配置(请根据实际路径修改) =====================
BASE_PATH = r'D:\20251204福字' # 主素材路径
WORD_TEMPLATE = os.path.join(BASE_PATH, '福字对联一页两个.docx') # Word模板路径
OUTPUT_ROOT = BASE_PATH
# os.path.join(BASE_PATH, '03最终输出') # 最终合并PDF存放路径
TEMP_FOLDER = os.path.join(BASE_PATH, '临时文件夹') # 临时文件(Word/PDF)路径
# 所有元素插入模板唯一表格(表格0),单元格索引需根据模板实际检测结果调整!
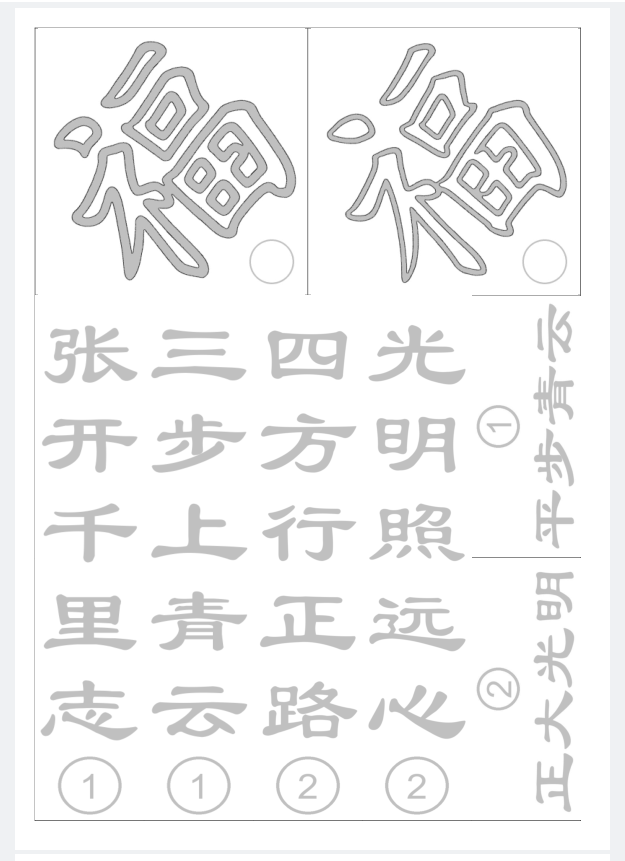
FOLDERS_CONFIG = {
'福字贴': {
'path': os.path.join(BASE_PATH, '09福字贴15CM灰色'),
'positions': [(0, 0), (0, 3)], # 表格0的单元格0(第1张)、单元格3(第2张)
'size': (9.4, 9.4), # 宽×高(cm)
'rotate': False # 不旋转
},
'上联': {
'path': os.path.join(BASE_PATH, '上联'),
'positions': [(0, 6), (0, 8)], # 表格0的单元格6(第1张)、单元格8(第2张)
'size': (3.85, 18.5), # 宽×高(cm)
'rotate': False # 不旋转
},
'下联': {
'path': os.path.join(BASE_PATH, '下联'),
'positions': [(0, 7), (0, 10)], # 表格0的单元格7(第1张)、单元格10(第2张)
'size': (3.85, 18.5), # 宽×高(cm)
'rotate': False # 不旋转
},
'横批': {
'path': os.path.join(BASE_PATH, '横批'),
'positions': [(0, 11), (0, 17)], # 请根据实际表格单元格数调整!
'size': (3.85, 9.2), # 宽×高(cm)
'rotate': True # 左转90度(逆时针)
}
}
SUPPORTED_IMG_FORMATS = ('.jpg', '.png', '.jfif', '.gif', '.tiff', '.bmp') # python-docx支持的图片格式
# ===================== 2. 工具函数(强化PDF相关校验) =====================
def check_template_single_table():
"""校验模板是否仅含1个表格,并返回表格的行数、列数、总单元格数(避免索引越界)"""
doc = Document(WORD_TEMPLATE)
if len(doc.tables) != 1:
raise ValueError(f"模板需仅含1个表格,实际检测到{len(doc.tables)}个,请检查模板结构")
table = doc.tables[0]
row_count = len(table.rows)
col_count = len(table.columns)
total_cells = row_count * col_count # 总单元格数(行优先索引:0~total_cells-1)
print("=== 模板唯一表格检测结果 ===")
print(f"行数:{row_count} | 列数:{col_count} | 总单元格数:{total_cells}")
print(f"可用单元格索引:0 ~ {total_cells-1}(行优先排序,如第1行第1列=0)\n")
return row_count, col_count, total_cells
def get_valid_images(folder_path):
"""筛选文件夹内支持格式的图片,按文件名排序,避免空列表或格式错误"""
if not os.path.exists(folder_path):
raise FileNotFoundError(f"图片文件夹不存在:{folder_path}")
# 仅保留支持格式的图片
img_files = [
os.path.join(folder_path, f)
for f in os.listdir(folder_path)
if f.lower().endswith(SUPPORTED_IMG_FORMATS)
]
if not img_files:
raise ValueError(f"文件夹{folder_path}中无支持格式的图片(支持格式:{SUPPORTED_IMG_FORMATS})")
img_files.sort(key=lambda x: os.path.basename(x)) # 按文件名排序,确保分组顺序一致
return img_files
def process_image(img_path, need_rotate):
"""处理图片:1. 非支持格式转JPG;2. 如需旋转则左转90度,返回可插入的图片源(路径/字节流)"""
# 步骤1:格式转换(非支持格式转为JPG字节流,避免生成临时文件)
ext = os.path.splitext(img_path)[1].lower()
if ext not in SUPPORTED_IMG_FORMATS:
with Image.open(img_path) as img:
# 处理透明通道图片(RGBA/P格式转为RGB,避免插入报错)
if img.mode in ('RGBA', 'P'):
img = img.convert('RGB')
img_stream = io.BytesIO()
img.save(img_stream, format='JPEG', quality=95) # 保存为JPG
img_stream.seek(0) # 重置流指针,确保后续可读取
img_source = img_stream
else:
img_source = img_path # 格式支持,直接使用原路径
# 步骤2:旋转处理(左转90度,expand=True确保完整显示旋转后图片,无裁剪)
if need_rotate:
with Image.open(img_source) as img:
# 若源为字节流,需重置指针
if isinstance(img_source, io.BytesIO):
img_source.seek(0)
# 左转90度(逆时针),expand=True自动调整图片尺寸
rotated_img = img.rotate(90, expand=True)
rotated_stream = io.BytesIO()
rotated_img.save(rotated_stream, format='JPEG', quality=95)
rotated_stream.seek(0)
return rotated_stream
return img_source
def get_max_valid_groups(image_groups):
"""
计算最大有效组数(适配奇数数量:最后一组仅1张)
返回:总组数 + 是否有最后一组单张
"""
min_img_count = min(len(imgs) for imgs in image_groups.values())
max_groups = min_img_count // 2 # 完整的2张/组数量
has_last_single = min_img_count % 2 == 1 # 是否有最后一组单张
# 总组数 = 完整组数 + (1 if 有单张 else 0)
total_groups = max_groups + (1 if has_last_single else 0)
if total_groups == 0:
raise ValueError(f"所有文件夹需至少1张图片才能生成PDF,当前最少图片数:{min_img_count}")
print(f"检测到有效组数:")
print(f"- 完整2张组:{max_groups}组")
print(f"- 最后1张组:{'有' if has_last_single else '无'}")
print(f"- 总组数:{total_groups}组\n")
return total_groups, has_last_single, max_groups
def validate_pdf_file(pdf_path):
"""校验PDF文件是否有效(可读取、非损坏)"""
if not os.path.exists(pdf_path):
raise FileNotFoundError(f"PDF文件不存在:{pdf_path}")
if os.path.getsize(pdf_path) == 0:
raise ValueError(f"PDF文件为空(损坏):{pdf_path}")
# 尝试读取PDF确认有效性
try:
with open(pdf_path, 'rb') as f:
PdfReader(f)
except Exception as e:
raise ValueError(f"PDF文件损坏,无法读取:{pdf_path} | 错误:{str(e)}")
# ===================== 3. 核心逻辑(生成单组Word→转PDF,适配单张/双张) =====================
def generate_group_doc(group_idx, image_groups, total_cells, has_last_single, max_full_groups):
"""
生成单组文档:适配最后一组仅1张的情况
group_idx: 当前组索引
has_last_single: 是否有最后一组单张
max_full_groups: 完整的2张组数量
"""
# 加载Word模板(唯一表格)
doc = Document(WORD_TEMPLATE)
table = doc.tables[0] # 仅1个表格,直接获取
# 判断当前组是否为最后一组单张
is_last_single_group = has_last_single and group_idx == max_full_groups
# 遍历4类元素(福字贴→上联→下联→横批),插入对应图片
for folder_name, config in FOLDERS_CONFIG.items():
# 确定当前组要取的图片数量(完整组取2张,最后单张组取1张)
if is_last_single_group:
# 最后一组:仅取1张(索引=max_full_groups*2)
group_start_idx = max_full_groups * 2
group_imgs = image_groups[folder_name][group_start_idx:group_start_idx + 1]
# 只使用第一个单元格,第二个单元格留空
use_positions = [config['positions'][0]] # 仅取第一个位置
else:
# 完整组:取2张
group_start_idx = group_idx * 2
group_imgs = image_groups[folder_name][group_start_idx:group_start_idx + 2]
use_positions = config['positions'] # 取两个位置
# 插入每张图片到指定单元格
for img_idx, (img_path, (_, cell_idx)) in enumerate(zip(group_imgs, use_positions)):
try:
# 校验单元格索引是否有效(避免超出表格总单元格数)
if cell_idx >= total_cells:
raise IndexError(
f"单元格索引{cell_idx}超出范围:表格0共{total_cells}个单元格(可用索引0~{total_cells-1})"
)
# 处理图片(格式+旋转)
img_final = process_image(img_path, config['rotate'])
# 定位单元格(行优先计算:行号=单元格索引//列数,列号=单元格索引%列数)
col_count = len(table.columns)
row_idx = cell_idx // col_count
col_idx = cell_idx % col_count
cell = table.cell(row_idx, col_idx)
# 清空单元格原有内容(避免模板残留文本/格式影响图片显示)
for para in cell.paragraphs:
para.clear()
# 插入图片并居中对齐
para = cell.paragraphs[0]
run = para.add_run()
width_cm, height_cm = config['size']
run.add_picture(img_final, width=Cm(width_cm), height=Cm(height_cm))
para.alignment = 1 # 1=居中对齐(确保图片在单元格内居中)
print(f"✅ 第{group_idx+1}组:{folder_name}第{img_idx+1}张(单元格{cell_idx})插入成功")
except Exception as e:
# 报错时明确提示哪组哪类图片失败,便于排查
raise RuntimeError(f"第{group_idx+1}组{folder_name}第{img_idx+1}张处理失败:{str(e)}")
# 保存单组Word文档到临时文件夹
doc_filename = f"对联福字贴_{group_idx+1:02d}组.docx"
doc_path = os.path.join(TEMP_FOLDER, doc_filename)
doc.save(doc_path)
# 将Word转为PDF(依赖docx2pdf,需提前安装Word/LibreOffice作为转换引擎)
pdf_filename = f"对联福字贴_{group_idx+1:02d}组.pdf"
pdf_path = os.path.join(TEMP_FOLDER, pdf_filename)
convert(doc_path, pdf_path) # Word→PDF转换
time.sleep(0.5) # 延迟0.5秒,避免文件未完全写入
# 校验PDF是否有效
validate_pdf_file(pdf_path)
if is_last_single_group:
print(f"✅ 第{group_idx+1}组(最后单张组):Word→PDF转换完成(路径:{pdf_path})\n")
else:
print(f"✅ 第{group_idx+1}组:Word→PDF转换完成(路径:{pdf_path})\n")
return pdf_path
# ===================== 4. 主执行函数(优化PDF合并逻辑) =====================
def main():
try:
# 1. 初始化文件夹(创建输出目录,清空旧临时文件)
os.makedirs(OUTPUT_ROOT, exist_ok=True) # 确保输出目录存在
if os.path.exists(TEMP_FOLDER):
shutil.rmtree(TEMP_FOLDER) # 删除旧临时文件夹(避免残留文件干扰)
os.makedirs(TEMP_FOLDER, exist_ok=True) # 创建新临时文件夹
print(f"初始化完成:\n- 输出路径(合并PDF):{OUTPUT_ROOT}\n- 临时路径(Word/PDF):{TEMP_FOLDER}\n")
# 2. 校验模板表格(确保仅1个表格,获取单元格范围)
_, _, total_cells = check_template_single_table()
# 3. 加载所有文件夹的图片(按类别分组)
image_groups = {}
for folder_name, config in FOLDERS_CONFIG.items():
image_groups[folder_name] = get_valid_images(config['path'])
print(f"检测到{folder_name}图片:{len(image_groups[folder_name])}张(路径:{config['path']})")
# 4. 计算最大有效组数(适配奇数数量)
total_groups, has_last_single, max_full_groups = get_max_valid_groups(image_groups)
# 5. 生成每组的Word和PDF,收集所有有效PDF路径
all_pdf_paths = []
for group_idx in range(total_groups):
pdf_path = generate_group_doc(
group_idx=group_idx,
image_groups=image_groups,
total_cells=total_cells,
has_last_single=has_last_single,
max_full_groups=max_full_groups
)
all_pdf_paths.append(pdf_path)
# 6. 合并所有单组PDF为一个总PDF(核心优化)
if not all_pdf_paths:
raise ValueError("无可用的PDF文件进行合并!")
final_pdf_name = "对联福字贴合集(全部灰色).pdf"
final_pdf_path = os.path.join(OUTPUT_ROOT, final_pdf_name)
# 先删除旧的合并PDF(避免权限问题)
if os.path.exists(final_pdf_path):
os.remove(final_pdf_path)
# 初始化PDF合并器,逐一审验并合并
merger = PdfMerger()
# 修复排序逻辑:适配「对联福字贴_01组.pdf」格式
all_pdf_paths_sorted = sorted(
all_pdf_paths,
key=lambda x: int(
os.path.basename(x).split('_')[1].split('组')[0] # 关键修复行
)
)
print(f"\n=== 开始合并PDF ===\n待合并的PDF列表(按组号排序):")
for i, pdf in enumerate(all_pdf_paths_sorted):
print(f"{i+1}. {os.path.basename(pdf)}")
# 逐页合并,避免一次性加载所有PDF导致内存问题
for pdf_path in all_pdf_paths_sorted:
try:
# 再次校验PDF有效性
validate_pdf_file(pdf_path)
# 以二进制模式打开PDF,避免文件占用
with open(pdf_path, 'rb') as f:
merger.append(f)
print(f"✅ 已合并:{os.path.basename(pdf_path)}")
except Exception as e:
raise RuntimeError(f"合并PDF失败:{pdf_path} | 错误:{str(e)}")
# 写入合并后的PDF(确保写入完成)
with open(final_pdf_path, 'wb') as f:
merger.write(f)
merger.close() # 显式关闭合并器,释放资源
time.sleep(1) # 延迟1秒,确保文件完全写入
# 校验最终合并PDF
validate_pdf_file(final_pdf_path)
print(f"\n✅ 所有PDF合并完成!合并后路径:{final_pdf_path}")
print(f"✅ 合并后PDF大小:{os.path.getsize(final_pdf_path) / 1024 / 1024:.2f} MB")
# 7. 清理临时文件夹(删除Word和单组PDF,仅保留合并后的总PDF)
shutil.rmtree(TEMP_FOLDER)
print(f"\n✅ 临时文件夹已清理:{TEMP_FOLDER}")
print(f"\n🎉 所有操作完成!最终仅保留合并PDF:\n - {final_pdf_path}")
except Exception as e:
# 报错时清理临时文件夹,避免残留文件占用空间
if os.path.exists(TEMP_FOLDER):
shutil.rmtree(TEMP_FOLDER)
print(f"\n❌ 执行失败:{str(e)}")
# 打印详细报错堆栈,便于定位
import traceback
traceback.print_exc()
# ===================== 启动执行 =====================
if __name__ == "__main__":
main()
 、
、