一、应用场景
许多图片上传都需要裁剪一下或者裁剪完之后压缩一下再上传,效果如图:
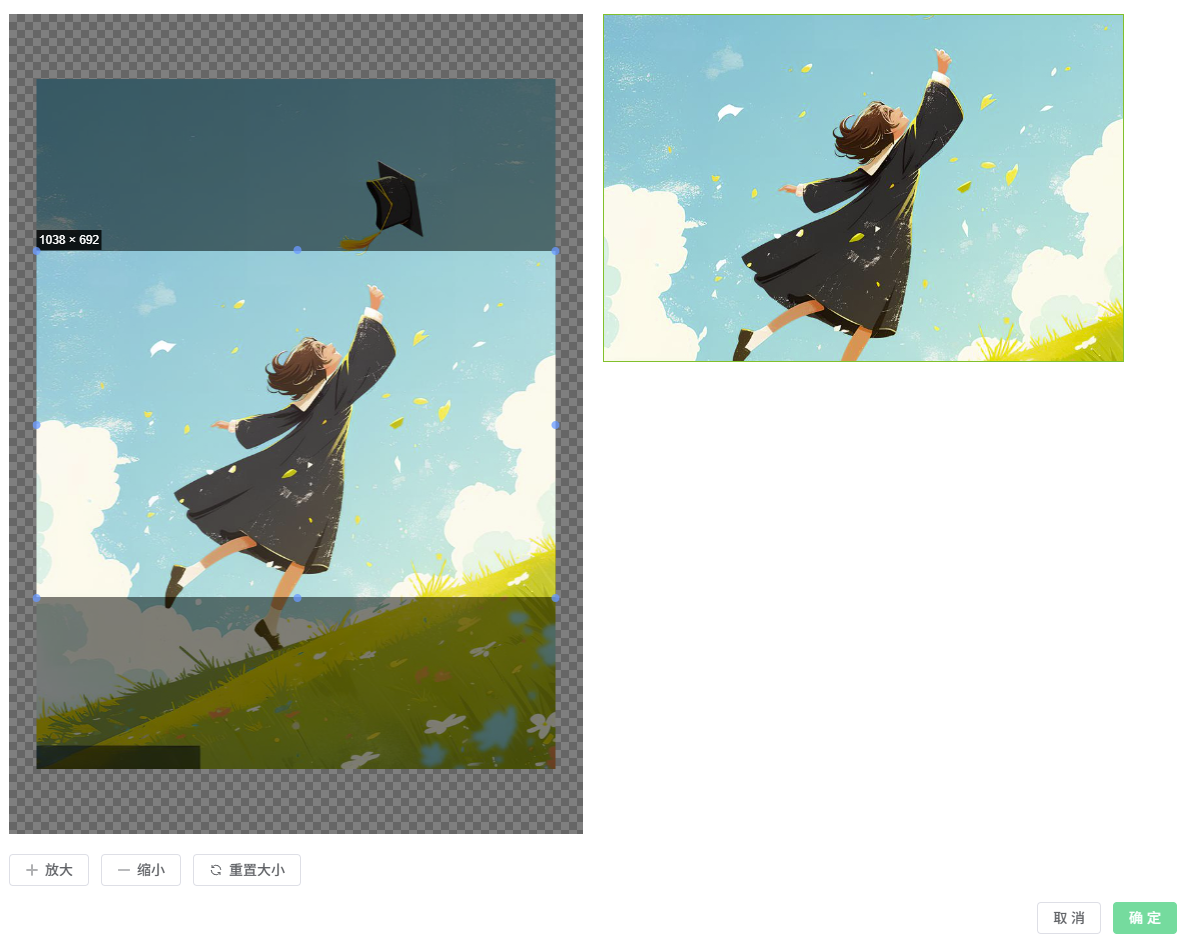
因我的项目需求只有简单点裁剪和压缩,所以这里没有添置过多的操作按钮
二、实现方式
1、安装vue-cropper
bash
npm install vue-cropper --save或
bash
yarn add vue-cropper --save2、vue-cropper实现图片裁剪
我使用vue-cropper封装了一个图片裁剪组件,在需要的父组件中调用即可;以下是基于vue3+elementPLus写的,如果你的项目不是,可适当调整组件,另外我的需求截图框的宽高比例改为1.5:1 ,如果你的是别的比例可自由调整fixedNumber字段
javascript
<template>
  <el-dialog title="图片裁剪" v-model="show" width="1200px" :closeOnClickModal="false" @close="handleClose" v-loading="loading">
    <el-row :gutter="20">
      <el-col :span="12" class="cropper-box">
          <div class="cropper">
            <vue-cropper
              ref="cropperRef"
              :img="option.img"
              :output-size="option.outputSize"
              :info="option.info"
              :can-scale="option.canScale"
              :auto-crop="option.autoCrop"
              :auto-crop-width="option.autoCropWidth"
              :auto-crop-height="option.autoCropHeight"
              :fixed="option.fixed"
              :fixed-number="option.fixedNumber"
              :full="option.full"
              :fixed-box="option.fixedBox"
              :can-move="option.canMove"
              :can-move-box="option.canMoveBox"
              :original="option.original"
              :center-box="option.centerBox"
              :height="option.height"
              :info-true="option.infoTrue"
              :max-img-size="option.maxImgSize"
              :enlarge="option.enlarge"
              :mode="option.mode"
              :limit-min-size="option.limitMinSize"
              @realTime="realTime"
          />
        </div>
      </el-col>
      <el-col :span="12">
        <!--预览效果图-->
        <div class="show-preview">
          <div :style="previews.div" class="preview">
            <img ref="previewsRef" :src="previews.url" :style="previews.img">
          </div>
        </div>
      </el-col>
    </el-row>
    <div>
      <el-button icon="Plus" @click="scaleBigger">放大</el-button>
      <el-button icon="Minus" @click="scaleSmaller">缩小</el-button>
      <el-button icon="Refresh" @click="reload">重置大小</el-button>
    </div>
    <template #footer>
      <span class="dialog-footer">
        <el-button @click="handleClose">取 消</el-button>
        <el-button type="primary" :loading="loading" @click="onSubmit">确 定</el-button>
      </span>
    </template>
  </e-dialog>
</template>
<script setup lang="ts">
import { ref, reactive, computed } from 'vue'
import 'vue-cropper/dist/index.css';
import { VueCropper } from 'vue-cropper';
import { Plus, Minus, Refresh } from '@element-plus/icons-vue';
import { compressImage } from '@/utils/biz';

const props = defineProps({
  fileSizeLimit: {
    type: Number,
    default: 20
  }
})
// 定义响应式数据
const show = ref(false)
const previews = ref({})
const cropperRef = ref()
const previewsRef = ref()
const ratioValue = ref(1.5) // 当前比例数值
const isRatioValid = ref(true) // 比例是否有效
const loading = ref(false) // 压缩加载状态

// 裁剪选项配置
const option = reactive({
  img: '', // 裁剪图片的地址
  outputSize: 1, // 裁剪生成图片的质量(可选0.1 - 1)
  outputType: 'png', // 裁剪生成图片的格式(png || png || webp),使用PNG保持质量
  info: true, // 图片大小信息
  canScale: true, // 图片是否允许滚轮缩放
  autoCrop: true, // 是否默认生成截图框
  autoCropWidth: 0, // 默认生成截图框宽度(设为0,将根据图片宽度自动计算)
  autoCropHeight: 0, // 默认生成截图框高度(设为0,将根据图片宽度和比例自动计算)
  fixed: true, // 是否开启截图框宽高固定比例
  fixedNumber: [1.5, 1], // 截图框的宽高比例改为1.5:1
  full: false, // false按原比例裁切图片,不失真
  fixedBox: false, // 允许调整截图框大小
  canMove: true, // 上传图片是否可以移动
  canMoveBox: true, // 截图框能否拖动
  original: false, // 上传图片不按照原始比例渲染,进行缩放
  centerBox: true, // 截图框是否被限制在图片里面
  height: true, // 是否按照设备的dpr 输出等比例图片
  infoTrue: true, // true为展示真实输出图片宽高,false展示看到的截图框宽高
  maxImgSize: 690, // 限制图片最大宽度和高度
  enlarge: 2, // 图片根据截图框输出比例倍数
  mode: 'contain', // 图片默认渲染方式,让图片缩放以完全显示在裁剪区域内
})

const file = ref(null)
const form = ref({})

// 定义事件
const emit = defineEmits(['handleUploadSuccess', 'handleUploadCancel'])

// 展示裁剪弹窗
const handleOpen = (val: any, obj: any, formData: any) => {
  Object.assign(option, obj)
  file.value = val
  form.value = formData
  show.value = true
  option.img = URL.createObjectURL(val.raw)

  // 创建图片对象来获取图片的实际尺寸
  const img = new Image()
  img.onload = () => {
    // 获取图片的实际宽度
    const imageWidth = img.width

    // 根据1.5的宽高比计算高度
    const imageHeight = Math.round(imageWidth / 1.5)

    // 设置裁剪框的宽度为图片宽度,高度为计算出的高度
    option.autoCropWidth = imageWidth
    option.autoCropHeight = imageHeight
  }
  img.src = URL.createObjectURL(val.raw)

  const reader = new FileReader()
  reader.readAsDataURL(val.raw)
}

// 关闭弹窗
const handleClose = () => {
  show.value = false
  // 触发取消事件
  emit('handleUploadCancel')
}

// 实时预览函数
const realTime = (data: any) => {
  previews.value = data

  // 计算并显示当前比例
  if (data && data.w && data.h) {
    const ratio = parseFloat((data.w / data.h).toFixed(2))
    ratioValue.value = ratio

    // 检查比例是否接近1.5(允许±0.1的误差)
    isRatioValid.value = ratio >= 1.4 && ratio <= 1.6

    // 如果比例超出范围,显示错误提示
    if (!isRatioValid.value) {
      // 可以在这里添加错误提示,但为了避免频繁提示,只在用户操作时显示
    }
  }
}

// 缩放图片
const resizeBlob = (blob: Blob, desiredWidth: number, desiredHeight: number): Promise<Blob> => {
  return new Promise((resolve, reject) => {
    const img = new Image()
    img.onload = () => {
      const canvas = document.createElement('canvas')
      const ctx = canvas.getContext('2d')

      if (!ctx) {
        reject(new Error('Canvas context not available'))
        return
      }

      // 计算缩放比例
      const scaleX = desiredWidth / img.width
      const scaleY = desiredHeight / img.height
      const scale = Math.min(scaleX, scaleY)

      // 设置 Canvas 的宽度和高度
      canvas.width = desiredWidth
      canvas.height = desiredHeight

      // 绘制图片到 Canvas 上,并进行缩放
      ctx.drawImage(img, 0, 0, img.width * scale, img.height * scale)

      // 将 Canvas 中的图像转换为 Blob 对象
      canvas.toBlob((resizedBlob) => {
        if (resizedBlob) {
          resolve(resizedBlob)
        } else {
          reject(new Error('Failed to create blob'))
        }
      }, blob.type)
    }

    img.onerror = (error) => {
      reject(error)
    }

    img.src = URL.createObjectURL(blob)
  })
}

// 确定
const onSubmit = async () => {
  if (!cropperRef.value) return

  // 显示Loading
  loading.value = true

  try {
    // 获取截图的Blob对象
    const data = await new Promise<Blob>((resolve) => {
      cropperRef.value.getCropBlob(resolve)
    })

    // 检查图片大小
    const fileSizeMB = data.size / (1024 * 1024)
    console.log(`裁剪后图片大小: ${fileSizeMB.toFixed(2)}MB`)

    let finalBlob = data

    // 如果图片大于指定MB,进行压缩(如不需要压缩功能,可删除这个if,不调用compressImage)
    if (fileSizeMB > props.fileSizeLimit) {
      console.log('图片大于指定MB,开始压缩...')
      finalBlob = await compressImage(data, props.fileSizeLimit)
      const compressedSizeMB = finalBlob.size / (1024 * 1024)
      console.log(`压缩后图片大小: ${compressedSizeMB.toFixed(2)}MB`)
    }

    // 创建最终文件,保持原始格式
    const originalType = data.type || 'image/png'
    const fileExtension = originalType.split('/')[1] || 'png'
    const result = new File([finalBlob], `图片${(new Date()).getTime()}.${fileExtension}`, {
      type: originalType,
      lastModified: Date.now()
    })

    // 获取裁剪后图片的实际尺寸用于调试
    const img = new Image()
    const url = URL.createObjectURL(finalBlob)
    img.src = url
    img.onload = function() {
      console.log('最终图片尺寸:', img.width, 'x', img.height)
      URL.revokeObjectURL(url)
    }

    show.value = false
    emit('handleUploadSuccess', result)
  } catch (error) {
    console.error('图片处理失败:', error)
    // 可以在这里添加错误提示
  } finally {
    // 关闭Loading
    loading.value = false
  }
}

const handleResizeBlob = (originalBlob: Blob, desiredWidth: number, desiredHeight: number) => {
  resizeBlob(originalBlob, desiredWidth, desiredHeight)
    .then((resizedBlob) => {
      // 在此处使用缩放后的 Blob 对象,保持原始格式
      const originalType = originalBlob.type || 'image/png'
      const fileExtension = originalType.split('/')[1] || 'png'
      const result = new File([resizedBlob], `图片${(new Date()).getTime()}.${fileExtension}`, {
        type: originalType,
        lastModified: Date.now()
      })
      show.value = false
      emit('handleUploadSuccess', result)
    })
    .catch((error) => {
      console.error('Error resizing Blob:', error)
    })
}

// 放大
const scaleBigger = () => {
  if (cropperRef.value) {
    cropperRef.value.changeScale(1)
  }
}

// 缩小
const scaleSmaller = () => {
  if (cropperRef.value) {
    cropperRef.value.changeScale(-1)
  }
}

// 重置大小
const reload = () => {
  if (cropperRef.value) {
    cropperRef.value.reload()
  }
}

// 暴露方法给父组件
defineExpose({
  handleOpen,
  handleClose
})
</script>
<style scoped lang="scss">
  .cropper-box{
    width: 550px;
    margin-bottom: 20px;
    .cropper{
      width: 100%;
      height: 820px;
    }
  }

  .show-preview{
    width: 345px;
    height: 175px;
    max-width: 345px;
    max-height: 175px;
    min-width: 345px;
    min-height: 175px;

    .preview{
      width: 100%;
      height: 100%;
      overflow: hidden;
      border:1px solid #67c23a;
      background: #cccccc;
      img{
        width: 100%;
        height: 100%;
        object-fit: contain;
      }
    }
  }
</style>
3、图片压缩
我上方代码里import { compressImage } from '@/utils/biz'; 引入了一个工具函数compressImage ,主要是进行压缩,返回压缩后的文件,函数入参已注释说明
javascript
// 图片压缩函数
// blob:需要压缩的blob
// maxSizeMB: 是需要压缩到多少MB内就传几
export const compressImage = (blob: Blob, maxSizeMB: number = 1): Promise<Blob> => {

  return new Promise((resolve, reject) => {

    const maxSizeBytes = maxSizeMB * 1024 * 1024 // 1MB

    // 如果图片已经小于等于1MB,直接返回

    if (blob.size <= maxSizeBytes) {

      resolve(blob)

      return

    }

    const img = new Image()

    const canvas = document.createElement('canvas')

    const ctx = canvas.getContext('2d')


    if (!ctx) {

      reject(new Error('Canvas context not available'))

      return

    }

    img.onload = () => {

      // 计算压缩比例

      const originalSize = blob.size

      const compressionRatio = maxSizeBytes / originalSize


      // 计算压缩后的尺寸(保持宽高比)

      const scale = Math.sqrt(compressionRatio)

      const newWidth = Math.floor(img.width * scale)

      const newHeight = Math.floor(img.height * scale)

      // 设置Canvas尺寸

      canvas.width = newWidth

      canvas.height = newHeight


      // 绘制压缩后的图片

      ctx.fillStyle = '#ffffff'

      ctx.fillRect(0, 0, newWidth, newHeight)

      ctx.drawImage(img, 0, 0, newWidth, newHeight)

      // 转换为Blob,逐步降低质量直到满足大小要求

      let quality = 0.9

      const tryCompress = () => {

        canvas.toBlob((compressedBlob) => {

          if (!compressedBlob) {

            reject(new Error('Failed to compress image'))

            return

          }


          if (compressedBlob.size <= maxSizeBytes || quality <= 0.1) {

            console.log(`压缩完成: ${originalSize} -> ${compressedBlob.size} bytes, 质量: ${quality}`)

            resolve(compressedBlob)

          } else {

            // 继续降低质量

            quality -= 0.1

            canvas.toBlob(tryCompress, 'image/jpeg', quality)

          }

        }, 'image/jpeg', quality)

      }


      tryCompress()

    }


    img.onerror = (error) => {

      reject(error)

    }


    img.src = URL.createObjectURL(blob)

  })

}
4、图片压缩组件使用
在你需要使用的父组件中引入2的子组件,以及实现相关函数,上传我用的是el-upload组件,这里只实现了beforeUpload,如果你不是改成你的上传回调即可。
javascript
<!-- 图片裁剪框 -->
<CropperImage ref="cropperImage" :fileSizeLimit="1" @handleUploadSuccess="handleUploadSuccess" @handleUploadCancel="handleUploadCancel" />

// 图片裁剪相关
const cropperImage = ref(null)
let uploadResolve: any = null
let uploadReject: any = null

// el-upload绑定的beforeUpload函数
const pictureBeforeUpload = async (rawFile): Promise<boolean | void | File | Blob> => {
	if (rawFile.type !== 'image/jpeg' && rawFile.type !== 'image/png') {
		ElMessage.error('只支持jpg和png格式的图片')
		return false
	}
	// 返回一个Promise,等待裁剪完成后再解析,否则还是给原图给el-upload组件
	return new Promise((resolve, reject) => {
		uploadResolve = resolve
		uploadReject = reject
		// 显示图片裁剪框,让用户调整图片
		cropperImage.value.handleOpen({ raw: rawFile })
	})
}

// 裁剪成功的回调
const handleUploadSuccess = (val) => {
	// 将裁剪后的图片传递给el-upload组件
	if (val && uploadResolve) {
		// 解析Promise
		uploadResolve(val)
		uploadResolve = null
		uploadReject = null
	}
}

// 裁剪取消的回调
const handleUploadCancel = () => {
	// 如果用户取消裁剪,拒绝Promise
	if (uploadReject) {
		uploadReject(new Error('用户取消了图片裁剪'))
		uploadResolve = null
		uploadReject = null
	}
}
end~
希望记录的问题能帮助到你!