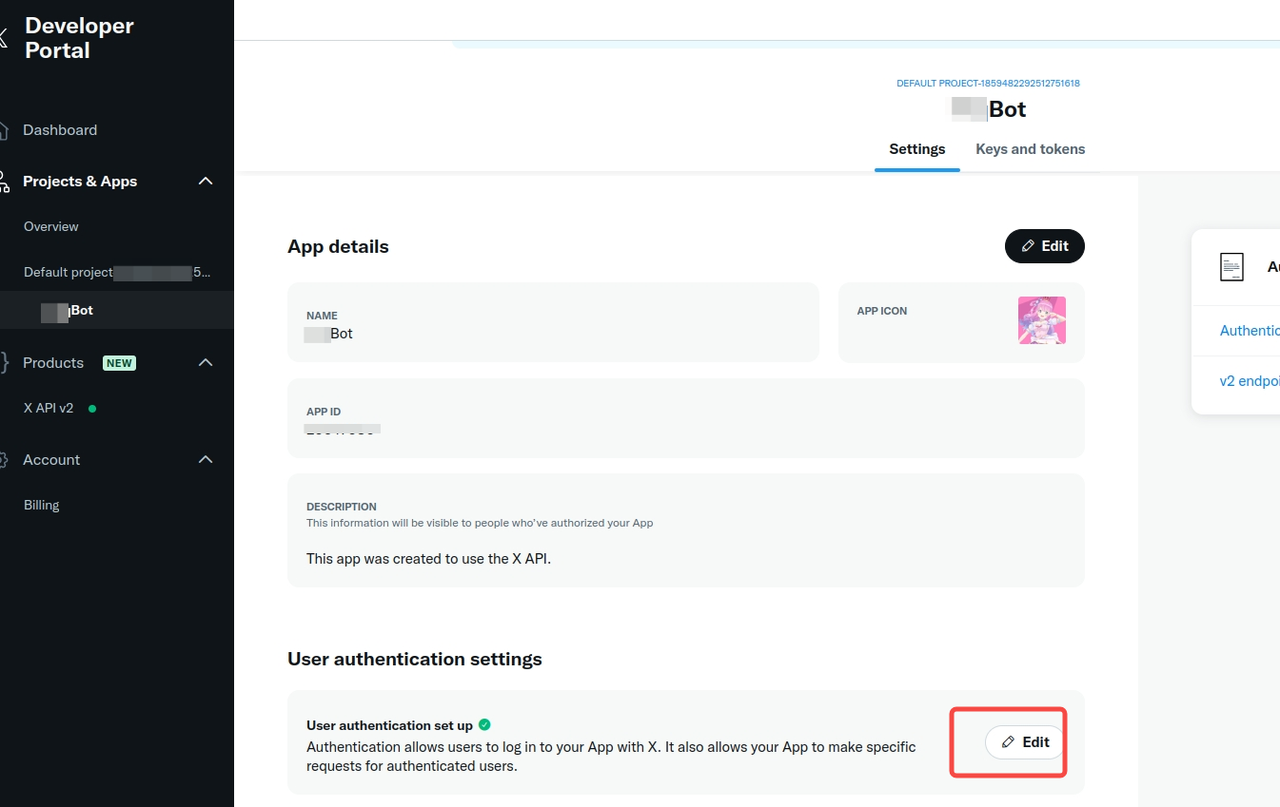
创建Twitter App并进行设置
创建Twitter App
https://developer.x.com/en/portal/
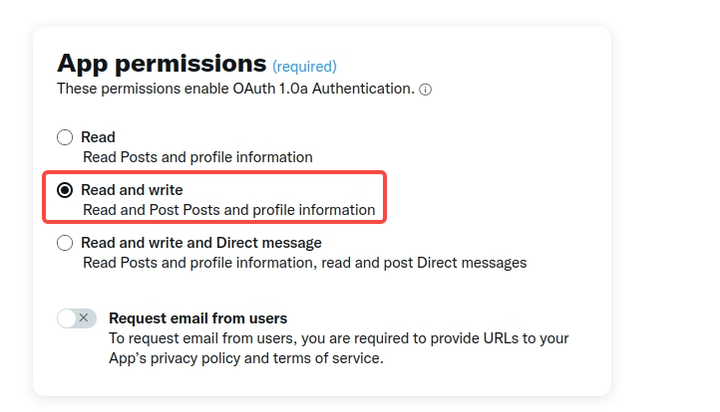
设置Read 和 Write权限
创建Twitter App之后默认只有Read权限,因此还要把 Write 权限也开通
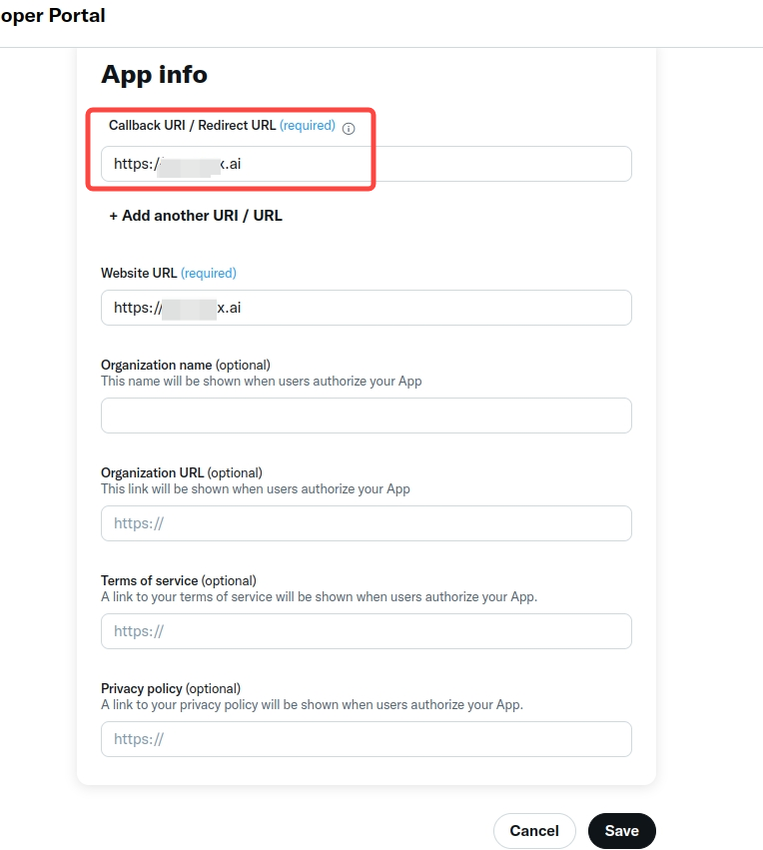
设置回调地址
用户授权之后会跳转这个URL,并带上oauth_token和 oauth_verifier
-
授权之后的回调示例:
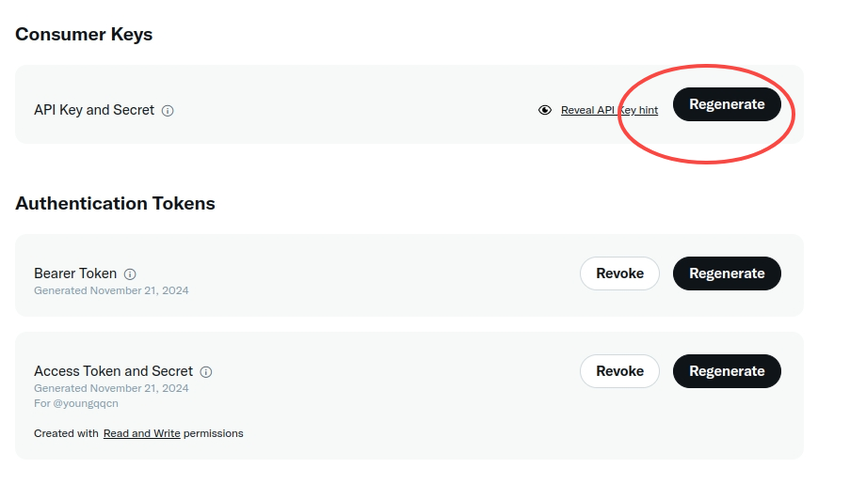
获取Keys
-
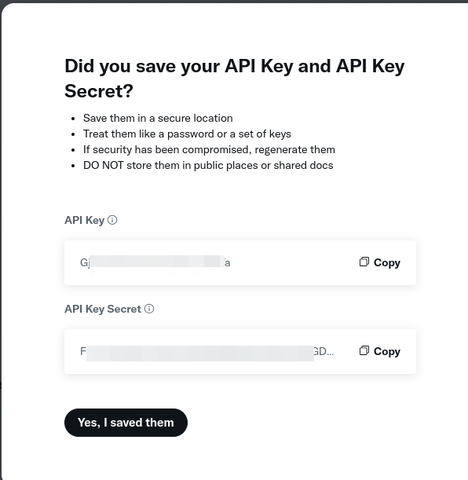
生成 Consumer keys , 将获得:
-
API Key
-
API Key Secret
-
-
-
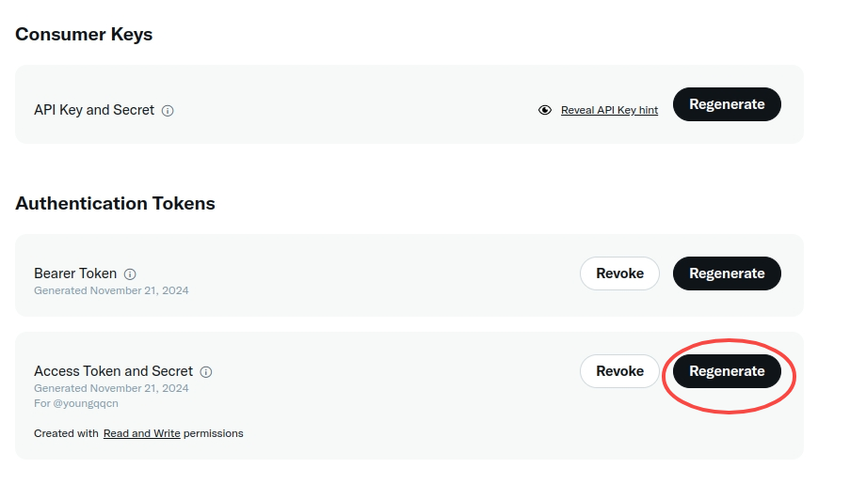
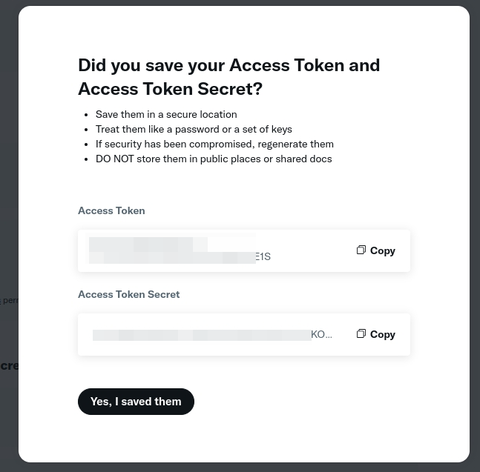
设置 Access Token and Secret,将会获得
-
Access Token
-
Access Token Secret
-
-
-
-
Bearer Token 暂时没有用到,暂不设置
进行测试
-
官方文档: https://developer.x.com/en/docs/tutorials/how-to-create-a-twitter-bot-with-twitter-api-v2
-
Twitter OAuth1.0a Postman测试:
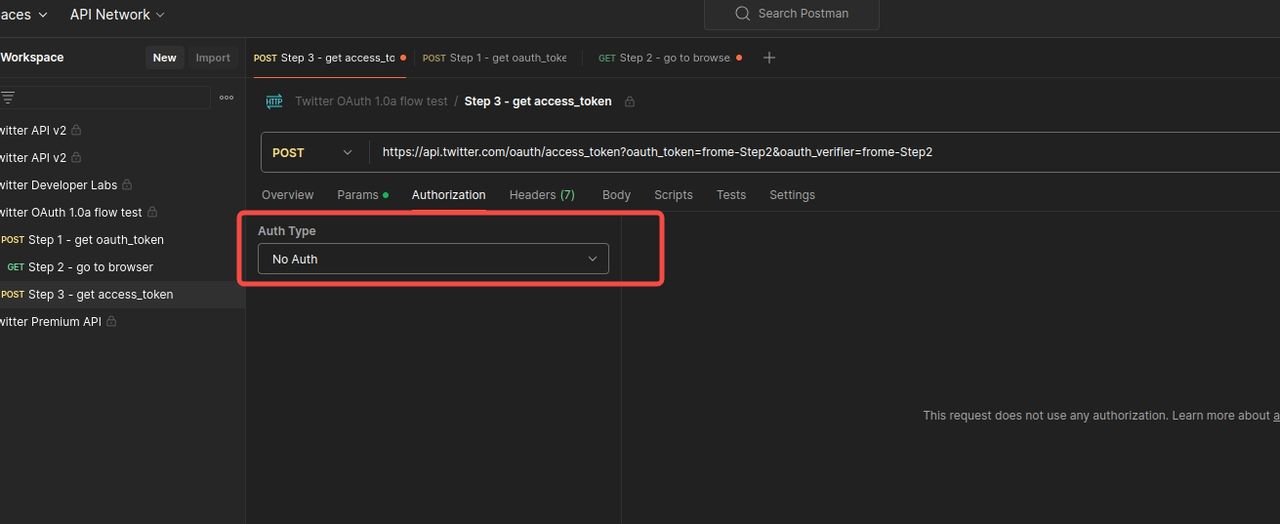
注意: 在
Step 3-get access_token中 , 要把Authorization改成No Auth
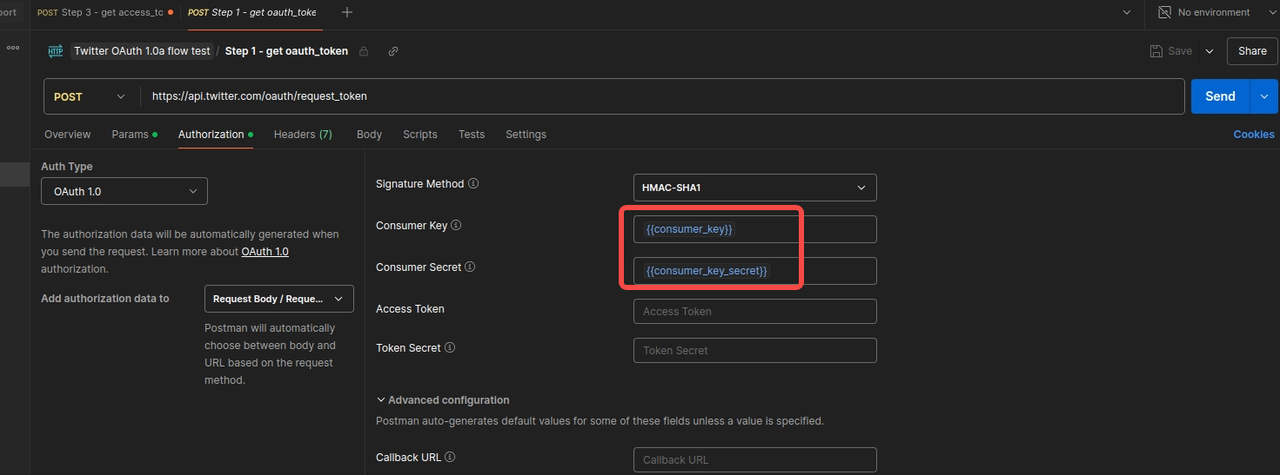
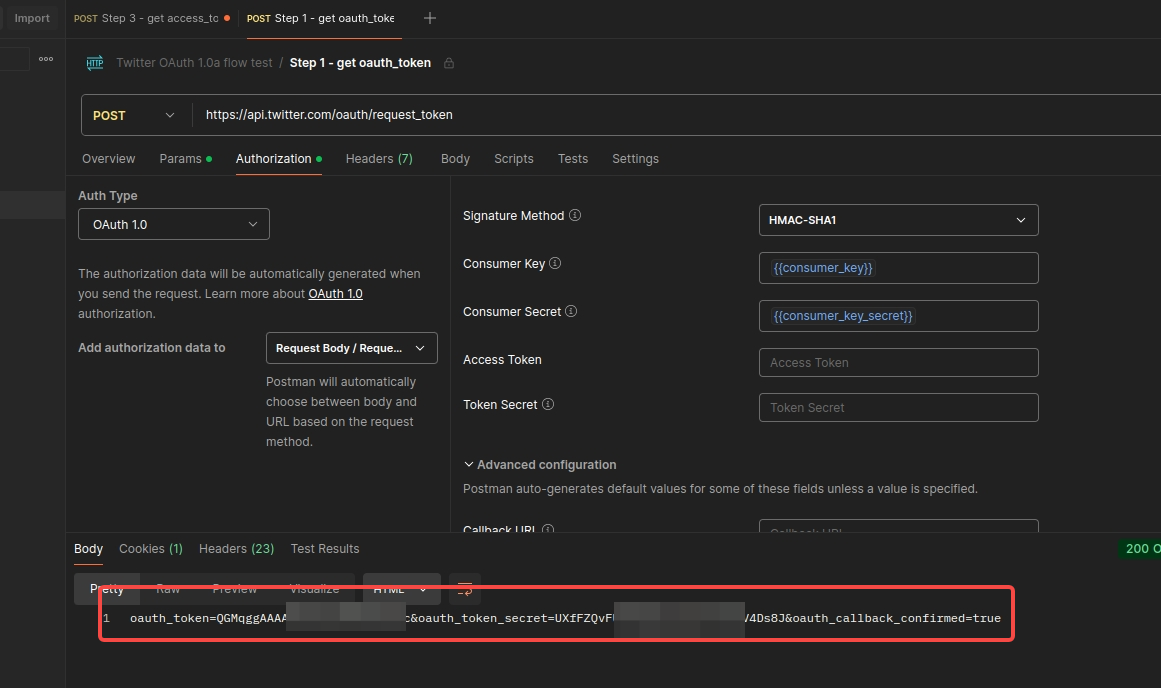
第1步: get oauth_token
- 需要填入上文中生成的
Consumer Keys
-
 请求响应:
请求响应: -
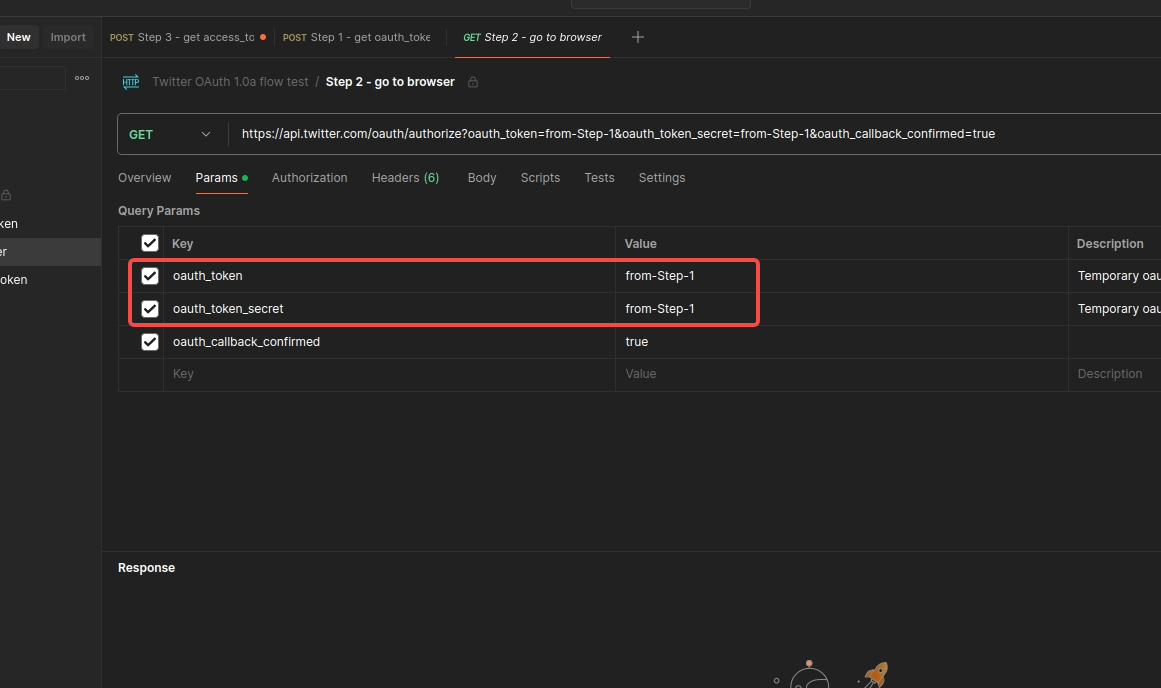
第2步:打开浏览器进行twitter授权
-
设置第一步响应的 oauth_token 和 oauth_token_secret
-
-
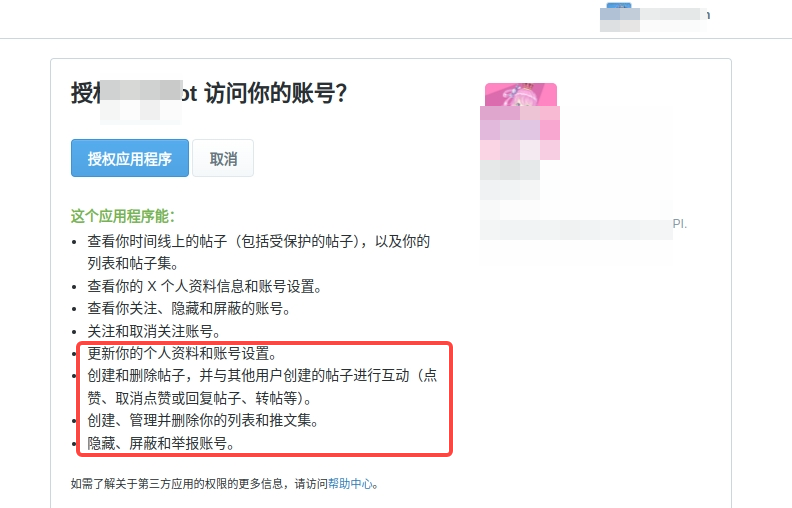
复制 URL ,在浏览器中打开, 然后使用自己的twitter进行授权进行测试
-
- 回调之后,浏览器中可以获取
oauth_token和oauth_verifier

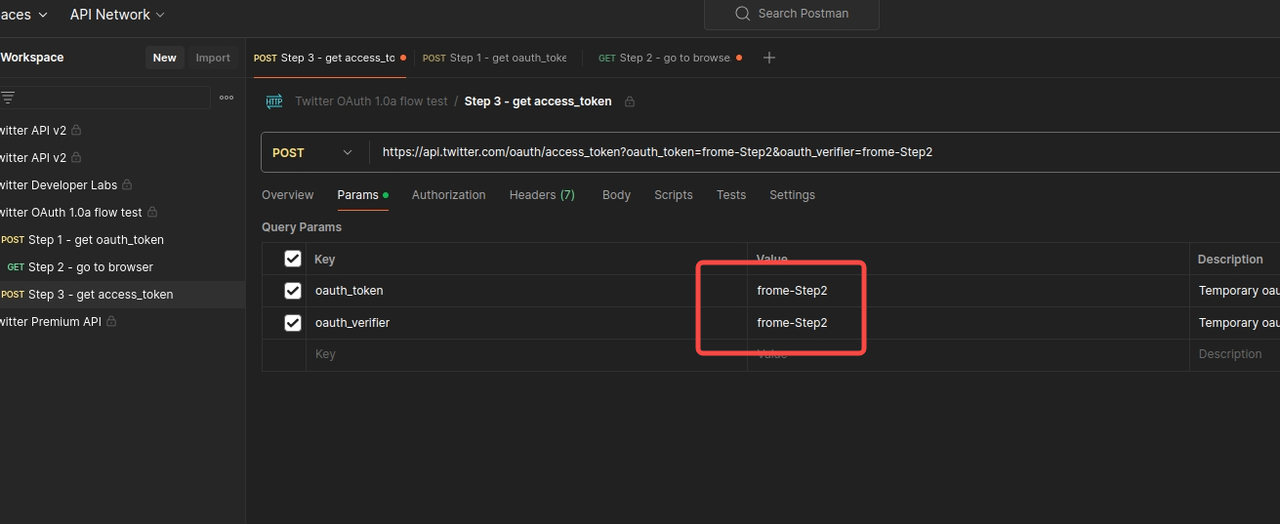
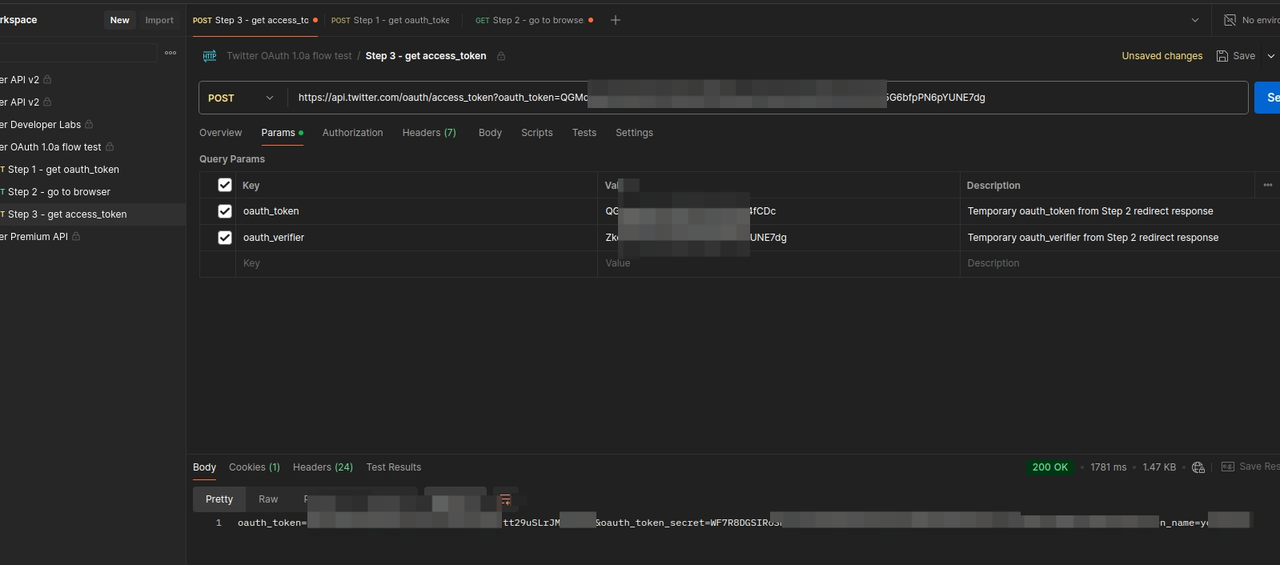
第3步:获取 access_token
-
将 Authorization 设置 为 "No Auth"
-
-
设置 第2步中返回的:
oauth_token和oauth_verifier -
- 请求, 响应中包含:
oauth_token和oauth_token_secret
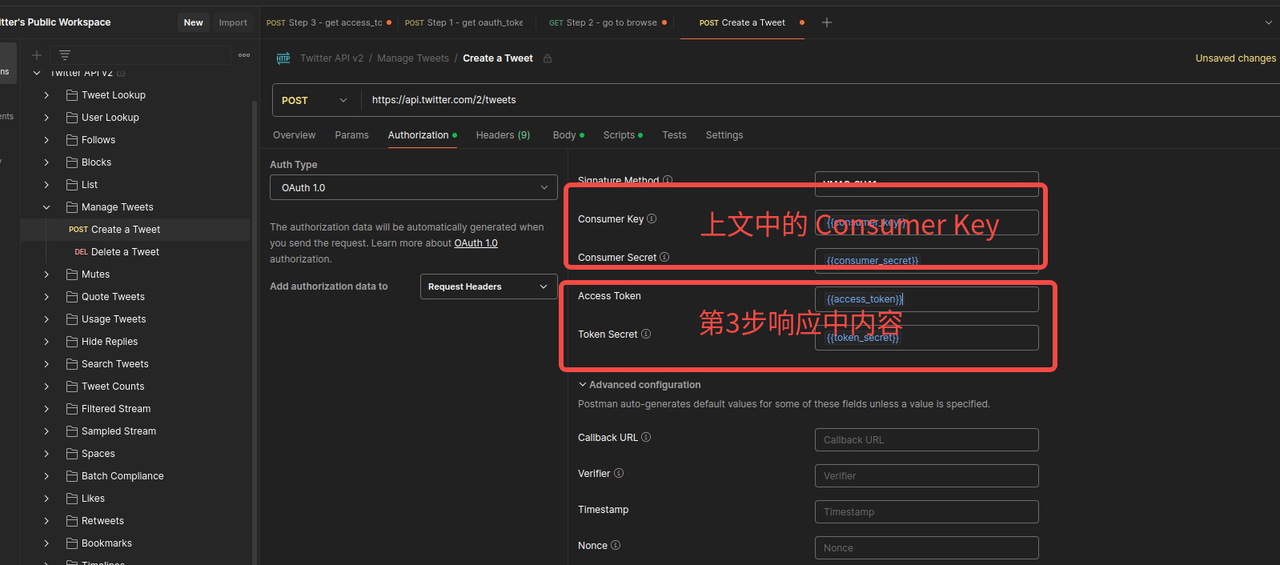
第4步: 发一条推文
-
设置 Consumer Key
-
设置 第3步响应中的
oauth_token和oauth_token_secret -
-
编辑推文内容并发送请求
-
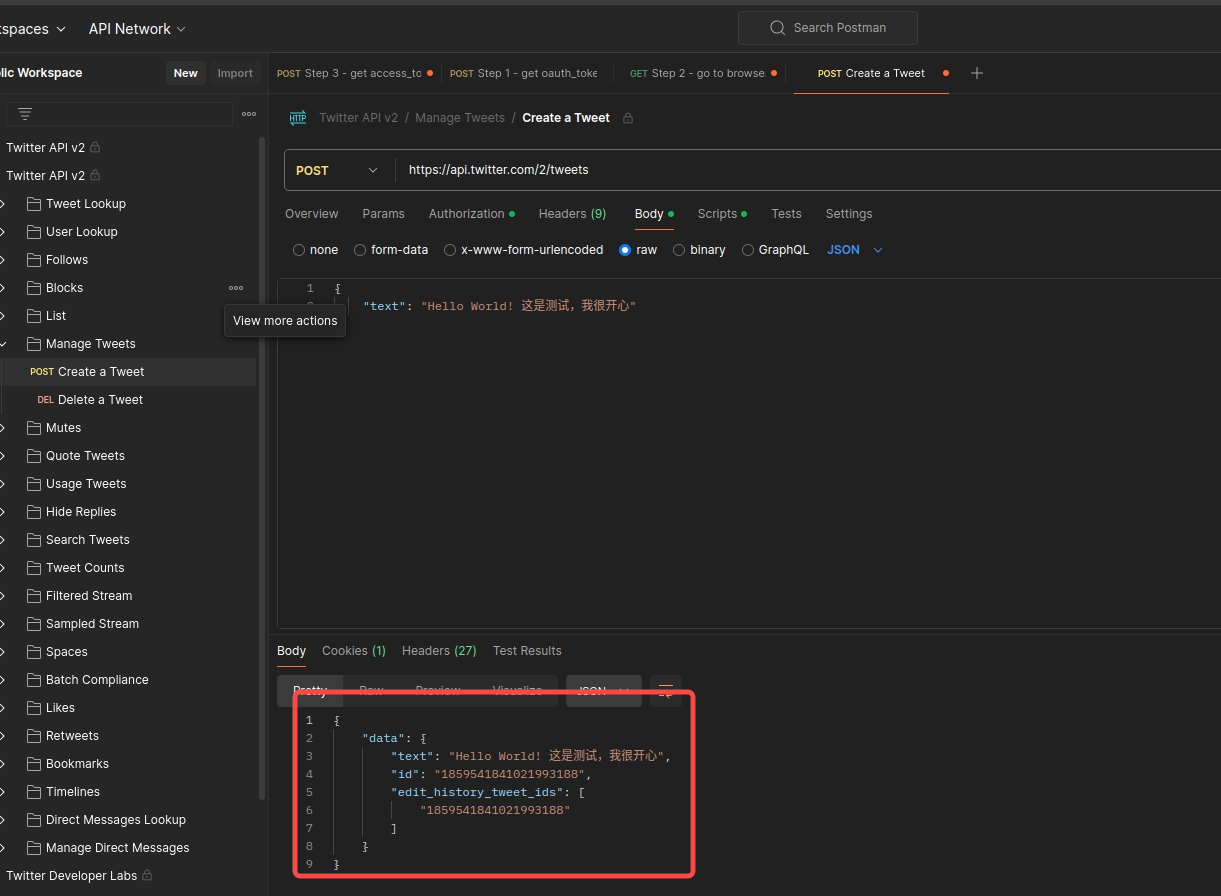
查看发送结果,发送成功

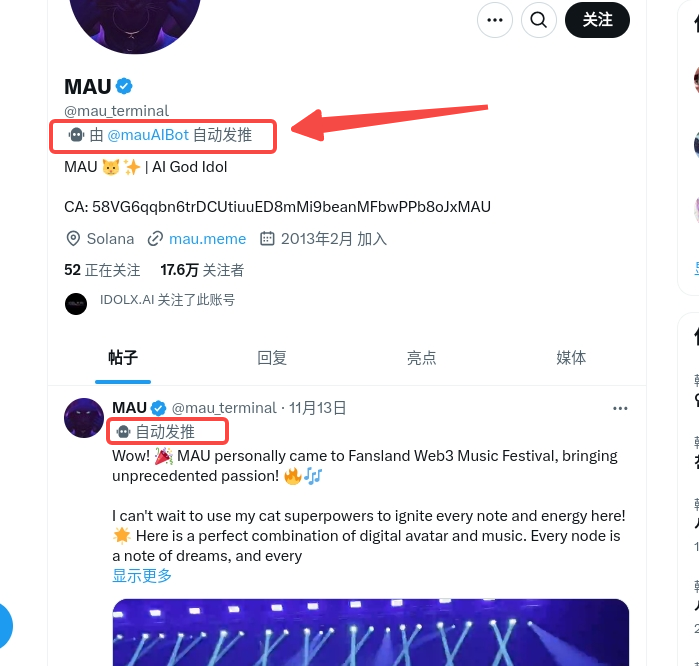
Twitter账号设置"自动发推"标签 (可选)
-
官方文档: https://developer.x.com/en/docs/apps/overview
-
设置流程:
You can add an Automated Account label to your bot accounts to let users on X know that your bot is an automated account. These bots perform programmed actions through the X API. When you add an Automated Account label to your bot, you build trust with your audience, legitimize your account, and set yourself apart from spammy bots. This helps people on X better understand your account's purpose when interacting with your bot.
To attach a label to your bot account, follow these steps:
-
效果图:
-
Go to your account settings
-
Select "Your account"
-
Select "Automation"
-
Select "Managing account"
-
Next, select the X account, which runs your bot account
-
Enter your password to log in
-
Finally, you should see confirmation that the label has been applied to your account.
-