前言
VSCode 几乎是前端开发人员的标配,而现在编辑器往往只提供代码编辑 、文件和项目管理 、终端集成 、源代码管理 、调试支持等核心功能,而一些扩展功能则交给插件来实现。
会编写 VSCode 插件可以极大提升我们的开发效率,本文将介绍如何编写一个简单的 VSCode 插件。
1、 安装工具,初始化项目
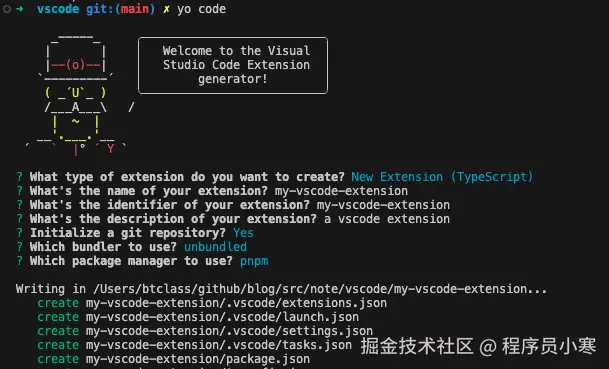
首先肯定要安装 node,再通过其自带 npm 包管理工具安装 yo 和 generator-code。
yo:全称叫Yeoman,是一个现代 Web 应用的脚手架工具(命令行工具),用于快速生成项目。generator-code:VS Code扩展生成器。
bash
npm install -g yo@5 generator-code注意,使用
yo最新的6.0.0版本运行yo命令会报错,因此这里指定安装5版本。
安装完成后,运行 yo code 命令,初始化项目。
bash
yo code这里按提示即可,我这里选择的是 pnpm + Typescript。
其主要项目结构如下:
bash
my-vscode-extension/
├── .vscode/            # VS Code 调试配置
│   ├── launch.json
│   └── tasks.json
├── src/
│   ├── test/           # 测试文件
│   └── extension.ts    # 插件主入口文件
├── .gitignore          # git 忽略文件
├── .npmrc              # npm 配置文件
├── .vscode-test.mjs    # 单测配置文件
├── .vscodeignore       # 插件发布忽略文件
├── package.json        # 项目依赖管理文件
├── tsconfig.json       # TypeScript 配置文件
├── eslint.config.mjs   # Eslint 配置文件
└── README.md
介绍一下 package.json 中提供的几个重要命令:
json
{
  "scripts": {
    "vscode:prepublish": "pnpm run compile",
    "compile": "tsc -p ./",
    "watch": "tsc -watch -p ./",
    "pretest": "pnpm run compile && pnpm run lint",
    "lint": "eslint src",
    "test": "vscode-test"
  },
}
npm run compile:编译 TypeScript 代码。npm run watch:监听 TypeScript 文件变化并实时编译。npm run test:运行单元测试。
另外是 package.json 中提供的插件命令。
json
{
  "contributes": {
    "commands": [
      {
        "command": "my-vscode-extension.helloWorld",
        "title": "Hello World"
      }
    ]
  },
}
在默认提供的 demo 中,插件命令名字叫 hello world。
2、调试插件
在调试插件前,需要先运行下 npm run compile 编译 TypeScript 代码,经编译后会生成 out/ 文件,然后便可以开始调试了。
为什么要先编译呢?因为在 package.json 中定义了插件运行的入口文件,也就是 main 字段,默认值为 ./out/extension.js,所以如果不先编译生成 out/ 文件是会运行报错的。
json
{
  "main": "./out/extension.js",
}
有两种启动调试的方式:
- 按快捷键
F5。 - 点击编辑器左下方的
Run Extension(插件名)。
启动后,会自动打开一个新的 VS Code 窗口,并启动调试模式,我们可以在该窗口中调试插件。
先按 Ctrl/Command + Shift + P,输入 hello word,会发现找不到命令。

这里是因为我们本地安装的 vscode 版本不符合插件要求,我们在 package.json 找到如下配置:
json
{
  "engines": {
    "vscode": "^1.107.0"
  },
}
然后我们再查看下本机的 vscode 版本,Code -> About VisualStdio Code。
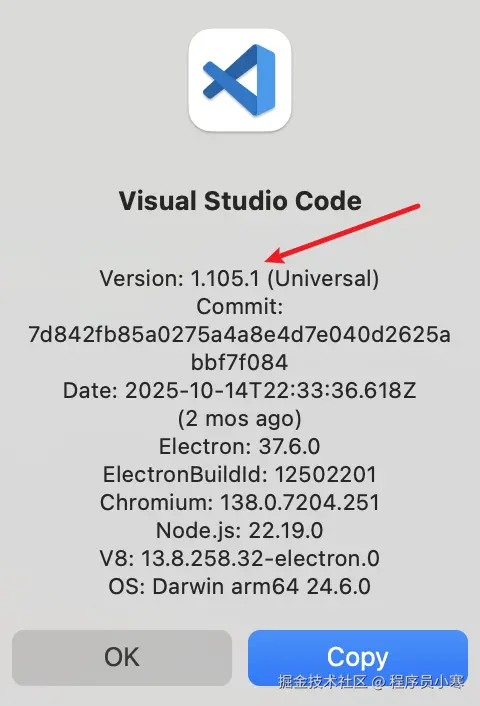
发现我们本地版本为 1.105.1,不满足 ^1.107.0,于是我们把 engines.vscode 修改为 ^1.105.0。
json
{
  "engines": {
    "vscode": "^1.105.0"
  },
}
再通过 F5 或者左下角 Run Extension 启动调试,按 Ctrl/Command + Shift + P,输入hello world,就能看到命令了。这个 hello world 就对应我们上面说的 package.json 文件中的 contributes.commands.title 字段。
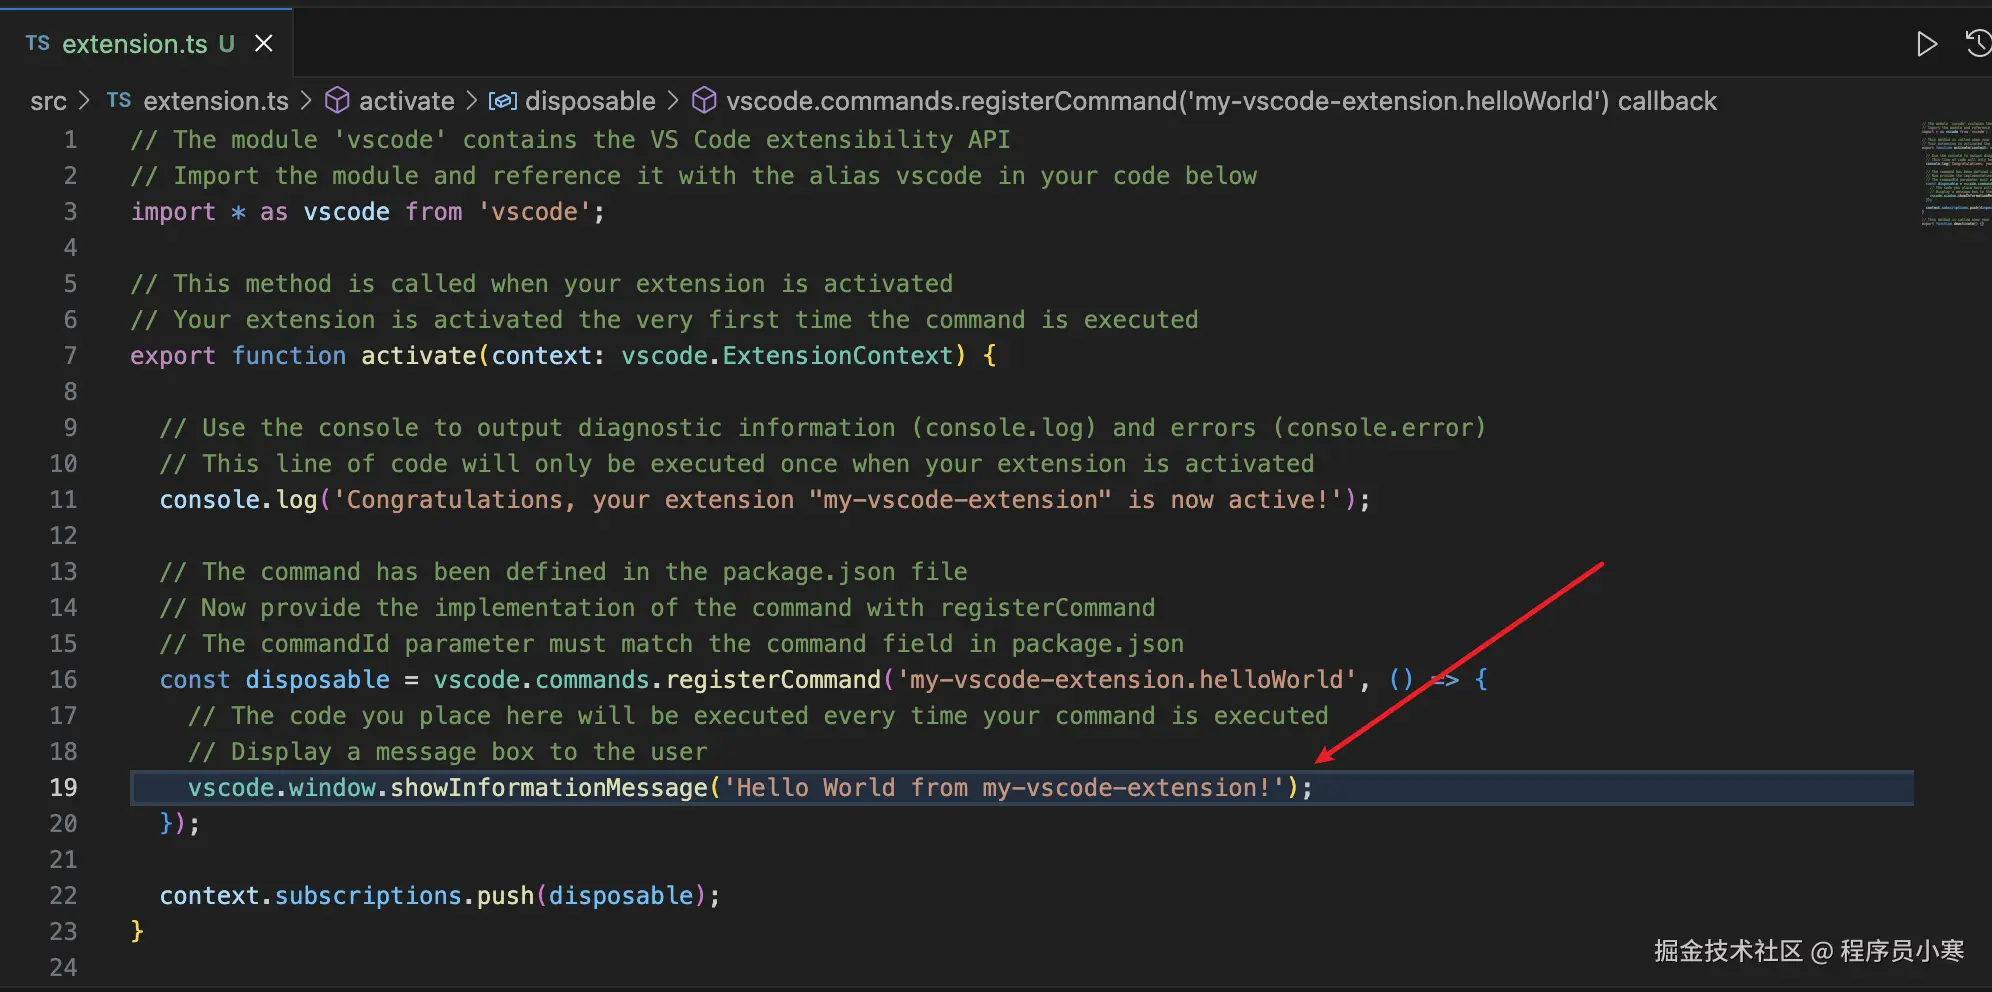
成功运行后,会在编辑器右下角看到如下提示:
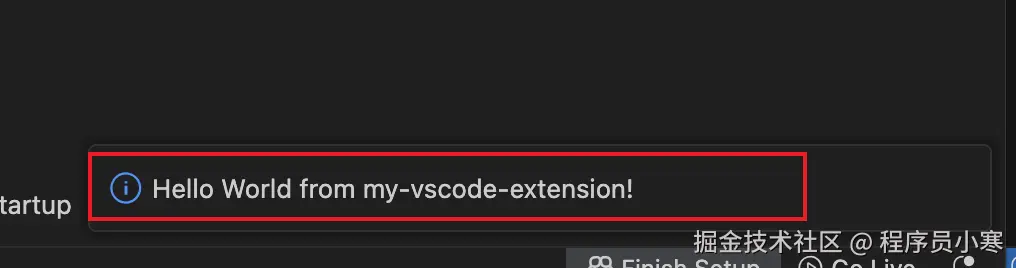
这个提示就是对应 src/extension.ts 的如下代码:
然后我们就可以开始编写插件的具体功能了。
3、编写插件核心逻辑
我们来实现一个简单的功能,平时我们写代码时,经常会写 console.log,如果每次都写这个太麻烦了,我们希望能实现下面的功能:
- 通过快捷键,可以快速生成
console.log语句。 - 光标选中变量并按下快捷键时,能把变量名也显示出来。
3.1 修改 package.json,定义插件名字、描述和快捷键
定义名字 name,描述 description,快捷键 keybindings,通过 ctrl/command+alt+l 可以运行插件。
json
{
  "name": "log-util",
  "displayName": "log-util",
  "description": "generate log statement",
   "contributes": {
    "commands": [
      {
        "command": "log-util.logUtil",
        "title": "log util"
      }
    ],
    "keybindings": [
      {
        "command": "log-util.logUtil",
        "key": "ctrl+alt+l",
        "mac": "cmd+alt+l",
        "when": "editorTextFocus"
      }
    ]
  },
}
3.2 核心功能代码
修改 src/extension.ts 文件,实现插件功能。
先实现第一步,快速生成 console.log 语句。
ts
import * as vscode from "vscode";

export function activate(context: vscode.ExtensionContext) {
  const disposable = vscode.commands.registerCommand(
    "log-util.logUtil",
    async () => {
      const editor = vscode.window.activeTextEditor;
      if (!editor) {
        vscode.window.showWarningMessage("没有打开的编辑器");
        return;
      }
      // 获取配置
      const getConfig = () =>
        vscode.workspace.getConfiguration("consoleLogGenerator");
      const config = getConfig();
      const logType = config.get<string>("logType", "log");
      const prefix = config.get<string>("logPrefix", "🚀 ~ ");

      const position = editor.selection.active;

      const document = editor.document;
      const selection = editor.selection;
      const text = document.getText(selection);

      const statement = `console.${logType}('${prefix}:', );`;

      editor
        .edit((editBuilder) => {
          const insertPosition = new vscode.Position(position.line, position.character + 1);
          editBuilder.insert(insertPosition, statement);
        })
        .then((success) => {
          if (success) {
            // 设置光标位置
            const newPosition = new vscode.Position(position.line, statement.length + position.character - 2);
            editor.selection = new vscode.Selection(newPosition, newPosition);
          }
        });
    }
  );

  context.subscriptions.push(disposable);
}

export function deactivate() {}
然后实现第二步,增加对光标选中变量的处理。
diff
		 // 获取变量名
+   let variableName = text.trim();
-   const statement = `console.${logType}('${prefix}:', );`;
+   const statement = `console.${logType}('${prefix}${variableName ? ` →  ${variableName}` : ''}:', ${variableName});`;

    editor.edit(editBuilder => {
-     const insertPosition = new vscode.Position(position.line, position.character + 1);
+     const insertPosition = new vscode.Position(position.line + (variableName ? 1 : 0), variableName ? 0 : position.character + 1);
+     if (variableName) {
+       editBuilder.insert(insertPosition, '\n');
+     }
      editBuilder.insert(insertPosition, statement);
    }).then(success => {
        if (success) {
          // 设置光标位置
-         const newPosition = new vscode.Position(position.line, statement.length + position.character - 2);
+         const newPosition = new vscode.Position(position.line + (variableName ? 1 : 0), variableName ? statement.length : statement.length + position.character - 2);
          editor.selection = new vscode.Selection(newPosition, newPosition);
			}
		});
测试插件功能:
js
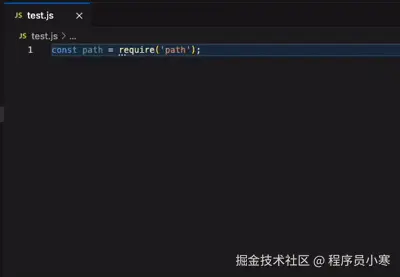
const path = require('path')
console.log('🚀 ~  →  path:', path); // 光标选中上一行的 path 变量,按 ctrl/command+alt+l 生成
console.log('🚀 ~ :', ); // 在当前行按 ctrl/command+alt+l 生成
效果如下:
4、发布插件
-
进入这个网站,点击
Sign in,先注册一个开发者账号。 -
点击
Public extensions,按照提示一步步发布即可。

小结
本文主要介绍了如何编写一个简单的 VSCode 插件,从开发到发布全流程:
- 安装
yo和generator-code。 - 运行
yo code命令生成插件项目,这里可以选择插件的开发语言,定义插件的名称、描述等。 - 修改
package.json文件,可以修改插件的名称、描述、入口文件,定义插件的快捷键。并要注意设置engines.vscode字段,指定插件支持的 VSCode 版本。 - 在
src/extension.ts文件中编写插件逻辑。 - 运行
npm run compile编译插件,或者运行npm run watch监听文件变化并编译。 - 按快捷键
F5,或者点击编辑器左下方的Run Extension进行插件调试。 - 在调试的新窗口中,使用
Ctrl/Command + Shift + P,输入配置的命令,或者按配置的快捷键,测试插件功能是否正常。 - 运行
npm run test测试插件功能。(本文未涉及到单元测试) - 发布插件。
希望本文对你有所帮助,如果你有任何问题,欢迎在评论区留言。