Flutter 实现一个容器内部元素可平移、缩放和旋转等功能(五)
Flutter: 3.35.6
前面我们简单实现了属性的抽取和元素的移动,接下来我们实现元素的旋转(因为旋转涉及到角度的变化,所以先行实现),因为原理在之前的单个中已经分析了,所以这里依然以代码结合详细注释来说明,只对特别注意的点单独提取出来说明。
因为前面我们抽取了响应区域的代码,我们应该能够了解到,响应操作的区域不止一个,所以直接提取列表存储响应区域。下面就该讨论如何渲染这些区域,第一种方式就是我们直接以元素自身为参考,定位这些区域,然后用选中状态判断,选中就展示,取消就隐藏;另外一种方式就是所有子元素共用一个,通过选中元素的状态去控制。这里选择的是第一种方式,不需要复杂的计算:
dart
/// 用于设置一些初始化值
class ConstantsConfig {
  // 其他省略...

  /// 元素的操作区域
  static final List<ResponseAreaModel> baseAreaList = [
    // 旋转
    ResponseAreaModel(
      areaWidth: 20,
      areaHeight: 20,
      xRatio: 1,
      yRatio: 0,
      status: ElementStatus.rotate,
      icon: 'assets/images/icon_rotate.png',
      trigger: TriggerMethod.move,
    ),
  ];
}
dart
/// 抽取渲染的元素
class TransformItem extends StatelessWidget {
  // 其他省略...

  @override
  Widget build(BuildContext context) {
    return Positioned(
      // 其他省略...

      // 新增旋转功能
      child: Transform.rotate(
        angle: elementItem.rotationAngle,
        child: Container(
          // 其他省略...

          // 新增区域的渲染
          child: selected ? Stack(
            clipBehavior: Clip.none,
            children: [
              ...ConstantsConfig.baseAreaList.map((item) => Positioned(
                top: elementItem.elementHeight * item.yRatio - item.areaHeight / 2,
                left: elementItem.elementWidth * item.xRatio - item.areaWidth / 2,
                child: Image.asset(
                  item.icon,
                  width: item.areaWidth,
                  height: item.areaHeight,
                ),
              )),
            ],
          ) : null,
        ),
      )
    );
  }
}
运行效果:
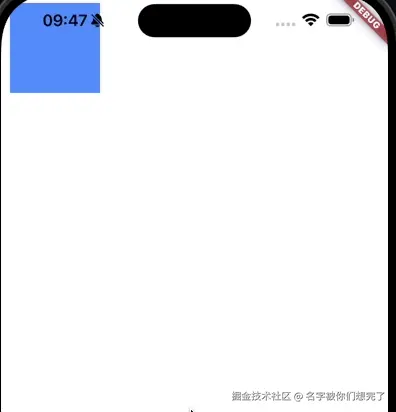
这样我们就实现了旋转区域的渲染,接下来就实现拖动旋转功能。
还值得注意的是,在单个的时候我们的坐标系都是以元素自身为参考,所以旋转的时候参考的坐标系也跟着旋转了,所以在计算旋转后的点坐标时我们使用了 final deg = rotateNumber * pi / 180; 进行还原操作,但在手势提升到外层容器了后,旋转都是元素自身,坐标系始终是以外层容器为参考,所以不需要进行还原。接下来实现元素的旋转(原理之前都分析了,所以这里直接给出一些新增的关键代码代码加注释):
dart
/// 以传入元素为参考确定某点旋转后的坐标
///
/// 以传入的[item]为参考,计算原坐标[x]和[y]旋转后的坐标
Offset _rotatePoint({
  required double x,
  required double y,
  required ElementModel item,
}) {
  final double deg = item.rotationAngle;
  // 确定旋转中心,坐标系是以外层容器为基准
  final double centerX = item.x + item.elementWidth / 2;
  final double centerY = item.y + item.elementHeight / 2;
  final double diffX = x - centerX;
  final double diffY = y - centerY;

  final double dx = diffX * cos(deg) - diffY * sin(deg) + centerX;
  final double dy = diffX * sin(deg) + diffY * cos(deg) + centerY;

  return Offset(dx, dy);
}

/// 判断点击落点是否在元素的某个操作区域
///
/// 以传入的[item]元素为参考,
/// 判断当前点击的坐标[x]和[y]是否落在[item]元素的某个响应区域
ElementStatus? _getElementZone({
  required double x,
  required double y,
  required ElementModel item,
}) {
  ElementStatus? tempStatus;

  for (var i = 0; i < ConstantsConfig.baseAreaList.length; i++) {
    final ResponseAreaModel currentArea = ConstantsConfig.baseAreaList[i];
    // 计算操旋转过后的操作区域的中心点坐标
    final Offset pos = _rotatePoint(
      x: item.x + item.elementWidth * currentArea.xRatio,
      y: item.y + item.elementHeight * currentArea.yRatio,
      item: item,
    );
    final double dx = pos.dx;
    final double dy = pos.dy;
    final double areaCW = currentArea.areaWidth / 2;
    final double areaCH = currentArea.areaHeight / 2;

    // 以区域中心点计算区域边界值和坐标进行比较
    if (
      x >= dx - areaCW &&
      x <= dx + areaCW &&
      y >= dy - areaCH &&
      y <= dy + areaCH
    ) {
      tempStatus = currentArea.status;
      break;
    }
  }

  return tempStatus;
}

/// 判断点击的区域
///
/// 以传入的[item]元素为参考,
/// 判断当前点击的坐标[x]和[y]落在[item]元素的哪个响应区域
ElementStatus? _onDownZone({
  required double x,
  required double y,
  required ElementModel item,
}) {
  // 先判断是否在响应对应操作的区域
  final ElementStatus? areaStatus = _getElementZone(x: x, y: y, item: item);
  if (areaStatus != null) {
    return areaStatus;
  } else if (_insideElement(x: x, y: y, item: item)) {
    // 因为加入旋转,所以单独抽取落点是否在元素内部的方法
    return ElementStatus.move;
  }

  return null;
}

/// 判断点击落点是否在元素内部
///
/// 以传入的[item]元素为参考,
/// 判断当前点击的坐标[x]和[y]是否落在[item]元素的内部
bool _insideElement({
  required double x,
  required double y,
  required ElementModel item,
}) {
  bool isInside = false;

  // 计算元素的四个顶点坐标
  final List<Offset> square = [
    _rotatePoint(
      x: item.x,
      y: item.y,
      item: item,
    ),
    _rotatePoint(
      x: item.x + item.elementWidth,
      y: item.y,
      item: item,
    ),
    _rotatePoint(
      x: item.x + item.elementWidth,
      y: item.y + item.elementHeight,
      item: item,
    ),
    _rotatePoint(
      x: item.x,
      y: item.y + item.elementHeight,
      item: item,
    ),
  ];

  for (var i = 0, j = square.length - 1; i < square.length; j = i++) {
    final double xi = square[i].dx;
    final double yi = square[i].dy;
    final double xj = square[j].dx;
    final double yj = square[j].dy;
    final bool intersect = yi > y != yj > y && x < (xj - xi) * (y - yi) / (yj - yi) + xi;

    if (intersect) isInside = !isInside;
  }

  return isInside;
}

/// 处理元素旋转
///
/// 通过移动点坐标[x]和[y]与按下的初始坐标计算旋转的角度
_onRotate({required double x, required double y}) {
  if (_currentElement == null || _temporary == null) return;

  final double centerX = _currentElement!.x + _currentElement!.elementWidth / 2;
  final double centerY = _currentElement!.y + _currentElement!.elementHeight / 2;
  final double angleStart = atan2(
    _startPosition.dy - centerY,
    _startPosition.dx - centerX,
  );
  final double angleEnd = atan2(y - centerY, x - centerX);

  _currentElement = _currentElement!.copyWith(
    rotationAngle: _temporary!.rotationAngle + angleEnd - angleStart,
  );
  _onChange();
}
运行效果:
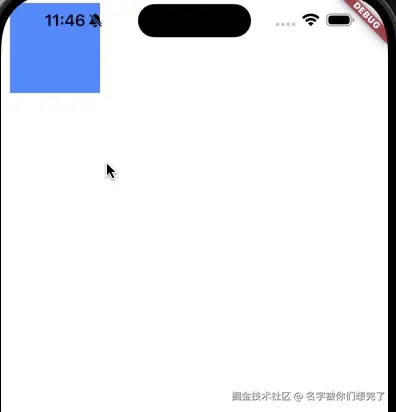
这样我们就简单完成了旋转功能。
其实现在我们对于区域的实现就有个大概的步骤了:
- 向区域列表中新增一个区域
- 手势响应的时候判断是否在这个区域(判断区域逻辑)
- 在这个区域执行相应的(功能实现逻辑)
按照上面的步骤,接下来我们快速实现一下缩放的功能。之前我们使用的是以宽度为基准实现的元素缩放,这样如果y变化大于x的变化,就会不是很协调,现在我们使用新的一种计算方式,以初始按下的坐标和中心点坐标的距离和结束点坐标到中心点坐标的距离来计算缩放的比例,通过这个比例再去计算宽高,这样可能稍微会协调一点。不过这样就需要记录初始的宽高(简单说明一下,对于完整的单次操作,在移动过程中,我们的变换都是基于上一次的状态来叠加的,所以变换过程中,使用初始状态加上变换的差值就可以得到移动过程中的状态):
dart
// 其他省略...

// 缩放
ResponseAreaModel(
  areaWidth: 20,
  areaHeight: 20,
  xRatio: 1,
  yRatio: 1,
  status: ElementStatus.scale,
  icon: 'assets/images/icon_scale.png',
  trigger: TriggerMethod.move,
),
dart
/// 处理元素缩放
///
/// 通过移动点坐标[x]和[y]与按下的初始坐标,
/// 通过两个坐标距离中心点的距离计算缩放比例
void _onScale({required double x, required double y}) {
  if (_currentElement == null || _temporary == null) return;

  final double oWidth = _temporary!.width;
  final double oHeight = _temporary!.height;
  final double oX = _temporary!.x;
  final double oY = _temporary!.y;
  // 中心点坐标,因为缩放不涉及到移动,
  // 所以中心点其实是没变的,用最初的值计算就行
  final double centerX = oX + oWidth / 2;
  final double centerY = oY + oHeight / 2;
  // 按下点与中心点的距离
  final double lineStart = sqrt(
    pow(centerX - _startPosition.dx, 2) + pow(centerY - _startPosition.dy, 2),
  );

  // 极地极低的概率出现0,因为真实手指点击到原始正中心点的概率太低了
  if (lineStart == 0) return;

  final double lineEnd = sqrt(pow(centerX - x, 2) + pow(centerY - y, 2));
  final double resizeRatio = lineEnd / lineStart;
  double newW = oWidth * resizeRatio;
  double newH = oHeight * resizeRatio;
  final double minSize = ConstantsConfig.minSize;

  // 以短边为基准来计算最小宽高
  if (oWidth <= oHeight && newW < minSize) {
    newW = minSize;
    newH = minSize * oHeight / oWidth;
  } else if (oHeight < oWidth && newH < minSize) {
    newH = minSize;
    newW = minSize * oWidth / oHeight;
  }

  // 以长边为基准来计算最大宽高
  if (oWidth >= oHeight && newW >= _containerWidth) {
    newW = _containerWidth;
    newH = _containerWidth * oHeight / oWidth;
  } else if (oHeight > oWidth && newH >= _containerHeight) {
    newH = _containerHeight;
    newW = _containerHeight * oWidth / oHeight;
  }

  if (
    newW == _currentElement?.elementWidth &&
    newH == _currentElement?.elementHeight
  ) {
    return;
  }

  _currentElement = _currentElement?.copyWith(
    elementWidth: newW,
    elementHeight: newH,
    x: oX - (newW - oWidth) / 2,
    y: oY - (newH - oHeight) / 2,
  );
  _onChange();
}
运行效果:
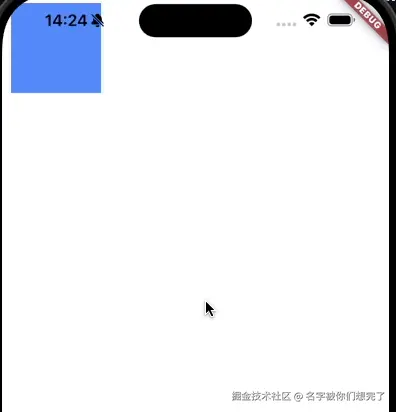
这样我们就简单将前面单个元素的操作复刻实现了,接下来我们再多加入几个元素看下效果:
dart
// 其他省略...

final List<ElementModel> _elementList = [
  ElementModel(
    id: DateTime.now().millisecondsSinceEpoch,
    elementWidth: 100,
    elementHeight: 100,
  ),
  ElementModel(
    id: DateTime.now().millisecondsSinceEpoch - 10,
    elementWidth: 80,
    elementHeight: 120,
    x: 50,
    y: 120,
  ),
  ElementModel(
    id: DateTime.now().millisecondsSinceEpoch + 10,
    elementWidth: 60,
    elementHeight: 140,
    x: 100,
    y: 280,
  ),
];
运行效果:
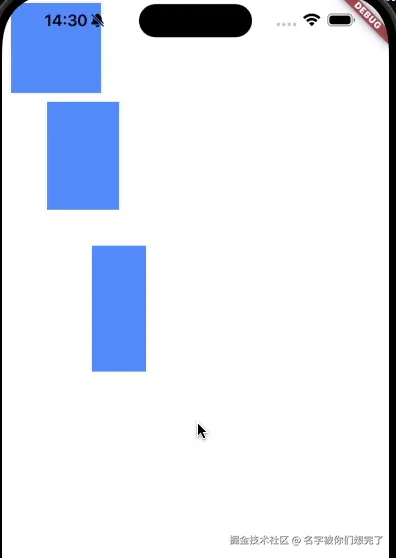
可以看到,这样就简单实现了多个元素的变换。代码还有优化空间,让我们一步一步来,不着急。
感兴趣的也可以关注我的微信公众号【前端学习小营地】,不定时会分享一些小功能~
今天的分享到此结束了,感谢阅读~拜拜~