基础设置
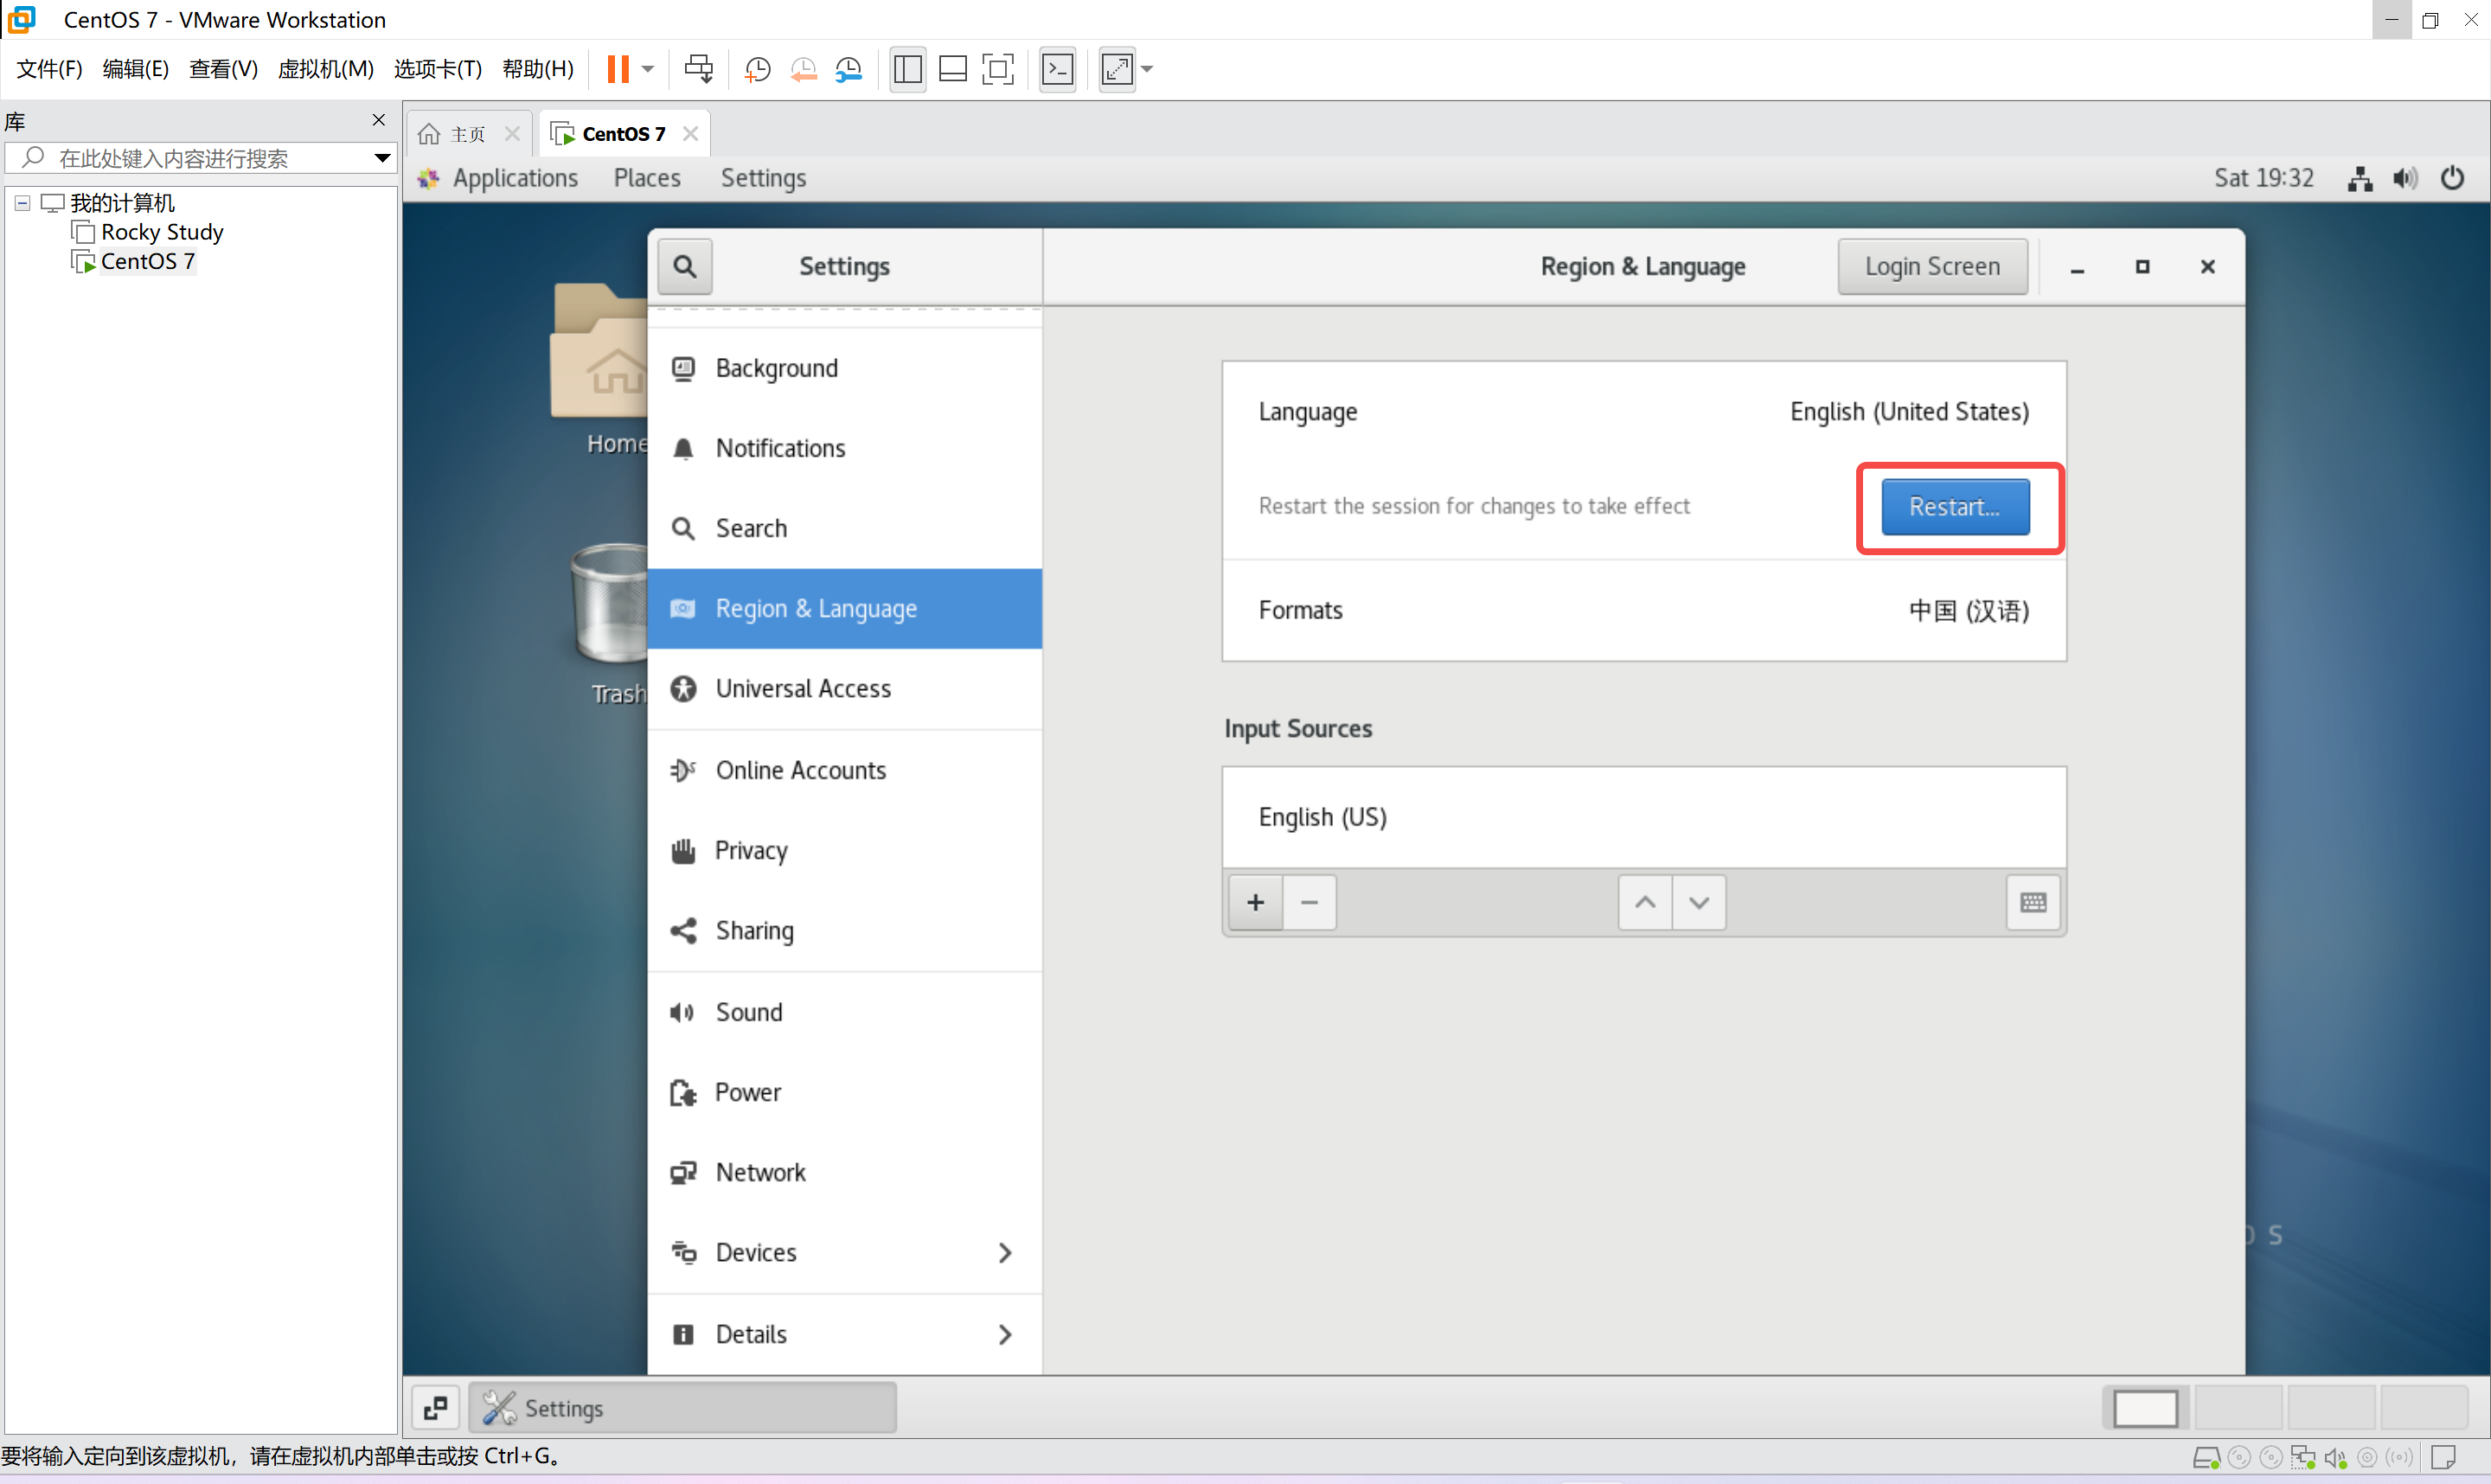
切换语言


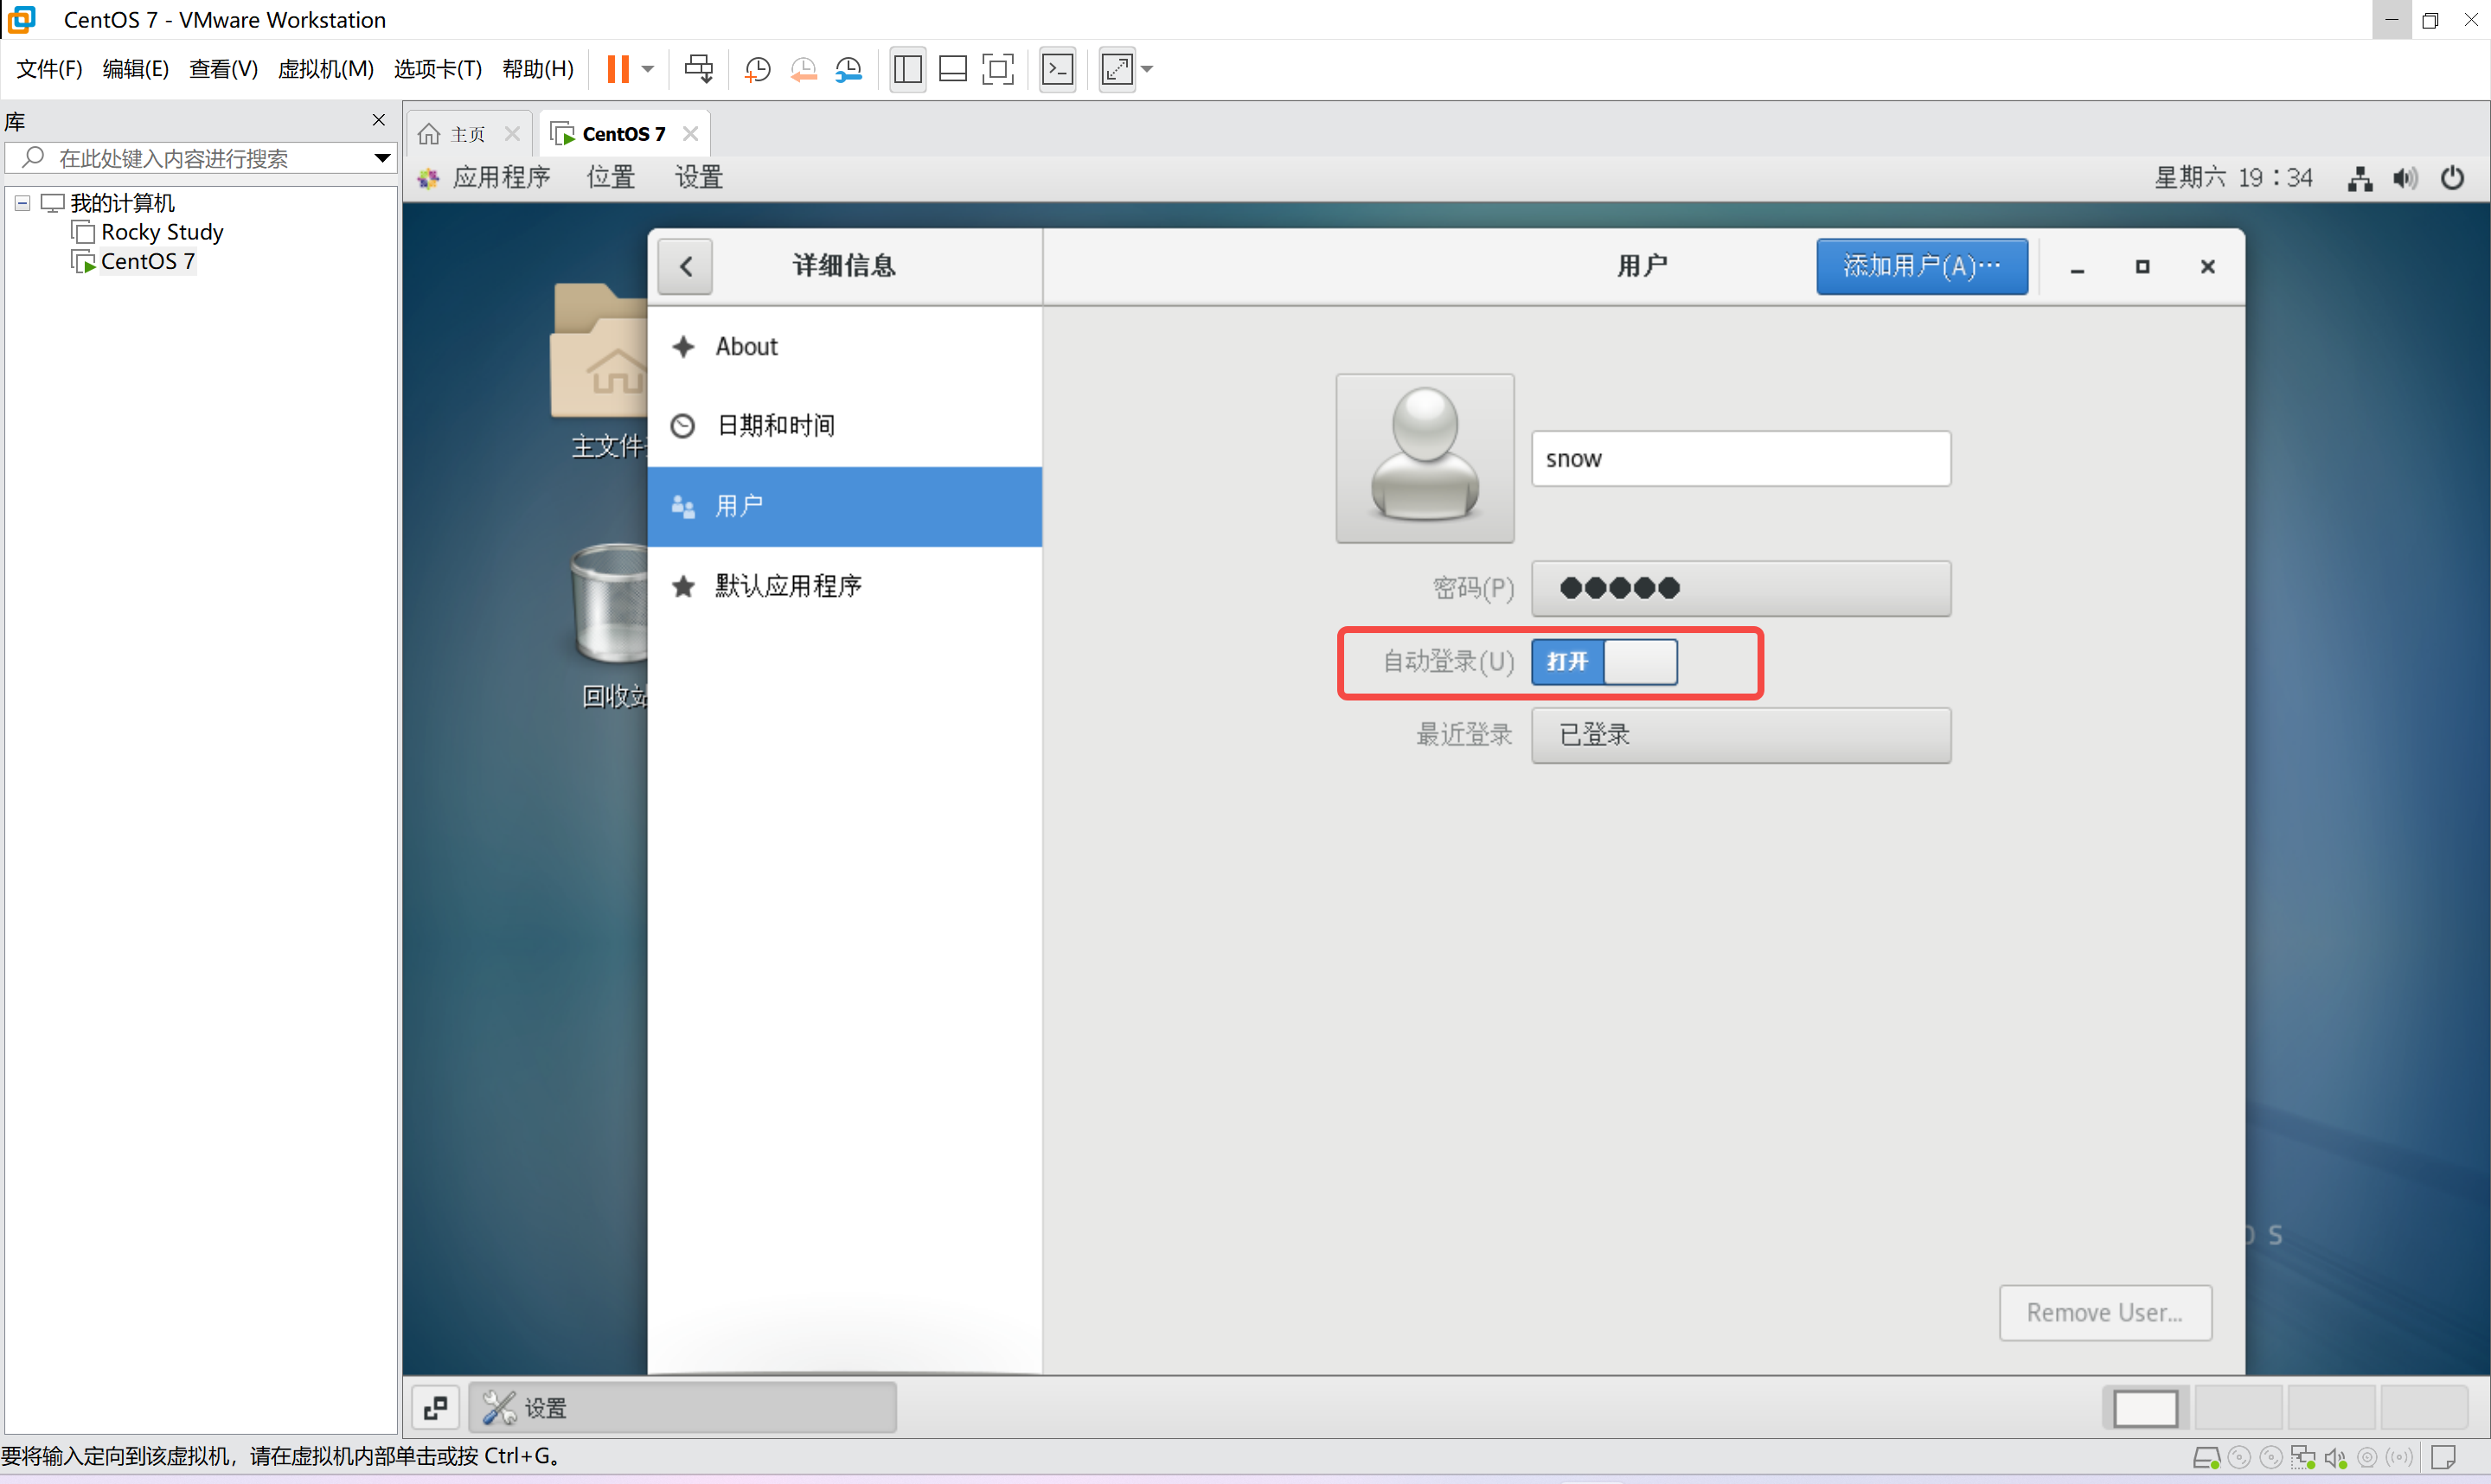
开启自动登录
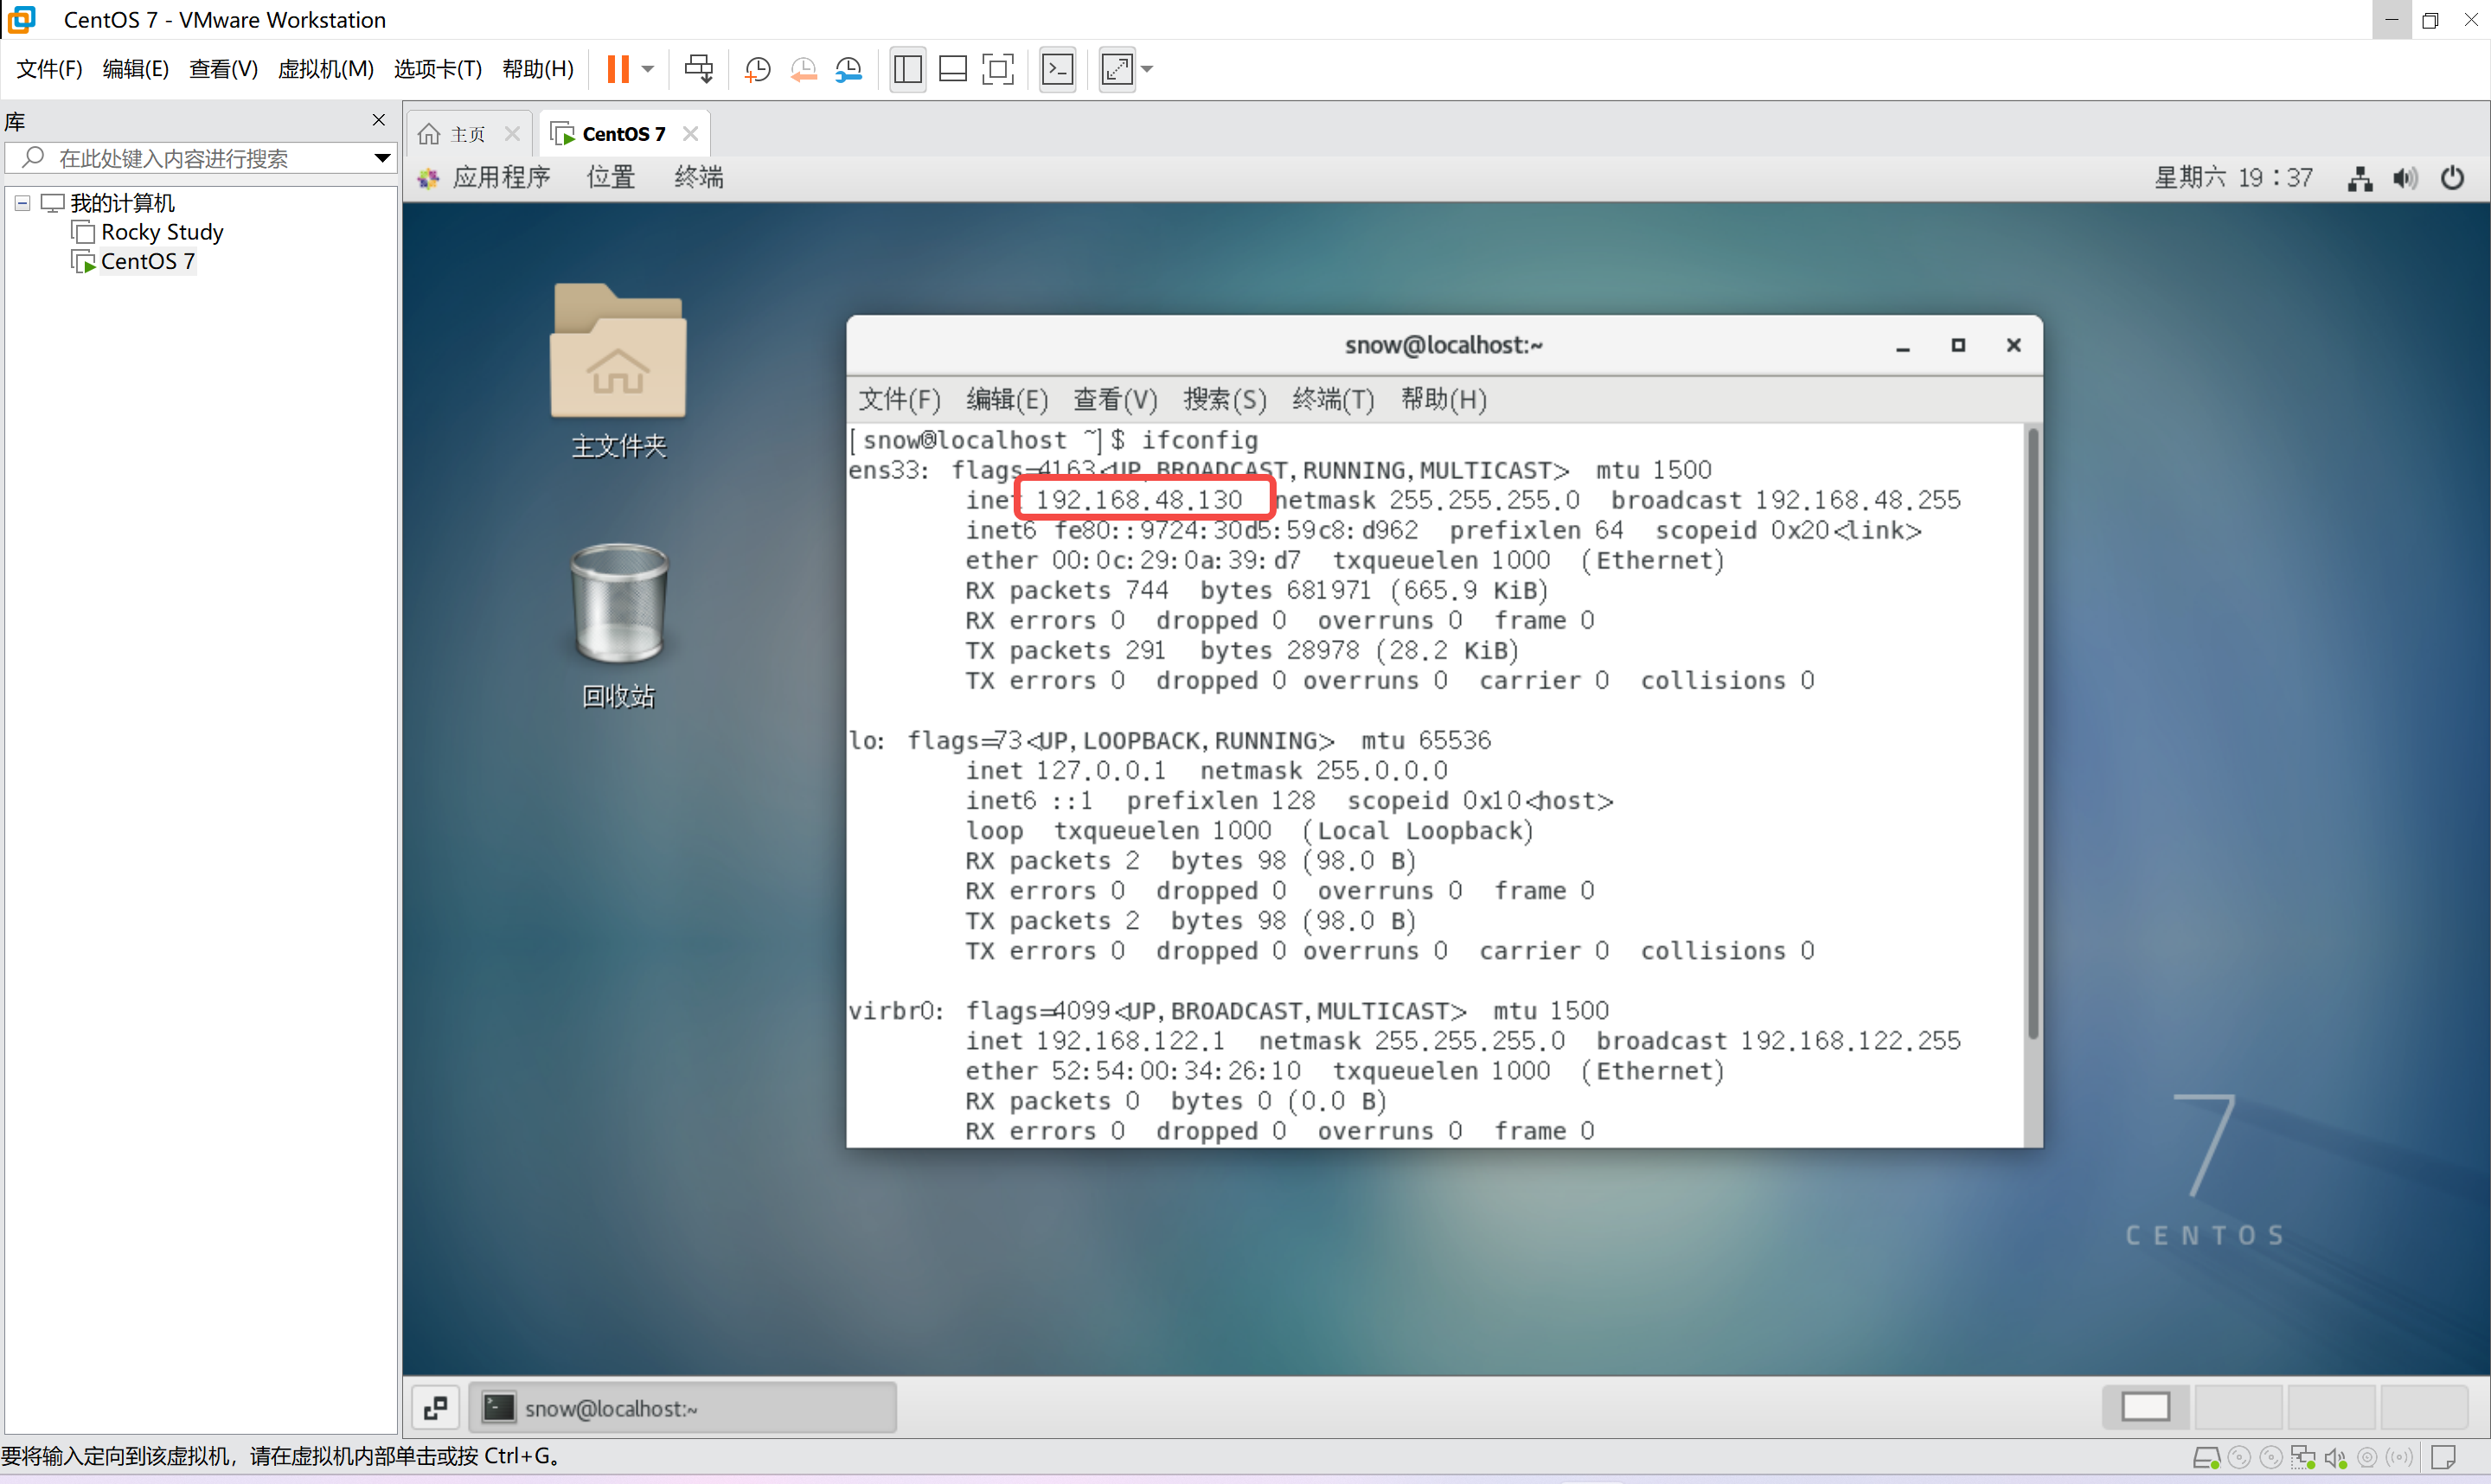
SSH连接
用【ifconfig】命令查看IP地址,然后就可以连接了
验证网络
尝试ping一下百度,看看通不通
ping www.baidu.com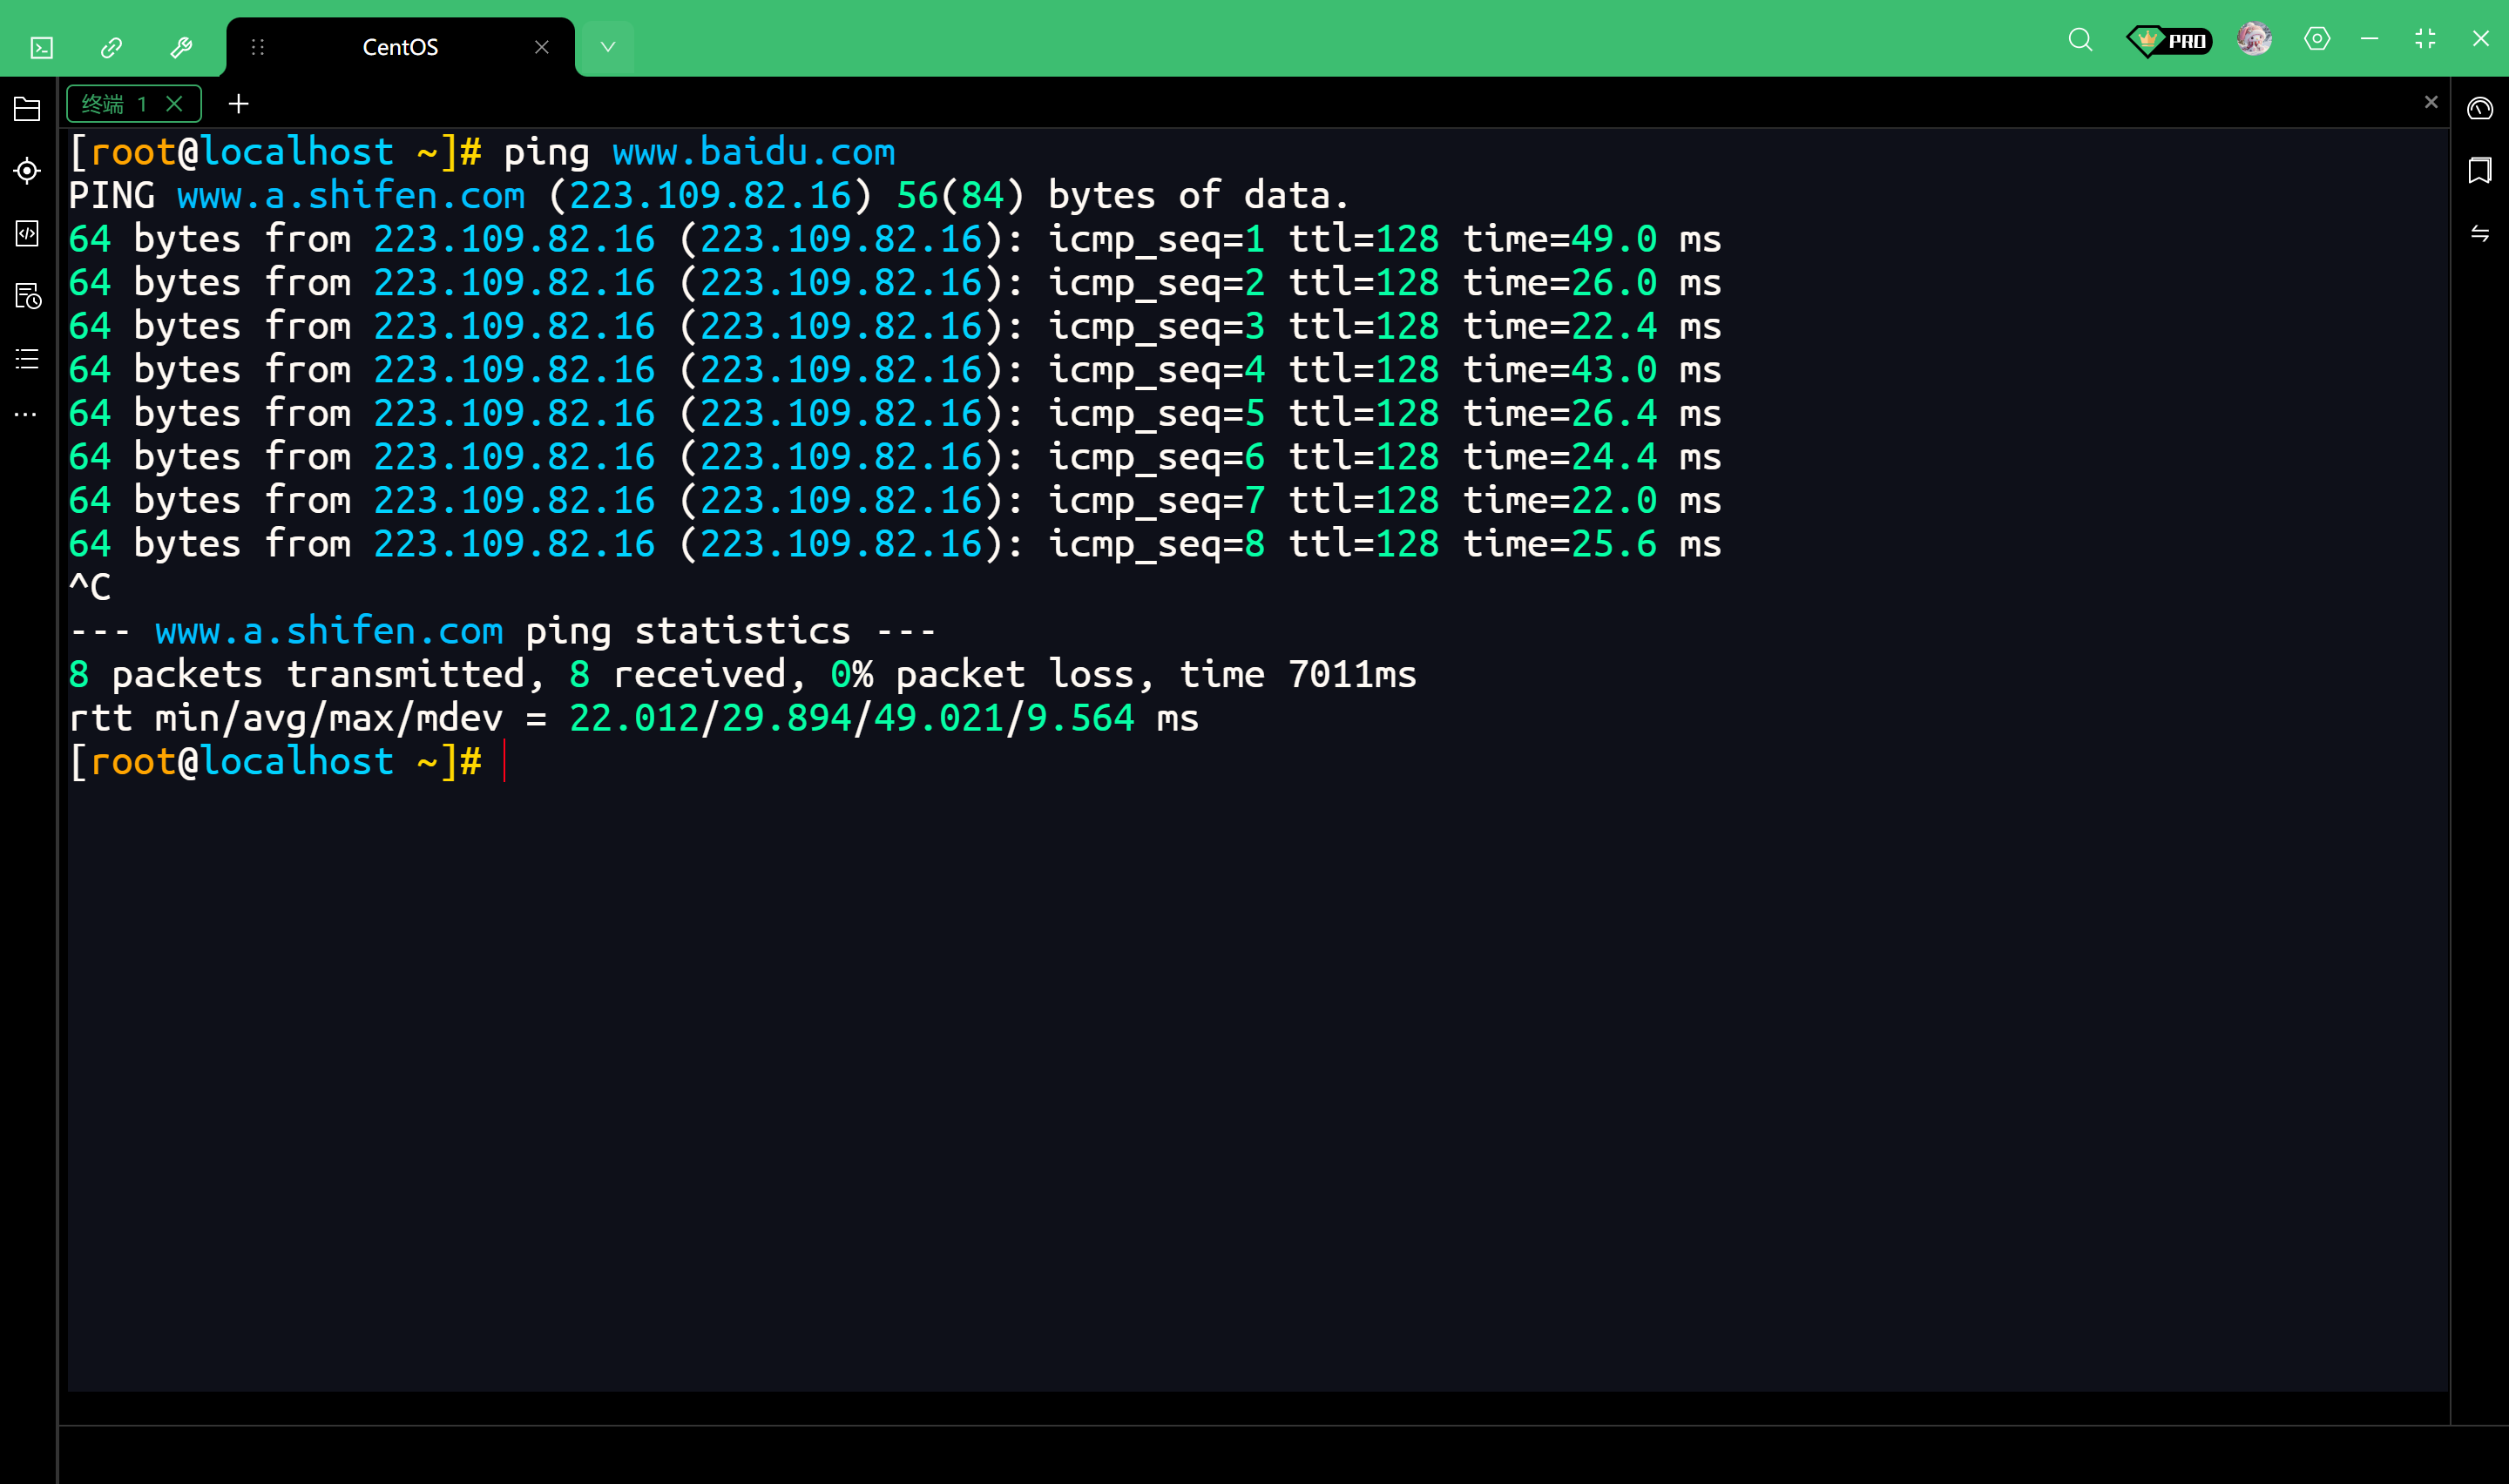
更换YUM源为阿里云源
使用 yum repolist 命令
这个命令可以查看当前系统中所有已启用的仓库列表
yum repolist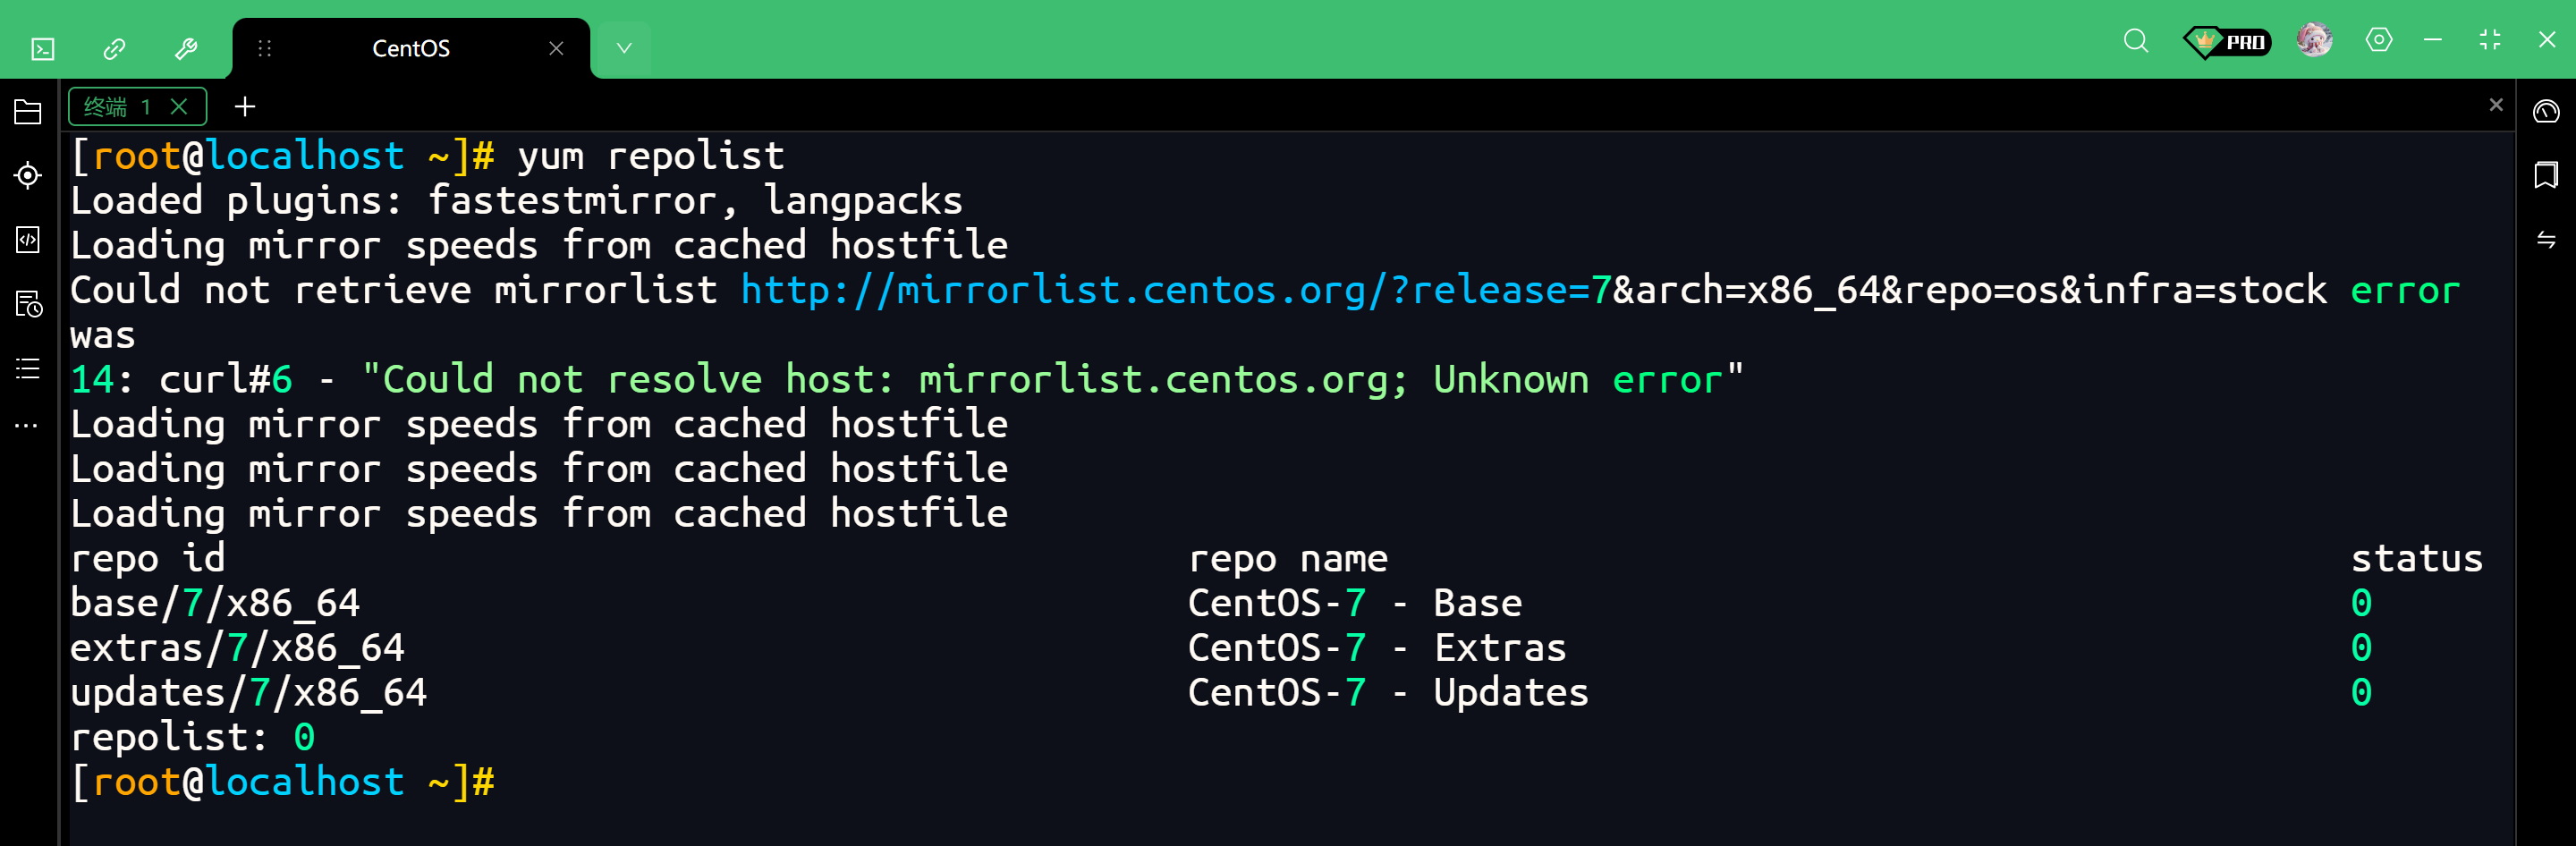
查看详细URL
加上【-v】参数可以显示详细信息,包括源的具体 URL地址
yum repolist -v输出以下内容是正常现象
完整输出如下
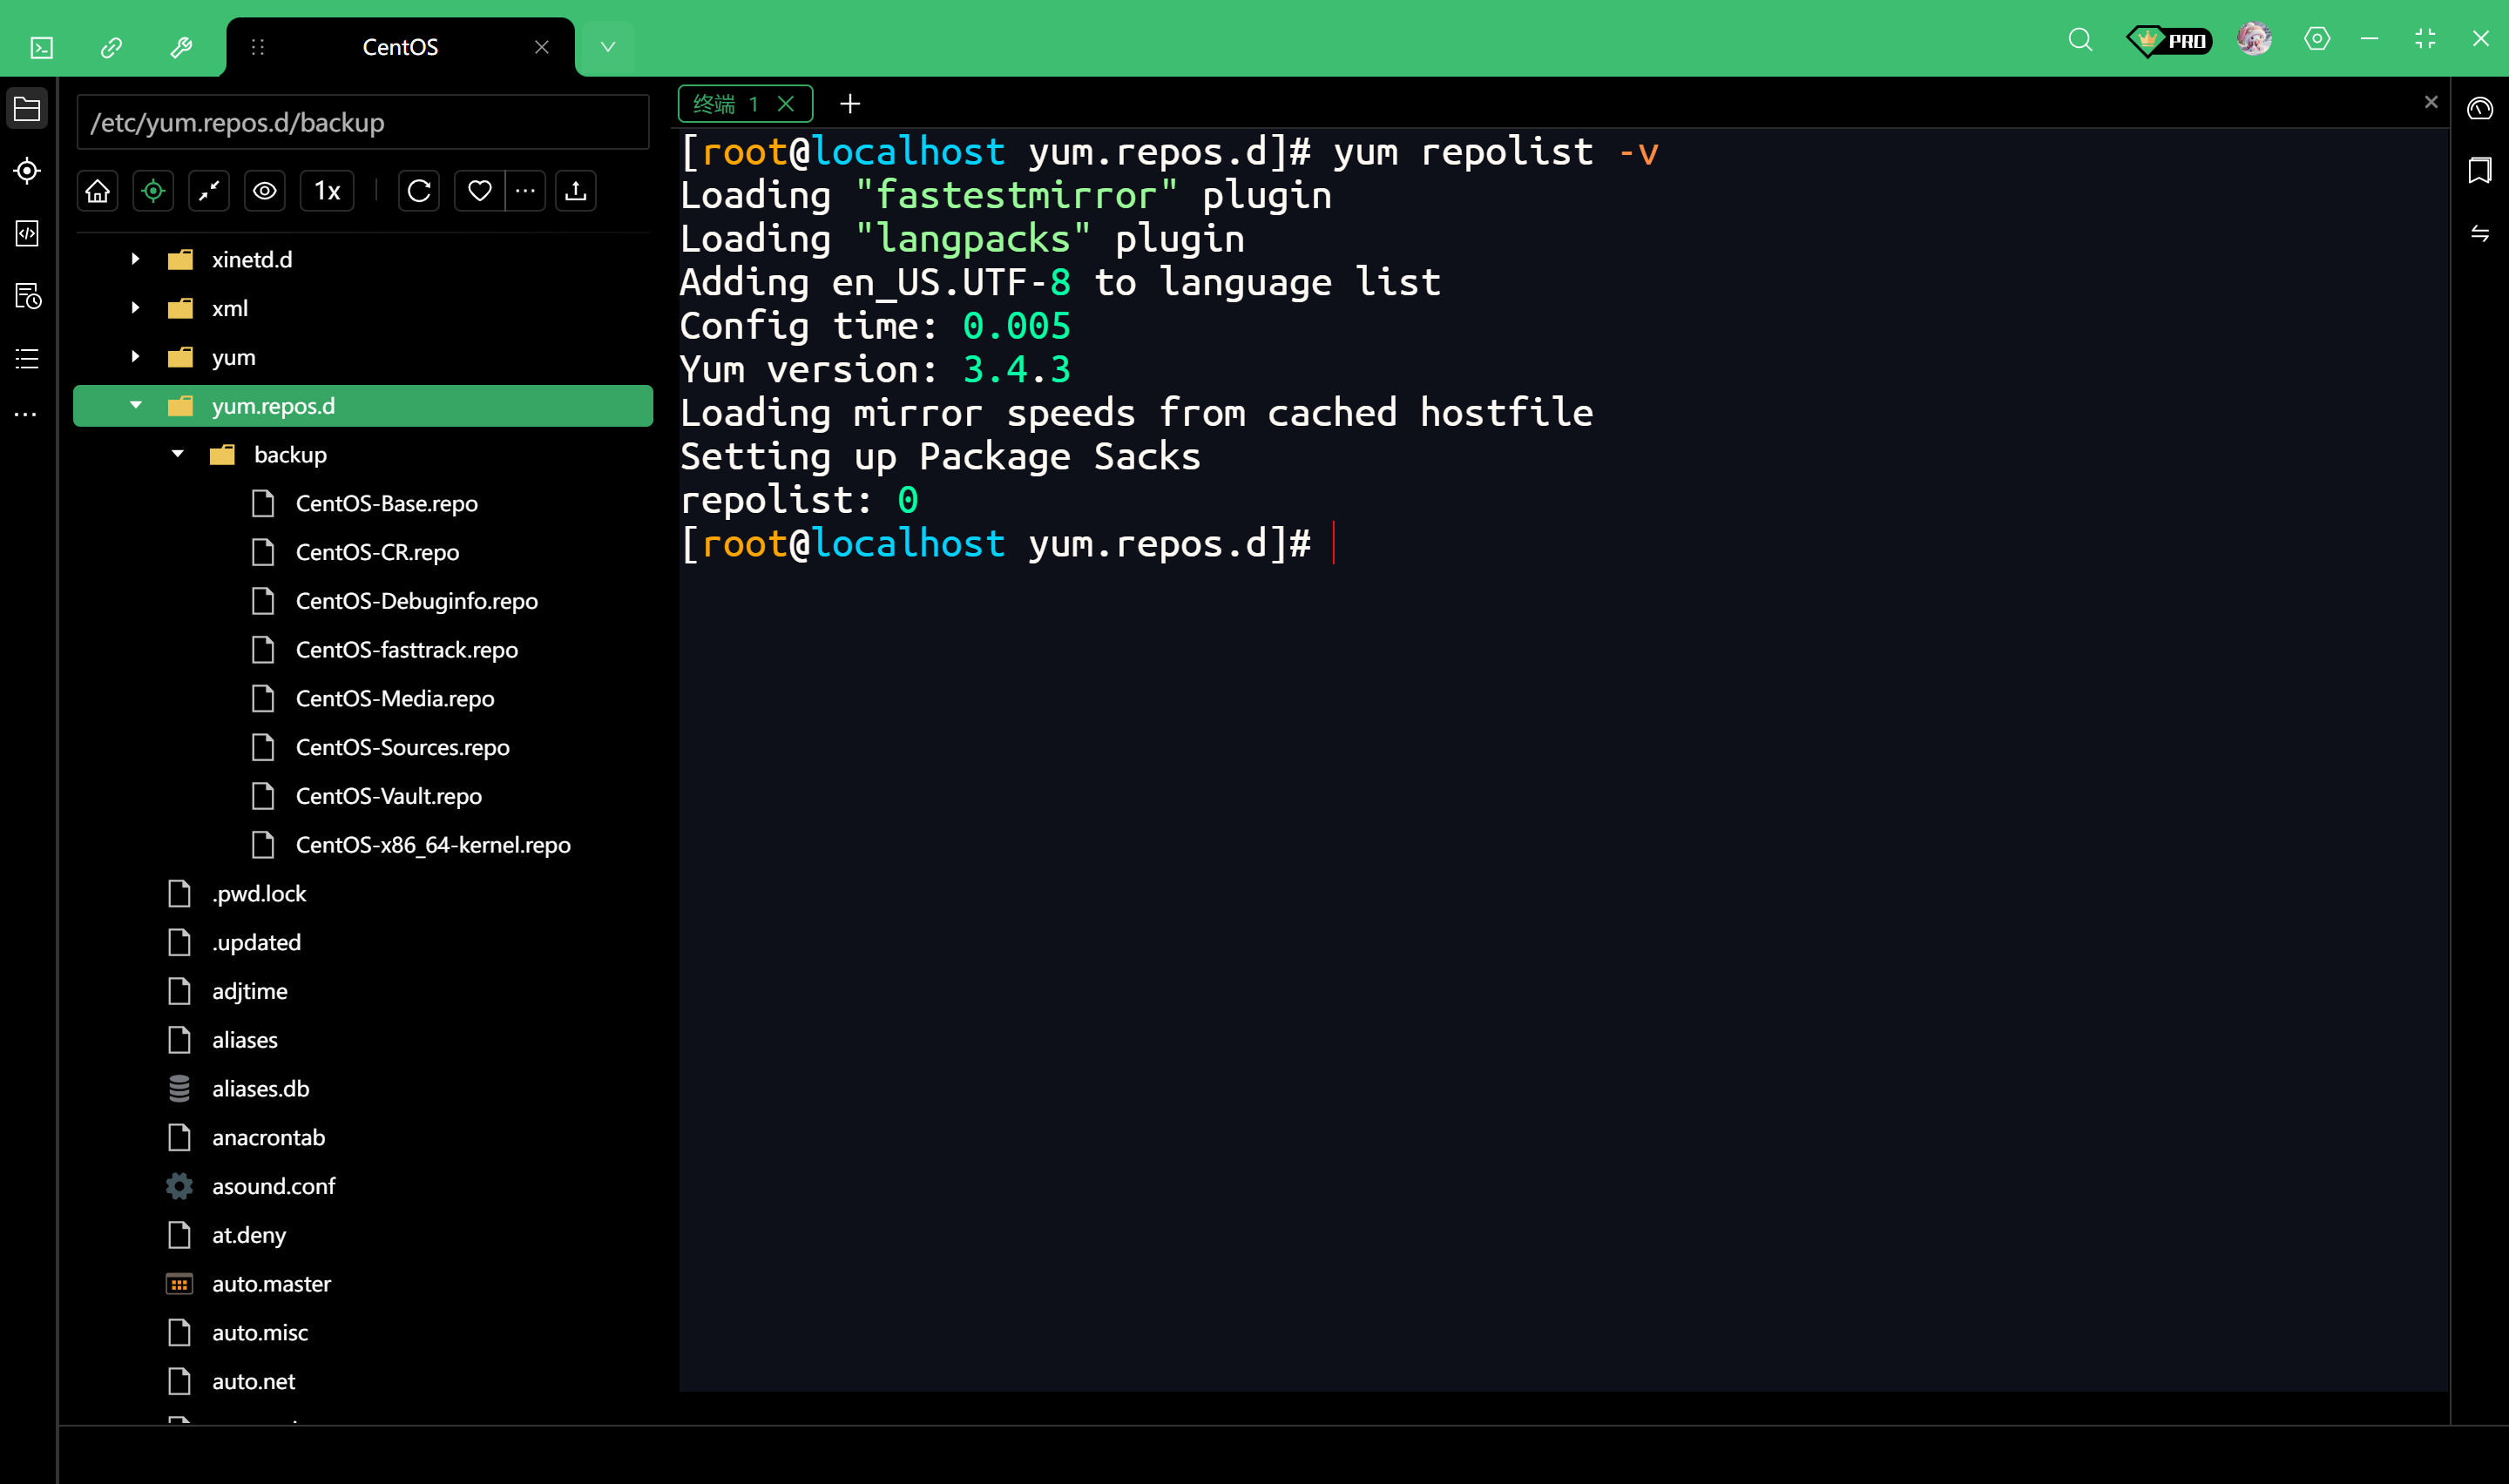
[root@localhost ~]# yum repolist -v
Loading "fastestmirror" plugin
Loading "langpacks" plugin
Adding en_US.UTF-8 to language list
Config time: 0.005
Yum version: 3.4.3
Loading mirror speeds from cached hostfile
Could not retrieve mirrorlist http://mirrorlist.centos.org/?release=7&arch=x86_64&repo=os&infra=stock error was
14: curl#6 - "Could not resolve host: mirrorlist.centos.org; Unknown error"
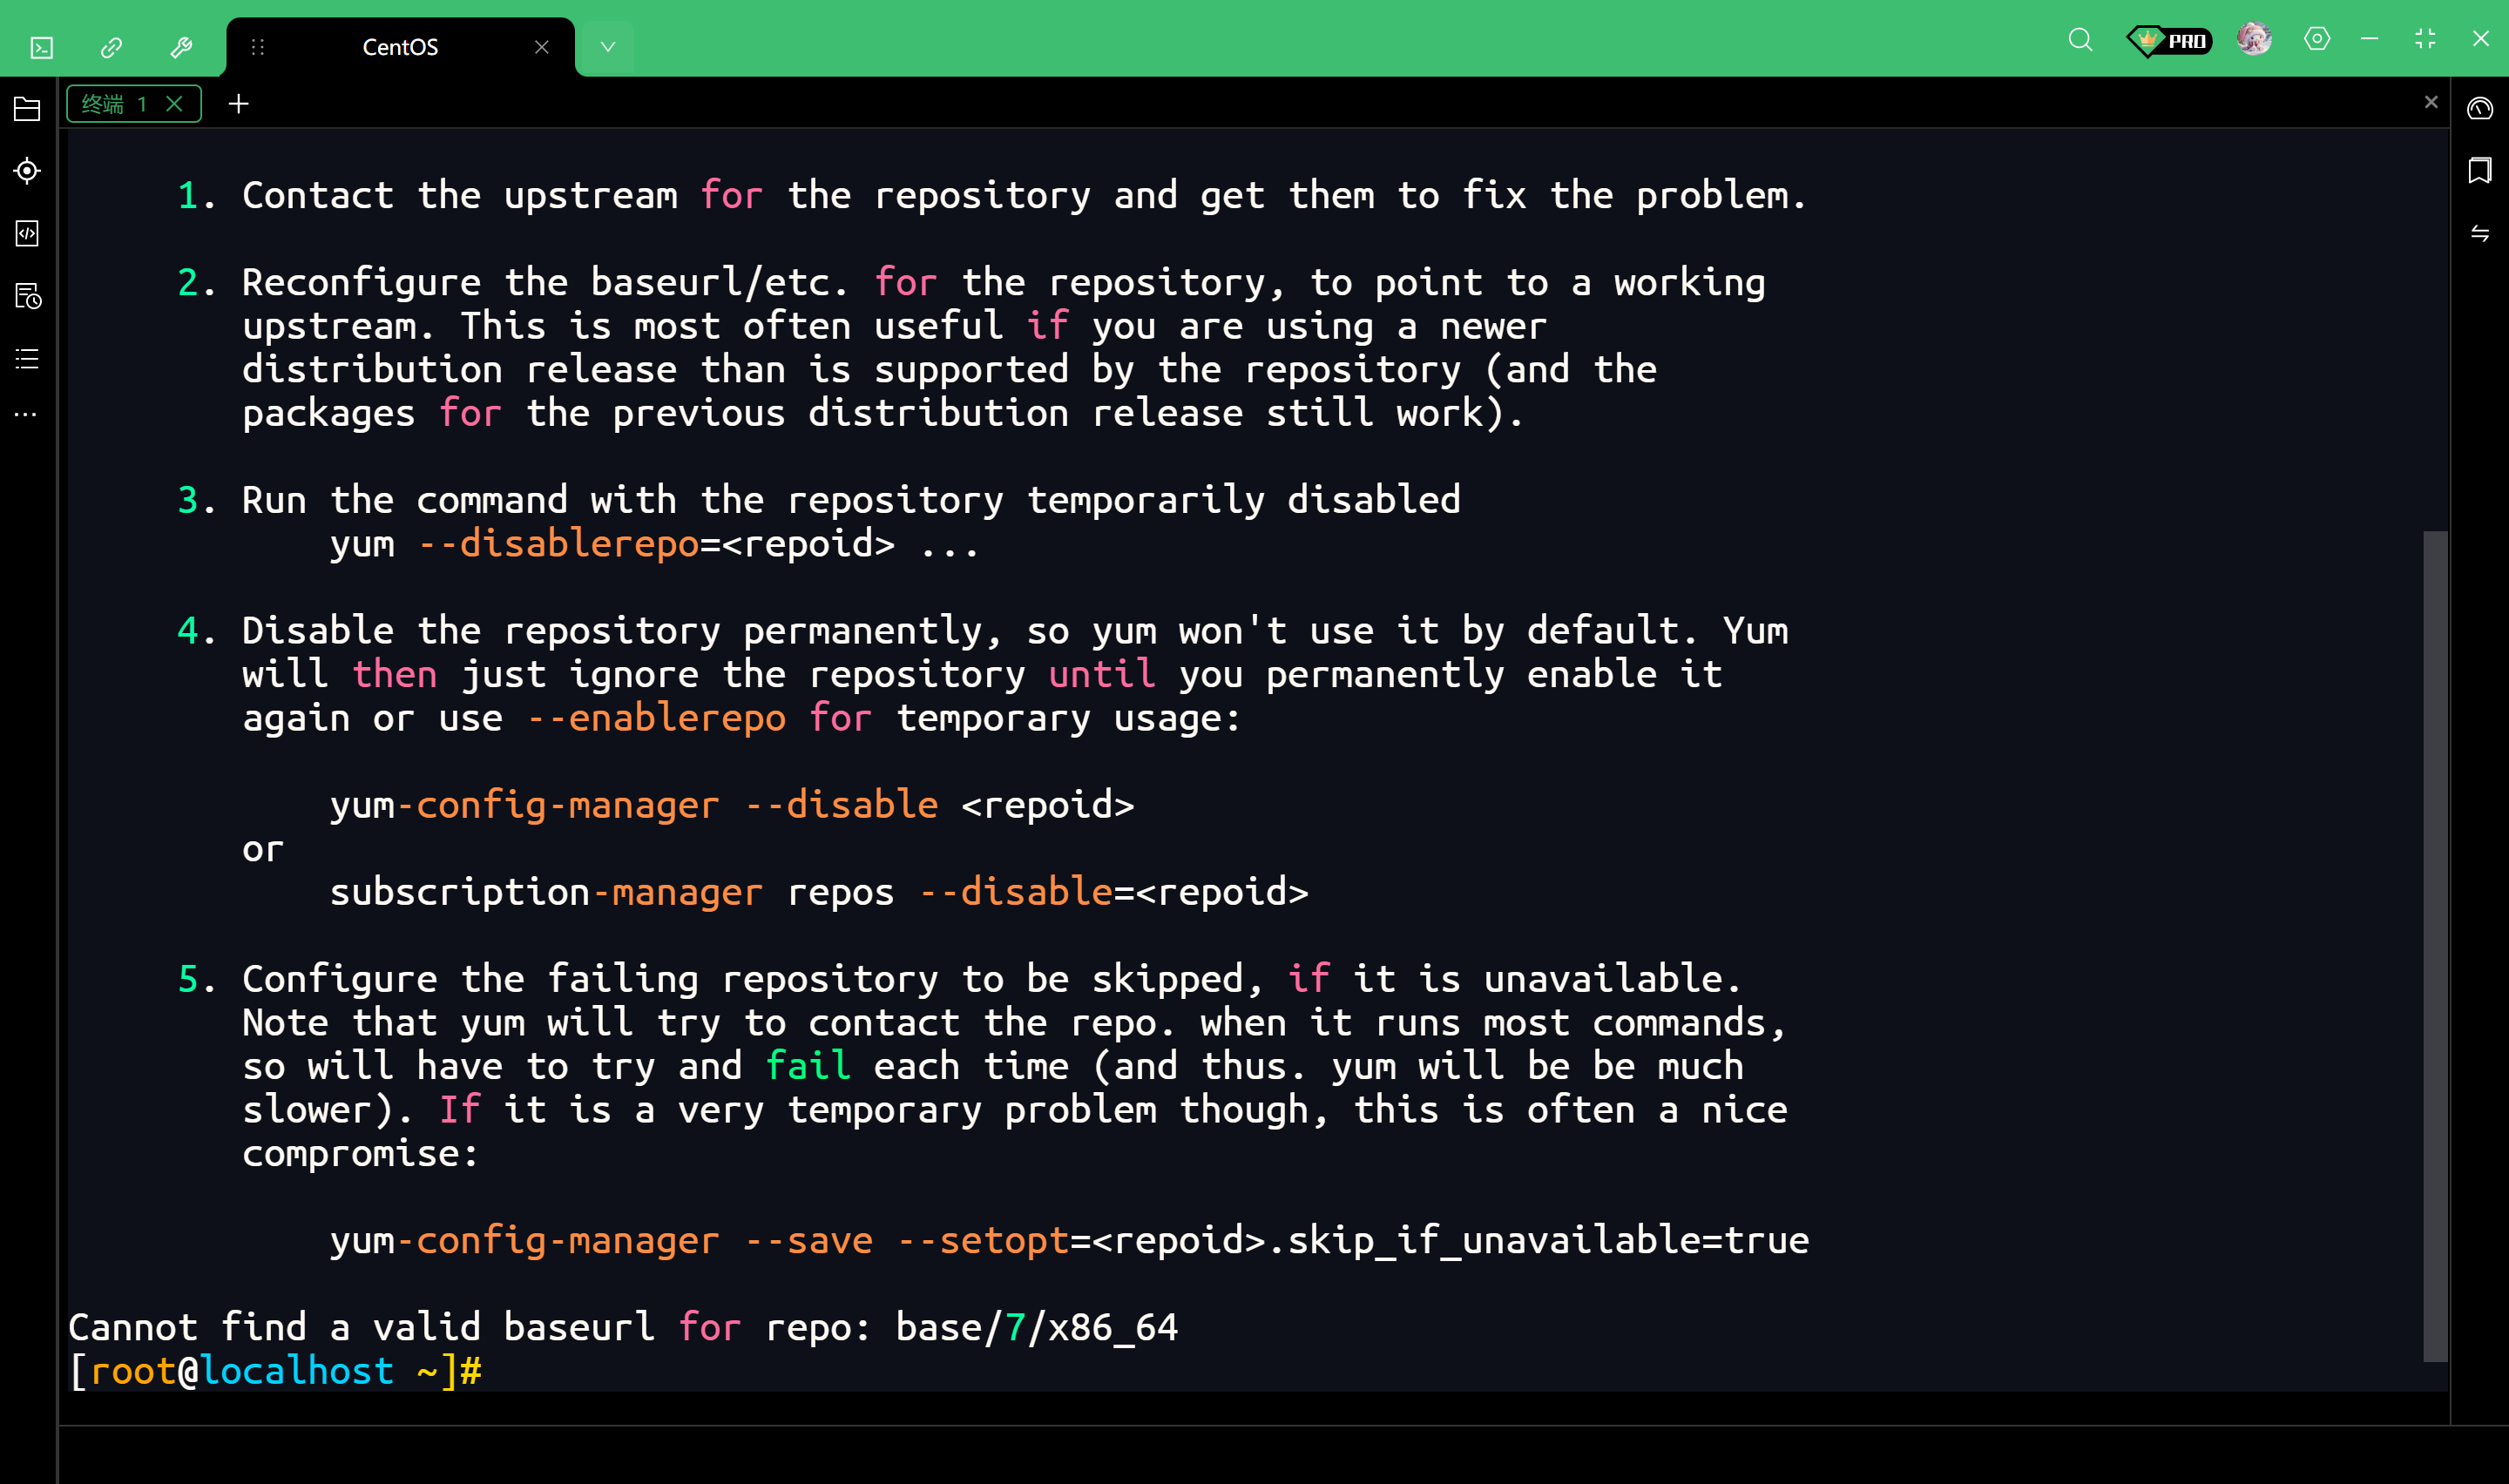
One of the configured repositories failed (Unknown),
and yum doesn't have enough cached data to continue. At this point the only
safe thing yum can do is fail. There are a few ways to work "fix" this:
1. Contact the upstream for the repository and get them to fix the problem.
2. Reconfigure the baseurl/etc. for the repository, to point to a working
upstream. This is most often useful if you are using a newer
distribution release than is supported by the repository (and the
packages for the previous distribution release still work).
3. Run the command with the repository temporarily disabled
yum --disablerepo=<repoid> ...
4. Disable the repository permanently, so yum won't use it by default. Yum
will then just ignore the repository until you permanently enable it
again or use --enablerepo for temporary usage:
yum-config-manager --disable <repoid>
or
subscription-manager repos --disable=<repoid>
5. Configure the failing repository to be skipped, if it is unavailable.
Note that yum will try to contact the repo. when it runs most commands,
so will have to try and fail each time (and thus. yum will be be much
slower). If it is a very temporary problem though, this is often a nice
compromise:
yum-config-manager --save --setopt=<repoid>.skip_if_unavailable=true
Cannot find a valid baseurl for repo: base/7/x86_64
[root@localhost ~]#备份原有源
我们把【/etc/yum.repos.d/】目录下所有的官方【.repo】文件全部移到一个备份文件夹里
# 进入yum源配置目录
cd /etc/yum.repos.d/

# 创建一个备份目录
mkdir backup

# 将所有现有的.repo文件移动到backup目录中
mv *.repo backup/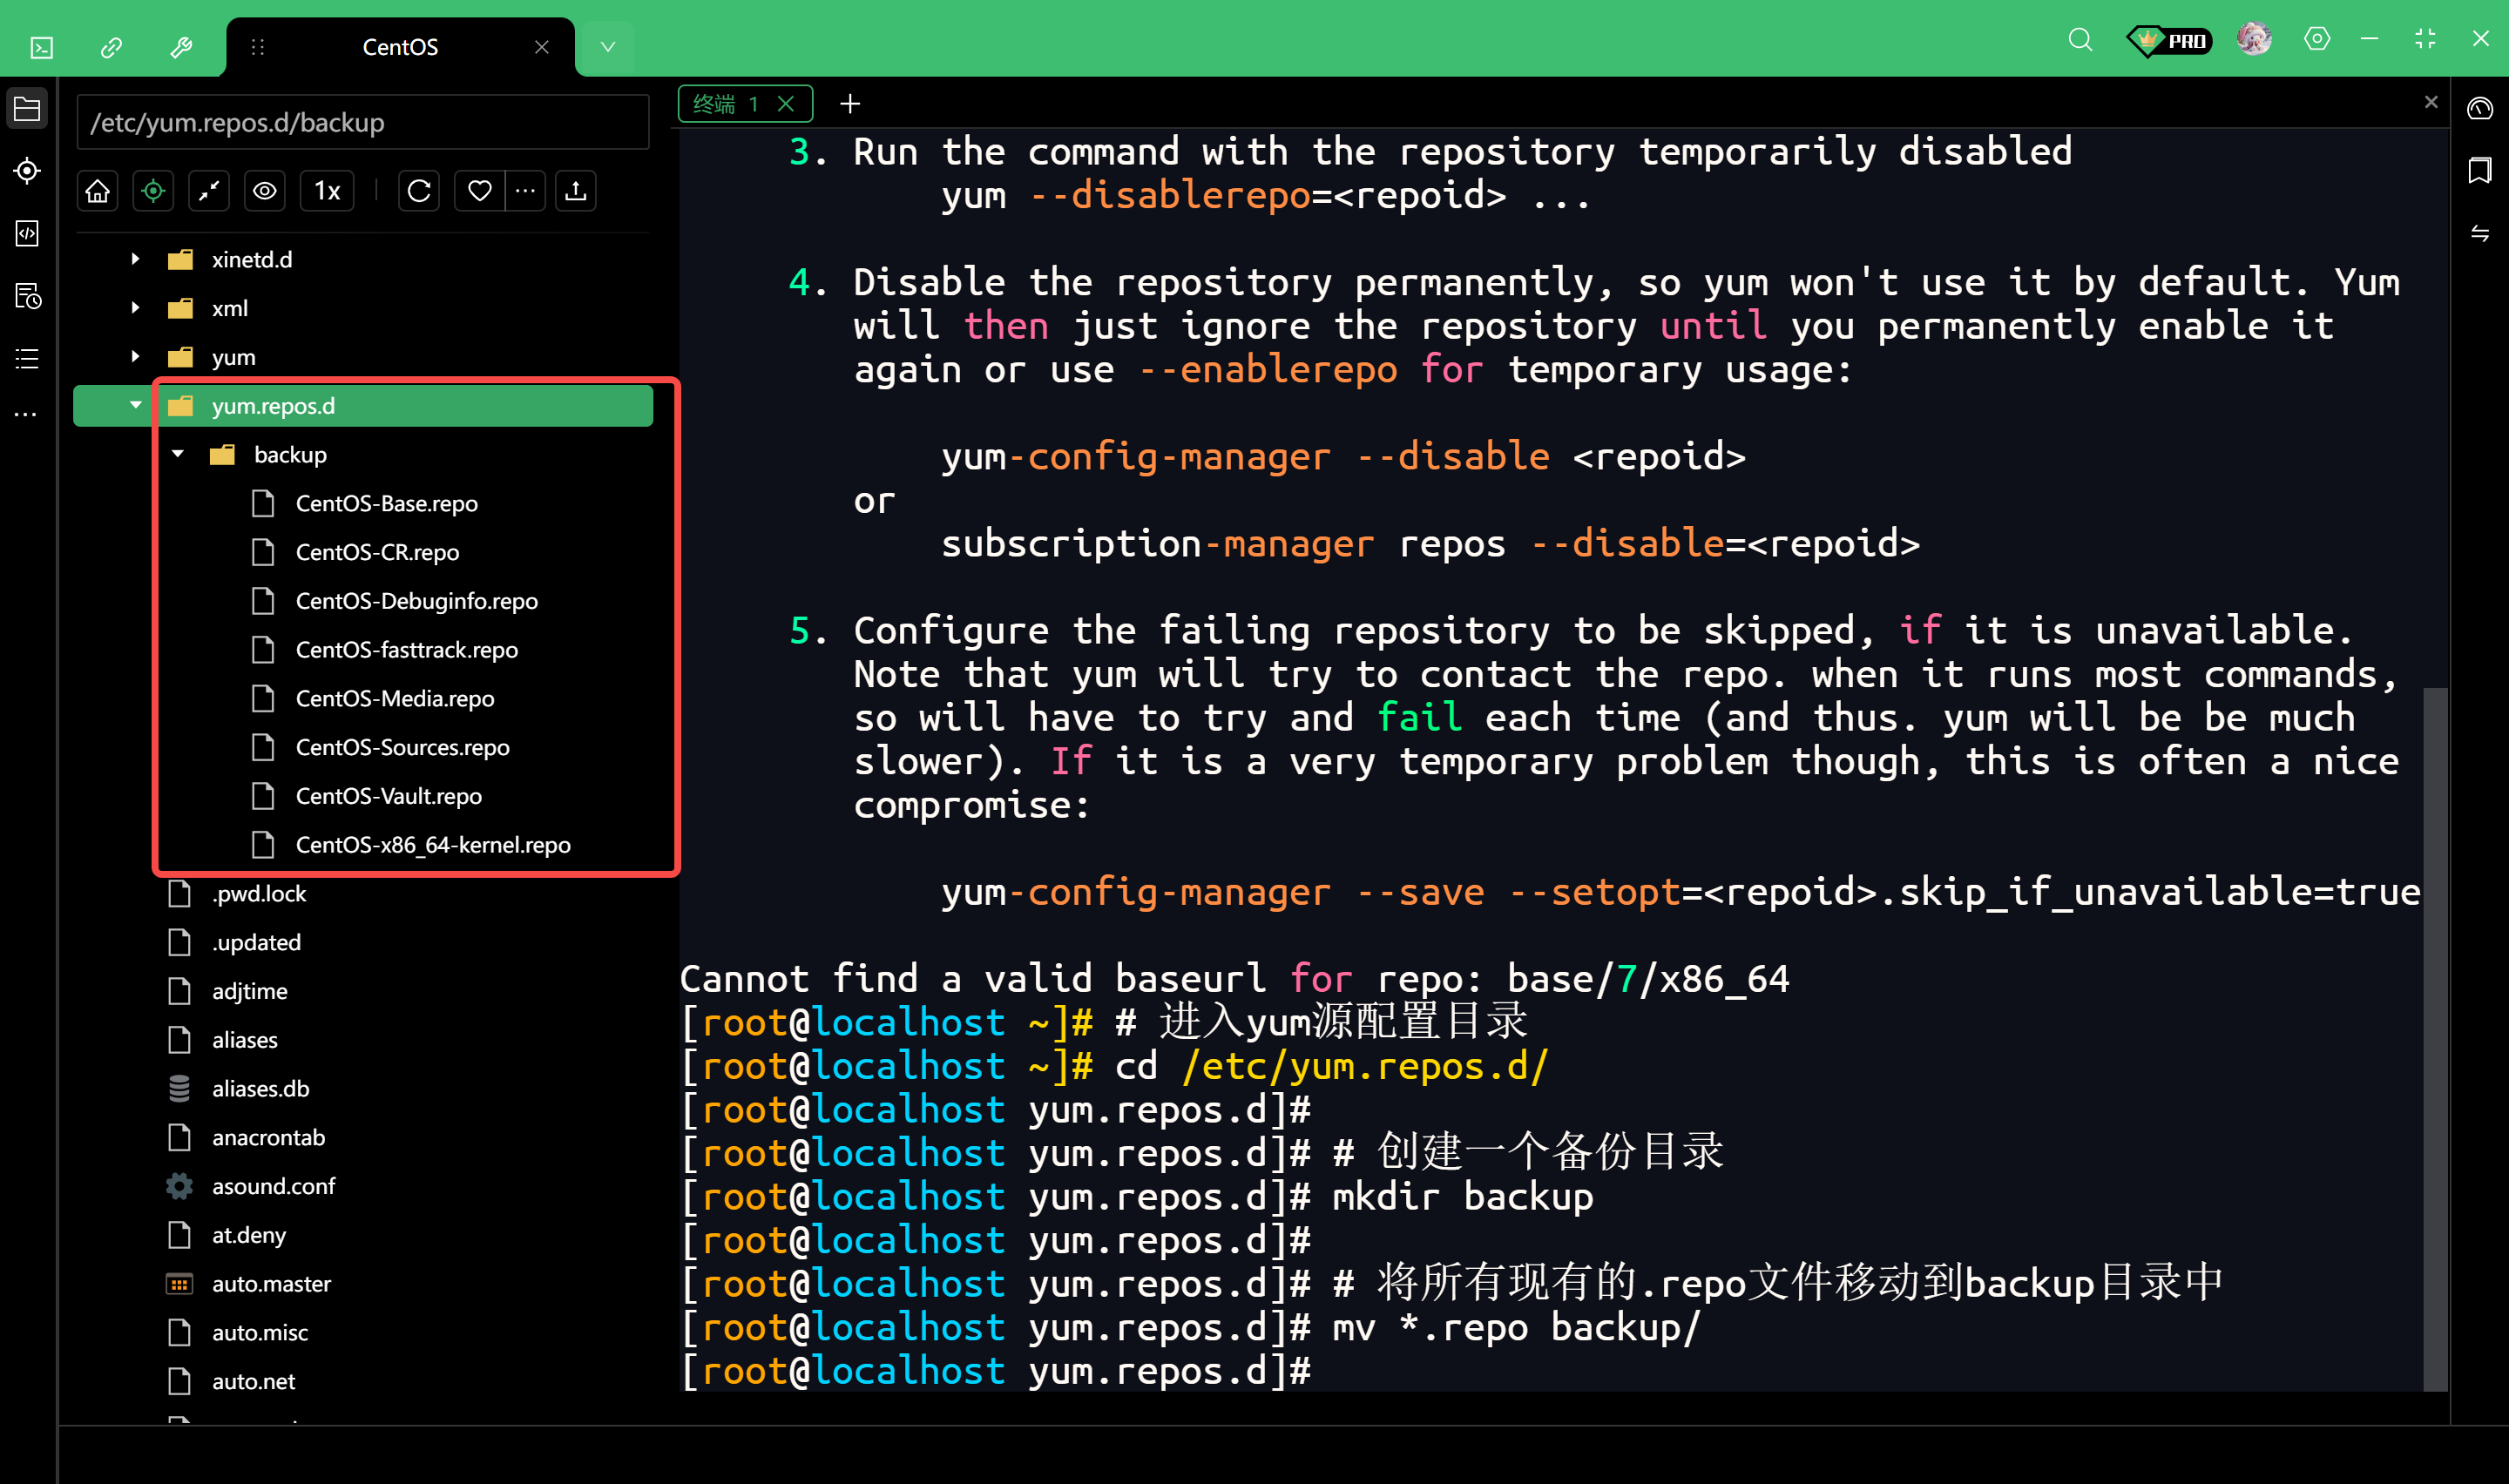
执行完这一步后,【yum.repos.d】目录下应该是空的(除了backup文件夹),这样就彻底把官方源移走了
再次查看详细URL
配置阿里云Base源
wget -O /etc/yum.repos.d/CentOS-Base.repo https://mirrors.aliyun.com/repo/Centos-7.repo配置阿里云EPEL源
有些软件(比如Nginx、Redis等)在Base源里没有,存在于EPEL源里。既然都用了阿里云,建议把EPEL源也配上
wget -O /etc/yum.repos.d/epel.repo https://mirrors.aliyun.com/repo/epel-7.repo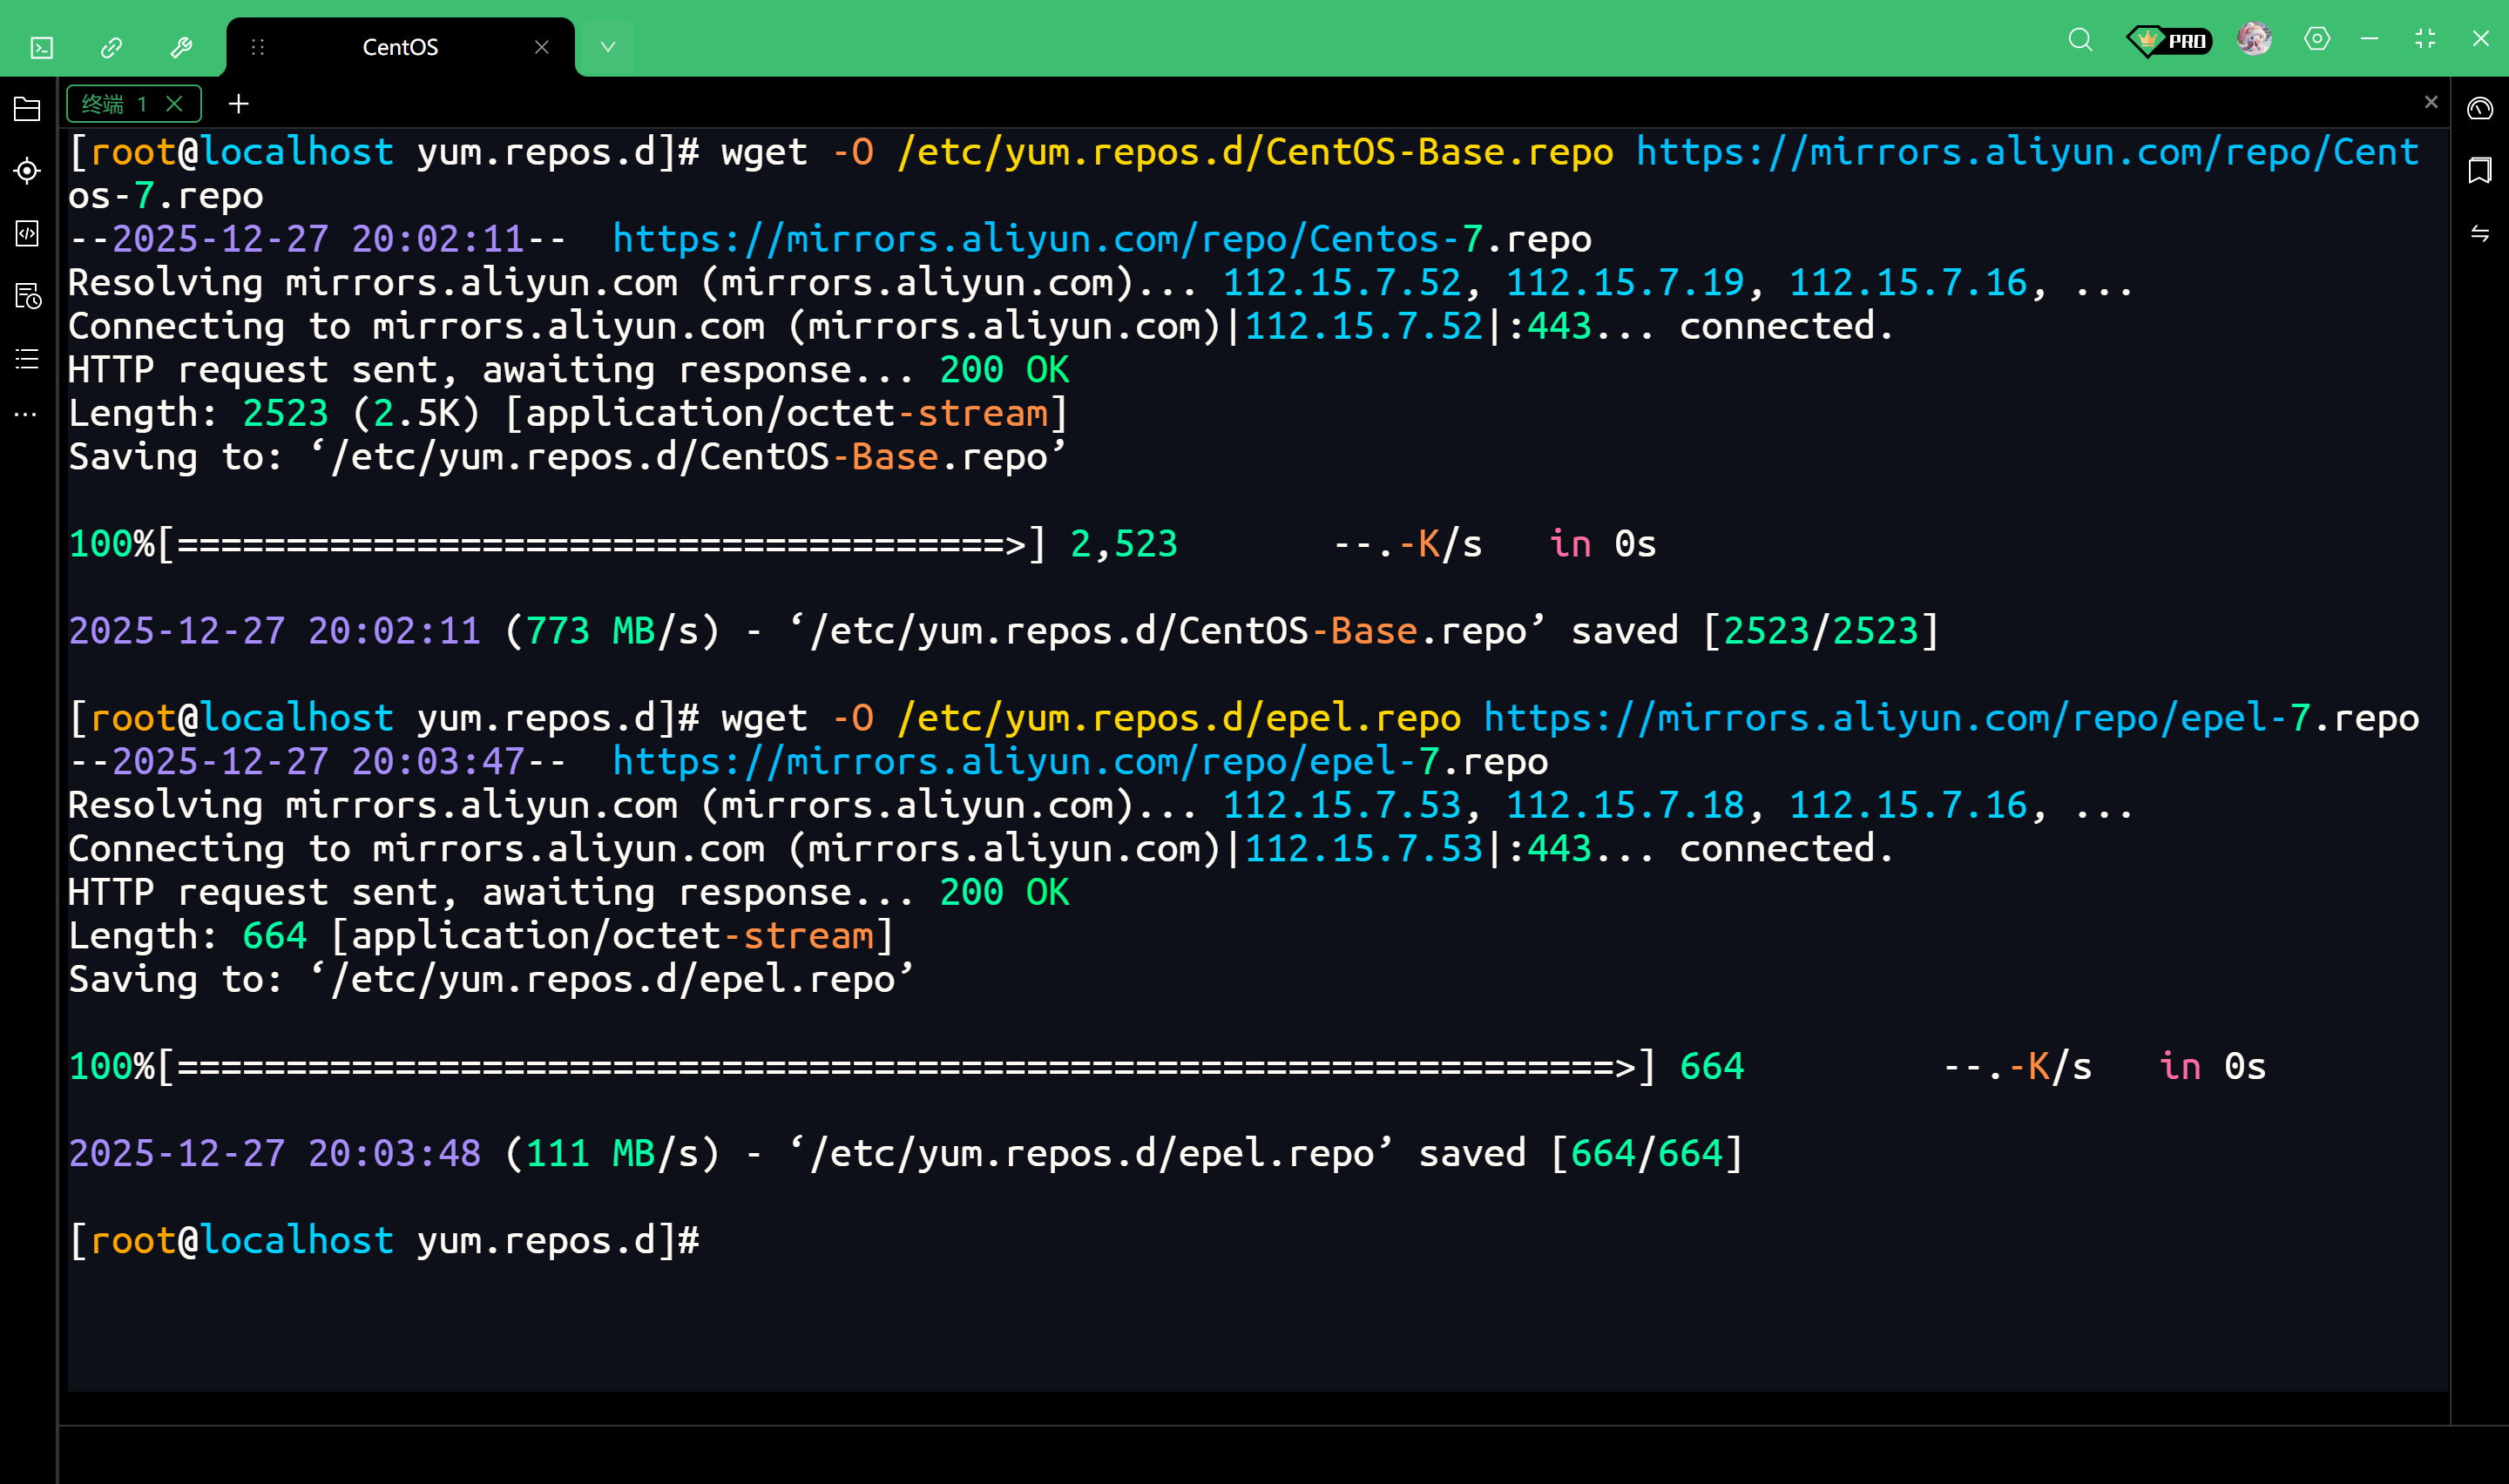
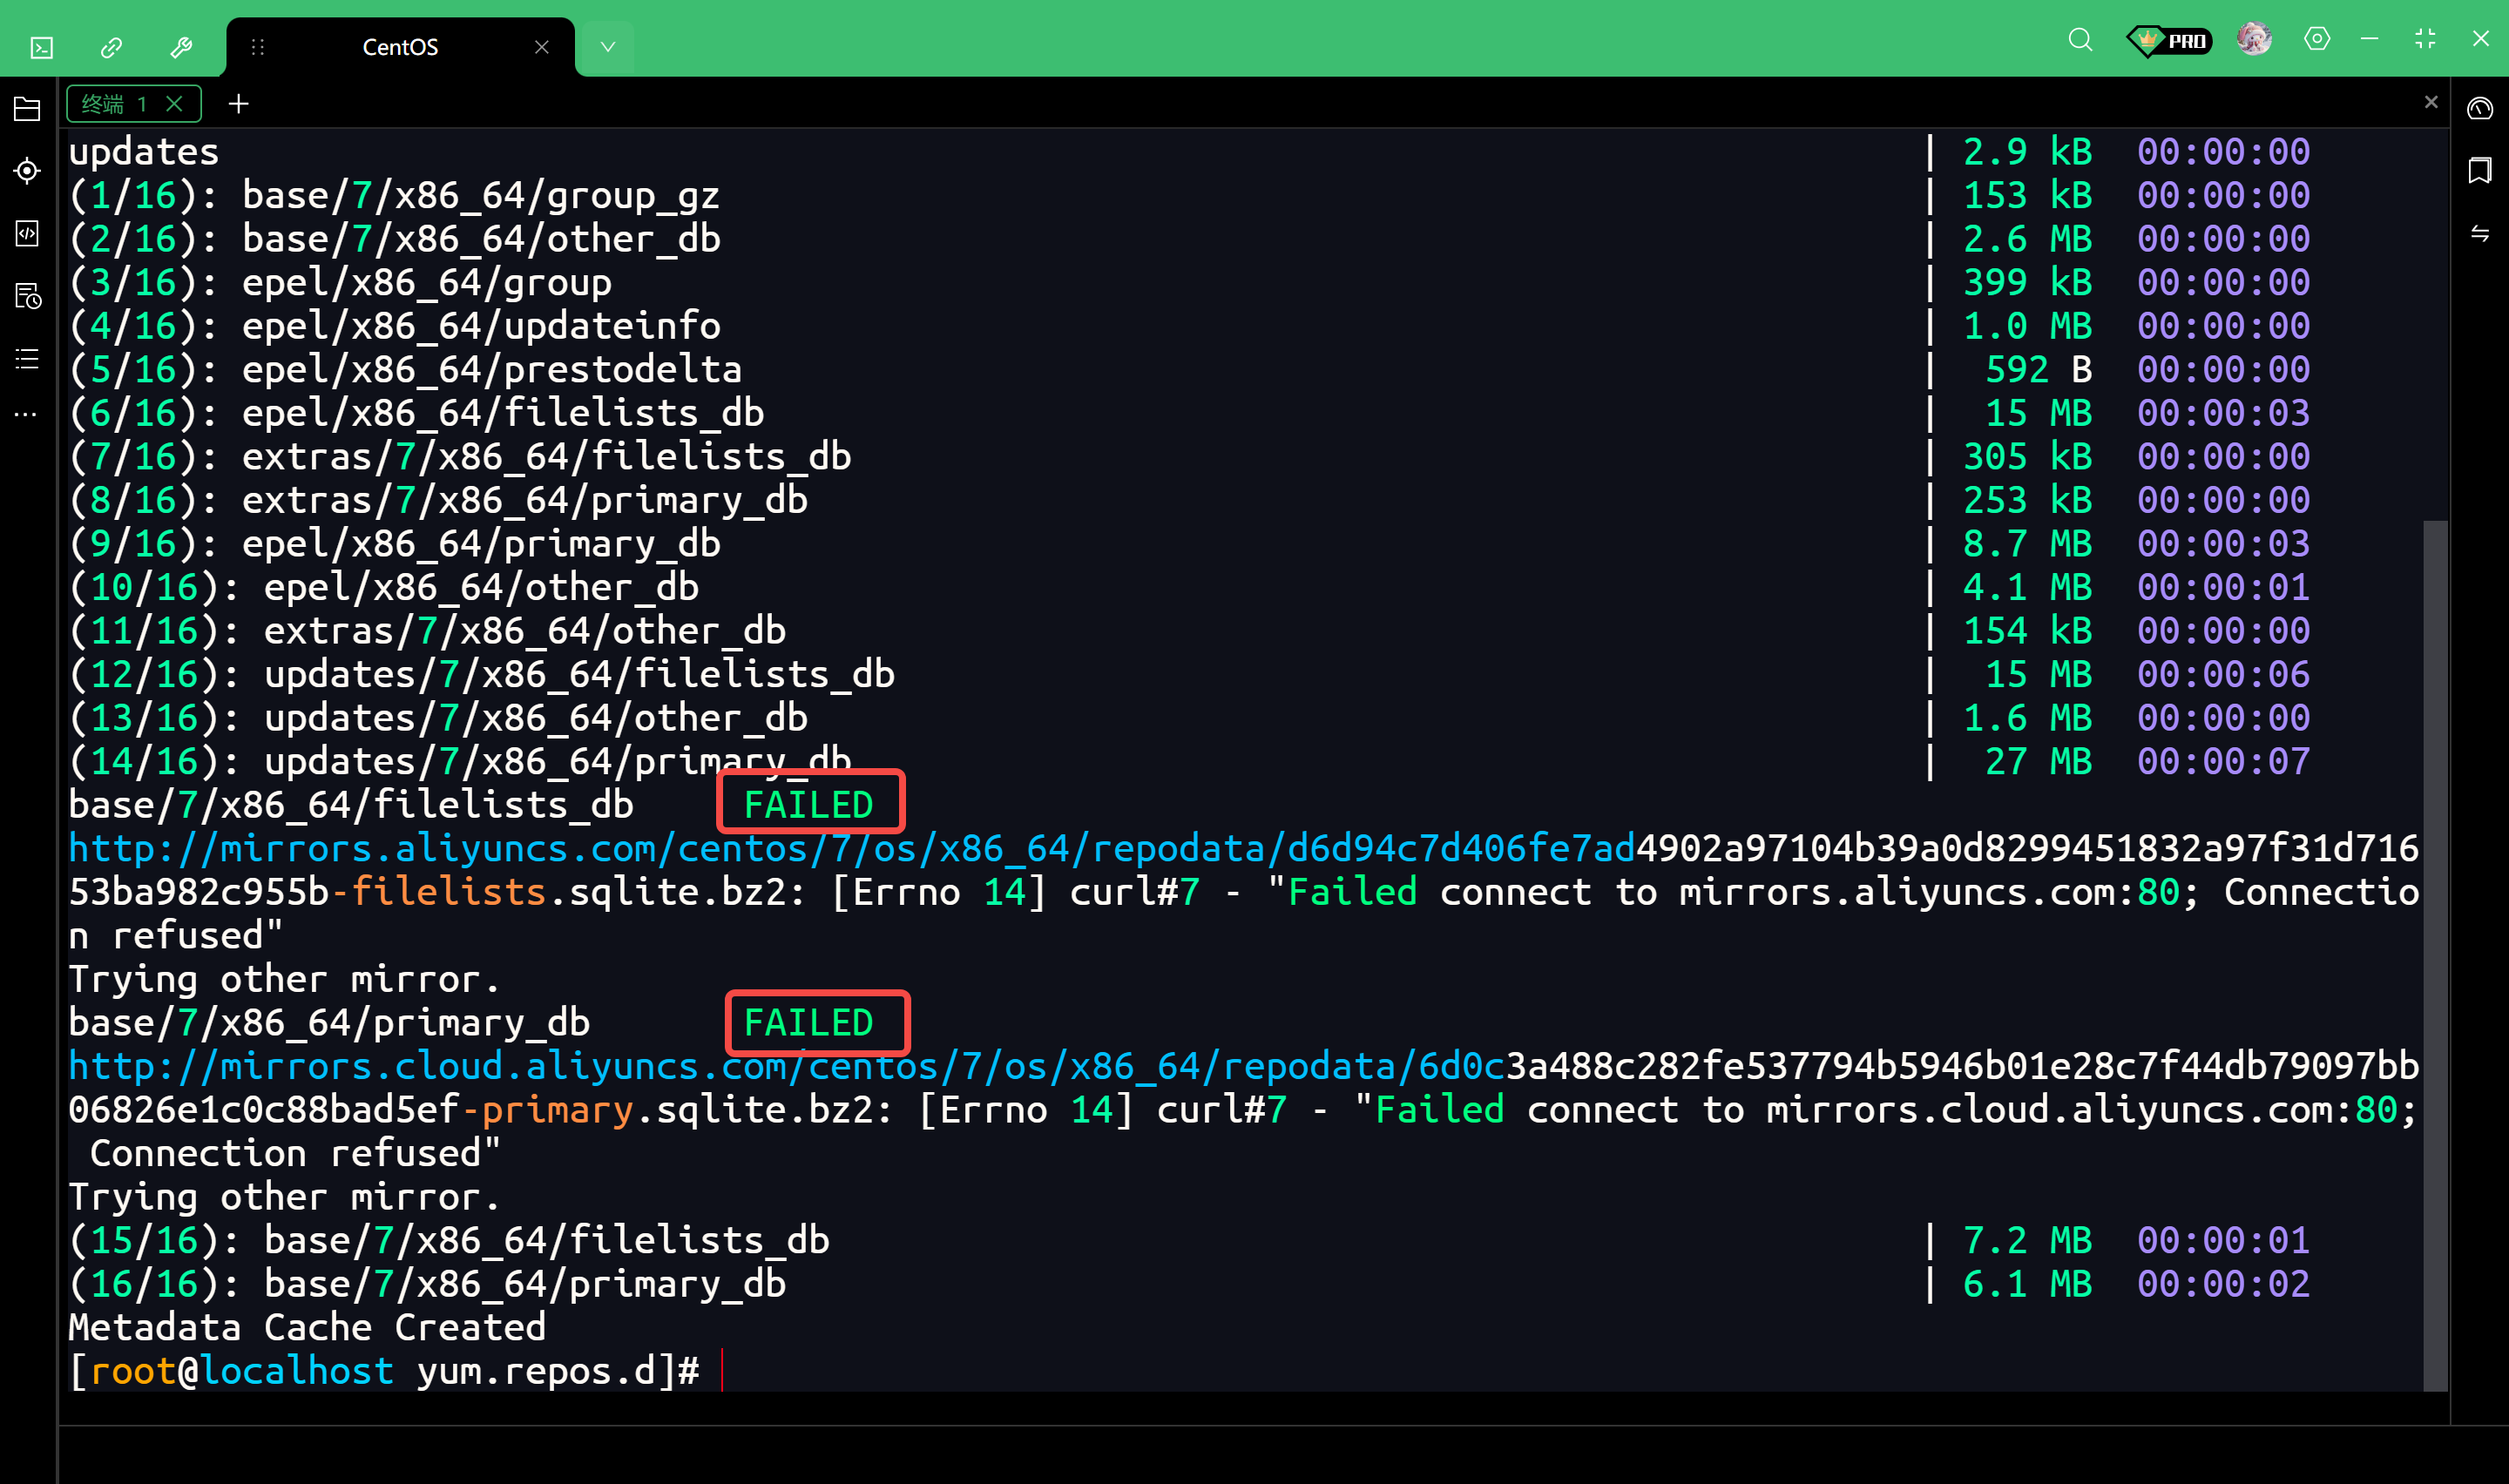
清理无法访问的内网地址
阿里云的配置文件里包含了一些仅限阿里云服务器内部访问的地址(aliyuncs.com)
我们在本地虚拟机使用时无法连接,生成新缓存的时候会导致报错
完整输出信息如下
[root@localhost yum.repos.d]# yum clean all
Loaded plugins: fastestmirror, langpacks
Cleaning repos: base epel extras updates
Cleaning up list of fastest mirrors
[root@localhost yum.repos.d]# yum makecache
Loaded plugins: fastestmirror, langpacks
Determining fastest mirrors
 * base: mirrors.aliyun.com
 * extras: mirrors.aliyun.com
 * updates: mirrors.aliyun.com
base                                                                                 | 3.6 kB  00:00:00
epel                                                                                 | 4.3 kB  00:00:00
extras                                                                               | 2.9 kB  00:00:00
updates                                                                              | 2.9 kB  00:00:00
(1/16): base/7/x86_64/group_gz                                                       | 153 kB  00:00:00
(2/16): base/7/x86_64/other_db                                                       | 2.6 MB  00:00:00
(3/16): epel/x86_64/group                                                            | 399 kB  00:00:00
(4/16): epel/x86_64/updateinfo                                                       | 1.0 MB  00:00:00
(5/16): epel/x86_64/prestodelta                                                      |  592 B  00:00:00
(6/16): epel/x86_64/filelists_db                                                     |  15 MB  00:00:03
(7/16): extras/7/x86_64/filelists_db                                                 | 305 kB  00:00:00
(8/16): extras/7/x86_64/primary_db                                                   | 253 kB  00:00:00
(9/16): epel/x86_64/primary_db                                                       | 8.7 MB  00:00:03
(10/16): epel/x86_64/other_db                                                        | 4.1 MB  00:00:01
(11/16): extras/7/x86_64/other_db                                                    | 154 kB  00:00:00
(12/16): updates/7/x86_64/filelists_db                                               |  15 MB  00:00:06
(13/16): updates/7/x86_64/other_db                                                   | 1.6 MB  00:00:00
(14/16): updates/7/x86_64/primary_db                                                 |  27 MB  00:00:07
base/7/x86_64/filelists_db     FAILED
http://mirrors.aliyuncs.com/centos/7/os/x86_64/repodata/d6d94c7d406fe7ad4902a97104b39a0d8299451832a97f31d71653ba982c955b-filelists.sqlite.bz2: [Errno 14] curl#7 - "Failed connect to mirrors.aliyuncs.com:80; Connection refused"
Trying other mirror.
base/7/x86_64/primary_db       FAILED
http://mirrors.cloud.aliyuncs.com/centos/7/os/x86_64/repodata/6d0c3a488c282fe537794b5946b01e28c7f44db79097bb06826e1c0c88bad5ef-primary.sqlite.bz2: [Errno 14] curl#7 - "Failed connect to mirrors.cloud.aliyuncs.com:80; Connection refused"
Trying other mirror.
(15/16): base/7/x86_64/filelists_db                                                  | 7.2 MB  00:00:01
(16/16): base/7/x86_64/primary_db                                                    | 6.1 MB  00:00:02
Metadata Cache Created
[root@localhost yum.repos.d]#
阿里云提供的这个 CentOS-7.repo 配置文件里,不仅包含了公网地址(mirrors.aliyun.com),还包含了阿里云服务器专用的内网地址(mirrors.aliyuncs.com)。
因为我的虚拟机是在本地(Windows)上运行的,而不是买的阿里云服务器,所以我的电脑连不上阿里云的内网,自然就报错。
虽然中间报了错,但最后显示 Metadata Cache Created,说明 yum 很聪明,它发现内网连不上,自动跳过并去连公网地址了,所以其实源已经配置好了。但是,这些报错看着很烦,而且会拖慢 makecache 的速度。
解决方案
使用 sed 命令批量删除包含 aliyuncs 的行
sed -i -e '/aliyuncs/d' /etc/yum.repos.d/CentOS-Base.repo生成新缓存
清理旧缓存并为新的阿里云源建立元数据
yum clean all
yum makecache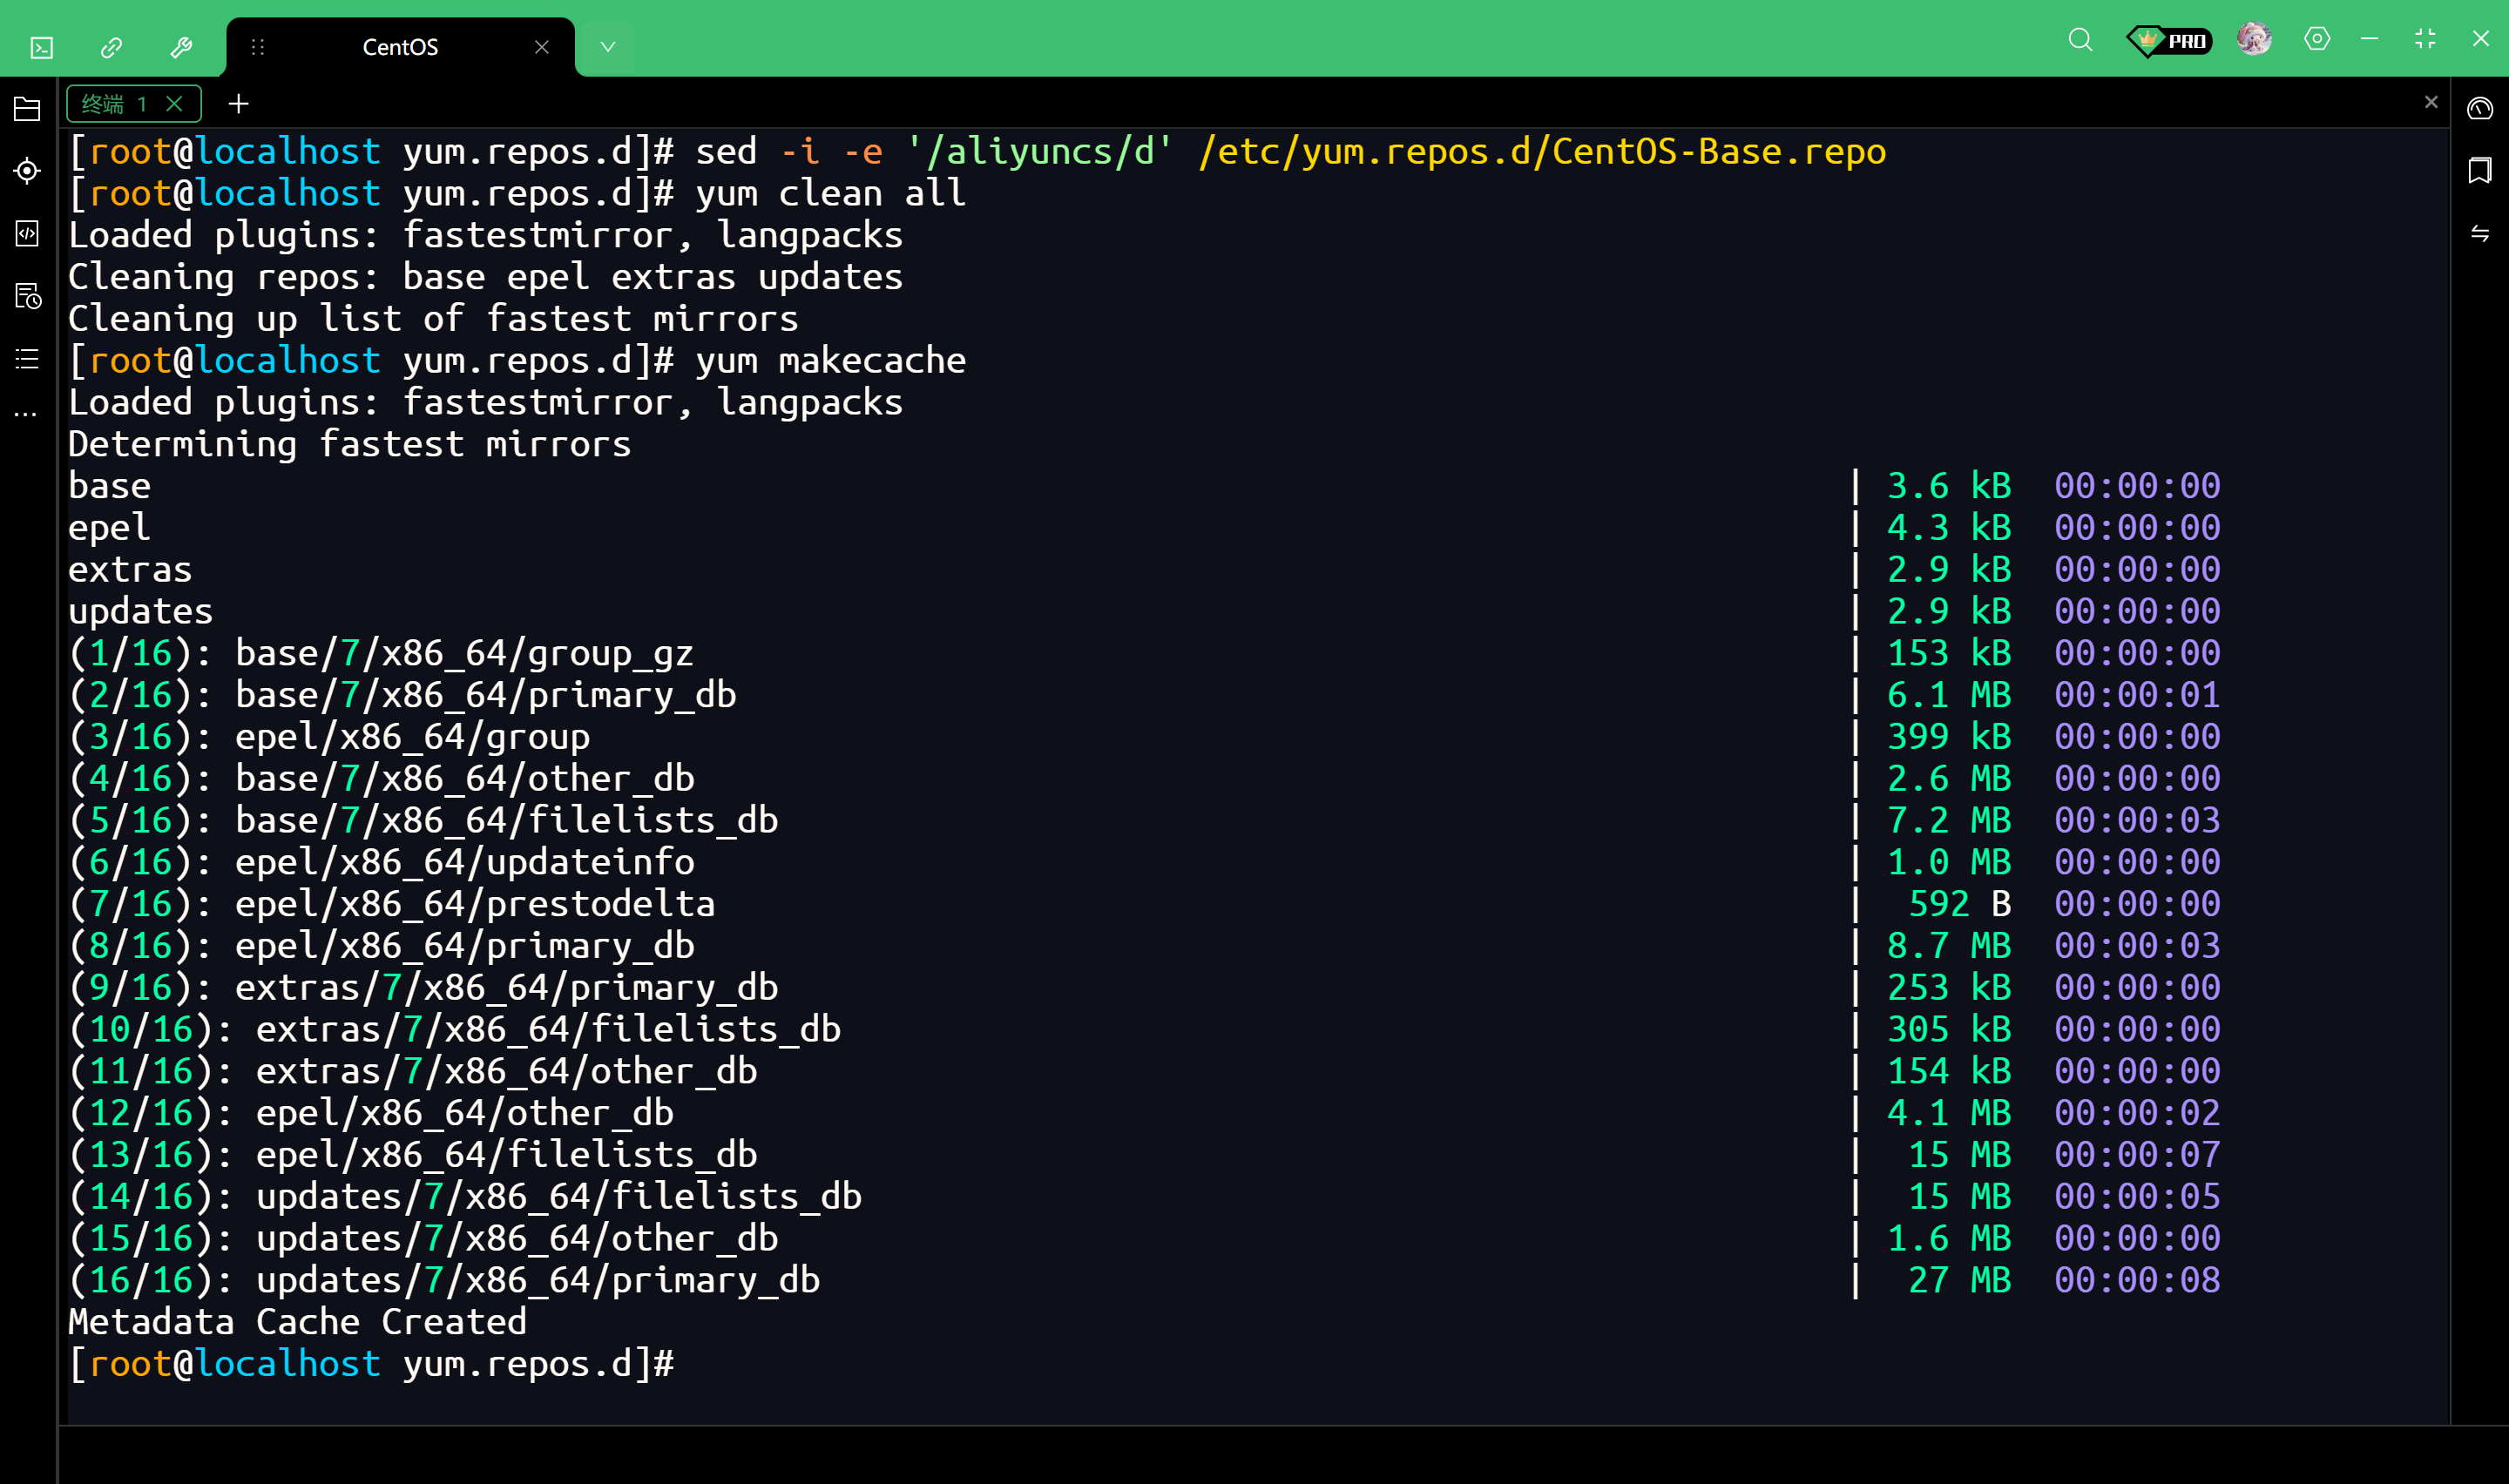
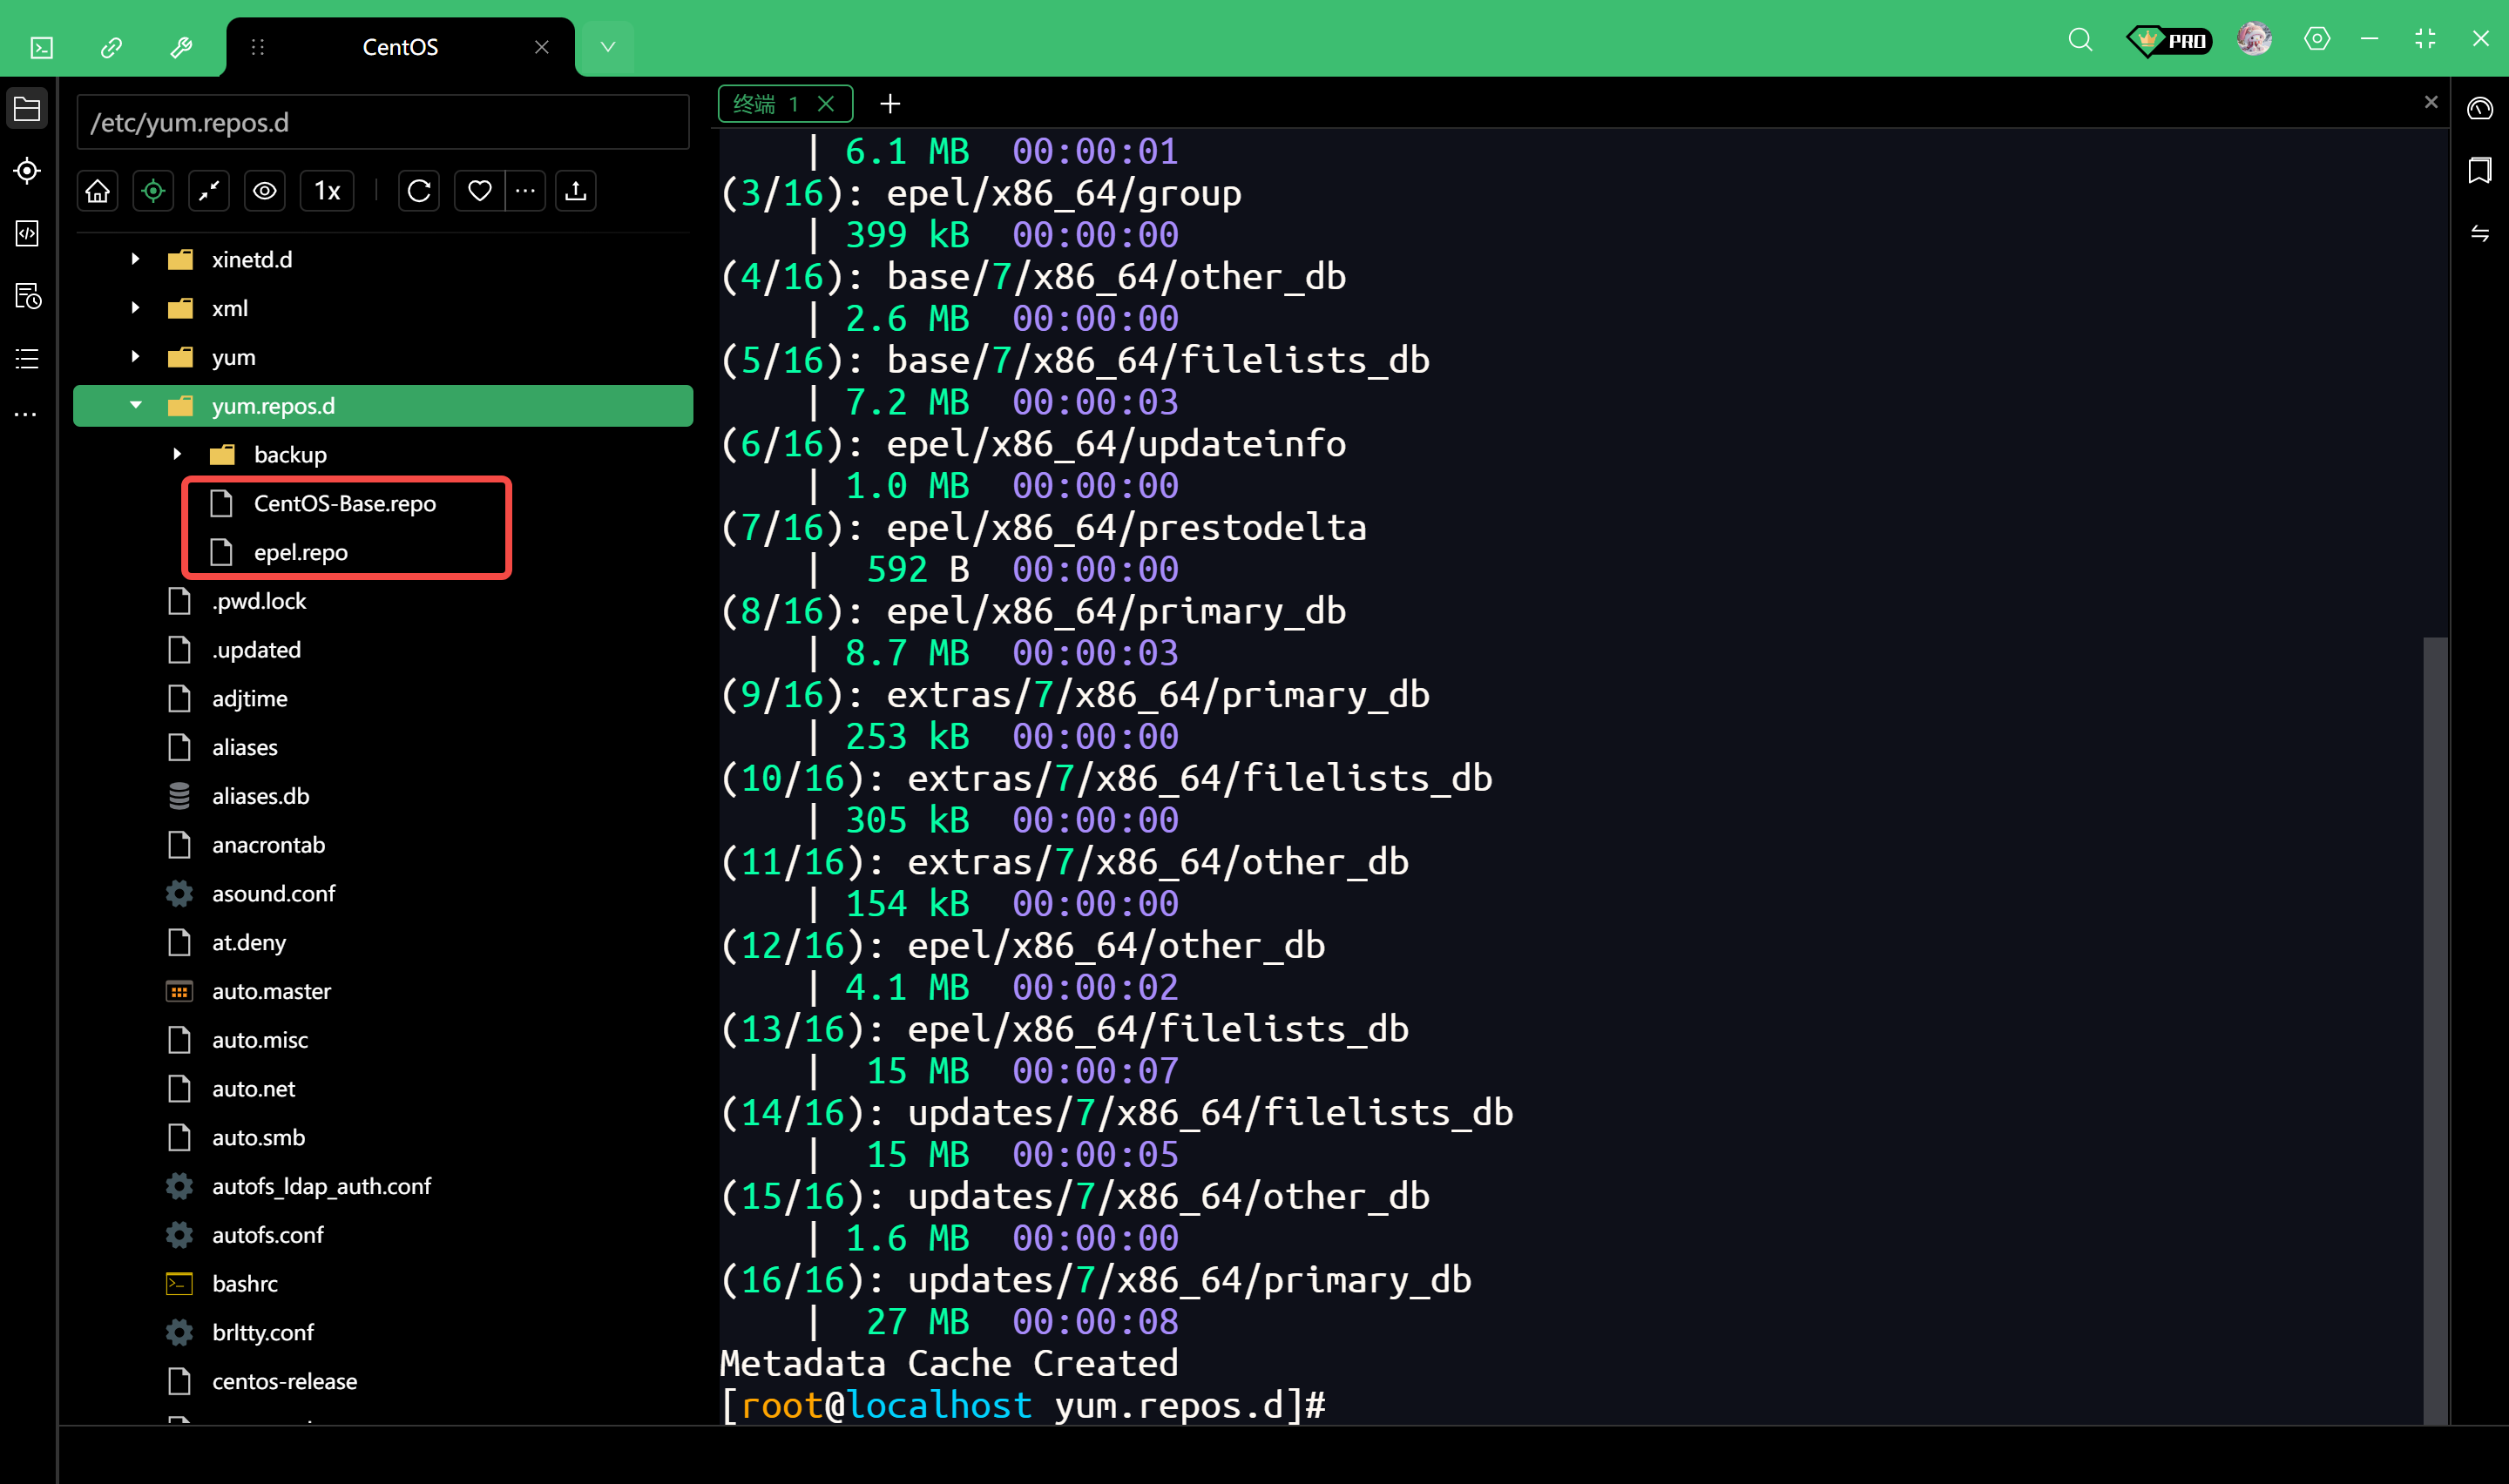
查看文件
可以看到多出来两个文件
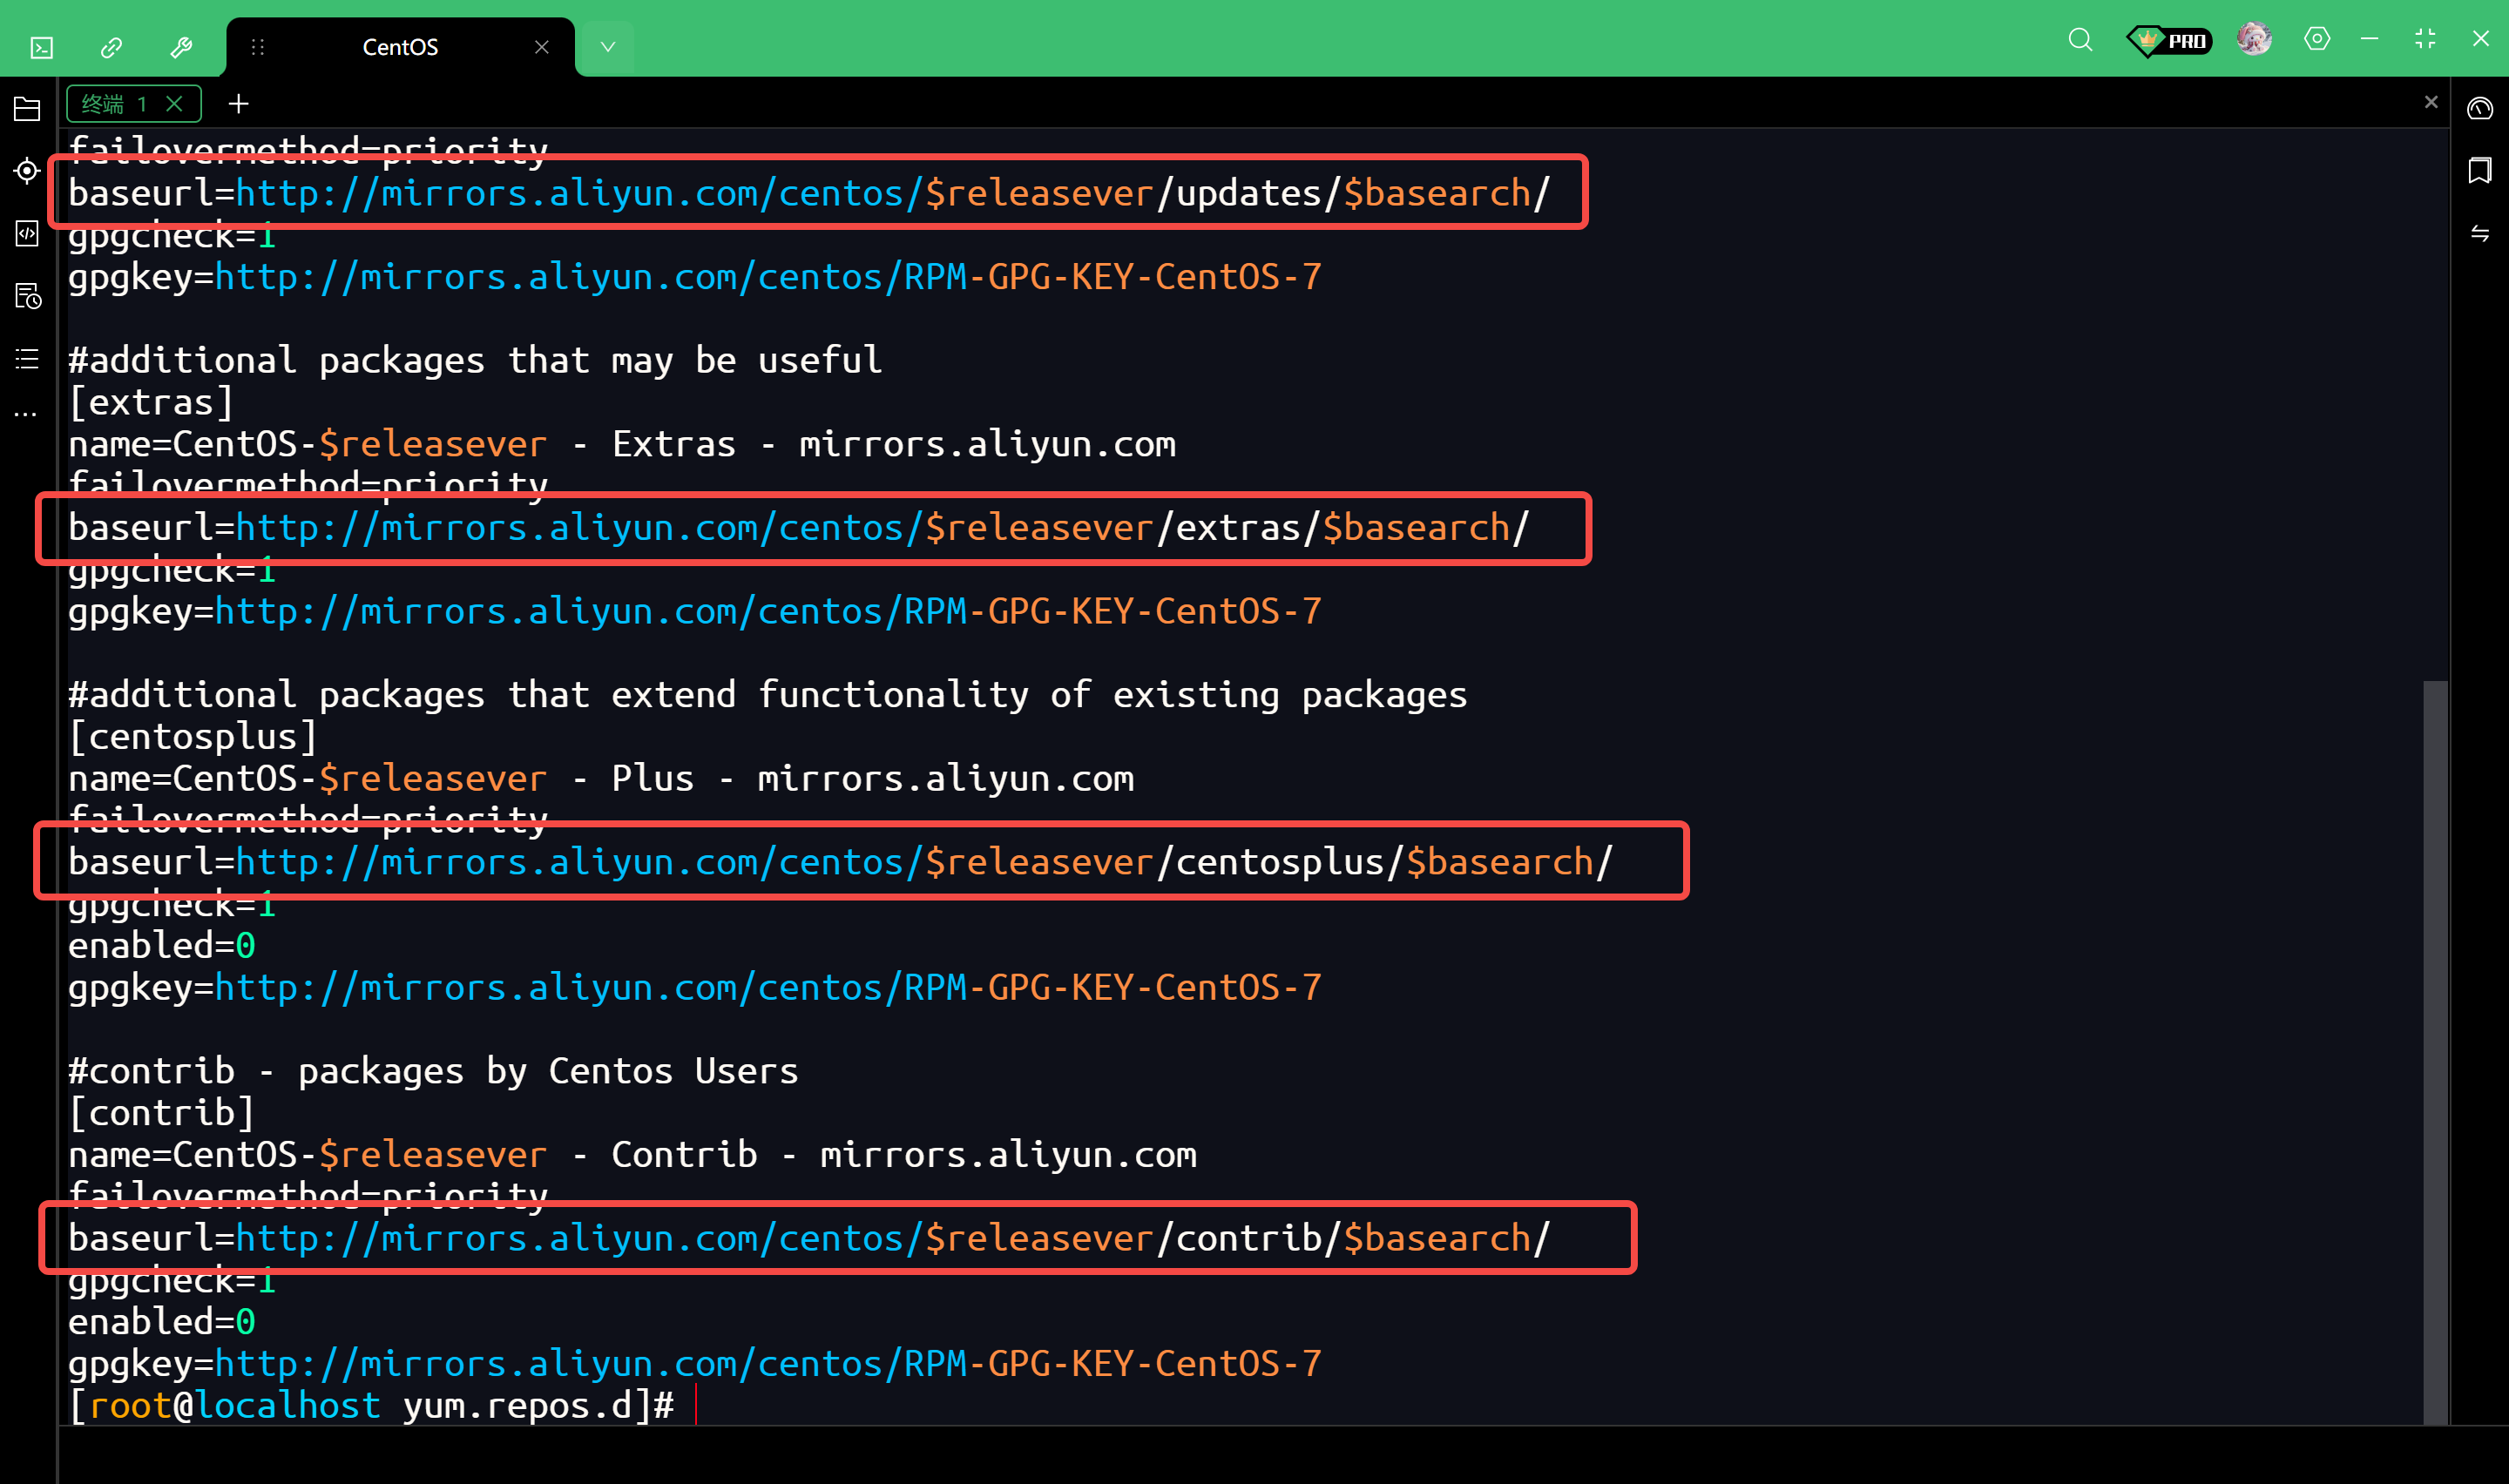
直接查看配置文件的内容
cat /etc/yum.repos.d/CentOS-Base.repo看输出内容中的 baseurl 字段,如果看到 mirrors.aliyun.com,说明配置完全正确
看另一个文件
cat /etc/yum.repos.d/epel.repo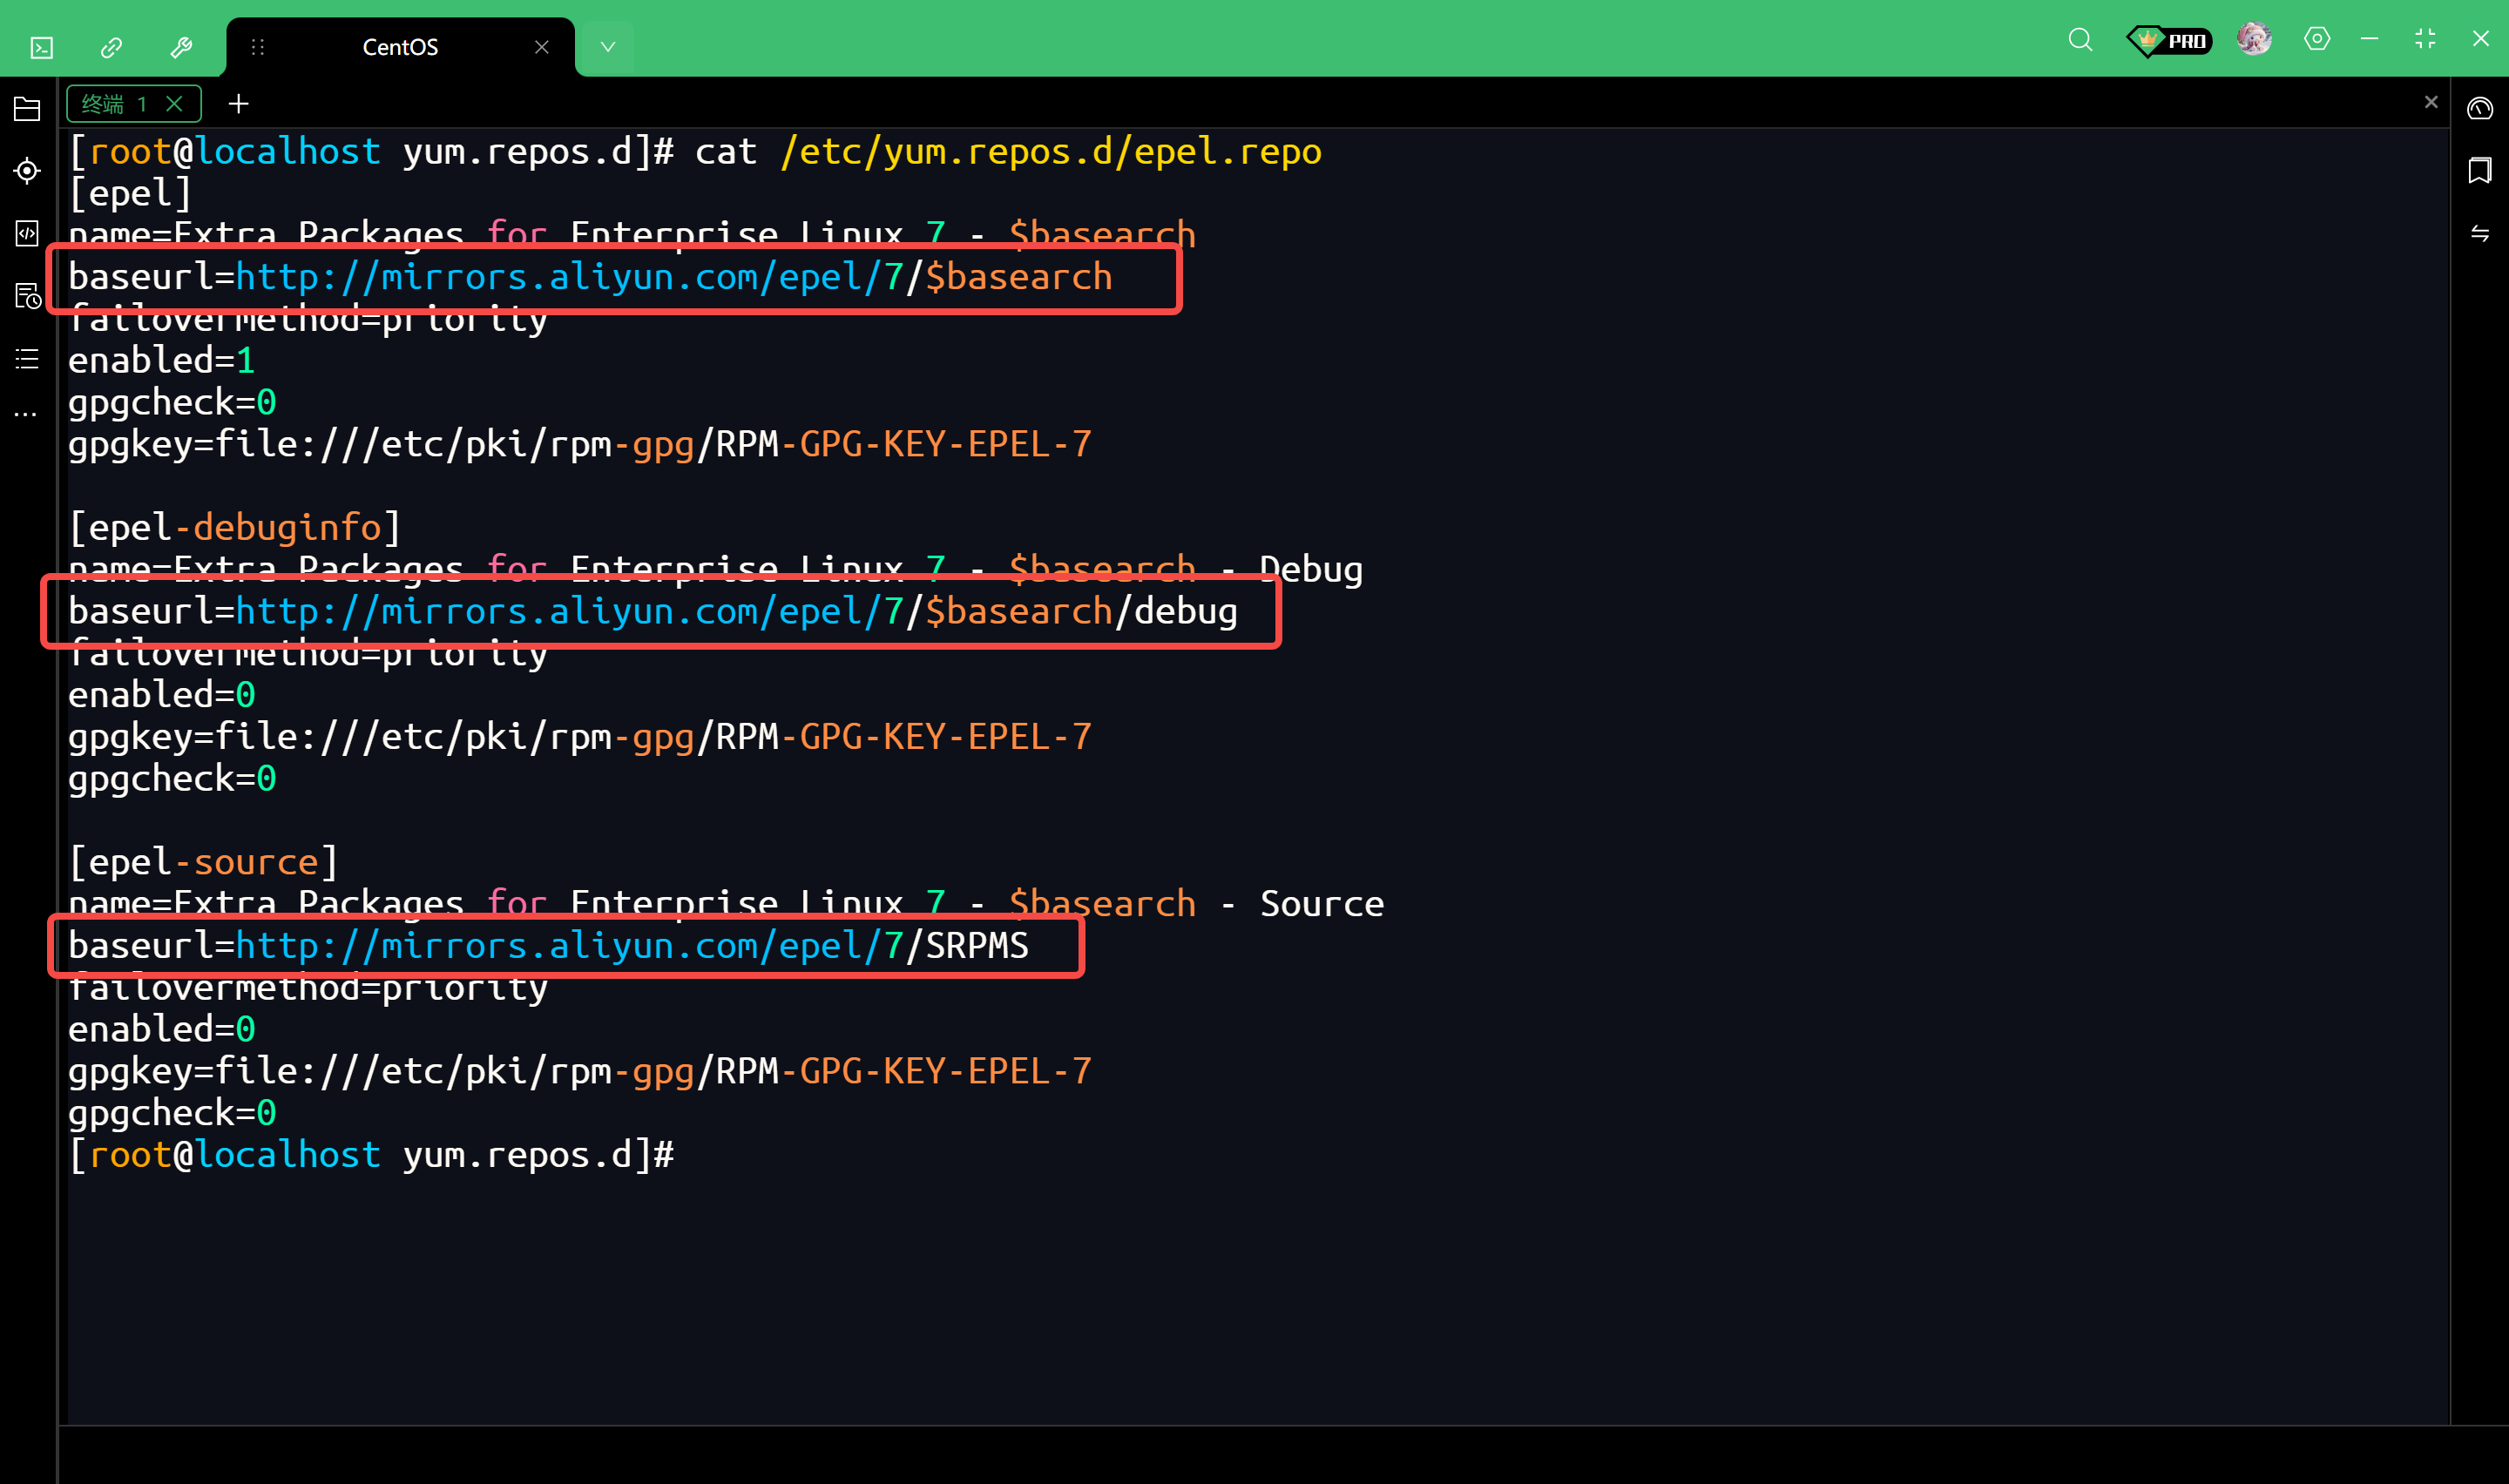
再次查看详细URL
yum repolist -v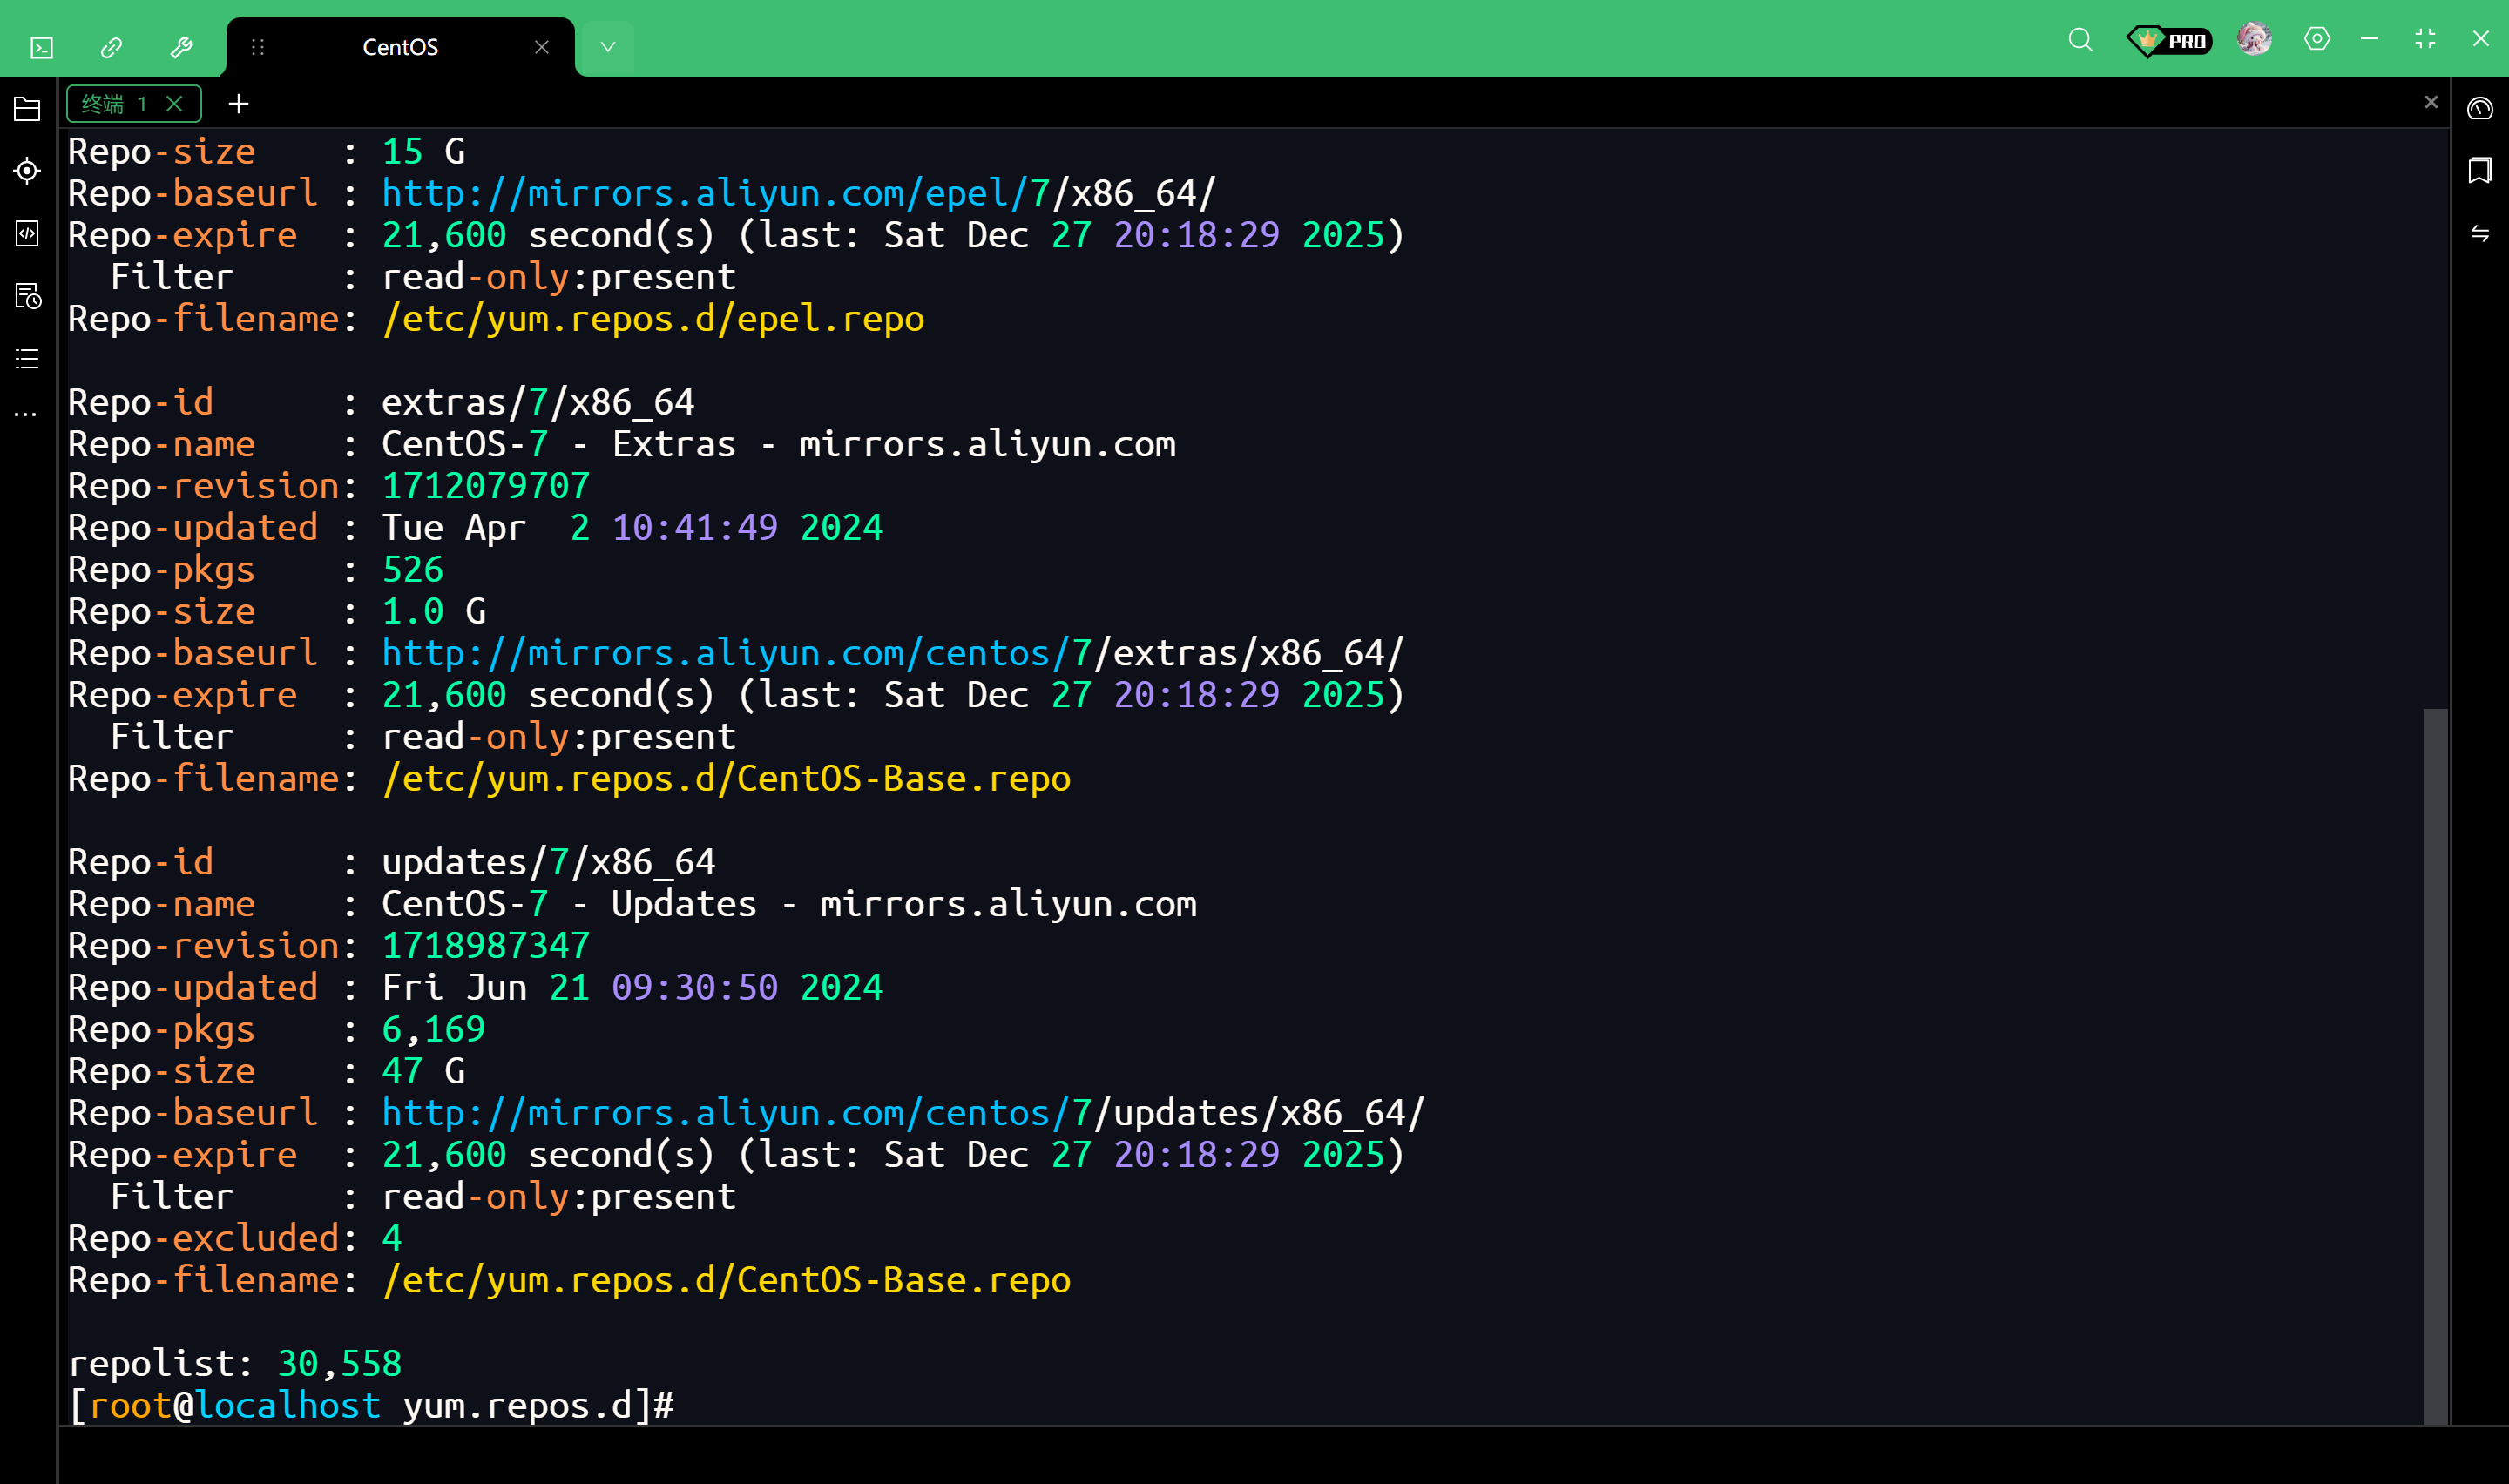
完整输出如下
[root@localhost yum.repos.d]# yum repolist -v
Loading "fastestmirror" plugin
Loading "langpacks" plugin
Adding en_US.UTF-8 to language list
Config time: 0.005
Yum version: 3.4.3
Loading mirror speeds from cached hostfile
Setting up Package Sacks
pkgsack time: 0.008
Repo-id      : base/7/x86_64
Repo-name    : CentOS-7 - Base - mirrors.aliyun.com
Repo-revision: 1604001756
Repo-updated : Thu Oct 29 13:03:00 2020
Repo-pkgs    : 10,072
Repo-size    : 8.9 G
Repo-baseurl : http://mirrors.aliyun.com/centos/7/os/x86_64/
Repo-expire  : 21,600 second(s) (last: Sat Dec 27 20:18:29 2025)
  Filter     : read-only:present
Repo-filename: /etc/yum.repos.d/CentOS-Base.repo

Repo-id      : epel/x86_64
Repo-name    : Extra Packages for Enterprise Linux 7 - x86_64
Repo-revision: 1719793483
Repo-updated : Sun Jun 30 17:25:02 2024
Repo-pkgs    : 13,791
Repo-size    : 15 G
Repo-baseurl : http://mirrors.aliyun.com/epel/7/x86_64/
Repo-expire  : 21,600 second(s) (last: Sat Dec 27 20:18:29 2025)
  Filter     : read-only:present
Repo-filename: /etc/yum.repos.d/epel.repo

Repo-id      : extras/7/x86_64
Repo-name    : CentOS-7 - Extras - mirrors.aliyun.com
Repo-revision: 1712079707
Repo-updated : Tue Apr  2 10:41:49 2024
Repo-pkgs    : 526
Repo-size    : 1.0 G
Repo-baseurl : http://mirrors.aliyun.com/centos/7/extras/x86_64/
Repo-expire  : 21,600 second(s) (last: Sat Dec 27 20:18:29 2025)
  Filter     : read-only:present
Repo-filename: /etc/yum.repos.d/CentOS-Base.repo

Repo-id      : updates/7/x86_64
Repo-name    : CentOS-7 - Updates - mirrors.aliyun.com
Repo-revision: 1718987347
Repo-updated : Fri Jun 21 09:30:50 2024
Repo-pkgs    : 6,169
Repo-size    : 47 G
Repo-baseurl : http://mirrors.aliyun.com/centos/7/updates/x86_64/
Repo-expire  : 21,600 second(s) (last: Sat Dec 27 20:18:29 2025)
  Filter     : read-only:present
Repo-excluded: 4
Repo-filename: /etc/yum.repos.d/CentOS-Base.repo

repolist: 30,558
[root@localhost yum.repos.d]#
安装 Docker
接下来我们在 CentOS 7 上安装 Docker CE(社区版)
卸载旧版本(如果有)
yum remove docker \
           docker-client \
           docker-client-latest \
           docker-common \
           docker-latest \
           docker-latest-logrotate \
           docker-logrotate \
           docker-engine
安装依赖包
yum install -y yum-utils
设置阿里云镜像仓库
yum-config-manager --add-repo https://mirrors.aliyun.com/docker-ce/linux/centos/docker-ce.repo
命令拆解
- yum-config-manager
这是一个管理工具
它不是CentOS自带的核心命令,而是包含在 yum-utils 这个包里的,这就是为什么要先运行 yum install -y yum-utils 的原因
如果不装 yum-utils,运行这条命令会报错
- --add-repo
这是工具的一个参数,意思是"添加一个仓库(Repository)"
它的作用相当于帮你省去了手动新建 .repo 文件并输入内容的繁琐步骤
这是一个URL地址,指向阿里云提供的一个文本文件(.repo文件)
这个文件里记录了Docker软件的下载地址、版本检查方式等信息
执行这条命令后,发生了什么
工具访问了那个阿里云的URL
下载了 docker-ce.repo 这个文件
把它保存在了 /etc/yum.repos.d/ 目录下
为什么要执行这一步
CentOS自带的源(即使换了阿里源的Base源)里,包含的Docker版本非常老(通常叫 docker,而不是 docker-ce),且很多年不更新了。
我们需要用 docker-ce(Community Edition,社区版)
执行这条命令,就是专门给 yum 指一条路:如果你要装 docker-ce,请去这个新加的阿里云仓库里找,别去默认的地方找
安装 Docker Engine
安装最新版的 Docker
yum install -y docker-ce docker-ce-cli containerd.io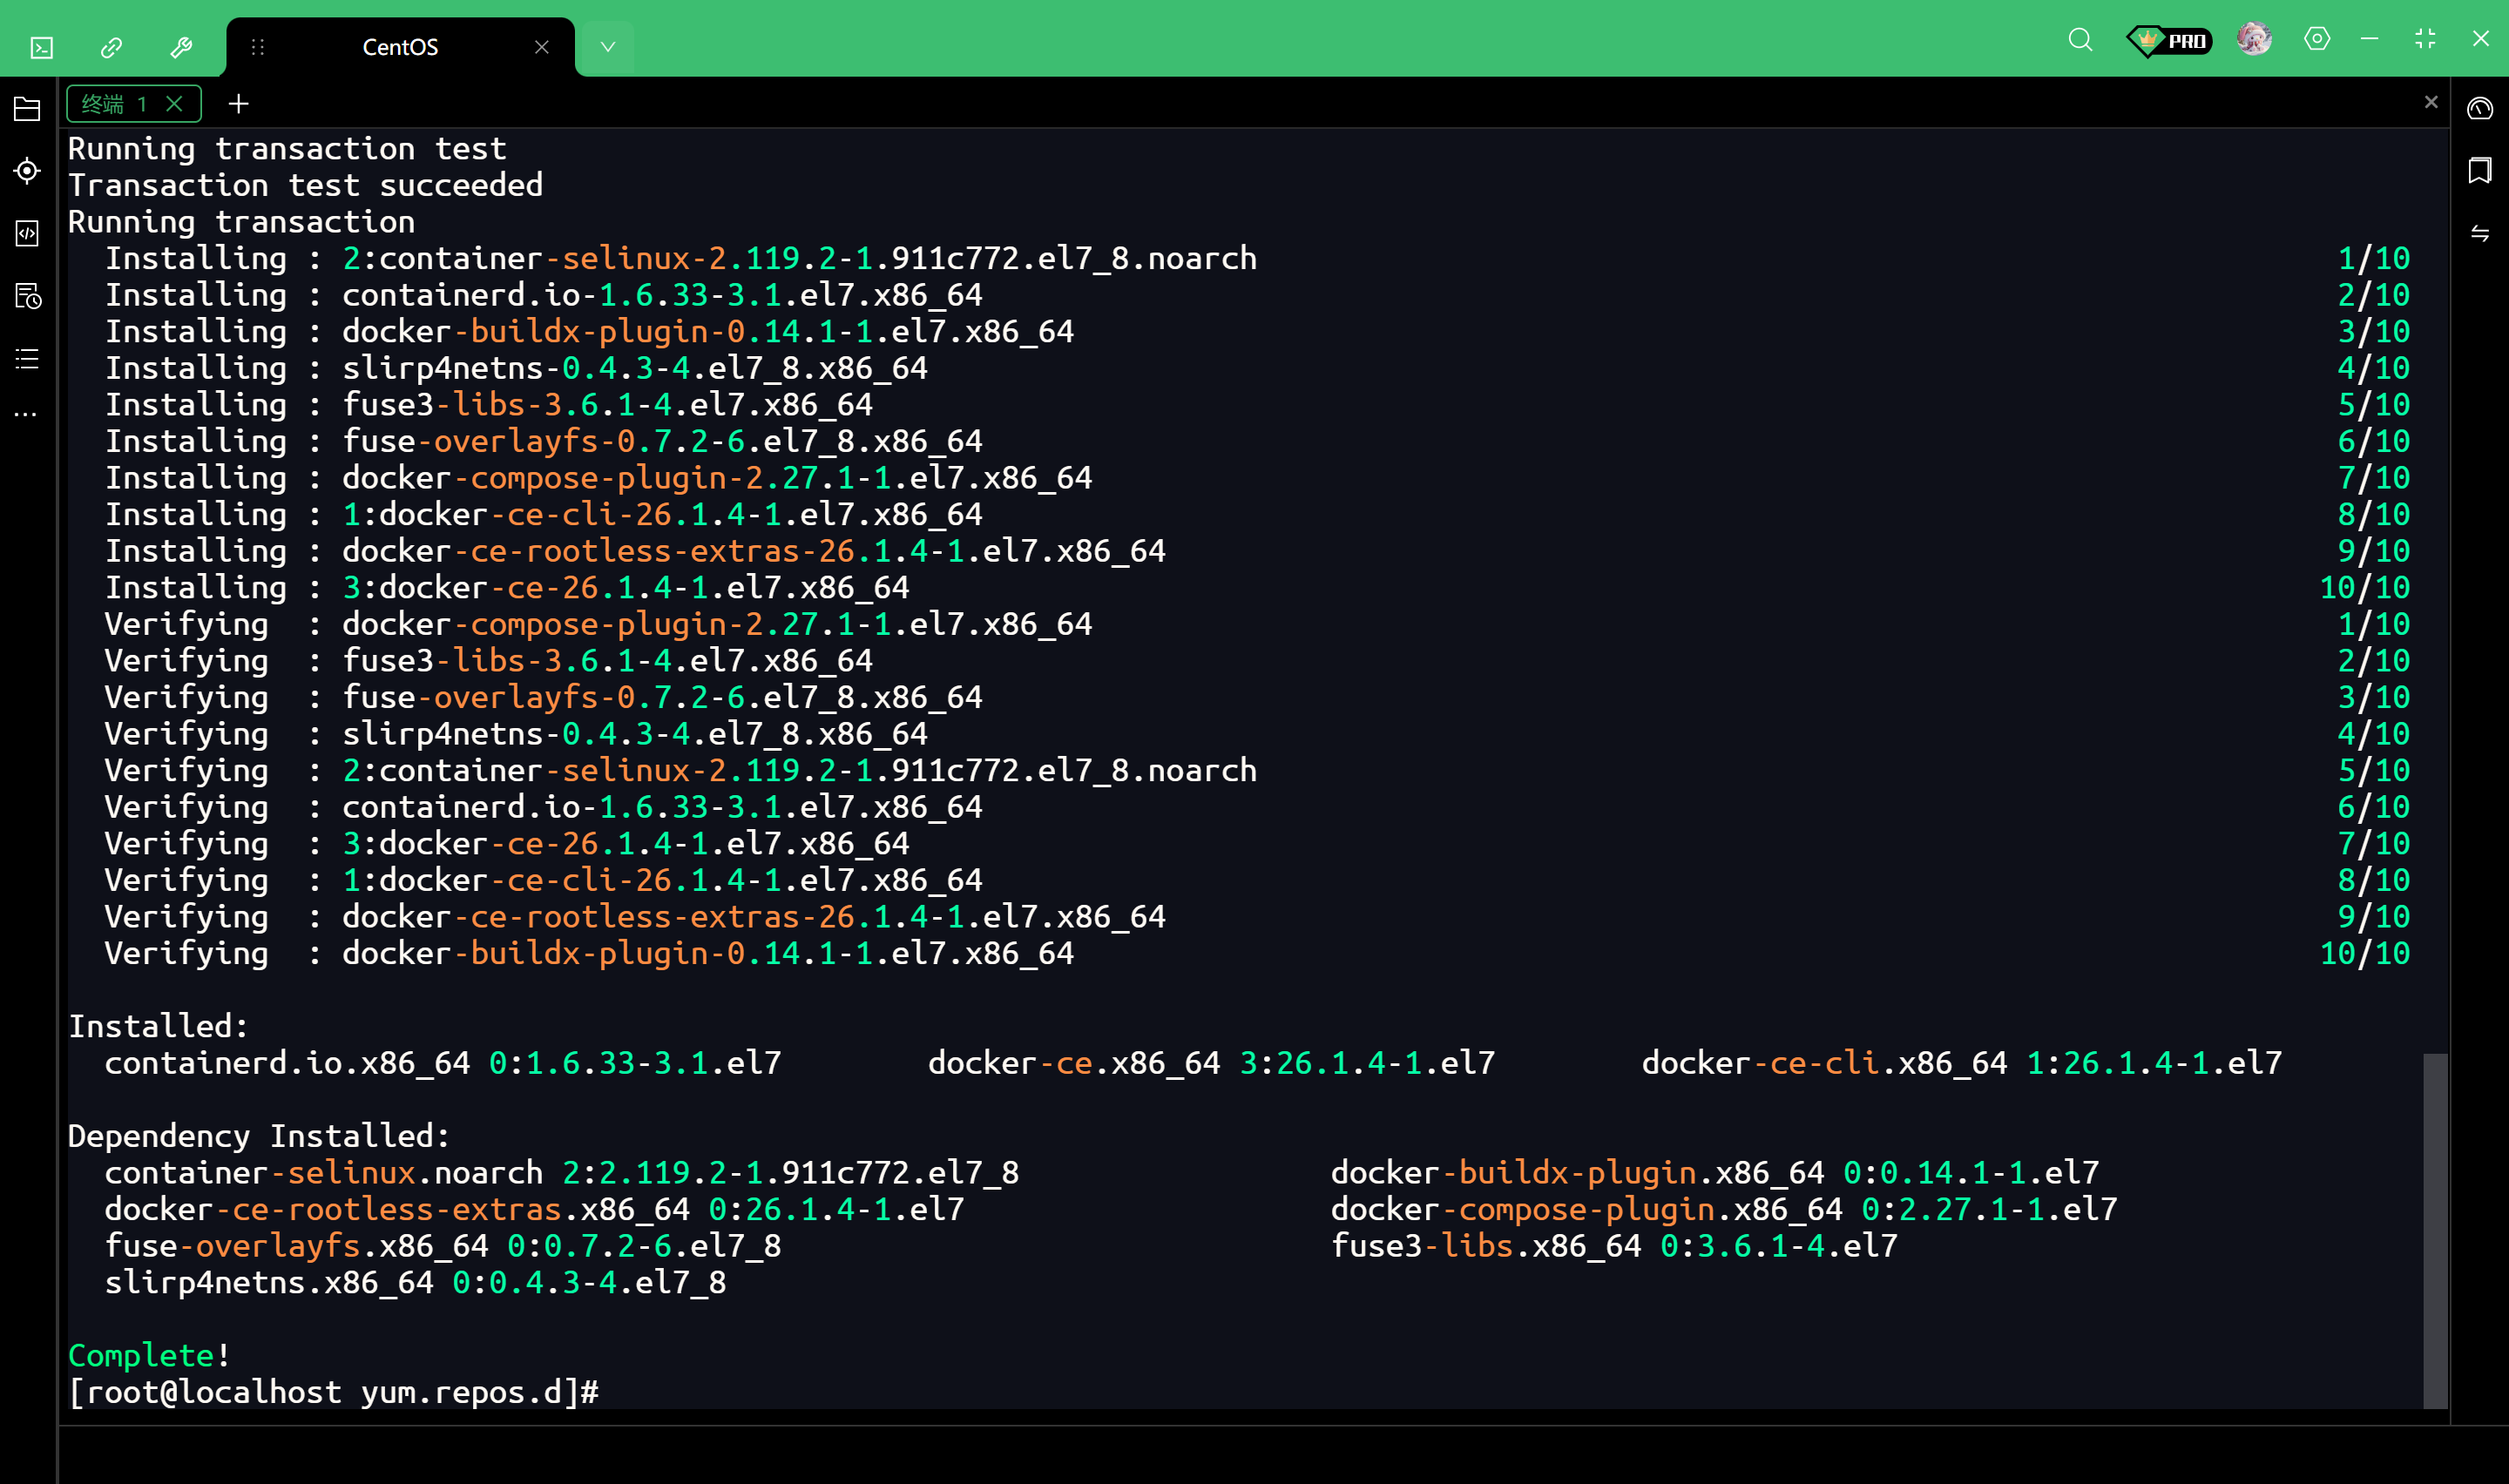
启动 Docker 并设置开机自启
# 启动Docker
systemctl start docker

# 设置开机自启
systemctl enable docker
配置 Docker 镜像加速
可以看我这篇文章