大家好,我是前端西瓜哥。
之前给我的图形编辑器加上了文本编辑功能。
详见文章:《图形编辑器:基于 canvas 的所见即所得文本编辑》
最近在这个基础上陆陆续续又加了点新功能。主要是:
-
引入 opentype.js 字体解析库,做字体的解析,然后用对应的字形路径进行渲染,放弃原来的 Canvas 2D 的 drawText 方案;
-
支持回车手动换行,原来只支持单行文本;
-
支持行间距,支持像素和百分比单位;
-
支持行高,支持 auto、像素和百分比单位;
suika 图形编辑器 github 地址:
线上体验:
字体加载和解析
为什么要自己去做解析字体,去做排版,可以看我的这篇文章:
《图形编辑器开发:使用 opentype.js 解析字体并渲染文本》
这样做有很多优点:
-
和渲染引擎的文字渲染高级功能解耦;
-
可以直接拿到路径数据,可以自定义字体路径效果,比如一些离散点较少的低保真渲染;
-
缓存路径数据,可以在一些场景下去掉文字加载和解析的必要,比如只读图纸;
-
实现灵活的文字排版。
缺点也很明显,需要自己去实现文字排版,这不是一个简单的工作,目前我也只实现了一些基础的能力而已。
下面看看我们需要怎么改造。
首先需要加载字体,为此我们需要定一个 FontManager 字体管理类,负责字体的加载以及解析。
js
import { type Font } from 'opentype.js';

class FontManager {
  private fonts: Record<string, Font | null> = {};
}
用一个 map 保存字体名到 opentype.js 库的 font 对象的映射关系。
然后定义一个 loadFonts 方法,这个方法会 并行 加载字体文件,然后解析成 font 对象,写入到 this.fonts 下。
ini
tasks.push(async () => {
  const font = await opentype.load(url);
  this.fonts[fontName] = font;
  return font;
});
我们基于这个 FontManger 类初始化一个 fontManager 实例,然后作为单例导出。
我们要用 单例模式,这样多个 editor 实例可以共用一套字体数据,避免字体的重复加载和解析。
在编辑器初始化前,我们需要先加载好字体,否则初始化时没法做 charcode 到 path 的映射。
字体文件通常很大,可以考虑在 UI 层加个进度条。
ini
await fontManager.loadFonts(FONT_FILES);
setProgress(100);

const editor = new Editor(/*...*/);
字形 glyph 路径不能直接用,表现在:
-
它是对齐基线的;
-
y 方向是向上的,我的编辑器用的是设备坐标系,y 是向下的;
-
最重要的是,它的单位不是 px,是 fontUnits,需要单位转换。
后面的对位和排版会需要做一些 琐碎的转换工作。
转换关系为:
ini
const sizeInPx = (sizeInFontUnit / unitsPerEm) * fontSize;考虑换行的文字排版
之前第一版是单行文本,现在要支持换行,改成 多行文本。
首先我们不能再用 input dom 元素了。
我们需要明确,用 input 节点是为了监听输入法的输入,是为了解决中文输入时,候选框定位不对的问题。
它本身是不可见的,我们需要监听它的 input 事件对象的 data 字符串,去给文本对象进行更新。input 元素有个特性:会过滤掉换行符 \n,尤其是粘贴的时候。
因为要支持换行,我们需要拿到换行符输入,所以我们需要 换成 textarea 元素。
不过 textarea 下输入回车键,input 事件对象的 data 依旧是空的,需要监听 enter 按键去插入换行符。换成 textarea 是为了 处理粘贴文本中有换行符的场景,input 会将其过滤掉。
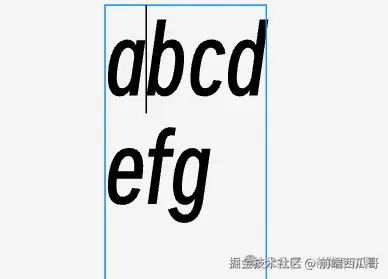
不管怎样,我们的字符串会出现换行符。如:
abcd\nefg\nhi我们需要将这段字符串转换为 glyph 数组,因为多了行的维度。
我们会基于换行符分割成多个子字符串,然后调用 opentype.js 的 font.stringToGlyphs(content) 方法,得到 glyph 数组。
代码大概如下(去掉了细节):
ini
// 切割成多行
const lines = content.split('\n');

let y = 0;
for (const line of lines) {
// 求出单行 glyph
const glyphs = calcGlyphInfos(line);

// y 设置为行高累加值
for (const glyph of glyphs) {
    glyph.position.y = y;
  }
  y += lineHeight;
if (glyphs.length > 0) {
    const lastGlyph = glyphs.at(-1)!;
    // 这里在找最大行宽,后面 autoFit 需要用到
    layoutWidth = Math.max(
      this.width,
      lastGlyph.position.x + lastGlyph.width,
    );
  }
this.glyphs.push(glyphs);
}

// 计算单行的 glyph
const calcGlyphInfos = (content: string)=> {
// 拿到 glyphs 数据
const originGlyphs = font.stringToGlyphs(content);
const glyphs: IGlyph[] = [];

let letterSpacingVal = fontStyle.letterSpacing.value;
// ...计算出了字间距(省略)...

let x = 0;

for (let i = 0; i < originGlyphs.length; i++) {
    const glyph = originGlyphs[i];
    let width = glyph.advanceWidth ?? 0;

    // 最后一个 glyph 不需要补偿字间距
    if (i < originGlyphs.length - 1) {
      width += letterSpacingVal;
    }

    glyphs.push({
      position: { x: x, y: 0 },
      width: width,
      commands: glyph.path.toPathData(100),
    });
    x += width;
  }

// 补上一个 \n 对应的空 glyph
  glyphs.push({
    position: { x, y: 0 },
    width: 0,
    commands: '',
  });

return glyphs;
};
对于前面的字符串,会得到这样的二维 glyph 数组:
csharp
[
 [a, b, c, d, <empty>],
 [e, f, g, <empty>],
 [h, i, <empty>],
]
glyph 需要记录的必要属性:
-
position:位置,是基于 width、字间距和行高,动态计算出来的;
-
width:字宽;
-
commands:path 字符串,如 "M96-30L107 21C126-19 158-40 203-40 ... Z"
换行符是没有对应的 glyph 的,因为它是不见字符。
但我们还是在末尾给它对应一个空的 glyph 做占位,宽度为 0,路径也为空,之后光标定位计算要用。类似链表的哨兵节点,只是简化算法用的,本身不存数据。
渲染的时候需要做一些变换操作。y 轴要翻转,baseLine 要移动一下,然后 fontUnits 也要转换为 px 单位。
ini
let lineHeight = defaultLineHeight;
let halfPadding = 0;

lineHeight = attrs.lineHeight / (attrs.fontSize / unitsPerEm);
halfPadding = (lineHeight - defaultLineHeight) / 2;

// unit 转为 px,且左上角对齐原点,需要应用的矩阵
const matrix = new Matrix()
// y 轴翻转
  .scale(1, -1)
// baseLine 移动,让 metric 顶部对齐文本的 y 位置
  .translate(0, ascender + lineGap / 2 + halfPadding)
// fontUnits 转换 px
  .scale(fontSize / unitsPerEm, fontSize / unitsPerEm);

ctx.transform(...matrix.getArray());
draw();
光标选区和定位
我们用 RangeManager 类表达光标的位置信息。
光标的位置就是,文本字符串的字符索引位置。有两个值 start 和 end。
start 就是起始位置,end 是结束位置。
当 start 等于 end 时,表现为一条闪烁地竖线(目前我没实现闪烁效果)。
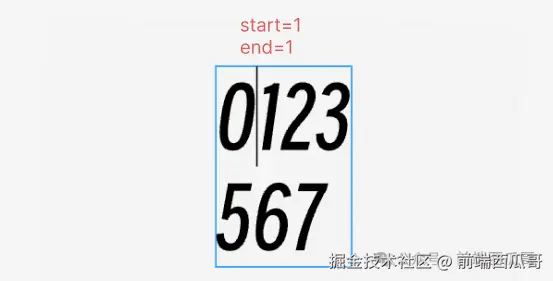
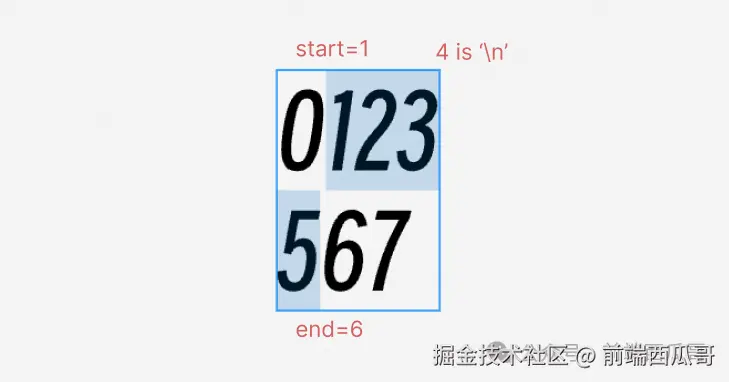
start 不等于 end 时,表现为多个矩形背景浅色色块。
start 和 end 没有大小关系,前者可能会大于后者,start 是个基准位置(鼠标按下时的位置),end 则是实际移动的聚焦光标。
按下鼠标时确定 start ,拖拽后释放确定 end。

求出点所在索引值
我们需要提供一个根据点位置计算出 index 位置的方法。
首先是确定点在哪一行,需要判断 y 落在哪一行。每行都有行高,通常用 二分法 快速找到。
但目前我们还不支持富文本,所以每行行高是一样的,可以直接整除行高向下取整。
确定好行数后,就是确定列数。取出该行对应的 glyph 数组,也是通过二分快速找到。行和列确定了,就能算出我们要的 index 值。
ini
const getGlyphIndexByPt(point: IPoint, lineIndex?: number) {
// 该方法可以指定行数,也可以不指定
// 如果不指定,整除找行数
if (lineIndex === undefined) {
    lineIndex = Math.floor(point.y / lineHeight);
  }
// 行数不要越界
if (lineIndex < 0) lineIndex = 0;
if (lineIndex >= glyphs.length) lineIndex = lineCount - 1;

// 取出该行对应的 glyph 数组
const lineGlyphs = glyphs[lineIndex];


// 二分查找变体,找到光标在第几个 glyph 的左侧
let left = 0;
let right = lineGlyphs.length - 1;
while (left <= right) {
    const mid = Math.floor((left + right) / 2);
    const glyph = lineGlyphs[mid];
    if (point.x < glyph.position.x) {
      right = mid - 1;
    } else {
      left = mid + 1;
    }
  }

let glyphIndexInLine = left;
if (left === 0) {
    glyphIndexInLine = 0;
  } elseif (left >= lineGlyphs.length) {
    glyphIndexInLine = lineGlyphs.length - 1;
  } else {
    if (
      lineGlyphs[left].position.x - point.x >
      point.x - lineGlyphs[right].position.x
    ) {
      glyphIndexInLine = right;
    } else {
      glyphIndexInLine = left;
    }
  }

// 将行列数据转换为 index 值返回
let totalIndex = 0;
for (let i = 0; i < lineIndex; i++) {
    totalIndex += glyphs[i].length;
  }
  totalIndex += glyphIndexInLine;

return totalIndex;
}
有了这个,我们就能拿到 start 和 end 的值了。
按下方向键更新选区
不同的软件的方向键更新选区的逻辑虽然大体上相同,但一些细节还是有些不一样的,尤其是上下方向键的场景。
这里我们选择 Figma 的实现。
不按住 shift
在不按住 shift 的情况下,按下方向键会改变文本光标位置,且 start 和 end 会设置为相同的值,渲染表现为渲染为竖线。
按下左方向键,
如果 start 不等于 end,取其中最小值,设置为新的 start 和 end;
如果 start 等于 end,就给 end 减 1,设置为新的 start 和 end。注意不要越界,即不能小于 0
sql
if (start != end) {
  const min = Math.min(start, end);
  setRange({ start: min, end: min });
} else {
  const newIndex = Math.max(end - 1, 0); // start 和 end 都行,它们是相等的
  setRange({ start: newIndex, end: newIndex });
}
按下右方向键,同理。
如果 start 不等于 end,取其中最大值,设置为新的 start 和 end;
如果 start 等于 end,就给 end 加 1,设置为新的 start 和 end。同样注意不要越界,不要超过字形数。
虽然字符串本身没体现,但末尾会补个 \n,方便一些算法统一处理,所以末尾索引值不是字符数减 1。
我们规定了光标只能定位到 glyph 的左侧,如果要在渲染上定位到最后一个字符后面,就要补上这么个 \n。
arduino
if (start != end) {
  const max = Math.max(start, end);
  setRange({ start: max, end: max });
} else {
  // 注意不是 contentLen - 1
  const newIndex = Math.min(end + 1, contentLen);
  setRange({ start: newIndex, end: newIndex });
}
按下向上方向键,
取 start 和 end 中最小值。
基于这个索引值,求所在的行数,及其 x 位置,然后基于这个 x 值求上一行的对应索引位置。如果已经是第一行的,索引值直接设为 0。
这里可以用前面的方法,加多一个参数去指定行数。
typescript
type GetGlyphIndexByPt = (point: IPoint, lineIndex?: number) => number;然后将这个索引位置设置为 start 和 end。
scss
const index = getUpGlyphIndex(Math.min(start, end)); // 如果是第一行,会返回 0
setRange({ start: index, end: index });
按下向下方向键,同理。
取 start 和 end 中最大值。
然后求该索引下一行的对应索引位置,设置为新的 start 和 end。如果已经是最后一行,索引值直接设为 content.length。
scss
const index = getDownGlyphIndex(Math.max(start, end)); // 如果是最后一行,会返回 content.length
setRange({ start: index, end: index });
按住 shift
如果按住 shift 键,表示选择连续的多个字符区域。我们会更新 end 的值,保持 start 不变。
按下左方向键,更新 end 值为 end - 1。 end 不能小于 0。
sql
const newEnd = Math.max(end - 1, 0);
setRange({ start: start, end: newEnd });按下右方向键,更新 end 值为 end + 1。 end 不能小于内容长度。
sql
const newIndex = Math.min(end + 1, contentLen);
setRange({ start: start, end: newIndex });按下向上方向键,找到 end 上方对应的索引值,将其设置为 end。
arduino
const newEnd = getUpGlyphIndex(end);
this.setRange({ start: start, end: newEnd });按下向下方向键,找到 end 下方对应的索引值,将其设置为 end。
arduino
const newEnd = getDownGlyphIndex(end);
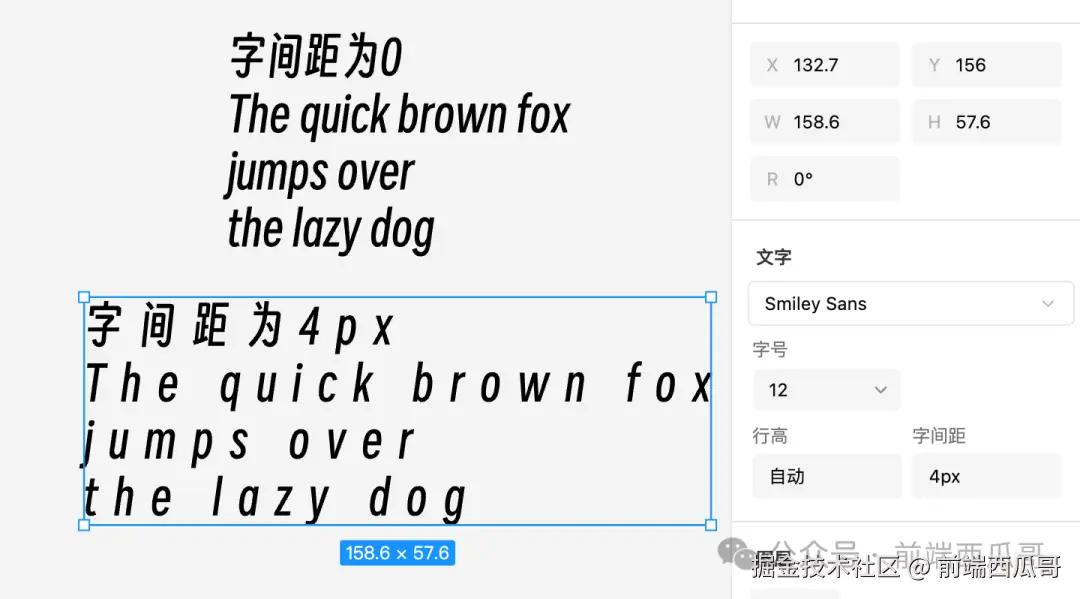
this.setRange({ start: start, end: newEnd });字间距
字间距,用于控制相邻两个 glyph 水平方向的距离。
字距的数据结构为:
css
interface ILetterSpacing {
  value: number;
  units: 'PIXELS' | 'PERCENT';
}
支持两种单位,像素值和百分比。像素值单位很好理解,就是实际间距的像素值。百分比是基于 fontSize 字号的像素值乘以一个百分比,得到的像素值。
ini
let letterSpacingVal = letterSpacing.value;
if (letterSpacing.units === 'PERCENT') {
  letterSpacingVal = fontSize * (letterSpacingVal / 100);
}在实现上,我直接将字距作为补偿值加到 glyph 的 width 上,这样原来的基于点找到 index、光标定位的逻辑可以保持不变。
要注意最后的 \n 和它前面的 glyph 不需要修改 width。因为它们后面没有 glyph 了。
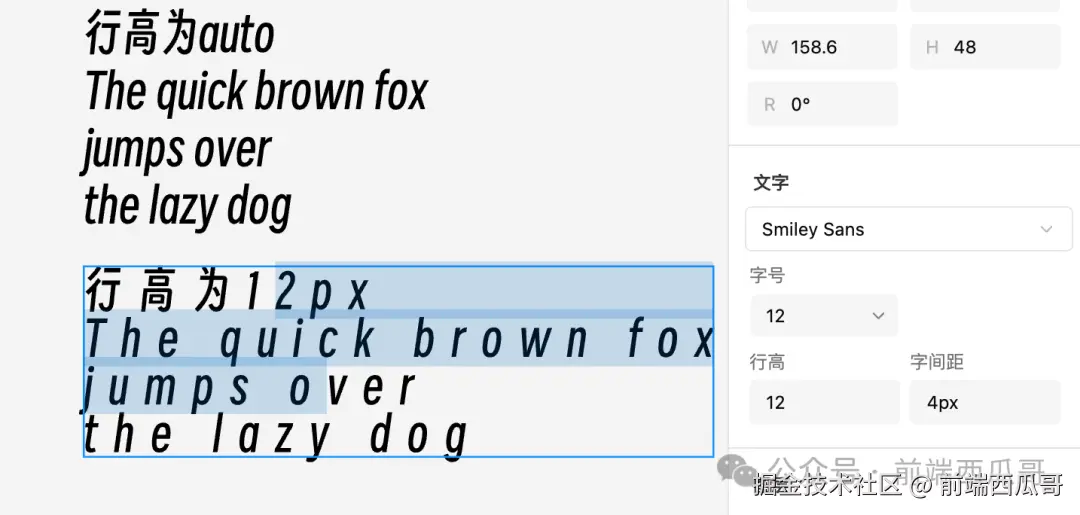
行高
行高,表达每行的高度。
行高数据结构为:
css
interface ILineHeight {
  value: number;
  units: 'PIXELS' | 'PERCENT' | 'RAW';
}
像素值和百分比的含义和前面的字间距一样。特别的是 RAW,表示一个默认行高。
字体文件内会记录默认行高相对字号的百分比信息。对于 { value: 1, units: 'RAW' },指的就是行高设置为一个默认行高。
一般来说,文本会使用字体提供的默认行高,即 lineHeight 的默认值是 { value: 1, units: 'RAW' }。
ini
let lineHeightPx = lineHeight.value;
if (lineHeight.units === 'RAW') {
  lineHeightPx = getDefaultLineHeightPx(font, fontSize);
} else if (lineHeight.units === 'PERCENT') {
  lineHeightPx = fontSize * (lineHeight.value / 100);
} else if (lineHeight.units === 'PIXELS') {
  lineHeightPx = lineHeight.value;
}
默认行高(单位为 fontUnits)的公式为:
ini
const lineHeight = ascender - descender + lineGap;选区矩形计算
选区渲染这块,还挺麻烦的。
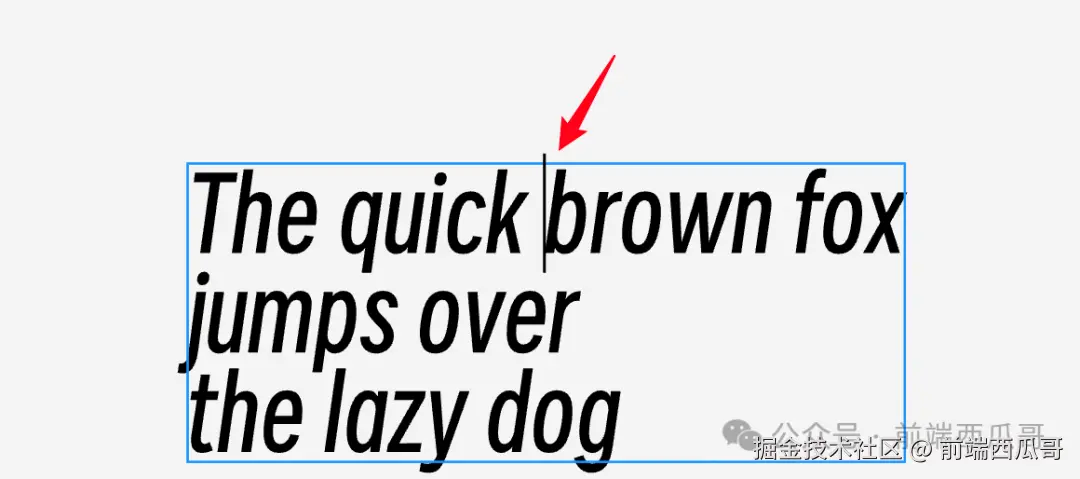
start 和 end 不相等时,我们需要计算出几个半透明的矩形绘制在文字上方。

start 和 end 相等时,绘制一条竖线,且需要闪烁,让用户可以感知到光标的位置。竖线某种意义上也是可以理解为一个宽为 1px 的窄矩形。
我们需要实现一个方法,传入 start 和 end,然后返回需要绘制的矩形数组。
代码实现大致如下,具体一些细节可看注释。
ini
const getRangeRects = (start: number, end: number) => {
// 确保 start 小于等于 end
if (start > end) {
    [start, end] = [end, start];
  }
const rects = [];

let i = 0;

let rectHeight = 0;
let rectOffsetY = 0;

// 设置的行高
const lineHeight = this.getLineHeightPx();
// 默认行高
const defaultLineHeight = getDefaultLineHeightInFontUnit(
    this.attrs.fontFamily,
  );

const isDrawLine = start === end;
// 绘制竖线,或行高小于默认行高时
if (isDrawLine || lineHeight < defaultLineHeight) {
    // 矩形高规定不能小于默认行高的,所以设置为默认行高
    rectHeight = defaultLineHeight;
    // 因为默认会用设置行高对应的 y,这里要修正一下
    rectOffsetY = -(defaultLineHeight - lineHeight) / 2;
  } else {
    // 使用设置的行高
    rectHeight = lineHeight;
  }

// 遍历每一行的 glyph
for (const line of glyphs) {
    const lineStart = i;
    const lineEnd = lineStart + line.length - 1;

    // 判断下当前行的起始和末尾是否在 start 和 end 范围内
    // 不在就直接结束了
    if (lineEnd < start) {
      i += line.length;
      continue;
    }
    if (lineStart > end) {
      break;
    }

    const a = Math.max(start, lineStart);
    const b = Math.min(end, lineEnd);

    // 找到当前行的在 [start, end] 范围内的第一个 glyph
    const glyphStart = line[a - lineStart];
    const x = glyphStart.position.x;
    const y = glyphStart.position.y;

    let x2 = 0;
    // 当发现当前行的 lineEnd 不是 end,我们直接把矩形画到最右边
    if (b === lineEnd && lineEnd !== end) {
      x2 = layoutWidth; // layoutWidth 是整个多行文本的实际宽度
    } else {
      // lineEnd 是 end 了,就画到其对应 glyph 的 x
      const glyphEnd = line[b - lineStart];
      x2 = glyphEnd.position.x;
    }

    // 记录这个选区矩形
    rects.push({
      x: x,
      y: y + rectOffsetY,
      width: x2 - x,
      height: rectHeight,
    });

    i += line.length;
  }
return rects;
};
拿到这些矩形数据,绘制即可。
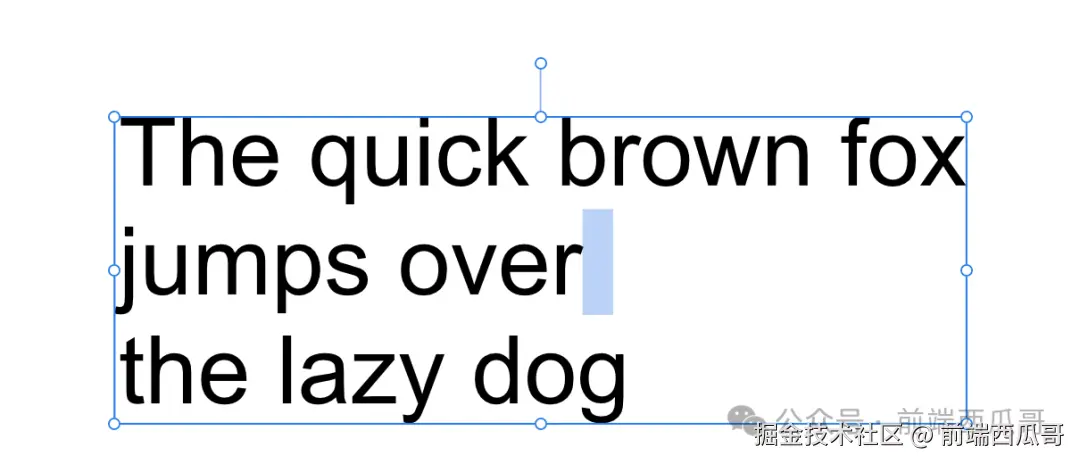
下面是矩形绘制到末尾的场景,这样用户明确知道这么一大段的区域会消失。
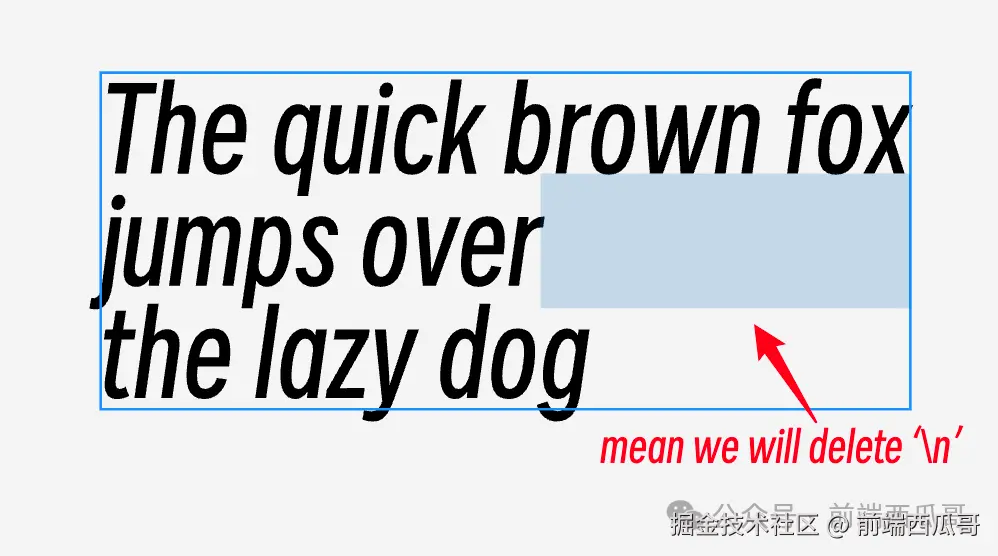
这样感觉比下面 Affinity 的这种效果好一些,Affinity 是给个定宽的选区表达换行符的选中。
结尾
这次加了几个简单的功能,可以发现文字排版的细节还是挺多的,希望对你有所帮助。
我是前端西瓜哥,关注我,学习更多文字排版知识。
相关阅读,