在处理成千上万条数据时,直接渲染所有 DOM 节点是影响前端性能的最大原因。虚拟滚动(Virtual Scrolling)通过"只渲染可视区域"的策略,将页面节点维持在恒定数量(如 20-50 个),从而实现 O(1) 级别的渲染性能。
页面里看起来是一个能顺滑滚动的长列表,但实际上它并没有把 10000 条数据都渲染成 10000 个 DOM 节点;相反,它只渲染"可视区域附近"的几十条,并用一个"幽灵占位层"把滚动条撑到正确的总高度。这就是虚拟列表 (Virtual List / Virtual Scrolling)的核心思想。
1. 目标:为什么要虚拟列表?
如果直接渲染 10000 个 <li>:
- 首次渲染慢(创建/插入大量 DOM)
- 滚动卡顿(布局/绘制压力大)
- 内存占用更高
而虚拟列表的目标是:无论数据多大,DOM 数量保持在一个小常数级别(比如 30~80 个),让滚动体验接近原生列表。
2. 布局策略:绝对定位 vs. Transform
- 绝对定位 (Absolute + Top)
- 改变 top 属性会触发 Reflow (重排)
- 虽然现代浏览器优化较好,但在低端机上高频触发仍有性能瓶颈。
- 3D 变换 (Transform: translate3d) ✅
- 改变transform 只触发 Composite (合成)
- 能够开启 GPU 加速,是高性能滚动的首选方案。
3. 三个核心 DOM:viewport / phantom / content
代码中有三个关键容器:
- viewport(可滚动视口) :
#list-view
overflow-y: auto,真正发生滚动的元素- 你从它读
scrollTop和clientHeight
- phantom(幽灵占位) :
#list-phantom
- 自身不放真实内容
- 只负责撑起总高度,让滚动条长度正确
- 总高度公式:
Htotal=N×itemHeight H_{total} = N \times itemHeight Htotal=N×itemHeight
对应代码:phantomDom.style.height =${data.length * itemHeight}px;
- content(真实渲染层) :
#list-content
- 这里面才是真正插入的
<ul><li>...</li></ul> - 它会用
transform: translateY(...)被"挪到"正确的位置
4. 关键公式:scrollTop 如何变成 startIndex / endIndex?
4.1 起始索引 startIndex
滚动了 scrollTop,每个 item 高度 itemHeight,那么滚到第几个 item:
startIndex=⌊scrollTopitemHeight⌋ startIndex = \left\lfloor \frac{scrollTop}{itemHeight} \right\rfloor startIndex=⌊itemHeightscrollTop⌋
对应代码:
js
const startIndex = Math.floor(scrollTop / itemHeight);4.2 可见数量 visibleCount
容器高度为 containerHeight,每个 item 高度固定,那么视口里大概能放下:
visibleCount=⌊containerHeightitemHeight⌋ visibleCount = \left\lfloor \frac{containerHeight}{itemHeight} \right\rfloor visibleCount=⌊itemHeightcontainerHeight⌋
对应代码:
js
const visibleCount = Math.ceil(containerHeight / itemHeight);4.3 结束索引 endIndex(含缓冲)
"理论可见区"的结束索引是:
endIndex≈startIndex+visibleCount endIndex≈startIndex+visibleCount endIndex≈startIndex+visibleCount
但你的代码加了 buffer(缓冲区),多渲染上下各一些,减少滚动时边缘闪烁:
js
const endIndex = Math.min(data.length, startIndex + visibleCount + buffer);
const fromIndex = Math.max(0, startIndex - buffer);
所以实际渲染区间是:
- 起点:
fromIndex = startIndex - buffer - 终点:
endIndex = startIndex + visibleCount + buffer
并且两端都做了边界保护(不小于 0,不超过 data.length)。
5. 为什么需要 translateY:把"这几十条 DOM"放到正确的位置
你只渲染[fromIndex, endIndex)这段数据,但这段数据在整个 10000 条列表中的真实位置应该从fromIndex开始。
因此要把真实渲染层整体下移:
offsetY=fromIndex×itemHeight offsetY=fromIndex×itemHeight offsetY=fromIndex×itemHeight
对应代码:
js
const offsetY = fromIndex * itemHeight;
listContentDom.style.transform = `translateY(${offsetY}px)`;
这样视觉上你看到的效果就像:列表从第 0 条一直排到第 9999 条;实际上 DOM 只有几十条,并且在滚动时不断复用/替换。
6. render() 做了什么?一步步拆开看
render() 的职责可以概括为:
- 读取滚动位置与容器高度
- 根据公式算出本次该渲染的数据范围
- 用 translateY 把渲染块移动到正确位置
- 创建这段范围内的
<li>,替换到#list-content
代码关键段:
js
const frag = document.createDocumentFragment();
const ul = document.createElement("ul");

for (let i = fromIndex; i < endIndex; i++) {
  const li = document.createElement("li");
  li.className = "list-item";
  li.style.height = `${itemHeight}px`;
  li.innerHTML = `...`;
  ul.appendChild(li);
}

frag.appendChild(ul);
listContentDom.replaceChildren(frag);
这里有两个性能点:
DocumentFragment:减少频繁插入 DOM 引起的多次重排replaceChildren:一次性替换,逻辑清晰(但每次滚动都会重建这一段 DOM)
7. onScroll 为什么要用 requestAnimationFrame 节流?
滚动事件触发频率非常高,可能在一帧内触发多次。你的做法是:
- 如果这一帧已经安排过渲染(scheduled = true),就直接返回
- 下一帧由 requestAnimationFrame 统一执行一次 render()
js
let scheduled = false;
function onScroll() {
  if (scheduled) return;
  scheduled = true;
  requestAnimationFrame(() => {
    scheduled = false;
    render();
  });
}
好处:
- 保证最多"一帧一次 render"
- 避免滚动事件把主线程挤爆
- 更贴近浏览器绘制节奏
附上代码
html
<!DOCTYPE html>
<html lang="zh-CN">
<head>
<meta charset="UTF-8" />
<meta name="viewport" content="width=device-width, initial-scale=1.0" />
<title>高性能不定高虚拟列表 (Vanilla JS)</title>
<style>
* {
margin: 0;
padding: 0;
box-sizing: border-box;
}
body {
font-family: -apple-system, BlinkMacSystemFont, "Segoe UI", Roboto,
Helvetica, Arial, sans-serif;
background: #f0f2f5;
height: 100vh;
display: flex;
justify-content: center;
align-items: center;
}
/* 容器样式 */
#app {
width: 375px;
height: 667px;
background: #fff;
border: 1px solid #ddd;
border-radius: 8px;
box-shadow: 0 4px 12px rgba(0, 0, 0, 0.1);
position: relative;
overflow: hidden; /* 内部滚动,外部隐藏 */
}
/* 头部 */
header {
height: 60px;
background: #000;
color: #fff;
display: flex;
align-items: center;
justify-content: center;
font-weight: bold;
font-size: 18px;
position: absolute;
top: 0;
left: 0;
right: 0;
z-index: 10;
}
/* 列表视口 (Viewport) */
#list-view {
position: absolute;
top: 60px;
bottom: 0;
left: 0;
right: 0;
overflow-y: auto; /* 开启原生滚动 */
-webkit-overflow-scrolling: touch;
}
/* 幽灵占位区域 (Phantom) - 用于撑开滚动条 */
#list-phantom {
position: absolute;
left: 0;
top: 0;
right: 0;
z-index: -1;
}
/* 真实列表容器 */
#list-content {
position: absolute;
left: 0;
right: 0;
top: 0;
}
#list-content ul {
list-style: none;
margin: 0;
padding: 0;
}
/* 列表项样式 */
.list-item {
padding: 16px;
border-bottom: 1px solid #eee;
background: #fff;
display: flex;
flex-direction: column;
}
.item-head {
display: flex;
justify-content: space-between;
margin-bottom: 8px;
color: #999;
font-size: 12px;
}
.item-text {
line-height: 1.6;
font-size: 14px;
color: #333;
word-break: break-all;
}
.item-img {
background: #eee;
margin-top: 8px;
border-radius: 4px;
display: flex;
align-items: center;
justify-content: center;
color: #999;
font-size: 12px;
}
/* 调试面板 */
#debug-panel {
position: fixed;
top: 10px;
right: 10px;
background: rgba(0, 0, 0, 0.7);
color: #0f0;
padding: 10px;
font-family: monospace;
font-size: 12px;
pointer-events: none;
border-radius: 4px;
}
</style>
</head>
<body>
<div id="app">
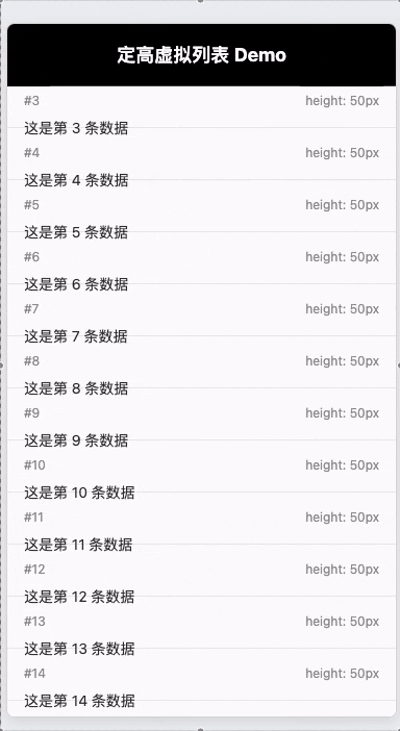
<header>定高虚拟列表 Demo</header>
<div id="list-view">
<div id="list-phantom"></div>
<div id="list-content"></div>
</div>
</div>
<script>
// 定高虚拟列表:各项高度固定为 itemHeight
const containerDom = document.querySelector("#list-view");
const phantomDom = document.querySelector("#list-phantom");
const listContentDom = document.querySelector("#list-content");
const itemHeight = 50;
const buffer = 5;
const count = 10000;
const data = Array.from({ length: count }, (_, i) => ({ id: i }));
// 列表总高度 = data.length * itemHeight
phantomDom.style.height = `${data.length * itemHeight}px`;
function render() {
const scrollTop = containerDom.scrollTop;
const containerHeight = containerDom.clientHeight;
// 起始索引 = scrollTop / itemHeight
const startIndex = Math.floor(scrollTop / itemHeight);
// 结束索引 = scrollTop/itemHeight + containerHeight/itemHeight
const visibleCount = Math.ceil(containerHeight / itemHeight);
const endIndex = Math.min(
data.length,
startIndex + visibleCount + buffer
);
const fromIndex = Math.max(0, startIndex - buffer);
const offsetY = fromIndex * itemHeight;
// 使用 translateY 把真实渲染块定位到正确位置
listContentDom.style.transform = `translateY(${offsetY}px)`;
const frag = document.createDocumentFragment();
const ul = document.createElement("ul");
for (let i = fromIndex; i < endIndex; i++) {
const li = document.createElement("li");
li.className = "list-item";
li.style.height = `${itemHeight}px`;
li.innerHTML = `
<div class="item-head">
<span>#${i}</span>
<span>height: ${itemHeight}px</span>
</div>
<div class="item-text">这是第 ${i} 条数据</div>
`;
ul.appendChild(li);
}
frag.appendChild(ul);
listContentDom.replaceChildren(frag);
}
// 滚动用 rAF 节流,避免高频重排
let scheduled = false;
function onScroll() {
if (scheduled) return;
scheduled = true;
requestAnimationFrame(() => {
scheduled = false;
render();
});
}
containerDom.addEventListener("scroll", onScroll, { passive: true });
render();
</script>
</body>
</html>