本来想自己写一个控制台下的类似Obsidian的笔记软件,后来opencode实在不给力,没写出来。于是想着是不是已经有人写了类似的软件,看到Dnote
repo:dnote/dnote: A simple command line notebook
Dnote 是一款简单的命令行笔记本。单一二进制文件,无依赖项。自 2017 年起开发。
您的笔记存储在一个 SQLite 文件中------可移植、可搜索,并且完全由您掌控。可通过自托管服务器实现设备间同步,并提供 REST API 访问。
安装dnote
支持常见的Linux, macOS, FreeBSD, Windows等操作系统,直接curl安装即可:
# Linux, macOS, FreeBSD, Windows
curl -s https://www.getdnote.com/install | sh

# macOS with Homebrew
brew install dnote
安装完毕
curl -s https://www.getdnote.com/install | sh
You need a root privilege to install Dnote binary to /usr/local/bin
Password:
Latest release version is v0.16.0.
Downloading https://github.com/dnote/cli/releases/download/cli-v0.16.0/dnote_0.16.0_freebsd_amd64.tar.gz.
######################################################################## 100.0%
Downloading the checksum file for v0.16.0
######################################################################## 100.0%
Comparing checksums for binaries.
Inflating the binary.
Password:
dnote v0.16.0 was successfully installed in /usr/local/bin.
这时候就有dnote命令了:
dnote
Dnote - a simple command line notebook

Usage:
  dnote [command]

Available Commands:
  add         Add a new note
  edit        Edit a note or a book
  find        Find notes by keywords
  help        Help about any command
  login       Login to dnote server
  logout      Logout from the server
  remove      Remove a note or a book
  sync        Sync data with the server
  version     Print the version number of Dnote
  view        List books, notes or view a content

Flags:
      --dbPath string   the path to the database file (defaults to standard location)
  -h, --help            help for dnote

Use "dnote [command] --help" for more information about a command.
服务器安装
dnote非常有特色的一点就是它有个配套的服务器,这样不管在哪里,都可以登录到这个服务器,笔记可以本地、远程一致!
Quick Start#
Download the server binary for your platform and architecture from releases:
# Extract and install
tar -xzf dnote-server-*.tar.gz
sudo mv dnote-server /usr/local/bin/

# Run
dnote-server start
下载server
到github下载服务端文件:github.com
比如当前是server-v3.0.0 ,下载到本地,然后解压
tar -xzvf dnote_server_3.0.0_freebsd_amd64.tar.gz解压完成
tar -xzvf dnote_server_3.0.0_freebsd_amd64.tar.gz
x ./
x ./dnote-server
x ./LICENSE
x ./README.md
将dnote-server文件放置到~/server目录中,
手工启动服务
~/server/dnote-server start如果想让服务像其它服务那样一直运行,可以用如下命令启动:
nohup ~/server/dnote-server start &服务启动了,客户端可以登录了
~/server/dnote-server start
{"level":"info","msg":"Database schema version.","ts":"2026-01-15T23:30:22.816687616Z","ts_unix":1768519822,"version":0}
{"file":"100-create-fts-table.sql","level":"info","msg":"Applying migration.","ts":"2026-01-15T23:30:22.81688576Z","ts_unix":1768519822}
{"file":"100-create-fts-table.sql","level":"info","msg":"Migrate success.","ts":"2026-01-15T23:30:22.819717305Z","ts_unix":1768519822}
{"level":"info","msg":"Dnote server starting","port":"3001","ts":"2026-01-15T23:30:22.829141481Z","ts_unix":1768519822,"version":"3.0.0"}
注册用户
我们的服务器放置在192.168.1.5,所以浏览器登录:http://192.168.1.5:3001/join
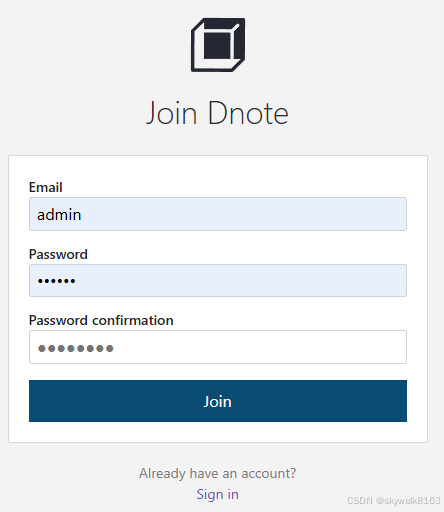
创建用户
点击Sign in,输入邮箱和密码以创建用户。
注意密码需要8位:password should be longer than 8 characters
发现需要https登录。于是另开一台jail来尝试安装(其实不需要)
登录见最后总结。
专门开一台jail用来启动web服务(不必须)
使用qjail创建jail
sudo qjail create -4 192.168.1.17 webjail创建完成,sudo qjail start webjail启动
skywalk@fb5:~ $ sudo qjail list


STATUS JID  NIC    IP              Jailname
------ ---- ------ --------------- --------------------------------------------
DR     29   igb0   192.168.1.15    mysql
DS     N/A  igb0   192.168.1.17    webjail


skywalk@fb5:~ $ sudo qjail start webjail
Jail successfully started  webjail
先不登录,先配置激活ssh和SysV IPC
skywalk@fb5:~ $ sudo qjail config -h webjail
Bypassed running jail webjail
skywalk@fb5:~ $ sudo qjail config -y ebjail
Bypassed running jail webjail
登录jail
sudo qjail console webjail安装和激活nginx
发现nginx已经有了
到/etc/rc.conf文件中,加入
nginx_enable=YES启动nginx
servie nginx start启动服务Systemd Service#
这一段是dnote的手册,讲解怎么把dnote的服务写成系统服务,并启动。因为我是FreeBSD,就不去写这些启动文件了。下面这些信息大家参考就行。
创建用户和目录
Create user and directories:
sudo useradd -r -s /bin/false dnote
sudo mkdir -p /var/lib/dnote
sudo chown dnote:dnote /var/lib/dnote
创建dnote服务
Create /etc/systemd/system/dnote.service:
[Unit]
Description=Dnote Server
After=network.target

[Service]
Type=simple
User=dnote
Group=dnote
Restart=always
RestartSec=3
WorkingDirectory=/var/lib/dnote

ExecStart=/usr/local/bin/dnote-server start

[Install]
WantedBy=multi-user.target
Enable and start:
sudo systemctl daemon-reload
sudo systemctl enable --now dnote
sudo systemctl status dnote
查看log
View logs:
sudo journalctl -u dnote -f使用官方的docker服务
最简单的方法是直接使用官方的docker服务,操作非常简单,主要是需要先安装好docker。
如果不想用docker占用资源,那么还是用一个执行文件的那个server就好了。
启动docker服务
创建compose.yml文件
services:
  dnote:
    image: dnote/dnote:latest
    container_name: dnote
    ports:
      - 3001:3001
    volumes:
      - ./dnote_data:/data
    restart: unless-stopped
启动docker服务
docker-compose up
修改客户端配置文件
修改配置~/.config/dnote/dnoterc
editor: vi
apiEndpoint: http://192.168.1.19:3001/api
enableUpgradeCheck: true
我看到原来里面写的是https,我忽然明白,为什么原来自己手工启动的服务器不行了.....
远程访问dnote服务器并创建账户
比如服务器在192.168.1.19,那么登录这个网址创建账户,当然默认我们都是http服务:
192.168.1.19:3001/v3/signin创建好账户,远程登录
在网页上创建好账户,然后在客户端使用命令dnote login登录服务器:
dnote login因为客户端配置文件已经设置好了http://192.168.1.19:3001/api ,所以客户端会自动去登录。
登录成功
安装提示写入刚才注册的email和密码:
skywalk@fb5:~/work $ dnote login
  Welcome to Dnote (http://192.168.1.19:3001)
  [?] email: 793475801@qq.com
  [?] password:
  ✔ logged in
写笔记
dnote add "笔记名" 进行写笔记,比如:
dnote add git默认用的是vi编辑器,写内容,然后:wq退出,显示:
  ✔ added to git
  • book name: git
  • created at: Jan 17, 2026 8:37pm (CST)
  • note id: 3
  • note uuid: 6e44c72a-258a-444a-8278-204c7d3cdbdc

------------------------content------------------------
this is a git demo


-------------------------------------------------------
看笔记
使用dnte view "笔记名"来看笔记。
dnte view git
on book git
(3) this is a git demo [---More---]
总结
一开始走弯路了,不知道修改配置文件~/.config/dnote/dnoterc 。对于本机用户和局域网用户,完全可以不用https,直接用http就行了,这样根本就不需要再去弄那么麻烦,直接下载server,运行server即可。
只能能登录到server,所以的笔记就都是可以浏览和编辑的,而不管在世界上任何地方,所以非常简便和实用!
操作步骤:
curl安装dnote:
# Linux, macOS, FreeBSD, Windows
curl -s https://www.getdnote.com/install | sh

# macOS with Homebrew
brew install dnote
下载server
到github下载服务端文件:github.com
比如当前是server-v3.0.0 ,下载到本地,然后解压
手工启动服务
把dnote-server文件放到~/server目录,用如下命令启动:
nohup ~/server/dnote-server start &远程访问dnote服务器并创建账户
ip+3001端口访问服务器。
创建账户后登录
dnote login写笔记
dnote add 笔记名添加笔记
dnote add git -c "time is a part of the commit hash"调试
注册时候报错dial tcp ::1:3001: connect: connection refused
dnote login
Welcome to Dnote (https://localhost:3001)
? email: xx801@qq.com
? password:
⨯ logging in: requesting session: making http request: making http request: Post "https://localhost:3001/api/v3/signin": dial tcp ::1:3001: connect: connection refused
原来是要自己开服务啊
下载安装了服务器
登录的时候报错server gave HTTP response to HTTPS client
dnote login
Welcome to Dnote (https://localhost:3001)
? email: 793475801@qq.com
? password:
⨯ logging in: requesting session: making http request: making http request: Post "https://localhost:3001/api/v3/signin": http: server gave HTTP response to HTTPS client
修改配置~/.config/dnote/dnoterc
editor: vi
apiEndpoint: http://192.168.1.5:3001/api
enableUpgradeCheck: true
我看到原来里面写的是https,我忽然明白,为什么原来自己手工启动的服务器不行了.....
改成了http就好了。