1. PDK安装
在得到tsmcN28的iPDK包后,需要对其进行安装,来选择不同的金属层数、库类型等。安装完后才能在Cadence Virtuoso中使用。
1、打开tsmcN28的库文件,找到pdkInstall.pl

2、在终端输入:perl pdkInstall.pl

3、配置选择:
根据以下论坛中的问题,可以得知PyCell安装后可能存在layout无法正确显示的问题,但安装Skill Pcell则不会出现。
https://community.cadence.com/cadence_technology_forums/f/custom-ic-design/20540/ipdk-from-tsmc-28nm-pcell-problems?ReplySortBy=CreatedDate&ReplySortOrder=Ascending因此在下方第一个选择中,选择2 Skill Pcell,其他的任选。
*Available PDK types: (1,2)
************** Please choose PDK type  ***********************
   1 - PyCell             : support multi-platform
                            Cadence/Synopsys/Mentor
   2 - Skill Pcell        : support only Cadence platform
==============================================================
Please enter your choice: (1/2) :
2
*Available process types are:
   1 - LO
Please enter your choice: (1,2...)
1
*Available voltages are:
   1 -  0.9/1.8V  [LO]
   2 -  0.9/2.5V  [LO]
Please enter your choice: (1,2...)
<按照自己需求进行选择>
*Available metal options are:
   1 - 1P10M_7X2Z UT-AlRDL
   2 - 1P10M_7X2R UT-AlRDL
   3 - 1P10M_6X3Z UT-AlRDL
   4 - 1P10M_6X2Y1Z UT-AlRDL
   5 - 1P10M_5X2Y2Z UT-AlRDL
   6 - 1P10M_5X2Y2R UT-AlRDL
   7 - 1P9M_7X1U UT-AlRDL
   8 - 1P9M_6X2Z UT-AlRDL
   9 - 1P9M_6X2R UT-AlRDL
   10 - 1P9M_6X1Z1U UT-AlRDL
   11 - 1P9M_5X2Y1Z UT-AlRDL
   12 - 1P9M_5X1Y1Z1U UT-AlRDL
   13 - 1P9M_5X3Z UT-AlRDL
   14 - 1P9M_4X2Y2Z UT-AlRDL
   15 - 1P9M_4X2Y2R UT-AlRDL
   16 - 1P8M_6X1U UT-AlRDL
   17 - 1P8M_6X1Z UT-AlRDL
   18 - 1P8M_5X1Y1Z UT-AlRDL
   19 - 1P8M_5X2Z UT-AlRDL
   20 - 1P8M_5X1Z1U UT-AlRDL  *Star_RC *Cal_RC *QRC
   21 - 1P8M_5X2R UT-AlRDL
   22 - 1P8M_4X3Z UT-AlRDL
   23 - 1P8M_4X2Y1Z UT-AlRDL
   24 - 1P7M_5X1Z UT-AlRDL    *Star_RC *Cal_RC *QRC
   25 - 1P7M_5X1U UT-AlRDL
   26 - 1P7M_4X2R UT-AlRDL
   27 - 1P7M_4X1Y1Z UT-AlRDL
   28 - 1P7M_4X2Z UT-AlRDL    *Star_RC *Cal_RC *QRC
   29 - 1P7M_4X1Z1U UT-AlRDL
   30 - 1P7M_3X3Z UT-AlRDL
   31 - 1P6M_4X1Z UT-AlRDL
   32 - 1P6M_4X1U UT-AlRDL
   33 - 1P6M_3X1Y1Z UT-AlRDL
   34 - 1P6M_3X2Z UT-AlRDL
   35 - 1P5M_3X1Z UT-AlRDL
--------------------------------------------------------------------------------------
-- *Star_RC: Support Star RCX
--
-- *Cal_RC: Support Calibre RCX
--
-- *QRC: Support Assura QRC
--
--------------------------------------------------------------------------------------
Please enter your choice: (1,2...)
<按照自己需求进行选择>
Please confirm with your selction information:
*********************************************************
*** Select PDK type : Skill Pcell
*** Select process : LO
*** Select voltage : 0.9/1.8V
*** Select metal option : 1P10M_7X2Z UT-AlRDL
*********************************************************
Are these correct (y|n) ?
y
2. Virtuoso设置
安装完成后,在个人的固定的文件夹中打开Virtuoso进行设置。
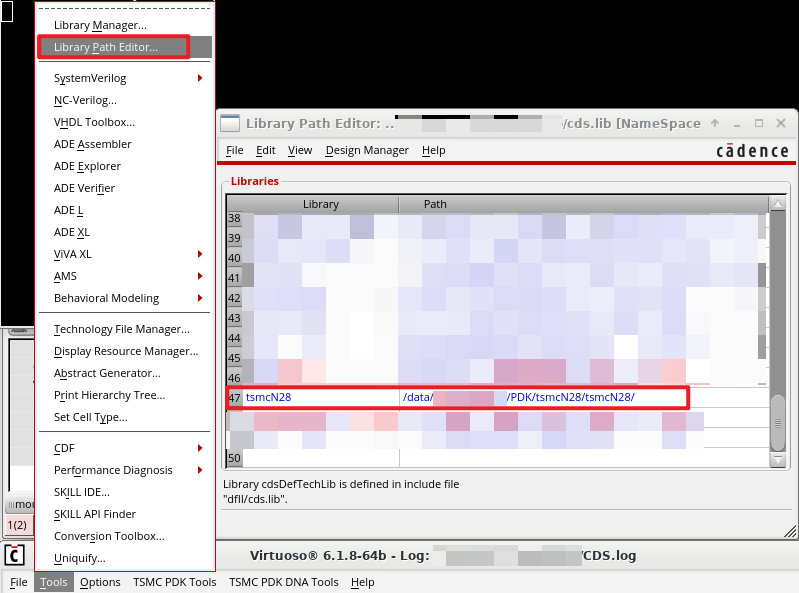
1、添加库路径:点击Tools->Library Path Editor,添加tsmcN28的路径。
也可以直接修改cds.lib,添加:DEFINE tsmcN28 /*********/PDK/tsmcN28/tsmcN28/
2、选择库:点击Display Resource Manager,点击Edit,选择tsmcN28。

3、加载:点击File-> Load,加载tsmcN28文件夹内的display.drf文件。
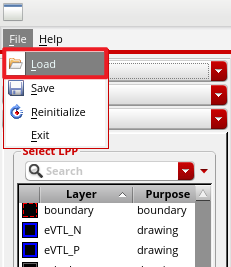
4、保存:点击File->Save,将新的display.drf保存到virtuoso运行的文件夹内。
3. 测试
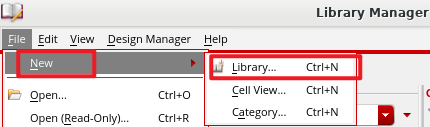
1、新建个人库:点击Tools -> Library Manager,在Library Manager中点击File->New -> Library。
设置名称为mylib_tsmcN28。
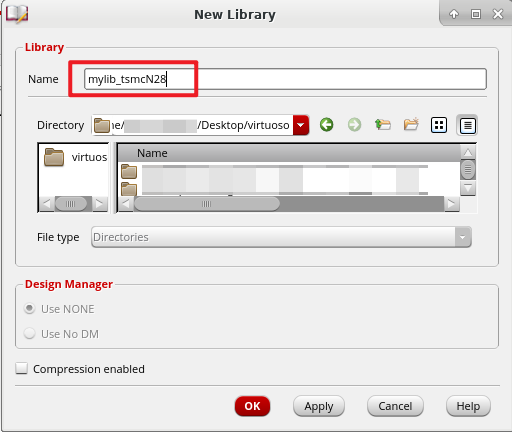
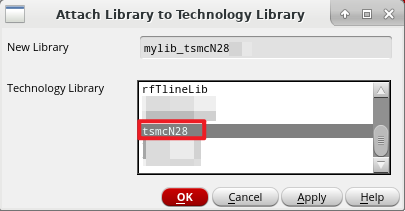
选择Attach to an existing technology library.
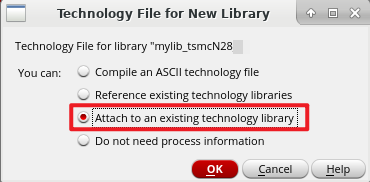
选择tsmcN28。
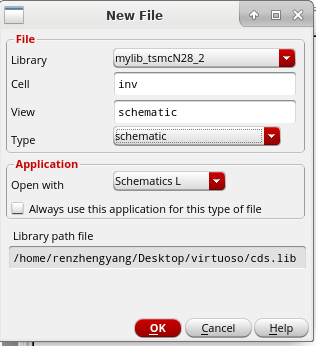
2、新建Cell View:
以inv反相器作为例子
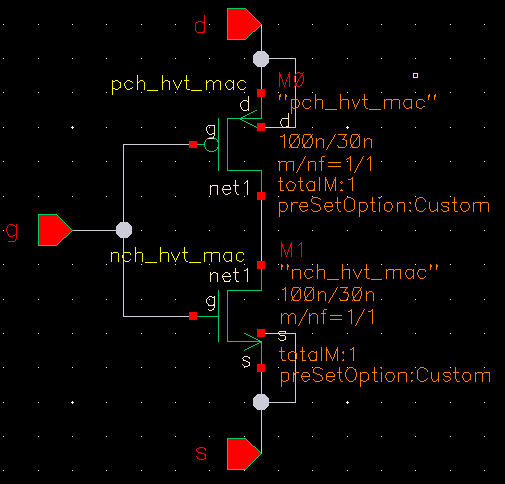
3、绘制schematic:
(画错了,见谅,本文中inv的结构不是重点)
4、导入Layout:
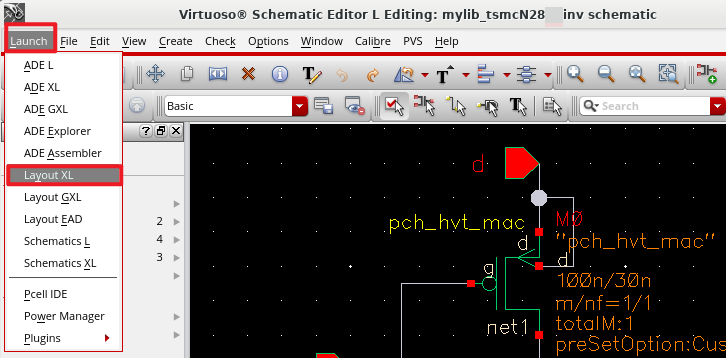
点击Launch->Layout XL。
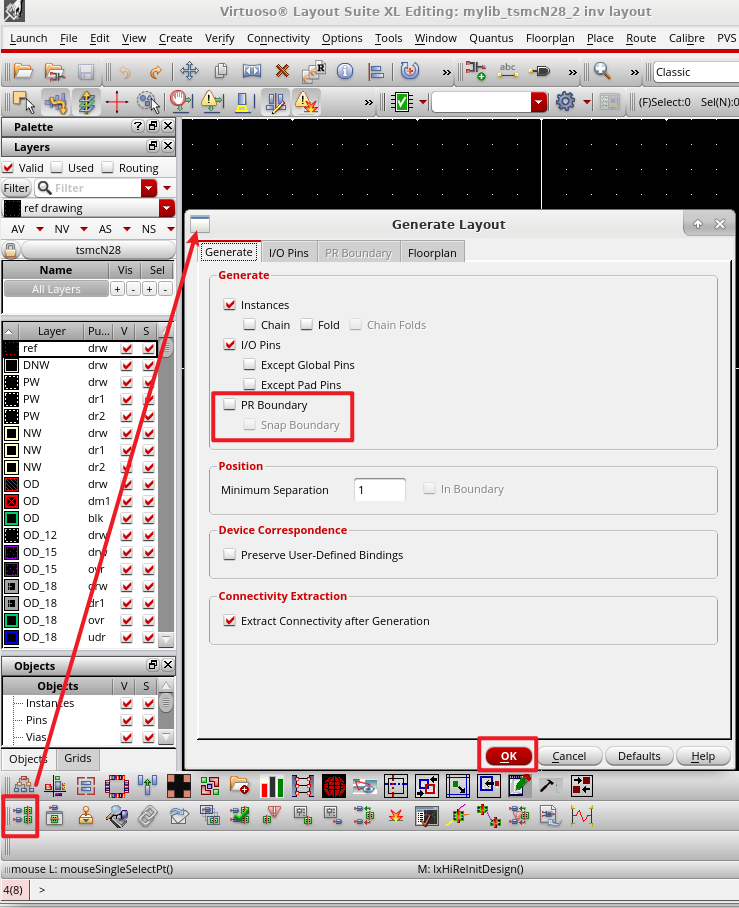
5、从源导入:点击Generate All from Source。
6、查看版图显示情况:按下Shift+F,显示出器件版图。
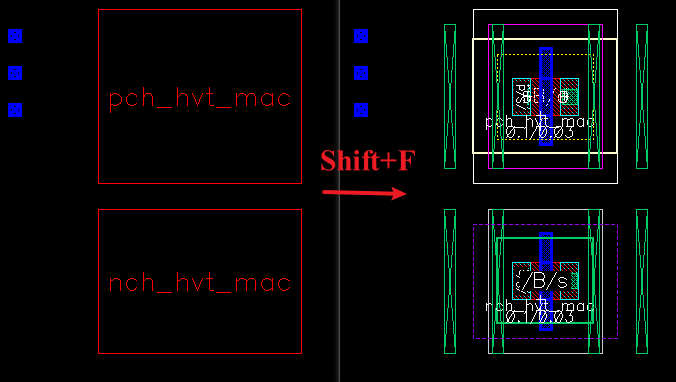
如果出现以上右侧的多种颜色的版图,则安装正常。