之前写了 cachetools 的缓存工具,那个是纯内存的,重启后缓存数据会丢失。diskcache 则利用轻量级的 sqlite 数据库,该数据库不需要单独的服务器进程,并可以持久化数据结构。且可以突破内存的限制,针对大量数据的缓存时,不会因为内存溢出而丢失数据。
安装
pip install diskcache淘汰策略
从源码的 EVICTION_POLICY 值可以看出,淘汰策略主要有以下几种。
'least-recently-stored'- 默认,按存储时间淘汰'least-recently-used'- 按访问时间淘汰(每次访问都写数据库)'least-frequently-used'- 按访问频率淘汰(每次访问都写数据库)'none'- 禁用自动淘汰
默认则是按照 LRS按缓存存储的先后时间进行淘汰的淘汰策略。
简单存取
python
from diskcache import Cache

# 1. 实例一个缓存对象
# 需要传入目录路径。如果目录路径不存在,将创建该路径,并且会在指定位置创建一个cache.db的文件。
# 如果未指定,则会自动创建一个临时目录,并且会在指定位置创建一个cache.db的文件。
cache = Cache("cache")

# 2. 保存缓存
cache.set('name', '张三', expire=60, read=True, tag='姓名', retry=True)

# 3. 获取缓存 expire_time为真,返回有效期时间;tag为真,返回缓存设置的tag值;
name = cache.get('name', default=False, expire_time=True, tag=True)
print(name)
# ('张三', 1770617370.6258903, '姓名')
上面代码执行之后,我们可以在当前位置的下发现有个 cache 目录,其中有个 cache.db 文件。因为这个 cache.db 是个 sqlite 数据库文件,我们可以尝试使用 pandas 读取一下。
python
import pandas as pd

from sqlalchemy import create_engine

engine = create_engine('sqlite:///cache/cache.db')
pd.set_option('display.max_columns', None)  # 不限制列数
pd.set_option('display.width', None)  # 不限制列宽

if __name__ == '__main__':
    res = pd.read_sql('SELECT * FROM cache;', con=engine)
    print(res)
python
   rowid   key  raw    store_time   expire_time   access_time  access_count tag  size  mode filename value
0      1  name    1  1.770605e+09  1.770605e+09  1.770605e+09             0  姓名     0     1     None    张三
从查询结果中可以看出,数据库除了常规的 key 和 value,还有过期时间戳 expire_time,tag, access_count 等参数。
缓存过期
设置缓存的时候(无论是使用 set() 还是 add() 方法),都有一个过期时长参数 expire 指定该缓存多久后过期。
python
from diskcache import Cache

cache = Cache("cache")
result = cache.add("key1", "value1", expire=60)
print(result)
# True
result = cache.add("key2", "value2", expire=30)
print(result)
# True
如果缓存已过期,则返回的对应的 value 为 None(当然,如果指定了默认值 default,则返回默认值,比如下面的 False)。
python
from diskcache import Cache

cache = Cache("cache")

name = cache.get('name', default=False, expire_time=True, tag=True)
print(name)
# (False, None, None)
但其实这个时候,数据仍然在数据库里的,只不过因为当前时间超过了过期时间 expire_time,所以不会将这个数据取回来。
python
import pandas as pd

from sqlalchemy import create_engine

engine = create_engine('sqlite:///cache/cache.db')
pd.set_option('display.max_columns', None)  # 不限制列数
pd.set_option('display.width', None)  # 不限制列宽

if __name__ == '__main__':
    res = pd.read_sql('SELECT * FROM cache;', con=engine)
    print(res)
    #    rowid   key  raw    store_time   expire_time   access_time  access_count tag  size  mode filename value
    # 0      1  name    1  1.770617e+09  1.770617e+09  1.770617e+09             0  姓名     0     1     None    张三
缓存清理
清空过期
使用 expire() 方法可以清空过期缓存,并返回清空的缓存数。
python
import time
from diskcache import Cache

cache = Cache("cache")

cache.set('name', '张三', expire=60, read=True, tag='姓名', retry=True)
cache.set('age', 30, expire=30, read=True, tag='年龄', retry=True)
time.sleep(35)
count = cache.expire()
print(count)
# 1
清空所有
使用 clear() 方法可以清空所有缓存,并返回清空的缓存数。
python
from diskcache import Cache

cache = Cache("cache")

cache.set('name', '张三', expire=60, read=True, tag='姓名', retry=True)
cache.set('age', 30, expire=60, read=True, tag='年龄', retry=True)
count = cache.clear()
print(count)
# 2
强制清理
使用 cull() 方法会先清理过期缓存,再按照给定的缓存淘汰策略,清理缓存直到磁盘缓存容量小于size_limit 的大小。
python
from diskcache import Cache

cache = Cache("cache")

cache.set('name', '张三', expire=60, read=True, tag='姓名', retry=True)
cache.set('age', 30, expire=60, read=True, tag='年龄', retry=True)
count = cache.cull()
print(count)
按 tag 清理
使用 evict() 方法可以手动按照 tag 的名称清理缓存,并返回清空的缓存数。
python
from diskcache import Cache

cache = Cache("cache")

cache.set('name', '张三', expire=60, read=True, tag='姓名', retry=True)
cache.set('age', 30, expire=60, read=True, tag='年龄', retry=True)
count = cache.evict("年龄")
print(count)
# 1
按 key 清理
delete() 删除并返回是否删除成功。
python
from diskcache import Cache

cache = Cache("cache")

cache.set('name', '张三', expire=60, read=True, tag='姓名', retry=True)
cache.set('age', 30, expire=60, read=True, tag='年龄', retry=True)
result = cache.delete("name")
print(result)
# True
pip() 删除并返回缓存的 value。
python
from diskcache import Cache

cache = Cache("cache")

cache.set('name', '张三', expire=60, read=True, tag='姓名', retry=True)
cache.set('age', 30, expire=60, read=True, tag='年龄', retry=True)
result = cache.pop("name")
print(result)
# 张三
缓存添加
可以使用 add() 方法仅添加缓存。
-
只有键不存在时才会存储
-
如果键已存在,不会覆盖 ,返回
False -
相当于
setdefault()的行为
python
from diskcache import Cache

cache = Cache("cache")
result = cache.add("key1", "value1")
print(result)
# True
当然,set() 方法也可以设置缓存。与 add() 的区别如下。
-
总是会存储值,无论键是否已存在
-
如果键已存在,会覆盖旧值
-
相当于字典的
dict[key] = value
缓存刷新
针对未过期的 key,重新刷新 key 的过期时间。如果 key 已过期,则会刷新失败。
python
from diskcache import Cache

cache = Cache("cache")
result = cache.touch("key1", 60)
print(result)
# True
缓存判断
Cache 中定义了 contains 魔法方法,可以用 in 的方式判断对应的 key 是否在缓存中。
python
from diskcache import Cache

cache = Cache("cache")
cache.set("key1", "value1")
print("key1" in cache)
# True
当然,也可以使用 get() 方法,看返回的结果是不是 None 来进行判断(但这种判断并不精确,如果 value 值本身是 None 的话,则会造成误判)。
缓存修改
针对整型的缓存数据类型,可以使用 incr() 和 decr() 对 value 进行加减指定 delta 的数值。
python
from diskcache import Cache

cache = Cache("cache")

cache.set('age', 30, expire=60, read=True, tag='年龄', retry=True)
cache.incr("age", delta=5)
print(cache.get("age"))  # 35
cache.decr("age", delta=3)
print(cache.get("age"))  # 32
缓存检查
check() 方法会对数据库和文件系统的一致性进行检查,如果有告警,则返回告警信息。
python
from diskcache import Cache

cache = Cache("cache")
warnings = cache.check()
print(warnings)
# []
队列操作
我们可以使用相同前缀的 key 来约定一个对列(简单理解就是相同前缀的 key 同属于一个队列),然后通过 push() 和 pull() 方法来实现入列和出列。
队列推送
可以使用 push() 方法往指定前缀的队列推送 value(key 则由方法根据前缀及缓存中已有的相同前缀的 key 来自动生成)。
python
from diskcache import Cache

cache = Cache("cache")
result = cache.push("first", prefix="test")
print(result)  # test-500000000000000
result = cache.push("second", prefix="test")
print(result)  # test-500000000000001
result = cache.push("third", prefix="test", side="front")  # 从队列前面插入
print(result)  # test-499999999999999
队列拉取
出队的顺序与入队顺序相同(遵从 FIFO 先进先出的规则)。
python
from diskcache import Cache

cache = Cache("cache")
result = cache.pull("test")
print(result)  # ('test-499999999999999', 'third')
result = cache.pull("test")
print(result)  # ('test-500000000000000', 'first')
result = cache.pull("test")
print(result)  # ('test-500000000000001', 'second')
当然,我们也可以通过参数 side 指定从头部出列还是尾部出列。
python
from diskcache import Cache

cache = Cache("cache")
result = cache.pull("test")
print(result)  # ('test-499999999999999', 'third')
result = cache.pull("test", side="back")
print(result)  # ('test-500000000000001', 'second')
result = cache.pull("test")
print(result)  # ('test-500000000000000', 'first')
连接关闭
使用 close() 方法可以关闭与底层 sqlite 数据库的连接。
python
from diskcache import Cache

cache = Cache("cache")
cache.close()
配置重置
缓存的配置存储在 Settings 表中。
python
SELECT key, value FROM Settings;
python
                     key                  value
0                  count                      0
1                   size                      0
2                   hits                      0
3                 misses                      0
4             statistics                      0
5              tag_index                      0
6        eviction_policy  least-recently-stored
7             size_limit             1073741824
8             cull_limit                     10
9     sqlite_auto_vacuum                      1
10     sqlite_cache_size                   8192
11   sqlite_journal_mode                    wal
12      sqlite_mmap_size               67108864
13    sqlite_synchronous                      1
14    disk_min_file_size                  32768
15  disk_pickle_protocol                      5
我们可以使用 reset() 方法重置 Settings 中对应 key 的 value。比如我们设置 cull_limit 值为 30。
python
from diskcache import Cache

cache = Cache("cache")

value = cache.reset("cull_limit", 30)
print(value)
# 30
再次查看 Settings 表时,可以看到 cull_limit 的值已被修改。
python
                     key                  value
0                  count                      2
1                   size                      0
2                   hits                      0
3                 misses                      0
4             statistics                      0
5              tag_index                      0
6        eviction_policy  least-recently-stored
7             size_limit             1073741824
8             cull_limit                     30
...
配置查看
如果我么仅仅是想查看配置的值,而不需要修改的话,则在使用 reset() 方法时,不需要传入对应的值,且 update 置为 False 即可。
python
from diskcache import Cache

cache = Cache("cache")

value = cache.reset("cull_limit", update=False)
print(value)
# 10
批量操作
可以使用事务的方式批量进行操作。
python
from diskcache import Cache

cache = Cache("cache")
items = {"key1": "value1", "key2": "value2", "key3": "value3"}

with cache.transact():  # 性能提升2-5倍
    for key, value in items.items():
        cache[key] = value
命中统计
python
from diskcache import Cache

cache = Cache("cache")
# 启用统计
cache.stats(enable=True)

# 获取命中率
hits, misses = cache.stats()
print(f"hits: {hits}; misses: {misses}")  # hits: 5; misses: 2

# 检查缓存一致性
warnings = cache.check()
print(warnings)  # []

# 获取缓存体积(字节)
size = cache.volume()
print(size)  # 32768
Index 索引存储
Index 组件提供了类似字典的持久化存储方案(从源码中也可以看出,它默认没有设置缓存淘汰策略,也即永不过期)。它支持事务操作,确保数据一致性,同时保持高效的读写性能。
python
self._cache = Cache(directory, eviction_policy='none')
python
from diskcache import Index

# 持久化字典,永不淘汰
index = Index("cache", {"a": 1, "b": 2}, c=3)

index.update([('d', 4), ('e', 5)])
print(list(index))
# ['a', 'b', 'c', 'd', 'e']
我们也可以从通用的 Cache() 实例来创建 index。
python
from diskcache import Cache, Index

cache = Cache("cache")
index = Index.fromcache(cache)
Index 缓存的设置和获取和字典一样(Index 中定义了 getitem,setitem,delitem 等字典类型的魔法方法)。
python
from diskcache import Index

index = Index("cache")
index['f'] = 6
print(index.get('c'))  # 3
还可以像字典一样 setdefault,对应的 key 有值时,返回缓存的值;没有值时,使用给定的值设置缓存并返回。
python
from diskcache import Index

index = Index("cache")
result = index.setdefault('h', 9)
print(result)  # 8
Fanout 分片存储
FanoutCache的一致性哈希算法确保了数据均匀分布,同时支持动态扩容。
python
from diskcache import FanoutCache
# 初始化分布式缓存,8个分片,每个分片1GB大小限制
distributed_cache = FanoutCache(
directory='./cache',
shards=8,
size_limit=1024 ** 3 # 1GB per shard
)
# 在多进程环境中共享使用
from multiprocessing import Pool
def fetch_page(url):
return f"content of {url}"
def spider_worker(url):
# 自动路由到对应分片
if distributed_cache.get(url, default=None) is None:
data = fetch_page(url)
distributed_cache.set(url, data, expire=86400) # 缓存24小时
return url
url_list = [
"https://example1.com",
"https://example2.com",
"https://example3.com",
"https://example4.com",
]
if __name__ == '__main__':
with Pool(processes=8) as pool:
# 并行处理URL列表
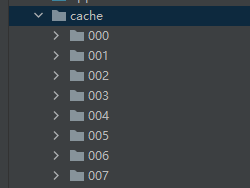
results = pool.map(spider_worker, url_list)此时,diskcache 会按照分片数目,在指定目录下建立分片个数目的目录,并将缓存均匀分散存储在这些目录中的 cache.db 数据库中。源码中的 self._shards 也可以看出他新建分片缓存目录的逻辑。
python
        self._shards = tuple(
            Cache(
                directory=op.join(directory, '%03d' % num),
                timeout=timeout,
                disk=disk,
                size_limit=size_limit,
                **settings,
            )
            for num in range(shards)
)注意:上面多进程示例,进程池的 with 块需要放到 main 块中执行,不然会因为安全因素导致执行失败。
下面是其中一个 cache.db 中存储的缓存数据。
python
import pandas as pd

from sqlalchemy import create_engine

engine = create_engine('sqlite:///cache/001/cache.db')
pd.set_option('display.max_columns', None)  # 不限制列数
pd.set_option('display.width', None)  # 不限制列宽

if __name__ == '__main__':
    res = pd.read_sql('SELECT * FROM cache;', con=engine)
    # res = pd.read_sql('SELECT key, value FROM Settings;', con=engine)
    print(res)
python
#    rowid                   key  raw    store_time   expire_time   access_time  access_count   tag  size  mode filename                            value
# 0      1  https://example4.com    1  1.770632e+09  1.770718e+09  1.770632e+09             0  None     0     1     None  content of https://example4.com
其他的缓存操作方法与 Cache 类似,只是针对每个 key,会通过相同的 Hash 算法先找到其所属的正确的分片,然后再进行操作。