trait 是对未知类型 Self 定义的方法集。该类型也可以访问同一个 trait 中定义的其他方法。
对任何数据类型都可以实现 trait。在下面例子中,我们定义了包含一系列方法的 Animal。然后针对 Sheep 数据类型实现 Animal``trait,因而 Sheep 的实例可以使用 Animal 中的所有方法。
// 第16章 特质trait

struct Sheep {naked: bool, name: &'static str}

trait Animal {
    // 静态方法签名;`Self` 表示实现者类型(implementor type)。
    fn new(name: &'static str) -> Self;

    // 实例方法签名;这些方法将返回一个字符串。
    fn name(&self) -> &'static str;
    fn noise(&self) -> &'static str;

    // trait 可以提供默认的方法定义。
    fn talk(&self) {
        println!("{} says {}", self.name(), self.noise());
    }
}

impl Sheep {
    fn is_naked(&self) -> bool {
        self.naked
    }

    fn shear(&mut self) {
        if self.is_naked() {
            // 实现者可以使用它的 trait 方法。
            println!("{} is already naked...", self.name());
        } else {
            println!("{} gets a haircut!", self.name);
            self.naked = true;
        }
    }
}

// 对 `Sheep` 实现 `Animal` trait。
impl Animal for Sheep {
    // `Self` 是实现者类型:`Sheep`。
    fn new(name: &'static str) -> Sheep {
        Sheep {name: name, naked: false }
    }

    fn name(&self) -> &'static str {
        self.name
    }

    fn noise(&self) -> &'static str {
        if self.is_naked() {
            "baaaah?"
        } else {
            "baaaah!"
        }
    }

    // 默认 trait 方法可以重载。
    fn talk(&self) {
        // 例如我们可以增加一些安静的沉思。
        println!("{} pauses briefly... {}", self.name, self.noise());
    }
}


fn main() {
    // 这种情况需要类型标注。
    let mut dolly: Sheep = Animal::new("Dolly");
    // 试一试 ^ 移除类型标注。

    dolly.talk();
    dolly.shear();
    dolly.talk();

    println!("Hello Rust");
}

// rustc main.rs
// ./main
编译运行:
PS F:\rustproject\rustbyexample\chapter16\example16_1> rustc main.rs
PS F:\rustproject\rustbyexample\chapter16\example16_1> ./main
Dolly pauses briefly... baaaah!
Dolly gets a haircut!
Dolly pauses briefly... baaaah?
Hello Rust
PS F:\rustproject\rustbyexample\chapter16\example16_1>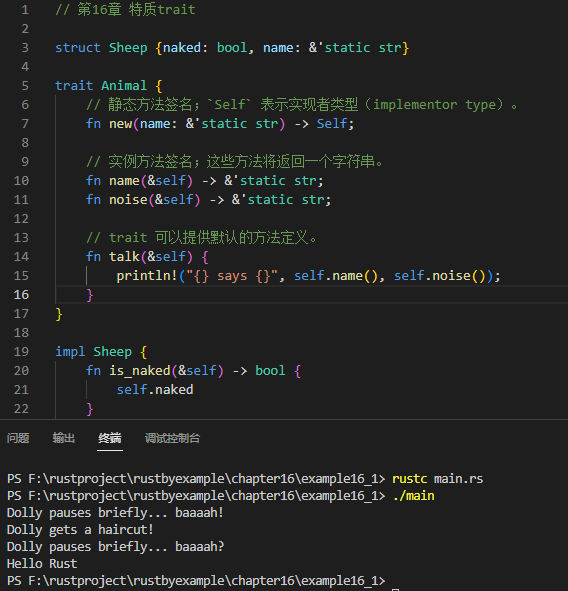
16.1 派生
通过 #[derive]属性,编译器能够提供某些 trait 的基本实现。如果需要更复杂的行为,这些 trait 也可以手动实现。
下面是可以自动派生的 trait:
-
比较 trait: Eq, PartialEq, Ord, PartialOrd
-
Clone, 用来从
&T创建副本T。 -
Copy,使类型具有 "复制语义"(copy semantics)而非 "移动语义"(move semantics)。
-
Hash,从
&T计算哈希值(hash)。 -
Default, 创建数据类型的一个空实例。
-
Debug,使用
{:?}formatter 来格式化一个值。// 16.1节 派生
//
Centimeters,可以比较的元组结构体
#[derive(PartialEq, PartialOrd)]
struct Centimeters(f64);//
Inches,可以打印的元组结构体
#[derive(Debug)]
struct Inches(i32);impl Inches {
fn to_centimeters(&self) -> Centimeters {
let &Inches(inches) = self;
Centimeters(inches as f64 * 2.54)
}
}//
Seconds,不带附加属性的元组结构体
//#[derive(Debug, PartialEq)]
#[allow(unused)]
struct Seconds(i32);fn main() {
let _one_second = Seconds(1);// 报错:`Seconds` 不能打印;它没有实现 `Debug` trait //println!("One second looks like: {:?}", _one_second); // 试一试 ^ 取消此行注释 // 报错:`Seconds`不能比较;它没有实现 `PartialEq` trait //let _this_is_true = (_one_second == _one_second); // 试一试 ^ 取消此行注释 let foot = Inches(12); println!("One foot equals {:?}", foot); let meter = Centimeters(100.0); let cmp = if foot.to_centimeters() < meter { "smaller" } else { "bigger" }; println!("One foot is {} than one meter.", cmp); println!("Hello Rust");}
// rustc main.rs
// ./main
编译运行:
PS F:\rustproject\rustbyexample\chapter16\example16_2> rustc main.rs
PS F:\rustproject\rustbyexample\chapter16\example16_2> ./main
One foot equals Inches(12)
One foot is smaller than one meter.
Hello Rust
PS F:\rustproject\rustbyexample\chapter16\example16_2>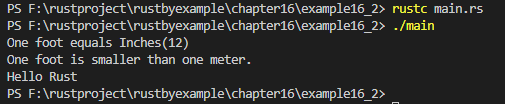
参见:
16.2 使用dyn返回trait
Rust 编译器需要知道每个函数的返回类型需要多少空间。这意味着所有函数都必须返回一个具体类型。与其他语言不同,如果你有个像 Animal 那样的的 trait,则不能编写返回 Animal 的函数,因为其不同的实现将需要不同的内存量。
但是,有一个简单的解决方法。相比于直接返回一个 trait 对象,我们的函数返回一个包含一些 Animal 的 Box。box 只是对堆中某些内存的引用。因为引用的大小是静态已知的,并且编译器可以保证引用指向已分配的堆 Animal,所以我们可以从函数中返回 trait!
每当在堆上分配内存时,Rust 都会尝试尽可能明确。因此,如果你的函数以这种方式返回指向堆的 trait 指针,则需要使用 dyn 关键字编写返回类型,例如 Box<dyn Animal>。
// 16.2节 使用 dyn 返回 trait

struct Sheep {}
struct Cow {}

trait Animal {
    // 实例方法签名
    fn noise(&self) -> &'static str;
}

// 实现 `Sheep` 的 `Animal` trait。
impl Animal for Sheep {
    fn noise(&self) -> &'static str {
        "baaaaah!"
    }
}

// 实现 `Cow` 的 `Animal` trait。
impl Animal for Cow {
    fn noise(&self) -> &'static str {
        "moooooooo!"
    }
}

// 返回一些实现 Animal 的结构体,但是在编译时我们不知道哪个结构体。
fn random_animal(random_number: f64) -> Box<dyn Animal> {
    if random_number < 0.5 {
        Box::new(Sheep {})
    } else {
        Box::new(Cow {})
    }
}

fn main() {
    let random_number = 0.234;
    let animal = random_animal(random_number);
    println!("You've randomly chosen an animal, and it says {}", animal.noise());

    let random_number = 1.234;
    let animal = random_animal(random_number);
    println!("You've randomly chosen an animal, and it says {}", animal.noise());


    println!("Hello Rust");
}

// rustc main.rs
// ./main
编译运行:
PS F:\rustproject\rustbyexample\chapter16\example16_3> rustc main.rs
PS F:\rustproject\rustbyexample\chapter16\example16_3> ./main
You've randomly chosen an animal, and it says baaaaah!
You've randomly chosen an animal, and it says moooooooo!
Hello Rust
PS F:\rustproject\rustbyexample\chapter16\example16_3>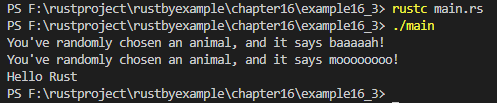
16.3 运算符重载
在 Rust 中,很多运算符可以通过 trait 来重载。也就是说,这些运算符可以根据它们的输入参数来完成不同的任务。这之所以可行,是因为运算符就是方法调用的语法糖。例如,a + b 中的 + 运算符会调用 add 方法(也就是 a.add(b))。这个 add 方法是 Add trait 的一部分。因此,+ 运算符可以被任何 Add trait 的实现者使用。
会重载运算符的 trait(比如 Add 这种)可以在这里查看。
// 16.3节 运算符重载

use std::ops;

struct Foo;
struct Bar;

#[derive(Debug)]
struct FooBar;

#[derive(Debug)]
struct BarFoo;

// `std::ops::Add` trait 用来指明 `+` 的功能,这里我们实现 `Add<Bar>`,它是用于
// 把对象和 `Bar` 类型的右操作数(RHS)加起来的 `trait`。
// 下面的代码块实现了 `Foo + Bar = FooBar` 这样的运算。
impl ops::Add<Bar> for Foo {
    type Output = FooBar;

    fn add(self, _rhs: Bar) -> FooBar {
        println!("> Foo.add(Bar was called");
        FooBar
    }
}

// 通过颠倒类型,我们实现了不服从交换律的加法。
// 这里我们实现 `Add<Foo>`,它是用于把对象和 `Foo` 类型的右操作数加起来的 trait。
// 下面的代码块实现了 `Bar + Foo = BarFoo` 这样的运算。
impl ops::Add<Foo> for Bar {
    type Output = BarFoo;
    fn add(self, _rhs: Foo) -> BarFoo {
        println!("> Bar.add(Foo) was called");
        BarFoo
    }
}

fn main() {
    println!("Foo + Bar = {:?}", Foo + Bar);
    println!("Bar + Foo = {:?}", Bar + Foo);

    println!("Hello Rust");
}

// rustc main.rs
// ./main
编译运行:
PS F:\rustproject\rustbyexample\chapter16\example16_4> rustc main.rs
PS F:\rustproject\rustbyexample\chapter16\example16_4> ./main
> Foo.add(Bar was called
Foo + Bar = FooBar
> Bar.add(Foo) was called
Bar + Foo = BarFoo
Hello Rust
PS F:\rustproject\rustbyexample\chapter16\example16_4>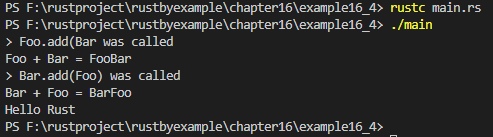
参见:
16.4 Drop
Drop trait 只有一个方法:drop,当对象离开作用域时会自动调用该方法。Drop trait 的主要作用是释放实现者的实例拥有的资源。
Box,Vec,String,File,以及 Process 是一些实现了 Drop trait 来释放资源的类型。Drop trait 也可以为任何自定义数据类型手动实现。
下面示例给 drop 函数增加了打印到控制台的功能,用于宣布它在什么时候被调用。
// 16.4节 Drop
#[derive(Debug)]
struct Droppable {
    name: &'static str,
}

// 这个简单的 `drop` 实现添加了打印到控制台的功能。
impl Drop for Droppable {
    fn drop(&mut self) {
        println!("> Dropping {}", self.name);
    }
}


fn main() {
    let a = Droppable{name: "a"};
    println!("a = {:?}", a);
    // 代码块 A
    {
        let b = Droppable {name: "b"};
        println!("b = {:?}", b);
        // 代码块 B
        {
            let c = Droppable {name: "c"};
            let d = Droppable {name: "d"};
            println!("c = {:?}", c);
            println!("d = {:?}", d);
            println!("Exiting block B");
        }
        println!("Just exited block B");
        println!("Exiting block A");
    }
    println!("Just exited block A");
    // 变量可以手动使用 `drop` 函数来销毁。
    drop(a);
    // 试一试 ^ 将此行注释掉。

    println!("end of the main function");

    // `a` *不会*在这里再次销毁,因为它已经被(手动)销毁。
    println!("Hello Rust");
}

// rustc main.rs
// ./main
编译运行:
PS F:\rustproject\rustbyexample\chapter16\example16_5> rustc main.rs
PS F:\rustproject\rustbyexample\chapter16\example16_5> ./main
a = Droppable { name: "a" }
b = Droppable { name: "b" }
c = Droppable { name: "c" }
d = Droppable { name: "d" }
Exiting block B
> Dropping d
> Dropping c
Just exited block B
Exiting block A
> Dropping b
Just exited block A
> Dropping a
end of the main function
Hello Rust
PS F:\rustproject\rustbyexample\chapter16\example16_5>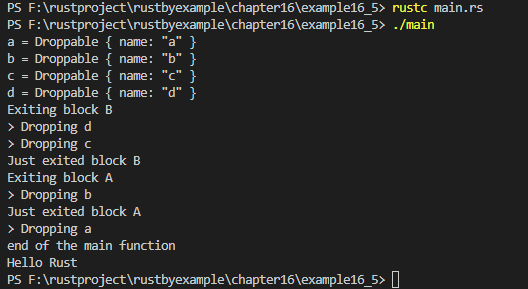
16.5 Iterator
Iterator trait 用来对集合(collection)类型(比如数组)实现迭代器。
这个 trait 只需定义一个返回 next(下一个)元素的方法,这可手动在 impl 代码块中定义,或者自动定义(比如在数组或区间中)。
为方便起见,for 结构会使用 .into_iter() 方法将一些集合类型转换为迭代器。
下面例子展示了如何使用 Iterator trait 的方法,更多可用的方法可以看这里。
// 16.5节 Iterator
#[derive(Debug)]
struct Fibonacci {
    curr: u32,
    next: u32,
}

// 为 `Fibonacci`(斐波那契)实现 `Iterator`。
// `Iterator` trait 只需定义一个能返回 `next`(下一个)元素的方法。
impl Iterator for Fibonacci {
    type Item = u32;
    // 我们在这里使用 `.curr` 和 `.next` 来定义数列(sequence)。
    // 返回类型为 `Option<T>`:
    //     * 当 `Iterator` 结束时,返回 `None`。
    //     * 其他情况,返回被 `Some` 包裹(wrap)的下一个值。
    fn next(&mut self) -> Option<u32> {
        let new_next = self.curr + self.next;

        self.curr = self.next;
        self.next = new_next;

        // 既然斐波那契数列不存在终点,那么 `Iterator` 将不可能
        // 返回 `None`,而总是返回 `Some`。
        Some(self.curr)
    }
}

// 返回一个斐波那契数列生成器
fn fibonacci() -> Fibonacci {
    Fibonacci { curr: 1, next: 1 }
}

fn main() {
    // `0..3` 是一个 `Iterator`,会产生:0、1 和 2。
    let mut sequence = 0..3;
    println!("Four consecutive `next` calls on 0..3");
    println!("> {:?}", sequence.next());
    println!("> {:?}", sequence.next());
    println!("> {:?}", sequence.next());
    println!("> {:?}", sequence.next());
    // `for` 遍历 `Iterator` 直到返回 `None`,
    // 并且每个 `Some` 值都被解包(unwrap),然后绑定给一个变量(这里是 `i`)。
    println!("Iterate through 0..3 using 'for'");
    for i in 0..3 {
        println!("> {}", i);
    }

    // `take(n)` 方法提取 `Iterator` 的前 `n` 项。
    println!("The first four terms of the Fibonacci sequence are: ");
    for i in fibonacci().take(4) {
        println!("> {}", i);
    }

    // `skip(n)` 方法移除前 `n` 项,从而缩短了 `Iterator` 。
    println!("The next four termes of the Fibonacci sequence are: ");
    for i in fibonacci().skip(4).take(4) {
        println!("> {}", i);
    }

    let array = [1u32, 3, 3, 7];

    // `iter` 方法对数组/slice 产生一个 `Iterator`。
    println!("Iterate the following array {:?}", &array);
    for i in array.iter() {
        println!("> {}", i);
    }

    println!("Hello Rust");
}

// rustc main.rs
// ./main
编译运行:
PS F:\rustproject\rustbyexample\chapter16\example16_6> rustc main.rs
PS F:\rustproject\rustbyexample\chapter16\example16_6> ./main
Four consecutive `next` calls on 0..3
> Some(0)
> Some(1)
> Some(2)
> None
Iterate through 0..3 using 'for'
> 0
> 1
> 2
The first four terms of the Fibonacci sequence are:
> 1
> 2
> 3
> 5
The next four termes of the Fibonacci sequence are:
> 8
> 13
> 21
> 34
Iterate the following array [1, 3, 3, 7]
> 1
> 3
> 3
> 7
Hello Rust
PS F:\rustproject\rustbyexample\chapter16\example16_6>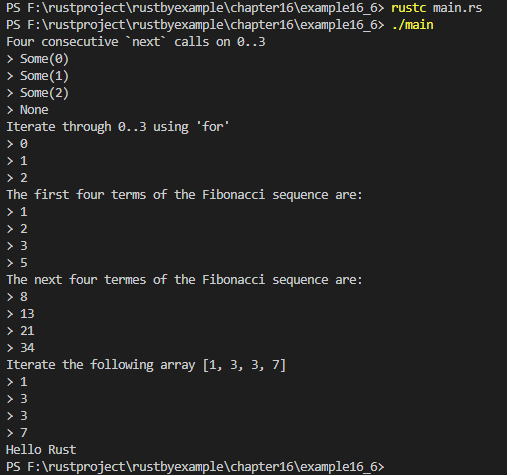
16.6 impl Trait
如果函数返回实现了 MyTrait 的类型,可以将其返回类型编写为 -> impl MyTrait。这可以大大简化你的类型签名!
// 16.6节 impl Trait
use std::iter;
use std::vec::IntoIter;

// 该函数组合了两个 `Vec <i32>` 并在其上返回一个迭代器。
// 看看它的返回类型多么复杂!
fn combine_vecs_explicit_return_type(
    v: Vec<i32>,
    u: Vec<i32>,
) -> iter::Cycle<iter::Chain<IntoIter<i32>, IntoIter<i32>>> {
    v.into_iter().chain(u.into_iter()).cycle()
}

// 这是完全相同的函数,但其返回类型使用 `impl Trait`。
// 看看它多么简单!
fn combine_vecs (
    v: Vec<i32>,
    u: Vec<i32>,
) -> impl Iterator<Item=i32> {
    v.into_iter().chain(u.into_iter()).cycle()
}

fn main() {
    let v1 = vec![1, 2, 3];
    let v2 = vec![4, 5];
    let mut v3 = combine_vecs(v1, v2);
    assert_eq!(Some(1), v3.next());
    assert_eq!(Some(2), v3.next());
    assert_eq!(Some(3), v3.next());
    assert_eq!(Some(4), v3.next());
    assert_eq!(Some(5), v3.next());
    println!("all done");
    let v4 = vec![6, 7, 8];
    let v5 = vec![9, 10];
    let mut v6 = combine_vecs_explicit_return_type(v4, v5);
    assert_eq!(Some(6), v6.next());
    assert_eq!(Some(7), v6.next());
    assert_eq!(Some(8), v6.next());
    assert_eq!(Some(9), v6.next());
    assert_eq!(Some(10), v6.next());

    println!("Hello Rust");
}

// rustc main.rs
// ./main
编译运行:
PS F:\rustproject\rustbyexample\chapter16\example16_7> rustc main.rs
PS F:\rustproject\rustbyexample\chapter16\example16_7> ./main
all done
Hello Rust
PS F:\rustproject\rustbyexample\chapter16\example16_7>
更重要的是,某些 Rust 类型无法写出。例如,每个闭包都有自己未命名的具体类型。在使用 impl Trait 语法之前,必须在堆上进行分配才能返回闭包。但是现在你可以像下面这样静态地完成所有操作:
// 16.6节 impl Trait
// 返回一个将输入和 `y` 相加的函数
fn make_adder_function(y: i32) -> impl Fn(i32) -> i32 {
    let closure = move |x: i32| { x + y };
    closure
}

fn main() {
    let plus_one = make_adder_function(1);
    assert_eq!(plus_one(2), 3);

    println!("plus_one(3) = {}", plus_one(3));

    println!("Hello Rust");
}

// rustc main.rs
// ./main
编译运行:
PS F:\rustproject\rustbyexample\chapter16\example16_8> rustc main.rs
PS F:\rustproject\rustbyexample\chapter16\example16_8> ./main
plus_one(3) = 4
Hello Rust
PS F:\rustproject\rustbyexample\chapter16\example16_8>
您还可以使用 impl Trait 返回使用 map 或 filter 闭包的迭代器!这使得使用 map 和 filter 更容易。因为闭包类型没有名称,所以如果函数返回带闭包的迭代器,则无法写出显式的返回类型。但是有了 impl Trait,你就可以轻松地做到这一点:
// 16.6节 impl Trait
// 这个函数会返回一个迭代器,它遍历 numbers 中所有正数并翻倍
fn double_positives<'a>(numbers: &'a Vec<i32>) -> impl Iterator<Item = i32> + 'a {
    numbers.iter().filter(|x| x > &&0).map(|x| x * 2)
}

fn main() {
    let numbers = vec![1, -2, 3, -4, 5, 0, 7];

    // 使用函数获取迭代器
    let result: Vec<i32> = double_positives(&numbers).collect();
    println!("原始数组: {:?}", numbers);
    println!("正数翻倍: {:?}", result);

    //惰性求值特性
    let numbers = vec![1, -2, 3, -4, 5];
    // 获取迭代器(此时还没执行计算)
    let iter = double_positives(&numbers);
    // 只有在消费迭代器时才执行计算
    for num in iter {
        println!("{}", num); // 依次打印: 2, 6, 10
    }

    // 也可以只取前几个
    let numbers = vec![10, -20, 30, -40, 50, 60, -70];
    let first_two: Vec<i32> = double_positives(&numbers).take(2).collect();
    println!("前两个: {:?}", first_two); // [20, 60]

    println!("Hello Rust");
}

// rustc main.rs
// ./main
编译运行:
PS F:\rustproject\rustbyexample\chapter16\example16_9> rustc main.rs
PS F:\rustproject\rustbyexample\chapter16\example16_9> ./main
原始数组: [1, -2, 3, -4, 5, 0, 7]
正数翻倍: [2, 6, 10, 14]
2
6
10
前两个: [20, 60]
Hello Rust
PS F:\rustproject\rustbyexample\chapter16\example16_9>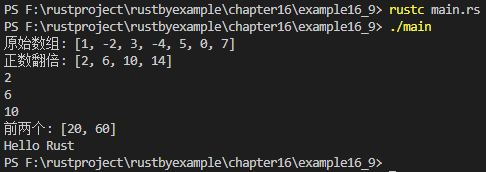
16.7 Clone
当处理资源时,默认的行为是在赋值或函数调用的同时将它们转移。但是我们有时候也需要把资源复制一份。
Clone trait 正好帮助我们完成这任务。通常,我们可以使用由 Clone trait 定义的 .clone() 方法。
// 16.7节 Clone
// 不含资源的单元结构体
#[derive(Debug, Clone, Copy)]
struct Nil;

// 一个包含资源的结构体,它实现了 `Clone` trait
#[derive(Clone, Debug)]
#[allow(unused)]
struct Pair(Box<i32>, Box<i32>);

fn main() {
    // 实例化 `Nil`
    let nil = Nil;
    // 复制 `Nil`,没有资源用于移动(move)
    let copied_nil = nil;

    // 两个 `Nil` 都可以独立使用
    println!("original: {:?}", nil);
    println!("copy: {:?}", copied_nil);

    // 实例化 `Pair`
    let pair = Pair(Box::new(1), Box::new(2));
    println!("original: {:?}", pair);

    //将 `pair` 绑定到 `moved_pair`,移动(move)了资源
    let moved_pair = pair;
    println!("copy: {:?}", moved_pair);
    // 报错!`pair` 已失去了它的资源。
    //println!("original: {:?}", pair);
    // 试一试 ^ 取消此行注释。

    // 将 `moved_pair`(包括其资源)克隆到 `cloned_pair`。
    let cloned_pair = moved_pair.clone();
    // 使用 std::mem::drop 来销毁原始的 pair。
    //drop(moved_pair);
    // 报错!`moved_pair` 已被销毁。
    println!("copy: {:?}", moved_pair);
    // 试一试 ^ 将此行注释掉。

    // 由 .clone() 得来的结果仍然可用!
    println!("clone: {:?}", cloned_pair);

    println!("Hello Rust");
}

// rustc main.rs
// ./main
编译运行:
PS F:\rustproject\rustbyexample\chapter16\example16_10> rustc main.rs
PS F:\rustproject\rustbyexample\chapter16\example16_10> ./main
original: Nil
copy: Nil
original: Pair(1, 2)
copy: Pair(1, 2)
copy: Pair(1, 2)
clone: Pair(1, 2)
Hello Rust
PS F:\rustproject\rustbyexample\chapter16\example16_10>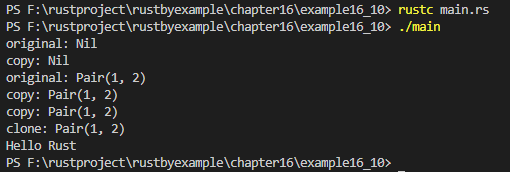
16.8 父trait
Rust 没有"继承",但是您可以将一个 trait 定义为另一个 trait 的超集(即父 trait)。例如:
// 16.8节 父trait

trait Person {
    fn name(&self) -> String;
}

// Person 是 Student 的父 trait。
// 实现 Student 需要你也 impl 了 Person。
trait Student: Person {
    fn university(&self) -> String;
}

trait Programmer {
    fn fav_language(&self) -> String;
}

// CompSciStudent (computer science student,计算机科学的学生) 是 Programmer 和 Student 两者的子类。
// 实现 CompSciStudent 需要你同时 impl 了两个父 trait。
trait CompSciStudent: Programmer + Student {
    fn git_username(&self) -> String;
}

fn comp_sci_student_greeting(student: &dyn CompSciStudent) -> String {
    format!(
        "My name is {} and I attend {}. My favorite language is {}. My Git username is {}",
        student.name(),
        student.university(),
        student.fav_language(),
        student.git_username()
    )
}

// 定义一个实现所有必需 trait 的结构体
struct ComputerScienceStudent {
    name: String,
    university: String,
    fav_language: String,
    git_username: String,
}

// 实现 Person trait
impl Person for ComputerScienceStudent {
    fn name(&self) -> String {
        self.name.clone()
    }
}

// 实现 Student trait (需要先实现 Person)
impl Student for ComputerScienceStudent {
    fn university(&self) -> String {
        self.university.clone()
    }
}

// 实现 Programmer trait
impl Programmer for ComputerScienceStudent {
    fn fav_language(&self) -> String {
        self.fav_language.clone()
    }
}

// 实现 CompSciStudent trait (需要先实现 Programmer 和 Student)
impl CompSciStudent for ComputerScienceStudent {
    fn git_username(&self) -> String {
        self.git_username.clone()
    }
}

fn main() {
    // 创建一个计算机科学学生
    let student = ComputerScienceStudent {
        name: "张三".to_string(),
        university: "清华大学".to_string(),
        fav_language: "Rust".to_string(),
        git_username: "zhangsan_dev".to_string(),
    };

    // 调用函数并打印问候语
    let greeting = comp_sci_student_greeting(&student);
    println!("{}", greeting);

    println!("Hello Rust");
}

// rustc main.rs
// ./main
编译运行:
PS F:\rustproject\rustbyexample\chapter16\example16_11> rustc main.rs
PS F:\rustproject\rustbyexample\chapter16\example16_11> ./main
My name is 张三 and I attend 清华大学. My favorite language is Rust. My Git username is zhangsan_dev
Hello Rust
PS F:\rustproject\rustbyexample\chapter16\example16_11>
参见:
16.9 消除重叠trait
一个类型可以实现许多不同的 trait。如果两个 trait 都需要相同的名称怎么办?例如,许多 trait 可能拥有名为 get() 的方法。他们甚至可能有不同的返回类型!
有个好消息:由于每个 trait 实现都有自己的 impl 块,因此很清楚您要实现哪个 trait 的 get 方法。
何时需要调用这些方法呢?为了消除它们之间的歧义,我们必须使用完全限定语法(Fully Qualified Syntax)。
// 16.9节 消除重叠trait

trait UsernameWidget {
    // 从这个 widget 中获取选定的用户名
    fn get(&self) -> String;
}

trait AgeWidget {
    // 从这个 widget 中获取选定的年龄
    fn get(&self) -> u8;
}

// 同时具有 UsernameWidget 和 AgeWidget 的表单
struct Form {
    username: String,
    age: u8,
}

impl UsernameWidget for Form {
    fn get(&self) -> String {
        self.username.clone()
    }
}

impl AgeWidget for Form {
    fn get(&self) -> u8 {
        self.age
    }
}

fn main() {
    let form = Form {
        username: "rustacean".to_owned(),
        age: 28,
    };

    // 如果取消注释此行,则会收到一条错误消息,提示 "multiple `get` found"(找到了多个`get`)。
    // 因为毕竟有多个名为 `get` 的方法。
    // println!("{}", form.get());
    let username = <Form as UsernameWidget>::get(&form);
    println!("username = {}", username);
    assert_eq!("rustacean".to_owned(), username);
    let age = <Form as AgeWidget>::get(&form);
    println!("age = {}", age);
    assert_eq!(28, age);

    println!("Hello Rust");
}

// rustc main.rs
// ./main
编译运行:
PS F:\rustproject\rustbyexample\chapter16\example16_12> rustc main.rs
PS F:\rustproject\rustbyexample\chapter16\example16_12> ./main
username = rustacean
age = 28
Hello Rust
PS F:\rustproject\rustbyexample\chapter16\example16_12>
参见: