标准库提供了很多自定义类型,在原生类型基础上进行了大量扩充。这是部分自定义类型:
- 可增长的
String(字符串),如:"hello world" - 可增长的向量(vector):
[1, 2, 3] - 选项类型(optional types):
Option<i32> - 错误处理类型(error handling types):
Result<i32, i32> - 堆分配的指针(heap allocated pointers):
Box<i32>
参见:
19.1 箱子、栈和堆
在 Rust 中,所有值默认都是栈分配的。通过创建 Box<T>,可以把值装箱 (boxed)来使它在堆上分配。箱子(box,即 Box<T> 类型的实例)是一个智能指针,指向堆分配的 T 类型的值。当箱子离开作用域时,它的析构函数会被调用,内部的对象会被销毁,堆上分配的内存也会被释放。
被装箱的值可以使用 * 运算符进行解引用;这会移除掉一层装箱。
// 19.1节 箱子、栈和堆
use std::mem;

#[allow(dead_code)]
#[derive(Debug, Clone, Copy)]
struct Point {
    x: f64,
    y: f64,
}

#[allow(dead_code)]
struct Rectangle {
    p1: Point,
    p2: Point,
}

fn origin() -> Point {
    Point {x: 0.0, y: 0.0 }
}

fn boxed_origin() -> Box<Point> {
    // 在堆上分配这个点(point),并返回一个指向它的指针
    Box::new(Point {x: 0.0, y: 0.0})
}

fn main() {
    // (所有的类型标注都不是必需的)
    // 栈分配的变量
    let point: Point = origin();
    let rectangle: Rectangle = Rectangle {
        p1: origin(),
        p2: Point {x: 3.0, y: 4.0 }
    };

    // 堆分配的 rectangle(矩形)
    let boxed_rectangle: Box<Rectangle> = Box::new(Rectangle {
        p1: origin(),
        p2: origin(),
    });
    // 函数的输出可以装箱
    let boxed_point: Box<Point> = Box::new(origin());
    // 两层装箱
    let box_in_a_box: Box<Box<Point>> = Box::new(boxed_origin());

    println!("Point occupies {} bytes in the stack",
             mem::size_of_val(&point));
    println!("Rectangle occupies {} bytes in the stack",
             mem::size_of_val(&rectangle));

    // box 的宽度就是指针宽度
    println!("Boxed point occupies {} bytes in the stack",
             mem::size_of_val(&boxed_point));
    println!("Boxed rectangle occupies {} bytes in the stack",
             mem::size_of_val(&boxed_rectangle));
    println!("Boxed box occupies {} bytes in the stack",
             mem::size_of_val(&box_in_a_box));
    // 将包含在 `boxed_point` 中的数据复制到 `unboxed_point`
    let unboxed_point: Point = *boxed_point;
    println!("Unboxed point occupies {} bytes in the stack",
             mem::size_of_val(&unboxed_point));

    println!("Hello Rust");
}

// rustc main.rs
// ./main
编译运行:
PS F:\rustproject\rustbyexample\chapter19\example19_1> rustc main.rs
PS F:\rustproject\rustbyexample\chapter19\example19_1> ./main
Point occupies 16 bytes in the stack
Rectangle occupies 32 bytes in the stack
Boxed point occupies 4 bytes in the stack
Boxed rectangle occupies 4 bytes in the stack
Boxed box occupies 4 bytes in the stack
Unboxed point occupies 16 bytes in the stack
Hello Rust
PS F:\rustproject\rustbyexample\chapter19\example19_1>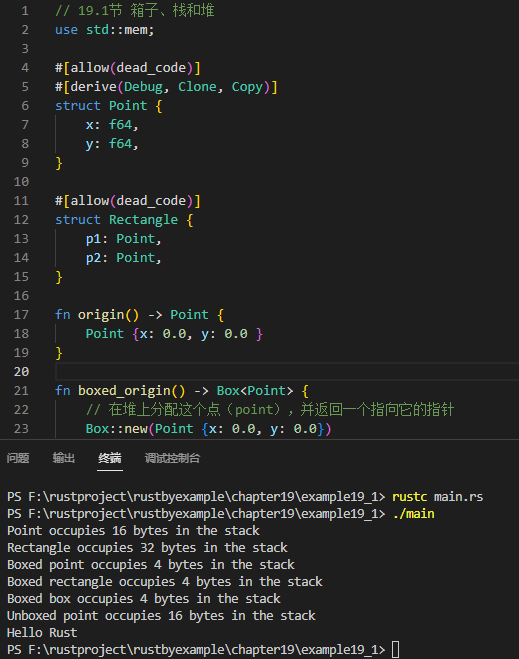
19.2 动态数组vector
vector 是大小可变的数组。和 slice(切片)类似,它们的大小在编译时是未知的,但它们可以随时扩大或缩小。一个 vector 使用 3 个词来表示:一个指向数据的指针,vector 的长度,还有它的容量。此容量指明了要为这个 vector 保留多少内存。vector 的长度只要小于该容量,就可以随意增长;当需要超过这个阈值时,会给 vector 重新分配一段更大的容量。
// 19.2节 动态数组vector

fn main() {
    // 迭代器可以被收集到 vector 中
    let collected_iterator: Vec<i32> = (0..10).collect();
    println!("Collected (0..10) into: {:?}", collected_iterator);

    // `vec!` 宏可用来初始化一个 vector
    let mut xs = vec![1i32, 2, 3];
    println!("Initial vector: {:?}", xs);

    // 在 vector 的尾部插入一个新的元素
    println!("Push 4 into the vector");
    xs.push(4);
    println!("Vector: {:?}", xs);

    // 报错!不可变 vector 不可增长
    //collected_iterator.push(0);
    // 改正 ^ 将此行注释掉

    // `len` 方法获得一个 vector 的当前大小
    println!("Vector size: {}", xs.len());

    // 下标使用中括号表示(从 0 开始)
    println!("Second element: {}", xs[1]);

    // `pop` 移除 vector 的最后一个元素并将它返回
    println!("Pop last element: {:?}", xs.pop());

    // 超出下标范围将抛出一个 panic
    //println!("Fourth element: {}", xs[3]);
    // 改正 ^ 注释掉此行

    // 迭代一个 `Vector` 很容易
    println!("Contents of xs:");
    for x in xs.iter() {
        println!("> {}", x);
    }

    // 可以在迭代 `Vector` 的同时,使用独立变量(`i`)来记录迭代次数
    for (i, x) in xs.iter().enumerate() {
        println!("In position {} we have value {}", i, x);
    }

    // 多亏了 `iter_mut`,可变的 `Vector` 在迭代的同时,其中每个值都能被修改
    for x in  xs.iter_mut() {
        *x *= 3;
    }
    println!("Update vector: {:?}", xs);

    println!("Hello Rust");
}

// rustc main.rs
// ./main
编译运行:
PS F:\rustproject\rustbyexample\chapter19\example19_2> rustc main.rs
PS F:\rustproject\rustbyexample\chapter19\example19_2> ./main
Collected (0..10) into: [0, 1, 2, 3, 4, 5, 6, 7, 8, 9]
Initial vector: [1, 2, 3]
Push 4 into the vector
Vector: [1, 2, 3, 4]
Vector size: 4
Second element: 2
Pop last element: Some(4)
Contents of xs:
> 1
> 2
> 3
In position 0 we have value 1
In position 1 we have value 2
In position 2 we have value 3
Update vector: [3, 6, 9]
Hello Rust
PS F:\rustproject\rustbyexample\chapter19\example19_2>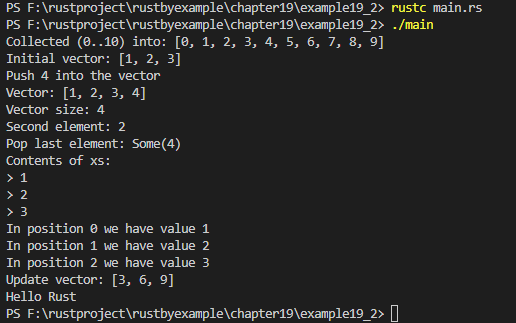
更多 Vec 方法可以在 std::vec 模块中找到。
19.3 字符串String
Rust 中有两种字符串类型:String 和 &str。
String 被存储为由字节组成的 vector(Vec<u8>),但保证了它一定是一个有效的 UTF-8 序列。String 是堆分配的,可增长的,且不是零结尾的(null terminated)。
&str 是一个总是指向有效 UTF-8 序列的切片(&[u8]),并可用来查看 String 的内容,就如同 &[T] 是 Vec<T> 的全部或部分引用。
// 19.3节 字符串

fn main() {
    // (所有的类型标注都不是必需的)
    // 一个对只读内存中分配的字符串的引用
    let pangram: &'static str = "the quick brown fox jumps over the lazy dog";
    println!("Pangram: {}", pangram);

    // 逆序迭代单词,这里并没有分配新的字符串
    println!("Words in reverse");
    for word in pangram.split_whitespace().rev() {
        println!("> {}", word);
    }

    // 复制字符到一个 vector,排序并移除重复值
    let mut chars: Vec<char> = pangram.chars().collect();
    chars.sort();
    chars.dedup();

    // 创建一个空的且可增长的 `String`
    let mut string = String::new();
    for c in chars {
        // 在字符串的尾部插入一个字符
        string.push(c);
        // 在字符串尾部插入一个字符串
        string.push_str(", ");
    }

    // 这个缩短的字符串是原字符串的一个切片,所以没有执行新的分配操作
    let chars_to_trim: &[char] = &[' ', ' '];
    let trimmed_str: &str = string.trim_matches(chars_to_trim);
    println!("Used characters: {}", trimmed_str);

    // 堆分配一个字符串
    let alice = String::from("I like dogs");
    // 分配新内存并存储修改过的字符串
    let bob: String = alice.replace("dog", "cat");

    println!("Alice says: {}", alice);
    println!("Bob says: {}", bob);
    println!("Hello Rust");
}

// rustc main.rs
// ./main
编译运行:
PS F:\rustproject\rustbyexample\chapter19\example19_3> rustc main.rs
PS F:\rustproject\rustbyexample\chapter19\example19_3> ./main
Pangram: the quick brown fox jumps over the lazy dog
Words in reverse
> dog
> lazy
> the
> over
> jumps
> fox
> brown
> quick
> the
Used characters: , a, b, c, d, e, f, g, h, i, j, k, l, m, n, o, p, q, r, s, t, u, v, w, x, y, z,
Alice says: I like dogs
Bob says: I like cats
Hello Rust
PS F:\rustproject\rustbyexample\chapter19\example19_3>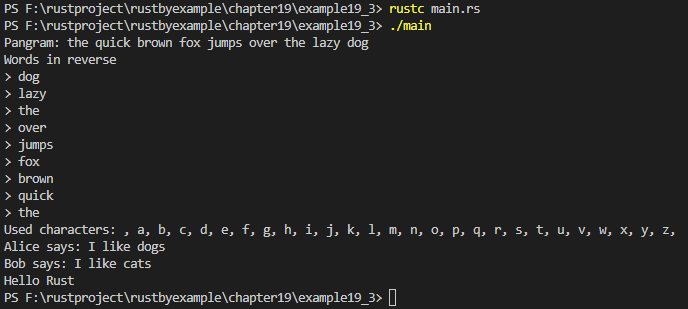
更多 str/String 方法可以在 std::str 和 std::string 模块中找到。
字面量与转义字符
书写含有特殊字符的字符串字面量有很多种方法。它们都会产生类似的 &str,所以最好选择最方便的写法。类似地,字节串(byte string)字面量也有多种写法,它们都会产生 &[u8; N] 类型。
通常特殊字符是使用反斜杠字符 \ 来转义的,这样你就可以在字符串中写入各种各样的字符,甚至是不可打印的字符以及你不知道如何输入的字符。如果你需要反斜杠字符,再用另一个反斜杠来转义它就可以,像这样:\\。
字面量中出现的字符串或字符定界符必须转义:"\""、'\''。
// 19.3节 字符串------------字面量与转义字符

fn main() {
    // 通过转义,可以用十六进制值来表示字节。
    let byte_escape = "I'm writeing \x52\x75\x73\x74!";
    println!("What are you doing\x3F (\\x3F means ?) {}", byte_escape);

    // 也可以使用 Unicode 码位表示。
    let unicode_codepoint = "\u{211D}";
    let character_name = "\"DOUBLE-STRUCK CAPITAL R\"";

    println!("unicode character {} (U+211D) is called {}",
             unicode_codepoint, character_name);

    let long_string = "String literals
                        can span multiple lines.
                        The limebreak and indentation here ->\
                        <- can be escaped too!";

    println!("{}", long_string);

    println!("Hello Rust");
}

// rustc main.rs
// ./main
编译运行:
PS F:\rustproject\rustbyexample\chapter19\example19_4> rustc main.rs
PS F:\rustproject\rustbyexample\chapter19\example19_4> ./main
What are you doing? (\x3F means ?) I'm writeing Rust!
unicode character ℝ (U+211D) is called "DOUBLE-STRUCK CAPITAL R"
String literals
                        can span multiple lines.
                        The limebreak and indentation here -><- can be escaped too!
Hello Rust
PS F:\rustproject\rustbyexample\chapter19\example19_4>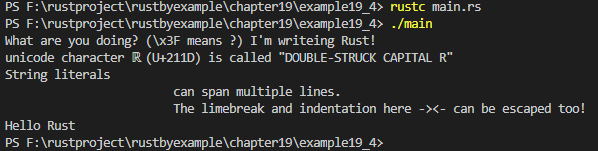
有时会有太多需要转义的字符,或者是直接原样写出会更便利。这时可以使用原始字符串(raw string)。
// 19.3节 字符串------------字面量与转义字符
//使用原始字符串(raw string)
fn main() {
    let raw_str = r"Escapes don't work here: \x3F \u{211D}";
    println!("{}", raw_str);

    // 如果你要在原始字符串中写引号,请在两边加一对 #
    let quotes = r#"And then I said: "There is no escape!""#;
    println!("{}", quotes);

    // 如果字符串中需要写 "#,那就在定界符中使用更多的 #。
    // 可使用的 # 的数目没有限制。
    let longer_delimiter = r###"A string with "# in it. And even "##!"###;
    println!("{}", longer_delimiter);

    println!("Hello Rust");
}

// rustc main.rs
// ./main
编译运行:
PS F:\rustproject\rustbyexample\chapter19\example19_5> rustc main.rs
PS F:\rustproject\rustbyexample\chapter19\example19_5> ./main
Escapes don't work here: \x3F \u{211D}
And then I said: "There is no escape!"
A string with "# in it. And even "##!
Hello Rust
PS F:\rustproject\rustbyexample\chapter19\example19_5>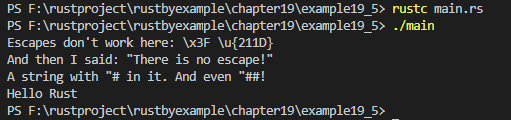
想要非 UTF-8 字符串(记住,&str 和 String 都必须是合法的 UTF-8 序列),或者需要一个字节数组,其中大部分是文本?请使用字节串(byte string)!
// 19.3节 字符串------------字面量与转义字符
//使用字节串(byte string)
use std::str;

fn main() {
    // 注意这并不是一个 &str
    let bytestring: &[u8; 20] = b"this is a bytestring";

    // 字节串没有实现 Display,所以它们的打印功能有些受限
    println!("A bytestring: {:?}", bytestring);

    // 字节串可以使用单字节的转义字符...
    let escaped = b"\x52\x75\x73\x74 as bytes";
    // ...但不能使用 Unicode 转义字符
    // let escaped = b"\u{211D} is not allowed";
    println!("Some escaped bytes: {:?}", escaped);

    // 原始字节串和原始字符串的写法一样
    let raw_bytestring = br"\u{211D} is not escaped here";
    println!("{:?}", raw_bytestring);

    // 把字节串转换为 &str 可能失败
    if let Ok(my_str) = str::from_utf8(raw_bytestring) {
        println!("And the same as text: '{}'", my_str);
    }

    let quotes = br#"You can also use "fancier" formatting, \
        like with normal raw strings"#;

    // 字节串可以不使用 UTF-8 编码
    let shift_jis = b"\x82\xe6\x82\xa8\x82\xb1\x82"; // SHIFT-JIS 编码的 "ようこそ"

    // 但这样的话它们就无法转换成 &str 了
    match str::from_utf8(shift_jis) {
        Ok(my_str) => println!("Conversion successful: '{}'", my_str),
        Err(e) => println!("Conversion failed: {:?}", e),
    };

    println!("Hello Rust");
}

// rustc main.rs
// ./main
编译运行:
PS F:\rustproject\rustbyexample\chapter19\example19_5> cd ../example19_6
PS F:\rustproject\rustbyexample\chapter19\example19_6> rustc main.rs
warning: unused variable: `quotes`
  --> main.rs:27:9
   |
27 |     let quotes = br#"You can also use "fancier" formatting, \
   |         ^^^^^^ help: if this is intentional, prefix it with an underscore: `_quotes`
   |
   = note: `#[warn(unused_variables)]` (part of `#[warn(unused)]`) on by default
warning: calls to `std::str::from_utf8` with an invalid literal always return an error
  --> main.rs:34:11
   |
31 |     let shift_jis = b"\x82\xe6\x82\xa8\x82\xb1\x82"; // SHIFT-JIS 编码的 "ようこそ"
   |                     ------------------------------- the literal was valid UTF-8 up to the 0 bytes
...
34 |     match str::from_utf8(shift_jis) {
   |           ^^^^^^^^^^^^^^^^^^^^^^^^^
   |
   = note: `#[warn(invalid_from_utf8)]` on by default

warning: 2 warnings emitted

PS F:\rustproject\rustbyexample\chapter19\example19_6> ./main
A bytestring: [116, 104, 105, 115, 32, 105, 115, 32, 97, 32, 98, 121, 116, 101, 115, 116, 114, 105, 110, 103]
Some escaped bytes: [82, 117, 115, 116, 32, 97, 115, 32, 98, 121, 116, 101, 115]
[92, 117, 123, 50, 49, 49, 68, 125, 32, 105, 115, 32, 110, 111, 116, 32, 101, 115, 99, 97, 112, 101, 100, 32, 104, 101, 114, 101]
And the same as text: '\u{211D} is not escaped here'
Conversion failed: Utf8Error { valid_up_to: 0, error_len: Some(1) }
Hello Rust
PS F:\rustproject\rustbyexample\chapter19\example19_6>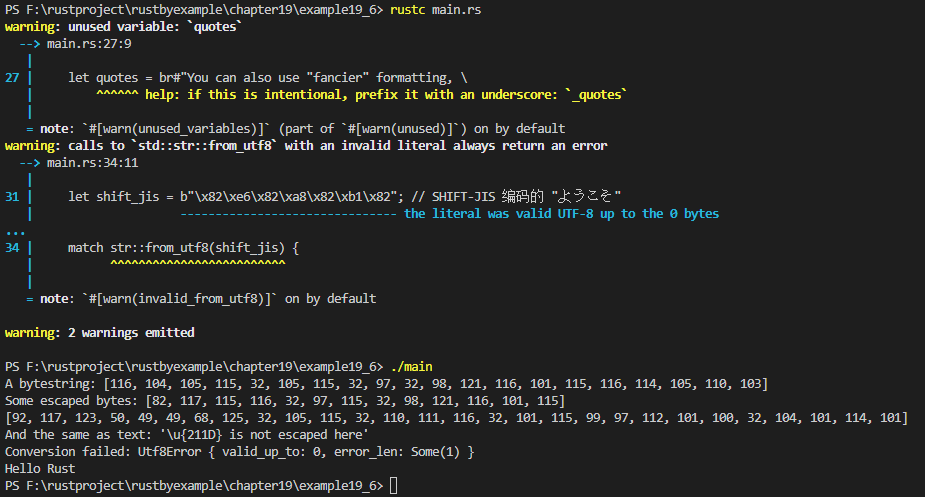
若需要在编码间转换,请使用 encoding crate。
Rust 参考中的 Tokens 一章详细地列出了书写字符串字面量和转义字符的方法。
19.4 选项Option
有时候想要捕捉到程序某部分的失败信息,而不是调用 panic!;这可使用 Option 枚举类型来实现。
Option<T> 有两个变量:
-
None,表明失败或缺少值 -
Some(value),元组结构体,封装了一个T类型的值value// 19.4节 选项Option
// 不会
panic!的整数除法。
fn checked_division(dividend: i32, divisor: i32) -> Option{
if divisor == 0 {
// 失败表示成None取值
None
} else {
// 结果 Result 被包装到Some取值中
Some(dividend /divisor)
}
}// 此函数处理可能失败的除法
fn try_division(dividend: i32, divisor: i32) {
//Option值可以进行模式匹配,就和其他枚举类型一样
match checked_division(dividend, divisor) {
None => println!("{} / {} failed!", dividend, divisor),
Some(quotient) => {
println!("{} / {} = {}", dividend, divisor, quotient)
},
}
}fn main() {
try_division(4, 2);
try_division(1, 0);// 绑定 `None` 到一个变量需要类型标注 let none: Option<i32> = None; let _equivalent_none = None::<i32>; let optional_float = Some(0f32); // 解包 `Some` 将取出被包装的值。 println!("{:?} unwraps to {:?}", optional_float, optional_float.unwrap()); // 解包 `None` 将会引发 `panic!`。 println!("{:?} unwraps to {:?}", none, none.unwrap()); println!("Hello Rust");}
// rustc main.rs
// ./main
编译运行:
PS F:\rustproject\rustbyexample\chapter19\example19_7> rustc main.rs
PS F:\rustproject\rustbyexample\chapter19\example19_7> ./main
4 / 2 = 2
1 / 0 failed!
Some(0.0) unwraps to 0.0

thread 'main' (8592) panicked at main.rs:38:49:
called `Option::unwrap()` on a `None` value
note: run with `RUST_BACKTRACE=1` environment variable to display a backtrace
PS F:\rustproject\rustbyexample\chapter19\example19_7>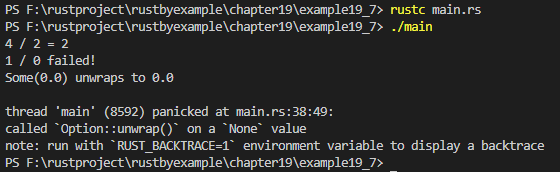
19.5 结果Result
我们已经看到 Option 枚举类型可以用作可能失败的函数的返回值,其中返回 None 可以表明失败。但是有时要强调为什么 一个操作会失败。为做到这点,我们提供了 Result 枚举类型。
Result<T, E> 类型拥有两个取值:
-
Ok(value)表示操作成功,并包装操作返回的value(value拥有T类型)。 -
Err(why),表示操作失败,并包装why,它(但愿)能够解释失败的原因(why拥有E类型)。// 19.5节 结果Result
mod checked {
// 我们想要捕获的数学 "错误"
#[derive(Debug)]
pub enum MathError {
DivisionByZero,
NegativeLogarithm,
NegativeSquareRoot,
}pub type MathResult = Result<f64, MathError>; pub fn div(x: f64, y: f64) -> MathResult { if y == 0.0 { // 此操作将会失败,那么(与其让程序崩溃)不如把失败的原因包装在 // `Err` 中并返回 Err(MathError::DivisionByZero) } else { // 此操作是有效的,返回包装在 `Ok` 中的结果 Ok(x / y) } } pub fn sqrt(x: f64) -> MathResult { if x < 0.0 { Err(MathError::NegativeSquareRoot) } else { Ok(x.sqrt()) } } pub fn ln(x: f64) -> MathResult { if x < 0.0 { Err(MathError::NegativeLogarithm) } else { Ok(x.ln()) } }}
//
op(x, y)===sqrt(ln(x / y))
fn op(x:f64, y: f64) -> f64 {
// 这是一个三层的 match 金字塔!
match checked::div(x, y) {
Err(why) => panic!("{:?}", why),
Ok(ratio) => match checked::ln(ratio) {
Err(why) => panic!("{:?}", why),
Ok(ln) => match checked::sqrt(ln) {
Err(why) => panic!("{:?}", why),
Ok(sqrt) => sqrt,
},
},
}
}fn main() {
println!("{}", op(100.0, 10.0));
// 这会失败吗? 会失败
println!("{}", op(1.0, 10.0));println!("Hello Rust");}
// rustc main.rs
// ./main
编译运行:
PS F:\rustproject\rustbyexample\chapter19\example19_8> rustc main.rs
PS F:\rustproject\rustbyexample\chapter19\example19_8> ./main
1.5174271293851465

thread 'main' (8884) panicked at main.rs:50:29:
NegativeSquareRoot
note: run with `RUST_BACKTRACE=1` environment variable to display a backtrace
PS F:\rustproject\rustbyexample\chapter19\example19_8>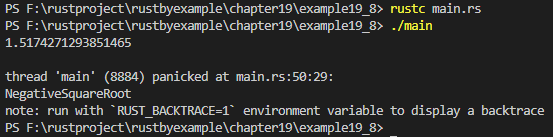
19.5.1 ?用法
把 result 用 match 连接起来会显得很难看;幸运的是,? 运算符可以把这种逻辑变得干净漂亮。? 运算符用在返回值为 Result 的表达式后面,它等同于这样一个匹配表达式:其中 Err(err) 分支展开成提前返回的 return Err(err),而 Ok(ok) 分支展开成 ok 表达式。
// 19.5.1节 ?用法

mod checked {
    #[derive(Debug)]
    enum MathError {
        DivisionByZero,
        NegativeLogarithm,
        NegativeSquareRoot,
    }

    type MathResult = Result<f64, MathError>;

    fn div(x: f64, y: f64) -> MathResult {
        if y == 0.0 {
            Err(MathError::DivisionByZero)
        } else {
            Ok(x / y)
        }
    }

    fn sqrt(x: f64) -> MathResult {
        if x < 0.0 {
            Err(MathError::NegativeSquareRoot)
        } else {
            Ok(x.sqrt())
        }
    }

    fn ln(x: f64) -> MathResult {
        if x < 0.0 {
            Err(MathError::NegativeLogarithm)
        } else {
            Ok(x.ln())
        }
    }

    // 中间函数
    fn op_(x: f64, y: f64) -> MathResult {
        // 如果 `div` "失败" 了,那么返回 `DivisionByZero`
        let ratio = div(x, y)?;

        // 如果 `ln` "失败" 了,那么返回 `NegativeLogarithm`
        let ln = ln(ratio)?;

        sqrt(ln)
    }

    pub fn op(x: f64, y: f64) {
        match op_(x, y) {
            Err(why) => panic!("{}", match why {
                MathError::NegativeLogarithm
                => "logarithm of negative number",
                MathError::DivisionByZero
                => "division by zero",
                MathError::NegativeSquareRoot
                => "square root of negative number",
            }),
            Ok(value) => println!("{}", value),
        }
    }

}


fn main() {
    checked::op(1.0, 10.0);

    println!("Hello Rust");
}

// rustc main.rs
// ./main
编译运行:
PS F:\rustproject\rustbyexample\chapter19\example19_9> rustc main.rs
PS F:\rustproject\rustbyexample\chapter19\example19_9> ./main

thread 'main' (5092) panicked at main.rs:50:25:
square root of negative number
note: run with `RUST_BACKTRACE=1` environment variable to display a backtrace
PS F:\rustproject\rustbyexample\chapter19\example19_9> 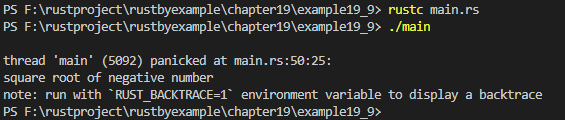
记得查阅文档,里面有很多匹配/组合 Result 的方法。
19.6 panic!
panic! 宏可用于产生一个 panic (恐慌),并开始回退(unwind)它的栈。在回退栈的同时,运行时将会释放该线程所拥有的所有资源,这是通过调用线程中所有对象的析构函数完成的。
因为我们正在处理的程序只有一个线程,panic! 将会引发程序报告 panic 消息并退出。
// 19.6节 panic!

// 整型除法(/)的重新实现
fn division(dividend: i32, divisor: i32) -> i32 {
    if divisor == 0 {
        // 除以 0 会引发 panic
        panic!("division by zero");
    } else {
        dividend / divisor
    }
}
// `main` 任务
fn main() {
    // 堆分配的整数
    let _x = Box::new(0i32);

    // 此操作将会引发一个任务失败
    division(3, 0);
    println!("This point won't be reached!");
    println!("Hello Rust");
    // `_x` 应当会在此处被销毁
}

// rustc main.rs
// ./main
编译运行:(ubuntu2004环境)
// 19.6节 panic!

// 整型除法(/)的重新实现
fn division(dividend: i32, divisor: i32) -> i32 {
    if divisor == 0 {
        // 除以 0 会引发 panic
        panic!("division by zero");
    } else {
        dividend / divisor
    }
}
// `main` 任务
fn main() {
    // 堆分配的整数
    let _x = Box::new(0i32);

    // 此操作将会引发一个任务失败
    division(3, 0);
    println!("This point won't be reached!");
    println!("Hello Rust");
    // `_x` 应当会在此处被销毁
}

// rustc main.rs
// ./main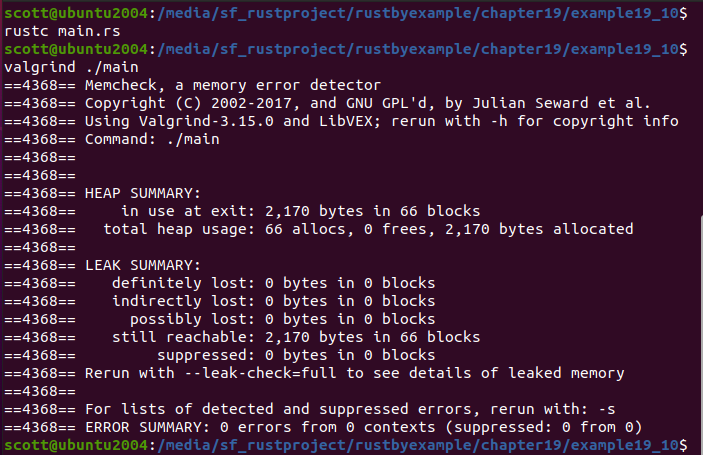
可以看到,panic! 不会泄露内存:
$ rustc panic.rs && valgrind ./panic
19.7 散列表HashMap
vector 通过整型下标来存储值,而 HashMap(散列表)通过键(key)来存储值。HashMap 的键可以是布尔型、整型、字符串,或任意实现了 Eq 和 Hash trait 的其他类型。在下一节将进一步介绍。
和 vector 类似,HashMap 也是可增长的,但 HashMap 在占据了多余空间时还可以缩小自己。可以使用 HashMap::with_capacity(unit) 创建具有一定初始容量的 HashMap,也可以使用 HashMap::new() 来获得一个带有默认初始容量的 HashMap(这是推荐方式)。
// 19.7节 散列表HashMap

use std::collections::HashMap;

fn call(number: &str) -> &str {
    match number {
        "798-1364" => "We're sorry, the call cannot be completed as dialed.
            Please hang up and try again.",
        "645-7689" => "Hello, this is Mr. Awesome's Pizza. My name is Fred.
            What can I get for you today?",
        _ => "Hi! Who is this again?",
    }
}

fn main() {
    let mut contacts = HashMap::new();
    contacts.insert("Daniel", "798-1364");
    contacts.insert("Ashley", "645-7689");
    contacts.insert("Katie", "435-8291");
    contacts.insert("Robert", "956-1745");

    // 接受一个引用并返回 Option<&V>
    match contacts.get(&"Daniel") {
        Some(&number) => println!("Calling Ashley: {}", call(number)),
        _ => println!("Don't have Ashley's number."),
    }
    contacts.remove(&"Ashley");

    // `HashMap::iter()` 返回一个迭代器,该迭代器以任意顺序举出
    // (&'a key, &'a value) 对。
    for (contact, &number) in contacts.iter() {
        println!("Calling {}: {}", contact, call(number));
    }

    println!("Hello Rust");
}

// rustc main.rs
// ./main
编译运行:
PS F:\rustproject\rustbyexample\chapter19\example19_11> rustc main.rs
PS F:\rustproject\rustbyexample\chapter19\example19_11> ./main
Calling Ashley: We're sorry, the call cannot be completed as dialed.
            Please hang up and try again.
Calling Daniel: We're sorry, the call cannot be completed as dialed.
            Please hang up and try again.
Calling Katie: Hi! Who is this again?
Calling Robert: Hi! Who is this again?
Hello Rust
PS F:\rustproject\rustbyexample\chapter19\example19_11> 
想要了解更多关于散列(hash)与散列表(hash map)(有时也称作 hash table)的工作原理,可以查看 Wikipedia 的散列表词条。
19.7.1 更改或自定义关键字类型
任何实现了 Eq 和 Hash trait 的类型都可以充当 HashMap 的键。这包括:
bool(当然这个用处不大,因为只有两个可能的键)int,unit,以及其他整数类型String和&str(友情提示:如果使用String作为键来创建HashMap,则可以 将&str作为散列表的.get()方法的参数,以获取值)
注意到 f32 和 f64没有 实现 Hash,这很大程度上是由于若使用浮点数作为散列表的键,浮点精度误差会很容易导致错误。
对于所有的集合类(collection class),如果它们包含的类型都分别实现了 Eq 和 Hash,那么这些集合类也就实现了 Eq 和 Hash。例如,若 T 实现了 Hash,则 Vec<T> 也实现了 Hash。
对自定义类型可以轻松地实现 Eq 和 Hash,只需加上一行代码:#[derive(PartialEq, Eq, Hash)]。
编译器将会完成余下的工作。如果你想控制更多的细节,你可以手动实现 Eq 和/或 Hash。本指南不包含实现 Hash 的细节内容。
为了试验 HashMap 中的 struct,让我们试着做一个非常简易的用户登录系统:
// 19.7.1节 更改或自定义关键字类型

use std::collections::HashMap;

// Eq 要求你对此类型推导 PartiaEq。
#[derive(PartialEq, Eq, Hash)]
struct Account<'a> {
    username: &'a str,
    password: &'a str,
}

struct AccountInfo<'a> {
    name: &'a str,
    email: &'a str,
}

type Accounts<'a> = HashMap<Account<'a>, AccountInfo<'a>>;

fn try_logon<'a>(accounts: &Accounts<'a>,
                 username: &'a str, password: &'a str) {
    println!("Username: {}", username);
    println!("Password: {}", password);
    println!("Attempting logon...");

    let logon = Account {
        username: username,
        password: password,
    };

    match accounts.get(&logon) {
        Some(account_info) => {
            println!("Successful logon!");
            println!("Name: {}", account_info.name);
            println!("Email: {}", account_info.email);
        },
        _ => println!("Login failed!"),
    }
}

fn main() {
    let mut accounts: Accounts = HashMap::new();

    let account = Account {
        username: "j.everyman",
        password: "password123",
    };

    let account_info = AccountInfo {
        name: "John Everyman",
        email: "j.everyman@email.com",
    };

    accounts.insert(account, account_info);

    try_logon(&accounts, "j.everyman", "psasword123");
    try_logon(&accounts, "j.everyman", "password123");

    println!("Hello Rust");
}

// rustc main.rs
// ./main
编译运行:
PS F:\rustproject\rustbyexample\chapter19\example19_12> rustc main.rs
PS F:\rustproject\rustbyexample\chapter19\example19_12> ./main
Username: j.everyman
Password: psasword123
Attempting logon...
Login failed!
Username: j.everyman
Password: password123
Attempting logon...
Successful logon!
Name: John Everyman
Email: j.everyman@email.com
Hello Rust
PS F:\rustproject\rustbyexample\chapter19\example19_12>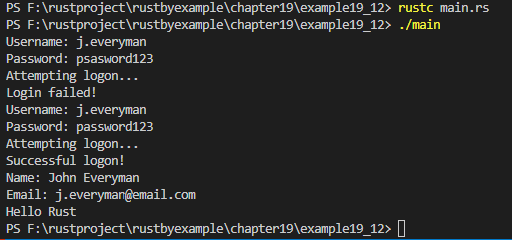
19.7.2 散列集HashSet
请把 HashSet 当成这样一个 HashMap:我们只关心其中的键而非值(HashSet<T> 实际上只是对 HashMap<T, ()> 的封装)。
你可能会问:"这有什么意义呢?我完全可以将键存储到一个 Vec 中呀。"
HashSet 的独特之处在于,它保证了不会出现重复的元素。这是任何 set 集合类型(set collection)遵循的规定。HashSet 只是它的一个实现。(参见:BTreeSet)
如果插入的值已经存在于 HashSet 中(也就是,新值等于已存在的值,并且拥有相同的散列值),那么新值将会替换旧的值。
如果你不想要一样东西出现多于一次,或者你要判断一样东西是不是已经存在,这种做法就很有用了。
不过集合(set)可以做更多的事。
集合(set)拥有 4 种基本操作(下面的调用全部都返回一个迭代器):
union(并集):获得两个集合中的所有元素(不含重复值)。difference(差集):获取属于第一个集合而不属于第二集合的所有元素。intersection(交集):获取同时属于两个集合的所有元素。symmetric_difference(对称差):获取所有只属于其中一个集合,而不同时属于 两个集合的所有元素。
在下面的例子中尝试使用这些操作。
// 19.7.2节 散列集HashSet

use std::collections::HashSet;

fn main() {
    let mut a: HashSet<i32> = vec!(1i32, 2, 3).into_iter().collect();
    let mut b: HashSet<i32> = vec!(2i32, 3, 4).into_iter().collect();

    assert!(a.insert(4));
    assert!(a.contains(&4));

    // 如果值已经存在,那么 `HashSet::insert()` 返回 false。
    //assert!(b.insert(4), "Value 4 is already in set B!");
    // 改正 ^ 将此行注释掉。

    b.insert(5);

    // 若一个集合(collection)的元素类型实现了 `Debug`,那么该集合也就实现了 `Debug`。
    // 这通常将元素打印成这样的格式 `[elem1, elem2, ...]
    println!("A: {:?}", a);
    println!("B: {:?}", b);

    // 乱序打印 [1, 2, 3, 4, 5]。
    println!("Union: {:?}", a.union(&b).collect::<Vec<&i32>>());

    // 这将会打印出 [1]
    println!("Difference: {:?}", a.difference(&b).collect::<Vec<&i32>>());

    // 乱序打印 [2, 3, 4]。
    println!("Intersection: {:?}", a.intersection(&b).collect::<Vec<&i32>>());

    // 打印 [1, 5]
    println!("Symmetric Difference: {:?}",
             a.symmetric_difference(&b).collect::<Vec<&i32>>());

    println!("Hello Rust");
}

// rustc main.rs
// ./main
编译运行:
PS F:\rustproject\rustbyexample\chapter19\example19_13> rustc main.rs
PS F:\rustproject\rustbyexample\chapter19\example19_13> ./main
A: {1, 3, 2, 4}
B: {3, 4, 2, 5}
Union: [1, 3, 2, 4, 5]
Difference: [1]
Intersection: [3, 2, 4]
Symmetric Difference: [1, 5]
Hello Rust
PS F:\rustproject\rustbyexample\chapter19\example19_13>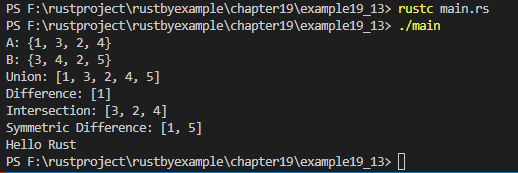
(例子改编自文档。)
19.8 引用计数Rc
当需要多个所有权时,可以使用 Rc(引用计数,Reference Counting 缩写)。Rc 跟踪引用的数量,这相当于包裹在 Rc 值的所有者的数量.
每当克隆一个 Rc 时,Rc 的引用计数就会增加 1,而每当克隆得到的 Rc 退出作用域时,引用计数就会减少 1。当 Rc 的引用计数变为 0 时,这意味着已经没有所有者,Rc 和值两者都将被删除。
克隆 Rc 从不执行深拷贝。克隆只创建另一个指向包裹值的指针,并增加计数。
// 19.8节 引用计数Rc

use std::rc::Rc;

fn main() {
    let rc_examples = "Rc examples".to_string();
    {
        println!("--- rc_a is created ---");
        let rc_a: Rc<String> = Rc::new(rc_examples);
        println!("Reference Count of rc_a: {}", Rc::strong_count(&rc_a));

        {
            println!("--- rc_a is cloned to rc_b ---");
            let rc_b: Rc<String> = Rc::clone(&rc_a);
            println!("Reference Count of rc_b: {}", Rc::strong_count(&rc_b));
            println!("Reference Count of rc_a: {}", Rc::strong_count(&rc_a));

            // 如果两者内部的值相等的话,则两个 `Rc` 相等
            println!("rc_a and rc_b are equal: {}", rc_a.eq(&rc_b));

            // 我们可以直接使用值的方法
            println!("Length of the value inside rc_a: {}", rc_a.len());
            println!("Value of rc_b: {}", rc_b);

            println!("--- rc_b is dropped out of scope ---");
        }
        println!("Reference Count of rc_a: {}", Rc::strong_count(&rc_a));
        println!("--- rc_a is dropped out of scope ---");
    }

    // 报错!`rc_examples` 已经移入 `rc_a`。
    // 而且当 `rc_a` 被删时,`rc_examples` 也被一起删除。
    // println!("rc_examples: {}", rc_examples);
    // 试一试 ^ 注释掉此行代码

    println!("Hello Rust");
}

// rustc main.rs
// ./main
编译运行:
PS F:\rustproject\rustbyexample\chapter19\example19_14> rustc main.rs
PS F:\rustproject\rustbyexample\chapter19\example19_14> ./main
--- rc_a is created ---
Reference Count of rc_a: 1
--- rc_a is cloned to rc_b ---
Reference Count of rc_b: 2
Reference Count of rc_a: 2
rc_a and rc_b are equal: true
Length of the value inside rc_a: 11
Value of rc_b: Rc examples
--- rc_b is dropped out of scope ---
Reference Count of rc_a: 1
--- rc_a is dropped out of scope ---
Hello Rust
PS F:\rustproject\rustbyexample\chapter19\example19_14>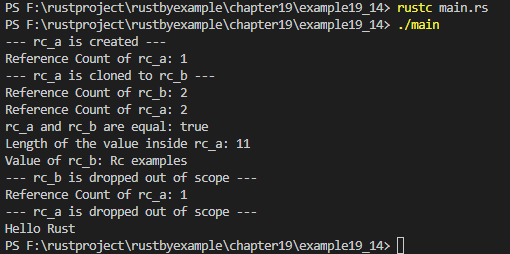
参见:
19.9 共享引用计数Arc
当线程之间所有权需要共享时,可以使用Arc(共享引用计数,Atomic Reference Counted 缩写)可以使用。这个结构通过 Clone 实现可以为内存堆中的值的位置创建一个引用指针,同时增加引用计数器。由于它在线程之间共享所有权,因此当指向某个值的最后一个引用指针退出作用域时,该变量将被删除。
// 19.9节 共享引用计数Arc

use std::sync::Arc;
use std::thread;

fn main() {
    // 这个变量声明用来指定其值的地方。
    let apple = Arc::new("the same apple");
    for _ in 0..10 {
        // 这里没有数值说明,因为它是一个指向内存堆中引用的指针。
        let apple = Arc::clone(&apple);

        thread::spawn(move || {
            // 由于使用了Arc,线程可以使用分配在 `Arc` 变量指针位置的值来生成。
            println!("{:?}", apple);
        });
    }

    println!("Hello Rust");
}

// rustc main.rs
// ./main
编译运行:
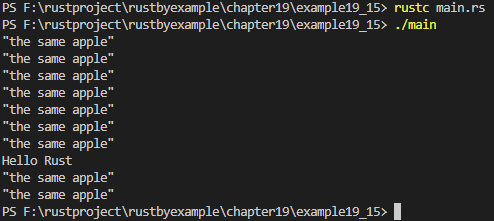
PS F:\rustproject\rustbyexample\chapter19\example19_15> rustc main.rs
PS F:\rustproject\rustbyexample\chapter19\example19_15> ./main
"the same apple"
"the same apple"
"the same apple"
"the same apple"
"the same apple"
"the same apple"
"the same apple"
Hello Rust
"the same apple"
"the same apple"
PS F:\rustproject\rustbyexample\chapter19\example19_15>