使用 ScrollView 自定义滚动视图
因为 List 不能设置 SizeToFit 的不方便,导致我们在想能否换成其他的方案进行解决呢?答案是肯定的,我们还有 ScrollView 的组件。我们使用 ScrollView 将代码修改成下面的样子。
swift
var body: some View {
    ScrollView {
        ForEach(items, id: \.self) { item in
            Text(item)
        }
    }
    .fixedSize()
}
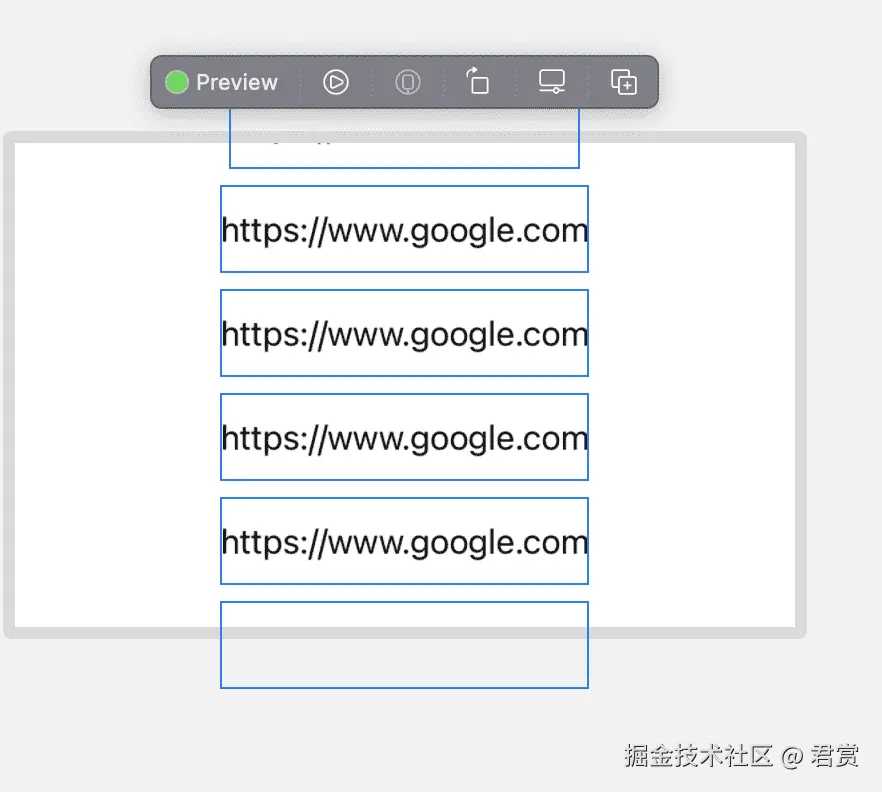
我们发现 ScrollView 是可以设置自身大小的,但是这样不行呀,我们还要求宽度是最大宽度,最大宽度是 5.5 * 44 。然后将每个元素的高度设置为 44 高度,我们看一下效果。
通过 alignment: .top 设置顶部布局
我们从预览看出来,整个 ScrollView 是让中间的内容显示出来了。我们设置 ScrollView Frame 顶部开始布局。
swift
.frame(maxWidth:.infinity,
       maxHeight: maxScrollViewHeight,
       alignment: .top)
一切都准备就绪,接下来我们来布局单个元素。
我们在 PopMenuButton.swift 的文件里面创建 PopMenuButtonItem, 之后在预览添加。这样我们就可以同时预览两个试图。
一般情况来说,不推荐一个页面预览多个试图,除非是预览测试同一个页面。最好是将不同的组件分开到不同的文件里面,因为 PopMenuButtonItem 是 PopMenuButton 的一部分,所以我们现在放在了一个文件里面。
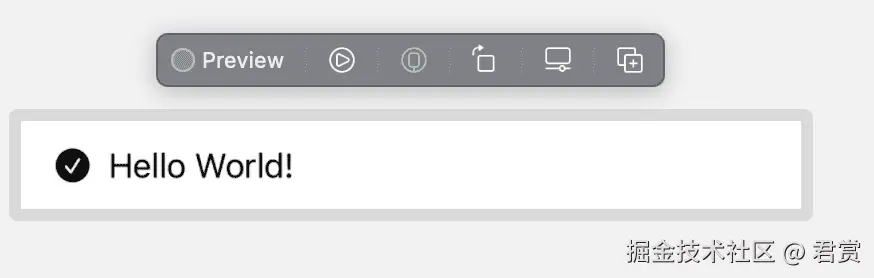
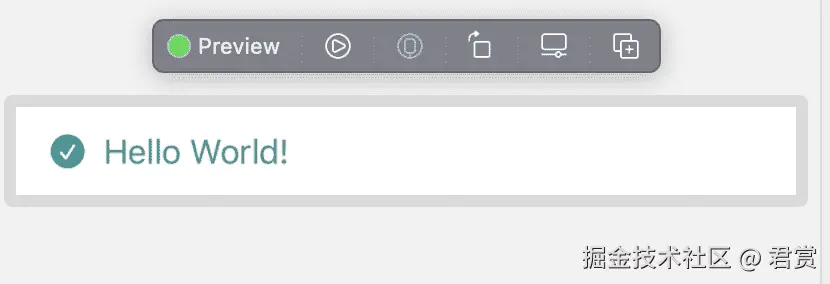
对于单个的 PopMenuButtonItem ,我们要在未选中显示文本,已选中的要显示 选中的图标 和文本。
使用系统 SF 符号
对于图标我们直接可以使用 SF 符号,对于有多少符号大家可以下载官方 SF 符号App。我们找到一个可以标识选中的图标。
将 PopMenuButtonItem 的 布局如下。
swift
struct PopMenuButtonItem: View {
    var body: some View {
        HStack {
            Image(systemName: "checkmark.circle.fill")
            Text("Hello World!")
        }
        .frame(maxWidth:.infinity,
               alignment: .leading)
        .padding()
        .frame(height:44)
    }
}
基本上已经大体的符合我们的要求了,我们再修改一下按钮的前景色和背景色,修改一些文本的前景色。
swift
struct PopMenuButtonItem: View {
    @EnvironmentObject private var appColor:AppColor
    var body: some View {
        HStack {
            Image(systemName: "checkmark.circle.fill")
                .foregroundColor(Color(uiColor: appColor.c_209090))
            Text("Hello World!")
                .foregroundColor(Color(uiColor: appColor.c_209090))
        }
        .frame(maxWidth:.infinity,
               alignment: .leading)
        .padding()
        .frame(height:44)
    }
}
将 AppColor 改造为单利方便全局监听
通过EnvironmentObject 注入,对于经常遇到使用起来十分的麻烦,我们是否可以使用单利方式。我们将 AppColor 改造成单利,之后我们验证一下。
swift
struct PopMenuButtonItem: View {
    @StateObject private var appColor:AppColor = AppColor.share
    var body: some View {
        HStack {
            Image(systemName: "checkmark.circle.fill")
                .foregroundColor(Color(uiColor: appColor.c_209090))
            Text("Hello World!")
                .foregroundColor(Color(uiColor: appColor.c_209090))
        }
        .frame(maxWidth:.infinity,
               alignment: .leading)
        .padding()
        .frame(height:44)
        .onTapGesture {
            AppColor.share.c_209090 = UIColor.red
        }
    }
}
使用 @StateObject 将对象改造为监听对象
经过测试如果直接使用 AppColor.share.c_209090 是不会根据变化更改试图的,但是如果根据 @StateObject 去使用的话是可以达到效果了。
既然使用单利可以,那么我们就去掉 @EnvironmentObject,不然后续的开发会十分的麻烦。
为了让图标不显示时候依然可以将左边位置空出来,我们设置最外层新增 HStack,并且大小设置为 20x20。
swift
HStack {
    Image(systemName: "checkmark.circle.fill")
        .foregroundColor(Color(uiColor: appColor.c_209090))
}
.frame(width: 20, height: 20)
为了让组件可以动态显示内容,我们新增一个变量用户显示文本。
swift
let title:String但是我们没法获取到我们的组件是否是选中的状态,我们再新增一个状态表示当前是否被选中。
swift
let isSelect:Bool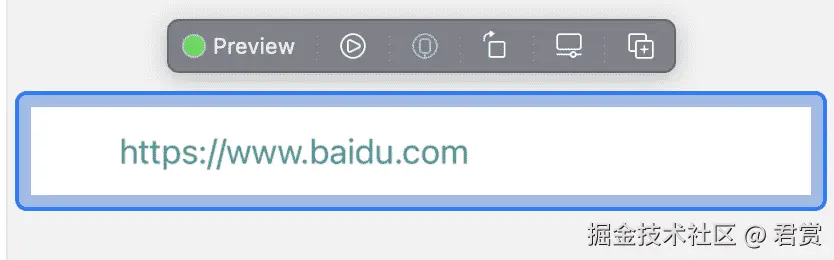
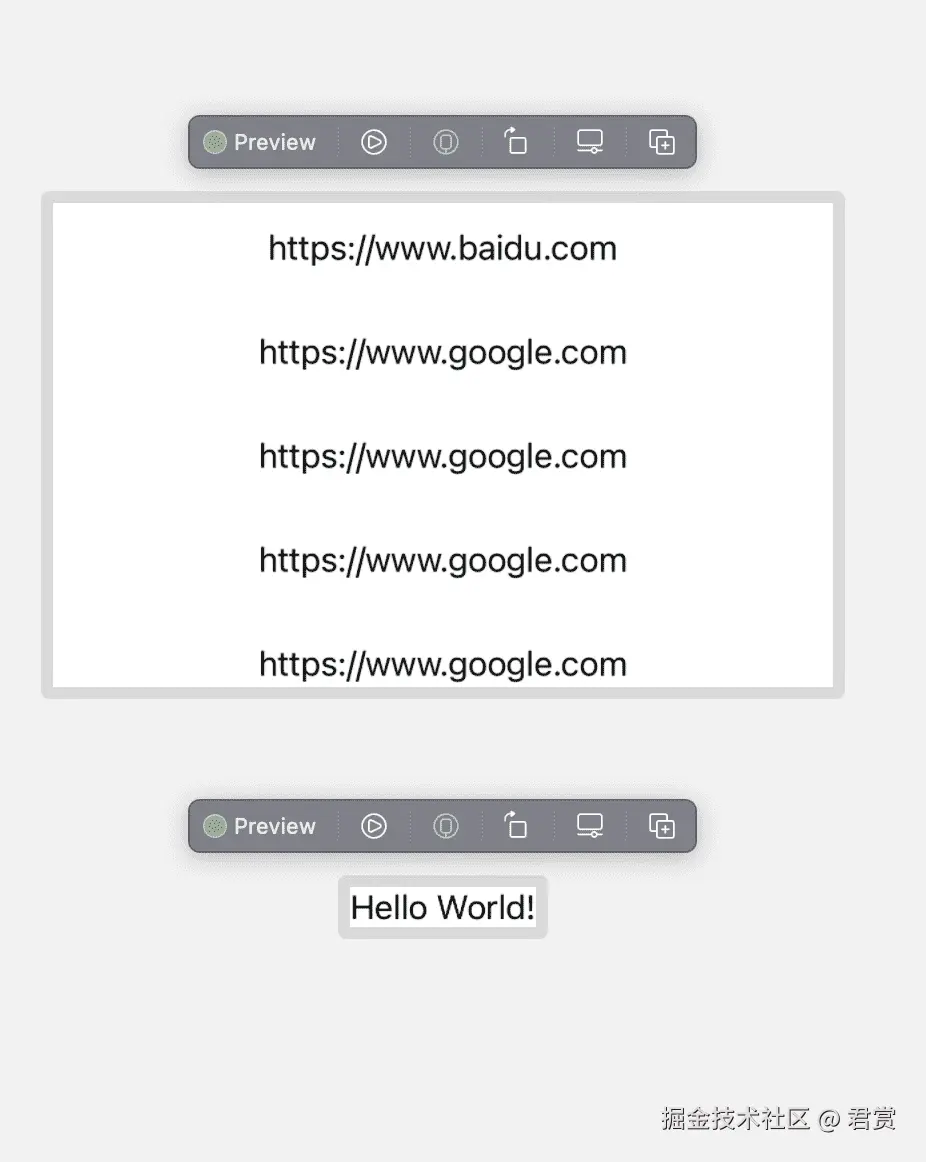
我们将新增加的 PopMenuButtonItem 用在 PopMenuButton 中,我们看一下效果。
swift
ForEach(items, id:\.self) {item in
      PopMenuButtonItem(title: item, isSelect: true)
  }
使用 @State 将基本类型改造为监听
我们在 PopMenuButton 定义一个变量代表当前选中的服务器地址。
swift
@State private var currentItem:String = ""

PopMenuButtonItem(title: item, isSelect: currentItem == item)
我们为了可以更改选中的服务器,我们给 PopMenuButtonItem 新增点击事件。
swift
.onTapGesture {
    currentItem = item
}
使用 @Binding 接收外部 @State 监听值
但是我们怎么将 currentItem 这个值及时的通知给使用者呢,这个时候我们需要用到 @Binding。
我们将代码修改如下
swift
@Binding var currentItem:String使用 @Binding 不能用于根视图刷新,根视图需要用 @State
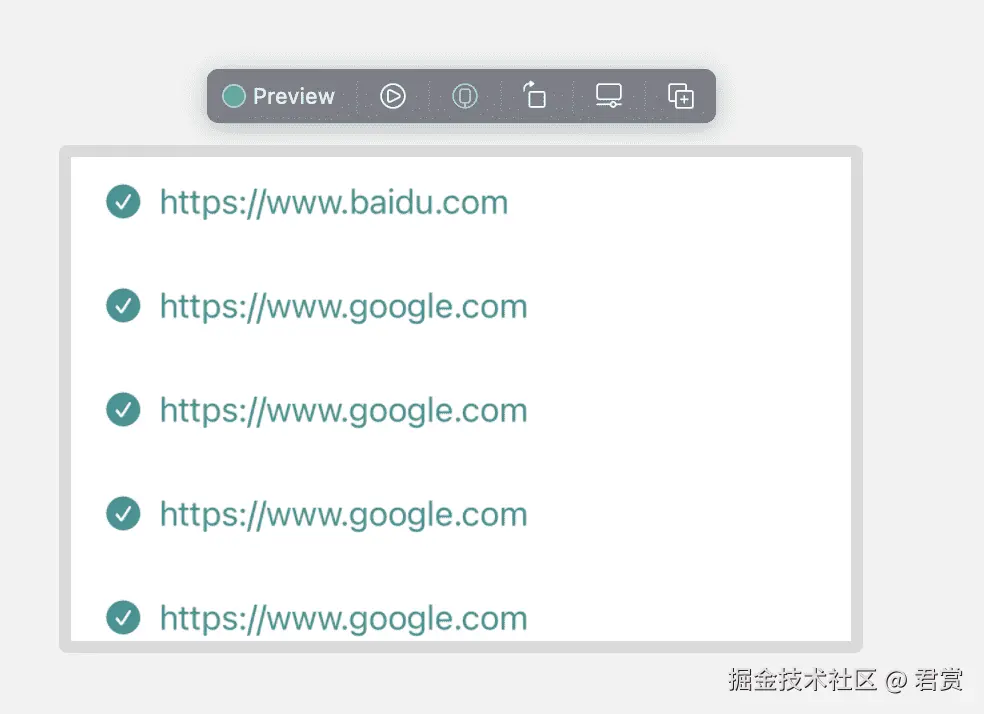
这代表使用者需要将 @State 的引用传递进来,我们在预览定义一个Static 的静态@State的变量表示当前选中的服务器变量,但是我们在预览的时候发现我们更改服务器地址刷新界面失效了。
后来谷歌之后发现,@Binding 不能在根试图进行刷新,根试图只能用 @State 进行刷新。
stackoverflow.com/questions/5...
我们需要在在外层包裹一层根试图用来传递我们需要的@State的值。
swift
struct PopMenuButtonPreviewView: View {
    @State private var currentItem:String = ""
    var body: some View {
        PopMenuButton(items: [
            "https://www.baidu.com",
            "https://www.google.com",
            "https://www.google1.com",
            "https://www.google2.com",
            "https://www.google3.com",
            "https://www.google4.com",
        ],
        currentItem: $currentItem)
    }
}
现在可以正常的完美运行了。