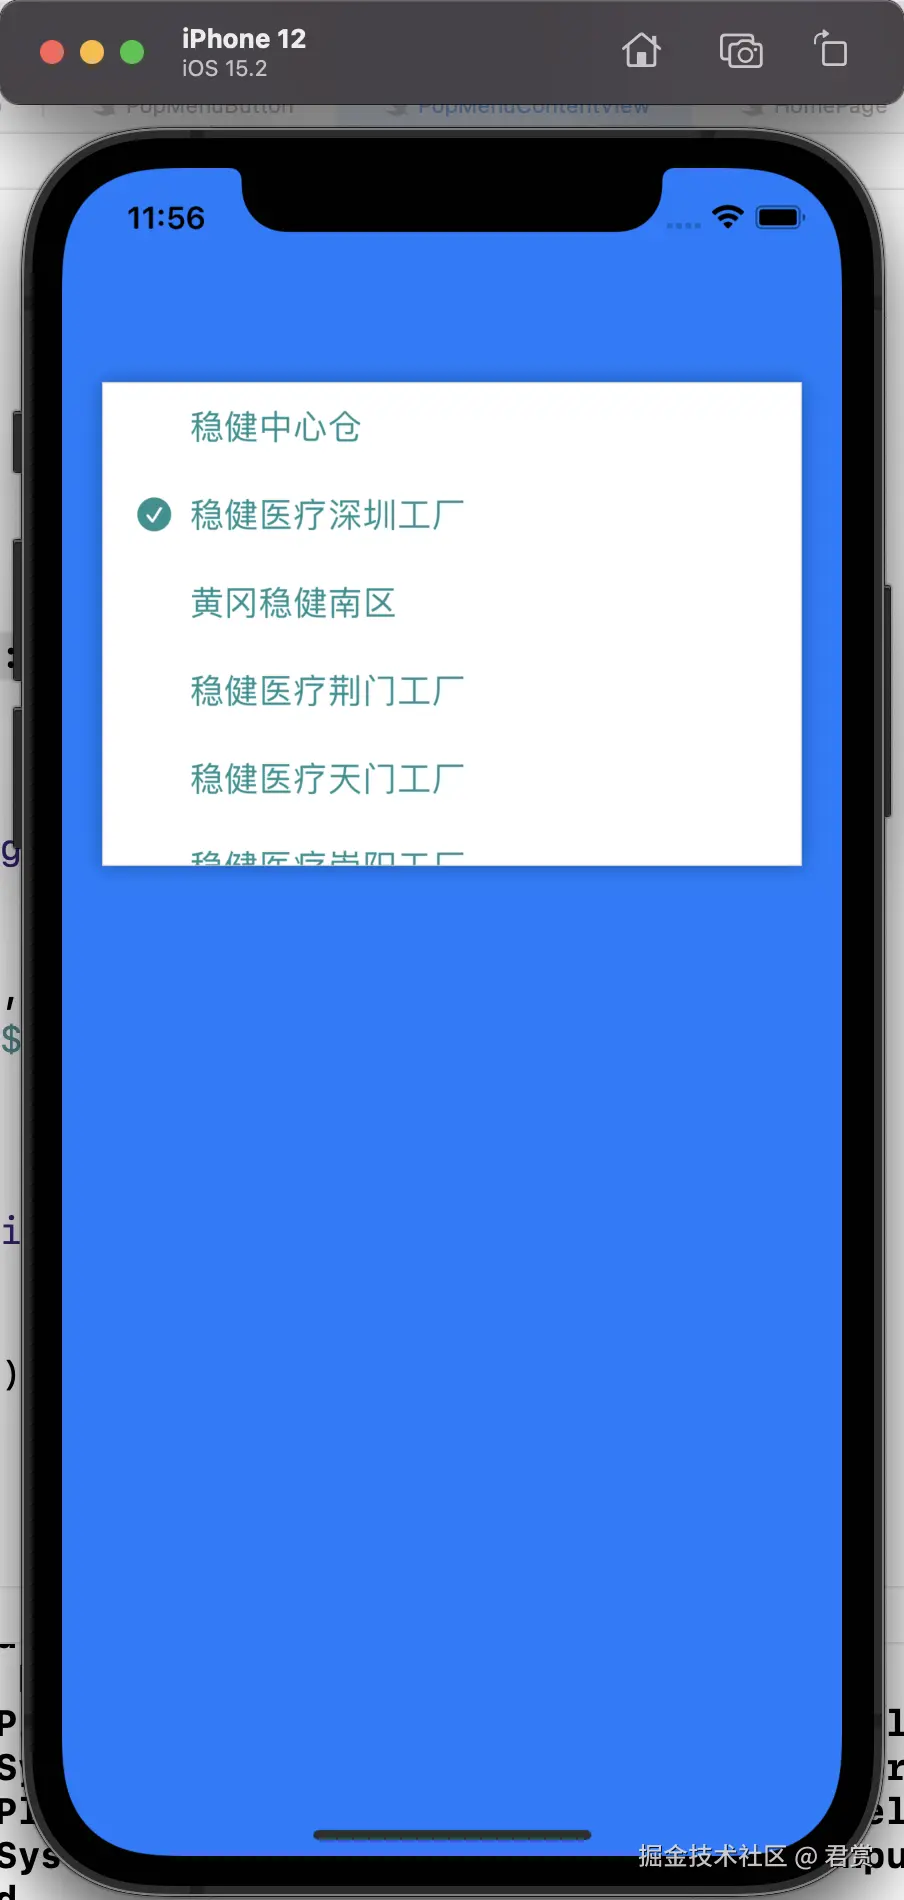
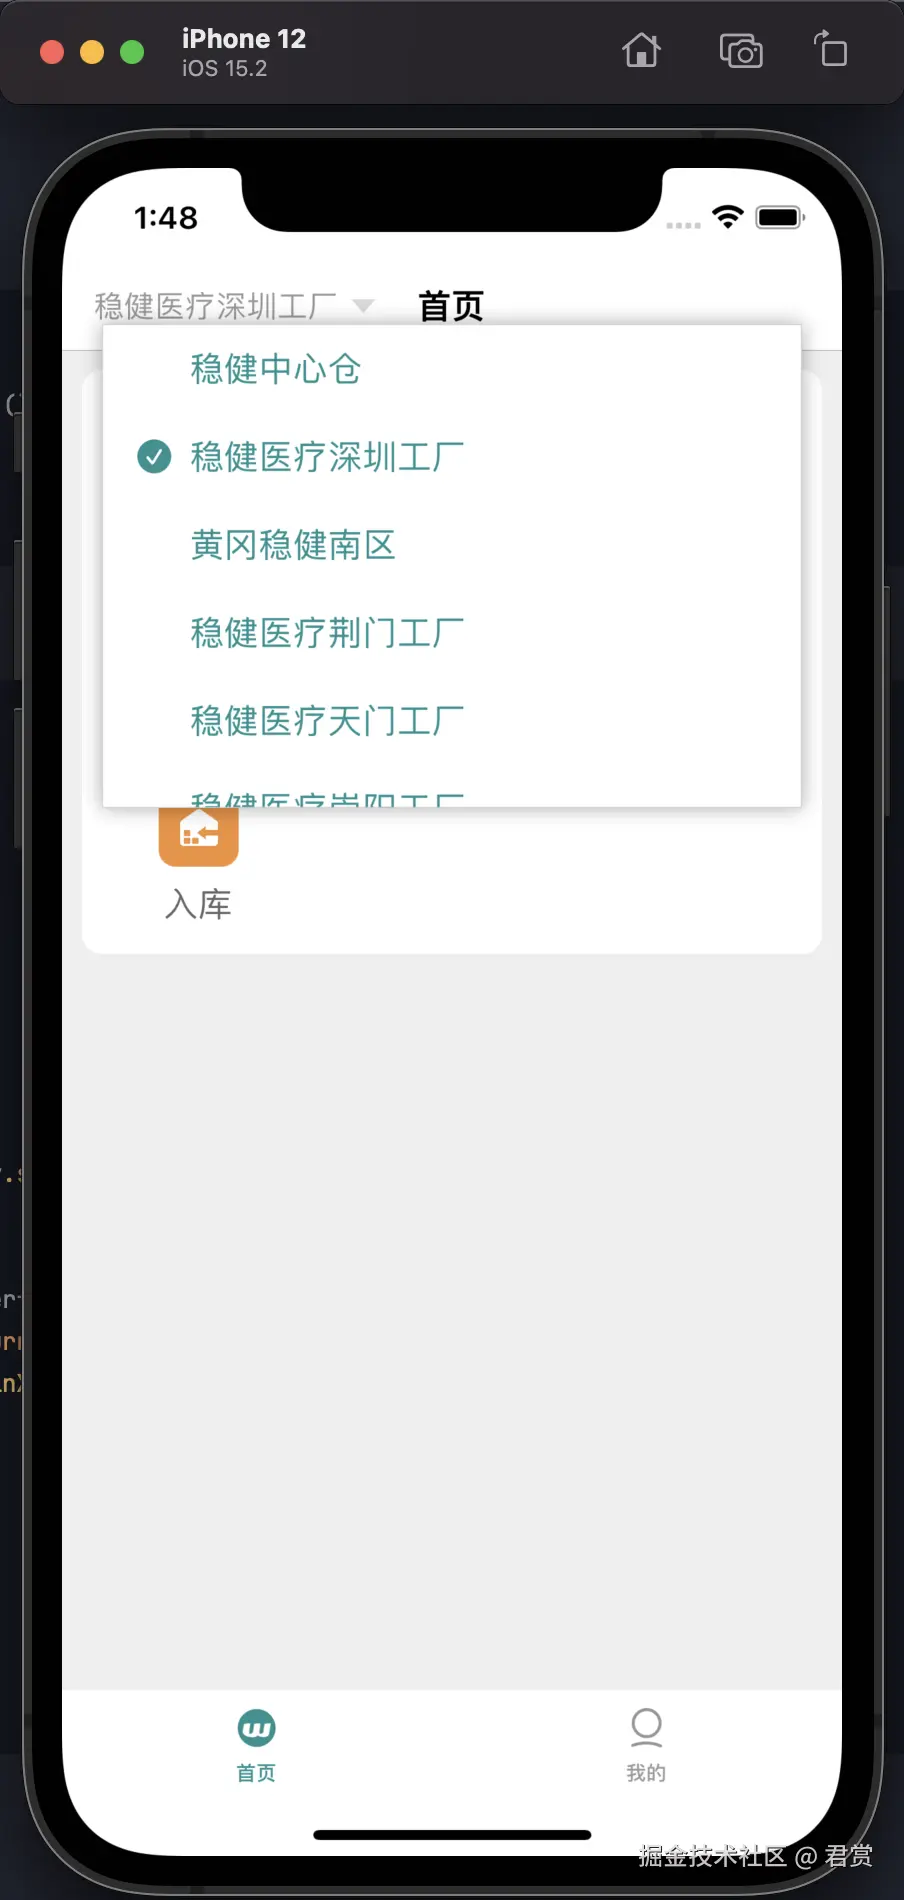
在首页切换工厂的时候,我们发现了一处严重的UI问题。
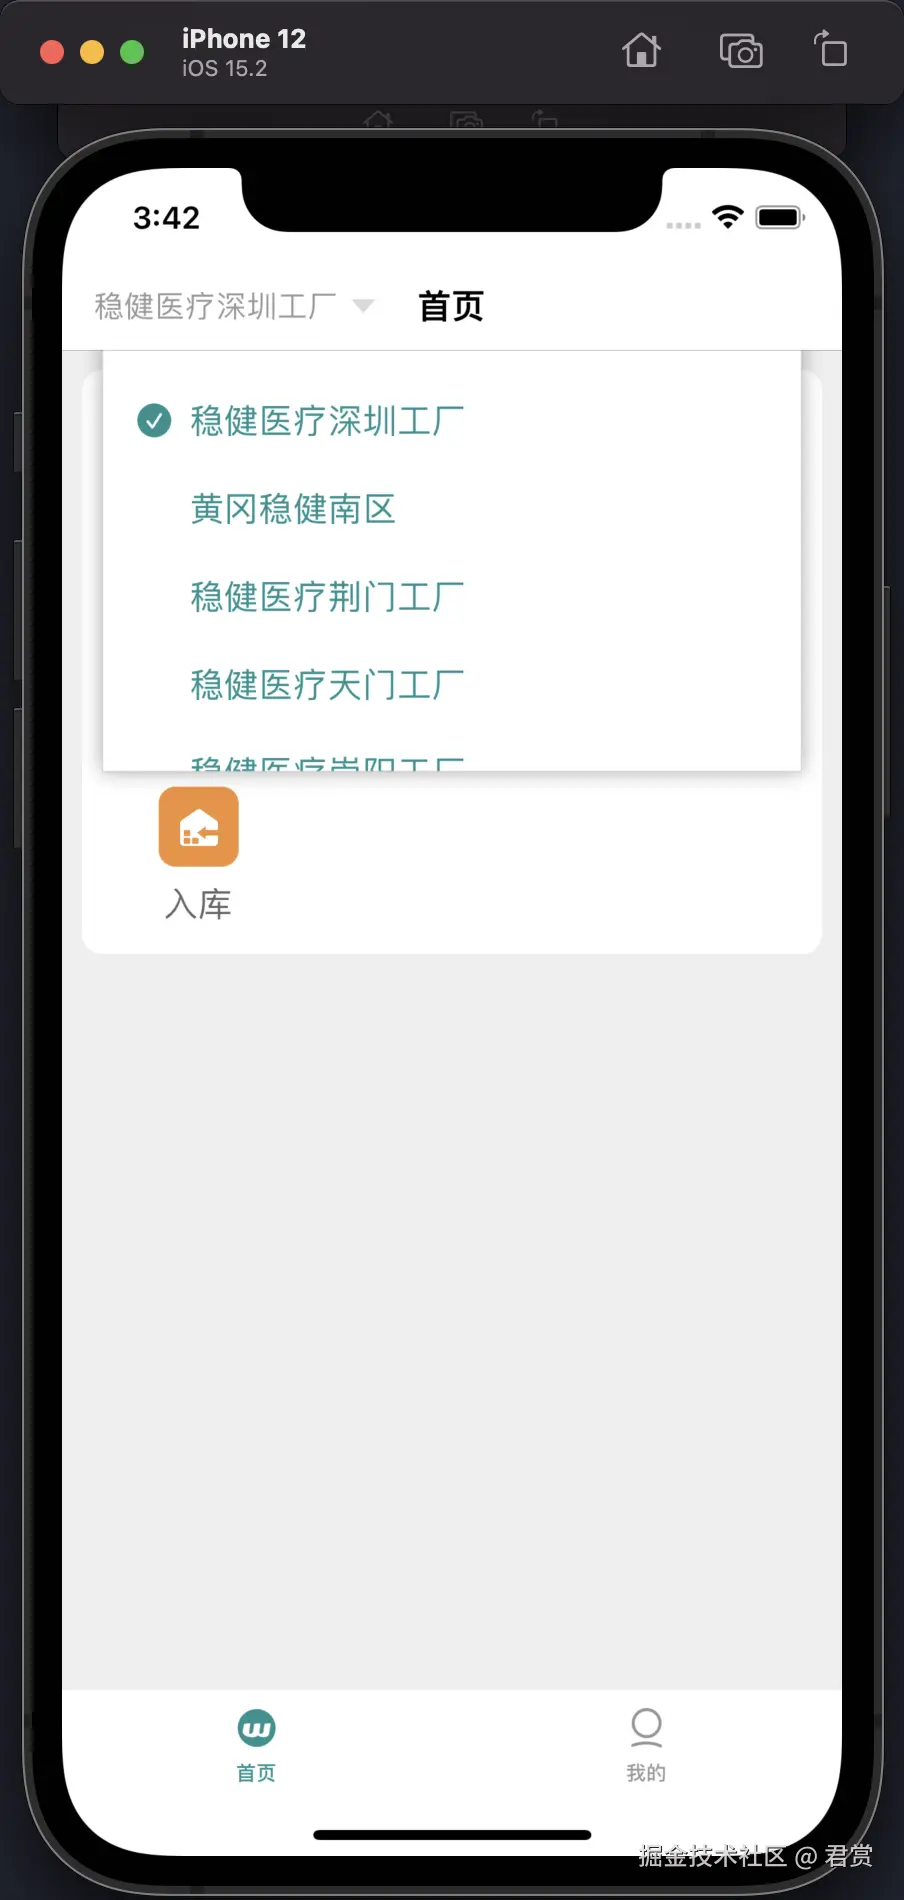
本来我们做的PopMenuButton竟然被导航栏遮挡在最下面。出现的原因在于,我们无法确保我们的PopMenuView一定在最外面,因此可能被其他外层遮挡。为了确保PopMenuView一定会在最外层弹出,我们只能弹出一个 UIViewController,这样保证一定出现在最外层。
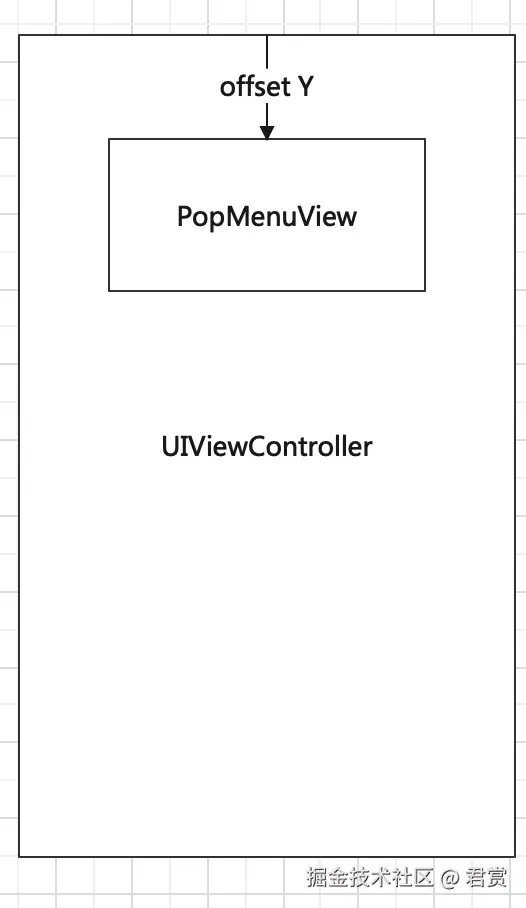
我们只需要获取到offset Y的高度即可,这个值也是PopMenuButton对应的在Golbal对应的offset y。
对于获取视图在对应视图的位置,我们可以使用GeometryReader。今天在测试通过PreferenceKey传递获取的偏移量时候,意外试验出一个BUG。
通过 PreferenceKey 获取指定视图的偏移量
1 创建 PreferenceKey
swift
struct TextPointKey: PreferenceKey {
    static var defaultValue: CGPoint = .zero
    static func reduce(value: inout CGPoint, nextValue: () -> CGPoint) {
        value = nextValue()
    }
}
2 组件获取 Point
swift
Text("Hello World!")
		/// 一般使用 `background`其实也可以使用 `overlay`
    .background {
        /// 使用  `GeometryReader` 获取父试图的大小
        GeometryReader { geometry in
            /// 使用 透明颜色 是为了不污染界面
            Color.clear
                /// 通过`GrometryProxy`的`frame`方法可以获取对应的位置
                /// 保存在 `Preference`中
                .preference(key: TextPointKey.self,
                            value: geometry.frame(in: .global).origin)
        }
    }
3 通过 onPreferenceChange 获取刚才设置的值
swift
Text("Hello World!")
		/// 一般使用 `background`其实也可以使用 `overlay`
    .background {
        ...
    }
    .onPreferenceChange(TextPointKey.self) { point in
        print(point.debugDescription)
    }
此时我们运行可以看到有下面打印信息。
shell
(148.5, 408.1666666666667)上述的方法进行使用会可能引起获取不到的Bug,关于这个Bug的研究可以看下面的文章。
\[\]: xiaozhuanlan.com/topic/74531... "关于 SwiftUI 通过 Preference 获取视图 Frame 的隐藏 BUG 探索"
获取PopMenuButton对应global的point
1 新增PreferenceKey
swift
struct PopMenuPointKey: PreferenceKey {
    static var defaultValue: [CGPoint] = []
    static func reduce(value: inout [CGPoint], nextValue: () -> [CGPoint]) {
        value.append(contentsOf: nextValue())
    }
}
2 获取选择工厂组件的Point
swift
struct HomePage: View {
    ...
    var body: some View {
        PageContentView(title: "首页",
                        viewModel: viewModel) {
            ...
        } leadingBuilder: {
            HStack(spacing:6) {
                ...
            }
            .background(content: {
                GeometryReader { geometry in
                    Color.clear
                        .preference(key: PopMenuPointKey.self, value: [geometry.frame(in: .global).origin])
                }
            })
            .onPreferenceChange(PopMenuPointKey.self, perform: { points in
                print(points.debugDescription)
            })
            ...
        } trailingBuildeder: {
            ...
        }
        ...
    }
}
shell
[(16.0, 60.0)]
[(16.000000000000007, 60.0)]
[(16.0, 60.0)]
打印了三次,打印多次,这就是使用数组的弊端吧。
保存获取到的Point
为了能够让我们弹出一个UIViewController可以定位到,我们需要将这个Point保存下来,我们需要新增一个@State变量存起来。
swift
struct HomePage: View {
		...
    @State private var popMenuButtonOffset:CGPoint = .zero
    var body: some View {
        PageContentView(title: "首页",
                        viewModel: viewModel) {
            ...
        } leadingBuilder: {
            HStack(spacing:6) {
                ...
            }
            ...
            .onPreferenceChange(PopMenuPointKey.self, perform: { points in
                guard let point = points.first else { return }
                popMenuButtonOffset = point
            })
            ...
        } trailingBuildeder: {
            EmptyView()
        }
        ...
    }
}
新增 View 展示 PopMenuView
swift
struct PopMenuContentView<T:PopMenuItem>: View {
    /// 数据源
    private let items:[T]
    /// `PopMenuButton`的`Offset`
    private let offset:CGPoint
    /// 当前选中的数据源
    @Binding private var currentItem:T
    init(items:[T],
         offset:CGPoint,
         currentItem:Binding<T>) {
        self.items = items
        self.offset = offset
        self._currentItem = currentItem
    }
    var body: some View {
        GeometryReader { geometry in
            popMenuButton
                .offset(x: 0, y: offset.y)
        }
    }

    private var popMenuButton: some View {
        PopMenuButton(items: items, currentItem: $currentItem) {item in
            currentItem = item
        }
    }
}使用UIHostingController展示工厂列表
swift
struct HomePage: View {
    ...
    @State private var popMenuButtonOffset:CGPoint = .zero
    var body: some View {
        PageContentView(title: "首页",
                        viewModel: viewModel) {
            ...
        } leadingBuilder: {
            HStack(spacing:6) {
                ...
            }
            ...
            .onTapGesture {
                let rootView = PopMenuContentView(items: viewModel.factoryList,
                                                     offset: popMenuButtonOffset,
                                                     currentItem: $viewModel.currentFactory)
                let controller = UIHostingController(rootView: rootView)
                controller.modalPresentationStyle = .overFullScreen
                controller.view.backgroundColor = .clear
                let rootWindow:UIWindow?
                if #available(iOS 13.0, *) {
                    rootWindow = UIApplication.shared.connectedScenes
                        .filter({$0.activationState == .foregroundActive})
                        .compactMap({$0 as? UIWindowScene})
                        .first?.windows
                        .filter({$0.isKeyWindow})
                        .first
                } else {
                    rootWindow = UIApplication.shared.windows.filter({$0.isKeyWindow}).first
                }
                rootWindow?.rootViewController?.present(controller, animated: false, completion: nil)
            }
        } trailingBuildeder: {
            ...
        }
        ...
    }
}封装获取Key Window的获取方法
我们在弹出了UIHostingController代码的时候,我们再次写了获取Key Window的代码,这是我们第二次用到,我们可以将获取Key Window进行封装,方便我们后续的使用。
swift
struct App {
    static var keyWindow:UIWindow? {
        if #available(iOS 13.0, *) {
            return UIApplication.shared.connectedScenes
                .filter({$0.activationState == .foregroundActive})
                .compactMap({$0 as? UIWindowScene})
                .first?.windows
                .filter({$0.isKeyWindow})
                .first
        } else {
            return UIApplication.shared.windows
                .filter({$0.isKeyWindow})
                .first
        }
    }
}替换掉工程现有获取Key Window的方法
DataPickerManager
swift
class DataPickerManager {
    ...
    /// show 方法采用 @ViewBuilder 获取自定义的视图
    func show<Content:View>(@ViewBuilder _ content:() -> Content) {
        /...
        guard let rootViewController = App.keyWindow?.rootViewController else {return}
        ...
    }
    ...
}
swift
struct HomePage: View {
    ...
    var body: some View {
        PageContentView(title: "首页",
                        viewModel: viewModel) {
            ...
        } leadingBuilder: {
            HStack(spacing:6) {
                ...
            }
            ...
            .onTapGesture {
               ...
                App.keyWindow?.rootViewController?.present(controller, animated: false, completion: nil)
            }
        } trailingBuildeder: {
            ...
        }
        ...
    }
}
修复偏移问题
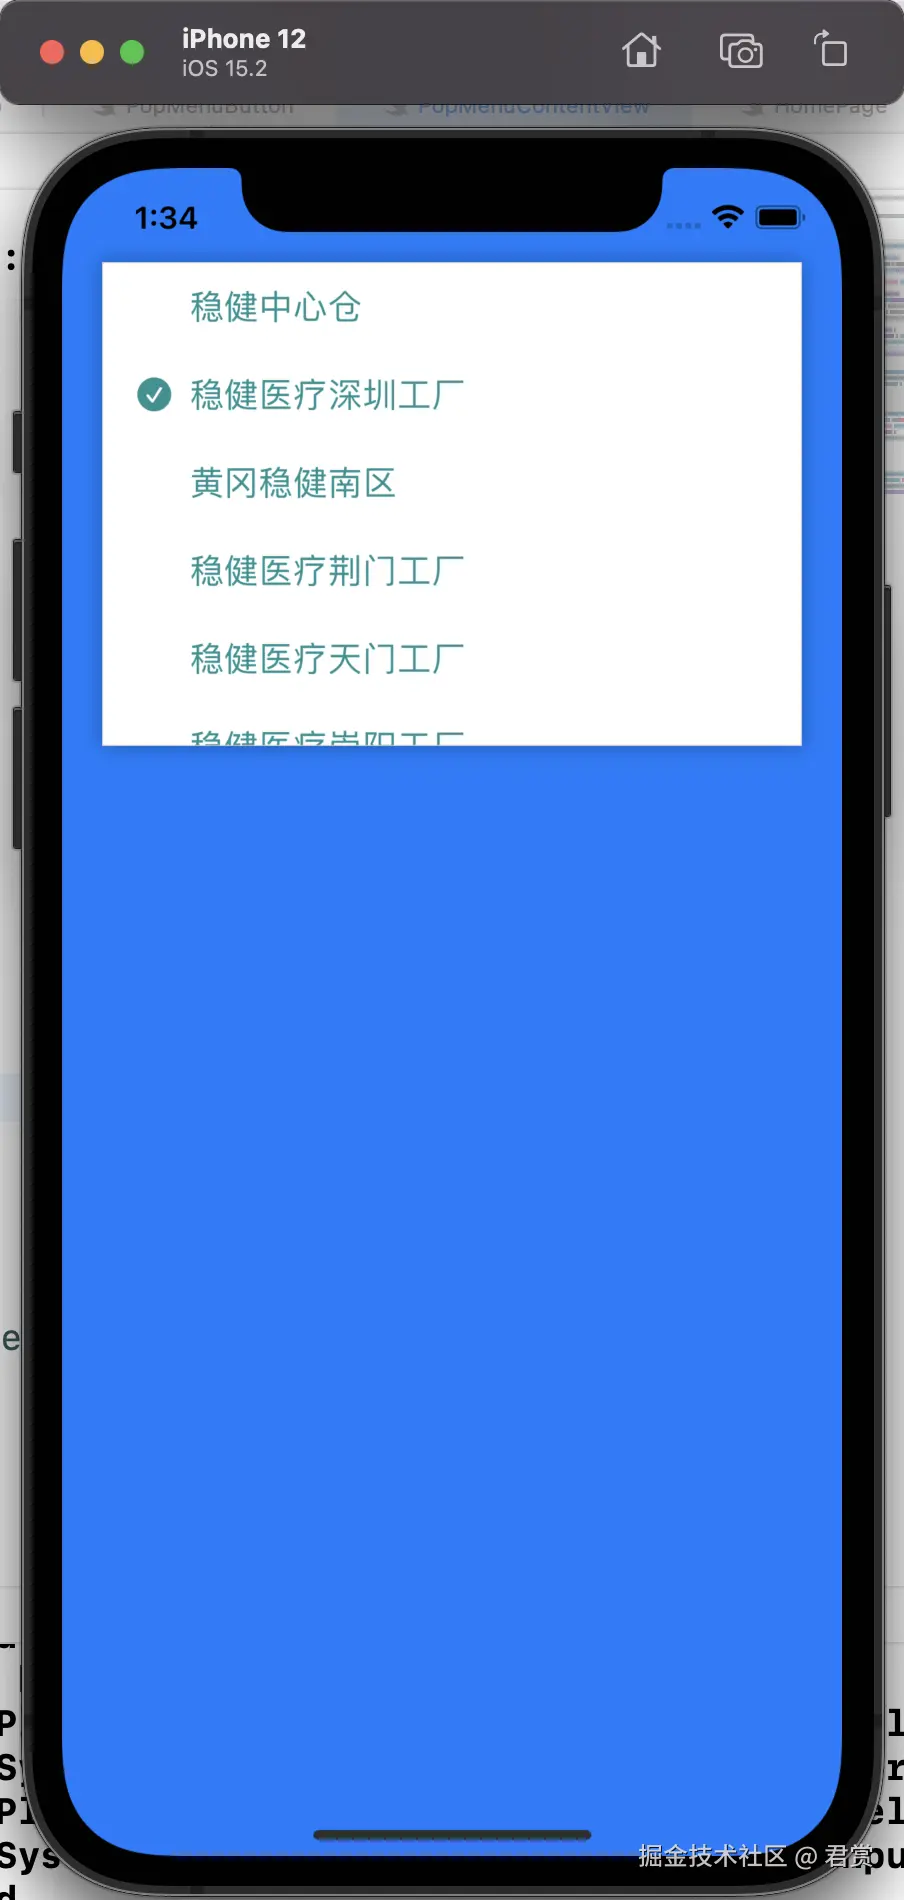
修改完毕,我们运行之后发现,这偏移的位置和也太远了。为了探明原因,我们修改一下PopMenuContentView背景颜色,看一下问题所在。
swift
struct PopMenuContentView<T:PopMenuItem>: View {
    ...
    var body: some View {
        GeometryReader { geometry in
            ...
        }
        .background(.blue)
    }

    ...
}
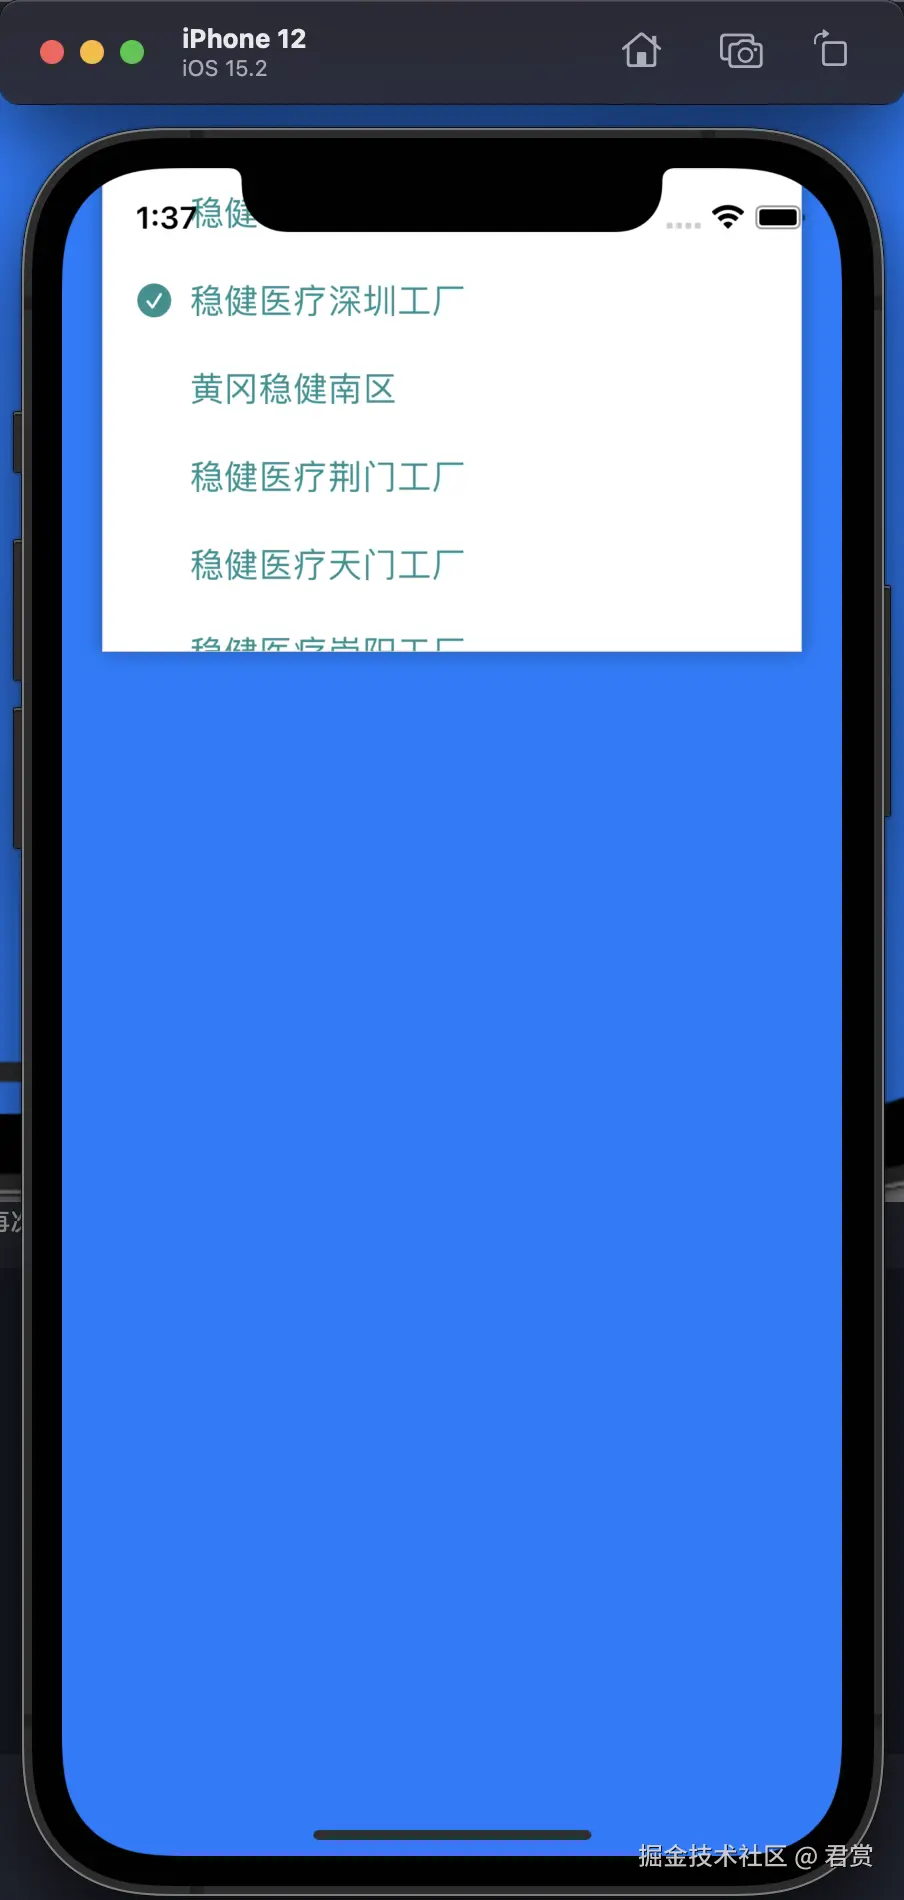
发现PopMenuContentView是完全铺满的,不是因为安全距离造成的。那是不是偏移量导致的吗?我们去掉offset.
swift
struct PopMenuContentView<T:PopMenuItem>: View {
    ...
    var body: some View {
        GeometryReader { geometry in
            popMenuButton
        }
        .background(.blue)
    }

    ...
}
我们去掉offset之后,竟然布局好像从安全距离开始的。我们就忽略掉安全距离,再次试一下。
swift
struct PopMenuContentView<T:PopMenuItem>: View {
    ...
    var body: some View {
        GeometryReader { geometry in
            popMenuButton
        }
        .ignoresSafeArea()
        .background(.blue)
    }
    ...
}
这个就符合我们的预期了。我们将代码恢复,运行,我们的组件已经布局正常了。
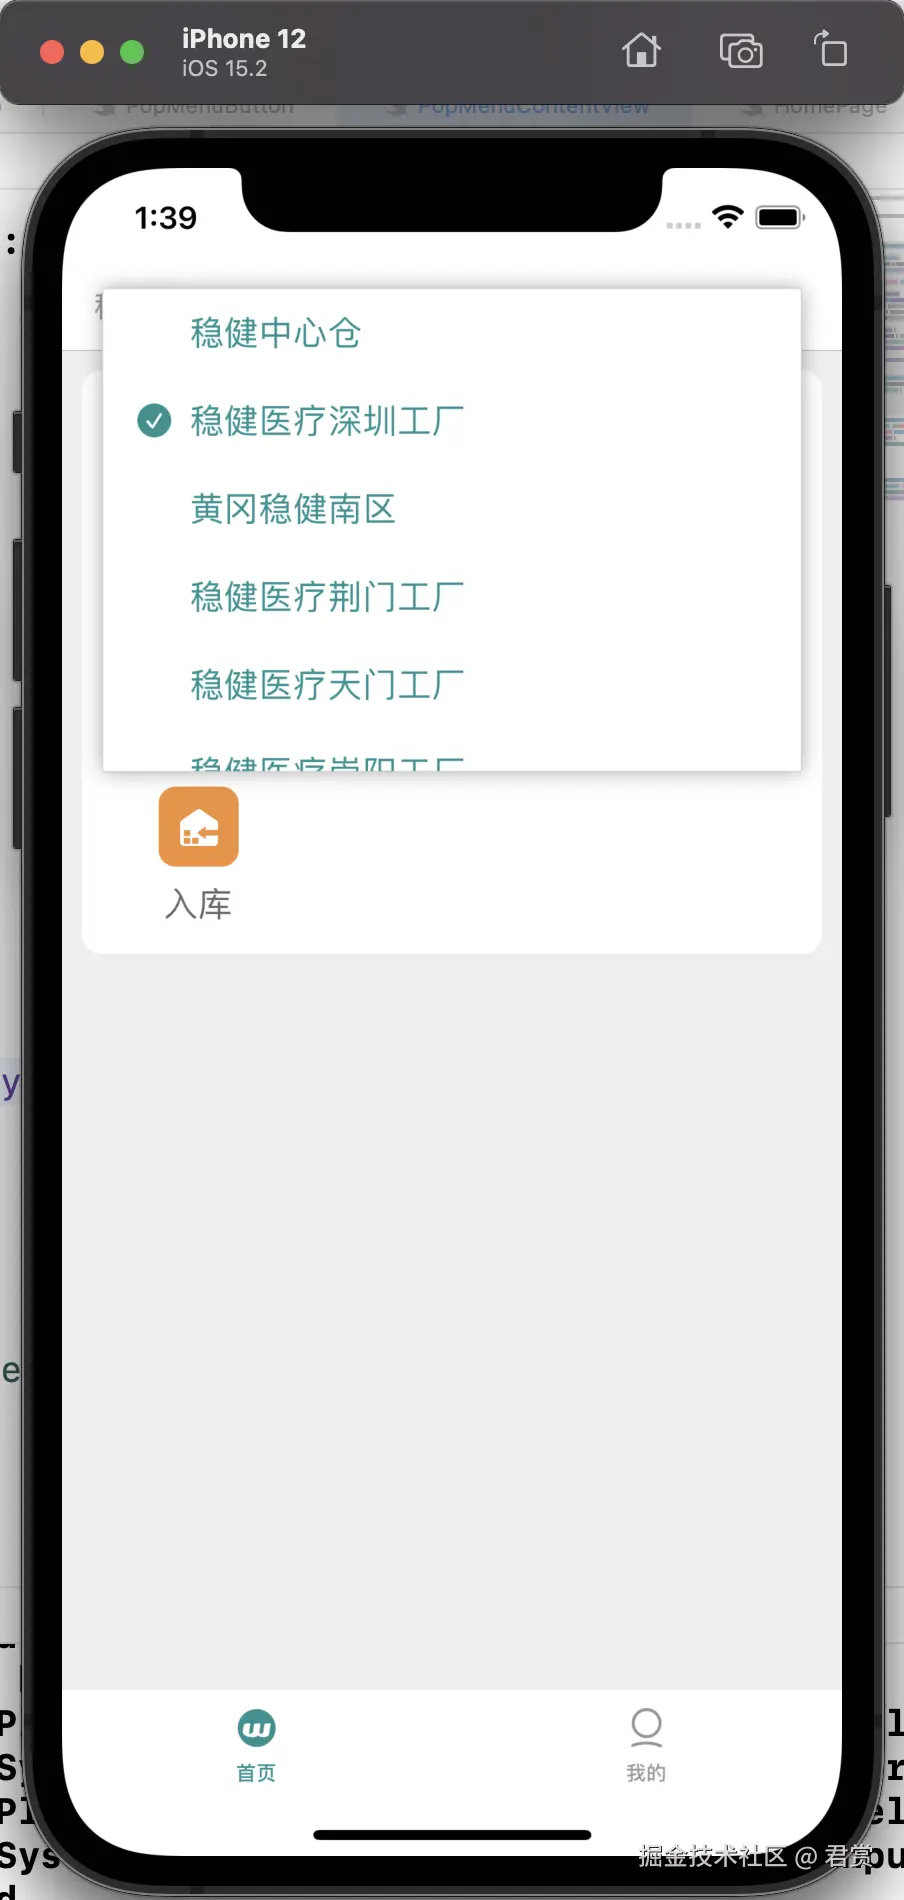
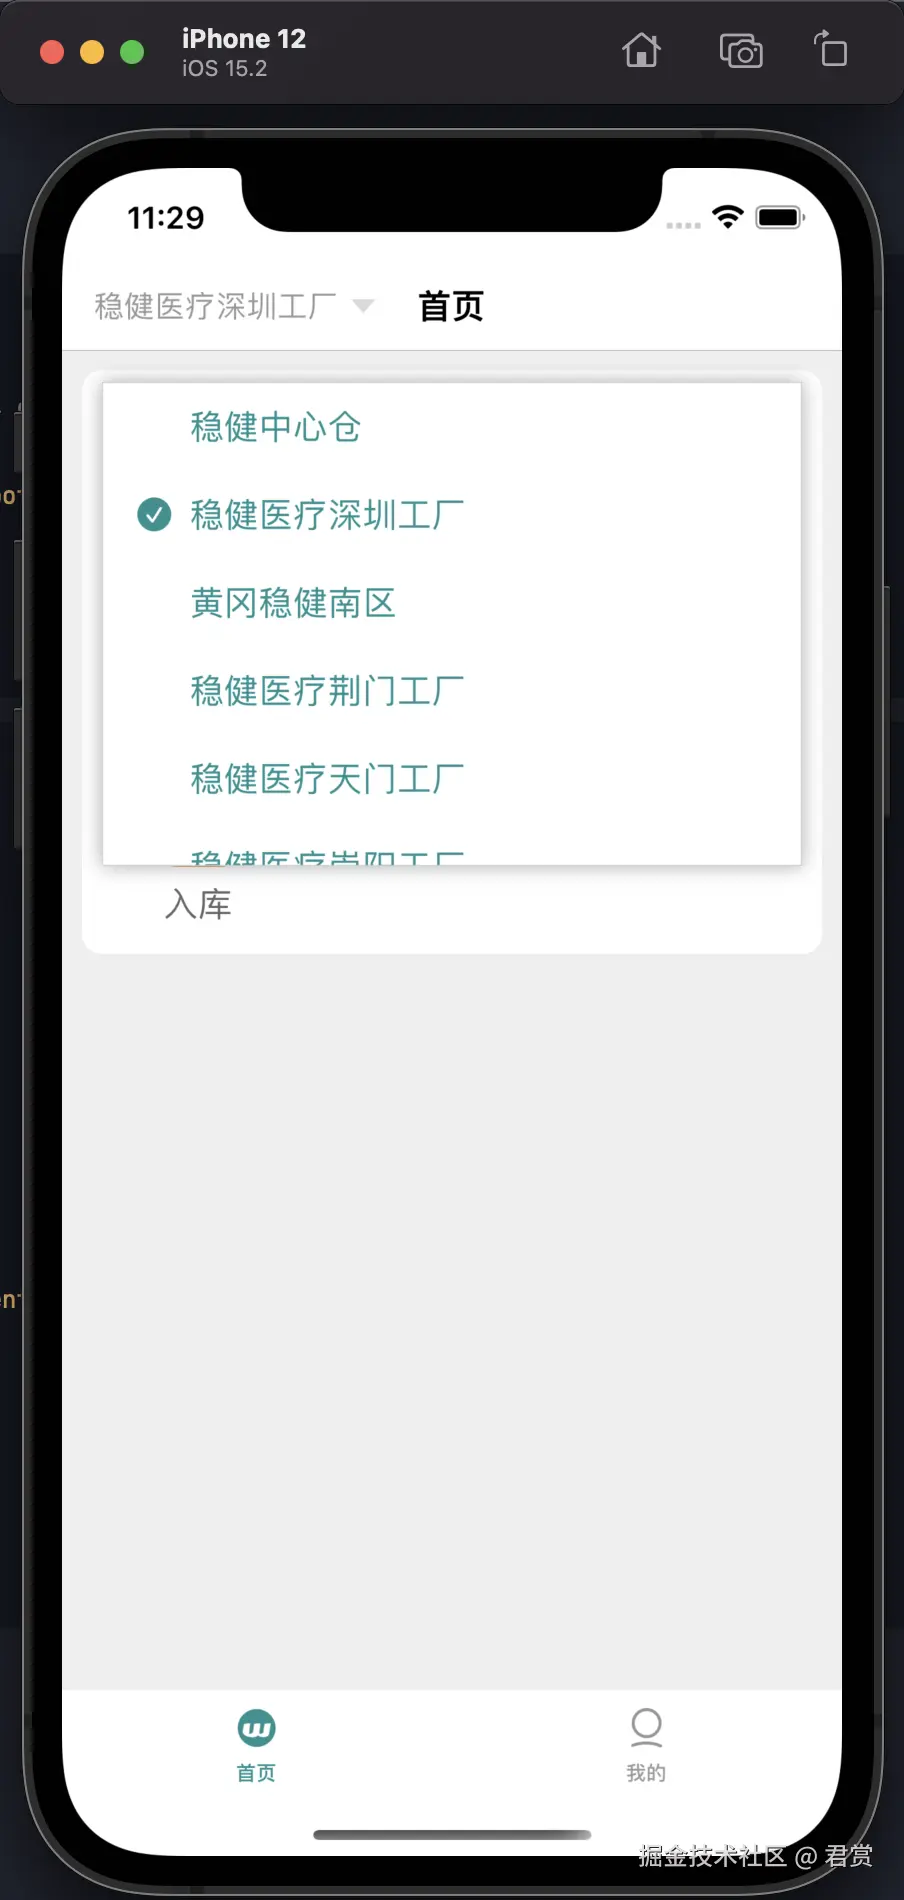
此时凭空出现的PopMenuView显得十分的突兀,我们不妨让PopMenuView显示在PopMenuButton的下来会好的多。
修改PopMenuPointKey值为[CGRect]
PopMenuPointKey
swift
struct PopMenuPointKey: PreferenceKey {
    static var defaultValue: [CGRect] = []
    static func reduce(value: inout [CGRect], nextValue: () -> [CGRect]) {
        value.append(contentsOf: nextValue())
    }
}
HomePage
swift
struct HomePage: View {
    ...
    var body: some View {
        PageContentView(title: "首页",
                        viewModel: viewModel) {
            ...
        } leadingBuilder: {
            ...
            .background(content: {
                GeometryReader { geometry in
                    Color.clear
                        .preference(key: PopMenuPointKey.self, value: [geometry.frame(in: .global)])
                }
            })
            .onPreferenceChange(PopMenuPointKey.self, perform: { rects in
                guard let rect = rects.first else { return }
                popMenuButtonOffset = CGPoint(x: rect.minX, y: rect.maxY)
            })
            ...
        } trailingBuildeder: {
            EmptyView()
        }
        ...
    }
}
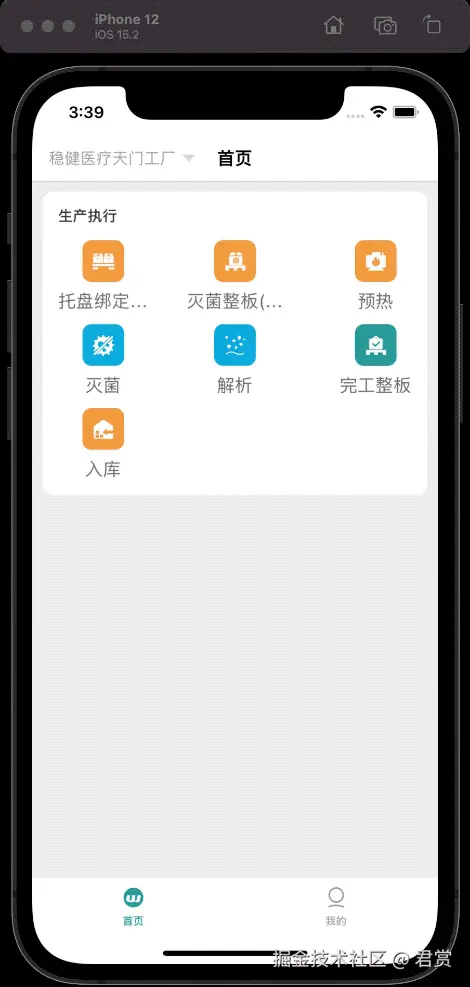
此时我们的界面看起来好一些,但是还是很丑。
封装PopMenu
刚才经过我们一阵的修改,功能实现了,但是需要实现这个功能,需要改很多的东西。最好体验就是封装一个组件,可以自定义PopMenuButton和自定义PopMenuView。通过一个变量控制UIHostingController显示和隐藏。
类似这样伪代码
swift
Button("show Menu")
.popMenu(isShow:$isShow) {
	PopMenuView
}改造PopMenuContentView
我们要做的让PopMenuContentView现实的内容可以用户自定义,参数offset保持不变。
swift
struct PopMenuContentView<Content:View>: View {
    ...
    /// 内容视图
    private let content:Content
    init(offset:CGPoint, @ViewBuilder content:() -> Content) {
        ...
        self.content = content()
    }
    var body: some View {
        GeometryReader { geometry in
            content
                ...
        }
        ...
    }
}封装.popMenu方法
swift
struct PopMenuViewModify: ViewModifier {
    @Binding private var isShow:Bool
    init(isShow:Binding<Bool>) {
        _isShow = isShow
    }
    func body(content: Content) -> some View {
        content
            .background(content: {
                GeometryReader { geometry in
                    Color.clear
                        .preference(key: PopMenuPointKey.self, value: [geometry.frame(in: .global)])
                }
            })
    }
}保存获取到的Frame
swift
struct PopMenuViewModify: ViewModifier {
    ...
    /// `PopMenuButton`的`Frame`
    @State private var contentFrame:CGRect = .zero
    ...
    func body(content: Content) -> some View {
        content
            ...
            .onPreferenceChange(PopMenuPointKey.self) { rects in
                guard let rect = rects.first else {return}
                contentFrame = rect
            }
    }
}通过onChange监听isShow值的变动
swift
struct PopMenuViewModify: ViewModifier {
    ...
    func body(content: Content) -> some View {
        content
            ...
            .onChange(of: isShow) { newValue in
                if newValue {
                    /// 展示 `UIHostingController`
                } else {
                    /// 隐藏 `UIHostingController`
                }
            }
    }
}
新增一个 @ViewBuilder设置 PopMenuView
swift
struct PopMenuViewModify<PopMenuView:View>: ViewModifier {
    ...
    /// 自定义 `PopMenuView`的闭包
    private let contentBlock:() -> PopMenuView
    init(isShow:Binding<Bool>,
         @ViewBuilder content:@escaping () -> PopMenuView) {
        ...
        contentBlock = content
    }
    func body(content: Content) -> some View {
        ...
    }
}
展示 UIHostingController
swift
struct PopMenuViewModify<PopMenuView:View>: ViewModifier {
    ...
    func body(content: Content) -> some View {
        content
            ...
            .onChange(of: isShow) { newValue in
                if newValue {
                    /// 展示 `UIHostingController`
                    show()
                } else {
                    /// 隐藏 `UIHostingController`
                }
            }
    }

    private func show() {
        let offset = CGPoint(x: contentFrame.minX, y: contentFrame.maxY)
        let rootView = PopMenuContentView(offset: offset, content: {
            contentBlock()
        })
        let controller = UIHostingController(rootView: rootView)
        controller.modalPresentationStyle = .overFullScreen
        controller.view.backgroundColor = .clear
        App.keyWindow?.rootViewController?.present(controller,
                                                   animated: false,
                                                   completion: nil)
    }
}
隐藏 UIHostingController
当我们进行隐藏时候发现,我们此时已经拿不到当前弹出的视图。
通过 presentedViewController获取当前弹出的 UIHostingController
swift
var presentedViewController: UIViewController? { get }当您使用 present(_:animated:completion:) 方法以模态方式(显式或隐式)呈现视图控制器时,调用该方法的视图控制器将此属性设置为它呈现的视图控制器。 如果当前视图控制器没有以模态方式呈现另一个视图控制器,则此属性中的值为 nil。
swift
struct PopMenuViewModify<PopMenuView:View>: ViewModifier {
    ...
    private func dismiss() {
        let controller = App.keyWindow?.rootViewController?.presentedViewController
        controller?.dismiss(animated: false, completion: nil)
    }
}
封装 View 的扩展
swift
extension View {
    func popMenu<PopMenuView:View>(isShow:Binding<Bool>,
                                   @ViewBuilder content:@escaping () -> PopMenuView) -> some View {
        let modify = PopMenuViewModify(isShow: isShow, content: content)
        return self.modifier(modify)
    }
}将封装好的PopMenu组件替换首页工厂功能
swift
struct HomePage: View {
    ...
    @State private var isShowFactoryMenu:Bool = false
    ...
    var body: some View {
        PageContentView(title: "首页",
                        viewModel: viewModel) {
            ...
        } leadingBuilder: {
            HStack(spacing:6) {
                ...
            }
            .popMenu(isShow: $isShowFactoryMenu, content: {
                PopMenuButton(items: viewModel.factoryList,
                              currentItem: $viewModel.currentFactory) { item in
                    viewModel.currentFactory = item
                    isShowFactoryMenu = false
                }
            })
            .onTapGesture {
                isShowFactoryMenu = true
            }
        } trailingBuildeder: {
            ...)
        }
        ...
    }
}
发现我们使用起来更加的简单方便。
修改登录页面选择服务器组件
swift
struct LoginPage: View {
    ...
    @StateObject private var appConfig:AppConfig = AppConfig.share

    var body: some View {
        ... {
            ... {
                ...
                ... {
                    ServerSelectMenuView()
                        ...
                        .popMenu(isShow: $viewModel.isShowServerMenu) {
                            PopMenuButton(items: viewModel.supportServerUrls,
                                          currentItem: $appConfig.currentAppServer) { item in
                                appConfig.currentAppServer = item
                                viewModel.isShowServerMenu = false
                            }
                        }
                        .onTapGesture {
                            viewModel.isShowServerMenu = true
                        }
                    ...
                }
                ...
            }
            ...
        }
        ...
    }
}