前言
《实践论》中讲认识从实践始,经过实践得到了理论的认识,还须再回到实践去。
理论的东西之是否符合于客观真理性这个问题,在前面说的由感性到理性之认识运动中是没有完全解决的,也不能完全解决的。
要完全地解决这个问题,只有把理性的认识再回到社会实践中去,应用理论于实践,看它是否能够达到预想的目的。
时间轴
根据mdn文档所述,canvas有最大的宽高的限制
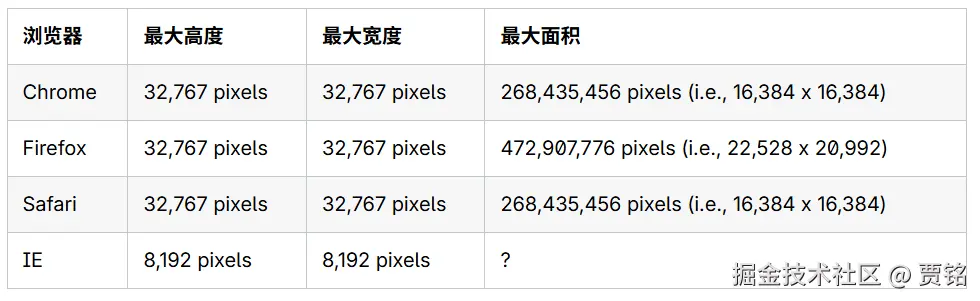
我们的视频缩略图和音频波形图是通过canvas绘制的,如果缩放时间轴,可能会超过这个最大宽度(画布会崩溃)
有如下方案:
- 无界云剪是将缩略图通过图片拼接成一个很长的图片
- 剪映是通过将canvas固定在一个最大宽度内,然后通过滚动+translate使canvas一直显示在视口
- clideo是拆分成多个canvas
- pro.diffusion.studio是整个时间轴通过canvas绘制出来
本文最终选取使用canvas把整个时间轴画出来这种方案
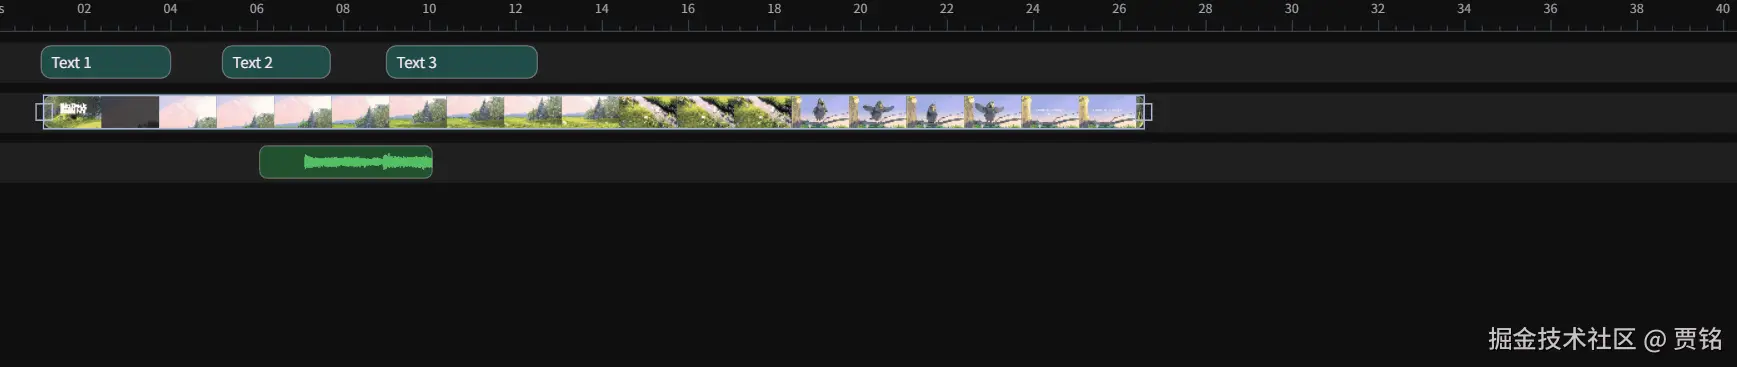
本文最终实现的效果如下
- 时间轴缩放(ctrl+滑轮)
- 视频轴、音频轴、文本轴的裁剪
- 轨道的对齐
- 视频缩略图、音频波形图的实现
视频轨道
本节将实现基本的视频轨道绘制、视频缩略图的绘制

本节将使用上一篇文章介绍的mediabunny来进行视频抽帧
mediabunny最大的亮点是:将webcodecs回调模式读取VideoFrame转换为迭代器模式
tsx
  const sink = new CanvasSink(videoTrack, {
    width: this.thumbnailWidth,
    height: Math.round(thumbHeight),
    fit: 'contain'
  });
  for (let t = 0; t <= this.duration; t += DEFAULT_THUMBNAIL_STEP) {
    const result = await sink.getCanvas(t);
}我们选取1s为间隔抽取缩略图,并将缩略图转为ImageBitmap存在map中(这一步还能进行优化,可以将ImageBitmap降低分辨率,可以节省更多内存)
时间轴进行缩放时,取最近的缓存时间点缩略图,避免重复解码
tsx
const key = Math.round(time / step) * step;
const img = this.thumbnailCache.get(key);
完整代码如下:
tsx
import { Rect } from 'fabric';
import { ALL_FORMATS, BlobSource, CanvasSink, Input } from 'mediabunny';
import { ClipType } from '../types';

/** 默认缩略图高度(像素) */
const DEFAULT_THUMBNAIL_HEIGHT = 52;
/** 默认视频宽高比 */
const DEFAULT_ASPECT_RATIO = 16 / 9;
/** 缩略图抽帧步长(秒) */
const DEFAULT_THUMBNAIL_STEP = 1;
/** 默认视频 URL */
const DEFAULT_VIDEO_URL = new URL(
  '../../../assets/test.mp4',
  import.meta.url
).toString();
/** 视频背景色 */
const VIDEO_BACKGROUND = '#1e1b4b';
/** 边框颜色 */
const BORDER_COLOR = 'rgba(255,255,255,0.3)';
/** 边框宽度 */
const BORDER_WIDTH = 1;

type VideoClipOptions = {
  id: string;
  left: number;
  top: number;
  width: number;
  height: number;
  src?: string;
};

export class VideoClip extends Rect {
  clipType: ClipType = 'video';
  elementId: string;
  /** 视频资源地址 */
  src: string;
  /** 视频源总时长(秒),用于裁剪边界约束 */
  sourceDuration = 0;
  /** 当前裁剪起点(秒),相对视频源时间轴 */
  trimStart = 0;
  /** 当前裁剪终点(秒),相对视频源时间轴 */
  trimEnd = 0;
  /** 预解码的缩略图列表与缓存 */
  private thumbnails: Array<{ time: number; image: CanvasImageSource }> = [];
  private thumbnailCache = new Map<number, CanvasImageSource>();
  /** 避免重复请求与解码 */
  private isLoading = false;
  /** 视频真实时长 */
  private duration = 0;
  /** 真实宽高比(用于缩略图铺排) */
  private aspectRatio = DEFAULT_ASPECT_RATIO;
  /** 单张缩略图宽度(像素) */
  private thumbnailWidth = 0;

  constructor(options: VideoClipOptions) {
    super({
      left: options.left,
      top: options.top,
      width: options.width,
      height: options.height,
      fill: VIDEO_BACKGROUND,
      stroke: null,
      strokeWidth: 0,
      rx: 6,
      ry: 6,
      selectable: true,
      hasControls: true,
      lockRotation: true,
      lockScalingY: true,
      lockScalingFlip: true,
      objectCaching: false,
      hoverCursor: 'move'
    });

    this.elementId = options.id;
    this.src = options.src ?? DEFAULT_VIDEO_URL;
    this.thumbnailWidth = Math.max(
      1,
      Math.round(
        (options.height || DEFAULT_THUMBNAIL_HEIGHT) * this.aspectRatio
      )
    );

    // 仅保留左右缩放控制点
    this.setControlsVisibility({
      tl: false,
      tr: false,
      bl: false,
      br: false,
      mt: false,
      mb: false,
      mtr: false,
      ml: true,
      mr: true
    });

    // 初始化缩略图加载,完成后会触发重绘
    this.loadThumbnails();
  }

  async loadThumbnails() {
    if (this.isLoading) return;
    this.isLoading = true;
    try {
      const response = await fetch(this.src);
      const blob = await response.blob();
      const input = new Input({
        formats: ALL_FORMATS,
        source: new BlobSource(blob)
      });

      // 读取视频真实时长,并同步裁剪边界
      this.duration = (await input.computeDuration()) || 0;
      this.sourceDuration = this.duration;
      // 初始化 trimEnd 为源时长,避免裁剪窗口超出视频长度
      if (this.trimEnd === 0 || this.trimEnd > this.sourceDuration) {
        this.trimEnd = this.sourceDuration;
      }
      // 若 trimStart 越界,则回退到 0
      if (this.trimStart > this.trimEnd) {
        this.trimStart = 0;
      }
      const videoTrack = await input.getPrimaryVideoTrack();
      if (!videoTrack) return;

      const canDecode = await videoTrack.canDecode();
      if (!canDecode) return;

      if (videoTrack.displayWidth && videoTrack.displayHeight) {
        this.aspectRatio = videoTrack.displayWidth / videoTrack.displayHeight;
      }

      const thumbHeight = this.height || DEFAULT_THUMBNAIL_HEIGHT;
      this.thumbnailWidth = Math.max(
        1,
        Math.round(thumbHeight * this.aspectRatio)
      );

      const sink = new CanvasSink(videoTrack, {
        width: this.thumbnailWidth,
        height: Math.round(thumbHeight),
        fit: 'contain'
      });

      // 均匀采样缩略图并缓存,避免每次 render 重复解码
      const thumbnails: Array<{ time: number; image: CanvasImageSource }> = [];
      const thumbnailCache = new Map<number, CanvasImageSource>();
      for (let t = 0; t <= this.duration; t += DEFAULT_THUMBNAIL_STEP) {
        const result = await sink.getCanvas(t);
        if (!result) continue;
        const canvas = result.canvas;
        const image = await createImageBitmap(canvas);
        const time = result.timestamp ?? t;
        thumbnails.push({ time, image });
        const key =
          Math.round(time / DEFAULT_THUMBNAIL_STEP) * DEFAULT_THUMBNAIL_STEP;
        thumbnailCache.set(key, image);
      }

      this.thumbnails = thumbnails;
      this.thumbnailCache = thumbnailCache;
      this.canvas?.requestRenderAll();
    } catch (error) {
      console.error('VideoClip loadThumbnails error:', error);
    } finally {
      this.isLoading = false;
    }
  }

  _render(ctx: CanvasRenderingContext2D) {
    ctx.save();

    // 反向缩放,让绘制逻辑用屏幕像素坐标
    const scaleX = this.scaleX || 1;
    const scaleY = this.scaleY || 1;
    ctx.scale(1 / scaleX, 1 / scaleY);

    const width = (this.width || 0) * scaleX;
    const height = (this.height || 0) * scaleY;
    const radius = this.rx || 6;

    // 以圆角矩形作为裁剪区域
    ctx.beginPath();
    ctx.roundRect(-width / 2, -height / 2, width, height, radius);
    ctx.clip();

    // 绘制底色,缩略图缺失时仍有可视背景
    ctx.fillStyle = VIDEO_BACKGROUND;
    ctx.fillRect(-width / 2, -height / 2, width, height);

    if (this.thumbnails.length > 0 && width > 0 && height > 0) {
      // 以裁剪窗口作为缩略图采样范围
      const trimStart = Math.max(0, this.trimStart || 0);
      const trimEnd = Math.max(trimStart, this.trimEnd || 0);
      const trimDuration = trimEnd - trimStart;
      if (trimDuration <= 0) {
        ctx.restore();
        return;
      }
      // 依据显示高度与视频宽高比计算单张缩略图宽度
      const thumbWidth = Math.max(1, Math.round(height * this.aspectRatio));
      // 根据显示宽度计算可容纳的缩略图数量
      const visibleCount = Math.max(1, Math.ceil(width / thumbWidth));
      const step = DEFAULT_THUMBNAIL_STEP;
      // 在裁剪区间内均匀采样对应数量的时间点
      const timeStep = trimDuration / visibleCount;

      for (let i = 0; i < visibleCount; i += 1) {
        const time = trimStart + i * timeStep;
        // 取最近的缓存时间点缩略图,避免重复解码
        const key = Math.round(time / step) * step;
        const img = this.thumbnailCache.get(key);
        if (!img) continue;
        // 缩略图按等宽平铺,保持宽高比不变
        const x = -width / 2 + i * thumbWidth;
        const drawWidth = Math.min(thumbWidth, width - i * thumbWidth);
        if (drawWidth <= 0) continue;
        ctx.drawImage(img, x, -height / 2, drawWidth, height);
      }
    }

    ctx.restore();

    // 绘制边框(在裁剪区域外,确保边框宽度不随缩放变化)
    ctx.save();
    ctx.scale(1 / scaleX, 1 / scaleY);
    ctx.beginPath();
    ctx.roundRect(-width / 2, -height / 2, width, height, radius);
    ctx.strokeStyle = BORDER_COLOR;
    ctx.lineWidth = BORDER_WIDTH;
    ctx.stroke();
    ctx.restore();
  }
}
最小使用demo:
tsx
import { Canvas } from 'fabric';
import { useEffect, useRef } from 'react';
import { VideoClip } from '../../core/timeline/clips/video-clip';
export default function VideoClipDemo() {
const canvasRef = useRef<HTMLCanvasElement>(null);
useEffect(() => {
if (!canvasRef.current) return;
const canvas = new Canvas(canvasRef.current, {
width: 800,
height: 200,
backgroundColor: '#0f172a'
});
const videoClip = new VideoClip({
id: 'demo-video-1',
left: 50,
top: 70,
width: 300,
height: 60
});
canvas.add(videoClip);
canvas.setActiveObject(videoClip);
return () => {
canvas.dispose();
};
}, []);
return <canvas ref={canvasRef} />;
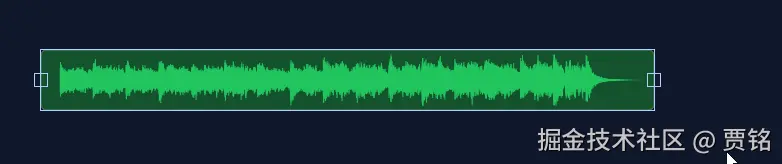
}音频轨道
上篇文章中,我们使用konva完成了音频波形图的绘制,在这一节中将会对它进行优化
原始音频本质是 PCM 采样数据(一秒可能 44100 个点),
如果你直接一个点一个点画,性能会炸。
所以这里做了一件非常关键的事:降采样 + 取峰值
在 extractWaveformData() 里做了三件事:
- 只取第一个声道
- 每秒固定抽 100 个"波形点"
- 每个点不存所有数据,而是只存:这一小段里的 最小值 和最大值
[min, max, min, max, min, max...]
这样做的好处是:数据量大幅减少,并且视觉上还能保留波形"形状"
tsx
import { Rect } from 'fabric';
import { ALL_FORMATS, BlobSource, Input } from 'mediabunny';
import { ClipType } from '../types';

/** 默认音频文件 URL */
const DEFAULT_AUDIO_URL = new URL(
  '../../../assets/1.wav',
  import.meta.url
).toString();

/** 波形颜色(绿色) */
const WAVEFORM_COLOR = '#22c55e';
/** 波形背景颜色(深绿色) */
const WAVEFORM_BACKGROUND = '#14532d';
/** 每秒采样的波形数据点数 */
const WAVEFORM_SAMPLES_PER_SECOND = 100;
/** 边框颜色 */
const BORDER_COLOR = 'rgba(255,255,255,0.3)';
/** 边框宽度 */
const BORDER_WIDTH = 1;

/** AudioClip 构造选项 */
type AudioClipOptions = {
  id: string;
  left: number;
  top: number;
  width: number;
  height: number;
  src?: string;
};

export class AudioClip extends Rect {
  clipType: ClipType = 'audio';
  /** 对应业务 Clip 的唯一标识 */
  elementId: string;
  /** 音频资源地址 */
  src: string;
  /** 音频源总时长(秒),用于裁剪边界约束 */
  sourceDuration = 0;
  /** 当前裁剪起点(秒),相对音频源时间轴 */
  trimStart = 0;
  /** 当前裁剪终点(秒),相对音频源时间轴 */
  trimEnd = 0;
  /** 预解码的波形数据(每个采样点包含 min 和 max 两个值) */
  private waveformData: Float32Array | null = null;
  /** 加载状态标记,避免重复加载 */
  private isLoading = false;
  /** 音频缓冲区,用于提取波形数据 */
  private audioBuffer: AudioBuffer | null = null;

  constructor(options: AudioClipOptions) {
    super({
      left: options.left,
      top: options.top,
      width: options.width,
      height: options.height,
      fill: WAVEFORM_BACKGROUND,
      stroke: null,
      strokeWidth: 0,
      rx: 6,
      ry: 6,
      selectable: true,
      hasControls: true,
      lockRotation: true,
      lockScalingY: true,
      lockScalingFlip: true,
      objectCaching: false,
      hoverCursor: 'move'
    });

    this.elementId = options.id;
    this.src = options.src ?? DEFAULT_AUDIO_URL;

    // 仅保留左右缩放控制点,允许裁剪式缩放
    this.setControlsVisibility({
      tl: false,
      tr: false,
      bl: false,
      br: false,
      mt: false,
      mb: false,
      mtr: false,
      ml: true,
      mr: true
    });

    this.loadAudio();
  }

  async loadAudio() {
    if (this.isLoading) return;
    this.isLoading = true;

    try {
      const response = await fetch(this.src);
      const blob = await response.blob();

      const input = new Input({
        formats: ALL_FORMATS,
        source: new BlobSource(blob)
      });

      this.sourceDuration = (await input.computeDuration()) || 0;

      // 初始化裁剪窗口,确保不超过音频时长
      if (this.trimEnd === 0 || this.trimEnd > this.sourceDuration) {
        this.trimEnd = this.sourceDuration;
      }
      if (this.trimStart > this.trimEnd) {
        this.trimStart = 0;
      }

      const arrayBuffer = await blob.arrayBuffer();
      const audioContext = new AudioContext();
      this.audioBuffer = await audioContext.decodeAudioData(arrayBuffer);
      audioContext.close();

      // 提取波形数据
      this.extractWaveformData();
      this.canvas?.requestRenderAll();
    } catch (error) {
      console.error('AudioClip loadAudio error:', error);
    } finally {
      this.isLoading = false;
    }
  }

  /**
   * 从音频缓冲区提取波形数据
   * 将原始音频采样降采样为固定数量的峰值点,用于高效渲染
   */
  private extractWaveformData() {
    if (!this.audioBuffer || this.sourceDuration <= 0) return;

    // 获取第一个声道的音频数据
    const channelData = this.audioBuffer.getChannelData(0);
    const samples = channelData.length;
    // 计算目标采样点数(每秒 100 个点)
    const targetSamples = Math.ceil(
      this.sourceDuration * WAVEFORM_SAMPLES_PER_SECOND
    );

    // 每个采样点存储 min 和 max 两个值
    this.waveformData = new Float32Array(targetSamples * 2);

    // 计算每个目标采样点对应的原始采样数
    const samplesPerPeak = Math.floor(samples / targetSamples);

    // 遍历所有目标采样点,计算每个区间的峰值
    for (let i = 0; i < targetSamples; i++) {
      const start = i * samplesPerPeak;
      const end = Math.min(start + samplesPerPeak, samples);

      let min = 0;
      let max = 0;

      // 在当前区间内查找最小值和最大值
      for (let j = start; j < end; j++) {
        const value = channelData[j];
        if (value < min) min = value;
        if (value > max) max = value;
      }

      // 存储峰值数据
      this.waveformData[i * 2] = min;
      this.waveformData[i * 2 + 1] = max;
    }
  }

  /**
   * 重写渲染逻辑,绘制音频波形
   * 根据裁剪窗口只显示 trimStart 到 trimEnd 区间的波形
   */
  _render(ctx: CanvasRenderingContext2D) {
    ctx.save();

    // 反向缩放,让绘制逻辑用屏幕像素坐标
    const scaleX = this.scaleX || 1;
    const scaleY = this.scaleY || 1;
    ctx.scale(1 / scaleX, 1 / scaleY);

    const width = (this.width || 0) * scaleX;
    const height = (this.height || 0) * scaleY;
    const radius = this.rx || 6;

    // 以圆角矩形作为裁剪区域
    ctx.beginPath();
    ctx.roundRect(-width / 2, -height / 2, width, height, radius);
    ctx.clip();

    // 绘制背景色
    ctx.fillStyle = WAVEFORM_BACKGROUND;
    ctx.fillRect(-width / 2, -height / 2, width, height);

    // 绘制波形数据
    if (this.waveformData && this.sourceDuration > 0) {
      // 获取裁剪窗口
      const trimStart = Math.max(0, this.trimStart || 0);
      const trimEnd = Math.max(trimStart, this.trimEnd || 0);
      const trimDuration = trimEnd - trimStart;

      if (trimDuration > 0) {
        const totalSamples = this.waveformData.length / 2;
        // 计算裁剪区间对应的采样点范围
        const startSample = Math.floor(
          (trimStart / this.sourceDuration) * totalSamples
        );
        const endSample = Math.ceil(
          (trimEnd / this.sourceDuration) * totalSamples
        );
        const visibleSamples = endSample - startSample;

        const centerY = 0;
        const halfHeight = height / 2 - 4;

        ctx.fillStyle = WAVEFORM_COLOR;

        // 绘制裁剪区间内的波形
        for (let i = 0; i < visibleSamples; i++) {
          const sampleIndex = startSample + i;
          if (sampleIndex * 2 + 1 >= this.waveformData.length) break;

          const min = this.waveformData[sampleIndex * 2];
          const max = this.waveformData[sampleIndex * 2 + 1];

          // 计算当前波形条的 x 坐标
          const x = -width / 2 + (i / visibleSamples) * width;
          const barWidth = Math.max(1, width / visibleSamples);

          // 计算波形条的 y 坐标范围
          const minY = centerY + min * halfHeight;
          const maxY = centerY + max * halfHeight;

          // 绘制波形条
          ctx.fillRect(x, minY, barWidth, maxY - minY);
        }
      }
    } else if (this.isLoading) {
      // 加载中显示提示文字
      ctx.fillStyle = 'rgba(255,255,255,0.5)';
      ctx.font = '12px Inter, sans-serif';
      ctx.textAlign = 'center';
      ctx.textBaseline = 'middle';
      ctx.fillText('Loading...', 0, 0);
    }

    ctx.restore();

    // 绘制边框(在裁剪区域外,确保边框宽度不随缩放变化)
    ctx.save();
    ctx.scale(1 / scaleX, 1 / scaleY);
    ctx.beginPath();
    ctx.roundRect(-width / 2, -height / 2, width, height, radius);
    ctx.strokeStyle = BORDER_COLOR;
    ctx.lineWidth = BORDER_WIDTH;
    ctx.stroke();
    ctx.restore();
  }

  /**
   * 获取音频缓冲区
   * 可用于音频播放等功能
   */
  getAudioBuffer(): AudioBuffer | null {
    return this.audioBuffer;
  }

  /**
   * 获取音频源总时长
   * 用于裁剪边界约束
   */
  getSourceDuration(): number {
    return this.sourceDuration;
  }
}
tsx
import { Canvas } from 'fabric';
import { useEffect, useRef } from 'react';
import { AudioClip } from '../../core/timeline/clips/audio-clip';
export default function AudioClipDemo() {
const canvasRef = useRef<HTMLCanvasElement>(null);
useEffect(() => {
if (!canvasRef.current) return;
const canvas = new Canvas(canvasRef.current, {
width: 800,
height: 200,
backgroundColor: '#0f172a'
});
const audioClip = new AudioClip({
id: 'demo-audio-1',
left: 50,
top: 70,
width: 300,
height: 60
});
canvas.add(audioClip);
canvas.setActiveObject(audioClip);
return () => {
canvas.dispose();
};
}, []);
return <canvas ref={canvasRef} />;
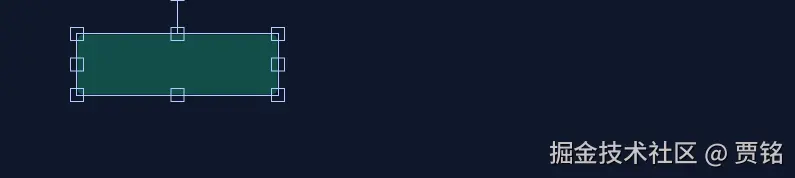
}文本轨道
tsx
import { Rect } from 'fabric';
import { ClipType } from '../types';

/** 文本 Clip 背景色 */
const TEXT_CLIP_BACKGROUND = '#134e4a';
/** 边框颜色 */
const BORDER_COLOR = 'rgba(255,255,255,0.3)';
/** 边框宽度 */
const BORDER_WIDTH = 1;

export class TextClip extends Rect {
  clipType: ClipType = 'text';
  elementId: string;
  /** 显示在块内的文字内容 */
  label: string;

  constructor(options: {
    id: string;
    text: string;
    left: number;
    top: number;
    width: number;
    height: number;
  }) {
    super({
      left: options.left,
      top: options.top,
      width: options.width,
      height: options.height,
      fill: TEXT_CLIP_BACKGROUND,
      stroke: null,
      strokeWidth: 0,
      rx: 8,
      /** 圆角 Y */
      ry: 8,
      selectable: true,
      hasControls: true,
      lockRotation: true,
      /** 锁定纵向缩放 */
      lockScalingY: true,
      /** 禁止缩放翻转(避免控制块反向导致的 clip 翻转) */
      lockScalingFlip: true,
      /** 禁用缓存,保证 _render 反向缩放逻辑直接作用于主画布 */
      objectCaching: false,
      hoverCursor: 'move'
    });
    this.elementId = options.id;
    this.label = options.text;

    // 仅保留左右缩放控制点,避免垂直方向缩放
    this.setControlsVisibility({
      tl: false,
      tr: false,
      bl: false,
      br: false,
      mt: false,
      mb: false,
      mtr: false,
      ml: true,
      mr: true
    });
  }

  /**
   * 重写渲染逻辑,在矩形块中绘制文本
   * 手动绘制圆角矩形背景和边框,确保缩放时不变形
   */
  _render(ctx: CanvasRenderingContext2D) {
    ctx.save();

    // 反向缩放,让绘制逻辑用屏幕像素坐标
    const scaleX = this.scaleX || 1;
    const scaleY = this.scaleY || 1;
    ctx.scale(1 / scaleX, 1 / scaleY);

    const width = (this.width || 0) * scaleX;
    const height = (this.height || 0) * scaleY;
    const radius = this.rx || 8;

    // 手动绘制圆角矩形背景,确保圆角不随缩放变形
    ctx.beginPath();
    ctx.roundRect(-width / 2, -height / 2, width, height, radius);
    ctx.fillStyle = TEXT_CLIP_BACKGROUND;
    ctx.fill();

    // 绘制边框,确保边框宽度不随缩放变化
    ctx.strokeStyle = BORDER_COLOR;
    ctx.lineWidth = BORDER_WIDTH;
    ctx.stroke();

    // 绘制文本
    ctx.fillStyle = 'rgba(255,255,255,0.9)';
    ctx.font = '12px Inter, sans-serif';
    ctx.textAlign = 'left';
    ctx.textBaseline = 'middle';

    // 移动到左边缘 8 像素,垂直居中位置
    ctx.fillText(this.label, -width / 2 + 8, 0);

    ctx.restore();
  }
}
滚动条
滑块宽度怎么算?barWidth = (视口宽度 / 内容宽度) * 轨道宽度
同时还加了:minWidth = 40防止内容太多时滑块小到点不到
滑块位置怎么算?leftOffset = (当前滚动 / 最大滚动距离) * 可滑动距离 可滑动距离 = 轨道总宽度 - 滑块自身宽度,可滑动距离也就是:滑块在轨道上"真正能移动的那一段距离"
tsx
import { Canvas } from 'fabric';
import { ITimeline, PointerEventLike } from '../types';

export type ScrollbarBar = {
  /** 滑块左边界 X 坐标 */
  left: number;
  /** 滑块右边界 X 坐标 */
  right: number;
  /** 滑块上边界 Y 坐标 */
  top: number;
  /** 滑块下边界 Y 坐标 */
  bottom: number;
  /** 最大可滚动距离(内容宽度 - 视口宽度) */
  maxOffset: number;
  /** 滚动轨道总宽度 */
  trackWidth: number;
  /** 滑块宽度 */
  barWidth: number;
};

/**
 * 1. 滚动条绘制在 Canvas 的顶层上下文(contextTop)上,不受 viewportTransform 影响
 * 2. 通过拦截 Canvas 的鼠标事件实现滚动条的拖拽交互
 * 3. 滑块宽度根据内容与视口的比例自动计算
 * 4. 当内容完全在视口内时自动隐藏滚动条
 */
export class HorizontalScrollbar {
  timeline: ITimeline;
  /** 滚动条滑块的高度(像素) */
  size = 8;
  /** 滚动条与画布边缘的间距(像素) */
  scrollSpace = 4;
  /** 滑块最小宽度,确保滑块始终可点击 */
  minWidth = 40;
  /** 滑块填充颜色 */
  fill = 'rgba(255,255,255,0.3)';
  /** 滑块边框颜色 */
  stroke = 'rgba(255,255,255,0.1)';
  /** 边框线宽 */
  lineWidth = 1;
  bar: ScrollbarBar | null = null;
  /** 是否处于拖拽滚动条状态 */
  dragging = false;
  /** 拖拽开始时的鼠标 X 坐标 */
  dragStartX = 0;
  /** 拖拽开始时的滚动位置 */
  dragStartScroll = 0;

  private originalMouseDown: ((e: PointerEventLike) => void) | null = null;
  private originalMouseMove: ((e: PointerEventLike) => void) | null = null;
  private originalMouseUp: ((e: PointerEventLike) => void) | null = null;

  constructor(timeline: ITimeline) {
    this.timeline = timeline;
    const canvas = timeline.canvas;

    const canvasInternal = canvas as unknown as {
      __onMouseDown?: (e: PointerEventLike) => void;
      _onMouseMove?: (e: PointerEventLike) => void;
      _onMouseUp?: (e: PointerEventLike) => void;
    };
    this.originalMouseDown = canvasInternal.__onMouseDown || null;
    this.originalMouseMove = canvasInternal._onMouseMove || null;
    this.originalMouseUp = canvasInternal._onMouseUp || null;

    canvasInternal.__onMouseDown = this.mouseDownHandler.bind(this);
    canvasInternal._onMouseMove = this.mouseMoveHandler.bind(this);
    canvasInternal._onMouseUp = this.mouseUpHandler.bind(this);

    this.beforeRenderHandler = this.beforeRenderHandler.bind(this);
    this.afterRenderHandler = this.afterRenderHandler.bind(this);
    canvas.on('before:render', this.beforeRenderHandler);
    canvas.on('after:render', this.afterRenderHandler);
  }

  dispose() {
    const canvas = this.timeline.canvas;
    const canvasInternal = canvas as unknown as {
      __onMouseDown?: (e: PointerEventLike) => void;
      _onMouseMove?: (e: PointerEventLike) => void;
      _onMouseUp?: (e: PointerEventLike) => void;
    };

    if (this.originalMouseDown)
      canvasInternal.__onMouseDown = this.originalMouseDown;
    if (this.originalMouseMove)
      canvasInternal._onMouseMove = this.originalMouseMove;
    if (this.originalMouseUp) canvasInternal._onMouseUp = this.originalMouseUp;

    // 移除渲染事件监听
    canvas.off('before:render', this.beforeRenderHandler);
    canvas.off('after:render', this.afterRenderHandler);
  }

  /**
   * 渲染前处理
   *
   * 重置 Canvas 顶层上下文的变换矩阵为单位矩阵。
   *
   * 为什么需要这样做?
   *
   * Fabric.js 在渲染时会应用 viewportTransform(用于实现滚动效果),
   * 这个变换会影响所有后续的绘制操作。但滚动条应该始终固定在视口底部,
   * 不应该随着内容滚动而移动。
   *
   * 通过在渲染前重置变换矩阵,我们确保滚动条的绘制坐标系
   * 始终与视口坐标系一致,不受滚动影响。
   */
  beforeRenderHandler() {
    const ctx = this.timeline.canvas.contextTop;
    if (!ctx) return;
    ctx.save();
    ctx.setTransform(1, 0, 0, 1, 0, 0);
    ctx.restore();
  }

  /**
   * 渲染后处理 - 绘制滚动条
   *
   * 在 Canvas 主内容渲染完成后,在顶层上下文绘制滚动条滑块。
   * 滑块的宽度和位置根据内容与视口的比例计算。
   *
   * 计算公式:
   * 滑块宽度 = (视口宽度 / 内容宽度) * 轨道宽度
   * 滑块位置 = (当前滚动位置 / 最大滚动距离) * 可滑动距离
   */
  afterRenderHandler() {
    const canvas = this.timeline.canvas;
    const ctx = canvas.contextTop;
    if (!ctx) return;

    const contentWidth = this.timeline.contentWidth;

    /**
     * 当内容宽度不超过视口宽度时,隐藏滚动条
     * 这意味着所有内容都可见,不需要滚动。
     */
    if (contentWidth <= canvas.width) {
      this.bar = null;
      // 清除之前可能绘制的滚动条区域
      ctx.clearRect(
        0,
        canvas.height - this.size - this.scrollSpace - this.lineWidth,
        canvas.width,
        this.size + this.scrollSpace + this.lineWidth
      );
      return;
    }

    /**
     * 计算滚动轨道宽度
     * 轨道是滑块可滑动的区域,两侧留出间距
     */
    const trackWidth = canvas.width - this.scrollSpace * 2;

    /**
     * 计算滑块宽度
     * 滑块宽度反映视口占内容的比例:
     * - 内容越多,滑块越小
     * - 但最小不低于 minWidth,确保始终可点击
     */
    const barWidth = Math.max(
      Math.floor((canvas.width / contentWidth) * trackWidth),
      this.minWidth
    );

    /**
     * 计算最大可滚动距离
     * 即内容超出视口的部分
     */
    const maxOffset = contentWidth - canvas.width;

    /**
     * 计算滑块位置
     * 滑块位置 = 间距 + (滚动比例 * 可滑动距离)
     * 滚动比例 = 当前滚动位置 / 最大滚动距离
     * 可滑动距离 = 轨道宽度 - 滑块宽度
     */
    const leftOffset =
      (this.timeline.scrollX / maxOffset) * Math.max(0, trackWidth - barWidth);
    const left = this.scrollSpace + leftOffset;

    /**
     * 计算滑块垂直位置
     * 滑块位于画布底部,与底部边缘保持间距
     */
    const top = canvas.height - this.size - this.scrollSpace;

    /**
     * 保存滚动条几何信息
     * 用于后续的命中检测(判断鼠标是否点击在滑块上)
     */
    this.bar = {
      left,
      right: left + barWidth,
      top,
      bottom: top + this.size,
      maxOffset,
      trackWidth,
      barWidth
    };

    ctx.clearRect(
      0,
      canvas.height - this.size - this.scrollSpace - this.lineWidth,
      canvas.width,
      this.size + this.scrollSpace + this.lineWidth
    );

    ctx.save();
    ctx.fillStyle = this.fill;
    ctx.strokeStyle = this.stroke;
    ctx.lineWidth = this.lineWidth;
    ctx.beginPath();
    ctx.roundRect(left, top, barWidth, this.size, this.size / 2);
    ctx.fill();
    ctx.stroke();
    ctx.restore();
  }

  /**
   * 鼠标按下事件处理
   * 判断鼠标是否点击在滚动条滑块上:
   * - 如果是,进入拖拽模式,阻止事件继续传播
   * - 如果不是,调用 Canvas 原始的鼠标按下处理
   *
   */
  mouseDownHandler(e: PointerEventLike) {
    const canvas = this.timeline.canvas;

    /**
     * 获取鼠标在视口坐标系中的位置
     * getViewportPoint 返回的是相对于画布左上角的坐标,
     * 不受 viewportTransform 影响,适合用于滚动条命中检测
     */
    const p = canvas.getViewportPoint(e);

    if (this.bar) {
      /**
       * 命中检测:判断鼠标坐标是否在滑块矩形范围内
       */
      const hit =
        p.x >= this.bar.left &&
        p.x <= this.bar.right &&
        p.y >= this.bar.top &&
        p.y <= this.bar.bottom;

      if (hit) {
        /**
         * 进入拖拽模式
         * 记录拖拽起始状态:
         * - dragStartX: 鼠标起始 X 坐标
         * - dragStartScroll: 起始滚动位置
         *
         * 后续在 mouseMoveHandler 中根据鼠标移动距离计算新的滚动位置
         */
        this.dragging = true;
        this.dragStartX = p.x;
        this.dragStartScroll = this.timeline.scrollX;
        return; // 阻止事件继续传播,不调用原始处理函数
      }
    }

    /**
     * 未命中滚动条,调用 Canvas 原始的鼠标按下处理
     * 通过原型链调用原始方法,确保 Fabric.js 的正常交互(如选择对象)不受影响
     */
    const proto = Canvas.prototype as unknown as {
      __onMouseDown: (e: PointerEventLike) => void;
    };
    return proto.__onMouseDown.call(canvas, e);
  }

  /**
   * 鼠标移动事件处理
   * 如果处于拖拽模式,根据鼠标移动距离更新滚动位置;
   * 否则调用 Canvas 原始的鼠标移动处理。
   */
  mouseMoveHandler(e: PointerEventLike) {
    /**
     * 非拖拽状态,调用原始处理函数
     */
    if (!this.dragging || !this.bar) {
      const proto = Canvas.prototype as unknown as {
        _onMouseMove: (e: PointerEventLike) => void;
      };
      return proto._onMouseMove.call(this.timeline.canvas, e);
    }

    const canvas = this.timeline.canvas;
    const p = canvas.getViewportPoint(e);

    /**
     * 计算滚动位置
     * 滚动距离映射:
     * - 鼠标移动距离(像素) -> 滚动距离(像素)
     * - 比例 = 鼠标移动距离 / 可滑动距离
     * - 滚动距离 = 比例 * 最大滚动距离
     *
     * 这样可以实现滑块移动 1 像素,内容滚动相应比例的距离
     */
    const delta = p.x - this.dragStartX;
    const maxOffset = this.bar.maxOffset;
    const trackAvailable = Math.max(1, this.bar.trackWidth - this.bar.barWidth);
    const scrollDelta = (delta / trackAvailable) * maxOffset;

    /**
     * 更新滚动位置
     * setScrollX 内部会处理边界约束(不超过最大滚动距离)
     */
    this.timeline.setScrollX(this.dragStartScroll + scrollDelta);
  }

  /**
   * 鼠标抬起事件处理
   * 如果处于拖拽模式,结束拖拽;
   * 否则调用 Canvas 原始的鼠标抬起处理。
   */
  mouseUpHandler(e: PointerEventLike) {
    /**
     * 非拖拽状态,调用原始处理函数
     */
    if (!this.dragging) {
      const proto = Canvas.prototype as unknown as {
        _onMouseUp: (e: PointerEventLike) => void;
      };
      proto._onMouseUp.call(this.timeline.canvas, e);
    }

    /**
     * 重置 dragging 标志,后续鼠标移动不再触发滚动
     */
    this.dragging = false;
  }
}
tsx
import { Canvas, Rect } from 'fabric';
import { useEffect, useRef } from 'react';
import { HorizontalScrollbar } from '../../core/timeline/scrollbar';

export default function ScrollBarDemo() {
  const canvasRef = useRef<HTMLCanvasElement>(null);

  useEffect(() => {
    if (!canvasRef.current) return;

    const canvas = new Canvas(canvasRef.current, {
      width: 800,
      height: 200,
      backgroundColor: '#0f172a',
      selection: false
    });

    const timeline = {
      canvas,
      contentWidth: 2000,
      scrollX: 0,
      setScrollX(x: number) {
        this.scrollX = Math.max(
          0,
          Math.min(x, this.contentWidth - canvas.width)
        );
        canvas.setViewportTransform([1, 0, 0, 1, -this.scrollX, 0]);
        canvas.requestRenderAll();
      }
    } as any;

    const scrollbar = new HorizontalScrollbar(timeline);

    const rect1 = new Rect({
      left: 50,
      top: 50,
      width: 200,
      height: 60,
      fill: '#134e4a',
      rx: 6,
      ry: 6,
      selectable: true,
      hasControls: true
    });

    rect1.on('moving', () => {
      const right = rect1.left! + rect1.width!;
      const newContentWidth = Math.max(canvas.width, right + 50);
      timeline.contentWidth = newContentWidth;
      canvas.requestRenderAll();
    });

    canvas.add(rect1);

    return () => {
      scrollbar.dispose();
      canvas.dispose();
    };
  }, []);

  return <canvas ref={canvasRef} />;
}
参考线绘制
整体流程是怎样的?可以理解成 5 步:
- 清掉旧的辅助线
- 收集画布上所有"可当参照物"的边
- 计算当前拖拽物体的边
- 找最近的一条线(距离小于 10px)
- 画辅助线 + 修正位置(吸附)
第一步:清理旧辅助线
clearAuxiliaryObjects()每次拖动都会重新计算吸附线,所以必须先把旧的删掉,避免画布上越画越多线,它的做法是:
- 遍历所有对象
- 找到带
isAlignmentAuxiliary标记的 - 删除
第二步:收集"所有可吸附的边"
getLineGuideStops()它做的事情是:
- 遍历画布所有可见对象
- 跳过当前拖动对象
- 跳过辅助线本身
- 获取每个对象的 boundingRect
最终得到一个列表:
kotlin
[
  { val: 100 },
  { val: 250 },
  { val: 300 },
  ...
]
第三步:计算当前对象的吸附边
getObjectSnappingEdges()它只算两个东西:当前对象的左边、当前对象的右边
并记录:
arduino
guide   // 当前边的位置
offset  // 实际坐标偏移
snap    // 是 start 还是 end
第四步:找最近的一条线
diff = Math.abs(lineGuide.val - itemBound.guide)
如果:diff < 10说明已经足够接近,然后把所有满足条件的候选放进数组进行排序,取最小的那个,这样可以避免多条线同时吸附导致抖动
resultV.sort((a, b) => a.diff - b.diff)[0]
第五步:画对齐线
new Line([x, 0, x, 2000])
tsx
import { Line, type Canvas, type FabricObject } from 'fabric';
import { AlignmentAuxiliary, LineGuide, TimelineObject, Guide } from '../types';

/**
 * 清除画布上的所有辅助对齐线
 */
export const clearAuxiliaryObjects = (
  canvas: Canvas,
  allObjects: FabricObject[]
) => {
  allObjects.forEach(obj => {
    if ((obj as AlignmentAuxiliary).isAlignmentAuxiliary) canvas.remove(obj);
  });
};

/**
 * 计算对象的对齐停靠点
 * 返回对象左边界与右边界的可吸附位置
 */
export const getStopsForObject = (
  start: number,
  distance: number,
  drawStart: number,
  drawDistance: number
) => {
  const stops = [start, start + distance];
  return stops.map(stop => ({
    val: stop,
    start: drawStart,
    end: drawStart + drawDistance
  }));
};

/**
 * 获取画布上所有可用作对齐基准的停靠点
 * 仅收集可见的 Clip,对齐线本身不会参与计算
 */
export const getLineGuideStops = (skipShapes: FabricObject[], canvas: Canvas) => {
  const vertical: LineGuide[] = [];
  canvas
    .getObjects()
    .filter(o => o.visible && (o as TimelineObject).elementId)
    .forEach(guideObject => {
      if (
        skipShapes.includes(guideObject) ||
        (guideObject as AlignmentAuxiliary).isAlignmentAuxiliary
      ) {
        return;
      }
      const box = guideObject.getBoundingRect();
      vertical.push(
        ...getStopsForObject(box.left, box.width, box.top, box.height)
      );
    });
  return { vertical, horizontal: [] as LineGuide[] };
};

/**
 * 获取当前拖拽对象的吸附边缘
 * 只计算水平吸附(左边界、右边界)
 */
export const getObjectSnappingEdges = (target: FabricObject) => {
  const rect = target.getBoundingRect();
  return {
    vertical: [
      {
        guide: Math.round(rect.left),
        offset: Math.round((target.left || 0) - rect.left),
        snap: 'start'
      },
      {
        guide: Math.round(rect.left + rect.width),
        offset: Math.round((target.left || 0) - rect.left - rect.width),
        snap: 'end'
      }
    ],
    horizontal: [] as Array<{ guide: number; offset: number; snap: string }>
  };
};

/**
 * 计算当前位置最接近的引导对齐线
 * 仅返回最接近的垂直引导,避免多条线干扰
 */
export const getGuides = (
  lineGuideStops: { vertical: LineGuide[]; horizontal: LineGuide[] },
  itemBounds: {
    vertical: { guide: number; offset: number; snap: string }[];
    horizontal: { guide: number; offset: number; snap: string }[];
  }
) => {
  const resultV: Array<{ lineGuide: number; diff: number; offset: number }> =
    [];
  lineGuideStops.vertical.forEach(lineGuide => {
    itemBounds.vertical.forEach(itemBound => {
      const diff = Math.abs(lineGuide.val - itemBound.guide);
      if (diff < 10) {
        resultV.push({
          lineGuide: lineGuide.val,
          diff,
          offset: itemBound.offset
        });
      }
    });
  });
  const guides: Guide[] = [];
  const minV = resultV.sort((a, b) => a.diff - b.diff)[0];
  if (minV) {
    guides.push({
      lineGuide: minV.lineGuide,
      offset: minV.offset,
      orientation: 'V'
    });
  }
  return guides;
};

/**
 * 在画布上绘制对齐线
 * 线条绘制在主画布之上,并标记为辅助对象
 */
export const drawGuides = (guides: Guide[], canvas: Canvas) => {
  guides.forEach(lineGuide => {
    if (lineGuide.orientation === 'V') {
      const line = new Line(
        [lineGuide.lineGuide, 0, lineGuide.lineGuide, 2000],
        {
          strokeWidth: 2,
          stroke: '#ffffff',
          strokeLineCap: 'square',
          selectable: false,
          evented: false,
          objectCaching: false
        }
      );
      (line as AlignmentAuxiliary).isAlignmentAuxiliary = true;
      canvas.add(line);
    }
  });
};
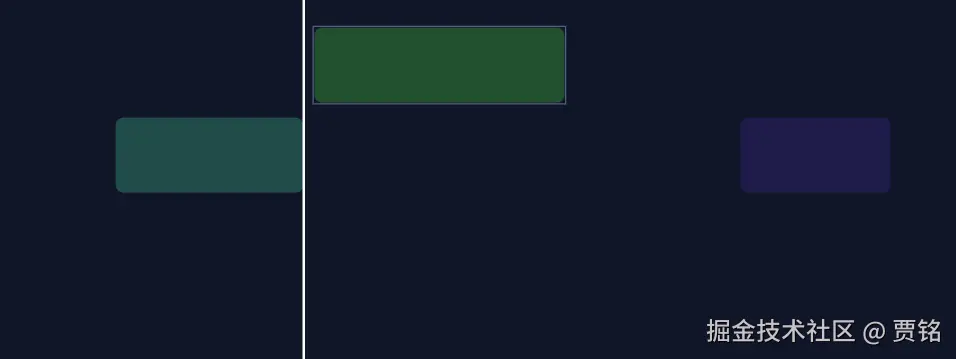
tsx
import { Canvas, Rect } from 'fabric';
import { useEffect, useRef } from 'react';
import {
  clearAuxiliaryObjects,
  drawGuides,
  getGuides,
  getLineGuideStops,
  getObjectSnappingEdges
} from '../../core/timeline/utils/guidelines';

export default function GuidelinesDemo() {
  const canvasRef = useRef<HTMLCanvasElement>(null);

  useEffect(() => {
    if (!canvasRef.current) return;

    const canvas = new Canvas(canvasRef.current, {
      width: 800,
      height: 300,
      backgroundColor: '#0f172a',
      selection: false
    });

    const rect1 = new Rect({
      left: 100,
      top: 100,
      width: 150,
      height: 60,
      fill: '#134e4a',
      rx: 6,
      ry: 6,
      selectable: true,
      hasControls: false
    });
    (rect1 as any).elementId = 'rect1';

    const rect2 = new Rect({
      left: 350,
      top: 100,
      width: 200,
      height: 60,
      fill: '#14532d',
      rx: 6,
      ry: 6,
      selectable: true,
      hasControls: false
    });
    (rect2 as any).elementId = 'rect2';

    const rect3 = new Rect({
      left: 600,
      top: 100,
      width: 120,
      height: 60,
      fill: '#1e1b4b',
      rx: 6,
      ry: 6,
      selectable: true,
      hasControls: false
    });
    (rect3 as any).elementId = 'rect3';

    canvas.add(rect1, rect2, rect3);

    canvas.on('object:moving', e => {
      const target = e.target;
      if (!target) return;

      clearAuxiliaryObjects(canvas, canvas.getObjects());

      const lineGuideStops = getLineGuideStops([target], canvas);
      const itemBounds = getObjectSnappingEdges(target);
      const guides = getGuides(lineGuideStops, itemBounds);

      if (guides.length > 0) {
        const guide = guides[0];
        target.set({
          left: guide.lineGuide + guide.offset
        });
        target.setCoords();
        drawGuides(guides, canvas);
      }
    });

    canvas.on('mouse:up', () => {
      clearAuxiliaryObjects(canvas, canvas.getObjects());
    });

    return () => {
      canvas.dispose();
    };
  }, []);

  return <canvas ref={canvasRef} />;
}
时间轴缩放
核心代码:
tsx
const timeAtMouse = mouseX / oldPixelsPerSecond;
const newMouseX = timeAtMouse * this.pixelsPerSecond;
const newScrollX = newMouseX - (mouseX - this.scrollX);第一步:算出鼠标指向的时间点时间 = 像素 / 像素每秒
第二步:缩放后,这个时间应该在哪个像素?新像素 = 时间 * 新像素每秒
第三步:算需要补偿多少滚动newScrollX = 新像素位置 - 视口中的鼠标位置
tsx
// 监听滚轮事件,支持横向滚动与 Ctrl + 滚轮缩放
this.canvas.on('mouse:wheel', opt => {
  const e = opt.e;
  if (e.ctrlKey) {
    // Ctrl + 滚轮:以鼠标位置为锚点缩放,保持时间点对齐
    const delta = e.deltaY;
    const pointer = this.canvas.getPointer(e);
    this.handleZoom(delta, pointer.x);
  } else {
    // 普通滚轮:横向滚动(优先横向 delta)
    const delta =
      Math.abs(e.deltaX) > Math.abs(e.deltaY) ? e.deltaX : e.deltaY;
    this.setScrollX(this.scrollX + delta);
  }
  e.preventDefault();
  e.stopPropagation();
});
tsx
  /**
   * 处理时间轴缩放逻辑
   * @param delta 滚轮增量
   * @param mouseX 鼠标在画布上的 X 坐标(包含滚动偏移)
   */
  handleZoom(delta: number, mouseX: number) {
    const zoomFactor = 1.1;
    const oldPixelsPerSecond = this.pixelsPerSecond;

    // 计算新的缩放比例
    if (delta > 0) {
      this.pixelsPerSecond /= zoomFactor;
    } else {
      this.pixelsPerSecond *= zoomFactor;
    }

    /** 最小缩放(像素/秒) */
    const minPixelsPerSecond = 10;
    /** 最大缩放(像素/秒),用于支持帧级显示 */
    const maxPixelsPerSecond = 3000;
    this.pixelsPerSecond = Math.max(
      minPixelsPerSecond,
      Math.min(maxPixelsPerSecond, this.pixelsPerSecond)
    );

    if (Math.abs(oldPixelsPerSecond - this.pixelsPerSecond) < 0.01) return;

    // 关键逻辑:保持鼠标指针下的时间点在缩放后位置不变
    // 时间点 = (mouseX) / oldPixelsPerSecond
    // 缩放后的像素位置 = 时间点 * newPixelsPerSecond
    // 滚动补偿 = 缩放后的像素位置 - (mouseX - scrollX)
    const timeAtMouse = mouseX / oldPixelsPerSecond;
    const newMouseX = timeAtMouse * this.pixelsPerSecond;
    const newScrollX = newMouseX - (mouseX - this.scrollX);

    // 更新所有 Clip 的位置和宽度
    this.updateClipsVisualsFromTime();

    // 更新内容宽度(轨道背景也会随之更新)
    this.updateContentWidth();

    // 应用新的滚动位置
    this.setScrollX(newScrollX);

    this.canvas.requestRenderAll();
  }
tsx
  /**
   * 设置时间轴横向滚动位置
   * 通过 viewportTransform 将所有对象整体平移
   */
  setScrollX(value: number) {
    const maxScroll = Math.max(0, this.contentWidth - this.canvas.width);
    const next = Math.max(0, Math.min(maxScroll, value));
    if (Math.abs(next - this.scrollX) < 0.5) return;
    this.scrollX = next;
    const vpt = (
      this.canvas.viewportTransform || ([1, 0, 0, 1, 0, 0] as Mat2D)
    ).slice(0) as Mat2D;
    // 使用 viewportTransform 平移内容
    vpt[4] = -this.scrollX;
    vpt[5] = 0;
    this.canvas.setViewportTransform(vpt);
    // this.canvas.getObjects().forEach(obj => {
    //   // 修正控制点位置,避免滚动时偏移
    //   if (obj.hasControls) obj.setCoords();
    // });

    if (this.ruler) this.ruler.render(); // 同步更新刻度尺

    this.canvas.requestRenderAll();
  }
拖拽的核心代码(包括轨道的裁剪)
tsx
/**
   * 配置所有拖拽、缩放交互逻辑及约束
   * 包含缩放约束、防重叠、对齐辅助线与轨道吸附
   */
  setupDragSnapping() {
    /**
     * 缩放事件处理
     * 核心功能:
     * 1. 约束最小宽度,避免 Clip 过小
     * 2. 防止 Clip 跨越相邻 Clip(防重叠)
     * 3. 对于视频/音频 Clip,实现裁剪式缩放(拖动端点改变裁剪窗口)
     * 4. 约束裁剪范围不超过媒体源时长
     */
    this.canvas.on('object:scaling', opt => {
      const target = opt.target as TimelineObject;
      if (!target || !target.elementId) return;

      const transform = opt.transform;
      if (!transform) return;

      // 只处理左右控制点
      const corner = transform.corner;
      if (corner !== 'ml' && corner !== 'mr') return;

      const originalWidth = target.width || 0;
      if (originalWidth === 0) return;

      const timelineTarget = target as TimelineObject;
      const isMediaClip = ['video', 'audio'].includes(timelineTarget.clipType);

      if (isMediaClip) {
        const mediaTarget = target as TimelineObject;
        if (mediaTarget.trimStart === undefined) mediaTarget.trimStart = 0;
        if (mediaTarget.trimEnd === undefined || mediaTarget.trimEnd === 0) {
          mediaTarget.trimEnd = mediaTarget.duration ?? 0;
        }
        // 记录缩放开始时的裁剪窗口,用于计算裁剪增量
        // 这样可以确保"回拉"操作不会超过原始裁剪量
        if (mediaTarget.__trimStartOriginal === undefined) {
          mediaTarget.__trimStartOriginal = mediaTarget.trimStart ?? 0;
        }
        if (mediaTarget.__trimEndOriginal === undefined) {
          mediaTarget.__trimEndOriginal = mediaTarget.trimEnd ?? 0;
        }
      }

      // 获取同一轨道上的其他 Clip,用于防重叠检测
      const trackIndex = this.getTrackIndexForObject(target);
      const siblings = this.canvas
        .getObjects()
        .filter(obj => (obj as TimelineObject).elementId && obj !== target)
        .map(obj => obj as TimelineObject)
        .filter(obj => this.getTrackIndexForObject(obj) === trackIndex)
        .map(obj => ({ obj, ...this.getClipBounds(obj) }))
        .sort((a, b) => a.left - b.left);

      // 记录缩放开始时的位置和尺寸
      const startLeft = transform.original.left;
      const startScaleX = transform.original.scaleX || 1;
      const startRight = startLeft + originalWidth * startScaleX;

      // 查找左右相邻的 Clip
      let leftNeighbor: { left: number; right: number } | null = null;
      let rightNeighbor: { left: number; right: number } | null = null;

      for (const clip of siblings) {
        if (clip.left < startLeft) {
          leftNeighbor = clip;
          continue;
        }
        rightNeighbor = clip;
        break;
      }

      // 计算最小缩放比例,确保 Clip 不会太小
      const minScale = MIN_CLIP_WIDTH / originalWidth;

      // ========== 右侧控制点缩放(mr)==========
      // 拖动右侧控制点:左边界固定,改变右边界
      // 对于媒体类型:trimStart 保持不变,trimEnd 随宽度变化
      if (corner === 'mr') {
        // 计算最大右边界(受相邻 Clip 或内容宽度限制)
        const maxRight = rightNeighbor ? rightNeighbor.left : this.contentWidth;
        const maxWidth = maxRight - startLeft;
        let maxScale = maxWidth / originalWidth;

        // 媒体类型额外约束:不能超过源文件末尾
        if (isMediaClip) {
          const mediaTarget = target as TimelineObject;
          const baseTrimStart = mediaTarget.__trimStartOriginal ?? 0;
          const sourceDuration = mediaTarget.sourceDuration || 0;
          if (sourceDuration > 0) {
            // 从当前 trimStart 到源文件末尾的剩余时长
            const maxDurationBySource = sourceDuration - baseTrimStart;
            const maxScaleBySource =
              (maxDurationBySource * this.pixelsPerSecond) / originalWidth;
            maxScale = Math.min(maxScale, maxScaleBySource);
          }
        }

        // 约束缩放比例在有效范围内
        let newScaleX = timelineTarget.scaleX || 1;
        if (newScaleX < minScale) newScaleX = minScale;
        if (newScaleX > maxScale) newScaleX = maxScale;

        // 应用缩放:左边界锚定,只改变宽度
        target.set({
          scaleX: newScaleX,
          left: startLeft
        });

        if (isMediaClip) {
          const mediaTarget = target as TimelineObject;
          const baseTrimStart = mediaTarget.__trimStartOriginal ?? 0;
          const sourceDuration = mediaTarget.sourceDuration || 0;
          const finalWidth =
            (timelineTarget.width || 0) * (timelineTarget.scaleX || 1);
          const finalDuration = finalWidth / this.pixelsPerSecond;
          // 右侧缩放:trimStart 固定,trimEnd 随宽度增加
          mediaTarget.trimStart = baseTrimStart;
          mediaTarget.trimEnd =
            sourceDuration > 0
              ? Math.min(baseTrimStart + finalDuration, sourceDuration)
              : baseTrimStart + finalDuration;
        }
      } else if (corner === 'ml') {
        // ========== 左侧控制点缩放(ml)==========
        // 拖动左侧控制点:右边界固定,改变左边界
        // 对于媒体类型:trimEnd 保持不变,trimStart 随宽度变化

        // 计算最小左边界(受相邻 Clip 或 0 限制)
        const minLeft = leftNeighbor ? leftNeighbor.right : 0;
        const maxWidth = startRight - minLeft;
        let maxScale = maxWidth / originalWidth;

        // 媒体类型额外约束:不能超过源文件开头
        if (isMediaClip) {
          const mediaTarget = target as TimelineObject;
          const baseTrimEnd = mediaTarget.__trimEndOriginal ?? 0;
          const sourceDuration = mediaTarget.sourceDuration || 0;
          // 从源文件开头到当前 trimEnd 的最大可用时长
          const maxDurationBySource = sourceDuration
            ? Math.min(baseTrimEnd || sourceDuration, sourceDuration)
            : baseTrimEnd;
          if (maxDurationBySource > 0) {
            const maxScaleBySource =
              (maxDurationBySource * this.pixelsPerSecond) / originalWidth;
            maxScale = Math.min(maxScale, maxScaleBySource);
          }
        }

        // 约束缩放比例在有效范围内
        let newScaleX = timelineTarget.scaleX || 1;
        if (newScaleX < minScale) newScaleX = minScale;
        if (newScaleX > maxScale) newScaleX = maxScale;

        // 应用缩放:右边界锚定,改变左边界位置
        target.set({
          scaleX: newScaleX,
          left: startRight - originalWidth * newScaleX
        });

        // 更新媒体类型的裁剪窗口
        if (isMediaClip) {
          const mediaTarget = target as TimelineObject;
          const baseTrimEnd = mediaTarget.__trimEndOriginal ?? 0;
          const finalWidth =
            (timelineTarget.width || 0) * (timelineTarget.scaleX || 1);
          const finalDuration = finalWidth / this.pixelsPerSecond;
          if (baseTrimEnd > 0) {
            // 左侧缩放:trimEnd 固定,trimStart 随宽度变化
            // 向左拖动 = 扩展开头 = trimStart 减小
            // 向右拖动 = 裁剪开头 = trimStart 增加
            mediaTarget.trimEnd = baseTrimEnd;
            mediaTarget.trimStart = Math.max(0, baseTrimEnd - finalDuration);
          }
        }
      }

      // 同步更新时间属性(将像素转换为秒)
      const finalWidth = (target.width || 0) * (target.scaleX || 1);
      target.startTime = (target.left || 0) / this.pixelsPerSecond;
      target.duration = finalWidth / this.pixelsPerSecond;

      // 更新内容宽度并重新渲染
      this.updateContentWidth();
      target.setCoords();
      this.canvas.requestRenderAll();
    });

    // 2. 移动过程中:执行辅助线吸附和重叠修正
    this.canvas.on('object:moving', opt => {
      const target = opt.target as TimelineObject;
      if (!target || !target.elementId) return;

      // 辅助对齐线吸附逻辑
      const allObjects = this.canvas.getObjects();
      const lineGuideStops = getLineGuideStops([target], this.canvas);
      const itemBounds = getObjectSnappingEdges(target);
      const guides = getGuides(lineGuideStops, itemBounds);

      clearAuxiliaryObjects(this.canvas, allObjects);
      if (guides.length > 0) drawGuides(guides, this.canvas);

      guides.forEach(lineGuide => {
        if (lineGuide.orientation === 'V') {
          target.set('left', lineGuide.lineGuide + lineGuide.offset);
        }
      });

      // 实时防重叠修正
      const previousLeft = target.__prevLeft;
      const currentLeft = target.left || 0;
      const direction =
        previousLeft === undefined || currentLeft >= previousLeft ? 1 : -1;
      this.resolveClipOverlap(target, direction);
      target.__prevLeft = target.left || 0;

      // 同步更新时间属性
      target.startTime = (target.left || 0) / this.pixelsPerSecond;

      this.updateContentWidth(); // 拖拽时实时更新内容宽度
      target.setCoords();
      this.canvas.requestRenderAll();
    });

    // 3. 交互结束后:处理轨道增删、回弹及坐标校准
    this.canvas.on('object:modified', (opt: TimelineEvent) => {
      const target = opt.target as TimelineObject;
      if (!target || !target.elementId) return;

      const width = (target.width || 0) * (target.scaleX || 1);
      const height = (target.height || 0) * (target.scaleY || 1);
      const centerY = (target.top || 0) + height / 2;

      // --- 动态轨道判定逻辑 ---
      const firstTrackTop = this.trackTops[0];
      const lastTrackTop = this.trackTops[this.trackCount - 1];

      if (centerY < firstTrackTop) {
        // 拖动到顶部边缘以上:在最上方插入新轨道
        this.canvas.getObjects().forEach(obj => {
          const t = obj as TimelineObject;
          if (t.elementId && t.trackIndex !== undefined) {
            t.trackIndex += 1;
          }
        });
        target.trackIndex = 0;
      } else if (centerY > lastTrackTop + TRACK_HEIGHT) {
        // 拖动到底部边缘以下:在最下方新增轨道
        target.trackIndex = this.trackCount;
      } else {
        // 落在现有轨道范围内:吸附到最近轨道
        target.trackIndex = this.getClosestTrackIndex(centerY);
      }

      const trackTop = this.getTrackTop(target.trackIndex);
      target.set({
        width: Math.max(MIN_CLIP_WIDTH, width),
        top: trackTop + (TRACK_HEIGHT - CLIP_HEIGHT) / 2,
        scaleX: 1
      });

      // 最终重叠检测:若空间仍不足,触发回弹逻辑
      const fits = this.resolveClipOverlap(target, 1);
      if (!fits && target.__originalLeft !== undefined) {
        target.set({
          left: target.__originalLeft,
          top: target.__originalTop
        });
        // 恢复后同步 trackIndex 并执行对齐
        const oldCenterY = (target.top || 0) + height / 2;
        target.trackIndex = this.getClosestTrackIndex(oldCenterY);
        this.resolveClipOverlap(target, 1);
      }

      // 执行轨道清理及重新排列
      this.syncTrackIndices();
      this.updateContentWidth(); // 交互结束后同步内容宽度

      // 同步最终的时间属性
      const finalWidth = (target.width || 0) * (target.scaleX || 1);
      target.startTime = (target.left || 0) / this.pixelsPerSecond;
      target.duration = finalWidth / this.pixelsPerSecond;

      // 清理交互临时属性
      target.__originalLeft = undefined;
      target.__originalTop = undefined;
      target.__prevLeft = undefined;
      // 清理裁剪交互基准,避免影响下一次缩放
      target.__trimStartOriginal = undefined;
      target.__trimEndOriginal = undefined;
      target.setCoords();
      this.canvas.requestRenderAll();
    });

    // 4. 鼠标抬起:清除辅助线
    this.canvas.on('mouse:up', () => {
      clearAuxiliaryObjects(this.canvas, this.canvas.getObjects());
      this.canvas.requestRenderAll();
    });
  }
tsx
  /**
 * 核心防重叠逻辑:
 * 在移动或缩放过程中,检测并修正位置,确保 Clip 不会与其他 Clip 发生重叠
 * @param target 当前操作的对象
 * @param direction 移动方向(1:向右,-1:向左)
 * @returns 是否能完整放下该对象
 */
resolveClipOverlap(target: TimelineObject, direction: number): boolean {
  const trackIndex = this.getTrackIndexForObject(target);
  const bounds = this.getClipBounds(target);

  // 获取同一轨道上的所有其他 Clip 并按左边界排序
  const siblings = this.canvas
    .getObjects()
    .filter(obj => (obj as TimelineObject).elementId && obj !== target)
    .map(obj => obj as TimelineObject)
    .filter(obj => this.getTrackIndexForObject(obj) === trackIndex)
    .map(obj => ({ obj, ...this.getClipBounds(obj) }))
    .sort((a, b) => a.left - b.left);

  let leftNeighbor: { left: number; right: number } | null = null;
  let rightNeighbor: { left: number; right: number } | null = null;

  // 寻找左右最近邻居
  for (const clip of siblings) {
    if (clip.left < bounds.left) {
      leftNeighbor = clip;
      continue;
    }
    rightNeighbor = clip;
    break;
  }

  // 计算可用空间范围
  const leftBound = leftNeighbor ? leftNeighbor.right : 0;
  const rightBound = rightNeighbor
    ? rightNeighbor.left - bounds.width
    : Number.POSITIVE_INFINITY;

  let nextLeft = bounds.left;
  /** 检测空间是否足够 */
  const fits = rightBound >= leftBound;
  if (!fits) {
    // 空间不足时,根据移动方向推送到边界
    nextLeft = direction >= 0 ? rightBound : leftBound;
  } else {
    // 空间足够时,确保不越过邻居边界
    if (nextLeft < leftBound) nextLeft = leftBound;
    if (nextLeft > rightBound) nextLeft = rightBound;
  }

  // 时间轴总范围约束(允许拖拽到整个时间轴容量范围)
  // const absoluteMaxRight = this.contentWidth;
  // const maxLeft = Math.max(0, absoluteMaxRight - bounds.width);
  if (nextLeft < 0) nextLeft = 0;
  // if (nextLeft > maxLeft) nextLeft = maxLeft;

  target.set('left', nextLeft);
  return fits;
}