一. 技术概要重点
MySQL 集群(MySQL Cluster)本质是为了解决单节点 MySQL 的 性能瓶颈 (高并发)、可用性风险 (单点故障)和 数据可靠性(数据丢失)问题,通过多台服务器协同工作,将数据分散 / 复制存储、请求分散处理,最终实现:
高可用(HA):单个节点故障不影响整体服务;
高扩展(Scalability):可通过增加节点提升处理能力;
数据一致性:集群内数据保持同步(不同架构一致性级别不同)
MySQL 在服务器中的部署方法
在企业中 90%的服务器操作系统均为 Linux
Mysql 版本使用最多的是 Mysql5.7 和 Mysql8
在企业中对于 Mysql 的安装通常用源码编译的方式来进行
二. RHEL9中的编译环境设置
在 Linux 下部署 mysql, 安装源码编译环境及依赖性:
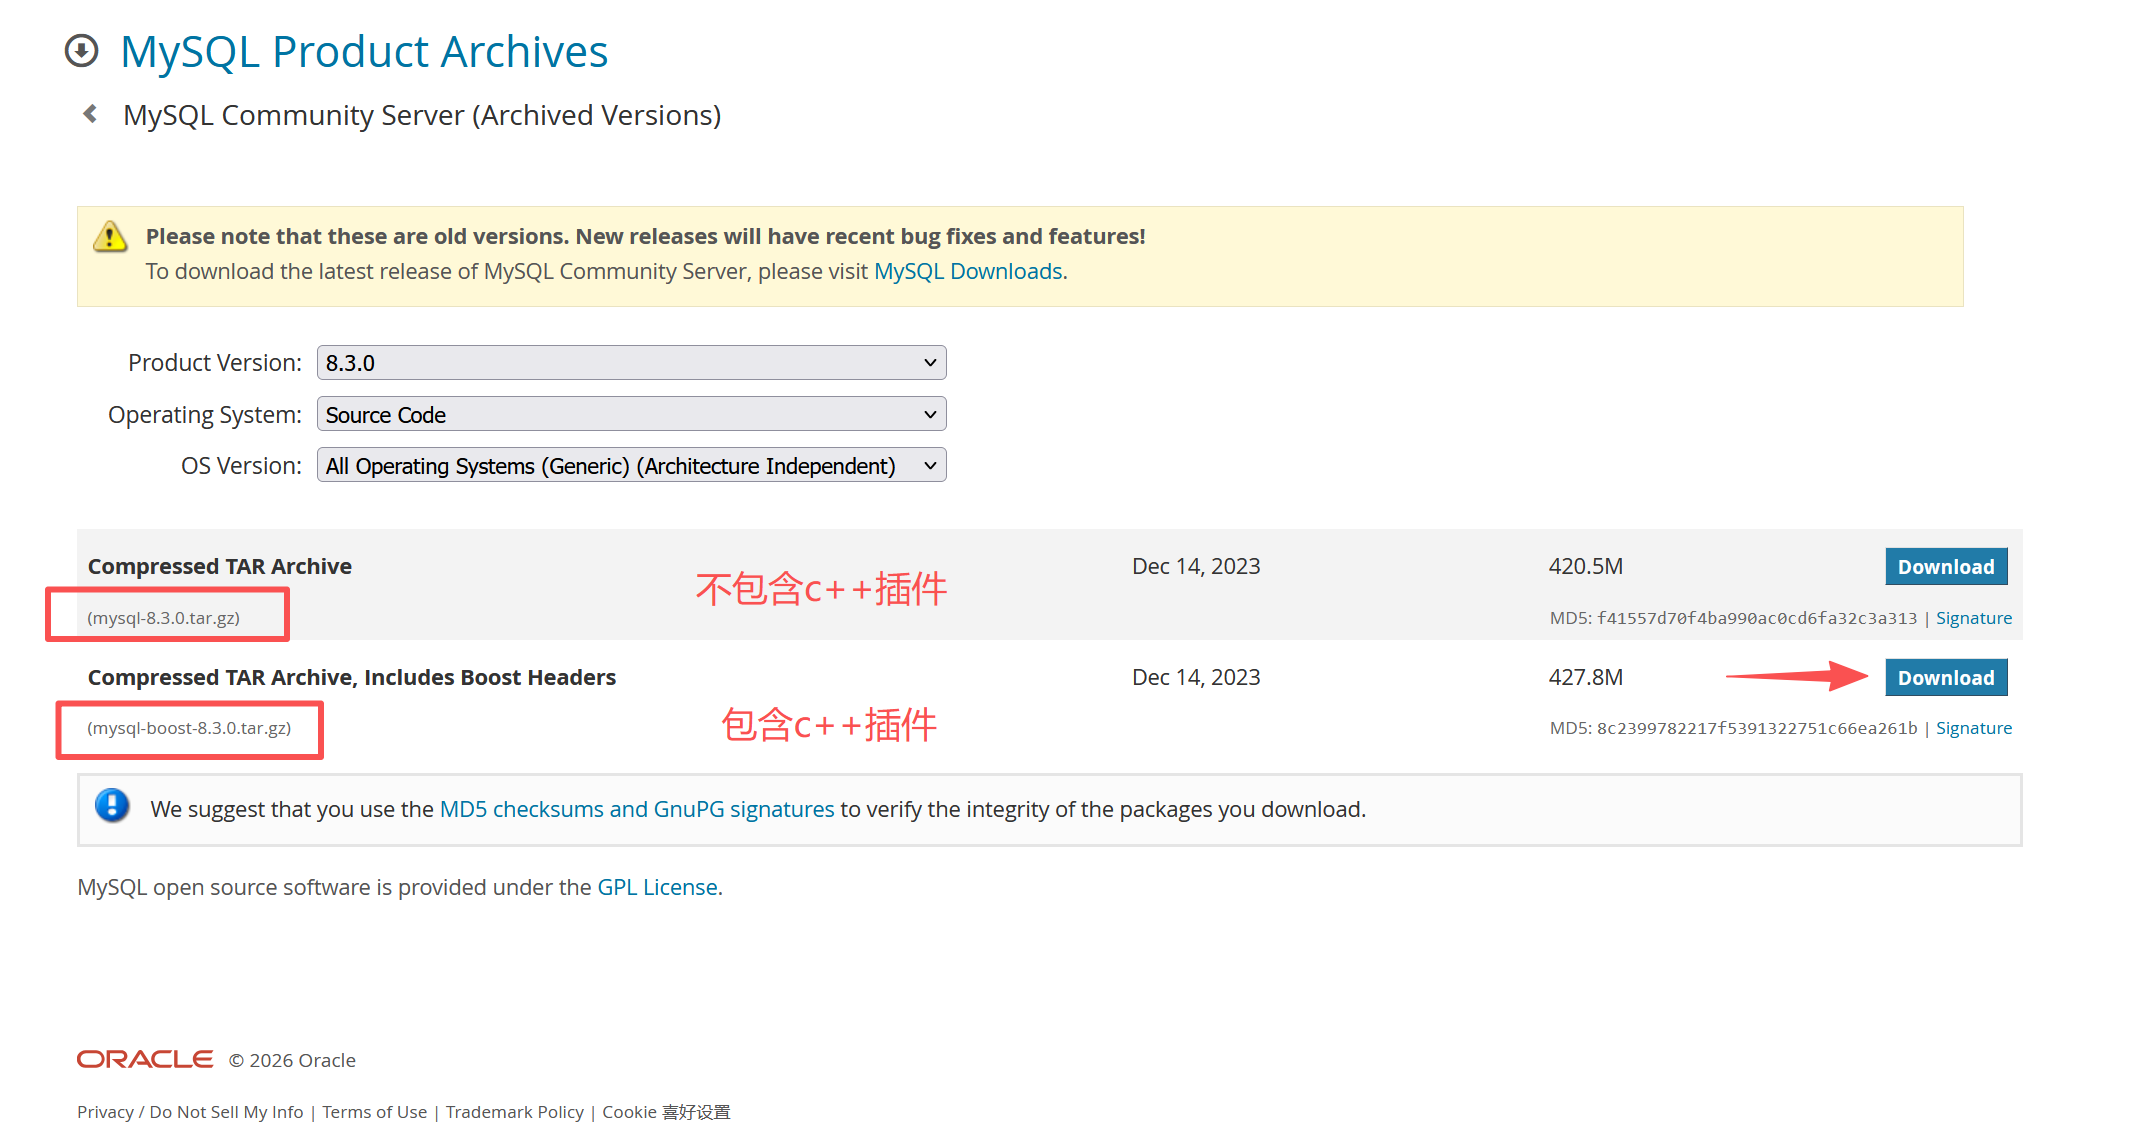
1.下载安装包
bash
wget https://downloads.mysql.com/archives/get/p/23/file/mysql-boost-8.3.0.tar.gz
2.源码编译
bash
[root@mysql-node1 ~]# dnf install cmake3 gcc git bison openssl-devel ncurses-devel systemd-devel rpcgen.x86_64 libtirpc-devel-1.3.3-9.el9.x86_64.rpm  gcc-toolset-12-gcc gcc-toolset-12-gcc-c++ gcc-toolset-12-binutils gcc-toolset-12-annobin-annocheck gcc-toolset-12-annobin-plugin-gcc -y

[root@mysql-node1 ~]# tar zxf mysql-boost-8.3.0.tar.gz
[root@mysql-node1 mysql-8.3.0]# mkdir  build
[root@mysql-node1 mysql-8.3.0]# cd build/

[root@mysql-node1 build]# cmake3 .. -DCMAKE_INSTALL_PREFIX=/usr/local/mysql -DMYSQL_DATADIR=/data/mysql -DMYSQL_UNIX_ADDR=/data/mysql/mysql.sock -DWITH_INNOBASE_STORAGE_ENGINE=1 -DWITH_EXTRA_CHARSETS=all -DDEFAULT_CHARSET=utf8mb4 -DDEFAULT_COLLATION=utf8mb4_unicode_ci -DWITH_BOOST=bundled  -DWITH_SSL=system -DWITH_DEBUG=OFF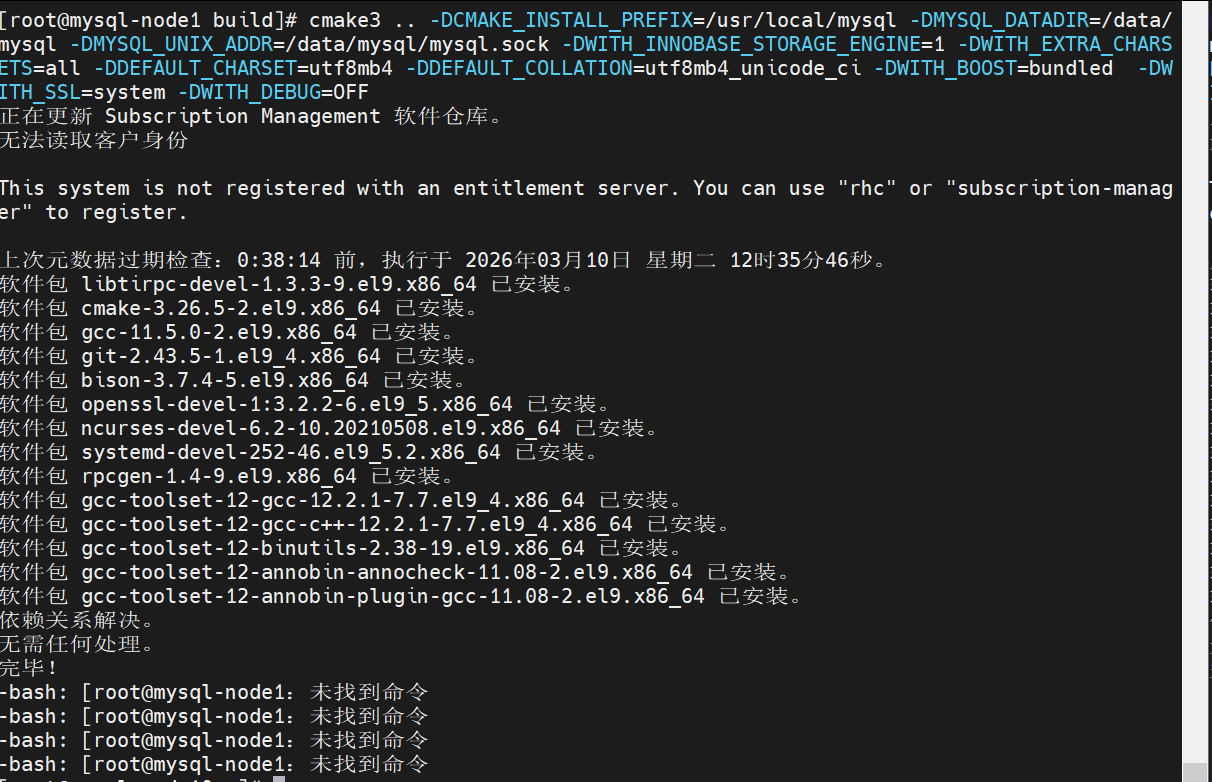
解析
bash
[root@mysql-node1 build]# make -j2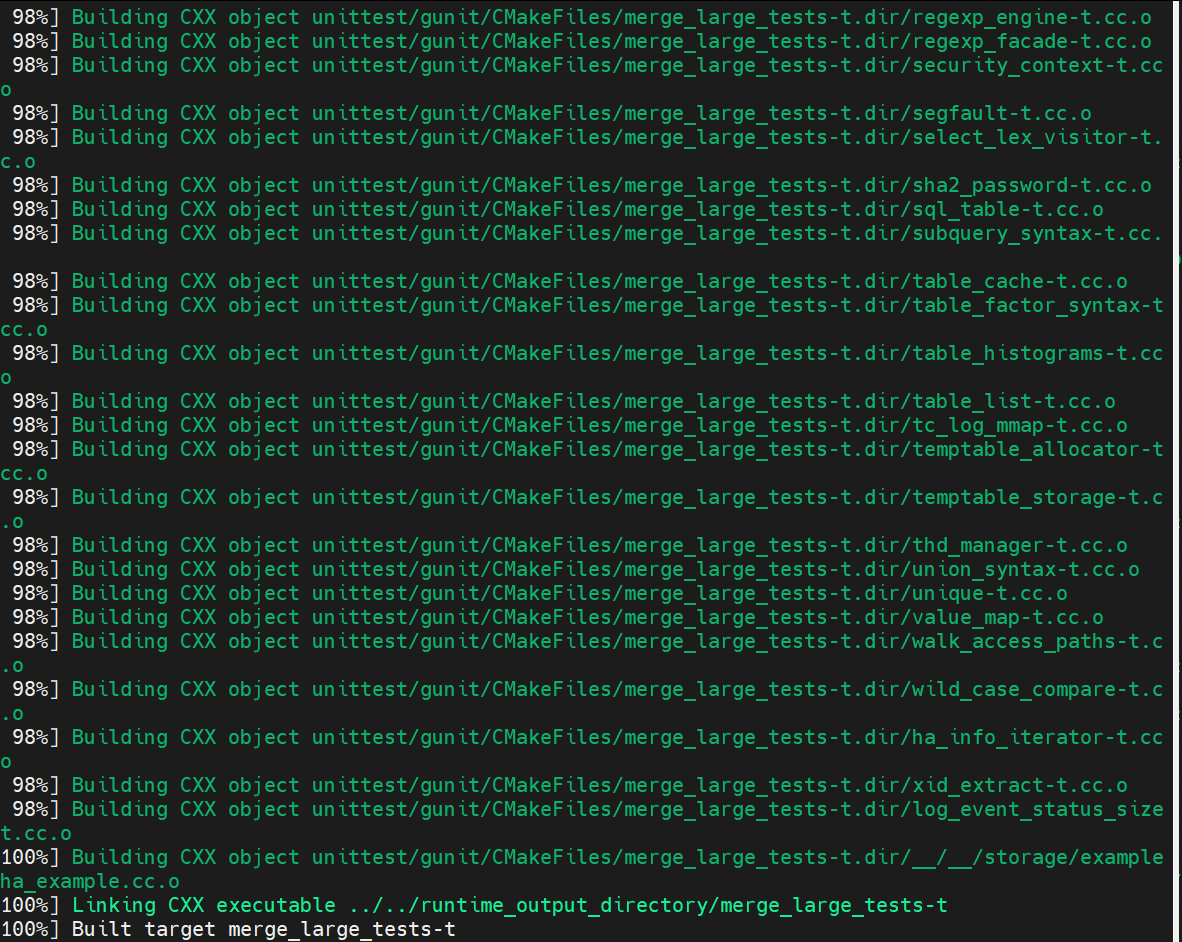
下载
bash
[root@mysql-node1 build]# make install
[root@mysql-node1 build]# cd /usr/local/mysql/
配置环境变量
bash
[root@mysql-node1 mysql]# vim ~/.bash_profile
# .bash_profile

# Get the aliases and functions
if [ -f ~/.bashrc ]; then
        . ~/.bashrc
fi

# User specific environment and startup programs
export PATH=$PATH:/usr/local/mysql/bin				#设置mysql运行环境的环境变量
设定生效
bash
[root@mysql-node1 mysql]# source ~/.bash_profile生效后不会显示找不到命令
而是报错

root@mysql-node1 mysql# useradd -r -s /sbin/nologin -M mysql
root@mysql-node1 mysql# mkdir -p /data/mysql
root@mysql-node1 mysql# chown mysql.mysql /data/mysql/
3.部署mysql
bash
[root@mysql-node1 build]# make install
[root@mysql-node1 build]# cd /usr/local/mysql/
[root@mysql-node1 mysql]# vim ~/.bash_profile
# .bash_profile
# Get the aliases and functions
if [ -f ~/.bashrc ]; then
. ~/.bashrc
fi
# User specific environment and startup programs
export PATH=$PATH:/usr/local/mysql/bin #设置mysql运行环境的环境变量
[root@mysql-node1 mysql]# source ~/.bash_profile #修改环境变量
[root@mysql-node1 mysql]# useradd -r -s /sbin/nologin -M mysql #建立数据库程序运行用户
[root@mysql-node1 mysql]# mkdir -p /data/mysql #建立数据库数据目录
[root@mysql-node1 mysql]# chown mysql.mysql /data/mysql/
[root@mysql-node1 ~]# vim /etc/my.cnf #生成配置文件
[mysqld]
datadir=/data/mysql
socket=/data/mysql/mysql.sock4.mysql数据结构初始化( 数据库安全初始化)
bash
[root@mysql-node1 ~]# mysqld --initialize --user=mysql #生成配置文件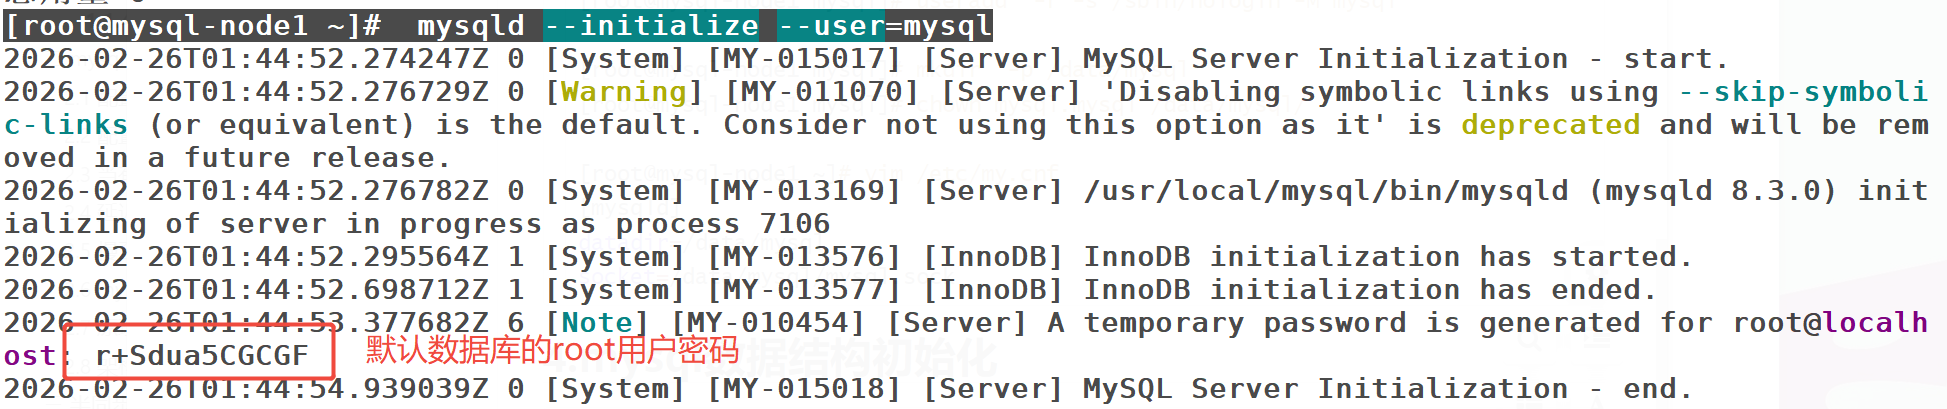
5.启动mysql
使用RHEL9,需要生成systemd启动文件
bash
[root@mysql-node1 support-files]# dnf install initscripts-10.11.8-4.el9.x86_64 -y
[root@mysql-node1 support-files]# cd /usr/local/mysql/support-files/
[root@mysql-node1 support-files]# cp -p mysql.server /etc/init.d/mysqld
[root@mysql-node1 support-files]# /etc/init.d/mysqld start
Starting MySQL.Logging to '/data/mysql/mysql-node1.err'.
. SUCCESS!
#开机启动
[root@mysql-node1 support-files]# chkconfig --level 35 mysqld on6.mysql的安全初始化
bash
[root@mysql-node1 ~]# mysql_secure_installation
Securing the MySQL server deployment. Enter password for user root: The existing password for the user account root has expired. Please set a new password. New password: Re-enter new password: VALIDATE PASSWORD COMPONENT can be used to test passwords and improve security. It checks the strength of password and allows the users to set only those passwords which are secure enough. Would you like to setup VALIDATE PASSWORD component? Press y|Y for Yes, any other key for No: no Using existing password for root. Change the password for root ? ((Press y|Y for Yes, any other key for No) : no Remove anonymous users? (Press y|Y for Yes, any other key for No) : y Success. Normally, root should only be allowed to connect from 'localhost'. This ensures that someone cannot guess at the root password from the network. Disallow root login remotely? (Press y|Y for Yes, any other key for No) : y Success. By default, MySQL comes with a database named 'test' that anyone can access. This is also intended only for testing, and should be removed before moving into a production environment. Remove test database and access to it? (Press y|Y for Yes, any other key for No) :y - Dropping test database... Success. - Removing privileges on test database... Success. Reloading the privilege tables will ensure that all changes made so far will take effect immediately. Reload privilege tables now? (Press y|Y for Yes, any other key for No) :y Success. All done!
三. mysql 的组从复制
2.1 配置 mastesr
bash
[root@mysql-node10 ~]# vim /etc/my.cnf
[mysqld]
datadir=/data/mysql
socket=/data/mysql/mysql.sock
symbolic-links=0
log-bin=mysql-bin
server-id=1
bash
[root@mysql-node10 ~]# /etc/init.d/mysqld restart验证设置是否成功
#进入数据库配置用户权限
bash
[root@mysql-node10 ~]# mysql -plee
#查看默认认证插件
bash
mysql> SHOW VARIABLES LIKE 'default_authentication_plugin';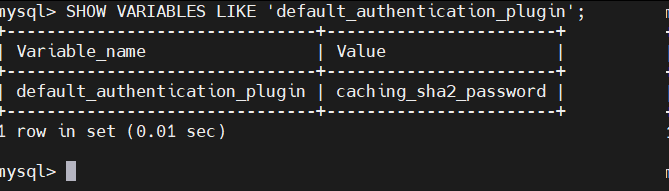
#生成专门用来做复制的用户,此用户是用于slave端做认证用
bash
mysql> create user lee@'%' identified with mysql_native_password by 'lee';
mysql> GRANT replication slave ON *.* to lee@'%';                ##对这个用户进行授权
mysql> SHOW MASTER STATUS;                                        ##查看master的状态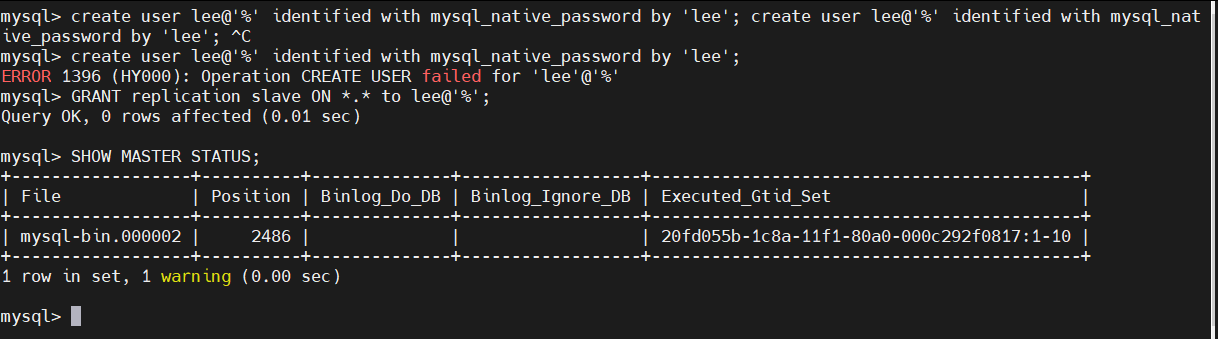
```
2.2 配置 salve
bash
[root@mysql-node2 ~]# vim /etc/my.cnf
[mysqld]
datadir=/data/mysql
socket=/data/mysql/mysql.sock
symbolic-links=0
server-id=2
bash
[root@mysql-node2 ~]# /etc/init.d/mysqld restart
[root@mysql-node2 ~]# mysql -plee

mysql> CHANGE MASTER TO MASTER_HOST='172.25.254.10',MASTER_USER='lee',MASTER_PASSWORD='lee',MASTER_LOG_FILE='mysql-bin.000001',MASTER_LOG_POS=350;
Query OK, 0 rows affected, 2 warnings (0.01 sec)
bash
mysql> start slave;Query OK, 0 rows affected (0.01 sec)
bash
mysql> SHOW SLAVE STATUS\G;
bash
#如果上述内容输入错误可以reset重新填入信息即可
mysql> RESET SLAVE ALL;
Query OK, 0 rows affected, 1 warning (0.00 sec)
bash
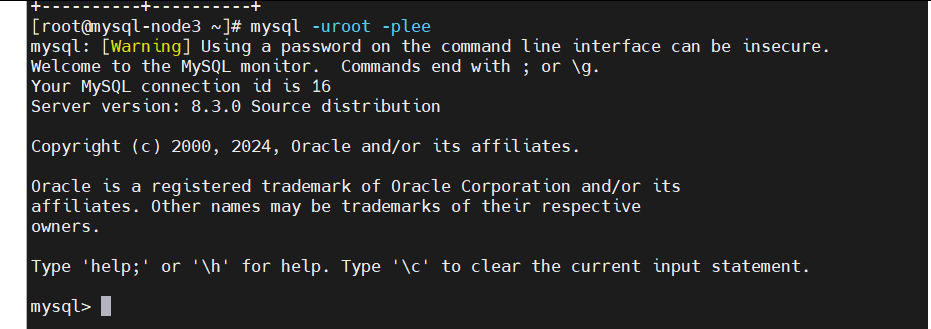
[root@mysql-node10 ~]# mysql -plee
mysql> CREATE DATABASE lee;
Query OK, 1 row affected (0.00 sec)

mysql> CREATE TABLE lee.userlist (
    -> username varchar(20) not null,
    -> password varchar(50) not null
    -> );
Query OK, 0 rows affected (0.02 sec)

mysql> insert into lee.userlist values ('lee','123');
Query OK, 1 row affected (0.02 sec)

mysql> SELECT * FROM lee.userlist;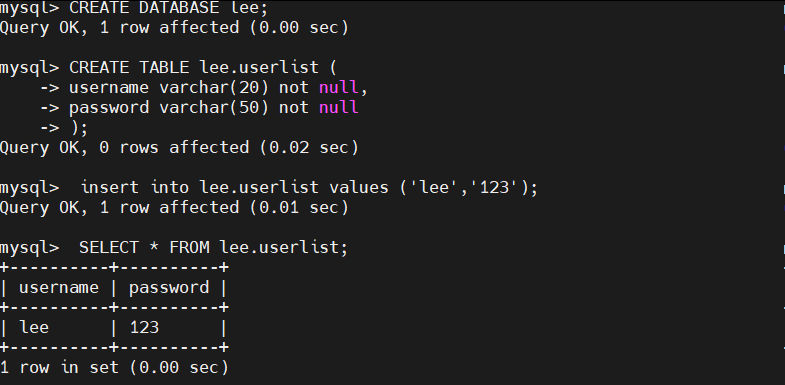
在slave中查看数据是否有同步过来
bash
[root@mysql-node2 ~]# mysql -plee
mysql> SELECT * FROM lee.userlist;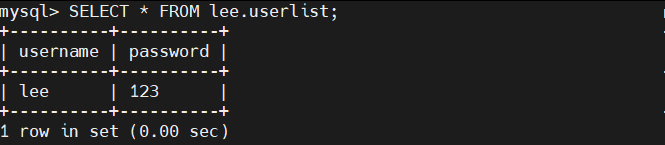
```
2.3 当有数据时添加 slave2
完成基础配置
bash
[root@mysql-node3 ~]# vim /etc/my.cnf
[mysqld]
datadir=/data/mysql
socket=/data/mysql/mysql.sock
symbolic-links=0
server-id=3
bash
[root@mysql-node3 ~]# /etc/init.d/mysqld restart
#从master节点备份数据
bash
[root@mysql-node1 ~]# mysqldump -uroot -plee lee > lee.sql
> !NOTE
>
> 生产环境中备份时需要锁表,保证备份前后的数据一致
>
> mysql > FLUSH TABLES WITH READ LOCK;
>
> 备份后再解锁
>
> mysql > UNLOCK TABLES;
>
> mysqldump 命令备份的数据文件,在还原时先 DROP TABLE,需要合并数据时需要删除此语句
>
> ```
> --
> -- Table structure for table `userlist`
> --
>
> DROP TABLE IF EXISTS `userlist`; #需要合并数据时需要删除此语句
> /*!40101 SET @saved_cs_client = @@character_set_client */;
> /*!40101 SET character_set_client = utf8 */;
> ```
```
#利用master节点中备份出来的lee.sql在slave2中拉平数据
#利用master节点中备份出来的lee.sql在slave2中拉平数据
bash
[root@mysql-node3 ~]# mysql -uroot -plee -e "create database lee;"
[root@mysql-node3 ~]# mysql -uroot -p lee <lee.sql
[root@mysql-node3 ~]# mysql -uroot -plee -e "select * from lee.userlist;"
配置slave2的slave功能
#在master中查询日志pos
mysql -uroot -plee -e "SHOW MASTER STATUS;"

root@mysql-node3 \~# mysql -uroot -plee
bash
mysql>  CHANGE MASTER TO MASTER_HOST='172.25.254.10', MASTER_USER='repl', MASTER_PASSWORD='lee', MASTER_LOG_FILE='mysql-bin.000002', MASTER_LOG_POS=3201;
mysql> start slave;
mysql> SHOW SLAVE STATUS\G;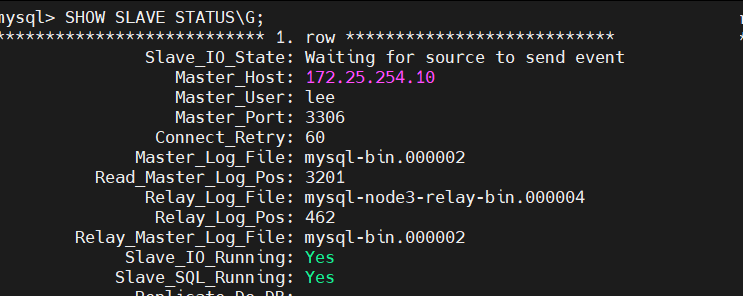
测试:
bash
[root@mysql-node1 ~]# mysql -uroot -plee -e "INSERT INTO lee.userlist VALUES('user3','123');"
bash
[root@mysql-node2 mysql]# mysql -uroot -plee -e 'select * from lee.userlist;'
mysql: [Warning] Using a password on the command line interface can be insecure.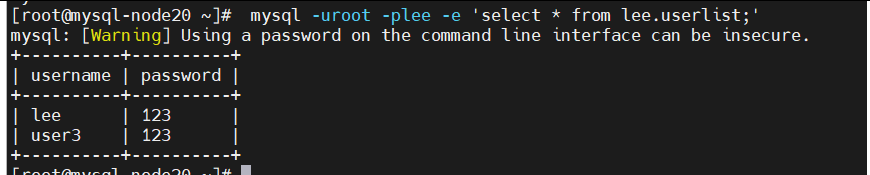
bash
[root@mysql-node3 ~]# mysql -uroot -plee -e 'select * from lee.userlist;'