源代码安装流程:
1.yum安装依赖
2.解压源代码
3.配置
4.编译
5.安装
6.修改配置文件
7.优化环境变量(比如:软连接)
8.启动并添加开机启动项
安装步骤
1.下载安装包
Apache下载地址:
2.将文件拖入Linux

Xshell可以直接拖或者rz上传
3.编译gcc(编译所需的基础环境)
[root@localhost ~]# yum -y install gcc*4.安装依赖关系(yum)
[root@localhost ~]# yum -y install expat-devel pcre-devel pcre5.解压文件包
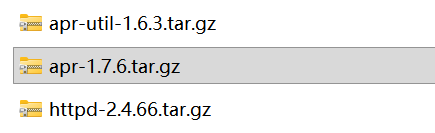
[root@localhost ~]# tar -zxvf apr-1.7.6.tar.gz -C /usr/src/

[root@localhost ~]# tar -zxvf apr-util 1.6.3.tar.gz -C /usr/src/

[root@localhost ~]# tar -zxvf httpd-2.4.66.tar.gz -C /usr/src/
将文件解压到/usr/src
6.配置指定路径并安装
(1)APR
[root@localhost apr-1.6.7]# ./configure --prefix=/usr/local/apr若报错 根据实际情况安装依赖环境(详见第四步)
root@localhost apr-1.6.7# make && make install 
(2)Apr-util
[root@localhost apr-util-1.6.3]# ./configure --prefix=/usr/local/apr-util --with-apr=/usr/local/apr

[root@localhost apr-util-1.6.3]# make && make install
(3)Httpd
[root@localhost httpd-2.4.66]# export LD_LIBRARY_PATH=/usr/local/apr/lib:/usr/local/apr-util/lib:$LD_LIBRARY_PATH

[root@localhost httpd-2.4.66]# ./configure --prefix=/usr/local/httpd --with-apr=/usr/local/apr --with-apr-util=/usr/local/apr-util --enable-so --enable-rewrite --enable-charset-lite --enable-cgi --enable-sockets

[root@localhost httpd-2.4.66]# make && make install
7.路径优化
[root@localhost ~]#ln -s /usr/local/httpd/bin/* /usr/local/bin/

[root@localhost ~]#ln -s /usr/local/httpd/include  /usr/include
8.服务优化
[root@localhost ~]# cp /usr/local/httpd/bin/apachectl /etc/init.d/httpd9.文件提权
[root@localhost ~]# chmod a+x /etc/init.d/httpd10.编辑优先级别
[root@localhost ~]# vim /etc/init.d/httpd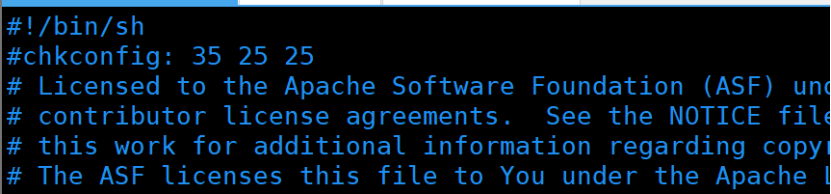
服务控制位是3和5,开机第25个启动httpd服务,关机第25个关闭
11.添加系统/开机自启动
(1)系统
[root@localhost ~]# chkconfig --add httpd(2)开机
[root@localhost ~]# chkconfig httpd on12.配置详细文件
(1)httpd.service
[root@localhost ~]#vim /lib/systemd/system/httpd.service

[Unit]

Description=The Apache HTTP Server

After=network.target


[Service]

Type=forking

PIDFile=/usr/local/httpd/logs/httpd.pid

ExecStart=/usr/local/bin/apachectl $OPTIONS

ExecReload=/bin/kill -HUP $MAINPID

KIllMode=process

Restart=On-failure

RestartSec=42s


[Install]

WantedBy=graphical.target
(2)httpd.conf
[root@localhost ~]# vim /usr/local/httpd/conf/httpd.conf 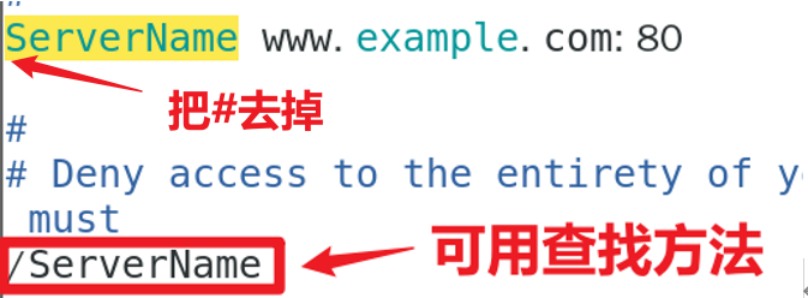
确保服务器使用指定的主机名或IP地址
13.启动httpd
[root@localhost ~]# /etc/init.d/httpd start

[root@localhost ~]# netstat -tuln | grep :80    //验证端口是否启动

[root@localhost ~]# systemctl start httpd
14.替换测试页
[root@localhost ~]# cd /usr/local/httpd/htdocs/

[root@localhost ~]#cp index.html index.html.bak

[root@localhost ~]#mv index.html.bak /var/www/html/  //备份原有的验证页面
测试页面文件包拖到文件夹中

[root@localhost ~]#unzip web.zip 解压到当前目录

[root@localhost ~]#mv * ../
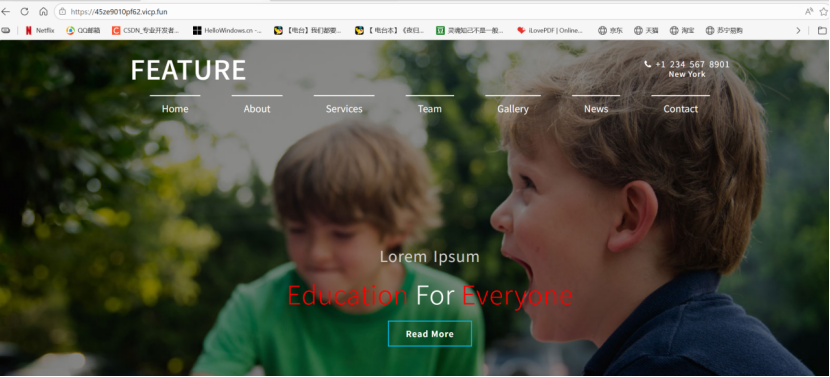
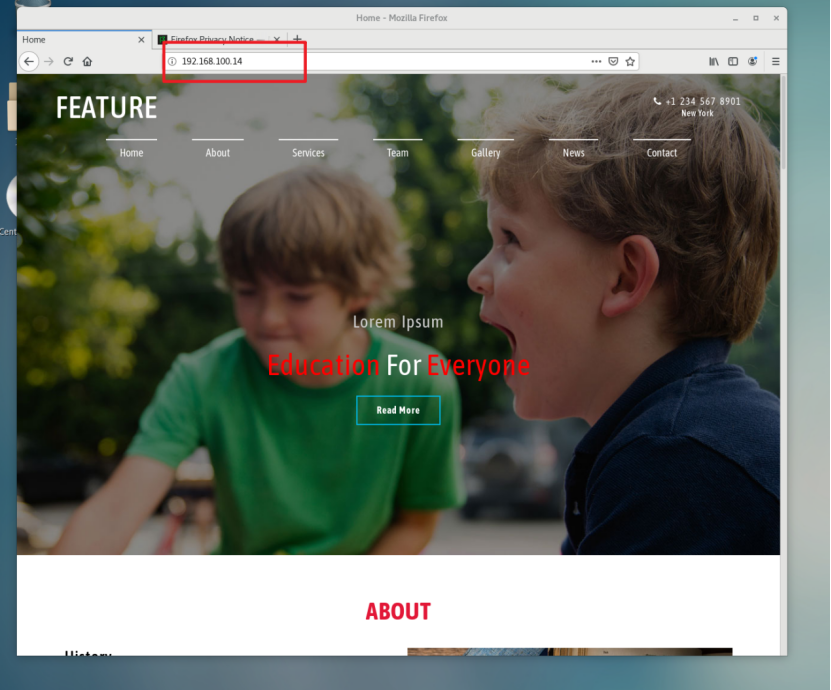
15.验证
内网穿透(花生壳)
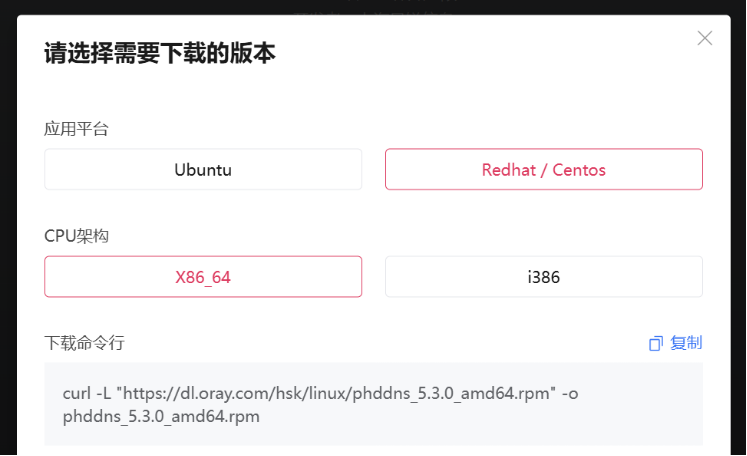
1.下载系统包
下载链接:https://hsk.oray.com/download
根据系统选择相应版本 复制连接
2.安装
[root@localhost ~]# curl -L "https://dl.oray.com/hsk/linux/phddns_5.3.0_amd64.rpm" -o phddns_5.3.0_amd64.rpm //下载安装包

[root@localhost ~]# rpm -ivh phddns_5.3.0_amd64.rpm //安装软件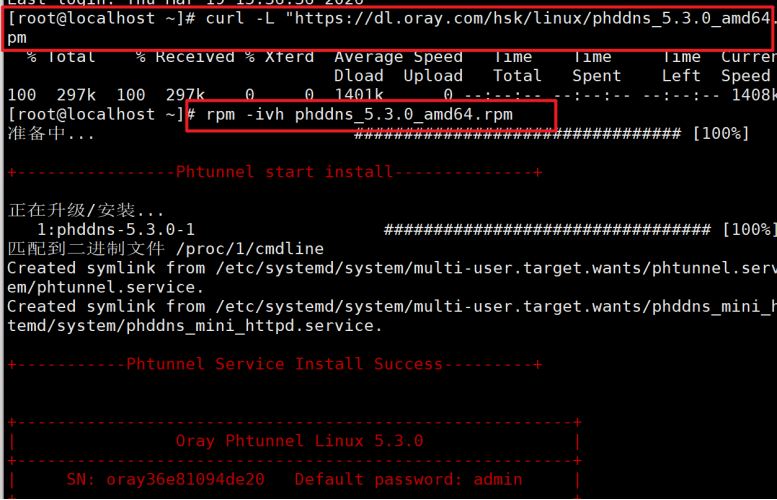
3.启动服务
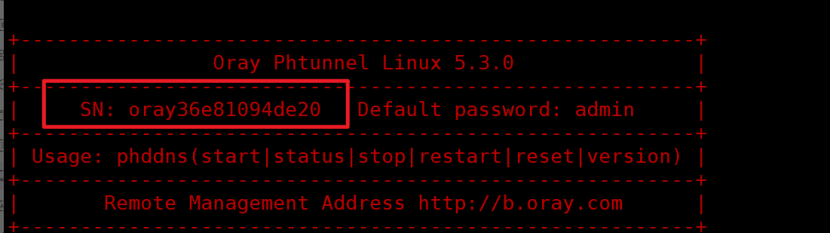
[root@localhost ~]# phddns start //启动服务

[root@localhost ~]# phddns status //查看状态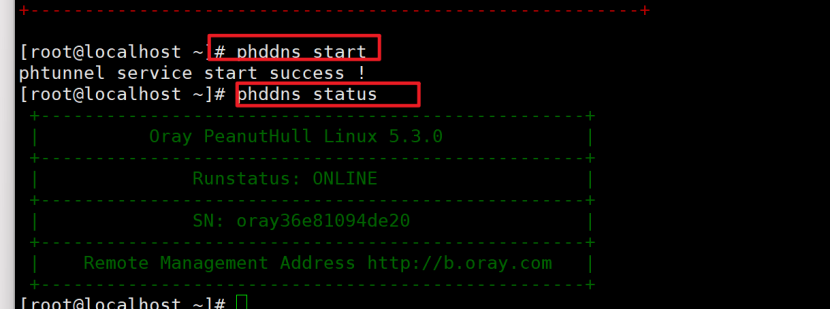
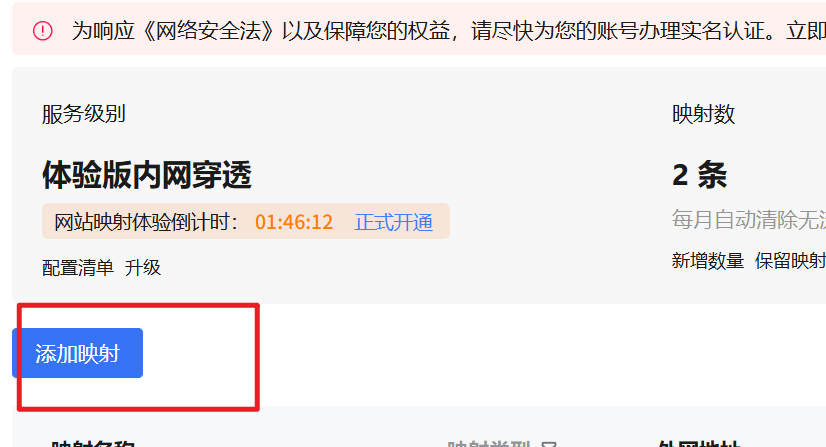
4.服务端映射
(1)登录
https://console.hsk.oray.com/zh/device 根据提示完成注册
(2)添加映射
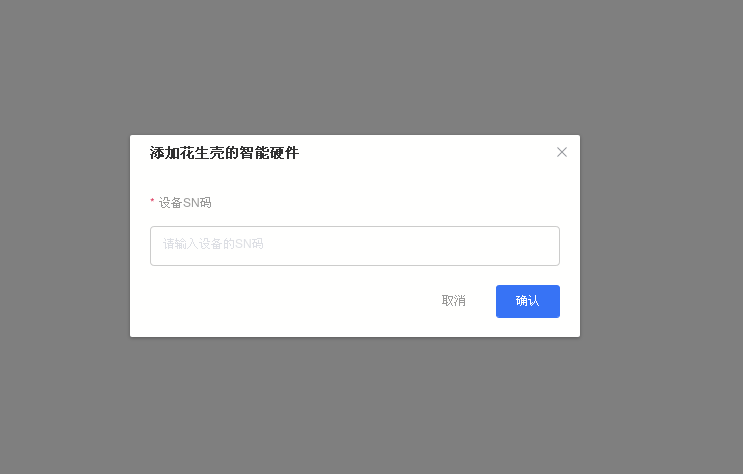
(3)绑定SN码
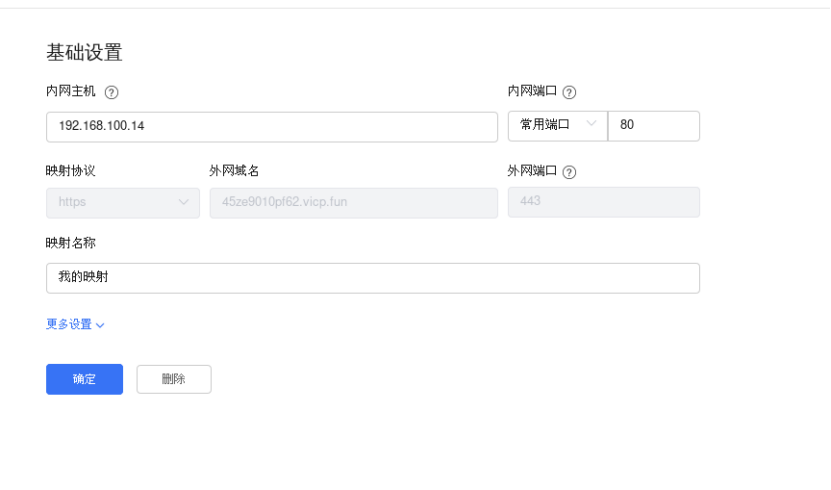
(4)编辑设置
(5)复制外网域名到浏览器上