首先,import 函数
import cv2
import numpy as np
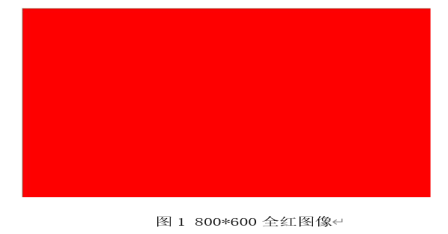
1.创建一个800*600的图像,全部为红色
new_pic = np.zeros((row_count, col_count, 3), np.uint8)
//np.zeros :创建全零数组,所有像素初始值为0(黑色)
//row_count, col_count, 3:高度,宽度,通道数,3表示BGR三个颜色通道
//np.uint8:数组数据类型,uint8表示无符号8位整数,取值范围0-255(正好对应像素值范围)
new_pic:, :, 2 = 255 # OpenCV中BGR,索引2为红色通道:, : → 选中所有行、所有列(整个图像)
2 → 选中第三个通道(索引从0开始:0=蓝,1=绿,2=红)
255 → 红色通道的最大值,代表纯红色
原理:OpenCV使用BGR颜色格式,不是常见的RGB,所以红色是第三个通道
# 实验1:创建800*600全红色图像
def create_red_image():
row_count = 600 #创建一个长*高为 800 * 600 的东西
col_count = 800
# 创建BGR三通道全零数组,uint8为像素值类型(0-255)
new_pic = np.zeros((row_count, col_count, 3), np.uint8)
new_pic[:, :, 2] = 255 # OpenCV中BGR,索引2为红色通道
print("全红图像形状:", new_pic.shape) #打印图像
# 显示图像
cv2.namedWindow('new_pic', cv2.WINDOW_NORMAL) #创建一个可调整大小的窗口
cv2.imshow('new_pic', new_pic) #将图像显示到指定窗口
cv2.waitKey(0) # 按任意键关闭窗口
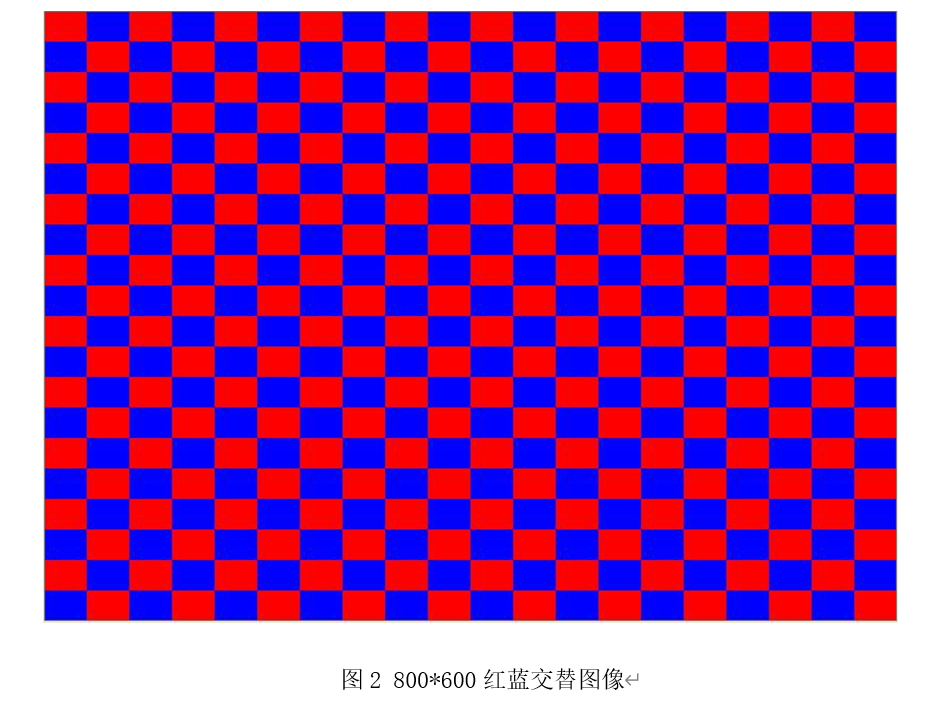
cv2.destroyAllWindows()2.创建一个800*600的图像,以40*30的方框红蓝交替,如图2所示:
要求:
图像大小:800*600
图像中方格大小:40*30
遍历每个方框区域
for i in range(0, image_height, box_height): #从零开始,每次加box_height个单位
for j in range(0, image_width, box_width):
奇偶判断实现红蓝交替
if (i // box_height + j // box_width) % 2 == 0:
imagei:i+box_height, j:j+box_width = 0, 0, 255 # 红色
else:
imagei:i+box_height, j:j+box_width = 255, 0, 0 # 蓝色
i // box_height:计算当前i属于第几行方框(比如i=30 → 30//30=1,第2行)
j // box_width:计算当前j属于第几列方框(比如j=40 → 40//40=1,第2列)
两者相加后取模2:和为偶数则是红色,奇数则是蓝色
python
# 实验2:创建800*600图像,40*30方框红蓝交替
def create_红蓝交替_boxes():
#整体图片大小
image_height = 600
image_width = 800
#划分的放块大小
box_width = 40
box_height = 30
# 创建全黑背景图像
image = np.zeros((image_height, image_width, 3), dtype=np.uint8)
# 遍历每个方框区域
for i in range(0, image_height, box_height): #从零开始,每次加box_height个单位
for j in range(0, image_width, box_width):
# 奇偶判断实现红蓝交替
if (i // box_height + j // box_width) % 2 == 0:
image[i:i+box_height, j:j+box_width] = [0, 0, 255] # 红色
else:
image[i:i+box_height, j:j+box_width] = [255, 0, 0] # 蓝色
# 显示图像
cv2.imshow('Alternating Boxes', image)
cv2.waitKey(0)
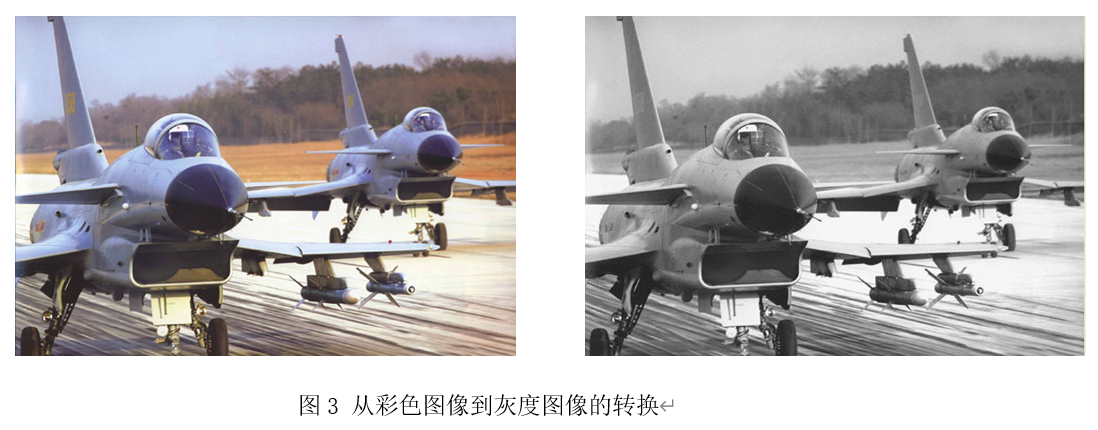
cv2.destroyAllWindows()3.完成从彩色图像到灰度图像的转换
首先要导入图像
img_file = r'C:\Users\24907\Python_Experiment\11img\11img\other\j20_01.jpg'
r'' 表示原始字符串,避免路径中的反斜杠(\)被Python识别为转义字符(比如\n、\t)
方一:
img_new = cv2.imread(img_file, cv2.IMREAD_GRAYSCALE)
cv2.imread(文件路径, 读取模式):OpenCV读取图像的核心函数 # 参数2:cv2.IMREAD_GRAYSCALE → 强制以灰度模式读取,无论原图是彩色还是灰度
彩色转灰度的底层原理:
OpenCV 的
cv2.IMREAD_GRAYSCALE模式会按照以下公式将彩色 BGR 图像转为灰度:Gray=0.299×R+0.587×G+0.114×B
python
# 实验3:彩色图像转灰度图像
def color2gray():
    img_file = r'C:\Users\24907\Python_Experiment\11img\11img\other\j20_01.jpg'
    # 以灰度模式读取图像
    img_new = cv2.imread(img_file, cv2.IMREAD_GRAYSCALE)
    # 校验图像是否加载成功
    if img_new is None:
        print("Could not open or find the image.")
    else:
        cv2.namedWindow("img_new", cv2.WINDOW_NORMAL)
        cv2.imshow("img_new", img_new)
        print("灰度图像形状:", img_new.shape)
        print(f"行数(高度):{img_new.shape[0]}, 列数(宽度):{img_new.shape[1]}")
        cv2.waitKey(0)
        cv2.destroyAllWindows()
方二:手搓
python
# 实验3:彩色图像转灰度图像
def color2gray():
img_file = r'C:\Users\24907\Python_Experiment\11img\11img\other\j20_01.jpg'
# 先读取彩色图像
color_img = cv2.imread(img_file)
if color_img is None:
print("图像加载失败")
return
# 手动转灰度:按加权公式计算
# 先拆分BGR通道(注意OpenCV是BGR顺序)
B = color_img[:, :, 0]
G = color_img[:, :, 1]
R = color_img[:, :, 2]
# 加权计算灰度值(转换为float避免溢出,再转回uint8)
gray_img = (0.299 * R + 0.587 * G + 0.114 * B).astype(np.uint8)
# 显示结果
cv2.imshow("Manual Gray", gray_img)
cv2.waitKey(0)
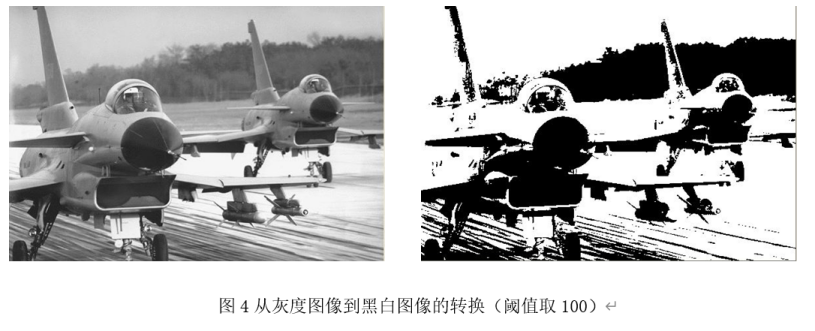
cv2.destroyAllWindows()4.完成从灰度图像到黑白图的转换
row, col = gray_img.shape #获取灰度图像尺寸
binary_img = np.zeros_like(gray_img) #初始值全为0
threshold = 100 #定义二值化阈值 像素值≥100设为白色(255),<100设为黑色(0)
遍历像素实现二值化
for i in range(row):
for j in range(col):
if gray_imgi, j >= threshold:
binary_imgi, j = 255 # 白色
else:
binary_imgi, j = 0 # 黑色
python
# 实验4:灰度图像转黑白二值图像(阈值100)
def gray2binary():
    img_file = r'C:\Users\24907\Python_Experiment\11img\11img\other\j20_01.jpg'
    # 读取灰度图像
    gray_img = cv2.imread(img_file, cv2.IMREAD_GRAYSCALE)
    if gray_img is None:
        print("Could not open or find the image.")
    else:
        row, col = gray_img.shape #获取灰度图像尺寸
        binary_img = np.zeros_like(gray_img) #初始值全为0
        threshold = 100 #定义二值化阈值 像素值≥100设为白色(255),<100设为黑色(0)
        # 遍历像素实现二值化
        for i in range(row):
            for j in range(col):
                if gray_img[i, j] >= threshold:
                    binary_img[i, j] = 255  # 白色
                else:
                    binary_img[i, j] = 0    # 黑色
        # 显示黑白图像
        cv2.namedWindow("Binary Image", cv2.WINDOW_NORMAL)
        cv2.imshow("Binary Image", binary_img)
        cv2.waitKey(0)
        cv2.destroyAllWindows()
5.在4的基础上,实现原来的灰度图像,大于阈值的,设为红色;小于阈值的,设为蓝色
if old_gray >= threshold:
new_picrow, col = (0, 0, 255) # 红色
同理可得:
python
# 实验5:灰度图像按阈值分红蓝(>100红,<100蓝)
def gray2red_blue():
    img_file = r'C:\Users\24907\Python_Experiment\11img\11img\other\j20_01.jpg'
    # 读取灰度图像
    pic = cv2.imread(img_file, cv2.IMREAD_GRAYSCALE)
    if pic is None:
        print("Could not open or find the image.")
    else:
        row_count, col_count = pic.shape[:2]
        # 创建三通道彩色空图像
        new_pic = np.zeros((row_count, col_count, 3), np.uint8)
        threshold = 100
        # 遍历像素赋值颜色
        for row in range(row_count):
            for col in range(col_count):
                old_gray = pic[row, col]
                if old_gray >= threshold:
                    new_pic[row, col] = (0, 0, 255)  # 红色
                else:
                    new_pic[row, col] = (255, 0, 0)  # 蓝色
        # 显示图像
        cv2.namedWindow("New Picture", cv2.WINDOW_NORMAL)
        cv2.imshow("New Picture", new_pic)
        cv2.waitKey(0)
        cv2.destroyAllWindows()
6.打开一副图像,取出以原图像为中心,原图像大小的十分之一的子图像。原来图像:800*600-->80*60的图像。
a)以方框的形式显示
python
# 实验6a:提取中心1/10子图像(方框形式显示)
def get_center_subimg_box():
    img_file = r'C:\Users\24907\Python_Experiment\11img\11img\other\j20_01.jpg'
    # 读取原始彩色图像
    original_img = cv2.imread(img_file)
    if original_img is None:
        print("Could not open or find the image.")
    else:
        height, width = original_img.shape[:2]
        # 计算子图像尺寸(原尺寸1/10)
        sub_img_height = height // 10
        sub_img_width = width // 10
        # 计算中心子图像起始坐标
        start_row = max(0, height // 2 - sub_img_height // 2)
        start_col = max(0, width // 2 - sub_img_width // 2)
        # 切片提取子图像
        sub_img = original_img[start_row:start_row+sub_img_height, start_col:start_col+sub_img_width]
        # 显示子图像
        cv2.namedWindow('Sub Image', cv2.WINDOW_NORMAL)
        cv2.imshow('Sub Image', sub_img)
        print(f"方框子图像尺寸:{sub_img_height}*{sub_img_width}")
        cv2.waitKey(0)
        cv2.destroyAllWindows()
b)以源图像为中心,半径为原图像十分之一的图像(原图像大小取宽度和高度中的最小值)。显示一个圆,圆的外面用绿色的背景
python
# 实验6b:提取中心圆形区域(外部绿色背景)
def get_center_subimg_circle():
    img_file = r'C:\Users\24907\Python_Experiment\11img\11img\other\j20_01.jpg'
    image = cv2.imread(img_file)
    if image is None:
        print("Could not open or find the image.")
    else:
        height, width = image.shape[:2]
        # 计算圆半径:原图像宽高最小值的1/10
        radius = min(width, height) // 10
        # 创建绿色背景图像
        green_background = np.full_like(image, (0, 255, 0))  # BGR绿色
        # 创建全黑遮罩(uint8类型)
        mask = np.zeros((height, width), np.uint8)
        # 圆心坐标(图像中心)
        center_x, center_y = width // 2, height // 2
        # 在遮罩上绘制白色填充圆(thickness=-1为填充,1为描边)
        cv2.circle(mask, (center_x, center_y), radius, 255, thickness=-1)
        # 按遮罩合并图像和背景
        masked_image = cv2.bitwise_and(image, image, mask=mask)  # 圆形区域保留原图
        masked_background = cv2.bitwise_and(green_background, green_background, mask=cv2.bitwise_not(mask))  # 外部绿色
        final_image = cv2.add(masked_image, masked_background)  # 合并结果
        # 显示最终图像
        cv2.imshow('final_image', final_image)
        cv2.waitKey(0)
        cv2.destroyAllWindows()

# 主函数:注释/取消注释对应行,运行单个实验
if __name__ == '__main__':
    # create_red_image()          # 实验1
    # create_红蓝交替_boxes()    # 实验2
     color2gray()               # 实验3
    # gray2binary()              # 实验4
    # gray2red_blue()            # 实验5
    # get_center_subimg_box()    # 实验6a
     get_center_subimg_circle() # 实验6b