一 安装机器人
安装飞书机器人,参考官方文档:https://www.volcengine.com/docs/6396/2189942?lang=zh#DU0OsR2G
这里测试三个机器人,main,coder,cook, (主机器人,写代码的机器人,美食的机器人)
二 openclaw添加agent
终端输入openclaw agents add, 然后选择模型,选择channel,这里选择上面新建的飞书机器人,填入appId,appSecret。
终端操作完成后观察配置文件:~/.openclaw/openclaw.json,有一些需入手动操作。
2.1 agents list
主要看agents里面的list,智能体都在这里
其中subagents里面是可以交互的智能体,需要手动输入
    "list": [
      {
        "id": "main",
        "subagents": {
          "allowAgents": ["main","coder", "cook"]
        }
      },
      {
        "id": "coder",
        "name": "coder",
        "workspace": "/Users/yubin/Documents/openclaw_proj/main_coder",
        "agentDir": "/Users/yubin/.openclaw/agents/coder/agent",
        "model": "minimax-portal/MiniMax-M2.7",
        "subagents": {
          "allowAgents": ["main","coder", "cook"]
        }
      },
      {
        "id": "cook",
        "name": "cook",
        "workspace": "/Users/yubin/Documents/openclaw_proj/main_cook",
        "agentDir": "/Users/yubin/.openclaw/agents/cook/agent",
        "model": "minimax-portal/MiniMax-M2.7",
        "subagents": {
          "allowAgents": ["main","coder", "cook"]
        }
      }
    ]
2.2 飞书配置
有一个默认的飞书配置,对于其它的智能体则需要写入到accounts里面(我这里主agent机器人没响应,就加了一个空的r_main然后主机器人就能回复了,不清楚原因。)
填入自己的appId,appSecret
  "channels": {
    "feishu": {
      "enabled": true,
      "appId": "---",
      "appSecret": "---",
      "domain": "feishu",
      "groupPolicy": "open",
      "connectionMode": "websocket",
      "webhookPath": "/feishu/events",
      "dmPolicy": "pairing",
      "reactionNotifications": "own",
      "typingIndicator": true,
      "resolveSenderNames": true,
      "accounts": {
        "r_main" : {
        },
        "r_coder": {
          "appId": "---",
          "appSecret":"---"
        },
        "r_cook": {
          "appId": "---",
          "appSecret":"---"
        }
      }
    }
  }
2.3 bindings设置
主要就是agentId和accountId要对应
  "bindings": [
    {
      "type": "route",
      "agentId": "main",
      "match": {
        "channel": "feishu",
        "accountId": "default"
      }
    },
    {
      "type": "route",
      "agentId": "coder",
      "match": {
        "channel": "feishu",
        "accountId": "r_coder"
      }
    },
    {
      "type": "route",
      "agentId": "cook",
      "match": {
        "channel": "feishu",
        "accountId": "r_cook"
      }
    }
  ]
2.4 机器人示例
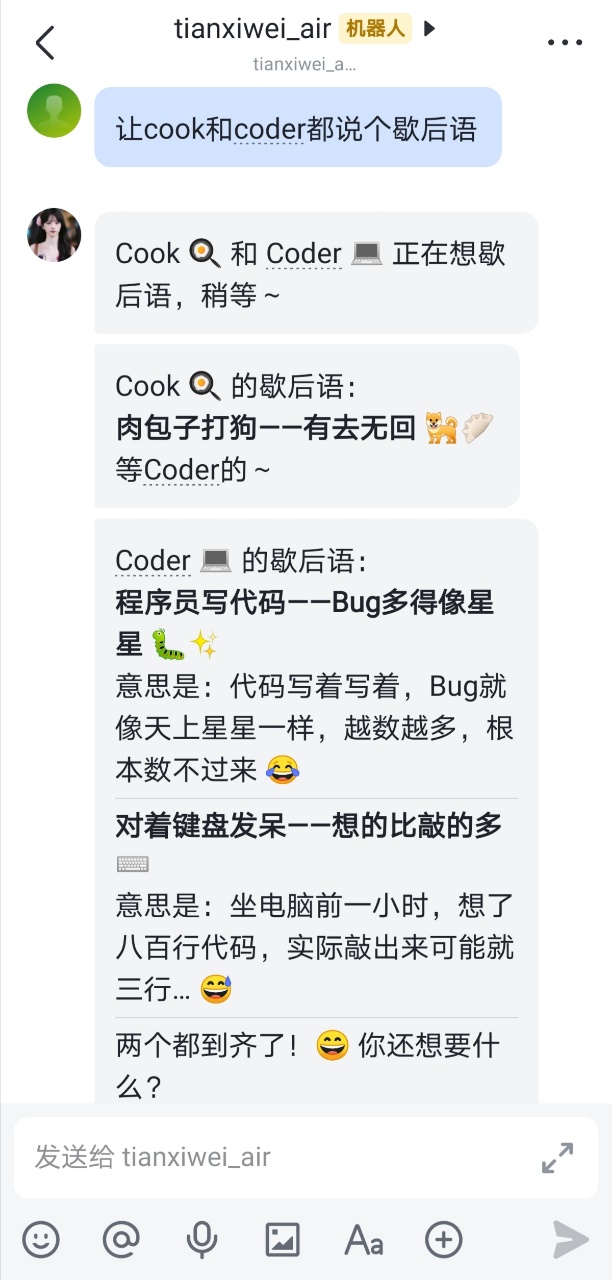
如下图,左展示了三个机器人,右展示一个机器人的对话
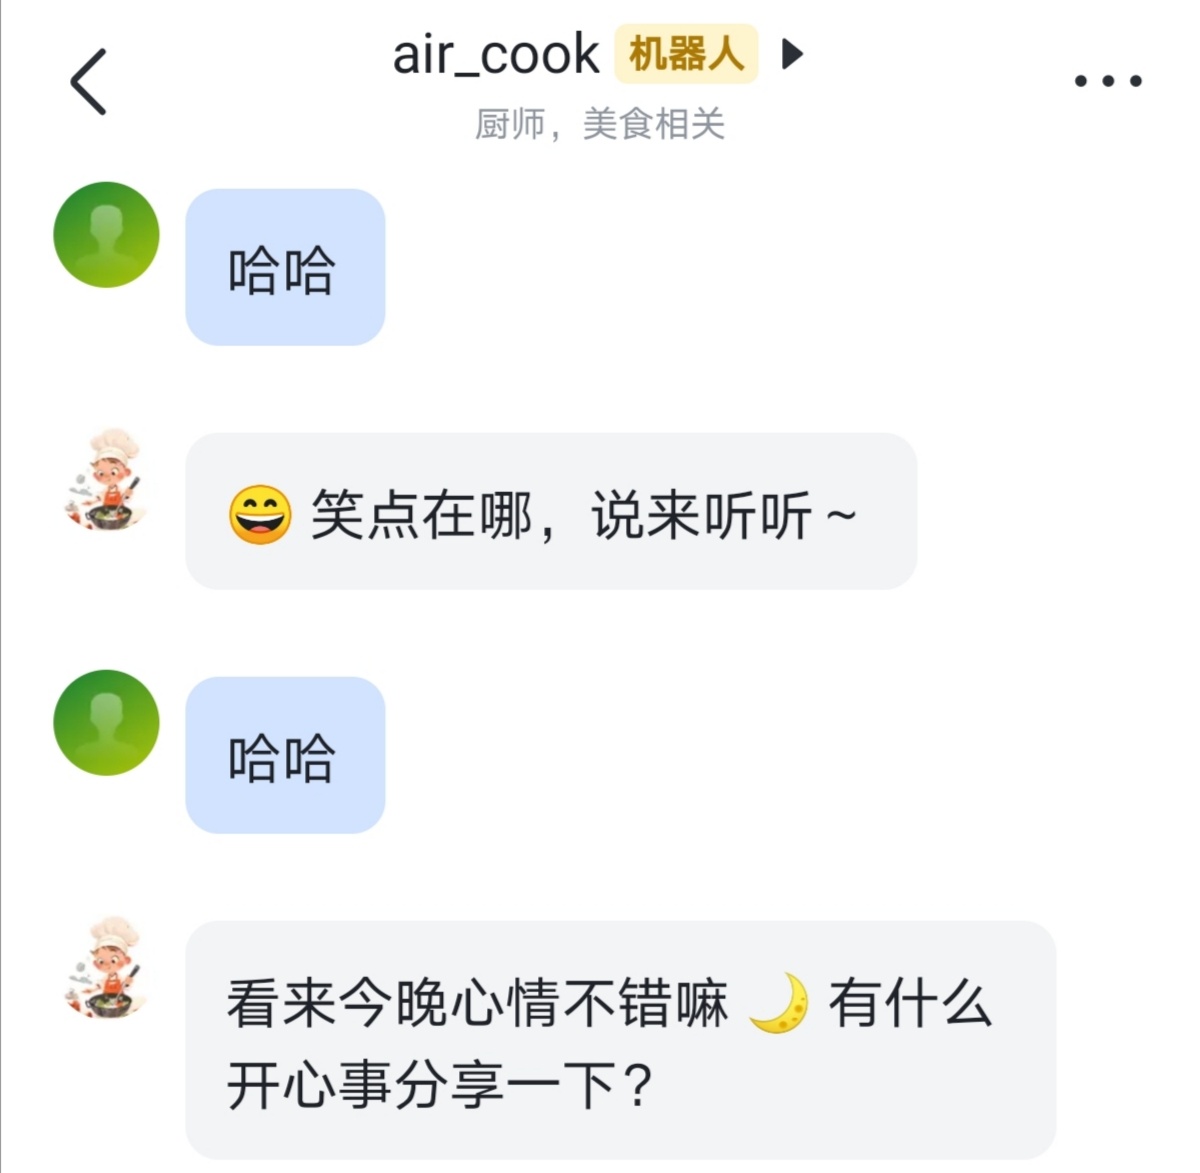
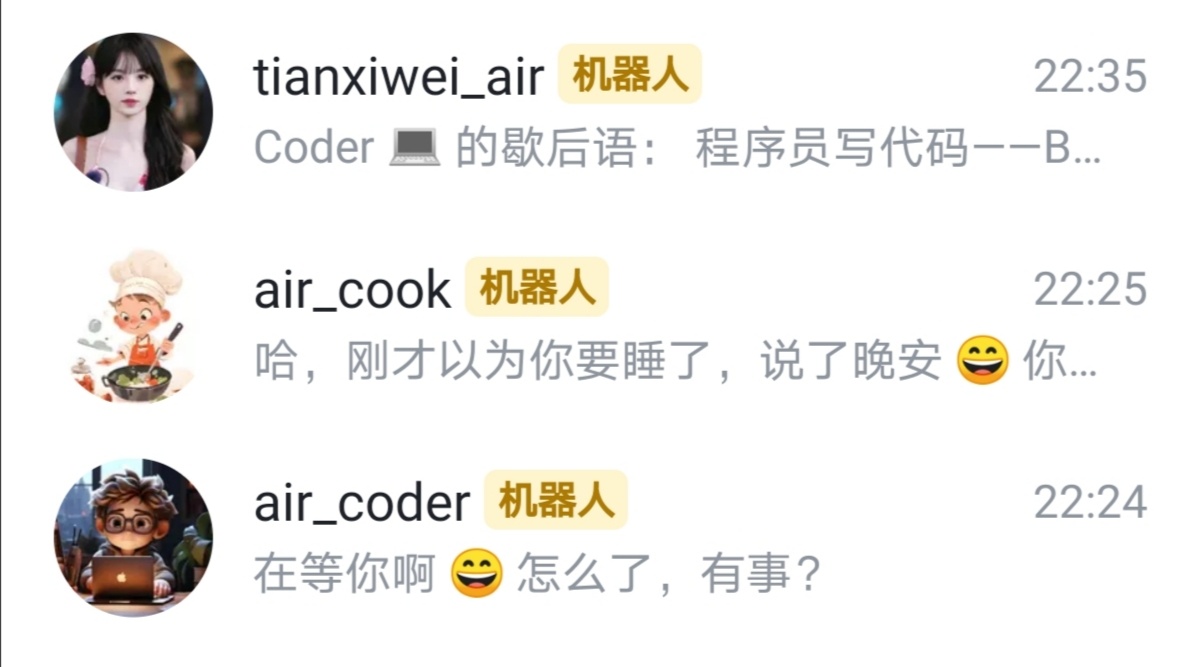
三 测试智能体
例子1 说歇后语
手机端测试,主机器人使唤另外两个机器人说歇后语
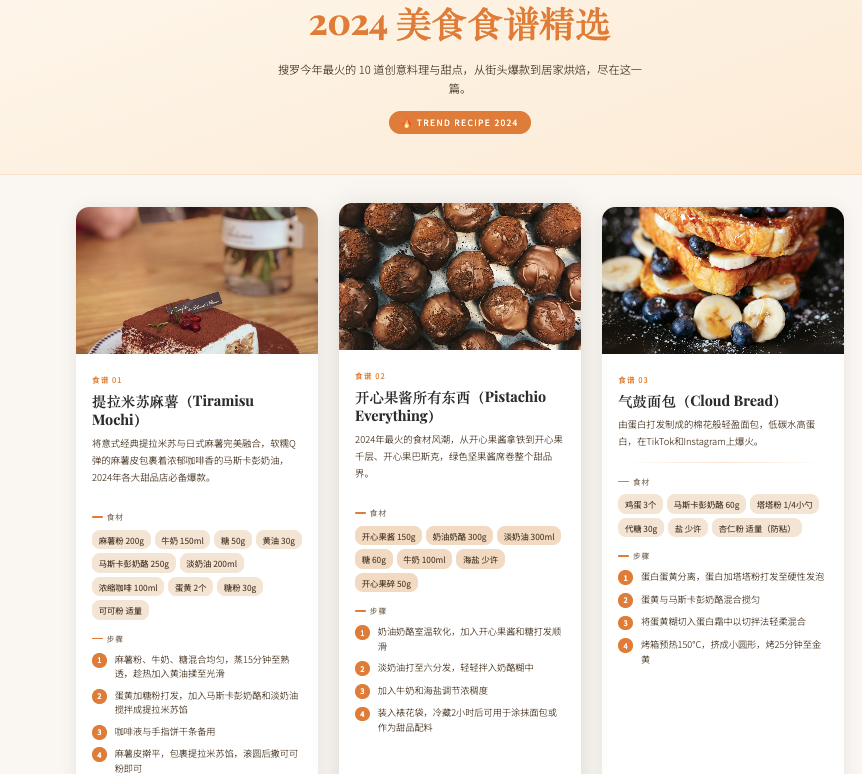
例子2 部署美食网页
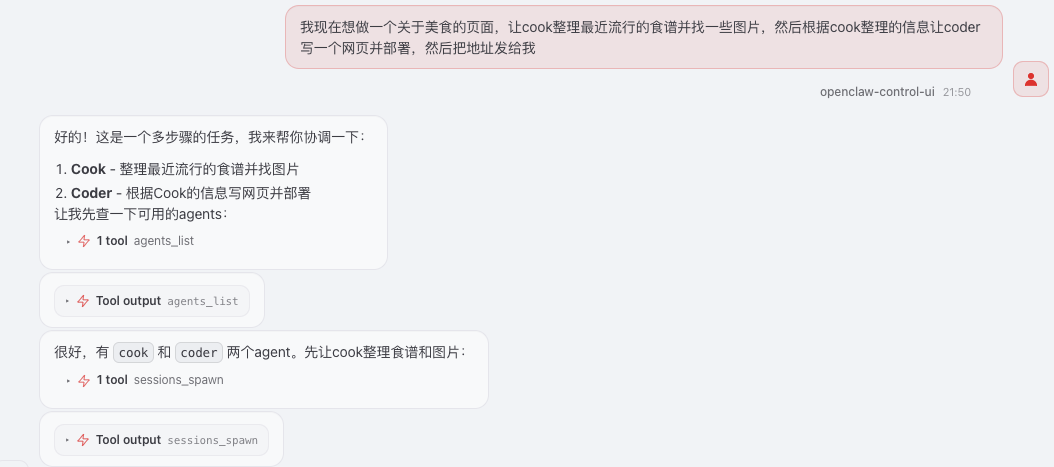
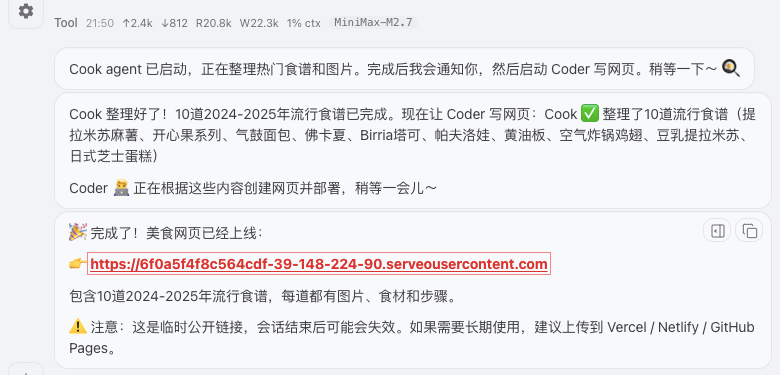
例子2网页效果示例
在网页中,切换到相应的智能体,可以查看主agent对子agent下发任务的消息
