欢迎加入开源鸿蒙跨平台社区 :https://openharmonycrossplatform.csdn.net
📋 前言
启动屏(Splash Screen)是移动应用的第一印象,一个精心设计的启动屏不仅能展示品牌形象,还能在应用初始化期间提供良好的用户体验。在应用启动时,用户往往需要等待数据加载、权限请求、用户认证等初始化操作完成,此时启动屏可以优雅地遮盖这些后台操作,避免用户看到空白或闪烁的界面。react-native-splash-screen 是一个功能完善的启动屏控制库,支持显示和隐藏启动屏幕,是应用开发中不可或缺的基础组件。
🎯 库简介
基本信息
- 库名称 :
react-native-splash-screen - 版本信息 :
3.3.0-0.0.2+@react-native-oh-tpl/react-native-splash-screen: 支持 RN 0.72 版本(已废弃)3.3.2+@react-native-ohos/react-native-splash-screen: 支持 RN 0.72 版本3.4.0+@react-native-ohos/react-native-splash-screen: 支持 RN 0.77 版本
- 官方仓库: https://github.com/crazycodeboy/react-native-splash-screen
- 鸿蒙仓库: https://gitcode.com/openharmony-sig/rntpc_react-native-splash-screen
- 主要功能 :
- 🖼️ 显示启动屏幕
- 🔄 隐藏启动屏幕
- 🎨 自定义启动屏背景和图标
- ⏱️ 精确控制启动屏显示时机
- 📱 支持 Android、iOS、HarmonyOS 多平台
为什么需要启动屏库?
| 特性 | 原生开发 | react-native-splash-screen |
|---|---|---|
| 启动屏控制 | ⚠️ 需配置原生文件 | ✅ 统一API控制 |
| 动态隐藏 | ⚠️ 需原生代码 | ✅ JS端控制 |
| 品牌展示 | ⚠️ 需单独配置 | ✅ 统一配置 |
| 初始化等待 | ❌ 需自行实现 | ✅ 完美支持 |
| 跨平台一致性 | ⚠️ iOS/Android差异 | ✅ 统一行为 |
| HarmonyOS 支持 | ❌ 无 | ✅ 完善适配 |
核心功能
| 功能 | 说明 | HarmonyOS 支持 |
|---|---|---|
| show() | 显示启动屏幕 | ✅(原生方法) |
| hide() | 隐藏启动屏幕 | ✅ |
| 自定义启动页 | 配置启动图片和背景色 | ✅ |
| 启动页组件 | SplashScreenView | ✅ |
兼容性验证
在以下环境验证通过:
- RNOH : 0.72.90; SDK : HarmonyOS 6.0.0 Release SDK; IDE : DevEco Studio 6.0.2; ROM: 6.0.0
📦 安装步骤
1. 安装依赖
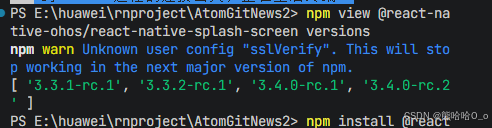
请到三方库的 Releases 发布地址查看配套的版本信息:
| 三方库版本 | 发布信息 | 支持 RN 版本 |
|---|---|---|
| 3.3.0-0.0.2 | @react-native-oh-tpl/react-native-splash-screen | 0.72(已废弃) |
| 3.3.2 | @react-native-ohos/react-native-splash-screen | 0.72 |
| 3.4.0 | @react-native-ohos/react-native-splash-screen | 0.77 |
bash
# RN 0.72 版本
npm install @react-native-ohos/react-native-splash-screen@3.3.2-rc.1

# RN 0.77 版本
npm install @react-native-ohos/react-native-splash-screen@3.4.0

# 或者使用 yarn
yarn add @react-native-ohos/react-native-splash-screen
2. 验证安装
安装完成后,检查 package.json 文件:
json
{
  "dependencies": {
    "@react-native-ohos/react-native-splash-screen": "^3.3.2-rc.1"
  }
}
🔧 HarmonyOS 平台配置 ⭐
1. 在工程根目录的 oh-package.json5 添加 overrides 字段(要看自己package.json中的版本)
打开 harmony/oh-package.json5,添加以下配置:
json
{
  // ... 其他配置
  "overrides": {
    "@rnoh/react-native-openharmony": "0.72.90"
  }
}
2. 引入原生端代码
打开 harmony/entry/oh-package.json5,添加以下依赖:
json5
"dependencies": {
  "@react-native-ohos/react-native-splash-screen": "file:../../node_modules/@react-native-ohos/react-native-splash-screen/harmony/splash_screen.har"
}
点击右上角的 sync 按钮,或者在终端执行:
bash
cd entry
ohpm install
3. 配置 CMakeLists
打开 entry/src/main/cpp/CMakeLists.txt,添加:
c
project(rnapp)
cmake_minimum_required(VERSION 3.4.1)
set(RNOH_APP_DIR "${CMAKE_CURRENT_SOURCE_DIR}")
+ set(OH_MODULES "${CMAKE_CURRENT_SOURCE_DIR}/../../../oh_modules")
set(RNOH_CPP_DIR "${CMAKE_CURRENT_SOURCE_DIR}/../../../../../../react-native-harmony/harmony/cpp")

add_subdirectory("${RNOH_CPP_DIR}" ./rn)

# RNOH_BEGIN: manual_package_linking_1
add_subdirectory("../../../../sample_package/src/main/cpp" ./sample-package)
+ add_subdirectory("${OH_MODULES}/@react-native-ohos/react-native-splash-screen/src/main/cpp" ./splash_screen)
# RNOH_END: manual_package_linking_1

add_library(rnoh_app SHARED
    ${GENERATED_CPP_FILES}
    "./PackageProvider.cpp"
    "${RNOH_CPP_DIR}/RNOHAppNapiBridge.cpp"
)

target_link_libraries(rnoh_app PUBLIC rnoh)

# RNOH_BEGIN: manual_package_linking_2
target_link_libraries(rnoh_app PUBLIC rnoh_sample_package)
+ target_link_libraries(rnoh_app PUBLIC rnoh_splash_screen)
# RNOH_END: manual_package_linking_2
4. 引入 SplashScreenPackage
打开 entry/src/main/cpp/PackageProvider.cpp,添加:
cpp
#include "RNOH/PackageProvider.h"
#include "generated/RNOHGeneratedPackage.h"
#include "SamplePackage.h"
+ #include "SplashScreenPackage.h"

using namespace rnoh;

std::vector<std::shared_ptr<Package>> PackageProvider::getPackages(Package::Context ctx) {
    return {
        std::make_shared<RNOHGeneratedPackage>(ctx),
        std::make_shared<SamplePackage>(ctx),
        + std::make_shared<SplashScreenPackage>(ctx),
    };
}
5. 在 ArkTS 侧引入 SplashScreenPackage
打开 entry/src/main/ets/RNPackagesFactory.ts,添加:
typescript
+ import { SplashScreenPackage } from '@react-native-ohos/react-native-splash-screen/ts';

export function createRNPackages(ctx: RNPackageContext): RNPackage[] {
  return [
    new SamplePackage(ctx),
    + new SplashScreenPackage(ctx)
  ];
}
6. 创建启动页面
在 entry/src/main/ets/pages 目录下新建启动页 SplashScreenPage.ets:
ts
import { SplashScreenView } from '@react-native-ohos/react-native-splash-screen/src/main/ets/SplashScreenView'

@Entry
@Component
export struct SplashScreenPage {
  build() {
    Row() {
      SplashScreenView();
    }
  }
}
7. 注册启动页面
在 entry/src/resources/base/profile/main_pages.json 内添加 pages/SplashScreenPage:
json
{
"src": [
"pages/SplashScreenPage",
"pages/Index"
]
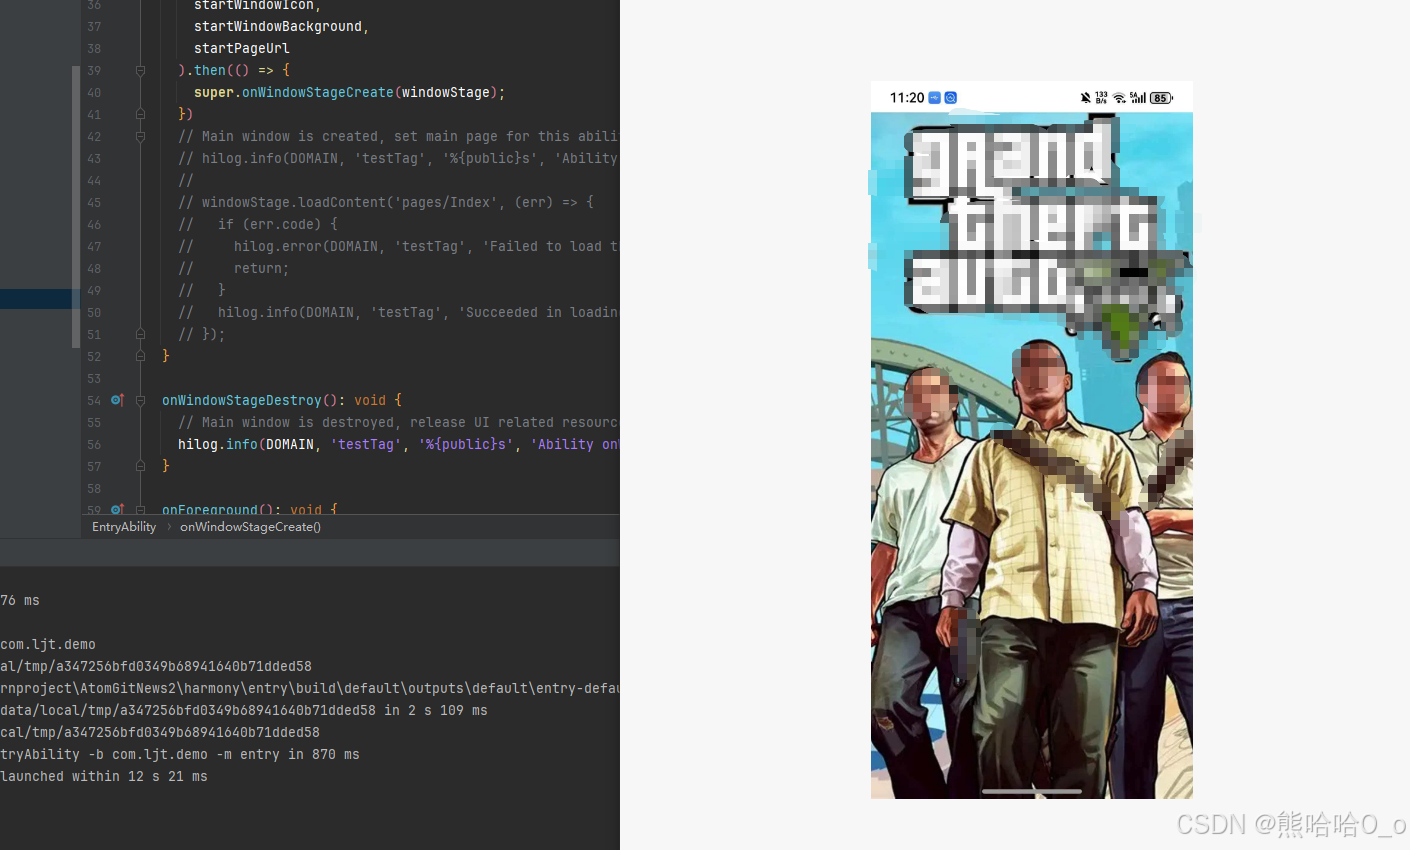
}8. 配置启动屏显示
在 entry/src/main/ets/entryability/EntryAbility.ets 内添加启动屏配置:
ts
import window from '@ohos.window';
import { SplashScreen } from '@react-native-ohos/react-native-splash-screen/src/main/ets/SplashScreen'

export default class EntryAbility extends RNAbility {
  onWindowStageCreate(windowStage: window.WindowStage): void {
    let startWindowIcon = $r('app.media.splashIcon');
    let startWindowBackground = "#FFFFFF";
    let startPageUrl = 'pages/SplashScreenPage';

    SplashScreen.show(
      this.context,
      windowStage,
      startWindowIcon,
      startWindowBackground,
      startPageUrl
    ).then(() => {
      super.onWindowStageCreate(windowStage);
    })
  }
}
9. 准备启动图片
将启动屏图片放置在 entry/src/main/resources/base/media 文件夹中,命名为 splashIcon.png(或其他名称,需与代码中引用一致)。
然后编译、运行即可。
📖 API 详解
hide() - 隐藏启动屏幕
在应用初始化完成后,调用此方法隐藏启动屏幕,显示应用主界面。这是最常用的 API,通常在 React Native 端调用。
类型 :() => void
返回值:无
使用场景:
- 应用数据加载完成后
- 用户登录验证完成后
- 首页渲染完成后
- 所有初始化任务完成后
tsx
import SplashScreen from 'react-native-splash-screen';

class App extends React.Component {
  componentDidMount() {
    this.initializeApp();
  }

  initializeApp = async () => {
    try {
      await this.loadUserData();
      await this.loadAppConfig();
      await this.requestPermissions();

      SplashScreen.hide();
    } catch (error) {
      console.error('初始化失败:', error);
      SplashScreen.hide();
    }
  };

  loadUserData = async () => {
    // 加载用户数据
  };

  loadAppConfig = async () => {
    // 加载应用配置
  };

  requestPermissions = async () => {
    // 请求权限
  };

  render() {
    return <MainApp />;
  }
}
使用 Hook 的方式:
tsx
import { useEffect, useState } from 'react';
import SplashScreen from 'react-native-splash-screen';

const App = () => {
  const [isReady, setIsReady] = useState(false);

  useEffect(() => {
    const init = async () => {
      try {
        await Promise.all([
          loadFonts(),
          loadAssets(),
          initializeStore(),
        ]);
        setIsReady(true);
      } catch (error) {
        console.error('初始化失败:', error);
      } finally {
        SplashScreen.hide();
      }
    };

    init();
  }, []);

  if (!isReady) {
    return null;
  }

  return <MainNavigator />;
};
show() - 显示启动屏幕(原生方法)
在 HarmonyOS 中,show() 方法需要在原生端调用,用于在应用启动时显示启动屏。这个方法只能在 EntryAbility.ets 中调用。
类型 :(context, windowStage, icon, background, pageUrl) => Promise<void>
参数说明:
| 参数 | 类型 | 必填 | 说明 |
|---|---|---|---|
| context | UIAbilityContext | 是 | 应用上下文 |
| windowStage | window.WindowStage | 是 | 窗口舞台 |
| icon | Resource | 是 | 启动屏图标资源 |
| background | string | 是 | 启动屏背景色 |
| pageUrl | string | 是 | 启动页面路径 |
返回值 :Promise<void>
使用场景:
- 应用启动时显示品牌页面
- 在 RN 页面加载期间展示启动屏
- 自定义启动屏样式
完整配置示例 :
ts
import window from '@ohos.window';
import { SplashScreen } from '@react-native-ohos/react-native-splash-screen/src/main/ets/SplashScreen'
import { RNAbility } from 'rnoh/ts';

export default class EntryAbility extends RNAbility {
  onWindowStageCreate(windowStage: window.WindowStage): void {
    let startWindowIcon = $r('app.media.splashIcon');
    let startWindowBackground = "#FFFFFF";
    let startPageUrl = 'pages/SplashScreenPage';

    SplashScreen.show(
      this.context,
      windowStage,
      startWindowIcon,
      startWindowBackground,
      startPageUrl
    ).then(() => {
      super.onWindowStageCreate(windowStage);
    }).catch((error: Error) => {
      console.error('启动屏显示失败:', error);
      super.onWindowStageCreate(windowStage);
    })
  }
}参数详解:
ets
// startWindowIcon - 启动屏图标
// 支持的图片格式:png, jpg, webp
// 建议尺寸:根据设备屏幕尺寸适配
let startWindowIcon = $r('app.media.splashIcon');

// startWindowBackground - 启动屏背景色
// 支持格式:十六进制颜色值
let startWindowBackground = "#FFFFFF";  // 白色
let startWindowBackground = "#007AFF";  // 蓝色
let startWindowBackground = "#1A1A1A";  // 深灰色

// startPageUrl - 启动页面路径
// 对应 main_pages.json 中注册的页面
let startPageUrl = 'pages/SplashScreenPage';
SplashScreenView - 启动屏视图组件
SplashScreenView 是一个原生组件,用于渲染启动屏的视觉效果。需要在 SplashScreenPage.ets 中使用。
类型:ArkUI 组件
使用场景:
- 自定义启动屏布局
- 添加动画效果
- 显示加载进度
基础用法:
ets
import { SplashScreenView } from '@react-native-ohos/react-native-splash-screen/src/main/ets/SplashScreenView'

@Entry
@Component
export struct SplashScreenPage {
  build() {
    Row() {
      SplashScreenView();
    }
  }
}自定义启动屏示例:
ets
import { SplashScreenView } from '@react-native-ohos/react-native-splash-screen/src/main/ets/SplashScreenView'

@Entry
@Component
export struct SplashScreenPage {
  @State private progress: number = 0;

  aboutToAppear() {
    this.startProgressAnimation();
  }

  startProgressAnimation() {
    setInterval(() => {
      this.progress = (this.progress + 5) % 100;
    }, 100);
  }

  build() {
    Column() {
      Image($r('app.media.logo'))
        .width(120)
        .height(120)
        .margin({ bottom: 20 })

      Text('欢迎使用')
        .fontSize(24)
        .fontColor('#333333')
        .margin({ bottom: 30 })

      Progress({ value: this.progress, total: 100, type: ProgressType.Linear })
        .width('60%')
        .color('#007AFF')

      Text(`${this.progress}%`)
        .fontSize(14)
        .fontColor('#999999')
        .margin({ top: 10 })
    }
    .width('100%')
    .height('100%')
    .backgroundColor('#FFFFFF')
    .justifyContent(FlexAlign.Center)
  }
}
📋 完整示例
tsx
import React, { useEffect, useState, useCallback } from "react";
import {
  View,
  Text,
  StyleSheet,
  ActivityIndicator,
  StatusBar,
  SafeAreaView,
} from "react-native";
import SplashScreen from "react-native-splash-screen";

type InitStep = {
  name: string;
  action: () => Promise<void>;
};

const App: React.FC = () => {
  const [isLoading, setIsLoading] = useState(true);
  const [currentStep, setCurrentStep] = useState<string>("");
  const [initProgress, setInitProgress] = useState(0);
  const [hasError, setHasError] = useState(false);

  const initSteps: InitStep[] = [
    { name: "加载字体资源", action: loadFonts },
    { name: "初始化存储", action: initializeStorage },
    { name: "检查用户状态", action: checkUserStatus },
    { name: "加载应用配置", action: loadAppConfig },
    { name: "预加载资源", action: preloadAssets },
  ];

  useEffect(() => {
    initializeApp();
  }, []);

  const initializeApp = async () => {
    try {
      for (let i = 0; i < initSteps.length; i++) {
        const step = initSteps[i];
        setCurrentStep(step.name);
        await step.action();
        setInitProgress(((i + 1) / initSteps.length) * 100);
      }

      setIsLoading(false);
    } catch (error) {
      console.error("初始化失败:", error);
      setHasError(true);
    } finally {
      SplashScreen.hide();
    }
  };

  async function loadFonts() {
    await new Promise((resolve) => setTimeout(resolve, 300));
  }

  async function initializeStorage() {
    await new Promise((resolve) => setTimeout(resolve, 200));
  }

  async function checkUserStatus() {
    await new Promise((resolve) => setTimeout(resolve, 400));
  }

  async function loadAppConfig() {
    await new Promise((resolve) => setTimeout(resolve, 300));
  }

  async function preloadAssets() {
    await new Promise((resolve) => setTimeout(resolve, 200));
  }

  const handleRetry = useCallback(() => {
    setHasError(false);
    setInitProgress(0);
    setCurrentStep("");
    initializeApp();
  }, []);

  if (isLoading) {
    return (
      <View style={styles.loadingContainer}>
        <StatusBar barStyle="dark-content" backgroundColor="#FFFFFF" />
        <ActivityIndicator size="large" color="#007AFF" />
        <Text style={styles.loadingText}>正在初始化应用...</Text>
        <Text style={styles.stepText}>{currentStep}</Text>
        <View style={styles.progressContainer}>
          <View style={[styles.progressBar, { width: `${initProgress}%` }]} />
        </View>
        <Text style={styles.progressText}>{Math.round(initProgress)}%</Text>
      </View>
    );
  }

  if (hasError) {
    return (
      <View style={styles.errorContainer}>
        <StatusBar barStyle="dark-content" backgroundColor="#FFFFFF" />
        <Text style={styles.errorTitle}>初始化失败</Text>
        <Text style={styles.errorText}>请检查网络连接后重试</Text>
        <Text style={styles.retryButton} onPress={handleRetry}>
          重试
        </Text>
      </View>
    );
  }

  return (
    <SafeAreaView style={styles.container}>
      <StatusBar barStyle="dark-content" backgroundColor="#FFFFFF" />
      <View style={styles.header}>
        <Text style={styles.title}>欢迎使用</Text>
        <Text style={styles.subtitle}>应用已准备就绪</Text>
      </View>
      <View style={styles.content}>
        <View style={styles.successIcon}>
          <Text style={styles.successIconText}>✓</Text>
        </View>
        <Text style={styles.welcomeText}>初始化完成</Text>
        <Text style={styles.descriptionText}>
          启动屏已成功隐藏,现在您可以开始使用应用了
        </Text>
      </View>
      <View style={styles.footer}>
        <Text style={styles.footerText}>react-native-splash-screen 示例</Text>
        <Text style={styles.versionText}>版本 1.0.0</Text>
      </View>
    </SafeAreaView>
  );
};

const styles = StyleSheet.create({
  container: {
    flex: 1,
    backgroundColor: "#FFFFFF",
  },
  loadingContainer: {
    flex: 1,
    justifyContent: "center",
    alignItems: "center",
    backgroundColor: "#FFFFFF",
    padding: 20,
  },
  loadingText: {
    marginTop: 20,
    fontSize: 18,
    fontWeight: "600",
    color: "#333333",
  },
  stepText: {
    marginTop: 8,
    fontSize: 14,
    color: "#666666",
  },
  progressContainer: {
    width: "80%",
    height: 4,
    backgroundColor: "#E5E5EA",
    borderRadius: 2,
    marginTop: 24,
    overflow: "hidden",
  },
  progressBar: {
    height: "100%",
    backgroundColor: "#007AFF",
    borderRadius: 2,
  },
  progressText: {
    marginTop: 8,
    fontSize: 14,
    color: "#007AFF",
    fontWeight: "500",
  },
  errorContainer: {
    flex: 1,
    justifyContent: "center",
    alignItems: "center",
    backgroundColor: "#FFFFFF",
    padding: 20,
  },
  errorTitle: {
    fontSize: 20,
    fontWeight: "600",
    color: "#FF3B30",
    marginBottom: 8,
  },
  errorText: {
    fontSize: 14,
    color: "#666666",
    marginBottom: 24,
  },
  retryButton: {
    fontSize: 16,
    fontWeight: "500",
    color: "#007AFF",
    paddingVertical: 12,
    paddingHorizontal: 32,
    backgroundColor: "#F2F2F7",
    borderRadius: 8,
    overflow: "hidden",
  },
  header: {
    padding: 24,
    backgroundColor: "#007AFF",
    alignItems: "center",
  },
  title: {
    fontSize: 28,
    fontWeight: "700",
    color: "#FFFFFF",
  },
  subtitle: {
    fontSize: 14,
    color: "rgba(255, 255, 255, 0.8)",
    marginTop: 4,
  },
  content: {
    flex: 1,
    justifyContent: "center",
    alignItems: "center",
    padding: 20,
  },
  successIcon: {
    width: 80,
    height: 80,
    borderRadius: 40,
    backgroundColor: "#34C759",
    justifyContent: "center",
    alignItems: "center",
    marginBottom: 24,
  },
  successIconText: {
    fontSize: 40,
    color: "#FFFFFF",
  },
  welcomeText: {
    fontSize: 24,
    fontWeight: "600",
    color: "#333333",
    marginBottom: 12,
  },
  descriptionText: {
    fontSize: 16,
    color: "#666666",
    textAlign: "center",
    lineHeight: 24,
  },
  footer: {
    padding: 16,
    alignItems: "center",
    borderTopWidth: 1,
    borderTopColor: "#E5E5EA",
  },
  footerText: {
    fontSize: 14,
    color: "#999999",
  },
  versionText: {
    fontSize: 12,
    color: "#CCCCCC",
    marginTop: 4,
  },
});

export default App;
⚠️ 注意事项
启动屏图片配置
启动屏图片需要放置在正确的资源目录下:
entry/src/main/resources/base/media/
├── splashIcon.png    # 启动屏图标
├── logo.png          # 应用 Logo
└── ...其他资源图片规格建议:
| 平台 | 建议尺寸 | 格式 |
|---|---|---|
| 手机 | 750 x 1334 px | PNG |
| 平板 | 2048 x 2732 px | PNG |
隐藏时机选择
选择合适的时机隐藏启动屏非常重要:
tsx
// ✅ 推荐:在数据加载完成后隐藏
useEffect(() => {
  const init = async () => {
    await loadData();
    SplashScreen.hide();
  };
  init();
}, []);

// ✅ 推荐:使用状态控制
const [isReady, setIsReady] = useState(false);

useEffect(() => {
  loadData().then(() => {
    setIsReady(true);
    SplashScreen.hide();
  });
}, []);

// ❌ 不推荐:立即隐藏,可能导致白屏
useEffect(() => {
  SplashScreen.hide();
}, []);
iOS 与 HarmonyOS 差异
| 平台 | show() 调用方式 | hide() 调用方式 |
|---|---|---|
| iOS | 自动调用 | JS 端调用 |
| Android | 自动调用 | JS 端调用 |
| HarmonyOS | EntryAbility.ets 中手动调用 | JS 端调用 |
在 iOS 中,show() 方法会自动在应用启动时调用。但在 HarmonyOS 中,需要在 EntryAbility.ets 中手动调用 SplashScreen.show() 方法。
版本差异
| 版本 | 说明 | AutoLink |
|---|---|---|
| <= 3.3.0-0.0.2 | 不支持 AutoLink,已废弃 | ❌ |
| ~3.3.2 | 支持 AutoLink,RN 0.72 | ✅ |
| ~3.4.0 | 不支持 AutoLink,RN 0.77 | ❌ |
常见问题
Q: 启动屏显示后无法隐藏?
A: 确保在 RN 端正确调用了 SplashScreen.hide() 方法,并且原生端配置正确。检查是否有异步操作阻塞了 hide 调用。
Q: 启动屏图片不显示?
A: 检查图片路径是否正确,确保图片放置在 entry/src/main/resources/base/media/ 目录下,并且文件名与代码中引用一致。
Q: 启动屏背景色不生效?
A: 确保背景色格式正确,使用十六进制颜色值如 #FFFFFF,不要使用 rgb() 或 rgba() 格式。
Q: 启动屏显示时间过长?
A: 检查初始化逻辑是否有耗时操作,考虑使用懒加载或分步初始化,确保在合适的时机调用 SplashScreen.hide()。
Q: 白屏闪烁问题?
A: 确保启动屏背景色与应用主界面背景色一致,避免颜色差异导致的视觉闪烁。