1.Nexus安装、配置、基本使用
下载地址:++++https://help.sonatype.com/repomanager3/product-information/download++++
1.1文件结构
下载解压后的文件结构是这样的:
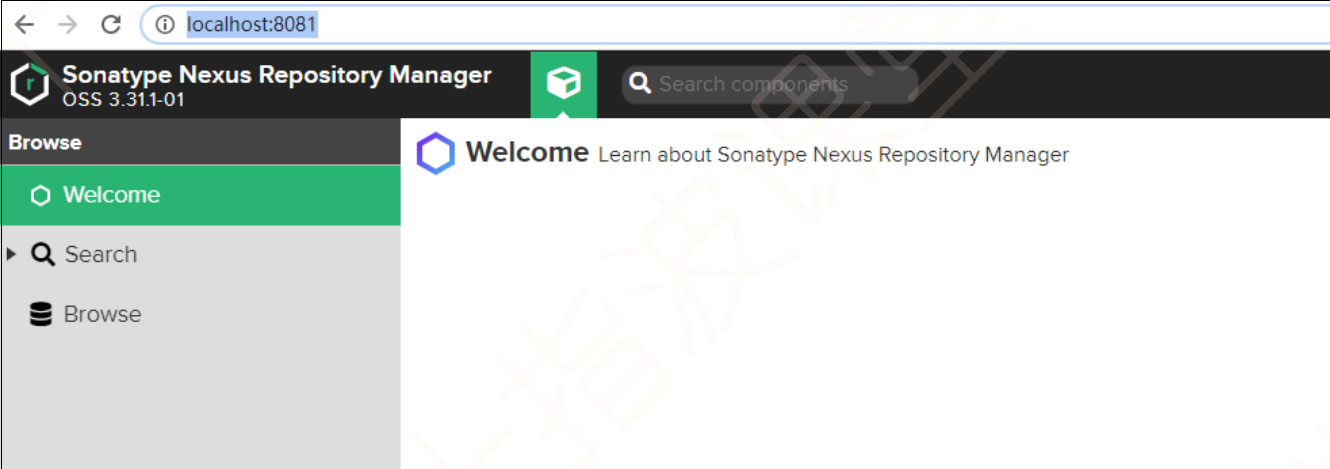
1.2启动Nexus
进入nexus->bin目录下,打开cmd,执行:
nexus /run nexus_server (服务器名称)开启后出现Started Sonatype Nexus OSS 3.31.1-01后就说明启动成功了,我们只需要访问一下++++http://localhost:8081/++++就查看我们的私服了;
如果要修改 8081 默认端口,到nexus->etc-> .properties文件修改端口 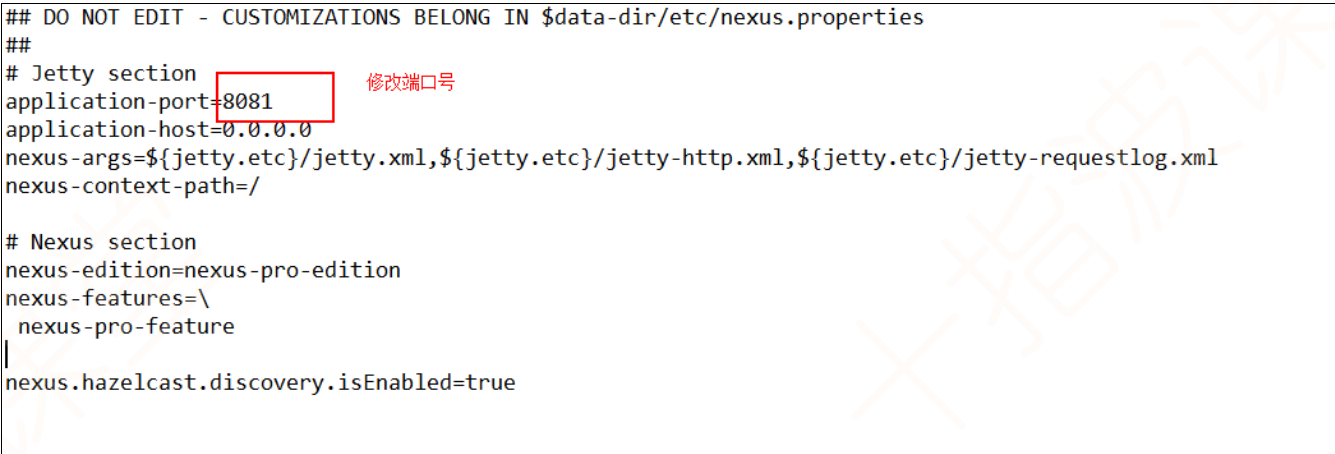
如果想修改虚拟机的参数,到nexus->bin->nexus.vmoptions进行修改
1.3登录
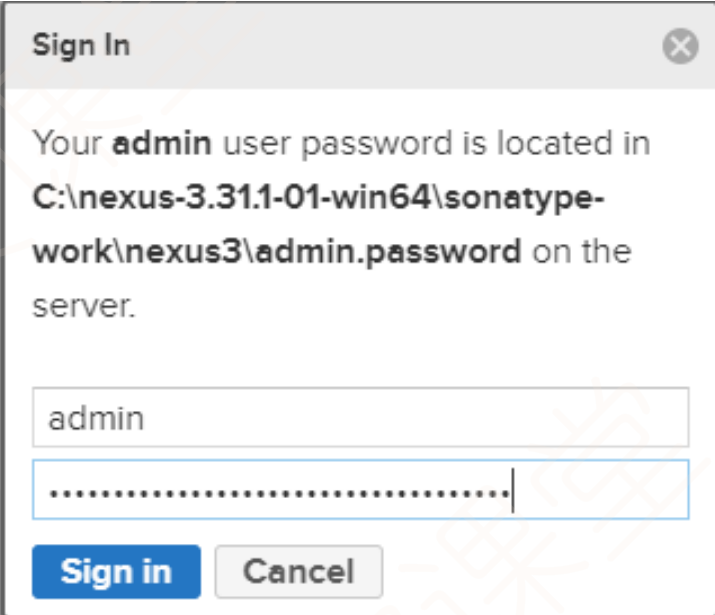
点击右上角的signIn,用户名是admin,我们第一次登录的密码是在sonatype-work\nexus3\admin.password文件下,复制粘贴即可,登录成功后他会让你设置新密码
2.仓库
2.1仓库类型
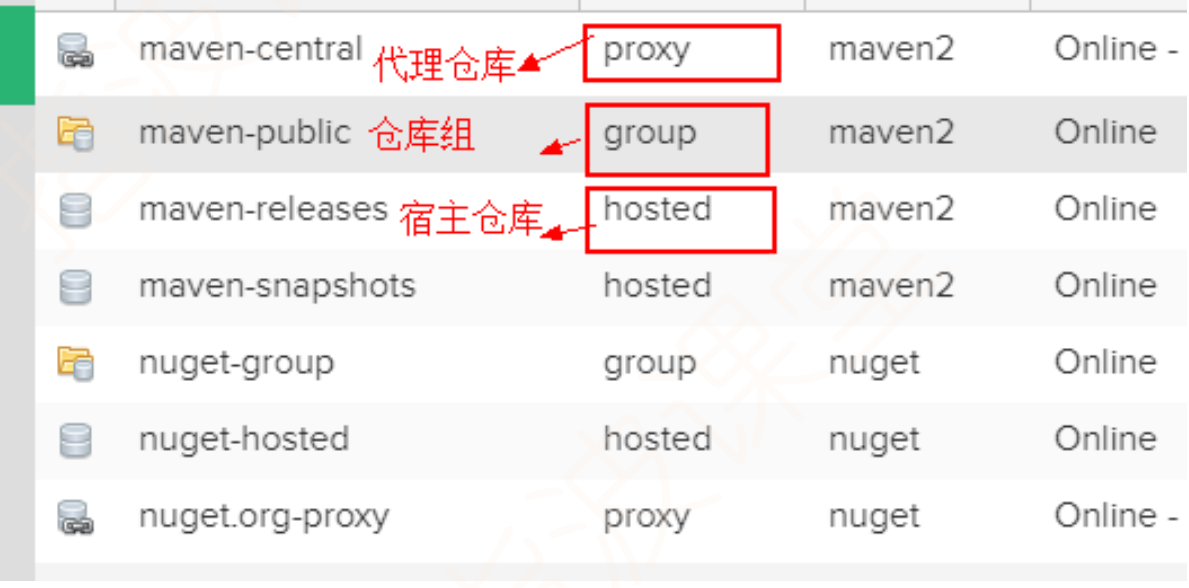
代理仓库:代理远程仓库,访问全球中央仓库或其他公共仓库,将资源存储在私服上;
宿主仓库:公司自主研发的或自主上传的资源构成的仓库,因为有闭源项目的存在,因此可以分为release和snapshot等;
仓库组:仓库组中包含多个仓库,本身就不能存资源,简化配置,配置好仓库后,避免用户自己去查找每个仓库
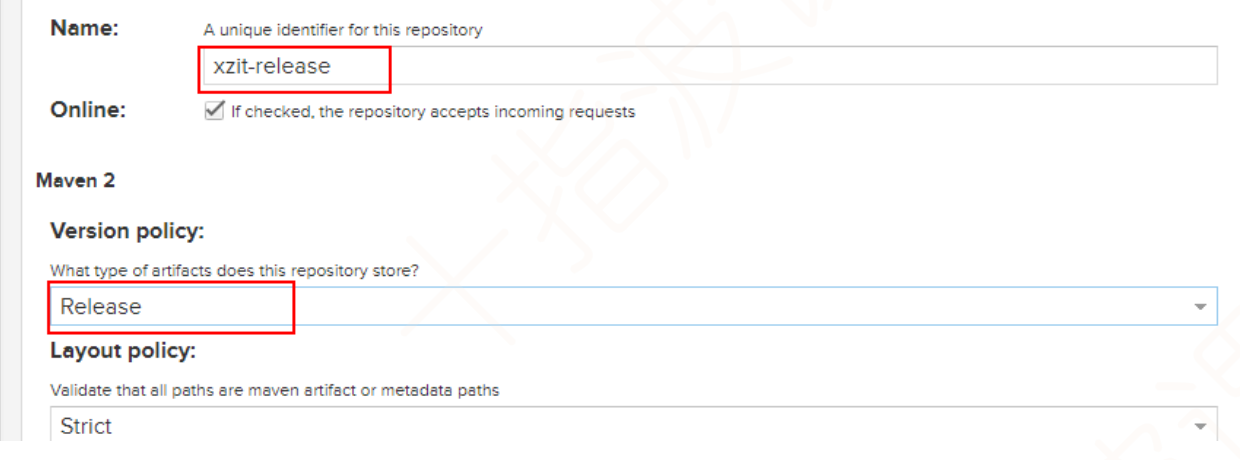
2.2创建仓库
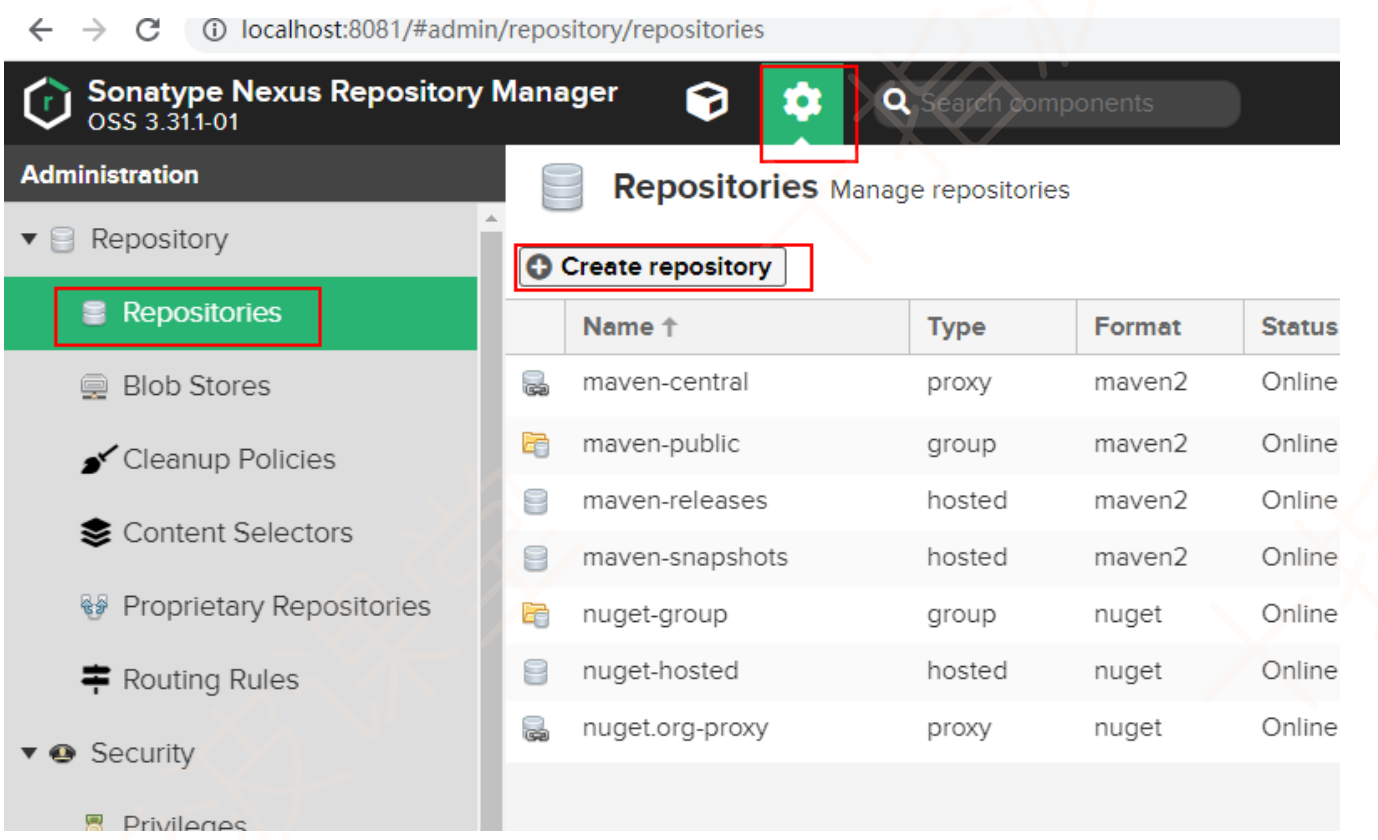
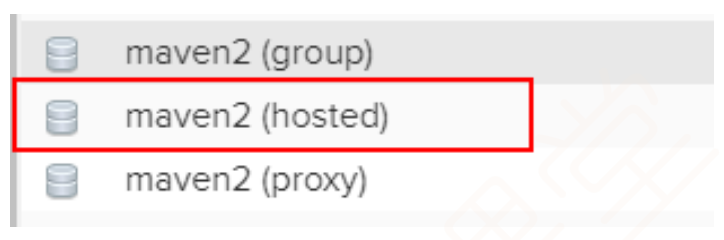
创建一个存放release版本的仓库
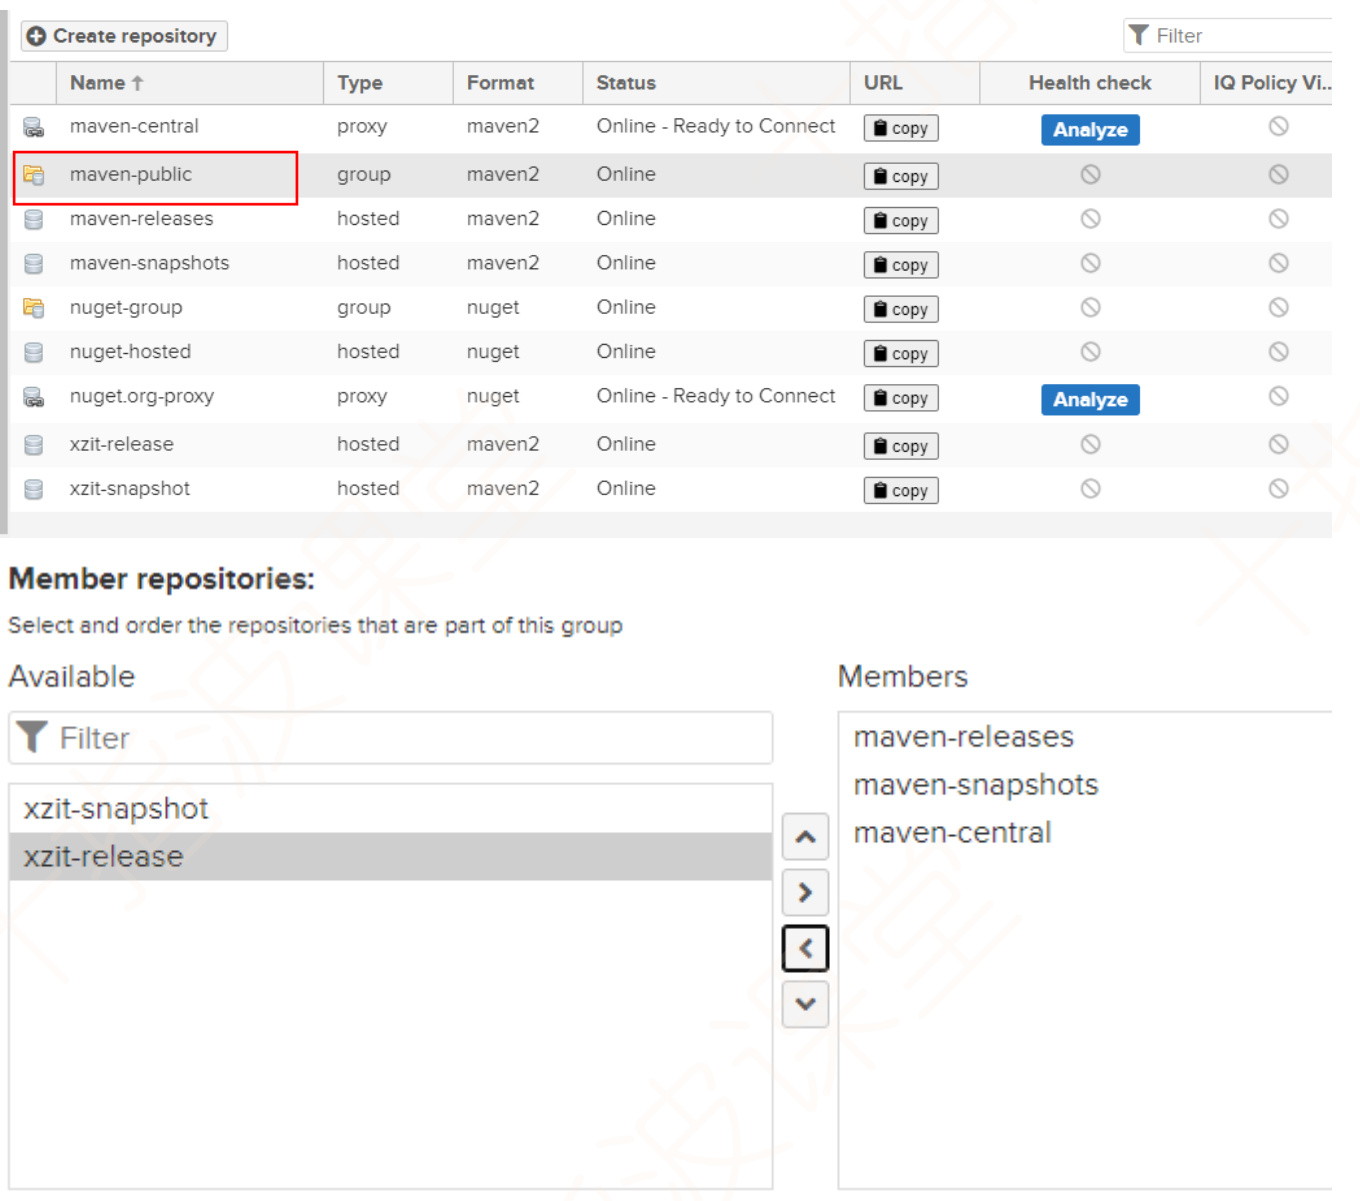
将创建好的仓库放在仓库组中,以暴露给外界;
3.向私服仓库上传资源
3.1手工上传第三方资源
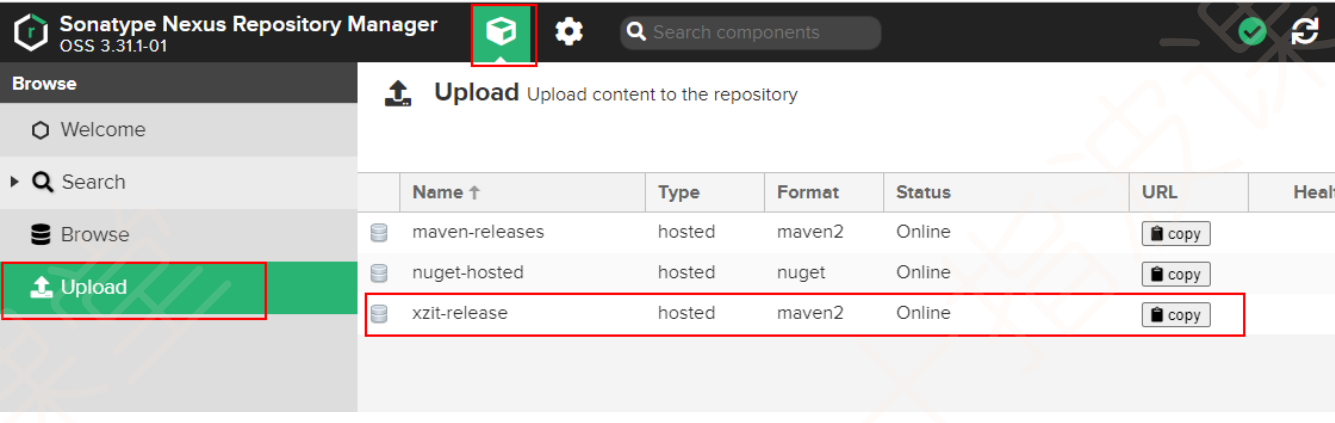
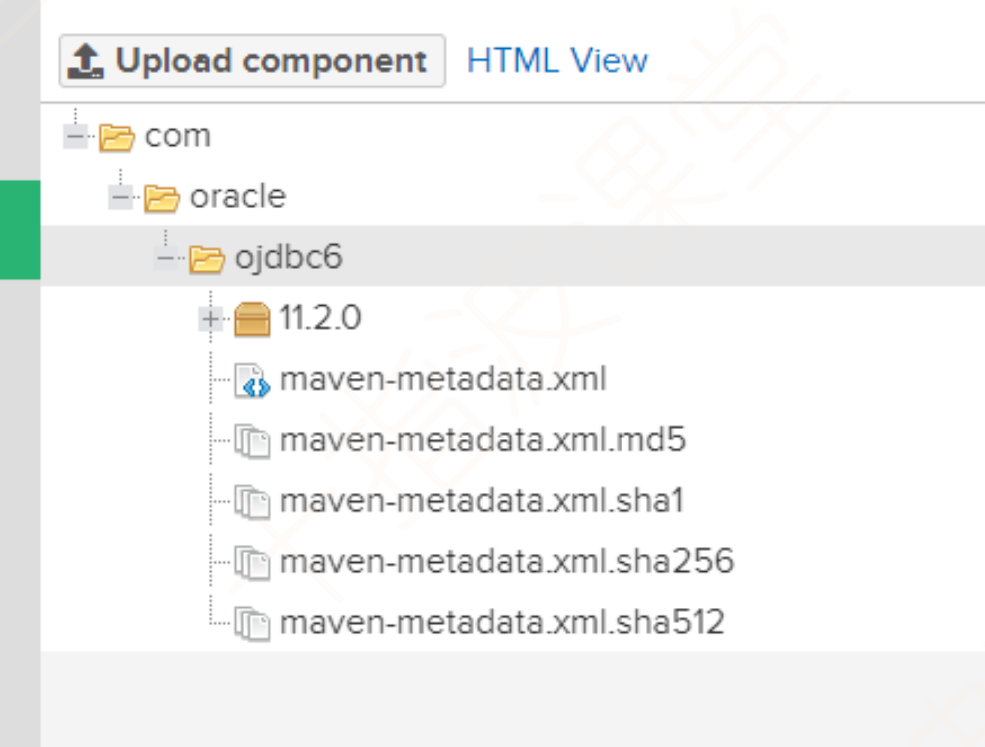
以上传oracle提供的ojdbc资源为例:
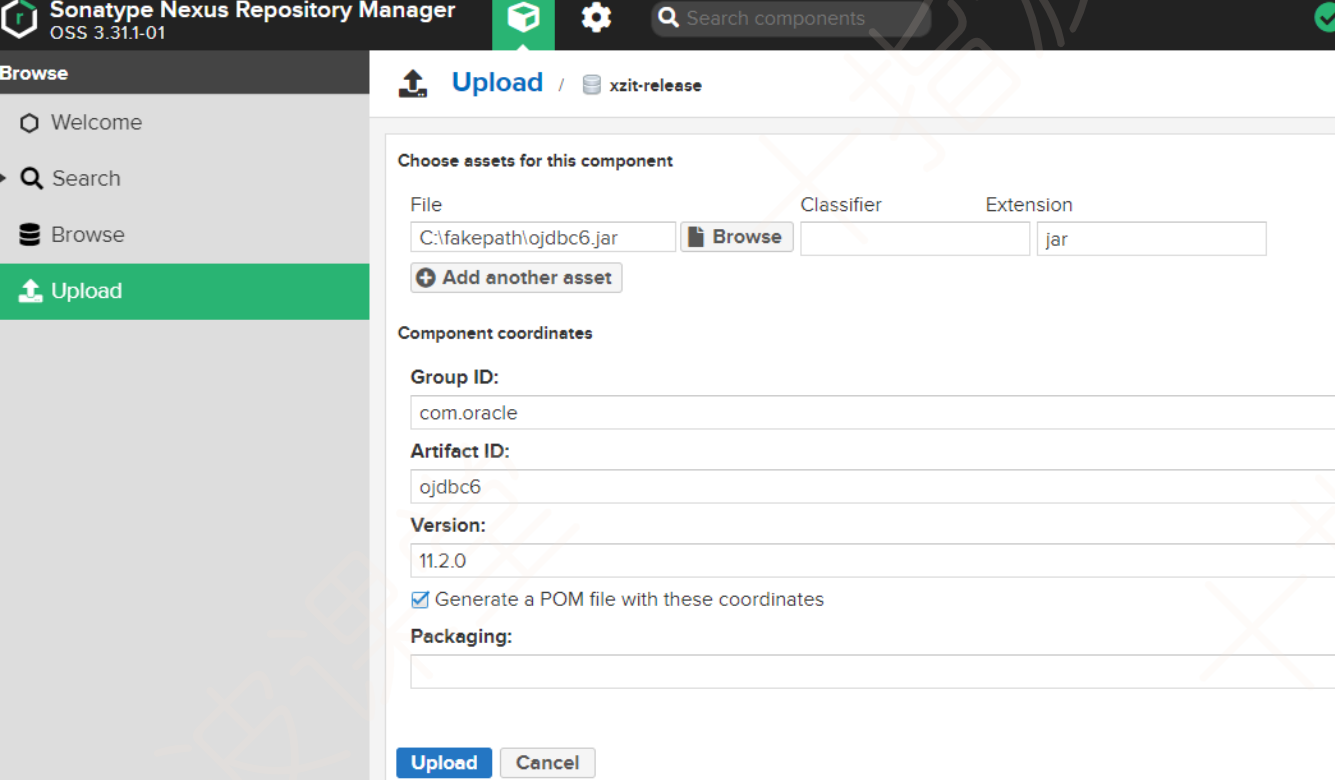
配置完了之后是这样的
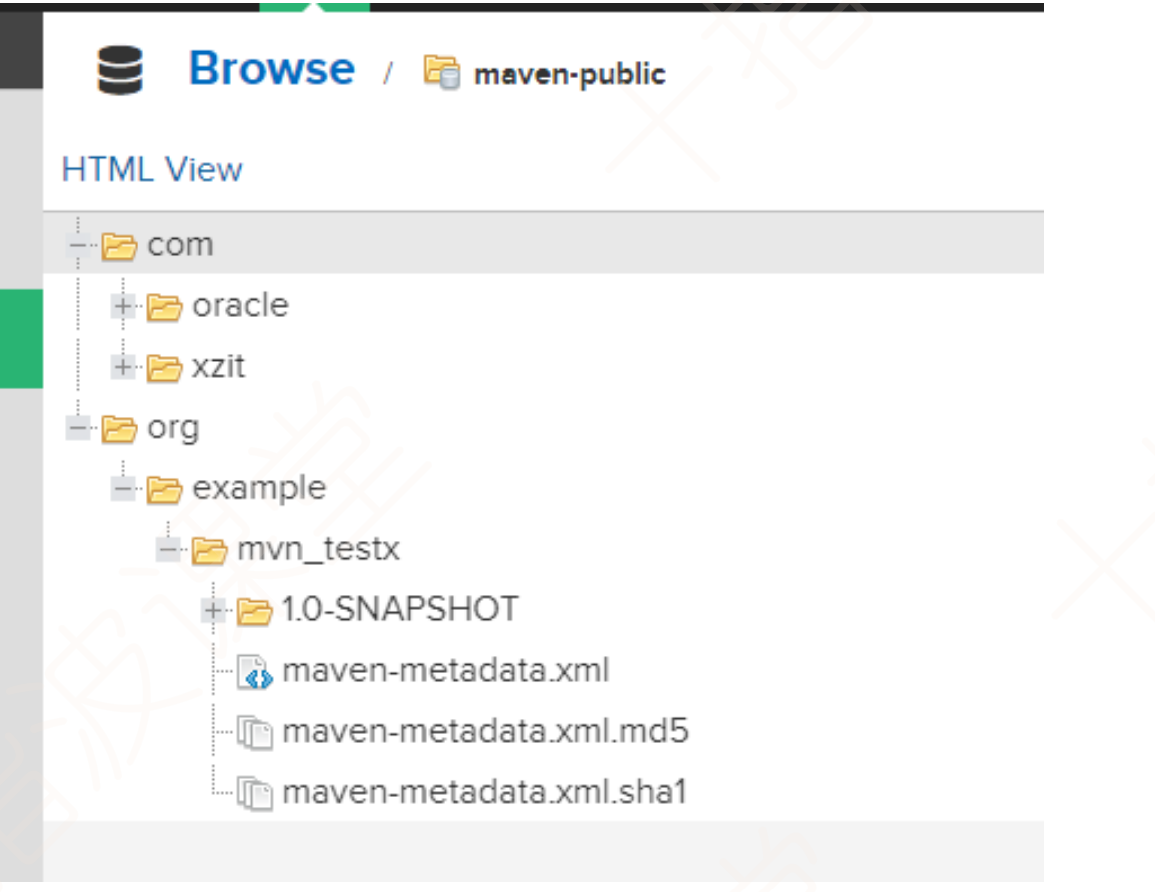
3.2idea操纵nexus私服
首先我们需要配置一下本地仓库
访问私服的账号和密码在maven下conf->settings.xml下的servers中配置
<server>
    <id>maven-public</id>
    <username>admin</username>
    <password>123456</password>
</server>
下载的地址在profiles标签下进行配置,这里url就是在私服中的仓库就可以获取
XML
<profile>
    <id>nexus</id>
    <repositories>
        <repository>
            <id>maven-public</id>
            <name>xzit-nexus</name>
            <url>http://localhost:8081/repository/maven-public/</url>
            <releases>
                <enabled>true</enabled>
            </releases>
            <snapshots>
                <enabled>true</enabled>
            </snapshots>
        </repository>
    </repositories>
    <pluginRepositories>
        <pluginRepository>
            <id>maven-public</id>
            <url>http://localhost:8081/repository/maven-public/</url>
            <releases>
                <enabled>true</enabled>
            </releases>
            <snapshots>
                <enabled>true</enabled>
            </snapshots>
        </pluginRepository>
    </pluginRepositories>
</profile>
配置当前被激活的profiles
XML
<activeProfiles>
      <activeProfile>nexus</activeProfile>
</activeProfiles>
以上在settings.xml中的配置可以让我们从私服上获取依赖或插件
以下配置可以让我们在项目中通过声明周期中的deploy上传的仓库中
在工程中配置的上传的地址在工程的pom.xml文件中做配置
XML
<distributionManagement>
    <repository>
        <id>maven-public</id>
        <url>http://localhost:8081/repository/xzit-release/</url>
    </repository>
    <snapshotRepository>
        <id>maven-public</id>
        <url>http://localhost:8081/repository/xzit-snapshot/</url>
    </snapshotRepository>
</distributionManagement>